Akatsuki Blitzkampf/Murakumo: Difference between revisions

From Mizuumi Wiki
Jump to navigation Jump to search
(→‎Combos: Rewrote combo guide, adding sections for midscreen, corner, and situational combos with damage values and videos for reference)
m (→‎Combos: Minor formatting errors fixed)
Line 449: Line 449:
:If close enough, replace 2C with [2]8X -> [2]8BC for BIG damage (3432)  


'''j.A/j.C air-to-air -> land -> Airthrow'''
*'''j.A/j.C air-to-air -> land -> Airthrow'''
:Not so much a combo as it is a setup for the airthrow. [https://youtu.be/2dZXNEWJHZI If you leave out the air throw, it can also cross under in certain situations!]


Revision as of 17:02, 11 April 2020

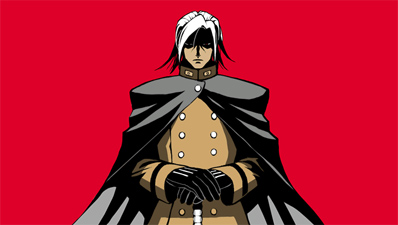
Murakumo's official profile image

Background

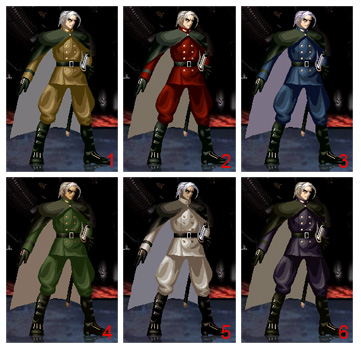
Murakumo's pre-made colors

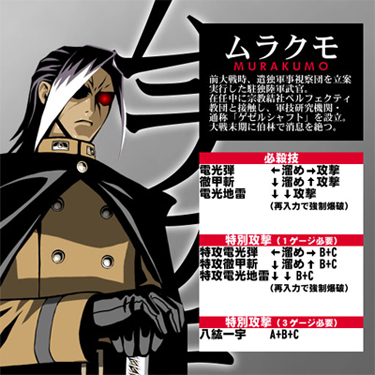
At the time of the previous War, he was a military officer, stationed in Germany, who planned actions for an inspection group on military affairs, dispatched here. During this position, he got in touch with a religious society called Perfecti Kyoudan, and had established the Military Technique Research facility, nicknamed "Gessellschaft". Towards the end of the War news from Berlin are interrupted. (from character selection screen)

Introduction

(placeholder)

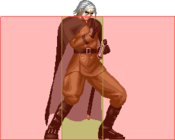
  • Armor Ratio = 1.000

Normal Moves

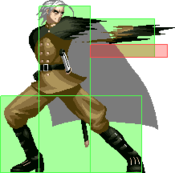
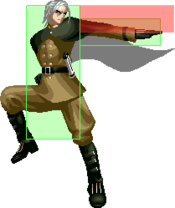
5A
ABK-Mura-5A.png
Damage Guard Startup Adv Hit Adv Block
500 High/Low 4 +0 +0

A quick jab. Can be mashed.

5B
ABK-Mura-5B.png
Damage Guard Startup Adv Hit Adv Block
1000 High/Low 6 +0 -2

A forward jab although it does not move Murakumo forward and is usually used to continue ground pressure.

2A
ABK-Mura-2A.png
Damage Guard Startup Adv Hit Adv Block
400 High/Low 4 +0 +0

A quick crouching jab. Can be mashed.

2B
ABK-Mura-2B.png
Damage Guard Startup Adv Hit Adv Block
800 Low 7 -12 -14

A very quick slide along the floor with Murakumo's leg extended. Easily one of his best normals since the length is pretty long (about 35% of the screen) and can be easily comboed into 2C for an easy knockdown. This is also a good normal to cancel into Tekkousan.

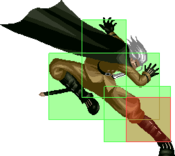
j.A
ABK-Mura-jA.png
Damage Guard Startup Adv Hit Adv Block
500 High 4 +0 +0

A quick jumping jab w/ hand extended. Good air to air normal. You can also do two in the air if you are high enough.

j.B
ABK-Mura-jB.png
Damage Guard Startup Adv Hit Adv Block
1000 High 5 VB VB

An aerial version of Murakumo's 2B/2C with the exception of the slide (lol) and also crosses up.

j.C
ABK-Mura-jC.png
Damage Guard Startup Adv Hit Adv Block
1500 High 6 VB VB

Downward kick towards the opponent. This move is very good for crossovers (j.C crosses up as well but not as good as 5C version) and is also a good air move to start bnbs (unlike 5C which is the same move but more recovery).

Illusions

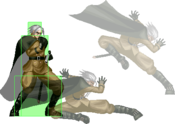
One of Murakumo's main gimmicks are his illusions. Think of Hibiki from Blazblue Centralfiction, though not as fleshed out.

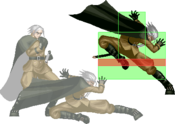
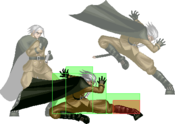
Illusion
ABK-Mura-5C.png
5C
5C
ABK-Mura-2C.png
2C
2C
ABK-Mura-4C.png
4C
4C
Version Damage Guard Startup Adv Hit Adv Block
5C 1500~ High 32 +1 -1

One of the three moves that uses Murakumo's illusions. This version makes the Murakumo above you visible and will come down with a jump C. The jump C goes almost half screen which makes it a easy crossup when you are close enough to the opponent. Only downside to it is that it has more recovery than the normal jump C which makes it impossible to combo into 2A for bnb. Still has its uses to trick players and to gain an easy crossover.

2C 1200~ Low 15 KD -12

One of the three moves that uses Murakumo's illusions. This version makes the Murakumo below you visible and will go along the floor with an extended 2B slide. Knocks down and is the move that usually ends ground bnbs. Not cancelable.

4C --- --- --- --- ---

One of the three moves that uses Murakumo's illusions. This version does not hit the opponent at all for both the high and low versions whiff through the opponent. The recovery out of this is pretty fast so you can trick the opponent into reflecting (thinking it is one of the other illusions) and throw them or get a free low/high depending where they reflect.

Command Normals

Teleport
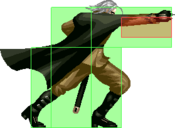
j.2A/B/C
ABK-Mura-j2X.png
- - - - -

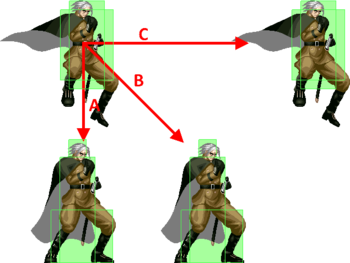
An aerial teleport move. A version teleports Murakumo to the ground directly below him, B - to the ground, but further away (as if he decended diagonally), C version also advances forward, except Murakumo reappears in midair.

Teleport Kick
j.2A/B > 8A/B/C
ABK-Mura-2X8X.png
- - - - -

After teleporting to the opponent, Murakumo quickly performs a rising kick. There are not a lot of options after one, though it's a knockdown.

  • Note you cannot perform it after a C Teleport, as Murakumo is left airborne.
  • Startup varies a lot, based on this (from the frame data chart):
    • 5F base startup;
    • All versions cancel Teleport's recovery starting from 8F:
      • A version: 29F startup in it's fastest variation;
      • B version: 26F startup in it's fastest variation;
      • C version: 23F startup in it's fastest variation;
Version Damage Guard Startup Adv Hit Adv Block
A 1200~ High/Low - KD -25
B 1400~ High/Low - KD -33
C 1600~ High/Low - KD -41

Special moves

電光弾 - Denkoudan
[4]6+A/B/C/B+C
ABK-Mura-46X.png
Version Damage Guard Startup Adv Hit Adv Block
-- 1000~ High/Low 13 +1 -3

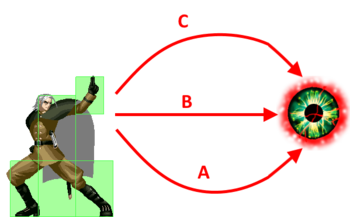
Murakumo's green projectile. Usually used on oki depending on the situation. All versions can be blocked mid and they travel the same speed but changes direction with different buttons. (Upward Arc [C], Downward Arc [A], and Straight [B])

A - - - - -

A version - Murakumo shoots the orb in a downward arc reaching its lowest point midscreen then eventually comes up on the way to the other side of the screen. This version can be used in a block string if the opponent is crouching and as an option select after throw or 2C whether or not the opponent techs.

  • If the opponent techs:
    • They will easily have something to block getting up from the tech.
  • If the opponent does not tech:
    • It will be considered as an OTG and can followup with 2B 2C afterwards.
B - - - - -

Murakumo shoots the orb in a straight line maintaining the same speed throughout. Nothing special about this one but this is the version that would most likely hit the opponent first if he is neutral midscreen. Also the one used in most of Murakumo's block strings.

C - - - - -

Murakumo shoots the orb in an upward arc reaching its highest midscreen then eventually comes down to the other side of the screen. This is usually the one you use when you expect a high jump in (Tekkouzan is very good at this as well) and can be blocked in the air.

EX - - - KD -1

Murakumo shoots all 3 versions of Denkoudan going in their respective directions at the same time. From opposite ends of the screen, the order that Denkoudan will make it across the screen to the opponent is A (downward arc), B (straight), then finally C version (upward arc). From midscreen, the C version may fly over the opponent at times and they usually mistake it that it could actually hit them. Also, all 3 Denkoudan will reach the opponent one after the other very fast for an easy crossup/tick/mixup.

徹甲斬 - Tekkouzan
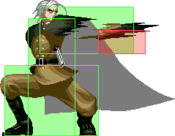
[2]8+A/B/C/B+C
ABK-Mura-28X.png
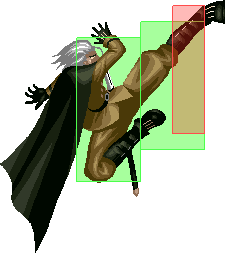
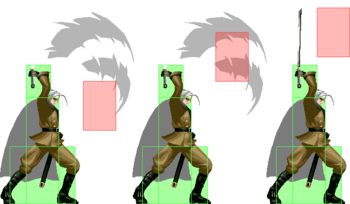
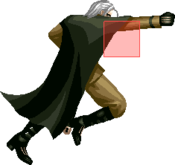
Note the hitboxes on the left are only in the C version.
ABK-Mura-28BC.png
-- - - - KD -25

Murakumo quickly unsheathes his sword and swipes upward. This move is a standard anti air and is also one to break certain block strings/pressure. All versions can be comboed from 2B.
The only difference between all three versions of this move is the actual startup and recovery after the move is done. A is the fastest and can be comboed from 2A/5A while C is the slowest yet strongest.

Version Damage Guard Startup Adv Hit Adv Block
A 1400~ High/Low 5 - -
B 1500~ High/Low 7 - -
C 1600~ High/Low 9 - -
EX 3229~ High/Low 5 KD -25

Murakumo swipes his sword out very very fast and holds it upwards before sheathing it again. This move has a range that dwarfs in comparison to the regular versions. It is also invisible on startup and it comes out very fast. In other words, if you aren't blocking it when it comes out, you're getting by it. This is Murakumo's best anti air at the expense of meter. It is also a beast when it comes to guard meter damage in the air (75% of guard meter to be exact) and is also safe on block in the air. Will OTG after 2C in case you need the kill.

電光地雷 - Denkou Jirai
22+A/B/C/B+C
ABK-Mura-22X.png
- - Complicated. Read further: -

Murakumo places a proximity mine, that will disappear after a set period of time or can detonate, either automatically (if the opponent steps on it) or manually, via the second 22+A/B/C command. Thus, player can't place more than one normal mine. Also, the mine command you used will be the one to actually come out even if you pressed a different button to detonate it. For example, if you used 22A to plant the mine then used 22B to detonate it, the A version will come out.

Since this move is a non-hitting, "setup" move, it's fairly hard to put the frame data in here. But understanding it doesn't hurt much:

  • The entire move, if done pointblank on an unsuspecting enemy (Setup on top of the enemy) lasts 42/44/46/40 frames, depending on the version (A/B/C/EX respectively).
  • The mine is setup on frames 25/27/29/23.
  • Mines explode on their own 17 frames after being triggered, either by activation (22X > 22X) or proximity.
  • When triggered, Mines have two hitboxes, a narrow one and a wide one:
    • Narrow hitbox starts on frame 9/13/17/9;
    • Wide hitbox starts on frame 11/15/19/11.
Version Damage Guard Startup Adv Hit Adv Block
A 800~ High/Low - - -

Mine comes out the fastest of the 3 but has the shortest aerial distance on hit. This version is the one used if you do not want to start your combo with an aerial move. For instance, if you want to start it with 5A instead of j.C after the initial hit, use A version.

B 1000~ High/Low - - -

Mine comes out a little slower but still faster than C version. The aerial distance is about the height of Akatsuki's 6C launcher. Has nice blockstun as well.

C 1200~ High/Low - - -

Mine comes out the slowest of the 3 versions but aerial distance is almost off the screen! Comboing off this version is very hard since it sends the opponent very high. Best blockstun of the 3 and also stays out the longest.

EX 1974~ High/Low - - -

Murakumo places 4 proximity mines. These can be detonated using the same 22+B+C input. Note, that Murakumo can have both normal and EX mines together on-screen, manual detonating command won't affect mines of the other type (ie: 22+A won't blow up EX mines).

Universal Mechanics

Reflector

Standing Reflector
4/5/6+B+C
ABK-Mura-BC.png
Damage Guard Startup Adv Hit Adv Block
500~ High/Low 7 KD +3

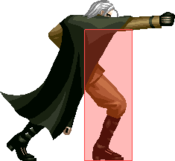
Murakumo performs a jab that launches the opponent. You can combo off of it with 2B > [2]8X > [2]8B+C on midscreen, but it's very reliant on how far you are when the Reflector hits. Probably does better off the corner.

Crouching Reflector
1/2/3+B+C
ABK-Mura-2BC.png
Damage Guard Startup Adv Hit Adv Block
400~ Low 7 KD +3

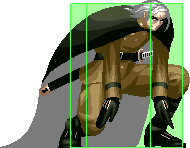
Murakumo does his 2B, but this time around it launches. Similar to 5B+C, but it seems to have a tiny slide. May help a bit in Reflector combos.

Jumping Reflector
j4/5/6+B+C
ABK-Mura-jBC.png
Damage Guard Startup Adv Hit Adv Block
500~ Dunno. 6! KD +3

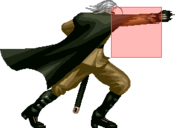
Murakumo performs his j.B, but you can follow it up with a neat juggle in places.

Throws

Standing Throw
4/5/6+A+B
ABK-Mura-AB.png
Damage Guard Startup Adv Hit Adv Block
1183~ N/A 6 --- ---

Murakumo grabs the opponent and discharges them with an explosive burst of energy upon releasing them. This throw can be tech rolled.

Jumping Throw
j.4/5/6+A+B
ABK-Mura-jAB.png
Damage Guard Startup Adv Hit Adv Block
2000~ N/A 3 --- ---

Murakumo throws the opponent at a downward angle across the screen. This throw can be tech rolled.

Super Move

八紘一宇 - Hakkou Ichiu
A+B+C
ABK-Mura-ABC.png
ABK-Mura-ABC (Anim).png
Damage Guard Startup Adv Hit Adv Block
5547~ High/Low 4 KD -20

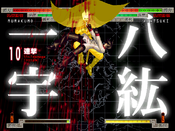
Murakumo surrounds himself in electric aura (looks like the mine detonation) and if the opponent makes contact with it, Murakumo will slice him upwards a few times then will strike him down back to the ground with his sword. The range on this move is about Murakumo's height and is a pretty good counter for last minute jump ins (since he is pretty tall) but isnt the move for all jump ins since you can use EX Tekkouzan for 2 meters less. Only use in combos/confirms that the opponent will be dead.

General Strategy

Kore de

Combos

2A x 2 -> 2B is approximately the time it takes to charge a special move, use this ground string if you are not already holding down back when your combo begins.


Midscreen

2C can be replaced with [2]8A -> BC/ABC for EX flashkick and Level 3 enders respectively, so make sure to charge down and back for these enders.


  • 2A -> 5B -> 2B -> 2C -> [4]6A (If no tech, -> 2B -> 2C) (1828, 2189 with OTG)
Without teching, [4]6A will OTG for a combo extension. If they tech, [4]6A will just meaty.
  • Reflector -> 2B -> 2C (1805)
If close enough, replace 2C with [2]8X -> [2]8BC for BIG damage (3432)
  • j.A/j.C air-to-air -> land -> Airthrow
Not so much a combo as it is a setup for the airthrow. If you leave out the air throw, it can also cross under in certain situations!


Corner

Meterless combos without mine detonations are the same as midscreen


1 Bar, No Mine

  • 2A -> 2B -> [2]8C -> [4]6BC -> 2A x 2 -> 2B -> [2]8B (3216, 4615 with extra EX) Video
The damage route. Forfeits mine oki for more damage and potential to burn another bar on [2]8BC for even more damage.
  • 2A -> 2B -> [2]8C -> [4]6BC -> 2A x 2 -> 2B -> 22X (If no tech, -> 2B -> 22X) (2680) Video
The oki route. Mine will OTG if not teched, leading to a bit of extra damage and an extra mine set.
Note: Using 2A x 2 -> 2B starter greatly scales the damage route down (2854/4263), making it only ~250 damage higher than the oki route (2496). Keep this in mind as 2A x 2 -> 2B is the required time for a charge input.


Mine Combos

  • 22A mine hit -> 2B -> 2C (1976)
  • 22B mine hit -> 9j.A j.C -> land 2B -> 2C (2580)
  • 22C mine hit -> 9j.A j.A -> land 9j.A j.C -> land 2B -> 2C (2772)
Can add 5A/2A/2B before 2B if close enough.


These next combos assume you have either 22B or 22C mines set in the corner. 2A scaling is almost minimal on these combos, so feel free to use as many as needed to hitconfirm.

  • 2A -> 2B -> 22X -> 9j.A j.C (hold 4 immediately after jumping) -> land 5B -> [4]6A -> 2A x 2 -> 2B -> [2]8B (3164, 4565 with EX) Video
Optimal meterless mine corner combo. Watch the video if you're having trouble with timing.
Note: Can also route into mine oki similar to the no mine corner combos for less damage, but another chance at landing one of these sick combos.
  • 2A -> 2B -> 22X -> 9j.A j.B -> land 9j.A j.C -> 5A x n -> 2A x 2 -> 2B -> [2]8B -> ABC (~6900, but can go past 8000!) Video
Murakumo's highest damage combo. Requires corner, mine setplay, and 3 bars. Pop off if you land this in a set.

Frame Data

source
KD - Knockdown
VB - Variable
*UV - vaule(s) marked with "?" in the table is/are unverified
x~yF - a period from frame "x" till frame "y"

                       |     Frames      |  Frame Advantage  |
               Attack  | Total | Startup | On Hit | On Block | Notes
Throws and Reflectors  ---------------------------------------
            4/5/6+A+B  |  20   |    6?   |   KD   |    --    | *UV
          j.4/5/6+A+B  |  20   |    3    |   KD   |    --    |
                5+B+C  |  17   |    7    |   KD   |    +3    |
                c.B+C  |  17   |    7    |   KD   |    +3    |
                j.B+C  |  16   |    6    |   KD   |    +3    |
              Normals  ---------------------------------------
                   5A  |  15   |    4    |   +0   |    +0    |
                   5B  |  21   |    6    |   +0   |    -2    |
                   5C  |  46   |   32    |   +1   |    -1    |
                  c.A  |  15   |    4    |   +0   |    +0    |
                  c.B  |  34   |    7    |  -12   |   -14    |
                  c.C  |  42   |   15    |   KD   |   -12    |
                  j.A  |  15   |    4    |   +0   |    +0    |
                  j.B  |  24   |    5    |   VB   |    VB    |
                  j.C  |  25   |    6    |   VB   |    VB    |
           c./5A > 5A  |  15   |    4    |   +0   |    +0    |
          c./5A > c.A  |  15   |    4    |   +0   |    +0    |
      Command Normals  ---------------------------------------
                   4C  |  32   |   --    |   --   |    --    |
                 j.2A  |  VB*  |   --    |   --   |    --    | landing recovery 16F, 4F invincible after that,
                                                               *33F if done right after the jump
                 j.2B  |  VB*  |   --    |   --   |    --    | landing recovery 16F, 4F invincible after that,
                                                               *34F if done right after the jump
                 j.2C  |  VB   |   --    |   --   |    --    | 16-21F invincible, cancellable into air normal after 32F
          j.2A/B > 8A  |  43   |    5*   |   KD   |   -25    | cancels j.2A/B landing recovery starting from 8F; *29th frame 
                                                               in its fastest variation (when done from ascending j.2A)
          j.2A/B > 8B  |  51   |    5*   |   KD   |   -33    | cancels j.2A/B landing recovery starting from 8F; *26th frame 
                                                               in its fastest variation (when done from ascending j.2A)
          j.2A/B > 8C  |  59   |    5*   |   KD   |   -41    | cancels j.2A/B landing recovery starting from 8F; *23rd frame 
                                                               in its fastest variation (when done from ascending j.2A)
             Specials  ---------------------------------------
               [4]6+A  |  42   |   13    |   +1   |    -3    |
               [4]6+B  |  42   |   13    |   +1   |    -3    |
               [4]6+C  |  42   |   13    |   +1   |    -3    |
               [2]8+A  |  45   |    5    |   KD   |   -25    |
               [2]8+B  |  47   |    7    |   KD   |   -25    |
               [2]8+C  |  49   |    9    |   KD   |   -25    |
                 22+A  |  40   |   42*   |   KD   |   +19*   | setup ends on 25F, mine auto explodes 17F after being     
                                                               triggered, Mura crouches during frames 3~38, *if triggered 
                                                               instantly after the setup
                 22+B  |  40   |   44*   |   KD   |   +21*   | setup ends on 27F, see all of the above   
                 22+C  |  40   |   46*   |   KD   |   +23*   | setup ends on 29F, see all of the above   
            22 > 22+A  |  30   |    9    |   KD   |    -4    | narrow hitbox on 9F, wide - on 11F; if the enemy enters
                                                               mine's trigger range before you finish detonating it, it 
                                                               will auto-explode
            22 > 22+B  |  30   |   13    |   KD   |    +0    | narrow hitbox on 13F, wide - on 15F; see above  
            22 > 22+C  |  30   |   17    |   KD   |    +4    | narrow hitbox on 17F, wide - on 19F; see above                                                                                                      
       EX and Level 3  ---------------------------------------
             [4]6+B+C  |  50   |   13    |   KD   |    -1    | 1~4F invincible
             [2]8+B+C  |  53   |    5    |   KD   |   -25    | 1~4F invincible
               22+B+C  |  40   |   40*   |   KD   |   +29*   | setup ends on 23F, mine auto explodes 17F after being     
                                                               triggered, Mura is 1~2F invincible and crouches during      
                                                               frames 3~38, *if triggered instantly after the setup
      22+B+C > 22+B+C  |  30   |    9    |   KD   |    +8*   | narrow hitbox on 9F, wide - on 11F; if the enemy enters
                                                               mine's trigger range before you finish detonating it, it 
                                                               will auto-explode; *in case all 4 explosions were blocked,
                                                               often becomes +6 with grounded opponents
                A+B+C  |  40   |    4    |   KD   |   -20    | superflash 40F, 1~4F invincible

Trivia
ZOOM

Murakumo's Ending


General
FAQ
Controls
Netplay
Menus
HUD
Glossary
Links
Characters
Akatsuki
Mycale
Sai
Kanae
Fritz
Marilyn Sue
Wei
Anonym
Elektrosoldat
Blitztank
Adler
Murakumo
Perfecti
Mechanics
System Specifics
Frametool
Reflector
Changelog