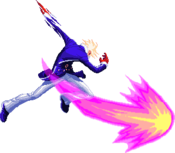
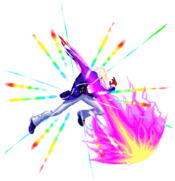
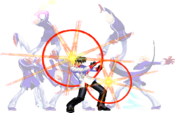
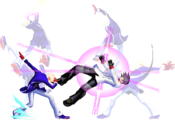
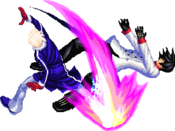
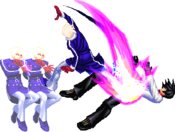
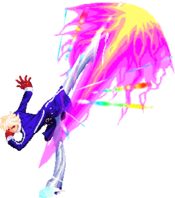
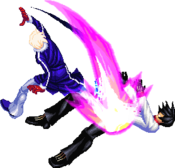
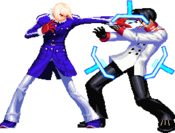
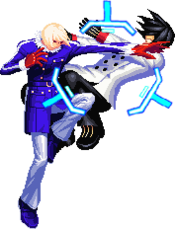
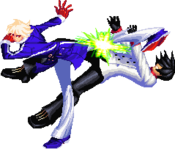
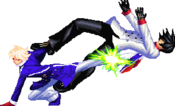
EN-Eins Perfektewelt/EN-Eins
Background
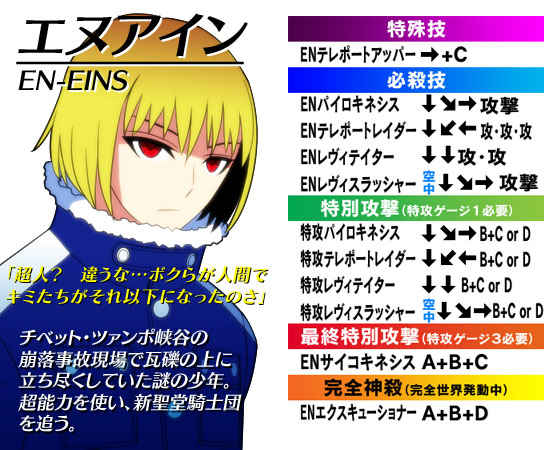
"A mysterious young boy who was standing stock-still above the rubble at the site of a large-scale cave-in incident in the Tibetan Tsangpo Canyon. A user of psychokinesis, he goes after the New Order of Knights Templar."
Introduction
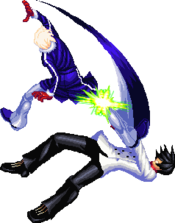
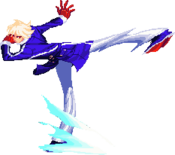
As the main character of the game, EN-Eins at first may seem like a shoto. However, he's much more rushdown and aggression in terms of playstyle. EN-Eins has good movement and quick frame data, with some of the easiest combos in the game. In addition, he has good tools for almost every situation you can think of. His only true weaknesses are his low defense, bad mixups, and lack of zoning capabilities. However, these aren't major, and with good play one can find ways to work around these issues. This all comes together to create one of the strongest characters in the game, while also being one of the easiest to learn.
- Armor Ratio = 1.025 (Second lowest armor value)
- Forward Speed = 6.0 dots/F (Second fastest unbuffed value)
- Backwards Speed = 5.0 dots/F (Fastest unbuffed value)
- Jump Startup = 4F (Second slowest value)
- Backdash Duration = 23F (Fourth shortest value)
Pros
- Good movement, including a double jump that goes full screen
- Good frame data
- Tools for any situation
- Decent damage combos that he can go into from most moves
- Easy to learn
- Safe, long, and spammable moves
- Cloned from God
Cons
- Bad mixups with only one bad overhead and very reactable crossups, relies on frame traps and throws
- Will lose the projectile war against most characters
- Lower defensive value
- He's a sad boy
All damage values below were tested on Akatsuki with 1.000 armor ratio, full life on both sides, and power level 0 (remember about "Health difference", "Guts", and "Power Level" systems)
Normal Moves
5A
|
|---|
5AA
|
|---|
5AAA
|
|---|
5AAAA
|
|---|
5B
|
|---|
5BB
|
|---|
5BBB
|
|---|
5C
|
|---|
5CC
|
|---|
2A
|
|---|
2AA
|
|---|
2B
|
|---|
2C
|
|---|
j.A
|
|---|
j.B
|
|---|
j.C
|
|---|
Command Normals
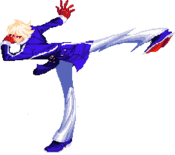
ENテレポートアッパー - EN Teleport Upper 6C Nothin' Nothin' Personal Personal Kid Kid
|
|---|
Special Moves
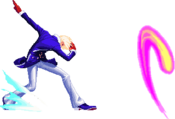
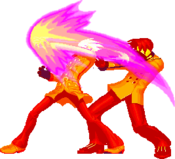
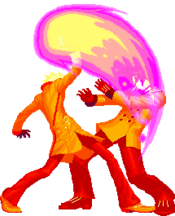
ENパイロキネシス - EN Pyrokinesis 236+A/B/C/D Dab on the haters Dab on the haters
|
|---|
ENレヴィスラッシャー - EN Levi-Slasher j.236+A/B/C/D Aerial dab Aerial dab
|
|---|
ENテレポートレイダー - EN Teleport Raider 214+A/B/C/D > Same button > Same button A version A version B version B version C version C version Welcome to the clone zone Welcome to the clone zone
|
|---|
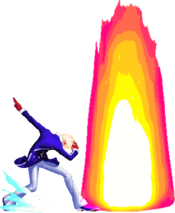
ENレヴィテイター - EN Levitator 22+A/B/C/D > A/B/C A followup A followup B followup B followup C followup C followup EX version EX version
|
|---|
Universal Mechanics
Throws
Forward Throw
4/5/6+A+B |
|---|
Air Throw
j.4/5/6+A+B |
|---|
Reflectors
Standing Reflector
4/5/6+B+C/D |
|---|
Crouching Reflector
1/2/3+B+C/D |
|---|
Jumping Reflector
7/8/9+B+C/D |
|---|
Dash Attack
66X
|
|---|
Super Moves
ENサイコキネシス - EN Psychokinesis A+B+C Aye, that's the game's logo Aye, that's the game's logo
|
|---|
ENエクスキューショナー - EN Executioner
A+B+D |
|---|
General Strategy
Neutral
EN-Eins has a very strong neutral, as his very good movement combined with fast, long ranged normals gives him very good footsies. His best normals in the neutral are 2B, 5B, and '5C', all of which have good range and good frame data. Having a projectile helps him out a lot too, as it allows him to apply pressure and cover an approach. Finally, 214A can be thrown out from time to time, as its completely safe on block, and leads to good damage if it hits. Good neutral with EN-Eins generally requires a good balance of his double jump, 2B, 5B, 214A, and 236X.
Combo Game
EN-Eins has a very strong combo game. EN-Eins has 4K-6K combos from any part of the screen, which normally end with 22D, which is untechable, leading to extra OTG damage and an assured oki situation. Making it even stronger is that, while he has his fair share of hard and complicated combos, you can very easily get by with his easier combos, as they still deal good damage and give an oki situation. His only weakness combo wise is that his meterless combos are relatively low damage. However, because meter builds up so fast in EE and EN-Eins is particularly good at building meter, he rarely doesn't have meter to burn. This gives him some of the best combo game in the cast, only being beaten by a few other characters like Sai and Adler who have good meterless combos.
Offensive Pressure
EN-Eins, while not having great mix, has pretty good offensive pressure. A lot of EN-Eins' pressure comes from the fact that his block strings are completely unpunishable except in specific situations, since he can always end a block string with 214A, which is -3 on block, and he can't be hit by a frame 3 move since it pushes opponents too far away from him. This basically means that once he gets in, he can keep pressuring opponents repeatedly, and while his mix isn't the best, if someone's stuck blocking too long eventually they'll get hit by a 2B or a 214C if he decides to go for a mixup and eat a full combo. This makes his offensive, while certainly not the best, very strong in its own right.
Okizeme
EN-Eins doesn't have the greatest okizeme options, due to his mix not being particularly good. However, he can still mixup 2B and 214C on oki to make the opponent guess low or high, or just like any other character, he can go for a throw. More often though, EN-Eins players will mash 2As and then go into either 2B or 214C from there. Additionally, EN-Eins can just do a regular block string that's safe if he wants. Overall, this means his oki is one of his only weaker aspects, but its still alright.
Reversal Options
EN-Eins has some very good reversal options, mainly due to his DP. EN-Eins' can do 22C on wakeup, and if it hits, he can do 236BC to convert into full combo. However, making this stronger is that if the opponent block the 22C, he can still do 236BC and it will be safe since 236BC is safe on block. Additionally, if you're too slow and you go into the air, then you can do j.236BC which is also safe on block. And if a player wants to, they can do A+B+C as a more risky reversal, although there's no good reason to do this. This all gives EN-Eins very strong and very safe reversal options, which adds to what makes him such a strong character.
Overview
Overall, EN-Eins is one of, if not the strongest character in the game, with very good neutral, very strong combos, ok mix, and very stroing reversal options. This makes it so that there's no aspect of gameplay EN-Eins is particularly bad at, and in addition to this, he's not that hard to play either.
Other Resources
Combos
On the A+B+D combos, the timing on activating Kanzen Sekai needs to be very tight in order to get the correct launch angle. Damage numbers not listed due to variability. Additionally, A+B+C can be implemented into almost every combo, but isn't listed as such to be concise.
Combo Starters
- 5A/2A > 5B/2B (> 5BB)
- Basic starters for most of his combos, although 2B tends to be the one used the most.
- 214C
- EN-Eins' only standing overhead combo starter, although it only combos into itself after the first hit.
- 6C
- The cross up launcher, rarely hits but leads to good damage when it does.
- Anti-Air 5C
- Doesn't lead to much but good to know what you can get from it.
Midscreen Combos
- Starter > 214A > A > (A) OR (22BC/D > (22C > B for side switch) OR (236C for same side))
- EN-Eins basic midscreen combo. Can add on 1 bar for 22BC/D to heavily increase the damage. 22BC/D gives a hard knockdown so it leads to assured OTG damage.
- Starter > 214B > B > B (> 214BC/D)
- Another basic combo, although it does slightly more damage meterless. Can add a bar to use 214BC/D, although this does less damage than the above combo due to 22BC/D adding a ton of damage. 214BC/D also gives a hard knockdown but launches the opponent too far away to lead to much.
- Starter > 214B > B > 236B
- Meterless side switch combo. Does low damage but is useful for when you need it.
- Starter > 22C > (B) OR (C) OR (22BC/D > (22C > B for side switch) OR (236C for same side))
- The C follow-up gives the most corner carry of his meterless combos but does low damage and launches the opponent far away from him, not a great combo option. The B follow-up gives a side switch, which has its uses, but still not a preferred combo. Can also be comboed into 22BC/D if inputted quickly enough to increase the damage a good amount.
- Starter > 22C > 214BC/D (Whiff) > 5B > 214B > B > B (> 214BC/D)
- High damage one bar side switch combo. 214BC/D can be added to the end although it's not very meter efficient.
- 214C > C > C > 22BC/D > (22C > B for side switch) OR (236C for staying same side)
- Overhead starter combo. The only possible combo to get from 214C besides just doing it meterless, even in corner.
- 6C > j.A > j.B > 5BB > 214B > B > B (> 214BC/D)
- Main 6C conversion. Does high damage but is somewhat difficult. Can add a meter for 214BC/D.
- Anti-Air 5C > 22C > (B) OR (214BC/D)
- Anti-air combo, the opponent needs to be somewhat close to you for the 22C to connect but does very high damage when a bar is added on, but can be risky.
- Anti-Air 5C > 2B > 214A > A > (A) OR (22BC/D > (22C > B for side switch) OR (236C for same side))
- More advanced anti-air combo, and can only be done if close enough to the opponent when 5C hits or versus Blitztank.
- Anti-Air 22A > 2B > 214A > A > (A) OR (22BC/D > (22C > B for side switch) OR (236C for same side))
- A combo for the odd occasion you get an anti-air 22A. Needs to hit the opponent while they're pretty high up to get the combo to work.
- Starter > 22C > 214BC/D > 5B > 214B > B > B (> 214BC/D)
- A fairly high damage but harder meter combo, that can also have another meter spent on it to do even more damage. For one bar it is pretty damage to meter spent efficient, although important to note, this combo side switches.
- Starter > 22C > 236BC/D > 214A > A > (A) OR (22BC/D > (22A for same side) OR (22C > B for side switch))
- More advanced meter conversion. Not really worth going for unless you're going to spend the second meter for 22BC/D, which causes it to deal high damage. The opponent is in launch state long enough that after the hard knockdown from 22D, they won't stay in OTG long enough to combo into 236C.
- Starter > 214B > B > B > A+B+C
- Highest damaging option for using A+B+C in midscreen. Does less damage than going for the above two bar conversion so not really worth it, but is cool to end a match with. A+B+C also gives a hard knockdown but puts the opponent too far away to allow for anything.
- Starter > 22C > 236BC/D > A+B+D > A+B+D
- Very advanced Kanzen Shinsatsu combo. As mentioned timing the Kanzen Sekai after 236BC/D can be very difficult, and this also isn't especially rewarding when you get it. However, it's really cool, and can be used to style on an opponent. Only real situation where it's the best option is when it would kill and you don't have enough meter to do the two bar conversion.
- Starter > 214A > A > 236BC/D > A+B+D > A+B+D
- An alternative the the other Kanzen Shinsatsu combo, although it's slightly more difficult. Does around the same amount of damage and has the same uses.
Corner Combos
- Starter > 214A > 2A > 5B > 5BB > 214A > A > A
- Typical meterless corner extension, 214A can be comboed into 2A' in corner leading to most corner combos. Doesn't deal a huge amount of damage but is important to know since most of his corner combos stem from this.
- Starter > 214A > 2A > 5B > 5BB > 214A > A > 22D > 22C > B
- Relatively easy corner meter combo. The same as the meterless one but with 22D added. In corner, the B follow-up to 22X will hit the opponent on OTG rather than whiffing like normal, allowing for slightly more damage, although EN-Eins can't get a safe jump when this is done.
- Starter > 214A > 2A > 5AA > 2A > 5AA > 2B > 214A > A > 22BC/D > 22C > B
- Slightly higher damaging combo route than the one above. Not much harder to do.
- Starter > 214A > 2A > 5A > 5B > 236B > 2A > 2B > 22C > 22BC/D > 22C > B
- More advanced but higher damaging corner route. Does only a bit more damage than the above route so not worth trying for if you're not consistent with it.
- Starter > 22C > 214BC/D > 5A > 5B > 236A > 5A > 5B > 5BB > 214A > A > 22BC/D > 22C > B
- Advanced two bar corner combo. Not especially difficult but isn't easy. Does high damage so it is worth learning, but you can get by with the one bar conversions.
- Starter > 22C > 214BC/D > 5A > j.A > j.B > j.C > 2A > 2A > 2B > 22C > 22BC/D > 22C > B
- Very advanced two bar corner combo. One of EN-Eins' hardest corner routes, but also his second highest damaging combo. Not exactly worth learning due to it's high difficulty along with it only dealing somewhat more damage than the other two bar route, but it feels great to pull off.
- Starter > 22C > 214BC/D > 5A > 66X (> j.A > j.B > j.C) > (5A > 5B > 22C > B) OR (22C > 22BC/D > 22A for same side) OR (22C > B for side switch))
- An alternative corner meter route, also pretty advanced. If you can get the aerial chain then it will deal very good damage, but otherwise isn't really worth it.
- 6C > 66X > j.A > j.B > j.C > 2A > 5B > 5BB > 22C > B
- A combo for the rare situation where you get 6C at or near corner. Does high damage if you land it.
- Starter > 214A > 2A > 5B > 5BB > 214A > A > A+B+C > 22C > B
- Optimal A+B+C corner combo. His highest damaging combo, but not very meter efficient, best used for closing out a match or styling on the opponent.
- Starter > 22C > 236BC/D > A+B+D > 2A > A+B+D
- Corner Kanzen Shinsatsu combo. Slightly more difficult than the midscreen ones while doing slightly more damage, but still not worth it unless there's no better options.
Far Side of Screen Combos
- Starter > 22C > 214BC/D (Whiff) > 5A > 66X > j.A > j.B > j.C > 5A > 5A > 22C > (B) OR (22D > 22C > B)
- Advanced side switch combo to use when EN-Eins is getting pressured in the corner. Very tight combo but absolutely worth the damage and side switch when there's an opportunity to do it.
- Starter > 22C > 214BC/D > 22C > 236BC/D > A+B+D > 2B > A+B+D
- Two bar side switch Kanzen Shinsatsu combo. The hardest and highest damaging of the Kanzen Shinsatsu routes, but still not really worth it outside of closing a round.
Reflector Combos
- Reflector > 214B > B > B > 214BC/D
- The general reflector combo for any reflector in any situation.
- Corner Reflector > 2B > 236B > 2A > 5B > 5BB > 214A > A > 22BC/D > 22C > B
- A somewhat difficult combo for if you get a grounded reflector on the opponent in corner. Does pretty high damage for a reflector combo.
- Air Corner Reflector > 5B > 236A > 5A > 5B > 5BB > 214A > A > 22BC/D > 22C > B
- A difficult combo for the rare occasion you get an air reflector with the opponent in corner. Does very high damage for a reflector combo, but you will rarely get an opportunity to use it.
Frame Data
KD - Knockdown
VB - Variable
*UV - value(s) marked with "?" in the table is/are unverified
x~yF - a period from frame "x" till frame "y"
N/A - not applicable
WB - wall bounce
WS - wall splat/stick
GB - ground bounce
                                |     Frames      |  Frame Advantage  |
                        Attack  | Total | Startup | On Hit | On Block | Notes
        Throws and Reflectors  ---------------------------------------
                    4/5/6+A+B   |  32   |    5    |   KD   |    N/A   |
                  j.4/5/6+A+B   |  VB   |    4    |   KD   |    N/A   |
                      5+B+C/D   |  36   |    7    |   KD   |    -2    |
                      c.B+C/D   |  36   |    7    |   KD   |    N/A   |
                      j.B+C/D   |  VB   |    6    |   KD   |    N/A   |
                          66X   |  32   |    7    |   WS   |    -10   |
                      Normals  ---------------------------------------
                          5A    |  15   |    4    |   +0   |    +0    |
                          5AA   |  19   |    4    |   -3   |    -3    |
                          5AAA  |  25   |    7    |   -1   |    -3    |
                          5AAAA |  30   |    7    |   KD   |    -7    |
                          5B    |  26   |    7    |   -3   |    -5    |
                          5BB   |  29   |    10   |   -3   |    -5    |
                          5BBB  |  30   |    6    |   KD   |    -8    |
                          5C    |  31   |    10   |   KD   |    -5    |
                          5CC   |  54   |    23   |   KD   |    -8    |
                          c.A   |  15   |    4    |   +0   |    +0    |
                          c.B   |  25   |    5    |   -4   |    -6    |
                          c.C   |  40   |    10   |   KD   |    -14   |
                          j.A   |  VB   |    4    |   VB   |    VB    |
                          j.B   |  VB   |    6    |   VB   |    VB    |
                          j.C   |  VB   |    9    |   VB   |    VB    |
              Command Normals  ---------------------------------------
                           6C   |  49   |    20   |   KD   |    -13   |
                     Specials  ---------------------------------------
                        236+A   |  44   |    10   |   -5   |    -9    |
                        236+B   |  43   |    13   |   -1   |    -5    |
                        236+C   |  61   |    16   |   KD   |    -10   |
                      j.236+A   |  VB   |    11   |   KD   |    VB    | 6F landing lag
                      j.236+B   |  VB   |    13   |   KD   |    VB    | 6F landing lag
                      j.236+C   |  VB   |    15   |   KD   |    VB    | 6F landing lag
                        214+A   |  32   |    11   |   KD   |    -6    |
                    214+A > A   |  32   |    VB   |   KD   |    -18   |
                214+A > A > A   |  32   |    VB   |   KD   |    -17   |
                        214+B   |  46   |    13   |   KD   |    -18   |
                    214+B > B   |  46   |    VB   |   KD   |    -17   |
                214+B > B > B   |  46   |    VB   |   KD   |    -11   |
                        214+C   |  54   |    20   |   GB   |    -14   |
                    214+C > C   |  54   |    20   |   WB   |    -11   |
                214+C > C > C   |  54   |    20   |   KD   |    -18   |
                         22+A   |  44   |    4    |   KD   |    -25   | 3F invincible
                         22+B   |  56   |    5    |   KD   |    -36   | 4F invincible
                         22+C   |  69   |    6    |   KD   |    -48   | 5F invincible
               EX, Supers  ---------------------------------------
                      236+D     |  96   |    10   |   WB   |   Safe   | 0F invincible
                    j.236+D     |  VB   |    7    |   KD   |    VB    | 0F invincible, 6F landing lag
                      214+D     |  37   |    11   |   KD   |    -12   | 7F invincible
                       22+D     |  67   |    5    |   KD   |    -48   | 7F invincible
                      A+B+C     |  39   |    12   |   KD   |   Safe   | 14F invincible
                      A+B+D     |  77   |    10   |   KD   |    -34   | 11F invincible
Trivia
- Stylistically, many of EN-Eins' moves seem to be based off of Iori from the KoF series.
Arcade Story
- Opening
 In the year 20XX AD in the Tibetan Tsangpo Canyon, there was a large-scale cave-in incident.
 There was only a young boy who stood above the rubble, his name was En-Eins.
 "This voice calling me... I have no choice but to go that place".
- VS Generic
Superhuman? (*1) No... We are nothing more than humans like all of you.
- VS Perfecti, Valkyria
 God?
 Isn't it the culmination of isolation?
- First Interaction
 Perfecti:
 Energeia Eins (*2), the "Form of God's Reality". How admirable of you to come.
 By taking the place of the legacy that sleeps here you will become God.
 EN-Eins:
 Sorry to disappoint... I won't do as you wish.
- Second Interaction
 Valkyria:
 EN-Eins... Why do you oppose the world that is to become yours?
 EN-Eins:
 The archaic humans have certainly fulfilled their role... but that is not a pretext for their obliteration.
 Valkyria:
 Such failure... well then, you shall be disposed right here together with the archaic humans. (*3)
- Ending
 EN-Eins:
 The New World, "Neuland"...
 The Gods legacy is sleeping below here.
 I am alone... all my brothers from the experiments are dead...
 At least I can live on with the remaining people.
EN-Eins crushed the permafrost and the incandescent magma poured underground.
- Translation Notes
- (*1) In his victory quote EN-Eins uses 超人 (choujin) (1) superman; (2) Übermensch (Nietzsche's ideal man of the future) [1]. I used superhuman since EN-Eins explains that his kind is not above humanity (they're just an evolved form). But in Japanese there's the added reference to Nietzsche's Übermensch.
- (*2) Perfecti refers to EN-Eins as Energeia Ein. エネルゲイア = Energeia, from Aristotle's principles of Potentiality (δύναμις, dunamis) and Actuality (ενέργεια, energeia and ἐντελέχεια, entelecheia). [2]
- (*3) The term Valkyria uses to refer to humanity is 旧人 (kyuujin) paleo-anthropic man (e.g. Neanderthal) I felt it was too technical and used Archaic human as more general term. [3]
