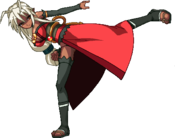
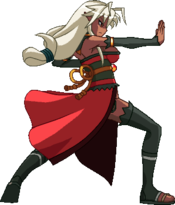
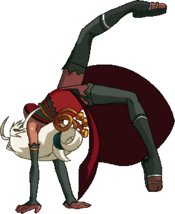
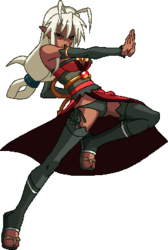
Nitroplus Blasterz: Heroines Infinite Duel/Muramasa
Profile
Name: Muramasa the Third
Debuted in: Full Metal Daemon Muramasa
Voice Actor: Sumoto Ayana
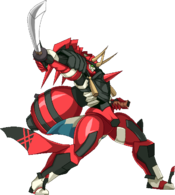
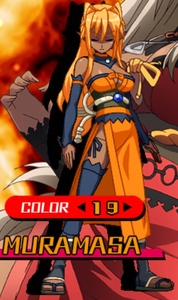
Introduction: One of the Tsurugis that houses a spirit. She is the third bearer of the Seishuu Uemon-no-jou Muramasa, which is also known as the "cursed armor". Normally, she is a red colored spider, but due to the "human transformation law", she can also take the form of a woman.
Summary
Muramasa is an unconventional as she has high mobility, long range capabilities, serviceable mix ups, on top hitting like truck for minimal resource. She has everything needed to be a perfect character bar one trait, a meter less reversal. Even with that disadvantage, she has a lot of “knowledge check” tools keep opponents honest. Indeed, Muramasa the Third Floats like a butterfly and stings like a bee.
Command List
If you are having trouble reading inputs, check out the Notation section!
Normals
5A 2A [6A / cl.B] st.B 2B 5C 2C [5E/2E] is basic chain route. Any deviations from that route will be noted as an additional or limited.
5A
|
|---|
6A
|
|---|
c.5B
|
|---|
f.5B
|
|---|
5C
|
|---|
5E / 5[E]
|
|---|
2A
|
|---|
2B
|
|---|
2C
|
|---|
2E
|
|---|
jA
|
|---|
jB
|
|---|
jC
|
|---|
jE
|
|---|
BC Ground Throw Ground Throw
|
|---|
j.BC Air Throw Air Throw
|
|---|
Specials
Strings of the Spider
236A/B/C |
|---|
Strings of the Spider
j236A/B/C |
|---|
Eardrum Breaking
623A/B/C |
|---|
Web of the Spider
214A/B/C |
|---|
Supers
Enchant Plus: Linear Acceleration
j236AB |
|---|
Enchant Minus: Magnetic Barrier
623AB |
|---|
Manual Down Self-repairing
421AB |
|---|
Counter Raid
6+E in blockstun |
|---|
Variable Rush
All Variable Rushes allow you to do a sequence of attacks depending on if you hit the A, B, or C button. If you press nothing, the VR will end. If your VR is blocked, you have the option to press nothing, or keep attacking. Even if you keep attacking, you could still stop at any time, assuming you don't execute the final attack.
Depending on what combination of buttons you use, you can come up with some useful strings.
CE
|
|---|
Lethal Blaze
Railgun MAGATSU
236236BC |
|---|
Combos
Please check out the Notation section, for help on understanding how to read and write combos!
Meterless
2B 2C> 236B > j.B dj9.B C j.236A > j.E j.236C >j.C
- Basic BnB to setup a wall air tech trap situation
...2B 2C> 236B > j.B dj9.B E j.236C > j.C j.236A > j.E
- Floor bounce tech trap setup
Air throw > Land 236C > j.B dj9.B E j.236C > j.C
Throw D > 236A > j.B dj9.B C j.236A > j.E j.236C >j.C
- Midscreen to corner throw combo
Throw > 5B 2C 236B > j.B dj9.B E j.236C > j.C
- Corner throw combo
Throw D > cl.B 6A 2C > 236B > j.B E j.236C > Land cl.B 5B 214C
- Corner throw to ground tech trap setup
Throw D > 236A > j.B dj9.B C j.236A > j.E j.236C >j.B > Land 236C > Air throw reset
- Throw into corner air throw reset setup to catch mash tech.
2B > 5C > 623C
A basic combo that connects with the opponent consistently regardless of distance or location. You can use various assist cancels and combos to extend the combo after the 623C.
2A (can be repeated) > 2E > 623B
A basic combo that connects regardless of distance or location once you’ve hitconfirmed off of 2A.
2B > 2C > 236B > j.B > djc > dj.B (> dj.C > dj.236A) > j.E > j.236C > ender of your choice
Basic air combo from a close range 2B. If you’re too close to the corner, j.C > j.E will not connect, so omit that part and just do dj.B > dj.E instead in that situation. 2C cancel timing is during the second half of the animation, so be careful not to input the 236B too early.
2B > 5C > (delayed) 214B > cl.B (> 6A) > f.B > j.B > djc > dj.B (> dj.C > j.236A) > dj.E > j.236C > ender of your choice
Basic air combo used when the opponent is not near the corner. Since 2C can’t reach after 2A or from the max range of 2B, go for this air combo in that situation. However, be careful of the timing, as it is a bit different from the timing used to connect 214B after 2C. The 214B is difficult to connect if you immediately cancel, so delay it slightly.
2B > 5C (delayed) 214B > 6A > 2C > 214C
If you want a good knockdown after the 2B > 5C route, use this. 2C > 214C offers a longer knockdown than other routes.
2B > 2C > 236B > j.E > j.D > low altitude j.C > land > 214B > 5B > 214C
A slightly more damaging okizeme route. Low altitude j.C keeps the combo stable for the 214B. This can be followed up with meter or assist use.
(j.236B hit >) j.B > 2B > 2C > 236B > j.B > j.C > j.236A > j.E > j.236C > j.236AB
This combo is also shown in the Muramasa character introduction video on the official website. The opponent needs to be on the ground for the first j.236B to connect properly.
2B > 5C > 2D > j.236AB
A combo that can be used after hitconfirming regardless of distance. It can be extended even by canceling into assists that don’t directly hit the opponent (such as Sakura), as a fast cancel will allow you to execute a 214C or 236C.
E > delay 214B > 6A > 2C > 236B > j.B > j.C > j.236A . j.E .
(Midscreen ground throw >) 5D > 236A > j.B > j.E > j.D > j.C > 214B > 5B > 214C
A combo from a ground throw. The route is to cancel the throw with 5D and follow it up by attacking with your string, closing with knockdown from 214C for okizeme.
6A (anti-air hit) > 5E > 214B > cl.B > f.B > jc > j.B > j.C > j.236A > j.E > j.236C > j.C
A combo that connects anti-air 6A to 5E. If you omit the 214B between 5E and cl.B, you can also use the route of [~j.236C > land > 5A > 5B > 214C]
Air Combo Parts ~j.E > j.236C > j.C (>236AB, various assist cancels) This is the basic air combo ender that you can optionally end by spending 1 bar. The j.C is easy to execute if you input it just before landing. Also, when you do this combo near the wall, you can use 214C to catch the opponent while they’re still in midair.
~j.E > j.236C > land > 5A > 5B > 214C (421AB, Variable Rush, Lethal Blaze, Various assists)
The other basic air combo ender. The enemy lands in front of you, so better for okizeme. If the opponent is too high in the air for this to connect, you can delay j.E > j.236C slight so that the j.236C hits the opponent while they’re lower in the air, making it easier to connect. If you want to end with a Variable Rush, you need to use a very slight delay. If you want to connect with your Lethal Blaze, you need to cancel very quickly.
Corner Combos
(Corner ground throw~) 5D > cl.B > 6A > 2C > 214B > j.B > j.E > j.236C > Ender of your choice
This combo is possible if you are close to the opponent when canceling 5D. Works on everyone except Saya. The strength of this combo is that it leads into an air combo.
(Near corner ground throw) 5D > 5C > 5E > 5D > 6A > 5C > 214C
Use this if you are further away from the corner, such as if you were too far for the 2C in the above corner combo to connect. The focus of this route is okizeme.
(Near corner ground throw) 5D > 5C > 5E > 5D > 6A > f.B > air combo
Use this if you are further away from the corner, such as if you were too far for the 2C in the above corner combo to connect. The focus of this route is damage.
(Corner) > 6A > 2B > 5C > 5E > microdash > 5B > 5C > 214C
This is a basic combo for when you've forced your opponent into the corner. By ending the combo with a forced knockdown from 214C, you are granted strong okizeme within the corner.
Metered and Partners
...2B 2C > 236B > j.B C j.236A > j.E j.236C > j.C j.236AB
- Basic Maximum spider setup combo.
...5B > 5C > 623x > Dragon > 2B > 5C > 214B Dragon hits Level3 or J623AB
...5B > 5C> 623x > Kaigen ender
...starter JE Kaigen ender
Blast
j.B dj9.B C j.236A > j.E ABC > land 5E 236A j.E D j.C > land 214B 236236BC
- Midair j.B to assistless Magatsu confirm
2B 5C 2D j.236AB <Amy> 5E ABC > 214B > 5B j.BC <Akane> 236A j.E VR
- Fancy Two assist Blast combo, makes use of both assists and blast in a way that can be extrapolated to other situations easily
Basically, you will want to hitconfirm with one or two strikes and launch combos. If the opponent is blasting, you can combo with your 623AB counter to catch them before initiating your combo blast. If you have an assist who can prevent the blast, the damage will be higher if you hit them before the blast is triggered. However, be aware that the combo connection after the combo blast from this situation is limited due to the recovery compensation caused by the hitstun decay of the assist’s attack.
(opponent gets hit in the air or on the ground) > combo blast > 5E > 214B (> 2A) > f.B > jc > j.B > j.E > j.236C > land > 5A > f.B > 214C > assist cancel, lethal blaze, et cetera.
Stable midscreen combo. It can be done without an assist and its strengths are that it doesn't matter if you blast when the opponent is on the ground or in the air and they can't blast out of it. If you're near the corner, don't use 214B. Rather, use 5E > 5D > cl.B > f.B > jump cancel to start your air combo.
(opponent gets hit on the ground) > combo blast > 2B > 5C > 623C > 5D > 5A > 623A > cl.B > 6A > 5E > 623B > assist cancel, lethal blaze, et cetera.
This is possible if you are closer to the corner than you are at round start position and reach the wall by the time that 623A connects. If you are too far away, you can use 5A > 6A > 5E~ for the latter part, or 623A > 5A > 623A > 2D > j.B > j.E ( > land > 623B) for the closing part. If you have a slow assist like Dragon, you can start with the last 5E and work on the timing.
(opponent gets hit on the ground) > combo blast > 2B > 5C > 623C > 5D > 5A > f.B > 5E > 5D > 5C > 623C > assist cancel, lethal blaze, et cetera.
Works further away from the corner than round start distance. 5E bounces the opponent, then 5C picks them up for the rest of the combo.
(opponent gets hit on the ground) > combo blast > instant rising j.E > j.D > land > 5C > 623C (reach the corner) > cl.B > 6A > 5E > 2D > j.B > j.C > land > lethal blaze, et cetera.
Doesn’t work if you’re already in the corner. j.D switches sides, but the rest of the combo is performed normally. This combo is optimized for a Lethal Blaze from f.B > combo blast, so if you want to use an assist cancel, you’re better off using another route for more damage.
~combo blast (check the opponent’s blast) > 623AB > 5D > dash > cl.B (f.B) > 2C > 236B > j.B > j.E > j.236C > ender of your choice
Start by checking the opponent's blast. If you have 3 bars of meter at the beginning, this route can be cancelled into a Variable Rush without an assist. If you have an assist available, go for the optimal route involving it.
Variable Rush (non-basic routes)
VR (A > C > C > C > C > B > C > B > A) DMG:8359
Technique action: Rush 6A > (cl.B > 2C > 236B > air throw > Rush x4 > Close Spider Press)
A high damage route. Effective when used to interrupt the opponent’s pressure or as a combo confirmed from a small number of hits. Since this attack string lasts for a long time, it is easy to delay your inputs to give you enough time for a Carol locust summon. However, the minimum guaranteed damage from this is lower if the combo counter is higher, so it is easier to get more damage if you launch Carol after hitconfirming as quickly as possible from a small amount of hits and connecting to this route. For example, when near the corner, you can use cl.B > 623X (1 hit) > Carol. This route will do about 120000 damage to the opponent with maximum health. The trick to inputting this is to hit C repeatedly from A > C until you see the motion of throwing in the air. The CBCB into four rush hits will be more stable if you are closer to the wall.
VR (B > A > B > C > C > B > C > B > A) DMG:7910
Technique action: Rush 6A > (2B > 5C > 5E > 3 hits of 623X > Rush x4 > Close spider press)
This is a special route found in the early days of the game. The damage is reduced, but it transitions into a continuous rush on block, so it’s better for pressure.
VR (A > C > B > B > B > B > B > A) DMG:7648
Technique action: Rush 6A > (cl.B > 2C > Jump Kick > JC without its effect > j.B > Strike Down > Close Spider Press)
This route has a high minimum damage guarantee (DMG:2805) and can be used to close combos for high damage. After A > C > B, the B > B > B > A that follows the jumping kick stabilizes the combo.
VR (A > C > C > B > A > C > A) DMG:7633
Technique action: Rush 6A > (cl.B > 2C > 236B > 214C > low altitude j.E > 2C > Close Spider Press)
This is another route that has a high minimum damage guarantee. (DMG:2578) Remember, after the A > C series, hit B as soon as the string is released.
Strategy
General
Muramasa's plays best at mid-range: close enough to reach the opponent, but distant enough to not be interrupted during any of her attack startups. Muramasa's gameplan consists of a "hit and run" style; this is due to Muramasa's limited capabilities to maintain offensive momentum, as well as her constant need to reposition herself to maintain optimal range while not being locked down by her opponent
Neutral
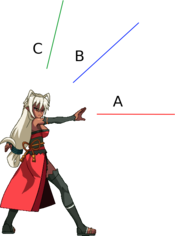
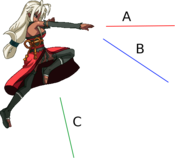
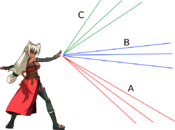
Muramasa is;nt character who gets to start her offense initially since most of her moves are easily interrupted or only effective at certain ranges. Thus Muramasa has to prioritize positioning her in advantage state, normally being right above the opponent in the mid range.. to the nature of her moves, so her basic approach is to use strings and web specials to frustrate the opponent and keep them at a distance. On the ground, Muramasa's main moves to use are 6A as both a reversal and an anti-air, 5E for huge reward, low-altitude j.E, and 2E into 623X. From the air, you can throw out j.B, j.C, and j.E attacks from various angles via the use of j.D cancels in the air from your strings. In addition, the angle of j.D is very high, so it can be used with j.236C in order to create left/right crossup situations.
623AB uses:
- Can be used to counter the opponent's attempt to blast out of you combo: when you cancel a normal into blast to go in for the kill, input 6>6235 to buffer a dash
- If you see the blue spark of the opponent's escape blast, hit AB. This will activate magnetic barrier and counter their burst, wasting it and giving you a reset combo with a strong starter
- If you do not see the burst spark during your blast freeze, only hit B instead to get a dashing c.5B to continue your combo from
Recommended Partners
Althea
Her strengths are combo potential and damage. She is an excellent assist for any character and can greatly increase Muramasa’s combo damage, even after an air combo ender or j.236AB. In addition, you can take advantage of how long this assist restrains the opponent by using the maximum healing time of 421AB. This assist is ready for use very quickly, but since the charge time is slow, you can probably only use this once per round.
Amy
Her strengths are improving your neutral and combo potential. She does little damage on her own, but when it hits, the opponent is stuck in hitstun for a long time and the combo proration is recovered, so if you incorporate it well into Muramasa’s air combo, you can greatly extend the route. The startup is not bad and even if you miss, Amy goes back and forth in the air 3 times from one end of the screen to the other, so this assist can create multiple opportunities for you and also restrains the opponent’s ability to jump.
Carol
Her strength is high damage. The startup time is long, so it’s very difficult to incorporate her into an improvised combo, but if you cancel into this assist, then use Muramasa’s Variable Rush for maximum damage (ACCCCBCBA), Carol’s plague of locusts will overlap with the Variable Rush’s ending. You can also adjust the Variable Rush route, as there are multiple routes that have an ending that sync up with Carol’s locusts. By adjusting the VR command, you can choose not only to go to for combo damage, but also for an earlier knockdown into setplay for more potential damage. The downside of this assist is that you can only use it once per round and, depending on where you are, such as near the corner, Carol’s attacks may miss the opponent, so you will need to adjust your combo starting position and find a VR route that works from said position.
Angela
This is a very slow assist with a high initial charge time and the startup on her actual attack is only a bit faster than Carol’s. In addition, the location of the lasers firing has a random element to it. However, she combos with j.236Ab very well and by cancelling into this assist during various combos and then immediately activating j.236AB, the lasers will hit just at the right time.
Sakura
Her strengths are improving your neutral and having a fast charge time. Although it cannot be incorporated into combos since it’s a counter, it is highly compatible with Muramasa, as she has limited invincible reversals and controlling neutral is important for her. She can be used to pressure the opponent and escape from a disadvantageous situation. She also functions as a wall due to her presence. Sakura can also be used to block reversals if you're up against a wall or on the attack. You can also use this assist to block an opponent’s counter-attack if you’re attempting your own attack. It's also very effective when used in an offensive manner, such as letting the opponent use their Vanishing Guard to gain frame advantage and then responding with Sakura to either bait and punish their attack or force them to not press a button and continue attacking yourself instead. However, it is weak to throws and has heavy proration.
Akane
Her strengths are combo potential and high damage. You can use the Paralyzer to extend your ground combos and the eliminator to get huge damage in general. However, the Dominator’s mode change depends on the opponent’s health (it becomes the Eliminator when the opponent’s health is within the red zone), and the Eliminator is slow, so you need to adopt a different combo recipe than what you would use with the Paralyzer.
Dragon
Her strength is huge damage. Like Althea, this is an excellent general purpose high damage assist that can be used by any character. It boasts about the same damage and restraining power as Carol despite being slightly faster. It is relatively easy to combo her with other assists and with Muramasa, who is typically played cautiously, you can potentially use it twice in one round under normal circumstances.
Franco
Her strengths are combo potential and neutral improvement. Although the restraint time is inferior to Althea and Henri, the balance between charge time and damage is very good, and it can be easily incorporated into combos, making it very easy to use. She’s a simple and excellent assist that can be used in many situations, so a player's individual preferences will affect how you personally use her.
Miyuki
Her strengths are neutral improvement and combo potential. Although she has low damage and a relatively high charge time, Miyuki has a fast startup upon activation where she immediately locks onto the opponent's position and launches them into the air, making it the perfect assist for extending Muramasa's combos. She can also be used to target the opponent's while they are recovering from a jump or during the startup of their projectile, punish the recovery after throwing out a Vanishing Guard, extend a combo on the ground, et cetera. Using this assist is a great way to support the tricks Muramasa can perform and expand her range of surprise attacks. She also has a fast recovery time.
Links
JP: Muramasa page on the Japanese NPB wiki
Muramasa trial combo collection
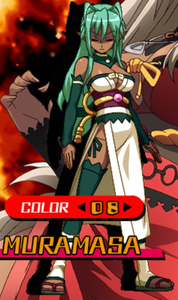
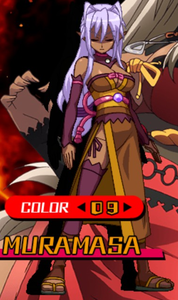
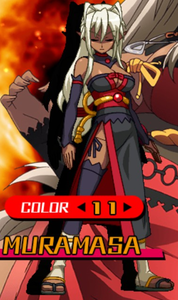
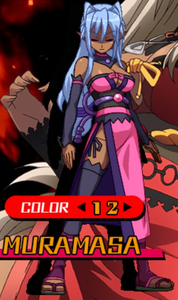
Colors
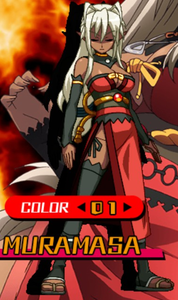
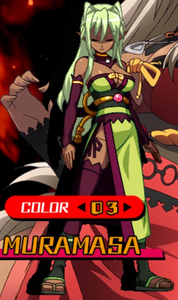
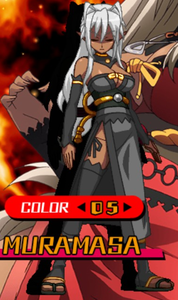
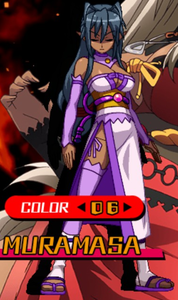
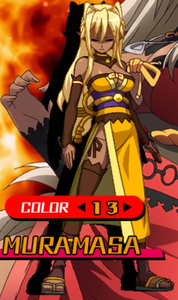
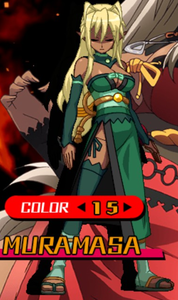
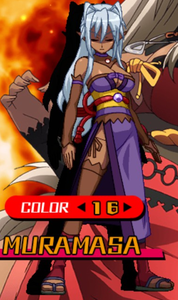
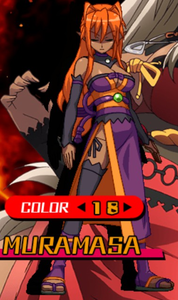
Click the pictures to see the full resolution.


