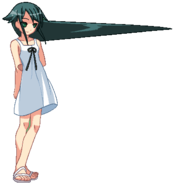
Nitroplus Blasterz: Heroines Infinite Duel/Saya
Profile
Name: Saya
Debuted in: Song of Saya
Voice Actor: Midori Kawamura (川村 みどり)
Introduction: An inhuman being from another world. It can normally take on multiple forms, but to one Fuminori Sakisaka, who sees everything as piles of flesh, it appears as the world's only normal girl.
Summary
Saya has long reaching attacks and teleports, but slow walk speed and a floaty jump. Since missing attacks or failing to convert into combos can be very punishing for Saya, she’s recommended for expert players. It is worth noting that she regenerates about 30 health per second, so keepaway can potentially be viable if you are low on health in some situations.
Command List
If you are having trouble reading inputs, check out the Notation section!
Normals
5A 2A [6A / cl.B] st.B 2B 5C 2C [5E/2E] is basic chain route. Any deviations from that route will be noted as an additional or limited.
5A
|
|---|
6A
|
|---|
c.5B
|
|---|
f.5B
|
|---|
5C
|
|---|
5E / 5[E] Not to scale Not to scale
|
|---|
2A
|
|---|
2B
|
|---|
3B
|
|---|
2C
|
|---|
2E
|
|---|
jA
|
|---|
jB
|
|---|
jC
|
|---|
jE
|
|---|
j.2A/B/C
|
|---|
BC Ground Throw Ground Throw
|
|---|
j.BC Air Throw Air Throw
|
|---|
Specials
236A/B/C
|
|---|
j.236A/B/C
|
|---|
214A/B/C
|
|---|
214X~X
|
|---|
421X / 623X Not to scale Not to scale
|
|---|
Supers
236AB
|
|---|
214AB
|
|---|
j.236AB
|
|---|
Variable Rush
All Variable Rushes allow you to do a sequence of attacks depending on if you hit the A, B, or C button. If you press nothing, the VR will end. If your VR is blocked, you have the option to press nothing, or keep attacking. Even if you keep attacking, you could still stop at any time, assuming you don't execute the final attack.
Depending on what combination of buttons you use, you can come up with some useful strings.
The A series does the most damage, the B route leads to a launcher that you can get an air combo off of, and the C route absorbs the opponent’s health. Variable Rush has an invincible startup, so you can use it for interrupting pressure or as a reversal option.
CE Not to scale horizontally Not to scale horizontally
|
|---|
Lethal Blaze
236236BC
|
|---|
Combos
Please check out the Notation section, for help on understanding how to read and write combos!
Common Starters for Saya:
- 2A, 2B, 3B 5B, or 5C
Solo Combos
2A
- 2A 2A 2B 3B 5C (214AB)
- 2A 2A 2B 3B 5C CE ...
Crouching Only
- 2A 2A 2B 3B 2E 236A/B
- 2A 2A 2B 3B 2E 236236BC
6A
- 6A 5E jc d.jB jc jB jE j2B
- 6A 5E jc d.jB jc jB j236AB
- 6A 5E jc d.jE ABC j2B 6A 214B~A jD jB 6A jc jB jE j2A (j236X)
- Blast Combo
Counter Hit:
- 6A 214B~A ...
2B
Air Hit:
- 2B 3B jc jA jB jE j2A
5B
- c.5B 6A 5E jc jB jc jA jB jE j2B
- c.5B f.5B ABC 66 6A 5E d.214B~A j236AB 214B~B j236AB 214B~A
- Blast Combo
2C
- 2C 2D jE j2A
- 2C 2D j236AB 214B~A
- j236AB at peak of 2D
5E
- 5E jc jB jc jB jE j2B
Guard Crush:
- 5[E] 214B~B ...
- 5[E] 5C CE ...
214X~A/B
- 214B~B j236AB 214B~A j236AB (236B / jc jE j2A 236A)
- 236B ender will Oki against neutral tech; j2A ender gets you closer and you can still Oki with 236A
- 214B~B CE ...
- 214B~B j236AB 214B~B CE ...
- Tight window between 214B~B and CE
jX
- jB jc jB jE j2B
- IAD jC j2B 2A 2A 2B 3B 5C ...
- 9jA j2A j236AB 214B~A j236AB 214B~A
- IOH on 9jA
Counter Hit:
- IAD jE j2B 6A 5E jc jB jE j2B (j236X ...)
Throw
Mid:
- Throw 66 f.5B 5E jc d.jB jc jB jE j2B
- Throw 66 f.5B 5E jc jE ABC j2B 6A 214B~A j236AB 214B~B j236AB (jc jE / 236B)
- Corner to corner blast combo
Corner:
- Throw 66 c.5B f.5B 5E jc d.jB jc jB jE j2B
- Throw 66 c.5B 6A jc d.jB j.2A(1) jD jA jE j2C 5A 6A jc jE j.2A (j.236X)
- Much harder combo, but with it comes greater glory
- Throw 236236BC
- Throw causes poor scaling
Air:
- AT jD jE 236B
- Priotizie Oki
- AT jD jE j2A
- Prioritize damage
236AB
- 236AB (623X) c.5B ABC 2C 5[E] 623B jE j2A 6A 214B~A CE ...
- Punish from far away; 623X to close the gap in time for f.5B
- Blast combo that can close the round
CE
- ... CE~ACABA - Highest damage. This can be used for both raw Variable Rush and in combos. Use this if the opponent is at low health and you need a KO immediately.
- ... CE~ACABB ... - End in launcher that allows you to continue combo
- ... CE~CBBBA - Lower damage, but side switches
- ... CE~ACACB ... - Corner carry and ends in launcher
- ... CE~ACABC - Regain health
Combo Blast
As you become used to using Saya, learn to use blast combos to get more damage and beat opponents faster. The basic starter of a Saya blast combo is 6A > 214X, so go into training mode and get used to hitconfirming this. The general structure of a blast combo with Saya is 6A > 214x > j.D > j.B > 6A after landing > 214X, but the trick is to hit the D button after using the 214X but before you enter the air from it, then jumping into j.B after confirming you are still on the ground.
Throw > Blast > cl.B > 6A > 214B ~ B > (land) Henri > 214A ~ A > (land) Miyuki > 236236BC
An example 3 bar blast combo. Since it can not be done in the corner, it is better to throw the opponent out of the corner if you are near it to do this combo. You can also simply omit the blast here since this combo is inescapable if you need to save your blast icon for later.
Throw > Blast > cl.B > 6A > 214B ~B > j.D > j.B (2 hits) > landing 6A > 214A~A > (land) > Henri > f.B > 5D > Miyuki > 236236BC
An example of a blast combo using Escape Cancel. This can’t be done at the edge of the screen either, so if the corner is close, throw the opponent to the other side before starting. Since this combo is similar to the above blast combo, be sure to practice them both.
Partner Combos
Henri
- 2A 2A 2B 3B 5C 214AB Henri jE j2C(w) 214B~B
- Ending 214B~B in corner seems to whiff everytime against:
- Saber
- Ending 214B~B in corner seems to whiff everytime against:
- 2A 2A 2B 3B 5C Henri 5C 5D 214B~B j236AB 214B~A
- 2A 2A 2B 3B 5C Henri 5C 5D 66 5B 5B 2C 3B 5C CE ...
- 2A 2A 2B 3B 5C Henri 5C 623C (d.jB) j2B 2A 2A 2B 3B 5C CE ...
- Side switch variation
- 2A 2A 2B 3B 5C Henri 5C 5D 66 2E 236236BC
- 6A 5E jc d.jB Henri jD d.jC jE
- 214B~B j236AB Henri jE 214B~A
- 214B~B d.Henri 236236BC
+ Akane
- 2A 2A 2B 3B 5C Henri 5C 5D d.214B~B d.Akane f.5B 214B~A j236AB 214B~A
Akane
Note: When opponent's health is red, Akane's startup is longer. This will prevent some combo routes from working
Combo routes like ... 5C Akane 5C ... will allow opponent to recover in time to block Akane, due to longer startup
- 2A 2A 2B 3B 5C Akane 5C 5D 236AB 66 236B d.jc jC jE (j2B)
- Akane whiffs on crouching oppoennt
- Delay jump after 236B until opponent at peak of the launcher
- 214B~B d.Akane 5B 5E jc d.jB jc jB jE j2B
- 214B~B d.Akane 5B 214B~A j236AB 214B~A
- Delay Akane until opponent is parallel with Saya's head as they ground bounce up
Corner:
- 214B~A/B Akane jB jE (66) 236236BC
Miyuki
- 2A 2A 2B 3B 5C Miyuki 44 236236BC
- 2A 2A 2B 3B 5C Miyuki 44 jc jB jc jB jE j2B
- 214B~B Miyuki 236236BC
Amy
- 214B~A/B Amy jB Microwalk d.5B 5E jc jB jc jB jE j2B
- 214B~A/B Amy jB Microwalk d.5B 5E jc jA jB jE jD jA jB jE (j2B)
- Seems to connect more consistently on larger characters (tested on Ignis vs. Ruili)
Alushia
- 214x~A/B Alushia 214B~B
- connects on the last hit
Carol
- 2A 2A 2B 3B 5C Carol CE~CBBBA d.jc jB jE j236AB
- Side switches with VR route to connect with Carol
+ Alushia
- 236AB Carol 214X~B 214AB Alushia
Strategy
- Ideally, you want to keep opponents at an optimal range where you can tentacle grab and hit them with normals without getting hit. Saya has many mixup options, including orb usage, teleport, dive kicks, tentacle grabs, slide, etc. Her 5C and 2E are multi hitting and one of the few normals in Nitroplus that can frame trap most barrier > button presses.
The basic gameplan of this character is to set up meat mines after controlling space with a long range technique and to anti-air the opponent if they try to jump in after this. Mix this up with jumping and teleporting towards the opponent to attack them. Poke with 5C when you are not close to the opponent. 5C is a 3 hit technique with long range, so it is easy to confirm hits with it. If the opponent blocks, set up a 236A Meat Mine and then try using 5C. If you’re close, try using 214x and then use C to cancel in order to confuse the opponent. Occasionally use the B or A followups instead to break the opponent’s guard and keep them guessing as to what they should be doing. If you confirm a hit and have meter, you can use your Variable Rush A series. Without meter, you can repeat the earlier mentioned 236A meat mine into 5C technique. When in close range, you have access to 2A. It has a fast startup and Is a low with long reach. In the air, you will want to use j.B, as it has long range and can be used to keep the opponent in check. You can also easily use your Aberrant Drill Kick (j.2X) in the air to approach the opponent. As far as anti-airs go, 2C is easy to use. It does not have any invincibility, but it covers a large area above Saya. Once you get used to it, you will end up getting better results with it than 6A. 6A functions better as an anti-air when the opponent is approaching from a 45 degree angle. The recommended partners for beginners are Henri and Miyuki. Get used to hit confirming partner blitz from 5C. For okizeme, you can use meaty 2A, a low to the ground Aberrant Drill Kick, or a delayed throw after seeing that the opponent is guarding. The 2A/Instant Drill is Saya’s most basic high/low mixup, so practice jumping, then quickly inputting j.2C while still rising from your jump to get the drill at the lowest level possible. You can also use meaty 214X attacks. Use the A followup if you think the opponent will jump, B to hit them with a low, and C to cancel. If you catch them, you will be at the correct distance to set up another 214X unless you are near the corner. After ending an air combo with j.E, you can use Aberrant Drill Kick to chase down the foe and tack on extra damage. Generally, you’ll use j.2B if your j.E came from a double jump and j.2A will be used if your j.E came from a single jump. Furthermore, you can cancel the drill and generate a meat mine in the air so you can continue attacking while setting up mines. As for defensive options, Aberrant Mighty Arm (214AB) has an invincible startup and is hard to deal with, so it is good to use if you are in trouble. The 421x versions of your teleport specials have invincible startup and can be used as a reversal option, but since you are locked in place after reappearing, do not overuse it.
Special Techniques
Vanishing Guard Defense
If you vanishing guard the opponent’s attack, you should use 2A if they are on the ground and 6A if they are in the air. After that, perform whatever combo you desire from that starter. If you get vanishing guarded, remember that you can counter-vanishing guard after that. When Saya is vanishing guarded during the middle of a multi-hitting technique, you may beat out whatever they are doing anyway if they don’t guard all of the hits and attempt to press a button. For example, if your 5C is vanishing guarded, you can just press 5C again to continue attacking.
Stepdash Cancel
Saya’s 66 stepdash can be canceled by starting the action (while Saya is in the air from the dash) by preforming a normal, special move, or a throw. This stepdash cancel allows Saya to perform a technique while sliding forward, thus giving it more range. You can try something like 2A > stepdash cancel > 2A for a blockstring. This can also be used for combos, extending routes since you now have better range by stepdash canceling your moves that would not have enough range otherwise.
Drill Kick Cancel
When Saya’s Drill Kick is canceled by Partner Blitz or Combo Blast, the inertia of said Drill Kick is carried over to subsequent actions. Keeping this inertia in mind, you can do something like blocked Drill Kick > Partner Blitz > j.A > j.B. It is also possible to do something like 2A into tick throw using this technique. Franco and Sakura are the recommended partners for this technique in terms of practicality and efficiency.
Recommended Partners
Recommendation Level ☆ 3
Henri
Good for combos and neutral. The proration for this partner is not so bad, such as from 5C pokes, anti-air 2C, and during aerial combos. Good for pressure due to putting the opponent in blockstun for a long time. Even if you hit the opponent OTG with Henri, you can continue hitting them with your meat drill while they are still in hitstun. It is also possible to set up a charged 5E when this assist is being used. If activated from the max range of 5C or in the air, this partner can potentially miss.
5C > Henri > 3B > 5C > 214B ~ B
Basic combo from 3B range. If you want to reset the opponent, use 5C > 3B > charged 5E > 214B ~ B. You will need to be close for this to work, otherwise you’ll have to microwalk after the 3B.
Long range 5C > Henri > 5C > 5D > 2E, (214B > B), or (5E > j.B > j.E)
5C > Henri > 5C > 5D > instant air dash > j.B > j.C > 2B > 3B > 5C > VR
Anti-air 2C > 2D > j.E > Henri > j.B > 214AB or 214B > B
2C Anti-air combo. Call Henri as soon as j.E his and press j.B immediately after Henri is summoned and you can move again so the enemy will be picked up for the attack.
Air to air j.B > Henri > j.B (> j.E) > land > j.B > j.E
Air to air combo. Might have to omit the part in parenthesis depending on the height at the start of the combo
214X > A/B > > Henri > j.B > Henri hits > charged 5E > sj.E
It is possible to use charged 5E as your ending instead of a 214X move.
Franco Nero
Good for combos and neutral. Fast activation time and short cooldown. Much like Henri, she allows you to combo from 5C confirms, 214X, and air combos. Great for blockstrings as well since she keeps the opponent locked down for a long time and her activation time is even faster than Henri’s. However, she is not as easy to OTG with and if you try to combo from the tip of 5C or in the air like you would with Henri, the opponent could fall out of the combo.
~5C > Franco > 3B > 214X
Basic combo structure from 3B range.
~5C > Franco > 5C > 421C > j.B > j.E
If you are at the furthest range where 5C will hit, use this.
Air to air j.B > Franco > j.B > j.E > Franco hits > ender of your choice
Air to air combo. If you are high in the air, you may need to input a j.D before the j.E
214X > (land) > Franco > 5E > Franco hits > 214A or pursue with an air combo of your choice.
Combo from 214X starter. Since it directly leads into Franco’s attack, it’s easy to input a 5E here. In the corner, you can charge 5E and get an air combo from there instead.
214AB > Franco > j.E > Franco hits > air combo of your choice.
214AB starter. The air combo you will want to use here will use something like j.B > j.E.
Carol
Good for high combo damage and lockdown, much like Dragon and Another Blood, but it can only be used once per round if you cancel into her. The attack takes a long time to start, so it is necessary to come up with a combo that eats up enough time to allow you to combo into her somehow. Also like Dragon, Carol can be used multiple times in a single round if you use her in neutral rather than cancel into her, so it’s worth coming up with knockdown combos into setplay that involve her for this. One of the few partners that can continue a combo as a followup to your Lethal Blaze.
~5C > Carol > 5C > Variable Rush (CBAAA) > Locusts hit > air combo of your choice.
Carol’s basic combo. Overlaps with the end of the VR slightly.
Akane
A partner that is good for combo damage and ending rounds. The paralyzer (shot that comes out when the opponent is at normal health) has the same crumple effect as Kaigen, but it cannot pull the enemy down from the air. The eliminator can be used when the opponent’s health bar is in the red state and although it has a slow startup, it is very powerful. The big issue with this partner is that if the opponent is hit while crouching, the paralyzer shot will miss, so even if you confirm a hit with 5C, only Ignis is tall enough to be hit in the crouching state and the attack will whiff on all other characters, so this partner requires the opponent to be standing to get the full benefit of her ability. However, if you’re a short distance from the opponent, the paralyzer can be set up a bit more easily with an f.B to force the opponent into a standing state. The eliminator shot requires a slightly longer combo after the confirm, such as 5C > Akane > 3B > 5C, as the startup is higher than the paralyzer shot. The basic combo structure for paralyzer would be something like 2E > Akane > 6A > 214X
Paralyzer combos
~5C > Akane > 5C > Paralyzer hit > 236AB > ender of your choice
Basic ground combo. Like Kaigen, it is very good in terms of damage and advantageous situation thereafter. If the opponent is crouching, you’ll want to force them to stand up with f.B before Akane’s shot.
~2E > Akane > 6A > Paralyzer hit > 214X
Combo from a sweep. However, you generally want to use the combo listed before this.
Air to air j.B (> j.E) > Akane > Paralyzer hit > ender of your choice
Combo starting from an air to air situation. If you are too high in the air, you will need to put a j.E in there for this all to connect.
214X > (land) > Akane > f.B > Paralyzer hit > 214X
Combo from 214X starter. You can end with 5E > air combo instead of 214X.
214AB > Akane > Paralyzer hit > ender of your choice
Combo from 214AB starter. Even if the opponent’s health is low enough for you to get the eliminator instead, this will still connect.
Eliminator combos
~5C > Akane > 3B > 5C > Eliminator hit > ender of your choice
Basic ground combo with Eliminator. Wait until both hits of 3B connect before continuing the rest. If your opponent is standing, you will want to input f.B before 3B.
Air to air j.B > Akane > j.B > j.E > Eliminator hit > ender of your choice
Combo starting from an air to air situation. However, this is not consistent at all heights.
214X > (land) > Akane > f.B > 5E > Eliminator hit > ender of your choice
Combo from 214X starter.
2C > Akane > sj.E > Eliminator hit
2C anti-air combo. Unlike paralyzer, this hits the opponent fairly easily.
Iria
Good for combos and setplay. Covers a very wide range and launches the opponent. Fast startup. The damage is not that great, but you can combo into her easily from any sort of 5C hit. The major feature of this partner is that she sets up icicles that block projectiles and keeps the opponent from approaching you. You can set up 214X and 5E while the opponent is locked down this way.
~5C > Iria > 5C > 5D > 214X or 5E > j.B > j.E
Can be used safely even if blocked thanks to the icicles.
214X > delayed Iria > f.B > 236C > 421C > j.E
Combo starting from 214X. The damage is great because the enemy is hit by Iria twice.
Recommendation Level ☆ 2
Natsumi
Good for setplay and neutral. If you end a combo with her, you can time attacks to correspond with her return to the screen after her first pass while the opponent is getting back up, but this is not consistent because how fast Natsumi makes her return trip depends on her distance from the corner. If the opponent is hit by her during that return, you can pick up from here with 6A and go into an air combo. You can also comb from 2C anti-air and the proration rate is reasonable. You can do something like Blocked 5C > Natsumi > 214X or 5E while using Natsumi as a shield so a potentially blocked attack can’t be punished as easily. Due to the nature of Natsumi, the opponent will want to escape by jumping, so it is a good idea to set up your 214X ~ A and 5E here to catch jumps.
Blocked 5C > Natsumi > 3B > 421B/C > j.B > j.2A > 2A~ will keep the opponent in blockstun since Natsumi will return and trip on them while this is happening.
Blocked 5C > Natsumi > 5C > 421B/C > j.B > j.2A > 2A~ Is useful if you aren’t at the right range for 3B or the opponent is near the corner. Natsumi’s own damage is not high, but with combos or blockstrings, you can get good damage off of her. A versatile and fairly easy to use partner.
~5C > Natsumi > 3B > 214X
Basic combo from 3B distance. If the positioning is good, Natsumi’s return will hit and you can convert into a combo. However, when she is too far from a corner to return in time, you cannot connect a combo this way.
~5C > Natsumi > 5C > 421C > slightly delayed j.E
Use this if you aren’t in range for 3B or are near the corner. If spaced properly, the return section will hit the opponent and you can follow up with a combo.
Anti-Air 2C > Natsumi > sj.E > j.D > j.E
2C anti-air starter. If you can space this properly, it increase the reward off of a 2C greatly.
214X or air to air j.B > Natsumi > j.B > j.E > j.D > j.E
Combo starting from 214X or from an air to air. The starter may be different, but the same route is used as the followup.
Spica
Good for combos and knockdowns. A partner similar to Henri and Franco. Can combo into her from various things such as a 5C confirm, 214X, air combo, et cetera. Don’t have to worry too much about things like spacing 5C or being in the wrong position in the air, so very stable. The proration rate is also very good, much like Franco. You can carry your opponent into the corner and score a knockdown with just a standalone Spica hit. The main advantage is that Spica’s stays on the screen for a good amount of time. She can be used in an air combo and can drag the opponent down towards the ground as well. If near the corner, you can combo Spica into something like 214AB or 236236BC. However, since the attack itself is actually pretty short with not much hitstun or blockstun, the amount of time you have to combo or do a blockstring from with it is pretty short. Difficult to use. You can use a string such as blocked 5C > Spica > 214X or 5E. In addition, it puts the enemy into an awkward position, so if you try to hit with j.E, there are many situations where it could potentially miss.
~5C > Spica > 3B > 214X
Basic combo from 3B range.
~5C > Spica > 5C (> 421C > j.E)
If are you are near the max range of 5C, use this. Teleport > j.E depends on how close you are to the corner. You can continue to pursue the opponent if you are near the corner.
Air to air j.B > Spica > j.B > land with j.2A > Spica hits > ender of your choice
Combo from air to air starter. If you can are near the corner, you can continue with 6A > j.E, 214AB > or 236236BC.
214X > (land) > Spica > f.B > Spica hit > 214X ~ A or 5E > j.E
Combo from 214X starter. In the corner, you can end with 214X ~ B or charged 5E.
214AB > Spica > j.E > Spica hit > ender of your choice.
A combo from 214AB starter. Since the opponent is stunned for a bit after this, you can perform various types of air combos here.
Sakura
Good for neutral and defense. The only counter-based partner. Therefore, she cannot be actively incorporated into combos. She is used as a cancel to continue a blockstring or to improve Saya’s defense, taking advantage of this partner’s good startup. You can use it to cancel 2E and extend the combo, and as with Natsumi, you can use it after a blocked 5C. The full sequence would be blocked 5C > Sakura > 214C or 5E using Sakura as a shield. It also interesting to use her after a movement option such as an airdash or a teleport if you read the opponent’s anti-air. If you land a hit with her, you can pick the opponent up with 6A into an air combo.
Miyuki
Good for combos and neutral. Your best bet is to combo into this from 5C. When the hit connects, the opponent will fly to your side. It can be used as a counter to ground projectiles because Miyuki appears behind the opponent and swings her bat, launching them towards you. It’s also a convenient way to quickly see what the opponent is doing, then make a counterattack based on what you observed during the swing. However, compared to Henri, Franco, or Spica, the charging time for this partner is slow.
5C > Miyuki > 236236BC or 6A > air combo
Miyuki’s basic combo structure. 236236BC must be input quickly to make sure it contacts the opponent in time. To space the 6A correctly, try walking backwards, doing a backdash, or wait until the opponent flies behind you for a side swap.
214X > (land) > Miyuki > Miyuki hits > 236236BC or 6A > air combo
Combo from 214X starter. Miyuki’s attack connects directly into the rest of the route.
Althea
Emphasis on combo damage. A useful partner because you can use her to stably connect a combo regardless of the height of the combo starter, such as an anti-air or meat mine. The main issue is that while the initial startup time is short, the recovery time is slow, so you will probably only be able to use her once per round. In addition, the proration of her attack is heavy, and if incorporated into a combo, the final hit of her attack oftentimes will not connect.
214X > A/B > Althea > 214B~A
Can confirm into huge damage from a simple hit confirm of Aberrant Arm.
Anti-Air 2C > Althea > 214B~B
Be careful with the spacing on this one, as if the opponent is directly above you rather than in front or behind while being hit by 2C, Althea could miss.
Yoishi
Useful for neutral and setplay. Summons a black fog starting from the edge of where the opponent is located and prevents them from jumping for a while if it hits them or they block it. It does not stop backdashes or hops, however. On the other hand, the opponent can’t use vanishing guard if they are using a hop, so you can easily hit them with f.B or 214X during this. You can use this to instantly set up a 236AB after the cloud hits, and while the opponent has ways to avoid this such as using an invincible move or variable rush, this is still a useful way to get damage. Works especially well against characters such as Ein and Muramasa since these characters are often in the air.
2A, cl.B, or 2B > Yoishi > cl.B > f.B > 2B > 3B > 5C > fog hits > 214X ~ B
Basic ground route, though it’s difficult to land unless you’re at close range. At the end, vs characters with large hitboxes, 2E > setup 236A should connect.
2A, cl.B, or 2B > Yoishi > 2B or f.B > 3B > 5C > fog hits > 2E > setup 236A
Corner combo. Can also use 214X ~ B at the end instead.
~2E > Yoishi > 6A > 5E > jc > j.B > j.E > fog hits > j.D > j.E > setup j.236X
Combo from sweep. It is safer to not pursue with a drill here.
j.B > Yoishi > j.B > j.E > fog hits > j.D > j.E > j.236X setup
Basic air combo structure.
214X > (land) > Yoishi > f.B > 5E > jc > j.E > fog hits > j.D > j.E > setup j.236X
Combo starting from 214X. Provides good damage.
Amy
Good for neutral and combos. At first glance, she seems difficult to use, but it is possible to combo from 2C or 2E using her and she has a very fast startup and good combo proration. The damage is not so great, but it is good against characters who are in the air often such as Ein, Anna, and Muramasa. Like Natsumi and Sakura, after a blocked 5C, you can call Amy, then use 3B > 214x or 5E to prevent the enemy from jumping away.
2C > Amy > microwalk > Amy hits > charged 5E > double jump j.E
Combo from anti-air 2C. Rather than charged 5E, 236B setup > 214A is also usable.
2E > Amy > 6A > charged 5E > 9sj.E
Combo from sweep. The timing of using charged 5E here is somewhat tight.
j.B > Amy > j.B > land with drill > 236236BC or 214AB or (214B ~ A)
Air to air combo. Use j.2B for 236236BC and 214AB, but use j.2C for 214B ~ A
214X > A/B > Amy > j.B > Amy hits > f.B > 5E > 9sj.E
Does a lot of meterless damage
Yuki
Good for neutral and provides strong setplay using zombies. Especially good when used with 214X and 5B. Initially, when Yuki runs and trips onto the opponent, she causes a knockdown. After that, a horde of zombies that can be beaten with one hit and have OTG properties run across the screen. Since the zombies have the OTG attribute, they often get in the way of a combo, but if you time your 214X well, it is possible to loop it into itself using the zombies. You can also prevent the opponent form fighting back against the zombies by teleporting or you can punish the opponent for attempting to clear out zombies using your 236AB to catch them during their recovery. The downsides to this partner are that it starts up a bit slow and the zombies are only good in the horizontal sense, not providing much benefit vertically, meaning they can easily be jumped over or dealt with by the opponent’s partner characters. Especially if the opponent is using Natsumi, zombies are made even more useless.
~5C > Yuki > 3B > 5C (> 421X)
Basic combo structure with Yuki. If you are near the corner, ~5C > Yuki trips > 214X ~ B will combo.
~2E > Yuki > 6A > 5E (> 421X)
Combo from 2E. If Yuki doesn’t hit, use 5E > j.B > j.E
214X > (land) > Yuki > f.B > 5E > Yuki trips
Combo starting with 214X. Yuki won’t hit if the opponent is near the corner.
214AB > Yuki > j.E > Yuki trips
A combo starting with 214AB. You can create a powerful setplay situation with this.
Recommendation Level ☆ 1
Kaigen
Provides combo damage. It is easy to extend combos with her because of her ability to force crumples on hit. Even if the opponent is airborne, Kaigen is good at dragging the opponent down to the ground for the crumple. When the opponent is in a crumple state, you can easily combo into 236AB. On the other hand, the proration rate is not so good and her usage is mostly limited to combos. Additionally, there’s an issue where you may not be able to connect the tip of 5C into Kaigen. If you do something like 5C > Kaigen, Kaigen will hit, but you will not get the crumple from that position. You’ll need to do something like 5C > Kaigen > 3B to get them at the right distance for a crumple.
~5C > Kaigen > 3B > Kaigen hits for crumple > 236AB > ender of your choice
Ground combo with Kaigen. The damage is quite high and you have enough time to incorporate another partner into this sequence.
214X > (land) > Kaigen > f.B > Kaigen hits > ender of your choice
214X starter. You will need to slightly delay the Kaigen summon for this to hit properly.
Air to air j.B > j.E > Kaigen > ender of your choice.
Air to air starter. However, if your air combo starts at too high of a point, this combo could be unstable and Kaigen could miss.
Dragon
She provides overwhelming damage and lockdown, but the charge time and startup are slow. Although the partner specializes in combo damage, her cooldown is much shorter if you use her in neutral instead of a cancel, so it is better if you can summon her after 236AB or while another partner is hitting to avoid the cancel situation.
~2B > Dragon (> cl.B) > f.B > 5C > Dragon hits > ender of your choice.
Basic combo structure for Dragon. If the opponent is in a crouching hit state, Dragon will likely miss, so you will want to use far be to force them into a standing hit state. Please note that Dragon may not hit depending on the character if you use the 5C as listed.
214X > (land) > Dragon > f.B > 5E > Dragon hits > ender of your choice
214AB > Dragon > j.E > j.2A > Dragon hits > ender of your choice.
Only works in the corner.
Another Blood
Boasts high damage, but the charge time is not good and doesn’t have much use outside of combos. Also, since the opponent is launched high after the hit, it is difficult to pursue them afterwards. There are ways to set up a knockdown with her, however.
~5C > Another Blood > 5C > Another Blood hits > ender/setup of your choice
2C > Another Blood > sj.E > Another Blood hits > ender/setup of your choice
j.B > Another Blood > j.B > j.E > Another Blood hits > ender/setup of your choice
214X > (land) > Another Blood > f.B > 5E > Another Blood hits > ender/setup of your choice.
Aoi
When used, this partner provides both you and your partner with an extra bar of meter, so good for meter gain and damage. It is easy to combo into your Lethal Blaze using this partner since you can immediately get 3 bars even if you just spent meter on a super or something like that. However, using her is a risk since the opponent also gains a bar of meter once she is activated.
Mugen
Provides setplay and damage. This partner is capable of also hitting you. While risky, the charge time is good, she provides a guard crush, and she remains on the screen for a while. Has a high guaranteed damage value. Saya can attack or set things up while avoiding taking damage from Mugen, such as by using teleport and 236AB from a distance, but the biggest problem is that Mugen’s attacks don’t overlap in the corner.
2A, 2B, or some air attack > Mugen > cl.B > f.B > 2B or 3B > 5C > 5D > Mugen hits > 214X
Doesn’t work in the corner. You will want to slightly delay some of these inputs in order to make sure the timing is correct. If possible, you want to hit the opponent with both Mugen attacks.
~2E (canceled before all of its hits have connected) > Mugen > cl.B > f.B > 2B or 3B > 5C > 5D > Mugen hits > 214X
Does not work in the corner. Cancel at any point other than the end of the sweep for this to connect properly.
214X > (land) > Mugen > f.B > 5E > j.B (1 hit) > j.E >j.D > Mugen hits > j.E
Does not work in the corner. Unlike the above combo, you will want to input the combo as fast as you can. Try to hit with f.B when the opponent is low to the ground, though.
Angela
Provides combo damage. It takes 3 seconds for the attack to trigger, but the reward on hit is great. When used near the corner where the lasers can focus on the target better, the damage is even higher. With a simple combo recipe, you can also incorporate 214AB into your Angela combos. The drawback is that the charge time is high and the cooldown is long.
2B or 3B > Angela > 5C > 214AB > Angela hits > ender of your choice
A damage focused route using 214AB. Works best near the corner.
~5C > Angela > Variable Rush B route > Angela hits > ender of your choice.
214X, 6A, or j.B > Angela > j.B > j.236X > meat mine hits > Air combo > Angela hits > ender of your choice
You are allowed to eat up more time in preparation for Angela with the j.236X
Sonico
If you use it, Sonico’s band will start playing until the end of the round and notes will be scattered on the screen that provided buffs to health, meter, damage, et cetera. If the opponent is also using Sonico, it will be overwritten in the position they are in. If you pick up the notes, you will recover about 500 health and your meter will increase by 25% of 1 bar. You can obtain effects such as an increase in attack power and defense value. These buffs can be useful, so so it can be worth using if you can manage to stay around Sonico. However, since the opponent can also use the notes, you may not be the only one receiving an advantage.
Matchup specific info
Ein
Use Vanishing Guard to deal with her 214A and 214B projectiles. Afterwards, you can punish with Variable Rush or 236AB. It is recommended that you use Miyuki and Sakura as your partners when fighting this character. Use Miyuki whenever she misses a shot or you successfully vanishing guard it. Sakura can be used as a read against the opponent attacking or used right at the moment that you successfully vanishing guard a projectile to punish the rest of the shots with her. You can hit her with an instant overhead rising j.C. Ein has difficulty stopping this technique, so use it actively for okizeme or resets.
Al
Her 236A can be low profiled with 2E. However, this move is unsafe and will be punished if you throw it out as a misread, so be sure to actually react to the shot with this rather than making too many predictions. If you instant airdash, you will get caught by 236A, so don’t overuse this tool either. If you want to do a low airdash towards the opponent, super jump first, then input 66 as you get close to the ground. Saya can duck 236B from all distances except around full screen. You can attack with 3B or set up Meat mines while this is happening. 236C’s first shot is duckable from any distance. If you have meter, you can easily punish after the duck even if the second shot has already been fired with 236AB, Variable Rush, et cetera. Al’s 5B > 5C blockstring is not gapless, so you can interrupt it with an invincible move such as variable rush or 214AB.
Mora
If Mora tries to use her j.2C on you, use 2C so you don’t have to deal with the left/right mixup that this move is used for. If you use 7j.A, you can easily and safely check her Jumping Sledgehammer (214X).
Ruili
If you see Ruili moving towards you, be on the look out for 2A or 2B If you hold 5E, you can easily look for her forward roll and catch it with this move.
Saya
If the opponent tries to set up a Meat Mine, you can respond with 236AB to instantly punish it, even when rising from the ground as a reversal option.
Anna
The only moves Anna has that can win against a max range f.B are 6A and Sectio (623X). As such, it is generally safe to throw this out if you are spaced well. If Anna uses an attack like j.C, you can time a 236AB to hit her as she is descending from it to punish it and she will not be able to jump out. Miyuki, Sakura, and Iria are useful partners for this matchup. You can use them after seeing her shoot while low in the air or on the ground. You can also use them after a successful Vanishing Guard.
Ignis
Saya can contest Ignis’ f.B with 2B, 3B, or 2E. If you activate one of her traps, you can avoid it with a successful 214AB or Variable Rush, so if you trip a wire during a combo on her, be sure to use one of these moves to stay safe and continue your offense. If you are high in the air or still have access to movement options like j.D, it’s fine to use j.236x, but keep in mind that you might accidentally trip one of her wires and get punished if low to ground with no access to your escape action. After the initial bear trap hit of Ignis’ Variable Rush, she charges forward, so if you vanishing guard the initial hit and have meter, you get an instant confirm into 214AB. If you don’t have meter, you can use a roll or teleport to escape, just be careful with your timing. Since Ignis’ VR can be avoided altogether, so you don’t really need to worry about it on okizeme or after a reset. You can hit her with an instant overhead rising j.C.
Muramasa
When Muramasa has 3 bars of meter, don’t set up 236x mines in neutral, as she can punish that from full screen. If you want a safe option after blocking or vanishing guarding Muramasa’s 236x threads, try teleporting forward. Pay attention to when she is landing so you can punish with 5C or 3B. Knock her out of the air with 2C and rising j.E Amy and Iria are good partners to use against her.
Saber
Blocked 5C > 236x setup can be punished by Saber’s Strike Air (236AB), so don’t overuse it. If you react to her Crashing Helm (j.22X) with a vanishing guard, you can punish with a 6A combo starter. She can check both your 2B and your 2E with her f.B, so be careful throwing those moves out. For approaching, mainly use back jump low altitude j.2A. Avoid using forward roll, 3B, 5C, or 5E too much in neutral. You can try to just attack outside of her range. Punish Saber’s Strike Air with 236AB on reaction to the super flash. When she uses her Variable Rush, punish with 214AB on reaction in the same way. When Saber uses Excalibur (236236BC), mash vanishing guard, then either use 236AB, warp, or roll towards her to punish.
Ethica
Ethica’s 2E puts her extremely low to the ground and it slides her forward a long distance. Be careful when using 5C against her, as she can low profile it with her aforementioned slide. It also generally beats out your own 2E. To counter it, use j.B, j.C > j.E, j.2B, or j.2C above her. You can interrupt her 2E > 2D blockstring with 2B. Unless you hit with the very tip of your 2E, Saya can punish it with a command grab, so please mind your spacing when using it. Since Ethica can use Orgy of the Dead (6321463214AB) to grab you even if you vanishing guarded against her, the safe option after using a vanishing guard on her is to backdash or teleport. For offense, you can use low altitude drills or rising j.A/j.C. Because Ethica’s invincible command grab is dangerous, on okizeme, you will want to use low to the ground air attacks, drills, or 214AB to avoid getting grabbed while she’s waking up. If the opponent has 3 bars of meter, try to avoid using 236X in neutral since she can full screen punish with 236AB into Lethal Blaze.
Ouka
Round start 3B is a safe option. After that, you can continue your offense with 5C into 5E or 236X.
Links
JP: Saya page on the Japanese NPB wiki
Colors
Click the pictures to see the full resolution.

