https://liquipedia.net/fighters/RogueYoshi
Introduction
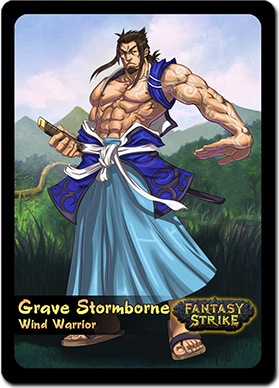
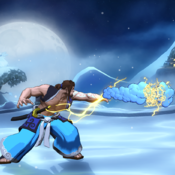
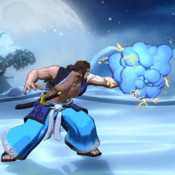
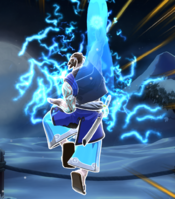
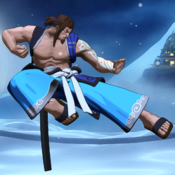
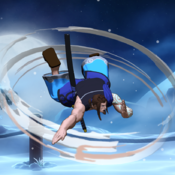
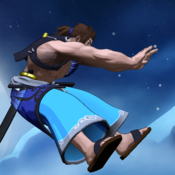
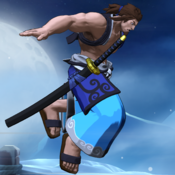
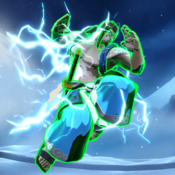
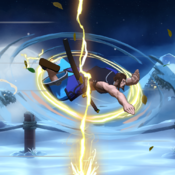
Grave Stormborne is a highly disciplined martial artist commited to improving his skills everyday. He draws on the power of wind and lightning. He has a sword but was taught to use it sparingly.
Overview
| Health |
Character Type |
Super Meter charge time |
Wind charge time
|
| 6 |
Zoner |
11 Seconds |
13 Seconds
|
General
Grave is very much the generalist of the Zoners. He is capable of keeping opponents out as well as rushing them down and players will find themselves playing very differently depending on their opponent's character.
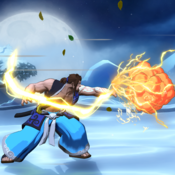
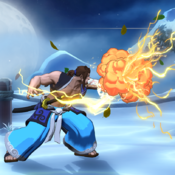
Grave's fireballs have average startup but are can vary the speed from very fast to very slow, however he has the worst recovery of all the zoners.
He has a very strong set of normals and invincible moves to keep out opponents or punish mistakes.
Grave can be played in a variety of ways; focusing on building up chip damage, playing aggressive and risky, playing passively and safe. All of these can be effective ways to win.
Unique Traits
Grave has a special Wind Meter, when available he can perform Wind Summon in the air and generate wind that goes forward or backward. Wind will last for 6 seconds.
Forwards wind will push all objects on screen, including characters. Backwards will go the opposite direction. Take care when using because this can sometimes provide unexpected side effects.
Moves
Ground
Knifehand
|
| Damage
|
Startup
|
Active
|
Recovery
|
Hit Advantage
|
Block Advantage
|
Counter Advantage
|
Properties
|
Attribute
|
| 1
|
8
|
8
|
8
|
4
|
2
|
9
|
Cancellable
|
Strike
|
Grave puts his hand up at a 45 degree angle, doesn't have much horizontal range but reaches quite far diagonally away from him. Excellent normal for anti air. It is strongest at the tip of Grave's hand and the startup is average but the active frames are quite long, so use it early and at a distance.
This move is also Grave's go to Normal for combos and up close pressure. Grave has a small advantage on block, allowing him to use repeated attacks to beat most moves. If opponent's try to block or use a fast move, Grave can use throw to beat them out of their startup.
Cancellable into  or or  on hit or block.
Due to having such long active frames, hitting the opponent late can allow this to combo into itself and other things, or even frametrap a throw.
Also due to both the active frames and startup, it is good for premptive counter-poking at a distance. on hit or block.
Due to having such long active frames, hitting the opponent late can allow this to combo into itself and other things, or even frametrap a throw.
Also due to both the active frames and startup, it is good for premptive counter-poking at a distance.
|
|
Double Palm + +
|
| Damage
|
Startup
|
Active
|
Recovery
|
Hit Advantage
|
Block Advantage
|
Counter Advantage
|
Properties
|
Attribute
|
| 1
|
12
|
7
|
25
|
-9
|
-11
|
-3
|
Cancellable
|
Strike
|
Grave reaches out far and thrusts his palms forward and lowering his hurtbox, this can low profile some moves.
Occasionally used for punishes when Knifehand won't reach. Cancellable into  or or  on hit or block. on hit or block.
Relatively vulnerable on whiff.
|
|
Sweep + +
|
| Damage
|
Startup
|
Active
|
Recovery
|
Hit Advantage
|
Block Advantage
|
Counter Advantage
|
Properties
|
Attribute
|
| 1
|
14
|
5
|
27
|
KD
|
-11
|
KD
|
Cancellable, Knockdown
|
Strike
|
Grave leans back and sweeps the opponent's leg. Shifts Grave's hurtbox around, making some attacks miss. This causes Knockdown and can set up safe jumps.
When used by itself it can be quite unsafe but Grave can cancel into his special moves to cover this. Cancellable into  or or  on hit or block. on hit or block.
Relatively vulnerable on whiff.
|
|
Lightning Cloud Normal version Normal version Charge version Charge version
|
| Version
|
Damage
|
Startup
|
Active
|
Recovery
|
Hit Advantage
|
Block Advantage
|
Counter Advantage
|
Properties
|
Attribute
|
| Normal
|
1
|
12
|
P
|
39
|
P
|
P
|
P
|
Knockdown
|
Projectile
|
Grave puts his hand out and creates a lighting cloud. Grave has a very large amount of recovery and moves his body forward during this, making him quite open to punishment. Knocks down airborne opponents.
Projectile can be delayed for between 12 and 20 frames. Becomes Charge version Lightning Cloud at 20 frames.
Adding  or or  will change speed. will change speed.
|
| Hold
|
1
|
20
|
P
|
39
|
P
|
P
|
P
|
Knockdown
|
Projectile
|
Projectile becomes very large and slow moving, disappearing after travelling a short distance. This will catch opponents jumping in or if blocked very late cause a huge advantage for Grave.
Knocks down on first frame and airborne opponents.
|
|
Sword Slice
|
| Damage
|
Startup
|
Active
|
Recovery
|
Hit Advantage
|
Block Advantage
|
Counter Advantage
|
Properties
|
Attribute
|
| 1
|
28
|
7
|
34
|
KD
|
-20
|
KD
|
Fully Invincible, Knockdown
|
Strike
|
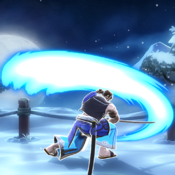
Grave leans forward with a large slash of his sword. Reaches quite far, use it to punish moves on reaction. This can be uses as a prediction but be aware the startup is so long that opponents can often recover before the active frames.
Invincible on frames 1 to 29. Very slow recovery and large amount of pushback. Can sometimes be safe at max range or during Wind.
|
|
Throw
|
| Version
|
Damage
|
Startup
|
Active
|
Recovery
|
Hit Advantage
|
Block Advantage
|
Counter Advantage
|
Properties
|
Attribute
|
| Forward
|
1
|
3
|
4
|
16
|
KD
|
-
|
KD
|
Knockdown
|
Throw
|
Grave leans forward and does a Judo throw, moving him and his opponent about half screen. Forward Throw gives enough advantage to set up safe jumps and meaty setups.
|
| Back
|
1
|
3
|
4
|
16
|
KD
|
-
|
KD
|
Knockdown
|
Throw
|
Grave switches sides and does a Judo throw. Back Throw has slightly more range than Forward Throw but less advantage.
|
|
Dragonheart
|
| Version
|
Damage
|
Startup
|
Active
|
Recovery
|
Hit Advantage
|
Block Advantage
|
Counter Advantage
|
Properties
|
Attribute
|
| Normal
|
1
|
2+4
|
2(0)25
|
34
|
KD
|
-39
|
KD
|
Fully Invincible, Knockdown
|
Strike
|
Grave focuses his energy into his fist and does a rising uppercut. Excellent for reacting to fireballs up close.
Very strong anti air due to full invincibility and speed. Be careful of opponent moves crossing Grave up as it will whiff allowing a strong punish.
Invincible on frames 1 to 33 (all the way up). Will turn into the cinematic version if the first 2 active frames hit.
|
| Cinematic
|
2
|
2+4
|
2
|
-
|
KD
|
-39
|
KD
|
Fully Invincible, Knockdown
|
Strike
|
Causes 1 extra damage and provides Grave's strongest advantage on knockdown.
|
|
Air
Jump Kick
|
| Damage
|
Startup
|
Active
|
Recovery
|
Hit Advantage
|
Block Advantage
|
Counter Advantage
|
Properties
|
Attribute
|
| 1
|
5
|
9
|
2
|
9 ~ 17
|
7 ~ 15
|
14 ~ 22
|
-
|
Strike
|
Very fast startup jump move with a large hitbox. Great used early as an air to air or later as a jump in attack.
|
|
Whirlwind
|
| Damage
|
Startup
|
Active
|
Recovery
|
Hit Advantage
|
Block Advantage
|
Counter Advantage
|
Properties
|
Attribute
|
| 1
|
9
|
18
|
2
|
KD
|
-8 ~ 2
|
KD
|
Knockdown
|
Strike
|
Grave spins around in the air. Hits twice in front of Grave, once behind him.
Changes his jump arc, allowing Grave to make it more difficult to anti air him or to avoid projectiles. Crosses up quite well, timing varies depending on opponent. Can be unsafe depending on timing and spacing.
|
|
Wind Summon Forward Wind Forward Wind Backward Wind Backward Wind
|
| Version
|
Damage
|
Startup
|
Active
|
Recovery
|
Hit Advantage
|
Block Advantage
|
Counter Advantage
|
Properties
|
Attribute
|

|
-
|
32
|
1
|
12
|
-
|
-
|
-
|
-
|
-
|
Causes forward wind for 6 seconds. Wind will push characters and objects.
|
 + +
|
-
|
10
|
1
|
24
|
-
|
-
|
-
|
-
|
-
|
Causes backward wind for 6 seconds. Wind will push characters and objects.
|
|
True Power of Storms
|
| Damage
|
Startup
|
Active
|
Recovery
|
Hit Advantage
|
Block Advantage
|
Counter Advantage
|
Properties
|
Attribute
|
| 2
|
0
|
21
|
31
|
KD
|
-
|
KD
|
Knockdown
|
Parry
|
|
|
|
Wind
Lightning Cloud Normal version Normal version Charge version Charge version
|
| Version
|
Damage
|
Startup
|
Active
|
Recovery
|
Hit Advantage
|
Block Advantage
|
Counter Advantage
|
Properties
|
Attribute
|
| Normal
|
1
|
10
|
P
|
39
|
P
|
P
|
P
|
-
|
Projectile
|
Wind upgrades lighting clouds to level 2.
|
| Charge
|
1
|
22
|
P
|
39
|
P
|
P
|
P
|
-
|
Projectile
|
Projectile Disappears very quickly.
|
|
Whirlwind , , 
|
| Damage
|
Startup
|
Active
|
Recovery
|
Hit Advantage
|
Block Advantage
|
Counter Advantage
|
Properties
|
Attribute
|
| 1
|
8
|
2(4)18
|
10
|
KD
|
1
|
KD
|
Ground Bounce, Knockdown
|
Strike
|
Wind enlarges the whirlwind and summons a lighting bolt. The lightning bolt causes ground bounce and will cause 2 chip damage if both the whirlwind and lightning bolt are blocked.
|
|
Combos
Basic
 >
>  (2 damage)
 +
+ ,
,  >
>  (3 damage)
 +
+ >
>  (2 damage, needs to be close)
Situational
Hold  ,
,  (2 damage, knockdown)
Counter Hit or Late Hit  ,
,  >
>  (3 damage)
While Wind is Active
 +
+ ,
,  (3 damage and knockdown)
 ,
,  (3 damage and knockdown, more projectiles can be linked but spacing is very specific)
Strategy
General
Grave wants to use his fast fireball ( +
+ ) to build up block damage and force his opponents to want to jump. Grave can then use his excellent anti airs to keep them out. If he scores a knockdown he has a strong mixup with
  +
+ or
or  +
+ built in as a left-right mixup.
If Grave is unable to employ fireballs because their zoning game is stronger he can try to use Wind Summon ( +
+ ) to force his way in or to temporarily gain zoning advantage. Another strong way to disrupt the opponents' fireballs is by using either
  or
or  to punish fireballs on reaction, the sword has the greater range but may be too slow to punish some fireball attempts. The same rule applies to slow attacks, Grave can often disrupt them on reaction to stop their offense.
If Grave is getting his fireballs punished by Projectile Invincible attacks then he can use his normal attacks or jumping to attack the opponent. His  +
+ and
and  +
+ are both good choices for this but they are also slow attacks and are vulnerable to counter poking, use close to max range to avoid this. His Sweep in particular is very good at low-profiling attacks and will knockdown, gaining advantage.
When jumping in, switching between between
  +
+ or
or  +
+ makes it more difficult to anti air due to different angles and timing. Additionally,
  +
+ will help Grave avoid projectiles by shifting his body forward. If
  +
+ does hit Grave will gain advantage through knockdown.
 +
+ can be used as a threat against air to airs or anti-airs
Anti-air
 , or Knifehand is Grave's go to normal anti-air. It is about average for speed but comes out fast enough that you can use it on reaction against many attacks. The hitbox gets better the further out it is and it has
excellent active frames so put it out there early enough that you make contact just at the fingertips of his extended hand. If desired, you can cancel into a fireball.
 is very slow but has very long invincibility, making it effective at beating attacks with a lot of active frames or recovery.
 is very strong as an anti-air; it can be used similarly to
  but it has complete invincibility all the way from startup to the apex of the move. This makes it easier to react and win against attacks. Be wary of attacks that will cross up, this move is very vulnerable if missed.
 can be an extremely good far anti-air, put the fireball out so that they fall onto it.
Surprisingly,  +
+ or
or  +
+ can both be used as situational anti-airs. They both low profile in different ways and are thus able to make attacks whiff or just beat them.
Hold  is a very strong anti-air, generally needed to be used as a prediction due to it's startup. Once set up it provides a huge zone that most characters will have a very difficult time getting around.
Wind
- Use Forward Wind (FW) to beat zoning. The Electrified Lighting Clouds
 are very big, fast, and strong and for a brief time Grave can overpower any zoning coming at him.
- Use FW to advance. Your walk speed is significantly increased, allowing you to close distance to
 or
or  range very quickly.
- Use FW to get a juice kick. Air movement increases even more than ground movement. Grave can jump across the full screen and even create very fast crossups with his new jump arc.
- Use FW to stall a projectile. When a projectile encounters wind it will continue it's momentum even after the Wind is gone. This can prevent the opponent from throwing a fireball because the old one is still on screen.
- Use FW for Electrified combos.
 +
+ 's lightning bolt will cause a ground bounce that allows combo followups. It is possible to follow up Clouds into more Clouds or Whirlwind and end these into Super.
- Use Back Wind (BW) to chip out. A slow Cloud during BW is very large and slow, forcing a block or an easy anti-air situation.
- Use BW to create setups. Putting out a slow Cloud during BW or after crossing up in FW can allow an extra layer of pressure be applied to opponents. Especially good after knocking someone down during Wind.
Knockdowns
- After
 Grave gets an easy safejump with
  +
+ . Simply hold
  +
+ after the throw. (Back throw is not always a safejump)
- Add in
 +
+ after throw for a left-right mixup. Note that the timing for the crossup varies and can cause Grave to be unsafe or even to whiff depending on how early or late it is done.
 +
+ or Hold
  to start a fireball trap can be a good option, especially in the corner. Grave will be advantaged afterwards and can throw more fireballs or bait jumps and reversals.
- Meaty
 is very strong if you can set it up. If it hits late enough you can combo into
  >
> or
or  .
.
 creates strong advantage, you have more time than throw to set up a safe jump or crossup.
Matchups
| Name |
Type |
Matchup Strategy
|
Argagarg

|
Zoner
|
Argagarg will win the zoning war with Grave, Argagarg will often be able to punish Grave outright for trading a projectile. Wind is Grave's best way of getting in, but he must be careful not to be punished on activation.
At far-range Grave should look to use Wind or move to mid-range.
When Grave is at mid-range he can use Sword or DragonHeart to punish Argagarg for using Flying Fish or Rushing River.
Jumping is risky but use of Jump Kick or Whirlwind can make it difficult for Argagarg to anti-air.
If Grave gets Argagarg knocked down, he will likely use his Bubble Shield Super to try to stop pressure. Use safejumps or projectiles to avoid it.
Once Grave gets close range he should try not to leave it.
Grave can threaten both supers to beat limbs. The cinematics will allow Grave to get in. Because Argagarg can often only punish for one damage, the risk reward ratio is good for Grave.
|
DeGrey

|
WildCard
|
It is possible for Grave to zone and anti-air DeGrey from far ranges. If Grave is within range of the Ghost, it is risky to use projectiles due to Ghost being fast startup and a level 2 projectile.
Sword is extra risky in this matchup as DeGrey can use his Super or his Tyrant Crusher to punish on reaction.
It is possible to Dragonheart the Ghost assist call on reaction but it is more difficult than other projectiles.
Once DeGrey has Super Meter fully charged, Grave should be extremely careful with using Wind Summon as it can be punished on reaction by Final Arbiter.
|
Geiger

|
Zoner
|
Grave does not want to trade projectiles with Geiger, especially once Geiger gets super. Time Stop will easily punish any projectile Grave has.
If Geiger does not have super, Grave can force his way in with wind. If Geiger does have super it can still be used to gain some positioning.
At far-range Grave should look to use Wind (watch out for Time Stop) or move to mid-range.
At mid-range Grave can use Dragonheart to punish Time Spirals or predict a time spiral with a jump.
Once you get in close, Geiger has Flash Gear as an option to stop offense and restart his zoning.
Be aware that if you try to anti-air Geiger with Dragonheart, Geiger can Pause on reaction to the Super Freeze.
|
Grave

|
Zoner
|
The mirror is difficult for Grave as all of his tools are countered well by himself. Sword and Super are both very good at being a reactive punish to Clouds, so fireball zoning outside of Wind Summon is fairly weak.
If Grave uses Sword, Sword can be used on reaction to beat it. Dragonheart can be punished with a full jump in combo.
If the opponent has full meter, Dragonheart is a very risky anti air because if they haven't pushed a button they can use counter Super in response.
|
Jaina

|
Zoner
|
This is somewhat similar to the Grave matchup but with more zoning dynamics. Both Jaina and Grave can take turns controlling the zoning in this matchup with Wind Summon or Rain of Fire but the edge tends to go to Jaina. Both characters can punish projectiles on reaction but Jaina's Dragonheart doesn't require meter.
Both characters want to get in close and pressure the other character.
Jaina's Dive Kick and Knee are very good at making Grave's Dragonheart Super whiff, be careful when using it as a reversal or anti-air.
Punish Red Dragon with a full jump in combo.
|
Lum

|
WildCard
|
Wind is extremely powerful in this matchup, Grave can easily get in on Lum and push or pull items on the screen. Electrified Clouds and Big Clouds do a good job of clearing Mini-Lums. Grave's main goal here should be to use Wind to quickly push Lum to the corner. Once there, Grave can pressure with projectiles (Lum cannot roll under any of them) and without a proper reversal, Lum's only good option is to jump out or hope for item that will give some space.
|
Midori

|
Grappler
|
Midori has no immediate counters for Wind Summon. Midori's Butt Slam is easily anti-aired by Knifehand and Dragonheart, however if Midori lands directly on top of Grave both will likely fail. Walking under and punishing is a good response.
When Midori gets full Super Meter, be very careful as Dragon Form can often be used to punish projectiles on reaction. Big Lightning Cloud, while strong against Human Form is very vulnerable against Dragon Form.
If Grave can get the cinematic of Dragonheart, it will waste a lot of the Dragon Form meter and force Midori back to Human Form.
|
Rook

|
Grappler
|
Rook will want to Earthquake to knock Grave down. Using Sword or making Rook land on a Cloud will stop that. It is also possible to beat Earthquake with anti-airs. If Rook trades Earthquake it is usually Rook's favor because of the longer knockdown time.
Rook will want to use Vines to get through the Clouds, it is very punishable if Grave is close enough.
Rook's armor on his Special and Super Throws will get through Sword but Dragonheart will break the armor and beat them.
Grave can often use Wind to get some space and chip away at Rook's health.
|
Setsuki

|
Rushdown
|
The best defense against Setsuki is a good offense. Make it your priority to get a knockdown and continue pressure.
She has no reversal that is invincible on startup and only five health.
Setsuki's Kunai projectile is destroyable, attacks like Knifehand and Jump Kick can go right through it. Ninjaport is also vulnerable, if not a combo then Grave can always Sword or Dragonheart it.
Saving Dragonheart for Dive Kicks is strong, though Setsuki can alter the angle to make it whiff.
Lightning Cloud isn't particularly strong against Setsuki due to having so many anti-projectile tools. Setsuki can often outright punish a projectile on reaction.
|
Valerie

|
Rushdown
|
Knifehand and Big Lightning Cloud are great at keeping Valerie out. Grave's fast startup on his Jump Kick allow him to often beat Valerie air to air and without Super, Valerie has difficulty dealing with it.
|
![]() +
+![]() >
> ![]() (2 damage, needs to be close)
(2 damage, needs to be close) ![]() ,
, ![]() >
> ![]() (3 damage)
(3 damage) ![]() ,
, ![]() (3 damage and knockdown, more projectiles can be linked but spacing is very specific)
(3 damage and knockdown, more projectiles can be linked but spacing is very specific) ![]() +
+![]() ) to build up block damage and force his opponents to want to jump. Grave can then use his excellent anti airs to keep them out. If he scores a knockdown he has a strong mixup with
) to build up block damage and force his opponents to want to jump. Grave can then use his excellent anti airs to keep them out. If he scores a knockdown he has a strong mixup with ![]() +
+![]() or
or ![]() +
+![]() built in as a left-right mixup.
built in as a left-right mixup.
![]() +
+![]() ) to force his way in or to temporarily gain zoning advantage. Another strong way to disrupt the opponents' fireballs is by using either
) to force his way in or to temporarily gain zoning advantage. Another strong way to disrupt the opponents' fireballs is by using either ![]() or
or ![]() to punish fireballs on reaction, the sword has the greater range but may be too slow to punish some fireball attempts. The same rule applies to slow attacks, Grave can often disrupt them on reaction to stop their offense.
to punish fireballs on reaction, the sword has the greater range but may be too slow to punish some fireball attempts. The same rule applies to slow attacks, Grave can often disrupt them on reaction to stop their offense.
![]() +
+![]() and
and ![]() +
+![]() are both good choices for this but they are also slow attacks and are vulnerable to counter poking, use close to max range to avoid this. His Sweep in particular is very good at low-profiling attacks and will knockdown, gaining advantage.
When jumping in, switching between between
are both good choices for this but they are also slow attacks and are vulnerable to counter poking, use close to max range to avoid this. His Sweep in particular is very good at low-profiling attacks and will knockdown, gaining advantage.
When jumping in, switching between between ![]() +
+![]() or
or ![]() +
+![]() makes it more difficult to anti air due to different angles and timing. Additionally,
makes it more difficult to anti air due to different angles and timing. Additionally, ![]() +
+![]() will help Grave avoid projectiles by shifting his body forward. If
will help Grave avoid projectiles by shifting his body forward. If ![]() +
+![]() does hit Grave will gain advantage through knockdown.
does hit Grave will gain advantage through knockdown.
![]() +
+![]() can be used as a threat against air to airs or anti-airs
can be used as a threat against air to airs or anti-airs
![]() , or Knifehand is Grave's go to normal anti-air. It is about average for speed but comes out fast enough that you can use it on reaction against many attacks. The hitbox gets better the further out it is and it has
excellent active frames so put it out there early enough that you make contact just at the fingertips of his extended hand. If desired, you can cancel into a fireball.
, or Knifehand is Grave's go to normal anti-air. It is about average for speed but comes out fast enough that you can use it on reaction against many attacks. The hitbox gets better the further out it is and it has
excellent active frames so put it out there early enough that you make contact just at the fingertips of his extended hand. If desired, you can cancel into a fireball.
![]() is very slow but has very long invincibility, making it effective at beating attacks with a lot of active frames or recovery.
is very slow but has very long invincibility, making it effective at beating attacks with a lot of active frames or recovery.
![]() is very strong as an anti-air; it can be used similarly to
is very strong as an anti-air; it can be used similarly to ![]() but it has complete invincibility all the way from startup to the apex of the move. This makes it easier to react and win against attacks. Be wary of attacks that will cross up, this move is very vulnerable if missed.
but it has complete invincibility all the way from startup to the apex of the move. This makes it easier to react and win against attacks. Be wary of attacks that will cross up, this move is very vulnerable if missed.
![]() can be an extremely good far anti-air, put the fireball out so that they fall onto it.
can be an extremely good far anti-air, put the fireball out so that they fall onto it.
![]() +
+![]() or
or ![]() +
+![]() can both be used as situational anti-airs. They both low profile in different ways and are thus able to make attacks whiff or just beat them.
can both be used as situational anti-airs. They both low profile in different ways and are thus able to make attacks whiff or just beat them.
![]() is a very strong anti-air, generally needed to be used as a prediction due to it's startup. Once set up it provides a huge zone that most characters will have a very difficult time getting around.
is a very strong anti-air, generally needed to be used as a prediction due to it's startup. Once set up it provides a huge zone that most characters will have a very difficult time getting around.
 are very big, fast, and strong and for a brief time Grave can overpower any zoning coming at him.
 or
or  range very quickly.
 +
+ 's lightning bolt will cause a ground bounce that allows combo followups. It is possible to follow up Clouds into more Clouds or Whirlwind and end these into Super.
 Grave gets an easy safejump with
  +
+ . Simply hold
  +
+ after the throw. (Back throw is not always a safejump)
 +
+ after throw for a left-right mixup. Note that the timing for the crossup varies and can cause Grave to be unsafe or even to whiff depending on how early or late it is done.
 +
+ or Hold
  to start a fireball trap can be a good option, especially in the corner. Grave will be advantaged afterwards and can throw more fireballs or bait jumps and reversals.
 is very strong if you can set it up. If it hits late enough you can combo into
  >
> or
or  .
. creates strong advantage, you have more time than throw to set up a safe jump or crossup.