Kirby Fighters 2/Ninja: Difference between revisions
Waffles ns (talk | contribs) m (→Moveset) |
m (→Moveset) |
||
| (22 intermediate revisions by 6 users not shown) | |||
| Line 5: | Line 5: | ||
<br> | <br> | ||
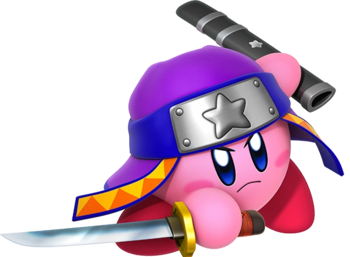
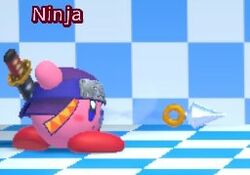
Ninja as an extremely powerful swordsman with great damage, large disjoints, and block pressure, plus a his Knife Throw(5B) projectile that forces your opponent to approach you by beating or trading with a majority of projectiles in the game, usually only losing to ones that have been charged. In general, you want to be using 5B in neutral, and using Shock( | Ninja as an extremely powerful swordsman with great damage, large disjoints, and block pressure, plus a his Knife Throw (5B) projectile that forces your opponent to approach you by beating or trading with a majority of projectiles in the game, usually only losing to ones that have been charged. In general, you want to be using 5B in neutral, and using Shock (5[B]) to win air-to-air and to start combos into Blossom Storm (82B). | ||
==Moveset== | ==Moveset== | ||
| Line 11: | Line 11: | ||
{{MoveData | {{MoveData | ||
|imageSize= 250x250px | |imageSize= 250x250px | ||
|image= | |image=KF2_Ninja_Knife_Throw.jpg | ||
|caption= | |image2=KF2 Ninja Kunai Hitbox.png | ||
|name= | |caption= Shing shing shing, shwing! These things are fast! | ||
|name=Knife Throw<br> | |||
5B | |||
|data= | |data= | ||
{{AttackData-KF2 | {{AttackData-KF2 | ||
|damage= | |damage= 3 | ||
|startup= | |startup= 5 | ||
|recovery= | |recovery= | ||
|attribute= | |attribute= Crouch avoidable | ||
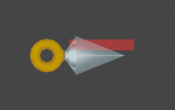
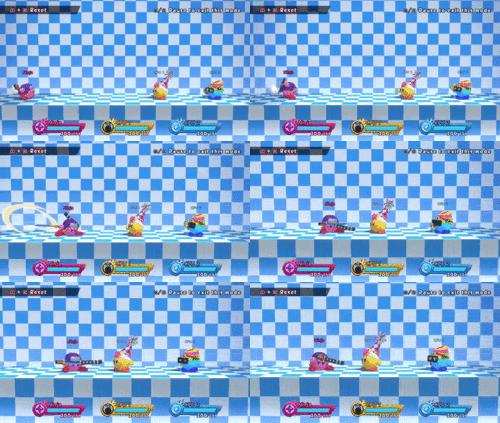
|description= * | |description= *Kirby Throws a Kunai. It does not cause opponents to flinch, but they do take a small amount of damage. Alternating between this attack and moving forward very rapidly throws them at a blistering speed when done correctly (also called "stutter-stepping"). It can surprise the opponent the first time, but most dash attacks can also deflect these Kunais and punish Kirby for throwing them out in some situations. | ||
}} | }} | ||
}} | }} | ||
| Line 27: | Line 28: | ||
{{MoveData | {{MoveData | ||
|imageSize= 250x250px | |imageSize= 250x250px | ||
|image= | |image=KF2_Ninja_Shock.jpg | ||
|caption= | |image2=KF2 Ninja Shock Hitbox.gif | ||
|name= | |caption= Yeah, it looks pretty slow, but it hits pretty fast for such a damaging move. | ||
|name=Shock<br> | |||
5[B] | |||
|data= | |data= | ||
{{AttackData-KF2 | {{AttackData-KF2 | ||
|damage= | |damage= 25 | ||
|startup= | |startup= 3 | ||
|recovery= | |recovery= | ||
|attribute= | |attribute= | ||
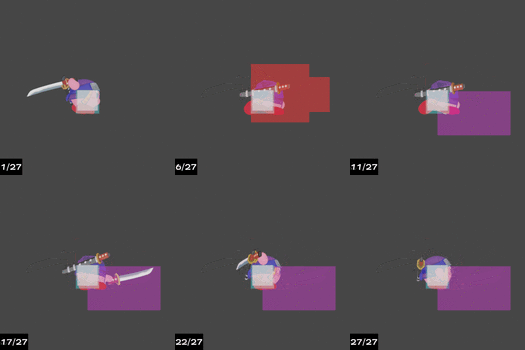
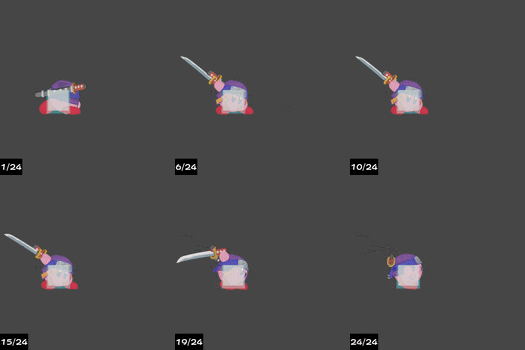
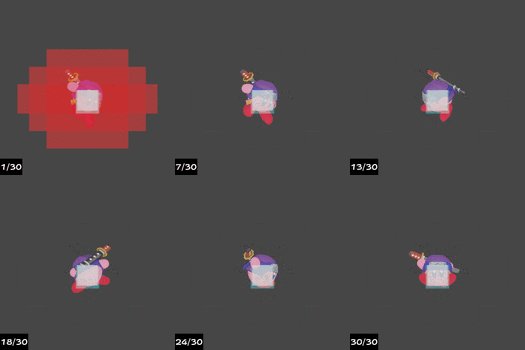
|description= * | |description= *Kirby makes a long slash with a katana. A very quick move, it is a quick option for Ninja out of shield. With a guaranteed 25 damage if it hits, as well as priority against multiple other moves with its semi-deceptive range and quickness, this move is going to be one of the go-tos in competitive Ninja play. | ||
}} | }} | ||
}} | }} | ||
| Line 43: | Line 45: | ||
{{MoveData | {{MoveData | ||
|imageSize= 250x250px | |imageSize= 250x250px | ||
|image= | |image=KF2_Ninja_Quad_Shock.gif | ||
|caption= | |image2=KF2 Ninja Quad Shock Hitbox.gif | ||
|name= | |caption= Those four hitboxes put the "Quad" in Quad Shock. If all of them hit, you'd be scared, too. | ||
|name=Quad Shock<br> | |||
c.5[B] | |||
|data= | |data= | ||
{{AttackData-KF2 | {{AttackData-KF2 | ||
|damage= | |damage= 39 (25, 14) | ||
|startup= | |startup= 5 | ||
|recovery= | |recovery= | ||
|attribute= | |attribute= | ||
|description= * | |description= *Kirby does a short 2 hit combo with a katana. The followup to Shock, it adds an extra 14 damage to the already damaging katana. It knocks the opponent away, but can setup for some useful mixups and option selects in the corner. | ||
}} | }} | ||
}} | }} | ||
| Line 59: | Line 62: | ||
{{MoveData | {{MoveData | ||
|imageSize= 250x250px | |imageSize= 250x250px | ||
|image= | |image=KF2_Ninja_Stealth_Slash.gif | ||
|caption= | |caption= A bit less cool as the ones in the movies. Also, a bit more risky as it doesn't instakill your opponent. | ||
|name= | |name=Stealth Slash<br> | ||
66B | |||
|data= | |data= | ||
{{AttackData-KF2 | {{AttackData-KF2 | ||
|damage= | |damage= 24 (6, 18) | ||
|startup= | |startup= 17 | ||
|recovery= | |recovery= | ||
|attribute= | |attribute= | ||
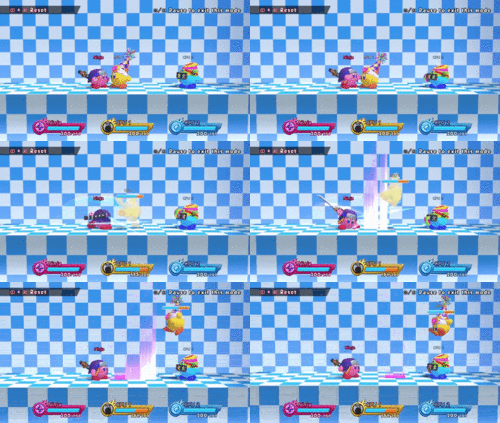
|description= * | |description= *Kirby dashes forward in the blink of an eye, striking quickly with a katana before sheathing it. This move will not hit for a moment before Kirby begins to sheath his sword. Useful to crossup opponents, although Kirby can be punished before he reseals his sword, as well as after the hits, as Kirby has quite a bit of time before he can make another move. | ||
}} | }} | ||
}} | }} | ||
| Line 75: | Line 78: | ||
{{MoveData | {{MoveData | ||
|imageSize= 250x250px | |imageSize= 250x250px | ||
|image= | |image=KF2_Ninja_Ninja_Kick.jpg | ||
|caption= | |image2=KF2 Ninja Kick Hitbox.png | ||
|name= | |caption= FOOT DIVE! | ||
|name=Ninja Kick<br> | |||
j.2B | |||
|data= | |data= | ||
{{AttackData-KF2 | {{AttackData-KF2 | ||
|damage= | |damage= 20 | ||
|startup= | |startup= 8 | ||
|recovery= | |recovery= | ||
|attribute= | |attribute= | ||
|description= * | |description= *Kirby does a diving kick. Simple aerial divekick attack. Very useful to shield pressure an opponent and check for dodges. This allows for more possibilities after a whiffed divekick, whether or not your opponent is near you. A common option is to whiff this move next to an opponent, then immediately 82B. You can cancel this move with an airpuff. | ||
}} | }} | ||
}} | }} | ||
| Line 91: | Line 95: | ||
{{MoveData | {{MoveData | ||
|imageSize= 250x250px | |imageSize= 250x250px | ||
|image= | |image=KF2_Ninja_Smoke_Screen.jpg | ||
|caption= | |image2=KF2 Ninja Smokescreen.gif | ||
|name= | |caption= SMOKE BOMB! | ||
|name=Smoke Screen<br> | |||
2B | |||
|data= | |data= | ||
{{AttackData-KF2 | {{AttackData-KF2 | ||
|damage= | |damage= 16 | ||
|startup= | |startup= 10 | ||
|recovery= | |recovery= | ||
|attribute= | |attribute= | ||
|description= * | |description= *Kirby creates a smoke screen around him. This launches the opponent into the air slightly. If close, can be followed up with Shock, although more reliably Stealth Slash can be used to combo and keep the opponent juggled in the air for more mixups. Note that this move also moves Kirby into the air slightly, which can be both useful and detrimental depending on the situation. | ||
}} | }} | ||
}} | }} | ||
| Line 107: | Line 112: | ||
{{MoveData | {{MoveData | ||
|imageSize= 250x250px | |imageSize= 250x250px | ||
|image= | |image=KF2_Ninja_Blossom_Storm.jpg | ||
|caption= | |image2=KF2_Ninja_Blossom_Storm_Hitbox.gif | ||
|name= | |caption= Those flowers are beautiful AND painful! What's a rose without its thorns? | ||
|name=Blossom Storm<br> | |||
82B | |||
|data= | |data= | ||
{{AttackData-KF2 | {{AttackData-KF2 | ||
|damage= | |damage= 30 (10, 20) | ||
|startup= | |startup= 10(First)/20(Second) | ||
|recovery= | |recovery= 40 | ||
|attribute= | |attribute= | ||
|description= * | |description= *Kirby leaps into the air, cherry blossoms surrounding him. He then crashes his fan down, creating a small explosion. Kirby will remain in the air after this move, which allows him to go for airpuff followups. This move gets Ninja Kirby out of sticky situations, as well as put him into a more advantageous position. After a Blossom Storm, it is very hard to punish Ninja on a regular block, as he can drop down and use Shock, or wait a bit and Air Drop the opponent. Opponents do not have much choice but to find a way out of the area if they are in the corner, or try and approach on Ninja Kirby's descent outside of the corner. | ||
}} | }} | ||
}} | }} | ||
| Line 123: | Line 129: | ||
{{MoveData | {{MoveData | ||
|imageSize= 250x250px | |imageSize= 250x250px | ||
|image= | |image=KF2_Ninja_Air_Drop.gif | ||
|caption= | |image2=KF2 Ninja Air Drop Hitbox.png | ||
|name= | |caption= Very fun move! What goes up... | ||
|name=Air Drop<br> | |||
c.6B/c.8B (Air OK) | |||
|data= | |data= | ||
{{AttackData-KF2 | {{AttackData-KF2 | ||
|damage= | |damage= 20 | ||
|startup= | |startup= 1 | ||
|recovery= | |recovery= | ||
|attribute= | |attribute= | ||
|description= * | |description= *Kirby grabs the opponent, leaps into the air, and comes slamming back down. Like most other command grabs in this game, the opponent is sent away from Kirby, but there are many followups and mixups that can be done after this when very close to the corner. | ||
}} | }} | ||
}} | }} | ||
| Line 139: | Line 146: | ||
{{MoveData | {{MoveData | ||
|imageSize= 250x250px | |imageSize= 250x250px | ||
|image= | |image=KF2_Ninja_Wall_Cling.jpg | ||
|caption= | |caption= The ninja must be patient. | ||
|name= | |name=Wall Cling<br> | ||
4/6 against a wall | |||
|data= | |data= | ||
{{AttackData-KF2 | {{AttackData-KF2 | ||
| Line 149: | Line 156: | ||
|recovery= | |recovery= | ||
|attribute= | |attribute= | ||
|description= * | |description= *Kirby clings to the wall. | ||
}} | }} | ||
}} | }} | ||
| Line 155: | Line 162: | ||
{{MoveData | {{MoveData | ||
|imageSize= 250x250px | |imageSize= 250x250px | ||
|image= | |image=KF2_Ninja_Wall_Strike.jpg | ||
|caption= | |image2=KF2 Ninja Kunai Hitbox.png | ||
|name= | |caption= Aggressive. | ||
|name=Wall Strike<br> | |||
B during Wall Cling | |||
|data= | |data= | ||
{{AttackData-KF2 | {{AttackData-KF2 | ||
| Line 165: | Line 173: | ||
|recovery= | |recovery= | ||
|attribute= | |attribute= | ||
|description= * | |description= *Kirby throws a Kunai while clinging to the wall. | ||
}} | }} | ||
}} | }} | ||
| Line 171: | Line 179: | ||
{{MoveData | {{MoveData | ||
|imageSize= 250x250px | |imageSize= 250x250px | ||
|image= | |image=KF2_Ninja_Wall_Jump.jpg | ||
|caption= | |caption= Agile. | ||
|name= | |name=Wall Jump<br> | ||
A during Wall Cling | |||
|data= | |data= | ||
{{AttackData-KF2 | {{AttackData-KF2 | ||
| Line 181: | Line 189: | ||
|recovery= | |recovery= | ||
|attribute= | |attribute= | ||
|description= * | |description= *Kirby jumps from the wall. | ||
}} | }} | ||
}} | }} | ||
| Line 187: | Line 195: | ||
{{MoveData | {{MoveData | ||
|imageSize= 250x250px | |imageSize= 250x250px | ||
|image= | |image=KF2_Ninja_Clone_Technique.jpg | ||
|caption= | |image2=KF2 Ninja Counter Hitbox.gif | ||
|name= | |caption= GASP! A Substitution! *cue fight scene longer than it should be* | ||
|name=Clone Technique<br> | |||
2L/2R right before getting hit | |||
|data= | |data= | ||
{{AttackData-KF2 | {{AttackData-KF2 | ||
| Line 197: | Line 206: | ||
|recovery= | |recovery= | ||
|attribute= | |attribute= | ||
|description= * | |description= *Kirby substitutes himself with a log, then reappears in a small smoke explosion that does damage. This move is jump-cancelable if done in midair, and can be used to approach if used with Kirby's back facing toward their opponent, although unlike other counters, this one does not have much invulnerability after the smoke explosion. This makes it useful against attacks with long endlag, but multihit attacks may be harder to escape. You can hold 2L/2R for a bit to delay the counter hitbox. | ||
}} | }} | ||
}} | }} | ||
| Line 203: | Line 212: | ||
==Neutral Gameplay== | ==Neutral Gameplay== | ||
Ninja's Knife Throw(5B) is an extremely powerful projectile, not for how much damage it does, but for how it's fast, low- | Ninja's Knife Throw (5B) is an extremely powerful projectile, not for how much damage it does, but for how it's fast, low-commitment, and destroys other projectiles (especially ones that aren't/can't be charged) that are much slower, meaning Ninja wins the interaction from a distance. Notable examples include Bomb, Magolor, and Water. | ||
5B is also a great pressure tool against characters who don't have projectiles of their own, such as Whip, Hammer, or Sword. This forces them to approach, meaning you can 50/50 with Stealth Slash(66B) or Shock(5[B]), or running up to them and using Air Drop(c.6B/c.8B). 5B is a powerful Ninja tool has, akin to Fox's Laser in Melee. Use this whenever there's any space between you and your opponent. Generally, you'll want to do 5B, jump, 5B twice, land, then repeat. This rhythm shoots knives at 3 different heights (Low, High, then Middle). If you mash both A and B over and over again, chances are that the two knives shot in the air will be around the same height, but if you jump higher they'll likely differ in height, covering more vertical range. | 5B is also a great pressure tool against characters who don't have projectiles of their own, such as Whip, Hammer, or Sword. This forces them to approach, meaning you can 50/50 with Stealth Slash (66B) or Shock (5[B]), or running up to them and using Air Drop (c.6B/c.8B). 5B is a powerful Ninja tool has, akin to Fox's Laser in Melee. Use this whenever there's any space between you and your opponent. Generally, you'll want to do 5B, jump, 5B twice, land, then repeat. This rhythm shoots knives at 3 different heights (Low, High, then Middle). If you mash both A and B over and over again, chances are that the two knives shot in the air will be around the same height, but if you jump higher they'll likely differ in height, covering more vertical range. | ||
With 5B projectiles flying across the screen, your opponent may go for dash attacks to approach. If you think they're going to try it, use Blossom Storm( | With 5B projectiles flying across the screen, your opponent may go for dash attacks to approach. If you think they're going to try it, use Blossom Storm (82B) to dodge their attack from above and strike with your own that sets up for j.5[B] pressure. It's worth noting that even if you use j.5[B] as soon as you leave the ground, the hitbox is always active. Ninja's best trait is how well he can trade with his disjoint and usually outdamage his opponent, or if it doesn't, you will put them into a combo situation. | ||
==Combos== | ==Combos== | ||
*Aerial Shock(j.5[B]) > Smoke Screen(2B) > Stealth Slash(66B) | *Aerial Shock (j.5[B]) > Smoke Screen (2B) > Stealth Slash (66B) | ||
: Extremely close range only, has to be a jump in | : Extremely close range only, has to be a jump in | ||
*j.5[B] (slash) > 5[B] (both the slash and the shockwave) | *j.5[B] (slash) > 5[B] (both the slash and the shockwave) | ||
:CLOSE RANGE ONLY, deals as much damage as the combo below | :CLOSE RANGE ONLY, deals as much damage as the combo below | ||
*j.5[B] > Blossom Storm( | *j.5[B] > Blossom Storm (82B) (Mid-Close range only) | ||
:Use this whenever your standing 5[B] won't connect | :Use this whenever your standing 5[B] won't connect | ||
*j.5[B] > 66B (Any range) | *j.5[B] > 66B (Any range) | ||
:Use this when | :Use this when 82B won't connect | ||
*2B > j.5[B] > | *2B > j.5[B] > 82B | ||
*82B > j.AB | |||
:In the corner, can continue with j.5[B] and 82B | |||
===Platform Combos/Unblockables=== | ===Platform Combos/Unblockables=== | ||
* | *82B > 66B | ||
:Below the platform, your opponent is above or below | :Below the platform, your opponent is above or below | ||
* | *82B > aerial Air Drop (jc.6B/jc.8B) | ||
:Your opponent blocks | :Your opponent blocks 82B on a platform, Unblockable set up | ||
* | *82B > fall for a few frames > jc.6B/jc.8B | ||
:Opponent blocks | :Opponent blocks 82B up close, unblockable set up, possibly not true | ||
===Corner Combos/Infinites=== | ===Corner Combos/Infinites=== | ||
| Line 234: | Line 245: | ||
==Blockstrings and pressure== | ==Blockstrings and pressure== | ||
Synopsis: Generally you want to continue Ninja's extreme guard pressure with Stealth | Synopsis: Generally you want to continue Ninja's extreme guard pressure with Stealth Slashes (66B) and Blossom Storms (82B), while using aerial Shock ( j.5[B]) to make sure they don't feel safe jumping, and Air Drops (c.6B/c.8B) so they don't get too comfortable blocking. It's worth noting a lot of these chain into themselves, which can be used to apply pressure over and over. Also worth noting is these work anywhere on stage, not just the corner. | ||
66B > j.5[B] > 5[B] > 5[B] | 66B > j.5[B] > 5[B] > 5[B] | ||
66B > j.5[B] > | 66B > j.5[B] > 82B > c.6B/c.8B(if close) or 66B(if far) | ||
j.5[B] > 6B (Close) | j.5[B] > 6B (Close) | ||
| Line 244: | Line 255: | ||
j.5[B] > j.5[B] | j.5[B] > j.5[B] | ||
j.5[B] > 66B > | j.5[B] > 66B > 82B > Smoke Screen (2B) > 6B (close) | ||
==Hats== | ==Hats== | ||
<gallery> | |||
KF2 Ninja Shinobi Hood(73).png|Shinobi Hood(Unlocked at Fighter's Rank 73) | |||
KF2 Ninja Samurai Helmet(91).png|Samurai Helmet(Unlocked at Fighter's Rank 91) | |||
</gallery> | |||
{{Navbox-KF2}} | {{Navbox-KF2}} | ||
[[Category:Kirby Fighters 2]] | [[Category:Kirby Fighters 2]] | ||
[[Category:Kirby Ninja]] | [[Category:Kirby Ninja]] | ||
Latest revision as of 20:20, 14 June 2021
Introduction
Ninja (Unlocked at Fighters Rank 33)
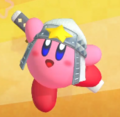
Ninja as an extremely powerful swordsman with great damage, large disjoints, and block pressure, plus a his Knife Throw (5B) projectile that forces your opponent to approach you by beating or trading with a majority of projectiles in the game, usually only losing to ones that have been charged. In general, you want to be using 5B in neutral, and using Shock (5[B]) to win air-to-air and to start combos into Blossom Storm (82B).
Moveset
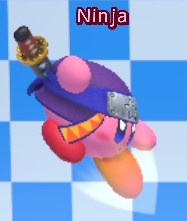
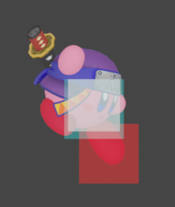
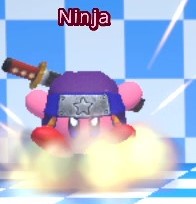
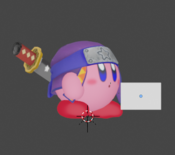
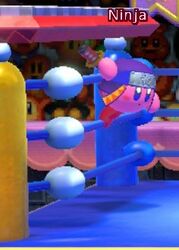
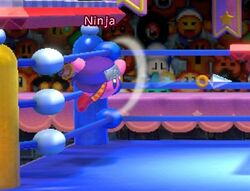
Knife Throw 5B Shing shing shing, shwing! These things are fast! Shing shing shing, shwing! These things are fast!
|
|---|
Shock 5[B] Yeah, it looks pretty slow, but it hits pretty fast for such a damaging move. Yeah, it looks pretty slow, but it hits pretty fast for such a damaging move.
|
|---|
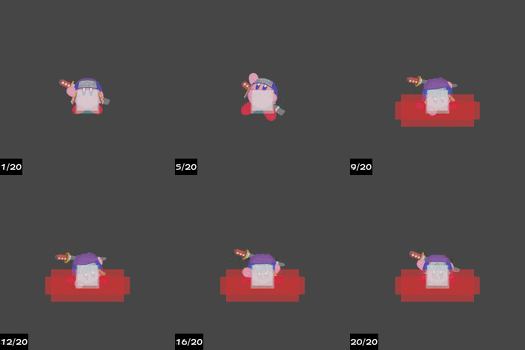
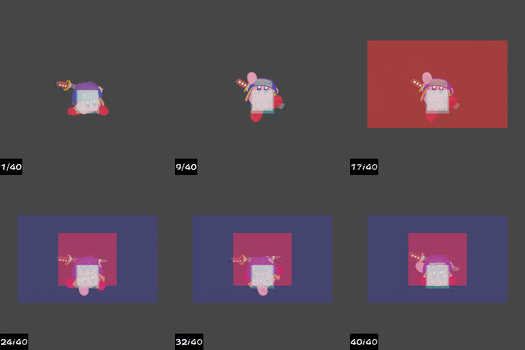
Quad Shock c.5[B] Those four hitboxes put the "Quad" in Quad Shock. If all of them hit, you'd be scared, too. Those four hitboxes put the "Quad" in Quad Shock. If all of them hit, you'd be scared, too.
|
|---|
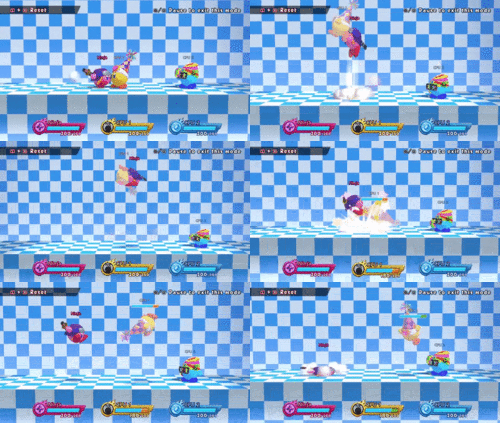
Stealth Slash 66B A bit less cool as the ones in the movies. Also, a bit more risky as it doesn't instakill your opponent. A bit less cool as the ones in the movies. Also, a bit more risky as it doesn't instakill your opponent.
|
|---|
Ninja Kick j.2B FOOT DIVE! FOOT DIVE!
|
|---|
Smoke Screen 2B SMOKE BOMB! SMOKE BOMB!
|
|---|
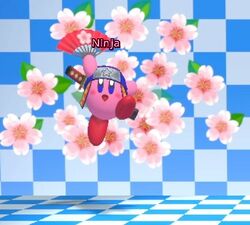
Blossom Storm 82B Those flowers are beautiful AND painful! What's a rose without its thorns? Those flowers are beautiful AND painful! What's a rose without its thorns?
|
|---|
Air Drop c.6B/c.8B (Air OK) Very fun move! What goes up... Very fun move! What goes up...
|
|---|
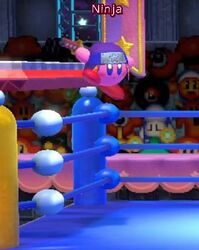
Wall Cling 4/6 against a wall The ninja must be patient. The ninja must be patient.
|
|---|
Wall Strike B during Wall Cling Aggressive. Aggressive.
|
|---|
Wall Jump A during Wall Cling Agile. Agile.
|
|---|
Clone Technique 2L/2R right before getting hit GASP! A Substitution! *cue fight scene longer than it should be* GASP! A Substitution! *cue fight scene longer than it should be*
|
|---|
Neutral Gameplay
Ninja's Knife Throw (5B) is an extremely powerful projectile, not for how much damage it does, but for how it's fast, low-commitment, and destroys other projectiles (especially ones that aren't/can't be charged) that are much slower, meaning Ninja wins the interaction from a distance. Notable examples include Bomb, Magolor, and Water.
5B is also a great pressure tool against characters who don't have projectiles of their own, such as Whip, Hammer, or Sword. This forces them to approach, meaning you can 50/50 with Stealth Slash (66B) or Shock (5[B]), or running up to them and using Air Drop (c.6B/c.8B). 5B is a powerful Ninja tool has, akin to Fox's Laser in Melee. Use this whenever there's any space between you and your opponent. Generally, you'll want to do 5B, jump, 5B twice, land, then repeat. This rhythm shoots knives at 3 different heights (Low, High, then Middle). If you mash both A and B over and over again, chances are that the two knives shot in the air will be around the same height, but if you jump higher they'll likely differ in height, covering more vertical range.
With 5B projectiles flying across the screen, your opponent may go for dash attacks to approach. If you think they're going to try it, use Blossom Storm (82B) to dodge their attack from above and strike with your own that sets up for j.5[B] pressure. It's worth noting that even if you use j.5[B] as soon as you leave the ground, the hitbox is always active. Ninja's best trait is how well he can trade with his disjoint and usually outdamage his opponent, or if it doesn't, you will put them into a combo situation.
Combos
- Aerial Shock (j.5[B]) > Smoke Screen (2B) > Stealth Slash (66B)
- Extremely close range only, has to be a jump in
- j.5[B] (slash) > 5[B] (both the slash and the shockwave)
- CLOSE RANGE ONLY, deals as much damage as the combo below
- j.5[B] > Blossom Storm (82B) (Mid-Close range only)
- Use this whenever your standing 5[B] won't connect
- j.5[B] > 66B (Any range)
- Use this when 82B won't connect
- 2B > j.5[B] > 82B
- 82B > j.AB
- In the corner, can continue with j.5[B] and 82B
Platform Combos/Unblockables
- 82B > 66B
- Below the platform, your opponent is above or below
- 82B > aerial Air Drop (jc.6B/jc.8B)
- Your opponent blocks 82B on a platform, Unblockable set up
- 82B > fall for a few frames > jc.6B/jc.8B
- Opponent blocks 82B up close, unblockable set up, possibly not true
Corner Combos/Infinites
- j.5[B] > 2B
- Repeat forever
Blockstrings and pressure
Synopsis: Generally you want to continue Ninja's extreme guard pressure with Stealth Slashes (66B) and Blossom Storms (82B), while using aerial Shock ( j.5[B]) to make sure they don't feel safe jumping, and Air Drops (c.6B/c.8B) so they don't get too comfortable blocking. It's worth noting a lot of these chain into themselves, which can be used to apply pressure over and over. Also worth noting is these work anywhere on stage, not just the corner.
66B > j.5[B] > 5[B] > 5[B]
66B > j.5[B] > 82B > c.6B/c.8B(if close) or 66B(if far)
j.5[B] > 6B (Close)
j.5[B] > j.5[B]
j.5[B] > 66B > 82B > Smoke Screen (2B) > 6B (close)
