|
|
| Line 641: |
Line 641: |
|
| |
|
| ==Strategy== | | ==Strategy== |
| ===In A Nut-shell=== | | |
| Muramasa best position is at the Mid-range, close enough to reach the opponent, but distant enough to not be interrupted during any of her attack startups. Muramasa gameplan consist a "hit and run" type of gameplay. this is due to Muramasa limited capabilities to press any offensive momentum, and have the constant need to be moving back into her optimal range while not being lockdown by her opponent.
| | ===General=== |
| | Muramasa's plays best at mid-range: close enough to reach the opponent, but distant enough to not be interrupted during any of her attack startups. Muramasa's gameplan consists of a "hit and run" style; this is due to Muramasa's limited capabilities to maintain offensive momentum, as well as her constant need to reposition herself to maintain optimal range while not being locked down by her opponent |
| | | |
| ====Nuetral==== | | ===Neutral=== |
| 623AB uses: | | 623AB uses: |
| * Can be used to counter the opponent's attempt to blast out of you combo: when you cancel a normal into blast to go in for the kill, input 6>6235 to buffer a dash | | * Can be used to counter the opponent's attempt to blast out of you combo: when you cancel a normal into blast to go in for the kill, input 6>6235 to buffer a dash |
Revision as of 12:49, 16 February 2020

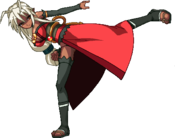
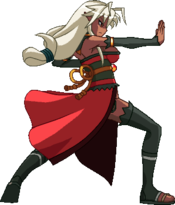
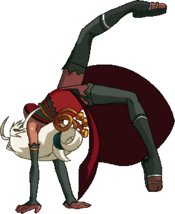
Muramasa
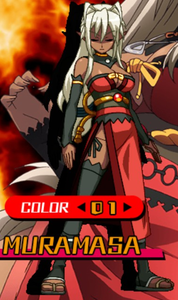
I am Sengou Uemon-no-jou Muramasa! Profile
Name: Muramasa the Third
Debuted in: Full Metal Daemon Muramasa
Voice Actor: Sumoto Ayana
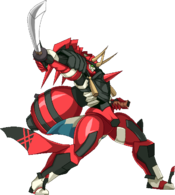
Introduction: One of the Tsurugis that houses a spirit. She is the third bearer of the Seishuu Uemon-no-jou Muramasa, which is also known as the "cursed armor". Normally, she is a red colored spider, but due to the "human transformation law", she can also take the form of a woman.
Summary
Muramasa is an unconventional as she has high mobility, long range capabilities, serviceable mix ups, on top hitting like truck for minimal resource. She has everything needed to be a perfect character bar one trait, a meter less reversal. Even with that disadvantage Muramasa of she has a lot of “knowledge check” tools keep opponent honest. Indeed, Muramasa the Third Floats like a butterfly and stings like a bee.
Command List
If you are having trouble reading inputs, check out the Notation section!
Normals
5A 2A [6A / cl.B] st.B 2B 5C 2C [5E/2E] is basic chain route. Any deviations from that route will be noted as an additional or limited.
5A
|
| Damage
|
Guard
|
Startup
|
Active
|
Recovery
|
Frame Adv
|
| 400
|
HLA
|
6
|
-
|
-
|
-
|
Regular ole jab. Great at catching people who attempt to jump out of pressure due to its height.
|
|
6A
|
| Damage
|
Guard
|
Startup
|
Active
|
Recovery
|
Frame Adv
|
| 1100
|
HLA (VG)
|
12
|
-
|
-
|
-
|
One of Muramasa amazing Pokes. While slower than most 6A, it makes up for its long invulnerability against Overheads and extremely small hurtbox that Low profile majority of mid-attacks.
- Moves Muramasa forward a little
- Due to Muramasa hurtbox returning to normal on only the active hitbox frames, 6S clashes or trades periodically.
|
|
c.5B
|
| Damage
|
Guard
|
Startup
|
Active
|
Recovery
|
Frame Adv
|
| 900
|
HLA
|
7
|
-
|
-
|
-
|
Short range palm strike, Its small damage poration make it Muramasa most damaging pratical starter.
- Chainable into 6A for some additional damage if close
|
|
f.5B
|
| Damage
|
Guard
|
Startup
|
Active
|
Recovery
|
Frame Adv
|
| 1100
|
HLA
|
8
|
-
|
-
|
-
|
Short range kick pf average speed but decent recovery. Micro dash extend the range
- Moves Muramasa forward a little
- This move carries momentuem from dashing. the longer the dash the more momentuem it carries.
|
|
5C
|
| Damage
|
Guard
|
Startup
|
Active
|
Recovery
|
Frame Adv
|
| 1500
|
HLA
|
16
|
-
|
-
|
-
|
Spin kick on creates a alot of pushback on hit or block. At max range hit, muramasa can continue her combos with 214A/B and 236A respectivly.
- landing this normal twice on a standing oppoennt force then airborn.
- Must Delay cancel 214A (standing), 214B (airborn)
|
|
5E / 5[E]
|
| Damage
|
Guard
|
Startup
|
Active
|
Recovery
|
Frame Adv
|
| 2200 (2800)
|
HLA
|
23 (45)
|
-
|
-
|
-
|
Blowback opponent into wallbounce. Exeptional normal that very plus on normal block.
- Destroy certain projectiles on its active frame.
- Less vulnerable to vanishing gaurd follow up if used at maxed range.
|
|
2A
|
| Damage
|
Guard
|
Startup
|
Active
|
Recovery
|
Frame Adv
|
| 400
|
HLA
|
6
|
-
|
-
|
-
|
this should be used in placed of 5A which can be low profiled or 6A agasint.
|
|
2B
|
| Damage
|
Guard
|
Startup
|
Active
|
Recovery
|
Frame Adv
|
| 800
|
L
|
11
|
-
|
-
|
-
|
Low kick that knocks opponent slightly into air
- Allows for tech recovery in air if combo is not continued
|
|
2C
|
| Damage
|
Guard
|
Startup
|
Active
|
Recovery
|
Frame Adv
|
| 1800
|
HLA
|
18
|
-
|
-
|
-
|
Slow AA flip that launches opponent, the start up can low profile some moves.
- has ssmall hitbox behind her to catch cross up attempts.
- must use 236B (mid screen), and 236C (corner) for proper follow up, can use resource additionally.
|
|
2E
|
| Damage
|
Guard
|
Startup
|
Active
|
Recovery
|
Frame Adv
|
| 1400
|
L
|
12
|
-
|
-
|
-
|
Standard sweep into hard knockdown that can be follow up with 623A/B or set up ambiguouse mix up with 236x upon knockdown.
- Can be combo from 2A
- Use Dash momentum to extend hits range
|
|
jA
|
| Damage
|
Guard
|
Startup
|
Active
|
Recovery
|
Frame Adv
|
| 600
|
HA
|
7
|
-
|
-
|
-
|
Yet another jab, solid Air to air option.
- Chains into itself, even on whiff
|
|
jB
|
| Damage
|
Guard
|
Startup
|
Active
|
Recovery
|
Frame Adv
|
| 1200
|
HA
|
8
|
-
|
-
|
-
|
horizontal kick that knocks opponent up slightly
|
|
jC
|
| Damage
|
Guard
|
Startup
|
Active
|
Recovery
|
Frame Adv
|
| 1600
|
HLA
|
18
|
-
|
-
|
-
|
Blowback opponent into wall
|
|
jE
|
| Damage
|
Guard
|
Startup
|
Active
|
Recovery
|
Frame Adv
|
| 1600
|
HA
|
12
|
-
|
-
|
-
|
Spin kick that ground bounces opponent
- Useful for instant overheads
- Continue combo by using f.5B into a jump cancel
|
|
BC Ground Throw Ground Throw
|
| Damage
|
Guard
|
Startup
|
Active
|
Recovery
|
Frame Adv
|
| 1800
|
UNB
|
4
|
-
|
-
|
-
|
Throw into blowback into corner, where opponent will be stuck in web for a moment
- Muramasase combo from change if she midscreen or near corner.
|
|
j.BC Air Throw Air Throw
|
| Damage
|
Guard
|
Startup
|
Active
|
Recovery
|
Frame Adv
|
| 2400
|
UNB
|
4
|
-
|
-
|
-
|
Throw into uppercut that launches
- 236C followup to continue combo
|
|
Specials
Strings of the Spider
236A/B/C
|
| Version
|
Damage
|
Guard
|
Startup
|
Active
|
Recovery
|
Frame Adv
|
| A
|
500
|
HLA
|
13
|
-
|
-
|
-
|
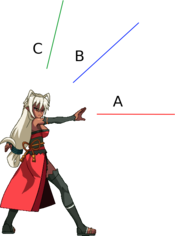
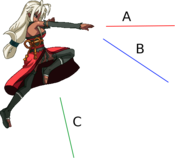
Shoots out a thread which connects to either the opponent or off screen. Once the thread anchors, Muramasa pulls herself along the line towards the anchor point. While Muramasa is reeling herself in, she can cancel the animation into any air action, such as: an attack, air Vanishing Guard, double jump, jD, or throw
- Shoots the thread horizontally
- Used to start offense on a far away grounded opponent
- Will combo into j.B on hit at certain ranges, but on block can go into a small mind game
- The standard option is to hit j.B, but that can be easily beaten by anti-air moves, so it is important to mix up your offense with double jumps, vanishing guards, j.E to delay the high, air escape to move over them, or cancelling a blocked j.B into other options rather than just landing and mashing 2A.
|
| Version
|
Damage
|
Guard
|
Startup
|
Active
|
Recovery
|
Frame Adv
|
| B
|
500
|
HLA
|
13
|
-
|
-
|
-
|
- Shoots the thread upwards at a 45° angle
- Primarily used to link into a combo after 2C
|
| Version
|
Damage
|
Guard
|
Startup
|
Active
|
Recovery
|
Frame Adv
|
| C
|
500
|
HLA
|
13
|
-
|
-
|
-
|
- Shoots the thread almost vertically
- Used to transition into the air, can also be used to combo after an air throw.
|
|
Strings of the Spider
j236A/B/C
|
| Version
|
Damage
|
Guard
|
Startup
|
Active
|
Recovery
|
Frame Adv
|
| A
|
500
|
HLA
|
TODO
|
-
|
-
|
-
|
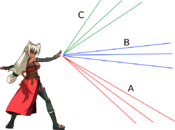
Air version of 236X
- Shoots the thread horizontally
- Used to create left/right situations on grounded opponents or to combo after a landed j.C
|
| Version
|
Damage
|
Guard
|
Startup
|
Active
|
Recovery
|
Frame Adv
|
| B
|
500
|
HLA
|
TODO
|
-
|
-
|
-
|
- Shoots the thread downwards at a 45° angle
- Used for threatening a j.B crossup situation from the air
|
| Version
|
Damage
|
Guard
|
Startup
|
Active
|
Recovery
|
Frame Adv
|
| C
|
500
|
HLA
|
TODO
|
-
|
-
|
-
|
- Shoots the thread almost straight down
- Used to transition from the air to the ground, or to extend combos from j.E
|
|
Eardrum Breaking
623A/B/C
|
| Version
|
Damage
|
Guard
|
Startup
|
Active
|
Recovery
|
Frame Adv
|
| A
|
1800
|
HLA
|
12
|
-
|
-
|
-
|
Charging tackle forward into 2 palm hits
|
| Version
|
Damage
|
Guard
|
Startup
|
Active
|
Recovery
|
Frame Adv
|
| B
|
1900
|
HLA
|
15
|
-
|
-
|
-
|
Charging tackle forward into 2 palm hits
- Distance: Medium; equivalent to her backdash distance
|
| Version
|
Damage
|
Guard
|
Startup
|
Active
|
Recovery
|
Frame Adv
|
| C
|
2100
|
HLA
|
18
|
-
|
-
|
-
|
Charging tackle forward into 2 palm hits
|
|
Web of the Spider
214A/B/C
|
| Version
|
Damage
|
Guard
|
Startup
|
Active
|
Recovery
|
Frame Adv
|
| A
|
1200
|
L
|
25
|
-
|
-
|
-
|
Send out 3 web strands fanned out at a 45° angle down. Spawn web at opponents feed, then pull back web strands
- Will whiff if used too close to opponent
- Even though it's a low, it acts like two hits. You can block the first "hit" (the web spawn) high, and still be able to switch your guard to low to block the actual hit
|
| Version
|
Damage
|
Guard
|
Startup
|
Active
|
Recovery
|
Frame Adv
|
| B
|
1200
|
HLA
|
25
|
-
|
-
|
-
|
Send out 3 web strands fanned out horizontally. Same properties as 214A, except this is a mid
|
| Version
|
Damage
|
Guard
|
Startup
|
Active
|
Recovery
|
Frame Adv
|
| C
|
1600
|
HLA
|
25
|
-
|
-
|
-
|
Send out 3 web strands fanned out at a 45° angle up. Same properties as 214A, except this is a mid
|
|
Supers
Enchant Plus: Linear Acceleration
j236AB
|
| Damage
|
Guard
|
Startup
|
Active
|
Recovery
|
Frame Adv
|
| 5500
|
HLA
|
6 + 7
|
-
|
-
|
-
|
AKA: Maximum Spider! Unlike the move this super is nicknamed for, Linear Acceleration has 0 tracking and only travels in a set diagonally upward trajectory
- A useful tool for ending a combo when the opponent is low on life and you're short on meter, or if you're running a Carol assist load out and can't devote the meter to a Lethal Blaze
- Combos easily after any of Muramasa's air normals, or after 5C 2D. Comboing after j.236AB with assist cancel > 236C is possible, but not recommended as only works for low to ground j.236AB and heavily prorates the combo
- As Muramasa has no hurtbox once she starts traveling across the screen, this super has some uses versus zoning characters (Ouka, Anna) to plow through their projectiles or catching the opponent mashing on long duration air moves like Ethica j.E or Heart's Homing
|
|
Enchant Minus: Magnetic Barrier
623AB
|
| Damage
|
Guard
|
Startup
|
Active
|
Recovery
|
Frame Adv
|
| 4800
|
HLA
|
6
|
-
|
-
|
-
|
Super counter with a fair amount of active frames
- Will not counter throws or projectiles, only physical attacks
- A strong combo starter if assist or blast canceled on hit, the knock back caused by this move can be followed up with anything you could combo a 5E into
|
|
Manual Down Self-repairing
421AB
|
| Damage
|
Guard
|
Startup
|
Active
|
Recovery
|
Frame Adv
|
| 2000
|
HLA
|
6
|
-
|
-
|
-
|
Muramasa's only Invincible startup move other than Variable Rush
- In Spider Form, you replenish health overtime; hold buttons to prolong healing duration
- Move has poor recovery, so don't open yourself up for a punish
- Usage is limited for this super
|
|
Variable Rush
All Variable Rushes allow you to do a sequence of attacks depending on if you hit the A, B, or C button. If you press nothing, the VR will end. If your VR is blocked, you have the option to press nothing, or keep attacking. Even if you keep attacking, you could still stop at any time, assuming you don't execute the final attack.
Depending on what combination of buttons you use, you can come up with some useful strings.
CE
|
| Damage
|
Guard
|
Startup
|
Active
|
Recovery
|
Frame Adv
|
| Varies
|
HLA
|
7 + 12
|
-
|
-
|
-
|
Charging tackle into a 6A
- A route - ends with corner carry into knockdown
- B route - ends with corner carry into launcher
- C route - ends with corner carry; opponent can tech recover in air after
|
|
Lethal Blaze
Railgun MAGATSU
236236BC
|
| Damage
|
Guard
|
Startup
|
Active
|
Recovery
|
Frame Adv
|
| 10000
|
HLA
|
11 + 1
|
-
|
-
|
-
|
Sends large wave that travels fullscreen; mid
- Good for punishing whiffed moves (DPs, etc.)
|
|
Combos
Please check out the Notation section, for help on understanding how to read and write combos!
Meterless
2B 2C> 236B > j.B dj9.B C j.236A > j.E j.236C >j.C
- Basic BnB to setup a wall air tech trap situation
...2B 2C> 236B > j.B dj9.B E j.236C > j.C j.236A > j.E
- Floor bounce tech trap setup
Air throw > Land 236C > j.B dj9.B E j.236C > j.C
Throw D > 236A > j.B dj9.B C j.236A > j.E j.236C >j.C
- Midscreen to corner throw combo
Throw > 5B 2C 236B > j.B dj9.B E j.236C > j.C
Throw D > cl.B 6A 2C > 236B > j.B E j.236C > Land cl.B 5B 214C
- Corner throw to ground tech trap setup
Throw D > 236A > j.B dj9.B C j.236A > j.E j.236C >j.B > Land 236C > Air throw reset
- Throw into corner air throw reset setup to catch mash tech.
Metered and Partners
...2B 2C > 236B > j.B C j.236A > j.E j.236C > j.C j.236AB
- Basic Maximum spider setup combo.
- 5B 5C 623x Dragon 2B 5C 214B Dragon hits Level3/JAB
Blast
j.B dj9.B C j.236A > j.E ABC > land 5E 236A j.E D j.C > land 214B 236236BC
- Midair j.B to assistless Magatsu confirm
2B 5C 2D j.236AB <Amy> 5E ABC > 214B > 5B j.BC <Akane> 236A j.E VR
- Fancy Two assist Blast combo, makes use of both assists and blast in a way that can be extrapolated to other situations easily
Strategy
General
Muramasa's plays best at mid-range: close enough to reach the opponent, but distant enough to not be interrupted during any of her attack startups. Muramasa's gameplan consists of a "hit and run" style; this is due to Muramasa's limited capabilities to maintain offensive momentum, as well as her constant need to reposition herself to maintain optimal range while not being locked down by her opponent
Neutral
623AB uses:
- Can be used to counter the opponent's attempt to blast out of you combo: when you cancel a normal into blast to go in for the kill, input 6>6235 to buffer a dash
- If you see the blue spark of the opponent's escape blast, hit AB. This will activate magnetic barrier and counter their burst, wasting it and giving you a reset combo with a strong starter
- If you do not see the burst spark during your blast freeze, only hit B instead to get a dashing c.5B to continue your combo from
Links
JP: Muramasa page on the Japanese NPB wiki
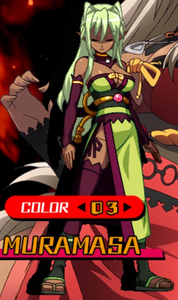
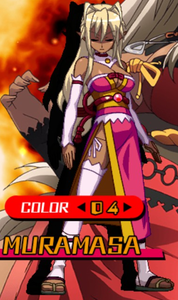
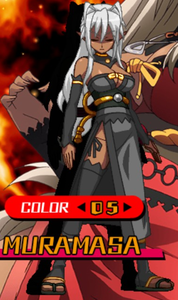
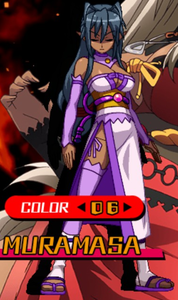
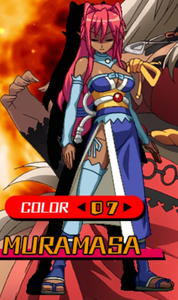
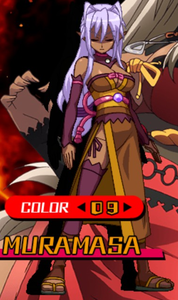
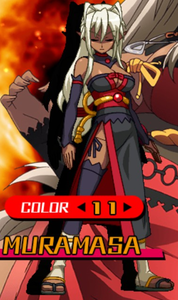
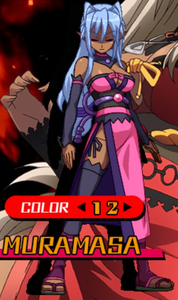
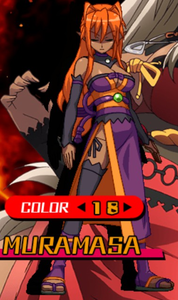
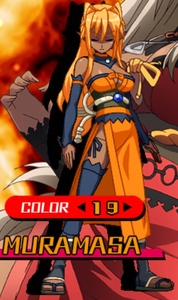
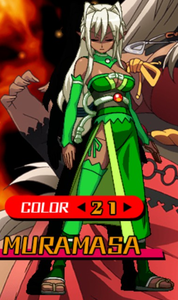
Colors
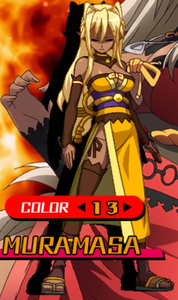
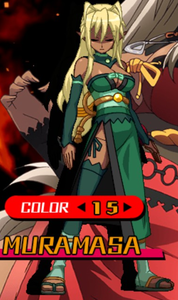
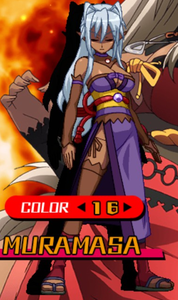
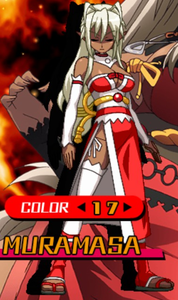
Click the pictures to see the full resolution.
| General
|
|
|
|
| Characters
|
|
|
|
| Partners
|
|


