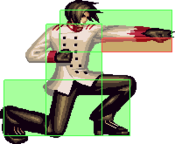
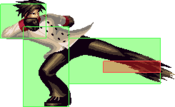
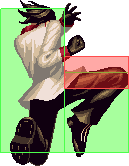
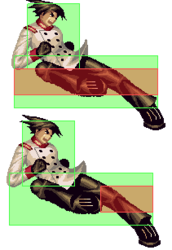
Akatsuki Blitzkampf/Akatsuki: Difference between revisions
(→Background: added a new background translation and a link to Akatsuki's story) |
|||
| (41 intermediate revisions by 11 users not shown) | |||
| Line 1: | Line 1: | ||
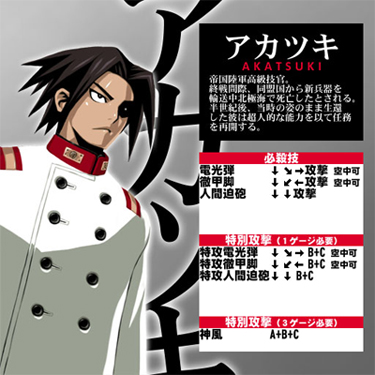
[[image:Movelist_akatsuki.jpg|frame|right|Akatsuki's official profile image]] | {{2 Column Flex|flex1=75|flex2=25|minwidth2=400px | ||
|content2= | |||
[[image:Movelist_akatsuki.jpg|410px|frame|right|Akatsuki's official profile image]] | |||
[[File:Akatsuki-colors-lazy.gif|410px|thumb|right|Ausf Achse Colors 1-6]] | |||
<div style="display:flex;flex-direction: column; margin: 0 20px; width:50%"> | |||
__TOC__ | |||
</div> | |||
|content1= | |||
== Background == | == Background == | ||
A high-ranking technical officer of the Imperial Army. | A high-ranking technical officer of the Imperial Army. | ||
Just before the end of the war, he was presumed dead in the Arctic Ocean while transporting a new weapon from an allied nation. | Just before the end of the war, he was presumed dead in the Arctic Ocean while transporting a new weapon from an allied nation. | ||
| Line 10: | Line 15: | ||
== Introduction == | == Introduction == | ||
Akatsuki is the main character of the game so it's no surprise that he is one of the | Akatsuki is the main character of the game so it's no surprise that he is one of the shotos with a special moveset consisting of a fireball, uppercut, and flying kick. Following the tradition of many shotos, Akatsuki is a well-rounded character with moves for practically every situation. He can convert random pokes into big damage with the opponent in and away from the corner using his devastating 6C or his 6B overhead. With his combo potential, high damage, and a moveset that covers practically all the bases, Akatsuki poses a major threat to any character in the hands of a skilled player. | ||
'''Similar to:''' Ken, Mizoguchi, Ryo Sakazaki | |||
{{ProConTable|width=100 | |||
|pros= | |||
*'''Well Rounded''': Having a shoto-type kit, Akatsuki works well most matchups and scenarios, and is pretty easy to play as. | |||
*'''Damage''': Akatsuki gets high damage and corner carry off any hit that isn't too far from the opponent, and can use his level 3 super to add a huge amount of damage to any confirm. | |||
*'''Pressure''': Akatsuki has solid high/low with 6B, a plus on block overhead that leads into a full combo on hit. On top of this, he has good stagger pressure with more gattlings than other characters and a -2 blockstring ender with 214A. | |||
*'''Meterless Reversal''': 22X is an invincible shoryuken that can be made safe on block with meter. 22A is also one of the fastest attacks in the game at 3 frames. | |||
*'''Strong Pokes''': With f.5B and 2B, Akatsuki has some solid poking normals to use which are safe and confirm well. However, other more specialized characters have better pokes. | |||
|cons= | |||
*'''Weak Fullscreen Neutral''': Akatsuki lacks options to contest or fight once he's out of the mid-range. His fireball is fairly weak, especially compared to other characters with projectiles and anti-projectile tools, and he has no option to quickly close the distance. Even his farthest moving option, 214C, is unsafe without meter, low reward, and doesn't go as far as similar moves on other characters. | |||
}} | |||
''All damage values below were tested on Akatsuki with 1.000 armor ratio and full life on both sides (remember about "Health difference" and "Guts" systems)'' | |||
== Character Summary == | |||
{{3 Column Flex | |||
|content1= | |||
{{Content Box|header=Move list|content= | |||
;Special Moves | |||
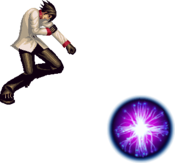
:236A/B/C (EX, Air OK) - ''Denkoudan'': Fireball | |||
:214A/B/C (EX, Air OK) - ''Tekkoukyaku'': Tatsu | |||
:22A/B/C (EX OK) - ''Ningen Hakubou'': Shoryuken/DP | |||
;Level 3 Super | |||
:A+B+C - ''Kamikaze'': Extremely high damage and easy to confirm combo ender | |||
;Unique Attacks | |||
:6B, 6C, j.2C | |||
}} | |||
|content2= | |||
{{Content Box|header=Stats & vitals|content= | |||
*'''Armor Ratio''' = 1.000 | *'''Armor Ratio''' = 1.000 | ||
*'''Forward Speed''' = 5.0 dots/f | |||
*'''Backward Speed''' = 4.0 dots/f | |||
*'''Jump Startup''' = 3F | |||
*'''Backdash Duration''' = 18F | |||
}} | |||
|content3= | |||
{{Content Box|header=Quick combo reference|content= | |||
Basic BNB: 2A > 5B > 6C > j.A > j.B > 214C | |||
Basic BNB #2: 2B > 5B > 214C (> 214B+C) | |||
Metered BNB: 2A > 2B > 6C > j.A > j.B > 5B > A+B+C | |||
Corner BNB: (6B >) 5A > 5B > 6C > 214A > cl.5C > dl.214A > 5A > 5B > (>214A OR 22C 2 hits > 236B+C/A+B+C) | |||
Corner BNB #2: 2B > 5B > 214B > 2A > 5B > 214A > 2A > cl.B > 5B (>214A OR 22C 2 hits > 236B+C/A+B+C) | |||
Reflector: B+C > 214C | |||
}} | |||
}} | |||
== Notes on Ausf. Achse == | |||
'''Universal Changes''' | |||
None of these changes particularly affected Akatsuki. | |||
'''Character Changes''' | |||
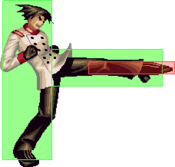
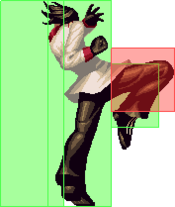
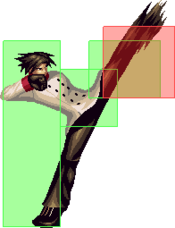
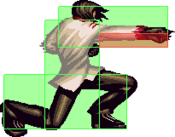
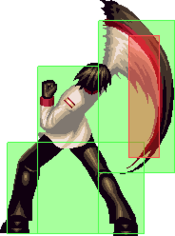
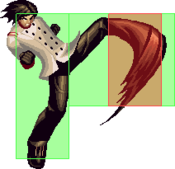
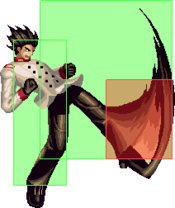
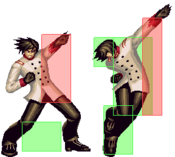
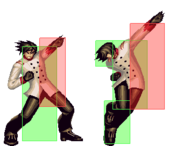
6B is now an overhead hammer punch. Frame data and overall utility remains the same, but it won't hit OTG, can't low crush, and has a more obvious startup animation. | |||
[https://wiki.gbl.gg/w/Akatsuki_Blitzkampf/Changelog/Ausf_Achse Complete Changelog] | |||
}} | |||
== Normal Moves == | == Normal Moves == | ||
{{MoveData | {{MoveData | ||
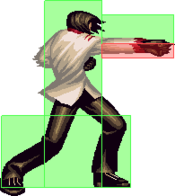
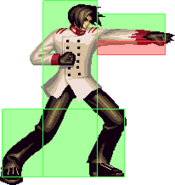
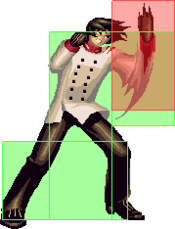
| Line 139: | Line 207: | ||
| advHit = KD | | advHit = KD | ||
| advBlock = -8 | | advBlock = -8 | ||
| description = A sweep kick. The startup isn't too bad | | description = A sweep kick. The startup isn't too bad and it's not that unsafe. However, it is incredibly stubby for a heavy normal, and there's few situations where you'd use it over '''2B'''. It can go under some moves but not enough to make it particularly worthwhile. | ||
}} | }} | ||
}} | }} | ||
| Line 152: | Line 220: | ||
| advHit = +0 | | advHit = +0 | ||
| advBlock = +0 | | advBlock = +0 | ||
| description = A jumping knee attack with short range. This isn't really a good move to use in air-to-air situations because its range is short and the attack doesn't stay out that long. It is useful in juggle combos however | | description = A jumping knee attack with short range. This isn't really a good move to use in air-to-air situations because its range is short and the attack doesn't stay out that long. It is useful in juggle combos however. | ||
}} | }} | ||
}} | }} | ||
| Line 165: | Line 233: | ||
| advHit = Variable | | advHit = Variable | ||
| advBlock = Variable | | advBlock = Variable | ||
| description = A downward jumping kick. This move has quite a large hitbox | | description = A downward jumping kick. This move has quite a large hitbox including behind, making it good for crossups. It also stays out for a while and it hits at a nice angle. | ||
}} | }} | ||
}} | }} | ||
| Line 178: | Line 246: | ||
| advHit = Variable | | advHit = Variable | ||
| advBlock = Variable | | advBlock = Variable | ||
| description = The first half animation of an axe kick that hits upward. | | description = The first half animation of an axe kick that hits upward. Decent air to air that comes out quickly but nothing special otherwise. | ||
}} | }} | ||
}} | }} | ||
| Line 191: | Line 259: | ||
| advHit = Variable | | advHit = Variable | ||
| advBlock = Variable | | advBlock = Variable | ||
| description = A jumping axe kick. This move does more damage than the previous two and it comes out relatively quick. It will slam an airborne opponent into the ground if it hits them. | | description = A jumping axe kick. Among the best jump-ins in the game with huge range both vertically and horizontally, even beating some anti-airs. This move does more damage than the previous two and it comes out relatively quick. It will slam an airborne opponent into the ground if it hits them. Very good general use aerial. | ||
}} | }} | ||
}} | }} | ||
| Line 204: | Line 272: | ||
| advHit = Variable | | advHit = Variable | ||
| advBlock = Variable | | advBlock = Variable | ||
| description = A spin kick performed while jumping in place. On hit, this attack will send the opponent flying across the screen and bounce | | description = A spin kick performed while jumping in place. On hit, this attack will send the opponent flying across the screen and cause a wall bounce. Leads to mediocre juggles in midscreen and better juggles in the corner. Only really useful for punishing after baiting an option with neutral jump or occasionally for air to air. | ||
}} | }} | ||
}} | }} | ||
| Line 221: | Line 289: | ||
| advBlock = +4 | | advBlock = +4 | ||
| description = Akatsuki hops forward while performing a slower version of his j.C. | | description = Akatsuki hops forward while performing a slower version of his j.C. | ||
::*Since this move is an overhead, it | ::*Since this move is an overhead, it gives Akatsuki one of the better high-low games. This is further supplemented by it's ability to be chained from most of his ground normals. | ||
::*If the attack hits, Akatsuki can go straight into a combo by linking a 2A or 5C | ::*If the attack hits, Akatsuki can go straight into a combo by linking a 2A or c.5C (much harder) into a launcher for very good damage. | ||
::* | ::*Being plus on block makes it useful even if the opponent reacts, as you get to keep your turn. | ||
Note: in Ausf. Achse, this move was changed to the overhead chop now familiar to UNI Akatsuki players. | Note: in Ausf. Achse, this move was changed to the overhead chop now familiar to UNI Akatsuki players. | ||
}} | }} | ||
| Line 235: | Line 303: | ||
{{AttackData-ABK | {{AttackData-ABK | ||
| damage = 1400~ | | damage = 1400~ | ||
| guard = High | | guard = High/Low | ||
| startup = 10 | | startup = 10 | ||
| advHit = Launch | | advHit = Launch | ||
| Line 241: | Line 309: | ||
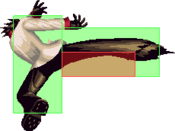
| description = Akatsuki dashes forward while performing a swift and powerful uppercut that will send the opponent flying vertically. | | description = Akatsuki dashes forward while performing a swift and powerful uppercut that will send the opponent flying vertically. | ||
::*This is probably the meat of Akatsuki's combos as it allows him to perform all sorts of damaging juggles either midscreen or close to the corner. | ::*This is probably the meat of Akatsuki's combos as it allows him to perform all sorts of damaging juggles either midscreen or close to the corner. | ||
::*Unlike its UNIB version, it cannot be cancelled regardless of the opponent's state and if the opponent blocks it at close range, Akatsuki is wide open to punishment. As a result, this move is best utilized in combos. | ::*Unlike its UNIB version, it cannot be cancelled regardless of the opponent's state and if the opponent blocks it at close range, Akatsuki is wide open to punishment. As a result, this move is best utilized in combos. | ||
}} | }} | ||
| Line 260: | Line 326: | ||
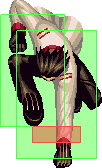
| description = Akatsuki kneels down with his fist pointing downward as he moves up slightly and then straight down with great force. | | description = Akatsuki kneels down with his fist pointing downward as he moves up slightly and then straight down with great force. | ||
This move completely cancels any jump trajectory and can be used for baiting anti-air normals because of the slight delay at the beginning. | ::*This move completely cancels any jump trajectory and can be used for baiting anti-air normals because of the slight delay at the beginning. | ||
It can be chained into | ::*It can be chained into various air normals for further effectiveness. | ||
::*Will generally be minus but safe on block thanks to the additional landing recovery. | |||
::*Can be comboed off if it hits especially deep or meaty, although this is very situational and not easy. | |||
::*Very annoying for most of the cast to punish due to it being hard to air to air, anti-air, or punish on block or whiff. | |||
}} | }} | ||
}} | }} | ||
| Line 346: | Line 415: | ||
| advBlock = -15 | | advBlock = -15 | ||
| description = | | description = | ||
::*'''B''' version hits twice ('''nj.C''' followed by '''nj.B'''). | ::*'''B''' version hits twice ('''nj.C''' followed by '''nj.B'''). | ||
::*Knocks up the opponent. You can juggle after it with 2A and combo | ::*Incredibly unsafe but many opponents will miss the punish if they're expecting the third hit. | ||
::*Knocks up the opponent. You can juggle after it with 2A and combo in the corner. | |||
}} | }} | ||
{{AttackData-ABK | {{AttackData-ABK | ||
| Line 359: | Line 429: | ||
| description = | | description = | ||
::*'''C''' version hits thrice, ('''B''' version ending with a '''j.C''') and slams the opponent into the ground. | ::*'''C''' version hits thrice, ('''B''' version ending with a '''j.C''') and slams the opponent into the ground. | ||
::*The third hit is an overhead, and it | ::*Good midscreen combo ender, although the oki isn't the best. | ||
::*The third hit is an overhead, although anyone opponent that knows what they're doing won't be hit by it. | |||
::*Travels fairly far forwards, allowing it to be used as a student forward attack option. However, it isn't nearly as effective as similar attacks on other characters. | |||
::*Can be tked to reduce the startup and recovery, making it much more useful in neutral compared to the grounded version. | |||
}} | }} | ||
{{AttackData-ABK | {{AttackData-ABK | ||
| Line 374: | Line 447: | ||
::*It's not particularly useful in juggles because depending on how many hits you use before it, a lot of the hits will miss and you won't get a lot of damage out of it. | ::*It's not particularly useful in juggles because depending on how many hits you use before it, a lot of the hits will miss and you won't get a lot of damage out of it. | ||
::*You can use this move in the event that you land a random poke on the ground but are too far away to combo into his '''6C'''. | ::*You can use this move in the event that you land a random poke on the ground but are too far away to combo into his '''6C'''. | ||
::*The air versions ends instead with an axe kick that knocks the opponent into the ground, making it more consistent. However, it still does less damage. | |||
}} | }} | ||
}} | }} | ||
| Line 390: | Line 464: | ||
| advHit = KD | | advHit = KD | ||
| advBlock = -23 | | advBlock = -23 | ||
| description = Akatsuki leaps vertically with his fist pointed upward.<br>This is your typical dragon punch move. It used to have more invincibility frames, but can still be used as an anti-air, reversal and in combos. | | description = Akatsuki leaps vertically with his fist pointed upward.<br>This is your typical dragon punch move. It used to have more invincibility frames, but can still be used as an anti-air, reversal and in combos. Can be avoided by long and disjointed normals although these are few in number. Used as a combo ender for corner combos since it consistently combos when the juggle gravity is higher. | ||
::*'''A''' version is a single hit. | ::*'''A''' version is a single hit. | ||
::*Completely invincible on startup. | ::*Completely invincible on startup. | ||
| Line 404: | Line 478: | ||
| description = | | description = | ||
::*'''B''' version hits twice. | ::*'''B''' version hits twice. | ||
::* | ::*Completely invincible on startup. | ||
}} | }} | ||
{{AttackData-ABK | {{AttackData-ABK | ||
| Line 429: | Line 503: | ||
::*This can eat up to half of the guard gauge in case the opponent decides to block it on the air. Though, if they block it on the ground, you're as good as dead. | ::*This can eat up to half of the guard gauge in case the opponent decides to block it on the air. Though, if they block it on the ground, you're as good as dead. | ||
::*Comboable off '''214A'''. | ::*Comboable off '''214A'''. | ||
::*The last hit ends with an '''nj.C''' which induces a wall bounce. | ::*The last hit ends with an '''nj.C''' which induces a wall bounce. However, you can't combo off this since there's too much recovery. | ||
::*Does the most damage of his EX moves and it can be used on wakeup but use it wisely as it's really easy to parry and the opponent has all day to punish you as you land. | ::*Does the most damage of his EX moves and it can be used on wakeup but use it wisely as it's really easy to parry and the opponent has all day to punish you as you land. | ||
}} | }} | ||
| Line 453: | Line 526: | ||
::*This super is very damaging but it also gives the opponent quite a bit of meter as well. | ::*This super is very damaging but it also gives the opponent quite a bit of meter as well. | ||
::*If the initial hit is blocked, he will perform about 8 hits before stopping. The final hit pushes them back a bit so it looks relatively safe. | ::*If the initial hit is blocked, he will perform about 8 hits before stopping. The final hit pushes them back a bit so it looks relatively safe. | ||
::*Can followup after the wallbounce(distance dependent) | ::*Can followup after the wallbounce(distance dependent) | ||
::*[https://twitter.com/Nagisa_ai/status/1101830057868181504 In the rare occasion that this super manages to OTG, he will perform the rest of the attacks and if the opponent blocks it, more often then not, the very last hit will break their guard.] | ::*[https://twitter.com/Nagisa_ai/status/1101830057868181504 In the rare occasion that this super manages to OTG, he will perform the rest of the attacks and if the opponent blocks it, more often then not, the very last hit will break their guard.] | ||
::*This is quite possibly one of the easiest level 3 attacks to insert into a combo. During a juggle or on the ground, your opponent will learn to fear your '''B''' normals once you've gained a level 3. | ::*This is quite possibly one of the easiest level 3 attacks to insert into a combo. During a juggle or on the ground, your opponent will learn to fear your '''B''' normals once you've gained a level 3. | ||
| Line 467: | Line 540: | ||
|data = | |data = | ||
{{AttackData-ABK | {{AttackData-ABK | ||
|damage = | |damage = 2000~ | ||
|guard = Throw | |guard = Throw | ||
|startup = 5 | |startup = 5 | ||
| Line 486: | Line 559: | ||
|advhit = KD | |advhit = KD | ||
|advBlock = --- | |advBlock = --- | ||
|description = Akatsuki throws the opponent straight into the ground below him. This throw can not be tech rolled. | |description = Akatsuki throws the opponent straight into the ground below him. This throw can not be tech rolled. Akatsuki can perform an air action, such as '''j.236''' or '''j.214''' after it, although this has no real utility. | ||
}} | }} | ||
}} | }} | ||
| Line 535: | Line 608: | ||
== General Strategy == | == General Strategy == | ||
'''[https://youtu.be/q0hKiDVqtLI zix's Akatsuki Guide video for Ausf. Achse & PC ABK.] This video is one of the best so far. Not only is the editing great, but it also has plenty of info that can actually help others.''' | |||
=== Overview === | === Overview === | ||
In spite of having the movelist of a shoto, Akatsuki can not be played like one. He can not spam projectiles and wait for the opponent to jump at him so he can score an anti-air. The reflector system absolutely kills that style of play. However, Akatsuki is a very flexible character with great normals, solid mixups, and powerful combos. His moves allow him to punish mistakes on the fly with oftentimes devastating results. | In spite of having the movelist of a shoto, Akatsuki can not be played like one. He can not spam projectiles and wait for the opponent to jump at him so he can score an anti-air. The reflector system absolutely kills that style of play. However, Akatsuki is a very flexible character with great normals, solid mixups, and powerful combos. His moves allow him to punish mistakes on the fly with oftentimes devastating results. | ||
| Line 581: | Line 657: | ||
:* 5A (air blocked) -> dash -> throw | :* 5A (air blocked) -> dash -> throw | ||
== | === Other Resources === | ||
[https://youtu.be/dktSHQlEviY Funny jokes] | |||
== Combos == | |||
=== Combo terminology === | |||
{| class="wikitable sortable" border="1" style="min-width: 300px; text-align: left" | |||
|- | |||
! style="width: 3em;" | Symbol!! | Meaning | |||
|- | |||
| > || Cancel from the previous move to the following move | |||
|- | |||
| land || The player must land | |||
|- | |||
| , || Link from the previous move to the following move | |||
|- | |||
| dl./delay || Delay before using the following move | |||
|- | |||
| nj.X || Neutral Jump | |||
|- | |||
| AA || Anti-Air, must hit an airborne opponent | |||
|- | |||
| [X] || Hold the input | |||
|- | |||
| (X) || Optional input | |||
|- | |||
| [X]*N || Repeat (sequence) N number of times | |||
|} | |||
=== Midscreen combos === | |||
:Alternative to the basic meterless combo. This combo gives more momentum at the expense of damage. The more hits before the launcher, the wider the damage gap. | {| class="wikitable sortable" border="1" style="text-align: center" | ||
|- | |||
!! style="width: 35em;" | Combo !! Damage !! Video !! style="width: 45em;" | Notes | |||
|- | |||
|| 2B > 5B > 214C/214BC/ABC || 2239 || [https://youtu.be/G7k2x5p--IA Link] || | |||
The most basic 214C confirm is also your only option outside of 6C range (e.g. tip 2B/5B range) | |||
|- | |||
|| 2A > 5B > 6C, j.B > j.214C || 2212 || [https://youtu.be/cvkmr2f0bcw Link] || | |||
A variation of the previous combo that works at 6C tip range | |||
|- | |||
|| (j.C) > 2A > 5B > 6C, j.A > dl.j.B > land 214C || 2476 || [https://youtu.be/cYELh1Kw0FM Link] || | |||
An easy combo that does fair damage for no meter. To get the combo to work, pause slightly between the two jumping attacks. 214C upon landing does more damage than the air version. This is the basic template for most of Akatsuki's juggles | |||
|- | |||
|| (j.C) > 2A > 5B > 6C, j.A, j.B > 5B/214A > ABC || 6545 || [https://youtu.be/nigTYsjdmBk Link] || | |||
Same combo as the one above although it ends in his level 3. His level 3 combos nicely off his B attacks both on the ground and in juggles, so use it if you need to make a comeback and establish some momentum | |||
|- | |||
|| (j.C) > 2A > 5B > 6C, j.A, dl.Air Throw || 2142 || [https://youtu.be/_Cd1k9yzhe0 Link] || | |||
Alternative to the basic meterless combo. This combo gives more momentum at the expense of damage. The more hits before the launcher, the wider the damage gap | |||
|- | |||
|| 6B, 5A > 5B > 214C || 2580 || [https://youtu.be/de-EP-VrYJI Link] || | |||
Standard combo from the 6B overhead | |||
|- | |||
|| 6B, 5A > 6C, j.A, j.B > land 214C || 2888 || [https://youtu.be/_yUEPNuzMfI Link] || | |||
More damaging version of the one above | |||
|- | |||
|| 22C(2) > 236BC || 2598 || [https://youtu.be/_____ Link] || | |||
This is more of a way to have a safe wakeup attempt/deal guard damage in the corner. You can super cancel up to the second hit of the 22C but beware of reflector-happy opponents as you are unable to super cancel the attack if the 22C gets reflected at any point | |||
|- | |||
|| Reflector, 5B > 214C || - || [https://youtu.be/_____ Link] || | |||
Simple combo off the reflector. This works if you reflect the opponent's air attack or if you're in the air and you reflect the opponent's ground attack. '''ONLY WORKS IN VANILLA''' | |||
|- | |||
|| nj.C > Dash 5B > 214C || 2824 || [https://youtu.be/_____ Link] || | |||
nj.C lets you juggle afterwards | |||
|} | |||
=== Corner Combos === | |||
All of these combos can be finished with ABC instead of 236BC if you have enough meter, or with 22A instead of 22C if you have none. Damage values always assumes a 22C(1) > 236BC ender | |||
{| class="wikitable sortable" border="1" style="text-align: center" | |||
: | |- | ||
!! style="width: 35em;" | Combo !! Damage !! Video !! style="width: 45em;" | Notes | |||
|- | |||
|| (j.C) > 5BB > 6C, nj.A, nj.C > land > j.A, j.B > land > 5BB > 22C(2) > 236BC || 4616 || [https://youtu.be/gQrSXnqo_b4 Link] || | |||
In the corner, Akatsuki can do longer and more damaging juggle combos. Be sure to super cancel the 22C on the second hit since 236BC does more damage on the ground than it does in the air | |||
|- | |||
|| (j.C) > 5BB > 6C, j.A, j.B > c.5C > dl.214A > {5A > 5BB > 22A}/{5A > 5B > 22C(2) > 236BC} || 4662 || [https://youtu.be/jHALUrV7gH8 Link] || | |||
214A juggle that also works slightly further away from the corner. Use f.5B if not in c.5C range | |||
|- | |||
|| (j.C) > c.5C > 6C, 214A, c.5C > dl.214A > 5A > 5BB > 22C(2) > 236BC || 5635 || [https://youtu.be/rR1LN5o8j0M Link] || | |||
This combo is the 214A loop. It requires a bit of timing and precision but is among one of the most damaging corner combos he has. Use f.5B instead of c.5C if you're not close enough, the combo still works | |||
|- | |||
|| 2A > 2B > 5B > 214B, 2A > 5B > 214A, 5A > 5BB > 22C(2) > 236BC || 4475 || [https://youtu.be/NKSr4yXwRk4 Link] || | |||
A shortened version of the 214A loop that can be setup from outside of the corner. Use this if you are out of range to land his 6C launcher. The 2A after 214B is a fairly tight link | |||
|- | |||
|| Reflector, 5B > 214A, 5B > 22C(2) > 236BC) || - || [https://youtu.be/_____ Link] || | |||
A longer combo that does more damage than the midscreen reflector combo. This one can do upwards of about ~3000+ damage which isn't bad off a reflector | |||
|- | |||
|| 22C(2) > 236BC, 2A > 5BB > 22A || 3474 || [https://youtu.be/xzxyUG1nfnE Link] || | |||
For when your guard break setup catches mashing | |||
|- | |||
|| 22C(1) > 236BC, 5B > 214A, 2A > 5BB > 22A || 3383 || [https://youtu.be/oGblUZ7nsRM Link] || | |||
A variation of the previous combo for when only the first hit of 22C was blocked | |||
|} | |||
=== Ausf Achse Combos === | |||
This will only lists combos that changed. | |||
'''Reflector Combos''' | |||
: | {| class="wikitable sortable" border="1" style="text-align: center" | ||
|- | |||
!! style="width: 35em;" | Combo !! Damage !! Video !! style="width: 45em;" | Notes | |||
: | |- | ||
|| Reflector, 214C || 1385 || [https://youtu.be/FcSOCPIFTt0 Link] || | |||
Basic easy reflector combo | |||
|- | |||
|| Reflector, 5B > ABC || 4587 || [https://youtu.be/kjFR0yquPRI Link] || | |||
Level 3 confirm combo. Does underwhelming damage but it's great for finishing off opponents | |||
|- | |||
|| Reflector, 5B > 214A, 2A > 2B > 22C || 2055 || [https://youtu.be/F8Oc0Pcb-Q4 Link] || | |||
Corner reflector combo. Not nearly as good as being able to do a full loop but it's nice to do | |||
|- | |||
: | || Air Reflector, 5C > 214C || 1447 || [https://youtu.be/BMl-0opU4pA Link] || | ||
Air reflector gives a better launch, allowing this combo to work. Works with both f.5C and c.5C | |||
|} | |||
== Frame Data == | == Frame Data == | ||
| Line 696: | Line 836: | ||
== Trivia == | == Trivia == | ||
[[Image:Intro_akatsuki.jpg|frame|left|Akatsuki's Intro]] | [[Image:Intro_akatsuki.jpg|frame|left|Akatsuki's Intro]] <!-- Let's move this to the story page soon. --> | ||
{{ABK}} | {{ABK}} | ||
Latest revision as of 03:54, 7 January 2023
Background
A high-ranking technical officer of the Imperial Army. Just before the end of the war, he was presumed dead in the Arctic Ocean while transporting a new weapon from an allied nation. Half a century later, he returned looking exactly the same and, having now superhuman abilities, he resumes his mission. (from character selection screen)
Read the translation of his arcade mode!
Introduction
Akatsuki is the main character of the game so it's no surprise that he is one of the shotos with a special moveset consisting of a fireball, uppercut, and flying kick. Following the tradition of many shotos, Akatsuki is a well-rounded character with moves for practically every situation. He can convert random pokes into big damage with the opponent in and away from the corner using his devastating 6C or his 6B overhead. With his combo potential, high damage, and a moveset that covers practically all the bases, Akatsuki poses a major threat to any character in the hands of a skilled player.
Similar to: Ken, Mizoguchi, Ryo Sakazaki
| Strengths | Weaknesses |
|---|---|
|
|
All damage values below were tested on Akatsuki with 1.000 armor ratio and full life on both sides (remember about "Health difference" and "Guts" systems)
Character Summary
- Special Moves
- 236A/B/C (EX, Air OK) - Denkoudan: Fireball
- 214A/B/C (EX, Air OK) - Tekkoukyaku: Tatsu
- 22A/B/C (EX OK) - Ningen Hakubou: Shoryuken/DP
- Level 3 Super
- A+B+C - Kamikaze: Extremely high damage and easy to confirm combo ender
- Unique Attacks
- 6B, 6C, j.2C
- Armor Ratio = 1.000
- Forward Speed = 5.0 dots/f
- Backward Speed = 4.0 dots/f
- Jump Startup = 3F
- Backdash Duration = 18F
Basic BNB: 2A > 5B > 6C > j.A > j.B > 214C
Basic BNB #2: 2B > 5B > 214C (> 214B+C)
Metered BNB: 2A > 2B > 6C > j.A > j.B > 5B > A+B+C
Corner BNB: (6B >) 5A > 5B > 6C > 214A > cl.5C > dl.214A > 5A > 5B > (>214A OR 22C 2 hits > 236B+C/A+B+C)
Corner BNB #2: 2B > 5B > 214B > 2A > 5B > 214A > 2A > cl.B > 5B (>214A OR 22C 2 hits > 236B+C/A+B+C)
Reflector: B+C > 214C
Notes on Ausf. Achse
Universal Changes
None of these changes particularly affected Akatsuki.
Character Changes
6B is now an overhead hammer punch. Frame data and overall utility remains the same, but it won't hit OTG, can't low crush, and has a more obvious startup animation.
Normal Moves
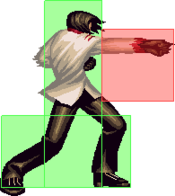
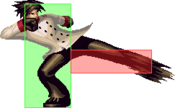
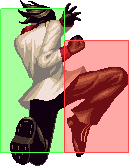
5A 5AA 5AA
|
|---|
5B (close)
|
|---|
5B (far) Tippytoes Tippytoes
|
|---|
5C (close)
|
|---|
5C (far)
|
|---|
2A
|
|---|
2B
|
|---|
2C
|
|---|
j.A
|
|---|
j.B
|
|---|
nj.B
|
|---|
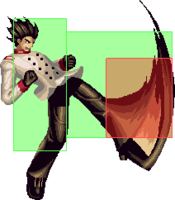
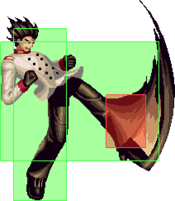
j.C Get used to this sprite. You'll see it here a lot. Get used to this sprite. You'll see it here a lot.
|
|---|
nj.C
|
|---|
Command Normals
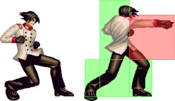
兜割リ - Kabuto Wari
6B |
|---|
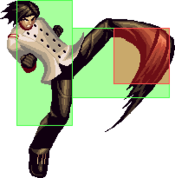
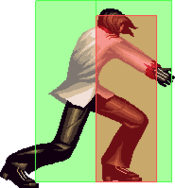
顎割リ - Agito Wari 6C Miss this and you're dead Miss this and you're dead
|
|---|
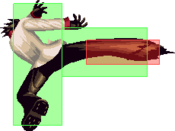
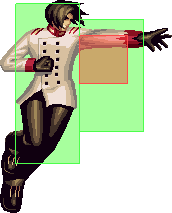
瓦割リ - Kawara Wari j.2C Can you call this a divekick? Can you call this a divekick?
|
|---|
Special Moves
電光弾 - Denkoudan 236 A/B/C/B+C (Air OK!) Hadouken! Hadouken!
|
|---|
徹甲脚 - Tekkoukyaku 214 A/B/C/B+C (Air OK!) Che- Che- Che- Che- Chesto! Chesto!
|
|---|
人間迫砲 - Ningen Hakubou 22 A/B/C/B+C It's no shoryuken but it's cute anyways. It's no shoryuken but it's cute anyways.
|
|---|
Super Move
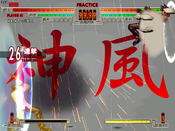
神風 - Kamikaze A+B+C 5AA c.5B c.5C f.5B f.5C 6B 2AA 2B 2C c.5B 6C 236 BOOM 5AA c.5B c.5C f.5B f.5C 6B 2AA 2B 2C c.5B 6C 236 BOOM
|
|---|
Universal Mechanics
Throws
Ground Throw 4/5/6 A+B Bzzt Bzzt
|
|---|
Air Throw
j.4/5/6 A+B |
|---|
Reflector
Standing Reflector 5B+C It's just a thicc 5A. It's just a thicc 5A.
|
|---|
Crouching Reflector
2B+C |
|---|
Jumping Reflector
j.B+C |
|---|
General Strategy
zix's Akatsuki Guide video for Ausf. Achse & PC ABK. This video is one of the best so far. Not only is the editing great, but it also has plenty of info that can actually help others.
Overview
In spite of having the movelist of a shoto, Akatsuki can not be played like one. He can not spam projectiles and wait for the opponent to jump at him so he can score an anti-air. The reflector system absolutely kills that style of play. However, Akatsuki is a very flexible character with great normals, solid mixups, and powerful combos. His moves allow him to punish mistakes on the fly with oftentimes devastating results.
Basics
Since Akatsuki is a well-rounded character, he isn't all that confusing to use effectively. Every one of his moves have a specific application, some of which can be used in more than one situation. Knowing how each move can be utilized in each of the many different situations is essential for success just like with any other character.
Pokes/Footsies
Akatsuki is equipped with very useful pokes. These pokes are: 5A, 2A, 5B, 2B. The A attacks are best utilized up-close because they are quick and have short range. The B attacks are best utilized with a little more space between you and the opponent. The B attacks are great for footsies because of their range and speed. On hit you can turn them into a combo depending on your spacing. Or block, you can cancel into a 236_(to create space) or a 214A to stay within close proximities.
Anti-Air
Akatsuki has a nice variety of moves which can be used for anti-air. However, due to the simplistic parrying system in the game, it isn't always wise to attempt an anti-air because not all of his anti-air options are parry-proof. This section lists his anti-airs and specific situations in which they may be used. As usual, mixing them up will yield better results.
- 22A/B/C: This is perhaps the most obvious one since it acts like a Shoryuken. It will beat out a lot of attacks provided that you do not attempt it too early. Mixing in the different versions can help throw off the opponent's parry timing. eg: You do 22A but the opponent was expecting a 22B/C and ends up doing an extra parry. This allows you to land without taking damage and the situation ends neutral.
- 22+B+C: This one can be used much like the one above. It deals much greater damage but it is also a lot riskier to use since if it gets blocked or parried, you are left completely vulnerable on the way down. It is best utilized if the opponent mistimes their meaty jump-in. Use this one with caution.
- 5C: This attack hits at a nice upward angle making it a pretty good anti-air. If the opponent takes the hit, it will knock them down allowing you to close the gap between you. If they block it, it will push them back a bit leaving you safe.
The following can be used in situations in which the opponent jumps at you but none of the above will hit them reliably:
- 5A: This can work against close empty jumps if you weren't quick enough to pull off a 22_ and are too close to hit a 5C. Hitting the opponent with one of these will cause them to quickly land on their feet which allows you to play a high-low upon their landing. You can also do this if they decided to block the 5A instead.
- 5B: This may not look like an anti-air, but it can be used as one. This will hit opponents if they are outside your normal anti-air range but happen to stick out an attack pretty late. If they decided to block instead, it will push them back at a safe distance.
- 2C: If the opponent sticks out a move, you might get hit, but otherwise this move will knock them down if they weren't holding crouch guard upon landing.
Mixups
Once Akatsuki gets a knockdown, he can continue to pressure his opponents as they are standing up.
High/Low
Akatsuki's 6B is an overhead and as a result, it must be blocked standing. On hit, you can link a 5A/2A into a combo for a knockdown and sometimes a corner situation. Alternatively, after a knockdown you can attempt this early and whiff it on purpose and as a result you can bait any wakeup attacks and block them in time. You can also use a meaty 2B after a whiffed 6B which must be blocked low and turn it into a combo which will also result in another knockdown or a tech punish. If the 6B gets blocked, you are relatively safe from punishment.
Crossups
Akatsuki's j.B is a great crossup. When done correctly, the opponent must block in the opposite direction from which they are facing because he is no longer in front of them when the j.B connects. Because of the position and timing, it can be a difficult attack to parry consistently. If you can aim your jump in such a way that you are at the very top of the opponent's hitbox, you can confuse the opponent into thinking whether or not the j.B will cross them up. When the j.B does hit (crossup or not), you can turn it into a damaging combo.
Guard Break
Also worth mentioning is Akatsuki's amazing guard damage, especially in the corner. Whenever you're not outright opening your opponent up, you will at least be close to breaking his guard, unless he's parrying.
214A > 22C(2) > 236BC alone eats up almost half of the guard gauge, with no gap to parry the 236BC once the DP has been blocked, while also checking for mashing. A good use of meter for when you really need the pressure.
Tick Throw Setups
Tick throws will normally come off blocked attacks. But most of these will also work in the case that the initial attack hits the opponent and they don't poke out in time.
- 2A -> throw
- 6B -> [2A] -> throw (The 2A is optional)
- j.B -> throw (This also work if the j.B crosses them up)
- 5A (air blocked) -> dash -> throw
Other Resources
Combos
Combo terminology
| Symbol | Meaning |
|---|---|
| > | Cancel from the previous move to the following move |
| land | The player must land |
| , | Link from the previous move to the following move |
| dl./delay | Delay before using the following move |
| nj.X | Neutral Jump |
| AA | Anti-Air, must hit an airborne opponent |
| [X] | Hold the input |
| (X) | Optional input |
| [X]*N | Repeat (sequence) N number of times |
Midscreen combos
| Combo | Damage | Video | Notes |
|---|---|---|---|
| 2B > 5B > 214C/214BC/ABC | 2239 | Link |
The most basic 214C confirm is also your only option outside of 6C range (e.g. tip 2B/5B range) |
| 2A > 5B > 6C, j.B > j.214C | 2212 | Link |
A variation of the previous combo that works at 6C tip range |
| (j.C) > 2A > 5B > 6C, j.A > dl.j.B > land 214C | 2476 | Link |
An easy combo that does fair damage for no meter. To get the combo to work, pause slightly between the two jumping attacks. 214C upon landing does more damage than the air version. This is the basic template for most of Akatsuki's juggles |
| (j.C) > 2A > 5B > 6C, j.A, j.B > 5B/214A > ABC | 6545 | Link |
Same combo as the one above although it ends in his level 3. His level 3 combos nicely off his B attacks both on the ground and in juggles, so use it if you need to make a comeback and establish some momentum |
| (j.C) > 2A > 5B > 6C, j.A, dl.Air Throw | 2142 | Link |
Alternative to the basic meterless combo. This combo gives more momentum at the expense of damage. The more hits before the launcher, the wider the damage gap |
| 6B, 5A > 5B > 214C | 2580 | Link |
Standard combo from the 6B overhead |
| 6B, 5A > 6C, j.A, j.B > land 214C | 2888 | Link |
More damaging version of the one above |
| 22C(2) > 236BC | 2598 | Link |
This is more of a way to have a safe wakeup attempt/deal guard damage in the corner. You can super cancel up to the second hit of the 22C but beware of reflector-happy opponents as you are unable to super cancel the attack if the 22C gets reflected at any point |
| Reflector, 5B > 214C | - | Link |
Simple combo off the reflector. This works if you reflect the opponent's air attack or if you're in the air and you reflect the opponent's ground attack. ONLY WORKS IN VANILLA |
| nj.C > Dash 5B > 214C | 2824 | Link |
nj.C lets you juggle afterwards |
Corner Combos
All of these combos can be finished with ABC instead of 236BC if you have enough meter, or with 22A instead of 22C if you have none. Damage values always assumes a 22C(1) > 236BC ender
| Combo | Damage | Video | Notes |
|---|---|---|---|
| (j.C) > 5BB > 6C, nj.A, nj.C > land > j.A, j.B > land > 5BB > 22C(2) > 236BC | 4616 | Link |
In the corner, Akatsuki can do longer and more damaging juggle combos. Be sure to super cancel the 22C on the second hit since 236BC does more damage on the ground than it does in the air |
| (j.C) > 5BB > 6C, j.A, j.B > c.5C > dl.214A > {5A > 5BB > 22A}/{5A > 5B > 22C(2) > 236BC} | 4662 | Link |
214A juggle that also works slightly further away from the corner. Use f.5B if not in c.5C range |
| (j.C) > c.5C > 6C, 214A, c.5C > dl.214A > 5A > 5BB > 22C(2) > 236BC | 5635 | Link |
This combo is the 214A loop. It requires a bit of timing and precision but is among one of the most damaging corner combos he has. Use f.5B instead of c.5C if you're not close enough, the combo still works |
| 2A > 2B > 5B > 214B, 2A > 5B > 214A, 5A > 5BB > 22C(2) > 236BC | 4475 | Link |
A shortened version of the 214A loop that can be setup from outside of the corner. Use this if you are out of range to land his 6C launcher. The 2A after 214B is a fairly tight link |
| Reflector, 5B > 214A, 5B > 22C(2) > 236BC) | - | Link |
A longer combo that does more damage than the midscreen reflector combo. This one can do upwards of about ~3000+ damage which isn't bad off a reflector |
| 22C(2) > 236BC, 2A > 5BB > 22A | 3474 | Link |
For when your guard break setup catches mashing |
| 22C(1) > 236BC, 5B > 214A, 2A > 5BB > 22A | 3383 | Link |
A variation of the previous combo for when only the first hit of 22C was blocked |
Ausf Achse Combos
This will only lists combos that changed.
Reflector Combos
| Combo | Damage | Video | Notes |
|---|---|---|---|
| Reflector, 214C | 1385 | Link |
Basic easy reflector combo |
| Reflector, 5B > ABC | 4587 | Link |
Level 3 confirm combo. Does underwhelming damage but it's great for finishing off opponents |
| Reflector, 5B > 214A, 2A > 2B > 22C | 2055 | Link |
Corner reflector combo. Not nearly as good as being able to do a full loop but it's nice to do |
| Air Reflector, 5C > 214C | 1447 | Link |
Air reflector gives a better launch, allowing this combo to work. Works with both f.5C and c.5C |
Frame Data
source
KD - Knockdown
VA - Variable
*UV - value(s) marked with "?" in the table is/are unverified
x~yF - a period from frame "x" till frame "y"
                       |     Frames      |  Frame Advantage  |
               Attack  | Total | Startup | On Hit | On Block | Notes
Throws and Reflectors  ---------------------------------------
            4/5/6+A+B  |  21   |    5    |   KD   |    --    |
          j.4/5/6+A+B  |  21   |    3    |   KD   |    --    |
                5+B+C  |  17   |    7    |   KD   |    +3    |
                c.B+C  |  17   |    7    |   KD   |    +3    |
                j.B+C  |  16   |    6    |   KD   |    +3    |
                  A+C  |  44   |   --    |   --   |    --    | cancellable after 28F
              Normals  ---------------------------------------
                   5A  |  15   |    4    |   +0   |    +0    |
             close 5B  |  24   |    5    |   -4   |    -6    |
               far 5B  |  25   |    7    |   -3   |    -5    |
             close 5C  |  25   |    6    |   +0   |    -4    |
               far 5C  |  31   |    8    |   KD   |    -8    |
                  c.A  |  14   |    4    |   +1   |    +1    |
                  c.B  |  25   |    7    |   -3   |    -5    |
                  c.C  |  32   |    9    |   KD   |    -8    |
                  j.A  |  15   |    4    |   +0   |    +0    |
                 7/9B  |  25   |    6    |   VA   |    VA    |
                   8B  |  24   |    5    |   VA   |    VA    |
                 7/9C  |  20   |    9    |   VA   |    VA    |
                   8C  |  21   |    7    |   KD   |    VA    |
           c./5A > 5A  |  15   |    4    |   +0   |    +0    |
          c./5A > c.A  |  15   |    4    |   +0   |    +0    |
      Command Normals  ---------------------------------------
                   6B  |  30   |   21    |   +6   |    +4    |
                   6C  |  41   |   10    |   KD   |   -16    |
                 j.2C  |  VA   |   15    |   VA   |    VA    | landing recovery 7F
             Specials  ---------------------------------------
                 236A  |  48   |   10    |   -8   |   -12    |
                 236B  |  48   |   11    |   -7   |   -11    |
                 236C  |  48   |   12    |   KD   |   -10    |
               j.236A  |  VA   |   11    |   VA   |    VA    | landing recovery 14F
               j.236B  |  VA   |   12    |   VA   |    VA    | landing recovery 15F
               j.236C  |  VA   |   13    |   KD   |    VA    | landing recovery 16F
                 214A  |  26   |   11    |   +0   |    -2    |
                 214B  |  50   |   11    |   KD   |   -15    |
                 214C  |  60   |   11    |   KD   |   -14    |
               j.214A  |  VA   |    8    |   VA   |    VA    | landing recovery 10F
               j.214B  |  VA   |    8    |   KD   |    VA    | landing recovery 10F
               j.214C  |  VA   |    8    |   KD   |    VA    | landing recovery 12F
                  22A  |  41   |    3    |   KD   |   -23    | 1~3F invincible? *UV
                  22B  |  52   |    4    |   KD   |   -32    | 1~4F invincible? *UV
                  22C  |  61   |    5    |   KD   |   -39    | 1~5F invincible? *UV
       EX and Level 3  ---------------------------------------
              236+B+C  |  51   |   13    |   KD   |    +0    | 1~4F invincible? *UV
            j.236+B+C  |  VA   |    5    |   KD   |    VA    | 1~2F invincible? *UV, landing recovery 18F
              214+B+C  | 100   |   13    |   KD   |   -25    | 1~5F invincible
            j.214+B+C  |  VA   |    4    |   KD   |    VA    | 1~2F invincible, landing recovery 14F
               22+B+C  |  72   |    5    |   KD   |   -50*   | 1~6F invincible, *if 3 hits were blocked
                A+B+C  |  38   |   15    |   KD   |   -20    | superflash 40F, 1~5F invincible
               (1st hits connect)
                A+B+C  |  ""   |   ""    |   KD   |   -10    | ""
               (1st hits are guarded/reflected)
Trivia
