Ougon Musou Kyoku/Shannon: Difference between revisions
KingFossil (talk | contribs) |
|||
| (101 intermediate revisions by 7 users not shown) | |||
| Line 1: | Line 1: | ||
[[image:Shannon-Framed.png|<center><font size="2"><b>Shannon</b></font></center>|frame|right]] | [[image:Shannon-Framed.png|<center><font size="2"><b>Shannon</b></font></center>|frame|right]] | ||
== | ==Story== | ||
One of the two servants present at Rokkenjima at the time of the serial killings, the other being her "younger brother" Kanon. Due to her constant breaking of mirrors she has 1000 years of bad luck. | One of the two servants present at Rokkenjima at the time of the serial killings, the other being her "younger brother" Kanon. Due to her constant breaking of mirrors she has 1000 years of bad luck. | ||
==Introduction== | ==Introduction== | ||
The big-hearted but sometimes clumsy maid of Ushiromiya mansion, she uses her clumsiness to her advantage in peculiar ways: Tripping to make plates fly, out of control food cart and clearing the floor make for unorthodox normals. Alongside that she does offers magic too, which she used for zoning and protective barrier which acts as great antiair and reversal. She can also summon seagull, which is a great oki- and neutral control tool. Her clumsiness sadly gives her almost no neutral presence with buttons, but if you can accept's Shannon quirks, she does as good job as expected from magical maid. | |||
{{ProConTable | |||
= | |pros= | ||
*'''Unorthodox normals:''' Shannon has alot unusual normals with weird properties which can be used in weird places to confuse opponent. | |||
*'''Great meterless reversal and antiair:''' Her Barrier is a both great antiair, which is rate treat in Ougon, and a great reversal which doesn't need any meter. | |||
*'''Seagull controls neutral and pressure:''' Seagull is good to control neutral for it's boomerang ark, and as oki tool to force opponent to block on wakeup. | |||
*'''Decent pressure and mixups:''' Shannon's pressure string cannot be optimally tagged off and pushbacks in a way that Shannon can summon Seagull back without it being punisheable. Seagull itself gives Shannon ways to use comboable overhead, emptyjumps and sideswitches. | |||
*''' Huge potential damage in corner:''' If Shannon player can do metaloops, opponent can be stunned quickly. | |||
|cons= | |||
*'''Lackluster normals:''' Shannon has no range or speed on almost any of her normals, so she cannot use them on neutral at all | |||
*'''Zoning is committal:''' She has to be careful with barrier spacing or opponent can punish Shannon for using them, and fast characters can negate her using seagull. | |||
*'''Hard time getting pressure started on her own:''' She doesn't get oki from almost any of her normal conversions or zoning, so she cannot start her main strength easily. | |||
Shannon | *'''Hard to fit in on many teams:''' Her unorthodox quirks and ability makes her little hard to fit on a team in a way both parties get something out. | ||
: | |||
}} | |||
==Ability== | |||
''Auto-Guard'' - You will automatically guard for 15 seconds. This allows you to autoblock in the middle of dashes. | |||
- | |||
==Gameplan== | |||
==Move List== | |||
===Normal Moves=== | |||
====Standing==== | |||
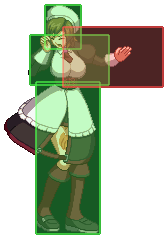
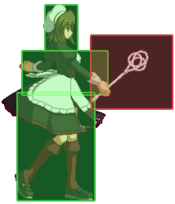
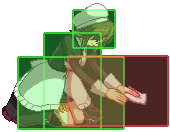
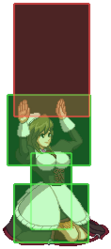
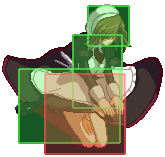
| | {{MoveData | ||
- | |image=Shannon-5A-Raw.png | ||
|hitbox=Shannon-5A.png | |||
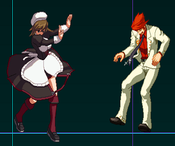
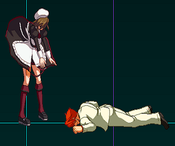
|caption=Why | |||
| | |name=f5A | ||
| | |input= | ||
| | |data= | ||
- | {{AttackData-Ougon | ||
Shannon | |damage=54 | ||
|recdamage= x | |||
|startup=4 | |||
|active=4 | |||
|recovery=12 | |||
|guard=HL | |||
|cancel=(J), Special, SP, Meta | |||
|adv hit=-4 | |||
|adv block=-4 | |||
|invul= x | |||
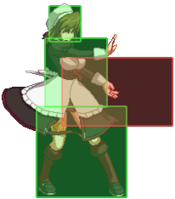
|description=It exists yet it will never land since proximity will make c5A come out instead, when Shannon is one body away from the opponent! | |||
|- | }} | ||
| | }} | ||
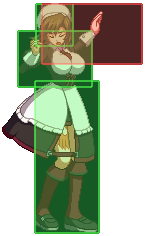
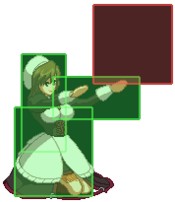
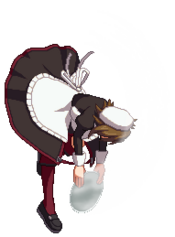
| | {{MoveData | ||
--- | |image=Shannon-c5A-Raw.png | ||
Shannon | |hitbox=Shannon-f5A.png | ||
|hitbox2=Shannon-c5A2.png | |||
|caption= | |||
|name=c.5A | |||
|input= | |||
|data= | |||
{{AttackData-Ougon | |||
|damage=42,42 | |||
|recdamage= x | |||
|startup=4 | |||
|active=2(6)2 | |||
|recovery=12 | |||
|guard=HL | |||
|cancel=(J), Special, SP, Meta | |||
|adv hit=-4 | |||
|adv block=-4 | |||
|invul= x | |||
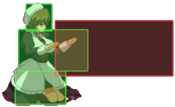
|description=*Shannon slaps attack twice. | |||
*Can be special/super canceled from the first slap. | |||
*It's Shannon fastest attack that isn't a proximity normal, but it tends to whiff on crouchers however. | |||
}} | |||
}} | |||
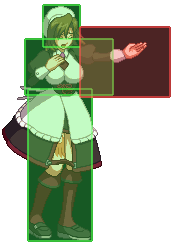
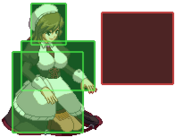
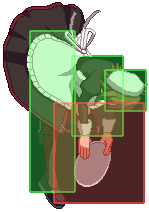
{{MoveData | |||
|image=Shannon-c5B-Raw.png | |||
|hitbox=Shannon-c5B.png | |||
|caption= | |||
|name=c.5B | |||
|input= | |||
|data= | |||
{{AttackData-Ougon | |||
|damage=150 | |||
|recdamage= x | |||
|startup=4 | |||
|active=4 | |||
|recovery=17 | |||
|guard=HL | |||
|cancel=(J), Special, SP, Meta | |||
|adv hit=-5 | |||
|adv block=-7 | |||
|invul= x | |||
|description=*Shannon shoves the opponent. | |||
*At 4f and hitting all crouchers, this is a very good punish for a lot of -4 ob moves. | |||
}} | |||
}} | |||
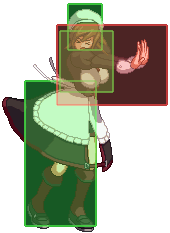
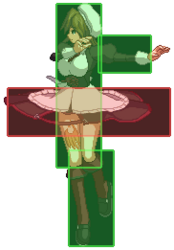
|- | {{MoveData | ||
| | |image=Shannon-5B-Raw.png | ||
| | |hitbox=Shannon-f5B.png | ||
--- | |caption= | ||
|name=f.5B | |||
|input= | |||
|data= | |||
{{AttackData-Ougon | |||
|damage=150 | |||
|recdamage= x | |||
|startup=7 | |||
|active=4 | |||
|recovery=17 | |||
|guard=HL | |||
|cancel=(J), Special, SP, Meta | |||
|adv hit=-5 | |||
|adv block=-7 | |||
|invul= x | |||
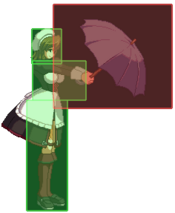
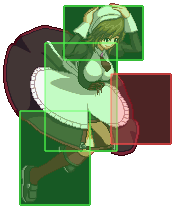
|description=*Shannon attacks with a carpet beater. | |||
*Used a lot in her combos. Can work as an anti-air. | |||
}} | |||
}} | |||
{{MoveData | |||
|- | |image=Shannon-6B-Raw.png | ||
| | |hitbox=Shannon-6B_1.png | ||
| | |hitbox2=Shannon-6B_2.png | ||
--- | |caption= | ||
|name=6B | |||
|input= | |||
|data= | |||
{{AttackData-Ougon | |||
|damage=90,90 | |||
|recdamage=x | |||
|startup=21 | |||
|active=8 | |||
|recovery=17 | |||
|guard=H | |||
|cancel=Special, SP, Meta | |||
|adv hit=-6 | |||
|adv block=-8 | |||
|invul= x | |||
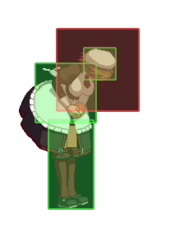
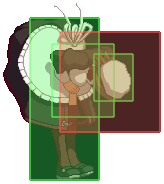
|description=*Shannon does a bow, which hits twice. Overhead. | |||
*Very good mix-up option to have when you have meter to declare and go into her meta loops if you are on corner. | |||
}} | |||
}} | |||
|- | {{MoveData | ||
| | |image=Shannon-c5C-Raw.png | ||
| | |hitbox=Shannon-c5C.png | ||
--- | |caption= | ||
Shannon | |name=c.5C | ||
|input= | |||
|data= | |||
{{AttackData-Ougon | |||
|damage=270 | |||
|recdamage= x | |||
|startup=10 | |||
|active=12 | |||
|recovery=18 | |||
|guard=HL | |||
|cancel=(J), Special, SP, Meta, Dash | |||
|adv hit=-5 | |||
|adv block=-8 | |||
|invul= x | |||
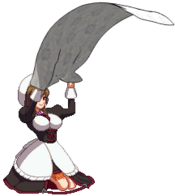
|description=*Shannon attacks by opening an umbrella. | |||
*Launches if it hits an airborne opponent. | |||
*Not very useful. If you are looking for a big anti-air, 22X should be your main option. | |||
}} | |||
}} | |||
{{MoveData | |||
|image=Shannon-5C-Raw.png | |||
|hitbox=Shannon-f5C.png | |||
|caption= | |||
|name=f.5C | |||
|input= | |||
|data= | |||
{{AttackData-Ougon | |||
|damage=120,150 | |||
|recdamage= x | |||
|startup=13 | |||
|active=3 | |||
|recovery=33 | |||
|guard=HL | |||
|cancel=(J), Special, SP, Meta, Dash | |||
|adv hit=-3/+6 | |||
|adv block=-6/+3 | |||
|invul= x | |||
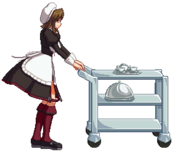
|description=*Attacks with a serving cart which hits twice. | |||
*Can only be special canceled from the first hit. | |||
*Shannon can act during the second hit. | |||
*2nd hit is considered a projectile. If opponents try to Guard Parry the 1st hit, their partner will get hit by it. Lambda can also make it disappear with 22X. | |||
*At some ranges, the 2nd hit can whiff after the 1st one. | |||
}} | |||
}} | |||
{{MoveData | |||
| | |image=Shannon-6C.png | ||
| | |caption= | ||
-- | |name=6C | ||
|input= | |||
|data= | |||
{{AttackData-Ougon | |||
|damage=264 | |||
|recdamage= x | |||
|startup=13 | |||
|active=? | |||
|recovery=30 | |||
|guard=HL | |||
|cancel=x | |||
|adv hit=? | |||
|adv block=? | |||
|invul= x | |||
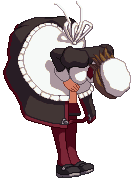
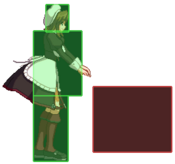
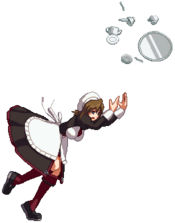
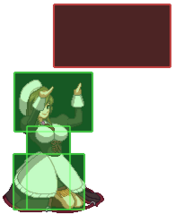
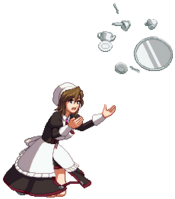
|description=*6C - A clumsy trip that spills cutlery in front of Shannon. | |||
*Corner staple in her juggles. Also works as projectile that moves you forward which is nice. | |||
}} | |||
}} | |||
====Crouching==== | |||
{{MoveData | |||
|image=Shannon-2A-Raw.png | |||
|hitbox=Shannon-2A.png | |||
|caption= | |||
|name=2A | |||
|input= | |||
|data= | |||
{{AttackData-Ougon | |||
|damage=69 | |||
|recdamage= x | |||
|startup=5 | |||
|active=4 | |||
|recovery=5 | |||
|guard=L | |||
|cancel=Special, SP, Meta | |||
|adv hit=+1 | |||
|adv block=+1 | |||
|invul= x | |||
|description=*A floor-scrubbing attack. | |||
*Low of choice. | |||
}} | |||
}} | |||
{{MoveData | |||
|image=Shannon-2B-Raw.png | |||
|hitbox=Shannon-2B.png | |||
|caption= | |||
|name=2B | |||
|input= | |||
|data= | |||
{{AttackData-Ougon | |||
|damage=171 | |||
|recdamage= x | |||
|startup=8 | |||
|active=4 | |||
|recovery=9 | |||
|guard=L | |||
|cancel=Special, SP, Meta | |||
|adv hit=+3 | |||
|adv block=+1 | |||
|invul= x | |||
|description=*Shannon pokes her opponent in the shins | |||
*Mostly combo fodder, can work as way to low profile some jump-ins, or as a staggered low after a 5B against opponents trying to jump. | |||
}} | |||
}} | |||
|- | {{MoveData | ||
| | |image=Shannon-3B-Raw.png | ||
| | |hitbox=Shannon-3B.png | ||
- | |caption= | ||
Shannon | |name=3B | ||
|input= | |||
|data= | |||
{{AttackData-Ougon | |||
|damage=180 | |||
|recdamage= x | |||
|startup=13 | |||
|active=28+ | |||
|recovery=20 | |||
|guard=L | |||
|cancel=Meta | |||
|adv hit=KD | |||
|adv block=+1 | |||
|invul= x | |||
|description=*Shannon moves forward in a floor scrubbing motion. | |||
*Can be held to extend the length. | |||
*It allows her to move under pokes and projectiles. | |||
*It launches on hit and can be cancelled into Meta, so she has access to juggles from it. | |||
}} | |||
}} | |||
{{MoveData | |||
|image=Shannon-2C-Raw.png | |||
|hitbox=Shannon-2C.png | |||
|hitbox2=Shannon-2C2.png | |||
|hitbox3=Shannon-2C3.png | |||
|hitbox4=Shannon-2C4.png | |||
|hitbox5=Shannon-2C5.png | |||
|caption= | |||
|name=2C | |||
|input= | |||
|data= | |||
{{AttackData-Ougon | |||
|damage=210-150 | |||
|recdamage= x | |||
|startup=9 | |||
|active=3,4,4,4,2 | |||
|recovery=30 | |||
|guard=L | |||
|cancel=Special, SP, Meta | |||
|adv hit=KD | |||
|adv block=-25/-9 | |||
|invul= x | |||
|description=*Shannon lifts a rug and puts it back down. Two-part attack. | |||
*If first part of the attack hits, it trips the opponent, causing the 2nd part to whiff. | |||
*If second part of the attack hits, it knocks down the opponent. | |||
*If the first part of the attack hits an airborne opponent, it launches them. | |||
*Launcher of choice. Cancel into MetaSuper during Meta if you already were in MetaWorld before using it. | |||
}} | |||
}} | |||
{{MoveData | |||
|image=Shannon-3C.png | |||
|caption= | |||
|name=3C | |||
|input= | |||
|data= | |||
{{AttackData-Ougon | |||
|damage=264 | |||
|recdamage= x | |||
|startup=13 | |||
|active=? | |||
|recovery=30 | |||
|guard=HL | |||
|cancel=x | |||
|adv hit=? | |||
|adv block=? | |||
|invul= x | |||
|description=*3C - Shannon while crouchimg, throws cutlery upwards. | |||
*Niche anti-jumping approach. Works as a substitute for 6C in her loops if really close to the corner against some characters. | |||
}} | |||
}} | |||
====Jumping==== | |||
{{MoveData | |||
|image=Shannon-J8A-Raw.png | |||
|hitbox=Shannon-JA.png | |||
|caption= | |||
|name=j.A | |||
|input= | |||
|data= | |||
{{AttackData-Ougon | |||
|damage=60 | |||
|recdamage= x | |||
|startup=3 | |||
|active=9 | |||
|recovery=6 | |||
|guard=H | |||
|cancel=x | |||
|adv hit=? | |||
|adv block=? | |||
|invul= x | |||
|description=*An aerial poke as Shannon struggles to keep her skirts down. | |||
*Mostly used as an air-to-air. | |||
}} | |||
}} | |||
|} | {{MoveData | ||
|image=Shannon-J8B-Raw.png | |||
|hitbox=Shannon-JB.png | |||
|caption= | |||
|name=j.B | |||
|input= | |||
|data= | |||
{{AttackData-Ougon | |||
|damage=150 | |||
|recdamage= x | |||
|startup=10 | |||
|active=8 | |||
|recovery=4 | |||
|guard=H | |||
|cancel= x | |||
|adv hit=? | |||
|adv block=? | |||
|invul= x | |||
|description=*A downwards smack with a serving tray. | |||
*Jump-in of choice | |||
*Can sometimes cross-up. | |||
}} | |||
}} | |||
{{MoveData | |||
|image=Shannon-J8C-Raw.png | |||
|hitbox=Shannon-J8C.png | |||
|caption= | |||
|name=j.8C | |||
|input= | |||
|data= | |||
{{AttackData-Ougon | |||
|damage=252 | |||
|recdamage= x | |||
|startup=10 | |||
|active=24 | |||
|recovery=3 | |||
|guard=H | |||
|cancel=Special, SP | |||
|adv hit=? | |||
|adv block=? | |||
|invul= x | |||
|description=*Shannon does a small twirl with the hitbox around her skirt. | |||
*Can cross-up, works in her mix-up game with Seagull. | |||
}} | |||
}} | |||
---- | {{MoveData | ||
|image=Shannon-J79C-Raw.png | |||
|hitbox=Shannon-J79C.png | |||
|caption= | |||
|name=j.7/9C | |||
|input= | |||
|data= | |||
{{AttackData-Ougon | |||
|damage=252 | |||
|recdamage= x | |||
|startup=14 | |||
|active=7 | |||
|recovery=8 | |||
|guard=H | |||
|cancel= x | |||
|adv hit=? | |||
|adv block=? | |||
|invul= x | |||
|description=*Shannon does a forwards flip, slamming her shoes down. | |||
*Pretty big hitbox but it's very slow at 14f. Sometimes it's used as your jump-in however. | |||
}} | |||
}} | |||
{{MoveData | |||
|image=Shannon-J2C-Raw.png | |||
|hitbox=Shannon-J2C.png | |||
|caption= | |||
|name=j.2C | |||
|input= | |||
|data= | |||
{{AttackData-Ougon | |||
|damage=270 | |||
|recdamage= x | |||
|startup=15 | |||
|active=12 | |||
|recovery=3 | |||
|guard=H | |||
|cancel= x | |||
|adv hit=? | |||
|adv block=? | |||
|invul= x | |||
|description=*A downwards bodyslam. | |||
*Can be used as a crossup. | |||
}} | |||
}} | |||
===Throw=== | |||
{{MoveData | |||
|image=Shannon-BCwhiff.png | |||
|image2=Shannon-BC.png | |||
|image3=Shannon-BC2.png | |||
|caption= | |||
|name=Throw | |||
|input=B+C | |||
|data= | |||
{{AttackData-Ougon | |||
|damage=360 | |||
|recdamage= x | |||
|startup=0-1 | |||
|active=? | |||
|recovery=50 (whiff) | |||
|guard=UNB | |||
|cancel= x | |||
|adv hit=KD | |||
|adv block=? | |||
|invul= x | |||
|description=*Shannon grabs the enemy, pushes them away, them slams them down with a floating plate. | |||
*Can do an OTG route after | |||
}} | |||
}} | |||
===Special Moves=== | ===Special Moves=== | ||
- | {{MoveData | ||
|image=Shannon-236A.png | |||
|image2=Shannon-236B.png | |||
| | |image3=Shannon-236C.png | ||
| | |caption=236A version | ||
- | |caption2=236B version | ||
Conjures a pink octagonal barrier in front of Shannon for a period of time. | |caption3=236C version | ||
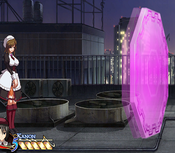
|name='''Magic Barrier 「魔法障壁」''' | |||
|input=236A/B/C | |||
|data= | |||
{{AttackData-Ougon | |||
|version=236A | |||
|damage=? | |||
|recdamage= x | |||
|startup=23 | |||
|active=? | |||
|recovery=51 total | |||
|guard=HL | |||
|cancel= | |||
|adv hit=Launches | |||
|adv block=? | |||
|invul= x | |||
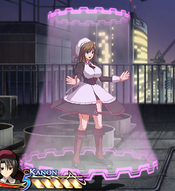
|description=*Conjures a pink octagonal barrier in front of Shannon for a period of time. | |||
*A: Summons a barrier one character length away from Shannon. | *A: Summons a barrier one character length away from Shannon. | ||
*Lasts about 3 seconds before disappearing. | |||
*Can be destroyed by other projectiles or melee attacks. | |||
}} | |||
{{AttackData-Ougon | |||
|version=236B | |||
|damage=? | |||
| | |recdamage= x | ||
| | |startup=23 | ||
| | |active=? | ||
|recovery=51 total | |||
|guard=HL | |||
|cancel= | |||
* | |adv hit=Launches | ||
|adv block=? | |||
|invul= x | |||
|description=*Summons a barrier four character lengths away from Shannon | |||
}} | |||
{{AttackData-Ougon | |||
|version=236C | |||
|damage=? | |||
|recdamage= x | |||
|startup=23 | |||
|active=? | |||
|recovery=51 total | |||
|guard=HL | |||
|cancel= | |||
|adv hit=Launches | |||
|adv block=? | |||
|invul= x | |||
|description=*Summons a barrier eight character lengths away from Shannon | |||
}} | |||
}} | |||
{{MoveData | |||
| | |image=Shannon-623ABC.png | ||
| | |caption= | ||
- | |name='''Capture Barrier 「捕縛障壁」''' | ||
Shannon | |input=623A/B/C | ||
*A: | |data= | ||
*B: | {{AttackData-Ougon | ||
*C: | |version=623A | ||
|damage=300 | |||
|recdamage= x | |||
|startup=9 | |||
|active=6 | |||
|recovery=? | |||
|guard=HL | |||
|cancel=x | |||
|adv hit=x | |||
|adv block=x | |||
|invul= x | |||
|description=*Shannon conjures a small burst of magic in front of herself. Enemies that step into the range are grappled in a capture barrier and receive damage as it shatters. Not a grab. | |||
*A: Fastest recovery. | |||
}} | |||
{{AttackData-Ougon | |||
|version=623B | |||
|damage=315 | |||
|recdamage= x | |||
|startup=9 | |||
|active=6 | |||
|recovery=? | |||
|guard=HL | |||
|cancel=x | |||
|adv hit=x | |||
|adv block=x | |||
|invul= x | |||
|description=*B: Middling recovery. | |||
}} | |||
{{AttackData-Ougon | |||
|version=623C | |||
|damage=330 | |||
|recdamage= x | |||
|startup=9 | |||
|active=6 | |||
|recovery=? | |||
|guard=HL | |||
|cancel=x | |||
|adv hit=x | |||
|adv block=x | |||
|invul= x | |||
|description=*C: Slowest recovery. | |||
}} | |||
}} | |||
{{MoveData | |||
|image=Shannon-214X.png | |||
|image2=Shannon-214X2.png | |||
|caption= | |||
|name='''To Feed (the seagulls)「エサやり''' | |||
|input=214A/B/C | |||
|data= | |||
{{AttackData-Ougon | |||
|version=214A | |||
|damage=? | |||
|recdamage= x | |||
|startup=? | |||
|active=? | |||
|recovery=38 total | |||
|guard=HL | |||
|cancel= | |||
|adv hit=? | |||
|adv block=? | |||
|invul= x | |||
|description=* | |||
}} | |||
{{AttackData-Ougon | |||
|version=214B | |||
|damage=? | |||
|recdamage= x | |||
|startup=? | |||
|active=? | |||
|recovery=38 total | |||
|guard=HL | |||
|cancel= | |||
|adv hit=? | |||
|adv block=? | |||
|invul= x | |||
|description=* | |||
}} | |||
{{AttackData-Ougon | |||
|version=214C | |||
|damage=? | |||
|recdamage= x | |||
|startup=? | |||
|active=? | |||
|recovery=38 total | |||
|guard=HL | |||
|cancel= | |||
|adv hit=? | |||
|adv block=? | |||
|invul= x | |||
|description=* | |||
}} | |||
}} | |||
{{MoveData | |||
| | |image=Shannon-22X.png | ||
|caption= | |||
--- | |name='''Protective Barrier 「守護障壁」''' | ||
|input=22A/B/C | |||
|data= | |||
{{AttackData-Ougon | |||
|version=22A | |||
|damage=300 | |||
|recdamage= x | |||
|startup=6 | |||
|active=? | |||
|recovery=? | |||
|guard=HL | |||
|cancel=x | |||
|adv hit=KD | |||
|adv block=? | |||
|invul=? | |||
|description=*Swiftly conjures a protective barrier which launches the enemy into the air. | |||
*Invincible on startup. | |||
*Active as long as the barrier is up. | |||
*Can block some projectiles | |||
}} | |||
{{AttackData-Ougon | |||
|version=22B | |||
|damage=315 | |||
|recdamage= x | |||
|startup=6 | |||
|active=? | |||
|recovery=? | |||
|guard=HL | |||
|cancel=x | |||
|adv hit=KD | |||
|adv block=? | |||
|invul=? | |||
|description=* | |||
}} | |||
{{AttackData-Ougon | |||
|version=22C | |||
|damage=330 | |||
|recdamage= x | |||
|startup=6 | |||
|active=? | |||
|recovery=? | |||
|guard=HL | |||
|cancel=x | |||
|adv hit=KD | |||
|adv block=? | |||
|invul=? | |||
|description=* | |||
}} | |||
}} | |||
===SP Supers=== | ===SP Supers=== | ||
{{MoveData | |||
|image=Shannon-236SP.png | |||
{ | |caption= | ||
| | |name='''Absolute Barrier 「絶対障壁」''' | ||
| | |input=236A+B | ||
- | |data= | ||
Summons a stronger octagon barrier in front of of Shannon. The barrier is larger, lasts longer and moves a larger distance before it vanishes. | {{AttackData-Ougon | ||
|damage=600 | |||
|recdamage= x | |||
|startup=53 | |||
|active=? | |||
|recovery=73 total | |||
|guard=HL | |||
|cancel= | |||
|adv hit=KD | |||
|adv block=? | |||
|invul= x | |||
|description=*Summons a stronger octagon barrier in front of of Shannon. The barrier is larger, lasts longer and moves a larger distance before it vanishes. Knocks back. | |||
*Cannot be destroyed by melee attacks. | |||
*Can take 5 hits before being destroyed. | |||
}} | |||
}} | |||
{{MoveData | |||
|image=Shannon-623ABC.png | |||
|caption= | |||
|name='''Enhanced Capture Barrier 「強化捕縛障壁」''' | |||
|input=623A+B | |||
|data= | |||
{{AttackData-Ougon | |||
|damage=576 | |||
|recdamage= x | |||
|startup=? | |||
|active=? | |||
|recovery=? | |||
|guard=HL | |||
|cancel= | |||
|adv hit=KD | |||
|adv block=? | |||
|invul= x | |||
|description=*Shannon performs a magic grab with a bigger hitbox than the meterless version. It is quite active although this usually won't matter, [https://streamable.com/up2ngx unless you are madman or something ] | |||
}} | |||
}} | |||
{{MoveData | |||
|image=Shannon-214SP.png | |||
|caption= | |||
|name='''It's Not A Hat?! 「帽子じゃなかった?!」''' | |||
|input=214A+B | |||
|data= | |||
{{AttackData-Ougon | |||
|damage=585 | |||
|recdamage= x | |||
|startup=? | |||
|active=? | |||
|recovery=? | |||
|guard=KD | |||
|cancel= | |||
|adv hit=KD | |||
|adv block=? | |||
|invul= x | |||
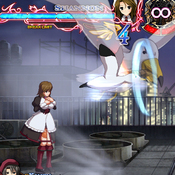
|description=*A larger seagull nabs Shannon's hat and charges head-on at an enemy. Knocks back. | |||
*Hits 5 times. | |||
Does 40% guard break. | |||
}} | |||
}} | |||
{{MoveData | |||
|image=Shannon-22SP.png | |||
|} | |image2=Shannon-22SP2.png | ||
|caption= | |||
|name='''Absolute Protection Barrier 「絶対守護障壁」''' | |||
|input=22A+B | |||
|data= | |||
{{AttackData-Ougon | |||
|damage=660 | |||
|recdamage= x | |||
|startup=49 | |||
|active=? | |||
|recovery=? | |||
|guard=L, HL | |||
|cancel= | |||
|adv hit=KD | |||
|adv block=? | |||
|invul=? | |||
|description=*A larger, more powerful version of the Protective Barrier. Knocks up. | |||
*Hits 8 times. | |||
*First few hits hit low before launching the opponent. | |||
*Has invincibility frames on startup. | |||
}} | |||
}} | |||
===Level 2 Super=== | ===Level 2 Super=== | ||
{{MoveData | |||
|image=Shannon-236236C.png | |||
{ | |name='''You should say "No" in bad situations. 「嫌な時は嫌と言いますね」''' | ||
| | |input=236236C | ||
| | |data= | ||
- | {{AttackData-Ougon | ||
A rush towards the enemy, | |damage=645 | ||
|recdamage x | |||
|startup=7 | |||
|active=6 | |||
|recovery=25 | |||
|guard=HL | |||
|cancel= | |||
|adv hit=KD | |||
|adv block=? | |||
|invul= x | |||
|description=*A rush towards the enemy which if hits, subjects the enemy to a long slapdown. | |||
*The Oki on corner is actually really good, 214 mix-ups are really hard to blow up now. | |||
*You can also Meta Declare after it and begin your loops from there. | |||
}} | |||
}} | |||
===Meta Super=== | ===Meta Super=== | ||
--- | {{MoveData | ||
|image=Shannon-MetaSuper.png | |||
|image2=Shannon-MetaSuper2.png | |||
|name='''Promised Lightning 「契約の落雷」''' | |||
|input=641236C during MetaWorld | |||
|data= | |||
{{AttackData-Ougon | |||
|damage=840 | |||
|recdamage x | |||
|startup=64 | |||
|active=? | |||
|recovery=? | |||
|guard=HL | |||
|cancel= | |||
|adv hit=KD | |||
|adv block=? | |||
|invul= x | |||
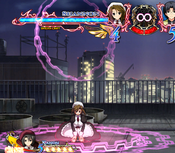
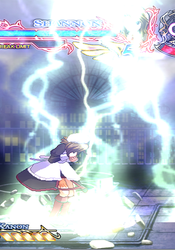
|description=*Shannon throws down a mirror and calls for lightning, which launches the opponent. | |||
*Invincible during startup. | |||
*Has a ''lot'' of hitstop and lags the game on hit, but not on block or whiff. This is probably intentional to give the move more impact, but who knows. | |||
*Can link a 5B afterwards if timed correctly. | |||
}} | |||
}} | |||
===Frame data=== | |||
---- | ---- | ||
KD = Knockdown | |||
4 | | Frames | Frame Advantage | | ||
Attack | Damage|Startup*| Active | Recovery |On Hit | On Block | Notes | |||
Throw ------------------------------------------------------------------ | |||
B+C | 360 | 0-1 | ? | ? | UKD | |50 Duration on Whiff | |||
Normals ------------------------------------------------------------------ | |||
c.5A | 42,42 | 4 | 2(6)2 | 12 | -4 | -4 |Frame Advantage is for 2nd hit | |||
f.5A | 54 | 4 | 4 | 10 | -4 | -4 | | |||
2A | 69 | 5 | 4 | 5 | +1 | +1 | | |||
c.5B | 150 | 4 | 4 | 17 | -5 | -7 | | |||
f.5B | 150 | 7 | 4 | 17 | -5 | -7 | | |||
2B | 171 | 8 | 4 | 9 | +3 | +1 | | |||
c.5C | 270 | 10 | 12 | 18 | -5 | -8 | | |||
f.5C |120,150| 13 | 3 | 33 | -3/+6 | -6/+3 |Missing data for 2nd (projectile) hit | |||
2C |210-150| 9 |3,4,4,4,2| 30 | UKD | -25/-9 |Hits only once; See Note C | |||
j.5A | 60 | 3 | 9 | 6 | | | | |||
j.5B | 150 | 10 | 8 | 4 | | | | |||
j8.5C | 252 | 10 | 24 | 3 | | | | |||
j(7/9).5C | 252 | 14 | 7 | 8 | | | | |||
Command Normals ------------------------------------------------------------------ | |||
6B | 90,90 | 21 | 8 | 17 | -6 | -8 | | |||
6C | 264 | 13 | - | 30 | | |See Note D | |||
3B | 180 | 13 | 28+ | 20 | TKD | +1 |Increases duration/distance if held | |||
3C | 264 | 14 | - | 32 | | |See Note D | |||
j.2C | 270 | 15 | 12 | 3 | | | | |||
Note B: Hits only once; Each hit has different damage (210, 180, 180, 150, 150) and different properties. | |||
Still need to test properties, but different hits seem to have different amounts of launch? | |||
Seems to also differ if the opponent is airborn, grounded, or already knocked-down. | |||
Note C: Hits only once; each hit has different damage (210, 180, 180, 150, 150) and different properties. | |||
Still need to test properties, but different hits seem to have different amounts of launch. | |||
Seems to also differ if the opponent is airborn, grounded, or already knocked-down. | |||
Note D: China Projectiles are independant from Shannon. | |||
They are active until they either hit the ground or exit the screen. | |||
==Strategy== | |||
==Team Building== | |||
''Feel free to edit this part of the wiki with your tips/strats what partners are best for Shannon to use. Remember I'm watching you.'' | |||
- | The information displayed here is from the 2022 [https://docs.google.com/spreadsheets/d/1XDgSDY3CVSySpuVgcf4qTxLy-mXrv1hdEZVWqmDchKs/edit?usp=sharing Team Tier List from the Ougon Discord] Thus, it is open to change, but it should work as a building block for people looking for team pairing ideas. If you are a player of any of the teams and want to change anything feel free to do so. | ||
'''<big>Reasons to choose Shannon for your team</big>''' | |||
*Having an anti air that leads into Oki and it's unable to be crossed up with 22X is extremely potent in a game like Ougon, where grounded anti airs are scarce. Shannon also has extremely high damage during MetaWorld if the player knows her loops, and they are unable to be bursted, while costing no more than the cost of the MetaDeclare itself. Her mix-up midscreen and in the corner is also fantastic, and combining it with good specials to guard break, she is really scary to face against if they find themselves in the corner. Sadly, pushing this side of her is very difficult. She is the easiest character in the game to both zone and outpoke, as her buttons are pressure oriented and her movement is very slow. Her damage is also really low outside of Meta, so if opponents have gotten the meter advantage on her, her reward isn't very good. | |||
*She benefits heavily from characters that can allow her to get hits in she otherwise wouldn't be able to. Her damage alone is worth considering her inclusion as she needs no resources outside of Meta to be a scary character to face, so characters that would otherwise have low damage can solve this problem with Shannon in their team. | |||
{| class="wikitable" | |||
|+ | |||
|- | |- | ||
! Image !! Team Composition !! 1 Bar of Health !! Notable information | |||
|- | |- | ||
| | | [[File:ANGSHAN.png|frameless]] || '''<big>Shannon/Ange</big>''' || Health || | ||
*StunBoost ruins Shannon’s corner loop which is her only way to do damage, leaving this team with no options left for that. They’re annoying to hit though. | |||
|- | |- | ||
| | | [[File:BATSHAN.png|frameless]] || '''<big>Shannon/Battler</big>''' || Health || | ||
*Middling damage and no synergy. Shannon’s ability can be nice on Battler, but it’s not like he needs it to approach or win neutral. | |||
*A decent defensive team, you might be able to weather out higher damage teams with it, but Bat/Rono is the superior option there. Battler gains nothing from Shannon’s mixup, leaving her to do most of your damage. Will/Shan is better for that. | |||
|- | |- | ||
| | | [[File:SHANBBAT.png|frameless]] || '''<big>Shannon/Black Battler</big>''' || Health || | ||
*Fairly fragile when Shannon kind of needs some leniency for momentum drops and misreads, Bat/Shan is better and has a little more synergy. Bat/Beato is even better than that. | |||
|- | |- | ||
| | | [[File:BETSHAN.png|frameless]] || '''<big>Shannon/Beatrice</big>''' || Health || | ||
*Both prefer Will. Weak neutral and bad meterless options. Hard to get into damage-dealing situations. | |||
*Shannon might just lose to the opponent if both have 5SP. | |||
|- | |- | ||
| | | [[File:BERNSHAN.png|frameless]] || '''<big>Shannon/Bernkastel</big>''' || Health || | ||
*It’s hard to fit Shannon into Bernkastel’s gameplan, but Bern does benefit from 15-second AutoGuard more than possibly any other character in the game. | |||
*Shannon can also loop her MetaSuper for longer, at least until she stuns. Bern has no trouble approaching, which Shannon struggles with, but she may have relative difficulty actually Attack Touching into Shannon so this adds a bit of awkwardness to their dynamic. | |||
*It’s no Will/Bern, but these two make a high-damage pair without many weaknesses. | |||
|- | |- | ||
| | | [[File:CHIESHAN.png|frameless]] || '''<big>Shannon/Chiester 410</big>''' || Health || | ||
*These two are just really hard to play together for the amount they can actually do. BreakBoost Shannon can start her corner loop from lower guard capacity by doing 22SP and 236SP at just the right bracket, but this is difficult. Having said that, if a player is good enough at recognizing when will a Shannon special move guard break at last hit can make this team very deadly to block, and having an invul reversal that can actually punish the opponent if its baited can be strong. | |||
*410 benefits from AutoGuard more than some others, but she is focused on counterplay anyway. Their roles are obvious with 410 handling neutral and Shannon handling damage, but compared to a dynamic like Luci/Beato it’s hard to place these two any higher. | |||
*Shannon can capitalise on 410’s MetaSuper to an extent though with her crossups and her own MetaSuper. | |||
*High average health + Autoguard + Scary reversals with BreakBoost makes this team fairly bulky. | |||
|- | |- | ||
| | | [[File:DLASHAN.png|frameless]] || '''<big>Shannon/Dlanor</big>''' || Health || | ||
*Terrible ability to approach, both are slow with limited neutrals, Dlanor can’t corner carry consistently, damage tends to fall short compared to other teams, the double defensive abilities are overkill. Has some comeback game at least. | |||
*Use Will/Shan instead. | |||
|- | |- | ||
| | | [[File:ERIKSHAN.png|frameless]] || '''<big>Shannon/Erika</big>''' || Health || | ||
*Shannon is your main damage dealer which isn’t fun. Erika has bad corner carry even though her neutral is decent. Bad reaction to pressure. | |||
*Just use Rono/Eri instead. | |||
|- | |- | ||
| | | [[File:EVASHAN.png|frameless]] || '''<big>Shannon/EVA-Beatrice</big>''' || Health || | ||
*Berserk can boost Shannon’s corner loop without increasing the stun which is nice, but these two have no other synergy. No reason to pick Shannon over Beato. AutoGuard with jelly is overkill. | |||
|- | |- | ||
| | | [[File:GEORSHAN.png|frameless]] || '''<big>Shannon/George</big>''' || Health || | ||
*Their abilities synergise perfectly, but they’re both defensive so it’s not that impressive. Their roles are clear but there’s no reason to choose Shannon over Beato (except love). | |||
|- | |- | ||
| | | [[File:JESSSHAN.png|frameless]] || '''<big>Shannon/Jessica</big>''' || Health || | ||
*A poor man’s Beato/Jess. It’s hard to come up with a reason to pick this over that. Together the two do way less damage, despite ShaveBoost working kind of well with Shannon’s 22SP at the correct range, and the relatively high damage this team does overall. | |||
*Jess doesn’t really need AutoGuard although it can help her if she makes a mistake; her pressure is comprised of frametraps anyway. These two don’t have the most amazing neutral either. | |||
|- | |- | ||
| | | [[File:KANSHAN.png|frameless]] || '''<big>Shannon/Kanon</big>''' || Health || | ||
*Similar to Kan/Jess but a bit more defensively-oriented, which Kanon honestly doesn’t appreciate. | |||
*These two definitely have complementary movesets and can come up with answers for most opponents, but their damage is low outside of Shannon’s corner loop. Kan/Jess and Kan/Will both do a better job at what this team does well. | |||
|- | |- | ||
| | | [[File:LAMSHAN.png|frameless]] || '''<big>Shannon/Lambdadelta</big>''' || Health || | ||
*Shannon is the worst partner for Lambda as she lacks good stun and corner carry. She can capitalise on comet to some extent but fails in every other area. Absolutely no practical reason to use her over Beato, although AutoGuard Lambda is kind of fun. | |||
|- | |- | ||
| | | [[File:LUCISHAN.png|frameless]] || '''<big>Shannon/Lucifer</big>''' || Health || | ||
*Shannon is your only source of big damage, too mixup heavy, minor misplays will create serious disadvantage. | |||
|- | |- | ||
| | | [[File:RONSHAN.png|frameless]] || '''<big>Shannon/Ronove</big>''' || Health || | ||
*On paper this team has the highest health in the game, but in practicality Bat/Rono will often end up with effectively more. | |||
*This team is good at comeback game and has pretty high damage, but both characters are slow and struggle to get the opponent into the corner where they’ll shine. Similar to Lia/Rono in this way. | |||
*CounterBoost Shannon can be funny and do a ton of damage, but Shannon’s counterhits largely come from gimmicks so the opponent will probably wise up before long. Rono/Lam and Rono/Eri are better for this. | |||
|- | |- | ||
| | | [[File:ROSSHAN.png|frameless]] || '''<big>Shannon/Rosa</big>''' || Health || | ||
*Struggles to approach, they share a stubby neutral, this team has a confused gameplan, Shannon makes no better use of Detachment than the rest of the cast. | |||
|- | |- | ||
| | | [[File:VIRSHAN.png|frameless]] || '''<big>Shannon/Virgilia</big>''' || Health || | ||
*Absolutely no ability to approach, they play similarly but have few ways to get the opponent where they want them, bullied by fast and pressure-oriented characters. Decent corner damage. | |||
|- | |- | ||
| | | [[File:SHANWILL.png|frameless]] || '''<big>Shannon/Willard</big>''' || Health || | ||
*The infamous JP team, these two have an interestingly complementary neutral with Will’s big normals and ability to approach making up for Shannon’s more stubby, mixup-heavy playstyle. Shannon really likes SPCancel as it enables her to increase her damage better than almost anyone’s, meaning this team can actually compare to Beato/Will in terms of damage. | |||
*Will probably generates enough SP lead for the team by himself. He can also capitalise on Shannon’s short combos that usually end with a 2C. Shannon’s subtle crossups and high-stun corner loops pair very well with Will’s unburstable and unprorated damage, so these two make the most of each other’s strengths. | |||
*AutoGuard suits Will’s approach-focused playstyle as well. They can be a bit meter-hungry though. | |||
|} | |} | ||
=== | ==Combos== | ||
|- | {{ComboTable-MBTL | ||
| | | data = | ||
{{ComboData-MBTL | |||
| combo = 2A > 2B > 5B > 5C > 236A/B | |||
| cost = 0 | |||
| metergain = 80% | |||
| oppmetergain = | |||
| damage = 938 | |||
| location = {{P-UNI|anywhere}} | |||
| notes = Basic BnB combo. | |||
}} | |||
{{ComboData-MBTL | |||
| combo = 2A > 2B > 2C > 236A/B | |||
| cost = 0 | |||
| metergain = 45% | |||
| oppmetergain = | |||
| damage = 749 | |||
| location = {{P-UNI|anywhere}} | |||
| notes = Variation of the BnB combo. | |||
}} | |||
{{ComboData-MBTL | |||
| combo = 2A > 2B > 5B > 5C > A+B+C > 2B > 2C > 641236C | |||
| cost = 1SP | |||
| metergain = 99% | |||
| oppmetergain = | |||
| damage = 1496 | |||
| location = {{P-UNI|anywhere}} | |||
| notes = Basic Metaworld combo. MetaSuper might not land all hits outside the corner. | |||
}} | |||
{{ComboData-MBTL | |||
| combo = 6B > A+B+C > 2C > 641236C | |||
| cost = 1SP | |||
| metergain = 95% | |||
| oppmetergain = | |||
| damage = 1230 | |||
| location = {{P-UNI|anywhere}} | |||
| notes = Overhead starter leading into Promised Lightning. Both hits of overhead should hit. | |||
}} | |||
{{ComboData-MBTL | |||
| combo = 2A > 2B > 5B > 2C > A+B+C > 66 > (5B > 3C/6C)xN > 5B > 641236C | |||
| cost = 1SP | |||
| metergain = 99% | |||
| oppmetergain = | |||
| damage = 2105+ | |||
| location = {{P-UNI|corner}} | |||
| notes = Can only be done near or at the corner. Loop combo leading to the meta super. 3C can replace 6C when in the corner. | |||
}} | |||
{{ComboData-MBTL | |||
| combo = 2A > 2B > 5B > 2C > A+B+C > (641236C > 5B)xN > 641236C | |||
| cost = 1SP | |||
| metergain = | |||
| oppmetergain = | |||
| damage = | |||
| location = {{P-UNI|corner}} | |||
| notes = Promised Lightning Loop. xN means can be done for as long as possible as long as opponent isn't stunned. | |||
}} | |||
{{ComboData-MBTL | |||
| combo = 2A > 2B > 5B > 5C > A+B+C > 2C > 641236C > 22A/B/C > 641236C | |||
| cost = | |||
| metergain = | |||
| oppmetergain = | |||
| damage = | |||
| location = {{P-UNI|corner}} | |||
| notes = Promised Lightning Loop using Will's SP Cancel. | |||
}} | |||
}} | |||
===Video Examples=== | |||
: | <youtube>https://youtu.be/xD5tSzw1H8w</youtube> | ||
: | ==Videos== | ||
[http://www.nicovideo.jp/watch/sm18451394 黄金夢想曲†CROSS 嘉音&紗音コンボムービー【-double-】] - Kanon/Shannon combo video<br> | |||
[http://www.nicovideo.jp/watch/sm18540992 黄金夢想曲†CROSS 嘉音&紗音コンボムービー【die zwillinge】] - Kanon/Shannon combo video<br> | |||
[http://www.nicovideo.jp/watch/sm18840216 黄金夢想曲†CROSS 嘉音&紗音コンボムービー【-Bonds-】]4 - Kanon/Shannon combo video<br> | |||
[http://www.nicovideo.jp/watch/sm22608447 黄金夢想曲†CROSS 嘉音&紗音コンボムービー【-resolution-】] - Kanon/Shannon combo video<br> | |||
[http://www.nicovideo.jp/watch/sm23078170 黄金夢想曲†CROSS 嘉音&紗音コンボムービー【-reveal the truth-】] - Kanon/Shannon combo video | |||
[https://www.youtube.com/watch?v=4bt7nYSRGP0 OMK:Shannon Combos] - Shannon BnB video | |||
== Pictures == | == Pictures == | ||
| Line 445: | Line 1,074: | ||
[[Category:Ougon Musou Kyoku]] | [[Category:Ougon Musou Kyoku]] | ||
[[Category:Shannon]] | |||
Revision as of 17:44, 27 July 2023
Story
One of the two servants present at Rokkenjima at the time of the serial killings, the other being her "younger brother" Kanon. Due to her constant breaking of mirrors she has 1000 years of bad luck.
Introduction
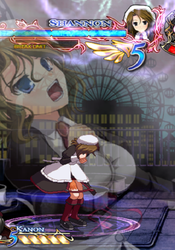
The big-hearted but sometimes clumsy maid of Ushiromiya mansion, she uses her clumsiness to her advantage in peculiar ways: Tripping to make plates fly, out of control food cart and clearing the floor make for unorthodox normals. Alongside that she does offers magic too, which she used for zoning and protective barrier which acts as great antiair and reversal. She can also summon seagull, which is a great oki- and neutral control tool. Her clumsiness sadly gives her almost no neutral presence with buttons, but if you can accept's Shannon quirks, she does as good job as expected from magical maid.
| Strengths | Weaknesses |
|---|---|
|
|
Ability
Auto-Guard - You will automatically guard for 15 seconds. This allows you to autoblock in the middle of dashes.
Gameplan
Move List
Normal Moves
Standing
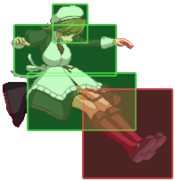
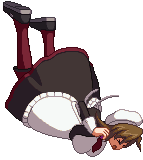
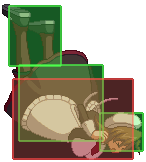
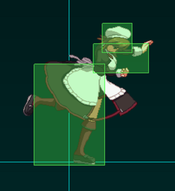
f5A Why Why
|
|
|---|---|
Toggle Hitboxes Toggle Hitboxes
|
c.5A
|
|
|---|---|
Toggle Hitboxes Toggle Hitboxes
|
c.5B
|
|
|---|---|
Toggle Hitboxes Toggle Hitboxes
|
f.5B
|
|
|---|---|
Toggle Hitboxes Toggle Hitboxes
|
6B
|
|
|---|---|
Toggle Hitboxes Toggle Hitboxes
|
c.5C
|
|
|---|---|
Toggle Hitboxes Toggle Hitboxes
|
f.5C
|
|
|---|---|
Toggle Hitboxes Toggle Hitboxes
|
6C
|
|---|
Crouching
2A
|
|
|---|---|
Toggle Hitboxes Toggle Hitboxes
|
2B
|
|
|---|---|
Toggle Hitboxes Toggle Hitboxes
|
3B
|
|
|---|---|
Toggle Hitboxes Toggle Hitboxes
|
2C
|
|
|---|---|
Toggle Hitboxes Toggle Hitboxes
|
3C
|
|---|
Jumping
j.A
|
|
|---|---|
Toggle Hitboxes Toggle Hitboxes
|
j.B
|
|
|---|---|
Toggle Hitboxes Toggle Hitboxes
|
j.8C
|
|
|---|---|
Toggle Hitboxes Toggle Hitboxes
|
j.7/9C
|
|
|---|---|
Toggle Hitboxes Toggle Hitboxes
|
j.2C
|
|
|---|---|
Toggle Hitboxes Toggle Hitboxes
|
Throw
Throw
B+C |
|---|
Special Moves
Magic Barrier 「魔法障壁」 236A/B/C 236A version 236A version 236B version 236B version 236C version 236C version
|
|---|
Capture Barrier 「捕縛障壁」
623A/B/C |
|---|
To Feed (the seagulls)「エサやり
214A/B/C |
|---|
Protective Barrier 「守護障壁」
22A/B/C |
|---|
SP Supers
Absolute Barrier 「絶対障壁」
236A+B |
|---|
Enhanced Capture Barrier 「強化捕縛障壁」
623A+B |
|---|
It's Not A Hat?! 「帽子じゃなかった?!」
214A+B |
|---|
Absolute Protection Barrier 「絶対守護障壁」
22A+B |
|---|
Level 2 Super
You should say "No" in bad situations. 「嫌な時は嫌と言いますね」
236236C |
|---|
Meta Super
Promised Lightning 「契約の落雷」
641236C during MetaWorld |
|---|
Frame data
  KD = Knockdown
                              |          Frames             |  Frame Advantage |
              Attack  | Damage|Startup*| Active  | Recovery |On Hit | On Block | Notes
               Throw  ------------------------------------------------------------------
                 B+C  |  360  |  0-1   |    ?    |    ?     |  UKD  |          |50 Duration on Whiff
             Normals  ------------------------------------------------------------------
                c.5A  | 42,42 |    4   |  2(6)2  |   12     |  -4   |   -4     |Frame Advantage is for 2nd hit
                f.5A  |   54  |    4   |    4    |   10     |  -4   |   -4     |
                  2A  |   69  |    5   |    4    |    5     |  +1   |   +1     |
                c.5B  |  150  |    4   |    4    |   17     |  -5   |   -7     |
                f.5B  |  150  |    7   |    4    |   17     |  -5   |   -7     |
                  2B  |  171  |    8   |    4    |    9     |  +3   |   +1     |
                c.5C  |  270  |   10   |   12    |   18     |  -5   |   -8     |
                f.5C  |120,150|   13   |    3    |   33     | -3/+6 |  -6/+3   |Missing data for 2nd (projectile) hit
                  2C  |210-150|    9   |3,4,4,4,2|   30     |  UKD  | -25/-9   |Hits only once; See Note C
                j.5A  |   60  |    3   |    9    |    6     |       |          |
                j.5B  |  150  |   10   |    8    |    4     |       |          |
               j8.5C  |  252  |   10   |   24    |    3     |       |          |
           j(7/9).5C  |  252  |   14   |    7    |    8     |       |          |
     Command Normals  ------------------------------------------------------------------
                  6B  | 90,90 |   21   |    8    |   17     |  -6   |   -8     |
                  6C  |  264  |   13   |    -    |   30     |       |          |See Note D
                  3B  |  180  |   13   |   28+   |   20     |  TKD  |   +1     |Increases duration/distance if held
                  3C  |  264  |   14   |    -    |   32     |       |          |See Note D
                j.2C  |  270  |   15   |   12    |    3     |       |          |

 Note B: Hits only once; Each hit has different damage (210, 180, 180, 150, 150) and different properties.
  Still need to test properties, but different hits seem to have different amounts of launch?
  Seems to also differ if the opponent is airborn, grounded, or already knocked-down.
 Note C: Hits only once; each hit has different damage (210, 180, 180, 150, 150) and different properties.
  Still need to test properties, but different hits seem to have different amounts of launch.
  Seems to also differ if the opponent is airborn, grounded, or already knocked-down.
 Note D: China Projectiles are independant from Shannon.
  They are active until they either hit the ground or exit the screen.
Strategy
Team Building
Feel free to edit this part of the wiki with your tips/strats what partners are best for Shannon to use. Remember I'm watching you.
The information displayed here is from the 2022 Team Tier List from the Ougon Discord Thus, it is open to change, but it should work as a building block for people looking for team pairing ideas. If you are a player of any of the teams and want to change anything feel free to do so.
Reasons to choose Shannon for your team
- Having an anti air that leads into Oki and it's unable to be crossed up with 22X is extremely potent in a game like Ougon, where grounded anti airs are scarce. Shannon also has extremely high damage during MetaWorld if the player knows her loops, and they are unable to be bursted, while costing no more than the cost of the MetaDeclare itself. Her mix-up midscreen and in the corner is also fantastic, and combining it with good specials to guard break, she is really scary to face against if they find themselves in the corner. Sadly, pushing this side of her is very difficult. She is the easiest character in the game to both zone and outpoke, as her buttons are pressure oriented and her movement is very slow. Her damage is also really low outside of Meta, so if opponents have gotten the meter advantage on her, her reward isn't very good.
- She benefits heavily from characters that can allow her to get hits in she otherwise wouldn't be able to. Her damage alone is worth considering her inclusion as she needs no resources outside of Meta to be a scary character to face, so characters that would otherwise have low damage can solve this problem with Shannon in their team.
Combos
| Combo | Damage | Cost | Meter Gain | Location |
|---|---|---|---|---|
| 2A > 2B > 5B > 5C > 236A/B | 938 | 0 | 80% | Anywhere |
|
Basic BnB combo. | ||||
| 2A > 2B > 2C > 236A/B | 749 | 0 | 45% | Anywhere |
|
Variation of the BnB combo. | ||||
| 2A > 2B > 5B > 5C > A+B+C > 2B > 2C > 641236C | 1496 | 1SP | 99% | Anywhere |
|
Basic Metaworld combo. MetaSuper might not land all hits outside the corner. | ||||
| 6B > A+B+C > 2C > 641236C | 1230 | 1SP | 95% | Anywhere |
|
Overhead starter leading into Promised Lightning. Both hits of overhead should hit. | ||||
| 2A > 2B > 5B > 2C > A+B+C > 66 > (5B > 3C/6C)xN > 5B > 641236C | 2105+ | 1SP | 99% | Corner |
|
Can only be done near or at the corner. Loop combo leading to the meta super. 3C can replace 6C when in the corner. | ||||
| 2A > 2B > 5B > 2C > A+B+C > (641236C > 5B)xN > 641236C | 1SP | Corner | ||
|
Promised Lightning Loop. xN means can be done for as long as possible as long as opponent isn't stunned. | ||||
| 2A > 2B > 5B > 5C > A+B+C > 2C > 641236C > 22A/B/C > 641236C | Corner | |||
|
Promised Lightning Loop using Will's SP Cancel. | ||||
Video Examples
Videos
黄金夢想曲†CROSS 嘉音&紗音コンボムービー【-double-】 - Kanon/Shannon combo video
黄金夢想曲†CROSS 嘉音&紗音コンボムービー【die zwillinge】 - Kanon/Shannon combo video
黄金夢想曲†CROSS 嘉音&紗音コンボムービー【-Bonds-】4 - Kanon/Shannon combo video
黄金夢想曲†CROSS 嘉音&紗音コンボムービー【-resolution-】 - Kanon/Shannon combo video
黄金夢想曲†CROSS 嘉音&紗音コンボムービー【-reveal the truth-】 - Kanon/Shannon combo video
OMK:Shannon Combos - Shannon BnB video

