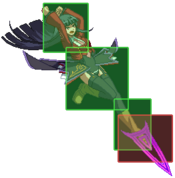
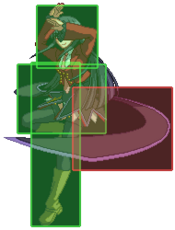
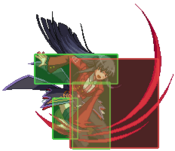
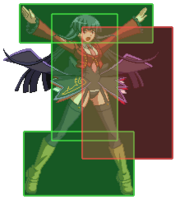
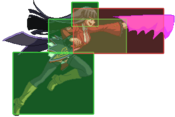
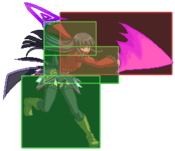
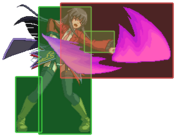
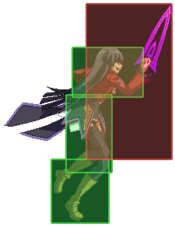
Ougon Musou Kyoku/Lucifer: Difference between revisions
KingFossil (talk | contribs) |
|||
| (91 intermediate revisions by 9 users not shown) | |||
| Line 1: | Line 1: | ||
[[image:Lucifer-Framed.png|<center><font size="2"><b>Lucifer</b></font></center> | [[image:Lucifer-Framed.png|thumb|300px|right|<center><font size="2"><b>Lucifer</b></font></center>]] | ||
== | ==Background== | ||
Lucifer is | Lucifer is the eldest sister of the Seven Stakes of Purgatory, furniture belonging to the Game Master in ''Umineko no Naku Koro ni''. Lucifer represents the sin of pride, and does it quite well. In ''Ougon Musou Kyoku'', Lucifer fulfills her duties as the furniture of the Game Master, while finding time to compete and play with the other furniture. | ||
==Introduction== | |||
Oldest of the seven purgatory sisters, Lucifer offers very fast and simple, beginner friendly gameplay for those who can keep up. She can get conversions from every range with her absurd neutral buttons, and her ability offers guaranteed easy damage. She also has access to some mixups with her overhead which can be spaced to be plus on block and combo'd on hit. She however struggles little against jumpers and her tools are one dimensional due to her some niche/useless specials. | |||
{{ProConTable | |||
|pros= | |||
*'''Really good neutral control and great conversions:''' Her 2B is an amazing button with great range, speed and can be converted to her rekkas from max range. Her 5B and 5C are decent pokes too, so she has some options. | |||
*'''Good, versatile ability:''' Lucifer's ability of another attack touch is great for quaranteed stun and damage, which everyone in the cast enjoys, and her good neutral control makes her even more versatile on any team. | |||
*'''Overhead offers mixups:''' Her overhead can be dialed into, and in some tight strings it can be paced to be plus on block and comboable on hit, which is great to keep opponent afraid. | |||
*'''Beginner friendly:''' Her good neutral button(s), simple ability and few usable specials makes her a great pick for people new to the game. | |||
|cons= | |||
*'''Some poor specials''' Outside of her rekkas and SP versions of drill and teleport, her specials are either useless or niche to use, so she doesn't have versatility in that regard. | |||
*'''Poor air to air options:''' Her air to air buttons have wonky hurtboxes and can whiff in weird places, and her overall air to air options are little limited. | |||
*'''Low solo damage:''' Lucifer doesn't stitch out much damage on her own, she needs high damaging partner. | |||
}} | |||
== | ==Ability== | ||
''Attack Touch''<br> | |||
Whilst this ability is active, your character can perform an an Attack Touch, regardless of the Touch Gauge's current state. Single use ability, consumed when you perform an Attack Touch. | |||
''' | Lucifer's ability is exactly what it's called - it's a free Attack Touch. It allows for very high damage combos without spending that many resources, simply by tagging Lucifer out or by entering the Meta World. Essentially it makes it so that Lucifer is almost always the character you want to have out, constantly building meter for her partner in the process. | ||
It is worth mentioning that ''Attack Touch'' takes precedence over Touch Gauge - if it was already full, it will remain full and consume the ability. If it wasn't full, the ability will simply be consumed and the standard 8 second cooldown from Attack Touching will be placed, regardless of what the previous cooldown value was at. You could potentially do this to shorten how long your Touch Gauge is disabled from a Damage Touch (15 seconds) by entering the Meta World and Attack Touching off of any random hit. | |||
''Attack Touch'' | |||
==Move List== | ==Move List== | ||
===Normal Moves=== | ===Normal Moves=== | ||
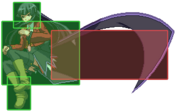
====Standing==== | |||
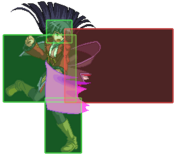
{| | {{MoveData | ||
| | |image=Lucifer-5A-Raw.png | ||
| | |hitbox=Lucifer-f5A.png | ||
- | |caption= | ||
Lucifer swing her hand horizontally in a karate chop. | |name=5A | ||
|input= | |||
|data= | |||
{{AttackData-Ougon | |||
|damage=54 | |||
|recdamage= x | |||
|startup=4 | |||
|active=5 | |||
|recovery=3 | |||
|guard=HL | |||
|cancel=(J), Special, SP, Meta | |||
|adv hit=+2 | |||
|adv block=+2 | |||
|invul= x | |||
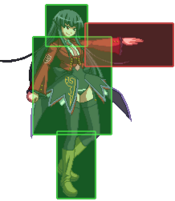
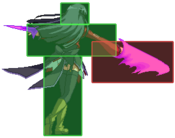
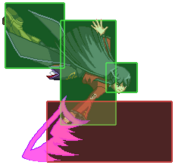
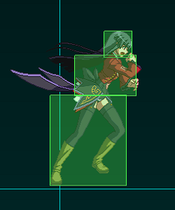
|description=*Lucifer swing her hand horizontally in a karate chop. | |||
*Whiffs crouching opponents. | |||
}} | |||
}} | |||
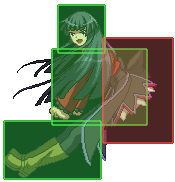
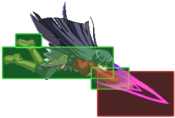
|- | {{MoveData | ||
| | |image=Lucifer-6A-Raw.png | ||
| | |hitbox=Lucifer-6A.png | ||
--- | |caption= | ||
Lucifer scratches | |name=6A | ||
|input= | |||
|data= | |||
{{AttackData-Ougon | |||
|damage=66 | |||
|recdamage= x | |||
|startup=6 | |||
|active=3 | |||
|recovery=9 | |||
|guard=HL | |||
|cancel=(J), Special, SP, Meta | |||
|adv hit=-2 | |||
|adv block=-2 | |||
|invul= x | |||
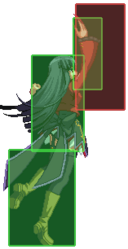
|description=*Lucifer scratches the opponent with her nails in an upward motion. | |||
*Good as a reactionary anti-air. | |||
}} | |||
}} | |||
|- | {{MoveData | ||
| | |image=Lucifer-c5B-Raw.png | ||
| | |hitbox=Lucifer-c5B.png | ||
Lucifer | |caption= | ||
|name=c.5B | |||
|input= | |||
|data= | |||
{{AttackData-Ougon | |||
|damage=150 | |||
|recdamage= x | |||
|startup=7 | |||
|active=5 | |||
|recovery=15 | |||
|guard=HL | |||
|cancel=(J), Special, SP, Meta | |||
|adv hit=-4 | |||
|adv block=-6 | |||
|invul= x | |||
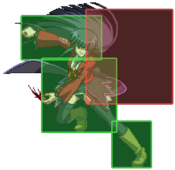
|description=*Lucifer scratches her opponent with her nails. | |||
*Moves her forward a little. | |||
}} | |||
}} | |||
{{MoveData | |||
|image=Lucifer-5B-Raw.png | |||
|hitbox=Lucifer-f5B.png | |||
|hitbox2=Lucifer-5B2.png | |||
|caption= | |||
|name=f.5B | |||
|input= | |||
|data= | |||
{{AttackData-Ougon | |||
|damage=123 | |||
|recdamage= x | |||
|startup=8 | |||
|active=8 | |||
|recovery=22 | |||
|guard=HL | |||
|cancel=(J), Special, SP, Meta | |||
|adv hit=-14 | |||
|adv block=-16 | |||
|invul= x | |||
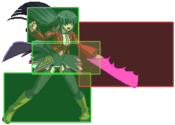
|description=*Lucifer steps forward and swings her blade. | |||
*Moves her forward a little. | |||
}} | |||
}} | |||
{{MoveData | |||
|image=Lucifer-6B-Raw.png | |||
|hitbox=Lucifer-6B.png | |||
|caption= | |||
|name=6B | |||
|input= | |||
|data= | |||
{{AttackData-Ougon | |||
|damage=180 | |||
|recdamage= x | |||
|startup=17 | |||
|active=13 | |||
|recovery=9 | |||
|guard=H | |||
|cancel=(J), Special, SP, Meta | |||
|adv hit=+3/+15 | |||
|adv block=±0/+12 | |||
|invul= x | |||
|description=*Lucifer leaps forward and hits the opponent with her butt. Overhead. | |||
*Can be followed up if it hits during its last few active frames. | |||
}} | |||
}} | |||
{{MoveData | |||
|image=Lucifer-c5C-Raw.png | |||
|hitbox=Lucifer-c5C_1.png | |||
|hitbox2=Lucifer-c5C_2.png | |||
|caption= | |||
|name=c.5C | |||
|input= | |||
|data= | |||
{{AttackData-Ougon | |||
|damage=129x2 | |||
|recdamage= x | |||
|startup=8 | |||
|active=4(5)5 | |||
|recovery=37 | |||
|guard=HL | |||
|cancel=(J), Special, SP, Meta, Dash | |||
|adv hit=-17 | |||
|adv block=-20 | |||
|invul= x | |||
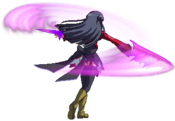
|description=*Lucifer spins in a circle, slashing the opponent with her blade twice. | |||
}} | |||
}} | |||
|- | {{MoveData | ||
| | |image=Lucifer-5C-Raw.png | ||
| | |hitbox=Lucifer-f5C.png | ||
--- | |caption= | ||
|name=f.5C | |||
|input= | |||
|data= | |||
{{AttackData-Ougon | |||
|damage=240 | |||
|recdamage= x | |||
|startup=12 | |||
|active=12 | |||
|recovery=22 | |||
|guard=HL | |||
|cancel=(J), Special, SP, Meta, Dash | |||
|adv hit=-9 | |||
|adv block=-12 | |||
|invul= x | |||
|description=*Lucifer steps forward, stabs the opponent with her blade, then returns to her original position. | |||
}} | |||
}} | |||
====Crouching==== | |||
|- | {{MoveData | ||
| | |image=Lucifer-2A-Raw.png | ||
| | |hitbox=Lucifer-2A.png | ||
- | |caption= | ||
Lucifer | |name=2A | ||
|input= | |||
|data= | |||
{{AttackData-Ougon | |||
|damage=54 | |||
|recdamage x | |||
|startup=4 | |||
|active=5 | |||
|recovery=4 | |||
|guard=HL | |||
|cancel=Special, SP, Meta | |||
|adv hit=+1 | |||
|adv block=+1 | |||
|invul= x | |||
|description=*The hem of Lucifer's skirt stabs the opponent. | |||
}} | |||
}} | |||
|- | {{MoveData | ||
| | |image=Lucifer-2B-Raw.png | ||
| | |hitbox=Lucifer-2B.png | ||
--- | |caption= | ||
Lucifer | |name=2B | ||
|input= | |||
|data= | |||
{{AttackData-Ougon | |||
|damage=135 | |||
|recdamage x | |||
|startup=8 | |||
|active=5 | |||
|recovery=14 | |||
|guard=L | |||
|cancel=Special, SP, Meta | |||
|adv hit=-3 | |||
|adv block=-5 | |||
|invul= x | |||
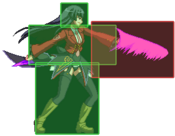
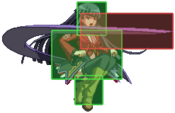
|description=*Lucifer slaps the opponent with the hem of her skirt. | |||
*Extremely long range and fast recovery, making this one of Lucifer's best normals. | |||
}} | |||
}} | |||
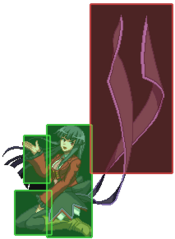
|- | {{MoveData | ||
| | |image=Lucifer-2C-Raw.png | ||
| | |hitbox=Lucifer-2C.png | ||
-- | |hitbox2=Lucifer-2C2.png | ||
Lucifer | |caption= | ||
|name=2C | |||
|input= | |||
|data= | |||
{{AttackData-Ougon | |||
|damage=240 | |||
|recdamage x | |||
|startup=13 | |||
|active=10 | |||
|recovery=12 | |||
|guard=L | |||
|cancel=Meta | |||
|adv hit=KD | |||
|adv block=-12/+3 | |||
|invul= x | |||
|description=*Lucifer slides along the ground, stabbing the feet of her opponent with her blade. Knocks down. | |||
*Slides. | |||
*Can not be cancelled into anything except Meta declare | |||
}} | |||
}} | |||
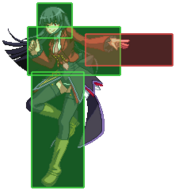
|- | {{MoveData | ||
| | |image=Lucifer-3C-Raw.png | ||
| | |hitbox=Lucifer-3C.png | ||
- | |caption= | ||
Lucifer | |name=3C | ||
|input= | |||
|data= | |||
{{AttackData-Ougon | |||
|damage=270 | |||
|recdamage x | |||
|startup=18 | |||
|active=8 | |||
|recovery=23 | |||
|guard=HL | |||
|cancel=Meta | |||
|adv hit=launch | |||
|adv block=±0 | |||
|invul= x | |||
|description=*Lucifer performs an uppercut stab with the hem of her skirt. Launches. | |||
*Gives free juggle. | |||
*Good anti-air if predicted well. | |||
}} | |||
}} | |||
====Jumping==== | |||
|- | {{MoveData | ||
| | |image=Lucifer-J8A-Raw.png | ||
| | |hitbox=Lucifer-J8A.png | ||
- | |caption= | ||
Lucifer | |name=j.8A | ||
|input= | |||
|data= | |||
{{AttackData-Ougon | |||
|damage=60 | |||
|recdamage= x | |||
|startup=3 | |||
|active=10 | |||
|recovery=3 | |||
|guard=H | |||
|cancel=Special, SP | |||
|adv hit=? | |||
|adv block=? | |||
|invul= x | |||
|description=*Lucifer chops the opponent in a manner similar to her 5A. | |||
}} | |||
}} | |||
{{MoveData | |||
|image=Lucifer-J79A-Raw.png | |||
|hitbox=Lucifer-J79A.png | |||
|caption= | |||
|name=j.7/9A | |||
|input= | |||
|data= | |||
{{AttackData-Ougon | |||
|damage=60 | |||
|recdamage= x | |||
|startup=6 | |||
|active=8 | |||
|recovery=3 | |||
|guard=H | |||
|cancel=Special, SP | |||
|adv hit=? | |||
|adv block=? | |||
|invul= x | |||
|description=*Lucifer's foot turns into a blade and stabs the opponent. | |||
}} | |||
}} | |||
{{MoveData | |||
|image=Lucifer-J8B-Raw.png | |||
|hitbox=Lucifer-J8B.png | |||
|caption= | |||
|name=j.8B | |||
|input= | |||
|data= | |||
{{AttackData-Ougon | |||
|damage=150 | |||
|recdamage= x | |||
|startup=7 | |||
|active=4 | |||
|recovery=6 | |||
|guard=H | |||
|cancel=Special, SP | |||
|adv hit=? | |||
|adv block=? | |||
|invul= x | |||
|description=*Lucifer spins in the air, hitting the opponent with the hem of her skirt. | |||
}} | |||
}} | |||
|- | {{MoveData | ||
| | |image=Lucifer-J79B-Raw.png | ||
| | |hitbox=Lucifer-J79B.png | ||
- | |caption= | ||
Lucifer | |name=j.7/9B | ||
|input= | |||
|data= | |||
{{AttackData-Ougon | |||
|damage=150 | |||
|recdamage x | |||
|startup=9 | |||
|active=4 | |||
|recovery=7 | |||
|guard=H | |||
|cancel=Special, SP | |||
|adv hit=? | |||
|adv block=? | |||
|invul= x | |||
|description=*Lucifer scratches the area below her with her nails. | |||
}} | |||
}} | |||
|- | {{MoveData | ||
| | |image=Lucifer-J8C-Raw.png | ||
| | |hitbox=Lucifer-J8C.png | ||
- | |caption= | ||
Lucifer | |name=j.8C | ||
|input= | |||
|data= | |||
{{AttackData-Ougon | |||
|damage=252 | |||
|recdamage x | |||
|startup=11 | |||
|active=4 | |||
|recovery=10 | |||
|guard=H | |||
|cancel=Special, SP | |||
|adv hit=? | |||
|adv block=? | |||
|invul= x | |||
|description=*Lucifer throws open her arms, slashing the area in front of her three times though only hitting once. Wallslams on hit. | |||
*Extremely good tool to use as a wall carry. | |||
}} | |||
}} | |||
{{MoveData | |||
|image=Lucifer-J79C-Raw.png | |||
|hitbox=Lucifer-J79C.png | |||
|caption= | |||
|name=j.7/9C | |||
|input= | |||
|data= | |||
{{AttackData-Ougon | |||
|damage=201 | |||
|recdamage x | |||
|startup=11 | |||
|active=3 | |||
|recovery=8 | |||
|guard=H | |||
|cancel=Special, SP | |||
|adv hit=? | |||
|adv block=? | |||
|invul= x | |||
|description=*Lucifer swings her blade at the area below her. | |||
*Can be used as a cross-up. | |||
}} | |||
}} | |||
===Throw=== | |||
{{MoveData | |||
|image=Lucifer-BCwhiff.png | |||
|image2=Lucifer-BC.png | |||
|image3=Lucifer-BC2.png | |||
|caption=Whiff animation | |||
|name=Throw | |||
|input= | |||
|data= | |||
{{AttackData-Ougon | |||
|damage=300 | |||
|recdamage x | |||
|startup=0-1 | |||
|active= x | |||
|recovery=29 (if whiffed) | |||
|guard=UNB | |||
|cancel= | |||
|adv hit=? | |||
|adv block=x | |||
|invul= x | |||
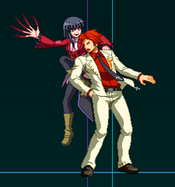
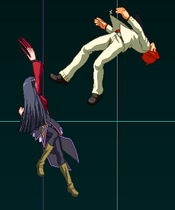
|description=* | |||
}} | |||
}} | |||
===Special Moves=== | |||
| | {{MoveData | ||
| | |image=Lucifer-236ABC_1.png | ||
--- | |caption= | ||
Lucifer | |name='''Lucifer Blade 1st 「ルシファーブレード 1st」''' | ||
|input=236A/B/C | |||
|data= | |||
{{AttackData-Ougon | |||
|version=236A | |||
|damage=120 | |||
|recdamage= x | |||
|startup=14 | |||
|active=4 | |||
|recovery=19 | |||
|guard=HL | |||
|cancel=x | |||
|adv hit=-5 | |||
|adv block=-9 | |||
|invul=? | |||
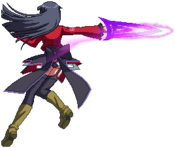
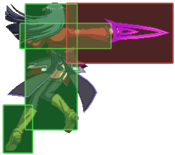
|description=*Lucifer steps forward and swings her blade three times before launching the opponent by jumping into the air. Can be executed up to three times in a row. | |||
*Can attack touch from the first two rekkas | |||
*1st Strike: Lucifer steps forward and strikes once. | |||
*A Version has Lucifer step forward a small distance | |||
}} | |||
{{AttackData-Ougon | |||
|version=236B | |||
|damage=120 | |||
|recdamage= x | |||
|startup=14 | |||
|active=4 | |||
|recovery=21 | |||
|guard=HL | |||
|cancel=x | |||
|adv hit=-9 | |||
|adv block=-12 | |||
|invul=? | |||
|description=*B Version a longer distance | |||
}} | |||
{{AttackData-Ougon | |||
|version=236C | |||
|damage=120 | |||
|recdamage= x | |||
|startup=14 | |||
|active=4 | |||
|recovery=23 | |||
|guard=HL | |||
|cancel=x | |||
|adv hit=-12 | |||
|adv block=-15 | |||
|invul= x | |||
|description=*C Version has her step forward the longest. | |||
}} | |||
}} | |||
{{MoveData | |||
|image=Lucifer-236ABC_2.png | |||
|image2=Lucifer-236ABC 22.png | |||
|caption= | |||
|name='''Lucifer Blade 2nd 「ルシファーブレード 2nd」''' | |||
|input=236X-236A/B/C | |||
|data= | |||
{{AttackData-Ougon | |||
|version=236X-236A | |||
|damage=60x2 | |||
|recdamage= x | |||
|startup=5 | |||
|active=6(3)2 | |||
|recovery=19 | |||
|guard=HL | |||
|cancel=x | |||
|adv hit=-5 | |||
|adv block=-11 | |||
|invul=? | |||
|description=*2nd Strikes: Lucifer steps forward again and strikes twice. | |||
*A Version has Lucifer step forward a small distance | |||
}} | |||
{{AttackData-Ougon | |||
|version=236X-236B | |||
|damage=60x2 | |||
|recdamage= x | |||
|startup=5 | |||
|active=6(3)2 | |||
|recovery=21 | |||
|guard=HL | |||
|cancel=x | |||
|adv hit=-7 | |||
|adv block=-13 | |||
|invul=? | |||
|description=*B Version a longer distance | |||
}} | |||
{{AttackData-Ougon | |||
|version=236X-236C | |||
|damage=60x2 | |||
|recdamage= x | |||
|startup=5 | |||
|active=6(3)2 | |||
|recovery=23 | |||
|guard=HL | |||
|cancel=x | |||
|adv hit=-9 | |||
|adv block=-15 | |||
|invul= x | |||
|description=*C Version has her step forward the longest. | |||
}} | |||
}} | |||
|- | {{MoveData | ||
| | |image=Lucifer-236ABC_3.png | ||
| | |image2=Lucifer-236ABC 32.png | ||
---- | |caption= | ||
Lucifer | |name='''Lucifer Blade 3rd 「ルシファーブレード 3rd」''' | ||
|input=236X-236X-236A/B/C | |||
|data= | |||
{{AttackData-Ougon | |||
|version=236X-236X-236A | |||
|damage=90 | |||
|recdamage= x | |||
|startup=11 | |||
|active=17 | |||
|recovery=23 | |||
|guard=HL | |||
|cancel=x | |||
|adv hit=KD | |||
|adv block=-30 | |||
|invul=? | |||
|description=*3rd Strike: Lucifer launches her and opponent into the air. | |||
*A Version has Lucifer step forward a small distance | |||
}} | |||
{{AttackData-Ougon | |||
|version=236X-236X-236B | |||
|damage=90 | |||
|recdamage= x | |||
|startup=11 | |||
|active=17 | |||
|recovery=23 | |||
|guard=HL | |||
|cancel=x | |||
|adv hit=KD | |||
|adv block=-30 | |||
|invul=? | |||
|description=*B Version a longer distance | |||
}} | |||
{{AttackData-Ougon | |||
|version=236X-236X-236C | |||
|damage=90 | |||
|recdamage= x | |||
|startup=11 | |||
|active=17 | |||
|recovery=23 | |||
|guard=HL | |||
|cancel=x | |||
|adv hit=KD | |||
|adv block=-30 | |||
|invul= x | |||
|description=*C Version has her step forward the longest. | |||
}} | |||
}} | |||
{{MoveData | |||
| | |image=Lucifer-421ABC.png | ||
| | |caption= | ||
-- | |name='''Magic Circle 「マジックサークル」 ― 421A/B/C''' | ||
Lucifer | |input=421A/B/C | ||
|data= | |||
{{AttackData-Ougon | |||
|version=421A | |||
|damage=450 | |||
|recdamage= x | |||
|startup=39 | |||
|active=2 | |||
|recovery=29 | |||
|guard=H | |||
|cancel=x | |||
|adv hit=KD | |||
|adv block=-13 | |||
|invul=? | |||
|description=*Lucifer vanishes and reappears closer to the opponent, slashing them. The distance traveled depends on the button used. | |||
*Overhead | |||
*Crosses up if used at a close enough distance. | |||
}} | |||
{{AttackData-Ougon | |||
|version=421B | |||
|damage=450 | |||
|recdamage= x | |||
|startup=39 | |||
|active=2 | |||
|recovery=29 | |||
|guard=H | |||
|cancel=x | |||
|adv hit=? | |||
|adv block=-13 | |||
|invul= x | |||
|description=* | |||
}} | |||
{{AttackData-Ougon | |||
|version=421C | |||
|damage=450 | |||
|recdamage= x | |||
|startup=39 | |||
|active=2 | |||
|recovery=29 | |||
|guard=H | |||
|cancel=x | |||
|adv hit=? | |||
|adv block=-13 | |||
|invul= x | |||
|description=* | |||
}} | |||
}} | |||
| | {{MoveData | ||
- | |image=Lucifer-214ABC.png | ||
=== | |image2=Lucifer-J214ABC.png | ||
- | |caption=Ground version | ||
|caption2=Aerial version | |||
|name='''Stake of Pride 「傲慢なる杭」''' | |||
|input=(j.)214A/B/C | |||
|data= | |||
{{AttackData-Ougon | |||
|version=214A | |||
|damage=300 | |||
|recdamage= x | |||
|startup=59 | |||
|active=8 | |||
|recovery=0 | |||
|guard=HL | |||
|cancel=x | |||
|adv hit=? | |||
|adv block=? | |||
|invul=? | |||
|description=*Ground - Lucifer backflips then launches herself in stake form. Hits mid. | |||
*On hit/block Lucifer will bounce backwards in the air and turn back to normal. At that moment she can use air normals or air specials. | |||
*A Version has the shortest startup and the shortest distance. | |||
*Invincible during the beginning of startup. | |||
*Punishable by some rushing supers | |||
}} | |||
{{AttackData-Ougon | |||
|version=214B | |||
|damage=300 | |||
|recdamage= x | |||
|startup=59 | |||
|active=10 | |||
|recovery=0 | |||
|guard=H | |||
|cancel=x | |||
|adv hit=? | |||
|adv block=? | |||
|invul= x | |||
|description=*B Version has medium startup and goes a medium distance. | |||
}} | |||
{{AttackData-Ougon | |||
|version=214C | |||
|damage=300 | |||
|recdamage= x | |||
|startup=59 | |||
|active=8 | |||
|recovery=0 | |||
|guard=HL | |||
|cancel=x | |||
|adv hit=? | |||
|adv block=? | |||
|invul=? | |||
|description=*C Version has the longest startup and goes the longest distance. | |||
}} | |||
{{AttackData-Ougon | |||
|version=j.214A | |||
|damage=120 | |||
|recdamage= x | |||
|startup=17 | |||
|active=6 | |||
|recovery=15 | |||
|guard=HL | |||
|cancel=x | |||
|adv hit=? | |||
|adv block=-7 | |||
|invul= x | |||
|description=*Air - Lucifer turns her lower half into stake form and launches at the ground. | |||
*A Version goes down at the lowest angle. | |||
}} | |||
{{AttackData-Ougon | |||
|version=j.214B | |||
|damage=120 | |||
|recdamage= x | |||
|startup=17 | |||
|active=6 | |||
|recovery=15 | |||
|guard=HL | |||
|cancel=x | |||
|adv hit=KD | |||
|adv block=-9 | |||
|invul=? | |||
|description=*B Version goes down at the median angle. | |||
}} | |||
{{AttackData-Ougon | |||
|version=j.214C | |||
|damage=120 | |||
|recdamage= x | |||
|startup=17 | |||
|active=6 | |||
|recovery=15 | |||
|guard=HL | |||
|cancel=x | |||
|adv hit=? | |||
|adv block=-10 | |||
|invul= x | |||
|description=*C Version goes down at the highest angle. | |||
}} | |||
}} | |||
=== | ===SP Supers=== | ||
--- | {{MoveData | ||
|image=Lucifer-236A+B.png | |||
|image2=Lucifer-236A+B2.png | |||
|name='''Lucifer Blade: 4th 「ルシファーブレード4th」''' | |||
|input=236A+B | |||
|data= | |||
{{AttackData-Ougon | |||
|damage=180x2 | |||
|recdamage= x | |||
|startup=5 | |||
|active=9 | |||
|recovery=27 | |||
|guard=HL | |||
|cancel=x | |||
|adv hit=KD | |||
|adv block=? | |||
|invul= x | |||
|description=*Lucifer launches the opponent in the air but lands and does another dragon punch. Only usable as a replacement to 3rd Strike. Hits mid. | |||
}} | |||
}} | |||
{{MoveData | |||
|image=Lucifer-421A+B.png | |||
|name='''Teleport Circle 「テレポートサークル」''' | |||
|input=421A+B | |||
|data= | |||
{{AttackData-Ougon | |||
|damage=570 | |||
|recdamage= x | |||
|startup=37 | |||
|active=9 | |||
|recovery=30 | |||
|guard=H | |||
|cancel=x | |||
|adv hit=KD | |||
|adv block=-21 | |||
|invul= x | |||
|description=*Lucifer vanishes and reappears right beside the opponent, slashing them. Overhead. | |||
*Travels full screen behind the opponent. | |||
*Much larger hitbox than the non-EX version allowing for Lucifer to anti-air with this move. | |||
}} | |||
}} | |||
{{MoveData | |||
|image=Lucifer-214A+B.png | |||
|image2=Lucifer-J214A+B.png | |||
|name='''The Sacrifice-Gouging Stake of Pride 「傲慢なる生贄抉りの杭」''' | |||
|input=(j.)214A+B | |||
|data= | |||
{{AttackData-Ougon | |||
|version=214A+B | |||
|damage=450 | |||
|recdamage= x | |||
|startup=21 | |||
|active=16 | |||
|recovery=30 | |||
|guard=HL | |||
|cancel=x | |||
|adv hit=KD | |||
|adv block=? | |||
|invul=? | |||
|description=*Ground - Lucifer back flips and launches herself in stake form. Hits mid. | |||
*Hits the enemy 5 times. | |||
*Goes through the enemy towards the other end of the screen. | |||
*Invincible on startup. | |||
}} | |||
{{AttackData-Ougon | |||
|version=j.214A+B | |||
|damage=90x6 | |||
|recdamage= x | |||
|startup=10 | |||
|active=6 | |||
|recovery=3 | |||
|guard=H | |||
|cancel=x | |||
|adv hit=? | |||
|adv block=+14 | |||
|invul= x | |||
|description=*Lucifer turns her lower half into stake form and launches at the ground at a 30 degree angle. Hits high. | |||
*Hits the enemy up to 6 times. | |||
*Depending on how low the final hit before landing connects, different follow-ups are possible, like 2A or c.5B. | |||
}} | |||
}} | |||
===Level 2 Super=== | |||
{{MoveData | |||
|image=Lucifer-236236C.png | |||
|name='''The Proud Eldest Daughter's Murder Spree 「傲慢なる長女の殺人劇」''' | |||
|input=236236C | |||
|data= | |||
{{AttackData-Ougon | |||
|damage=645 | |||
|recdamage= x | |||
|startup=8 | |||
|active=12 | |||
|recovery=27 | |||
|guard=HL | |||
|cancel=x | |||
|adv hit=KD | |||
|adv block=-7 | |||
|invul= x | |||
|description=*Lucifer rushes at the opponent and if contact is made, hits the opponent with a 10 hit combo. | |||
}} | |||
}} | |||
|- | ===Meta Super=== | ||
| | {{MoveData | ||
| | |image=Lucifer-MetaSuper.png | ||
-- | |image2=Lucifer-MetaSuper2.png | ||
|caption=Projectile | |||
|name='''Seven Sisters of Purgatory, to me! 「煉獄の七姉妹、ここに!」''' | |||
|input=641236C during MetaWorld | |||
|data= | |||
{{AttackData-Ougon | |||
|damage=765 | |||
|recdamage= x | |||
|startup=? | |||
|active=? | |||
|recovery=? | |||
|guard=HL | |||
|cancel=x | |||
|adv hit=? | |||
|adv block=-33 | |||
|invul= x | |||
|description=*Lucifer throws the other six stakes as a single projectile at the opponent. If they hit, the sisters hold the opponent down as Lucifer collides into them in stake form. | |||
*Air unblockable, making jumping over it very risky. | |||
*Very fast, allowing for full screen punishes. | |||
*Beats out most other projectiles. | |||
}} | |||
}} | |||
==Frame Data== | |||
|- | KD = Knockdown | ||
| | | Frames | Frame Advantage | | ||
Attack | Damage|Startup*| Active | Recovery |On Hit | On Block | Notes | |||
| | Throw ------------------------------------------------------------------ | ||
---- | B+C | 300 | 0-1 | ? | ? | TKD | |29 Duration on Whiff | ||
Normals ------------------------------------------------------------------ | |||
5A | 54 | 4 | 5 | 3 | +2 | +2 | | |||
2A | 54 | 4 | 5 | 4 | +1 | +1 | | |||
c.5B | 150 | 7 | 5 | 15 | -4 | -6 | | |||
f.5B | 123 | 8 | 8 | 22 | -14 | -16 | | |||
2B | 135 | 8 | 5 | 14 | -3 | -5 | | |||
c.5C | 129x2 | 8 | 4(5)5 | 37 | -17 | -20 | | |||
f.5C | 240 | 12 | 12 | 22 | -9 | -12 | | |||
2C | 240 | 13 | 10 | 12 | UKD | -12/-3 | | |||
j8.5A | 60 | 3 | 10 | 3 | | | | |||
j8.5B | 150 | 7 | 4 | 6 | | | | |||
j8.5C | 252 | 11 | 4 | 10 | | | | |||
j(7/9).5A | 60 | 6 | 8 | 3 | | | | |||
j(7/9).5B | 150 | 9 | 4 | 7 | | | | |||
j(7/9).5C | 201 | 11 | 3 | 8 | | | | |||
Command Normals ------------------------------------------------------------------ | |||
6A | 66 | 6 | 3 | 9 | -2 | -2 | | |||
6B | 180 | 17 | 13 | 9 | +3/+15| +0/+12 | | |||
3C | 270 | 18 | 8 | 23 | launch| +0 | | |||
Specials ------------------------------------------------------------------ | |||
236A: | -4 | | |||
236AA: | -3? | | |||
236AAA: | -25? | | |||
236B: | -5 | | |||
236BB: | -4 | | |||
236BBB: | -25? | | |||
236C: | -9? | | |||
236CC: | -9? | | |||
236CCC: | -25? | | |||
421A: | -8 | | |||
421B: | -8 | | |||
421C: | -8 | | |||
214A/B/C: | | | |||
j.214A: | -1? | | |||
j.214B: | -2? | | |||
j.214C: | -4 | | |||
SPs and Meta ------------------------------------------------------------------ | |||
236XXA+B: | -26? | | |||
421A+B: | -16 | | |||
214A+B: | | | |||
j.214A+B: | +7 | | |||
236236C: | -5 | | |||
Meta 641236C: | -28? | | |||
==General Strategy== | |||
''Feel free to edit this part of the wiki with your tips/strats on how to best use Lucifer.'' | |||
:''Coming Soon'' | |||
==Team Building== | |||
''Feel free to edit this part of the wiki with your tips/strats what partners are best for Lucifer to use.'' | |||
The information displayed here is from the 2022 [https://docs.google.com/spreadsheets/d/1XDgSDY3CVSySpuVgcf4qTxLy-mXrv1hdEZVWqmDchKs/edit?usp=sharing Team Tier List from the Ougon Discord] Thus, it is open to change, but it should work as a building block for people looking for team pairing ideas. If you are a player of any of the teams and want to change anything feel free to do so. | |||
'''<big>Reasons to choose Lucifer for your team</big>''' | |||
*Lucifer is a very similar character to [[Ougon_Musou_Kyoku/Kanon|Kanon]], and most of his strenghts and weaknesses like good neutral and movement, but bad defensive options still apply to Lucifer. She specializes more in a dominant ground game and better rushdown rather than a more balanced approach like Kanon. Her 2B, 2C, and teleport can tag opponents from far away. Her ability is also a very useful ability for combos and pressure, and tends to allow for combos that would otherwise need meter to stun or get more reward, do that by default. Her 6B is a very good overhead that is + on block if spaced and allows to link after, and can even cross-up in some oki set-ups. As Previously said, just like Kanon, she suffers from a very demanding gameplan, and unlike Kanon, lacks reliable anti airs to stop aerial approaches, so she needs to do hard call-outs most of the time to stop opponents from jumping. | |||
*If you need a summary as to who to choose in a team, Lucifer is a Point character that tends to benefit more proactive and predictive play, while Kanon is a Point who benefits a more reactive and counterplay based approach. | |||
{| class="wikitable" | |||
|+ | |||
|- | |||
! Image !! Team Composition !! 1 Bar of Health !! Notable information | |||
|- | |||
| [[File:ANGLUCI.png|frameless]] || '''<big>Lucifer/Ange</big>''' || 2600 || | |||
*Fun neutral, but these two have some of the worst damage in the game. Stun causes proration and this makes Luci sad. | |||
*They will win a surprising number of exchanges between them, but more than anyone have almost nothing to do once they do. | |||
*Luci/Beato or Ange/Rono is much better as Ange can handle neutral just fine especially with meter. | |||
|- | |||
| [[File:BATLUCI.png|frameless]] || '''<big>Lucifer/Battler</big>''' || 2600 || | |||
*One of the best neutral pairs in the game, there’s no character that can really counter both of them, so you’ll have an answer for every situation. | |||
*You might do a little mixup with Luci, but this is an honest team with honest (low) damage to match. | |||
*Rely on resets wherever you can as neither of these two can do unprorated damage even though Luci’s ability makes them capable of super long combos. You need to play creative. | |||
|- | |||
| [[File:LUCIBBAT.png|frameless]] || '''<big>Lucifer/Black Battler</big>''' || 2200 || | |||
*Hopelessly fragile, Bat/Luci is a straight upgrade, imposing neutral but even one mistake could lose the match. | |||
|- | |||
| [[File:BETLUCI.png|frameless]] || '''<big>Lucifer/Beatrice</big>''' || 2600 || | |||
*One of the better rushdown teams in the game; just a couple of confirms from Lucifer might be enough to win you the round. Lucifer’s ability to 3C touch into Beatrice’s tower setup is not to be underestimated and adds a real threat to her MetaDeclarations in almost any situation. | |||
*Expect Beatrice to be lagging behind in meter for the majority of the match, but this is no issue; she only needs one or two meter to take out an entire healthbar and stun, and Lucifer’s SP can be used chiefly to reduce the opponent’s through MetaDeclaring as she has little use for it in neutral. | |||
*Overall the ability to loop momentum through mixup or guardbreak is what makes this team so lethal and consistent. That being said, this team can struggle defensively, so there isn’t a lot of room for mistakes. It can be considered one of the best teams if both characters are played optimally. | |||
|- | |||
| [[File:LUCIBERN.png|frameless]] || '''<big>Lucifer/Bernkastel</big>''' || 2400 || | |||
*Great neutral and decent damage but very fragile. Bern has no need for such a fast partner as she is fast and evasive herself and has no trouble approaching anyone. | |||
*In terms of damage this team is pretty much completely inferior to Beato/Luci (which also has better pressure) and Luci/Will. | |||
|- | |||
| [[File:LUCICHIE.png|frameless]] || '''<big>Lucifer/Chiester 410</big>''' || 2650 || | |||
*A great pick if neutral and mixup are your ultimate strengths. These two have answers between them to any character’s moveset and their mixup can be very overwhelming (410 can loop momentum with her MetaSuper off any Attack Touch from Luci or her own grab, and you will also constantly guardbreak) but they lack defensive options so they need to play rushdown and approach neutral skilfully. | |||
*Probably one of the hardest teams in the game to get good at but well worth the effort. You’ll need to be a dynamic player to avoid becoming predictable. | |||
|- | |||
| [[File:DLALUCI.png|frameless]] || '''<big>Lucifer/Dlanor</big>''' || 2700 || | |||
*A fair dynamic but completely outclassed by Luci/Will. | |||
*Can be more defensive but this doesn’t suit Luci or her ability. No good reversal. | |||
|- | |||
| [[File:ERIKLUCI.png|frameless]] || '''<big>Lucifer/Erika</big>''' || 2500 || | |||
*Both want a more damaging partner. Force Counter doesn’t really help Luci. | |||
*Too weak to pressure, but strong neutral. | |||
|- | |||
| [[File:EVALUCI.png|frameless]] || '''<big>Lucifer/EVA-Beatrice</big>''' || 2650 || | |||
*A solid and surprisingly damaging team that is difficult for just about anyone to approach, but it struggles defensively when the opponent has momentum. You want to sustain careful pressure and pick the opponent apart with threatening MetaDeclarations and forcing Damage Touch. | |||
*Plays kind of similarly to Bat/Luci, opt for resets sometimes and these two will maintain a meter advantage without much difficulty. Neither tend to spend it in neutral. | |||
*Lucifer greatly appreciates the boost from Berserk, as damage is her main shortcoming. Lucifer’s own ability can mean free MetaSupers for Eva too, which means SP advantage. | |||
*The main strength of this team is that it’s strong against many high-tier teams; Will and Bern in particular struggle with this pair. | |||
*Both have low stun, so while you’ll be hard to hit, don’t be careless. These two have really annoying hurtboxes. | |||
|- | |||
| [[File:LUCIGEOR.png|frameless]] || '''<big>Lucifer/George</big>''' || 2600 || | |||
*Major damage issues, Bat/Luci outclasses, can excel in mixup but low stun on both and low health makes this team very punishable. | |||
|- | |||
| [[File:LUCIJESS.png|frameless]] || '''<big>Lucifer/Jessica</big>''' || 2600 || | |||
*High damage and great mixup, but both characters have better options. | |||
*Jess can’t capitalise fully on Attack Touch because she needs to charge for her combos. She generally prefers Kanon as a fast, neutral-oriented partner. *Luci has a better dynamic with Beato, Lia and Will as damage dealers as they can capitalise fully on her confirms without having to score a hit of their own straight after. Jess’s MetaSuper partly makes up for this but it’s not as good as the aforementioned options for corner setplay/combos. | |||
|- | |||
| [[File:LUCIKAN.png|frameless]] || '''<big>Lucifer/Kanon</big>''' || 2400 || | |||
*Unparalleled depth to their neutral, but damage even worse than Bat/Luci’s. You’ll be relying on resets and momentum to a pretty great extent; Luci/410 is probably the better pick for that kind of playstyle. | |||
*This team will build up a meter advantage over time though, but since it relies on rushdown this isn’t as useful as it sounds. | |||
*Terrible bulk and mediocre defensive options. | |||
|- | |||
| [[File:LAMLUCI.png|frameless]] || '''<big>Lucifer/Lambdadelta</big>''' || 2400 || | |||
*Fragile, damage issues, will rely too much on guardbreak. Decent mixup. There’s no need for both chars to be so fast. | |||
*Just replace one with Beato. | |||
|- | |||
| [[File:LUCIRON.png|frameless]] || '''<big>Lucifer/Ronove</big>''' || 2850 || | |||
*Plays pretty similarly to Luci/Eva, except it’s a little more pressure-oriented. CounterBoost Lucifer is a massive threat; scoring counterhits is what she does best, and her short combos that tend to start from pokes are the perfect match for the ability. She also appreciates the extra health that Ronove provides, and he in turn gains a lot from her corner carry and ability to mixup. | |||
*These two don’t really appreciate Guard Touch so similarly to Jess/Rono, try to stay unpredictable. | |||
*Meter advantage is common and these two happily maintain it; you might want to focus on counterplay. | |||
|- | |||
| [[File:ROSLUCI.png|frameless]] || '''<big>Lucifer/Rosa</big>''' || 2700 || | |||
*Good control over... Touch dynamics? This team will struggle to build meter a bit and their damage and stun leaves a lot to be desired if they are unoptimized, but it's decent once you learn the advanced routes of both characters, then it's solid, and this team's punishes will shine a lot more. | |||
*Pretty much a lite version of Beato/Luci. They do have a slightly better neutral than that team though. | |||
|- | |||
| [[File:LUCISHAN.png|frameless]] || '''<big>Lucifer/Shannon</big>''' || 2750 || | |||
*Shannon is your only source of big damage, too mixup heavy, minor misplays will create serious disadvantage. | |||
|- | |- | ||
| [[File:VIRLUCI.png|frameless]] || '''<big>Lucifer/Virgilia</big>''' || 2700 || | |||
| | *With Lucifer bringing out the best in Virgilia whose main weakness is neutral, this team basically plays like a safer version of Luci/Beato with a little less adaptable pressure. You can start going for the kill in the corner a little earlier than you would be able to with Beato as Lia’s corner setplay is more varied and can safely get a guardbreak from lower capacity than Beato 214SP can. Unlike that team you’ll slowly accumulate SP advantage with Lia’s ability rather than controlling the dynamic with towers. | ||
*Lia will do most of your damage and pressure; these are her strengths and she has a lot of conversions out of Luci’s 2C and 3C, which she may be forced to Attack Touch out of at times. | |||
|- | |- | ||
| [[File:LUCIWILL.png|frameless]] || '''<big>Lucifer/Willard</big>''' || 2600 || | |||
*Again, a team pretty comparable to Luci/Beato but this time neutral is its strength. You will probably end up doing a little less damage than Luci/Beato and Luci/Lia overall just because of this pair’s inability to guardbreak as efficiently, but it’s hardly a devastating loss with Will’s crazy damage and more hits scored overall with these two. Basically this is preferable to those teams if you’re less of a setplayer. | |||
*A solid offensive team with great damage and decent mixup. Will can capitalise amazingly on Luci’s 2C and 3C. | |||
*Great against Jess, who is a fairly common threat in the metagame. | |||
* | |||
* | |||
|} | |} | ||
==Combos== | ==Combos== | ||
''Feel free to edit this part of the wiki with other combos to use, ranging from BnBs to optimized.'' | |||
{{ComboTable-MBTL | |||
| data = | |||
{{ComboData-MBTL | |||
| combo = 2A > 2B > 5B > 5C > 236C~236C~236C | |||
| cost = 0 | |||
| metergain = 99% | |||
| oppmetergain = | |||
| damage = 839 | |||
| location = {{P-UNI|anywhere}} | |||
| notes = Lucifer's staple BnB. | |||
}} | |||
{{ComboData-MBTL | |||
| combo = 2A > 2B > 5B > f.5C > 2C | |||
| cost = 0 | |||
| metergain = 50% | |||
| oppmetergain = | |||
| damage = 718 | |||
| location = {{P-UNI|anywhere}} | |||
| notes = Alternative BnB for max range confirms. | |||
}} | |||
{{ComboData-MBTL | |||
| combo = 2A > 2B > 5B > 5C > 66 > f.5C > 3C > j.9C > j.9B > 214C | |||
| cost = 0 | |||
| metergain = 101% | |||
| oppmetergain = | |||
| damage = 1420 | |||
| location = {{P-UNI|midscreen}} {{P-UNI|corner}} | |||
| notes = Meterless dash cancel combo that build 1 full bar. You must get a Far 5C after the dash cancel so you can combo into 3C, also you have to slightly delay the "j.9C > j.9B" so that the opponent is not too high or too below you so that 214C doesnt whiff. | |||
}} | |||
{{ComboData-MBTL | |||
| combo = 2A > 2B > 5B > 5C > metaDeclare xx 66 2A > 2B > 5B > 5C > 236C 236C attackTouch(partner) (...) attackTouch(Lucifer) 2A > 2B > 5B > 5C > metaSuper | |||
| cost = 1SP | |||
| metergain = X | |||
| oppmetergain = | |||
| damage = X | |||
| location = {{P-UNI|anywhere}} | |||
| notes = Extremely basic Meta World BnB that makes use of Lucifer's ability. | |||
::* (...) stands in for whatever combo that Lucifer's partner does, assuming it leaves the opponent grounded. | |||
}} | |||
{{ComboData-MBTL | |||
| combo = 2A > 2B > 5B > 5C > 2C > metaDeclare xx dash 3C > j9.C > j9.B > land dash 6A > j8.C xx land metaSuper | |||
| cost = 1SP | |||
| metergain = | |||
| oppmetergain = | |||
| damage = | |||
| location = {{P-UNI|anywhere}} | |||
| notes = High execution combo that looks amazing and is surprisingly practical. | |||
::* Can be done anywhere in the screen. | |||
::* The j.9C j9.B must be timed close to the ground. | |||
}} | |||
{{ComboData-MBTL | |||
| combo = [http://www.youtube.com/watch?v=RRZq5VCQW2I '''2A > 2B > 5B > 5C dashCancel (instant)f.5C > 3C metaDeclare xx dash 3C xx 3C > j9.C > j9.B > land dash 6A > j8.C > land metaSuper'''] | |||
| cost = 1SP | |||
| metergain = | |||
| oppmetergain = | |||
| damage = | |||
| location = {{P-UNI|anywhere}} | |||
| notes = A variation of the high execution combo. | |||
::* Can be done anywhere on the screen. | |||
::* The f.5C must be timed at the max of distance of the Dash Cancel in order to connect. | |||
::* The j.9C j9.B must be timed close to the ground. | |||
}} | |||
{{ComboData-MBTL | |||
| combo = 2A > 2B > 5B > 5C > 2C > metaDeclare xx dash 3C > j8.C > land [2A 5A/6A j.8C > land]xN > metaSuper | |||
| cost = 1SP | |||
| metergain = | |||
| oppmetergain = | |||
| damage = | |||
| location = {{P-UNI|corner}} | |||
| notes = A corner-only variation of the high execution combo. | |||
::* xN can be done for as long as Meta World is active. | |||
}} | |||
{{ComboData-MBTL | |||
| combo = [http://www.youtube.com/watch?v=yM_K2tJaz8A&feature=youtu.be '''2A > 2B > 5B > 5C > dashCancel (instant)f.5C > 3C > metaDeclare xx dash 3C xx 3C > j8.C > land [2A 5A/6A j8.C land]xN > metaSuper] | |||
| cost = 1SP | |||
| metergain = | |||
| oppmetergain = | |||
| damage = | |||
| location = {{P-UNI|corner}} | |||
| notes = Another corner variation. | |||
::* The f.5C must be timed at the max of distance of the Dash Cancel in order to connect. | |||
::* xN can be done for as long as Meta World is active. | |||
}} | |||
{{ComboData-MBTL | |||
| combo = | |||
| cost = | |||
| metergain = | |||
| oppmetergain = | |||
| damage = | |||
| location = | |||
| notes = | |||
}} | |||
}} | |||
===Video Examples=== | |||
<youtube>https://youtu.be/SyZZSBdwK3g</youtube> | |||
==Pictures== | |||
== Pictures == | |||
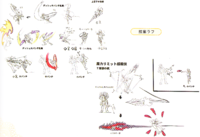
[[File:Lucifer Artwork.png|200px|thumb|left|Early concept art of Lucifer.]] | [[File:Lucifer Artwork.png|200px|thumb|left|Early concept art of Lucifer.]] | ||
{{Navbox-OMK}} | |||
{{OMK}} | |||
[[Category:Ougon Musou Kyoku]] | [[Category:Ougon Musou Kyoku]] | ||
[[Category:Lucifer]] | |||
Latest revision as of 15:19, 24 March 2024
Background
Lucifer is the eldest sister of the Seven Stakes of Purgatory, furniture belonging to the Game Master in Umineko no Naku Koro ni. Lucifer represents the sin of pride, and does it quite well. In Ougon Musou Kyoku, Lucifer fulfills her duties as the furniture of the Game Master, while finding time to compete and play with the other furniture.
Introduction
Oldest of the seven purgatory sisters, Lucifer offers very fast and simple, beginner friendly gameplay for those who can keep up. She can get conversions from every range with her absurd neutral buttons, and her ability offers guaranteed easy damage. She also has access to some mixups with her overhead which can be spaced to be plus on block and combo'd on hit. She however struggles little against jumpers and her tools are one dimensional due to her some niche/useless specials.
| Strengths | Weaknesses |
|---|---|
|
|
Ability
Attack Touch
Whilst this ability is active, your character can perform an an Attack Touch, regardless of the Touch Gauge's current state. Single use ability, consumed when you perform an Attack Touch.
Lucifer's ability is exactly what it's called - it's a free Attack Touch. It allows for very high damage combos without spending that many resources, simply by tagging Lucifer out or by entering the Meta World. Essentially it makes it so that Lucifer is almost always the character you want to have out, constantly building meter for her partner in the process.
It is worth mentioning that Attack Touch takes precedence over Touch Gauge - if it was already full, it will remain full and consume the ability. If it wasn't full, the ability will simply be consumed and the standard 8 second cooldown from Attack Touching will be placed, regardless of what the previous cooldown value was at. You could potentially do this to shorten how long your Touch Gauge is disabled from a Damage Touch (15 seconds) by entering the Meta World and Attack Touching off of any random hit.
Move List
Normal Moves
Standing
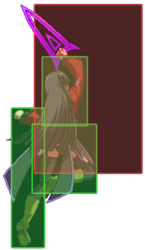
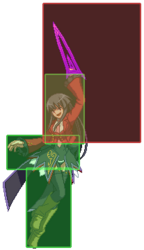
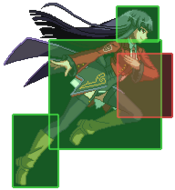
5A
|
|
|---|---|
Toggle Hitboxes Toggle Hitboxes
|
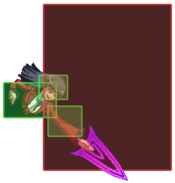
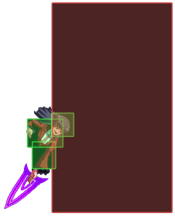
6A
|
|
|---|---|
Toggle Hitboxes Toggle Hitboxes
|
c.5B
|
|
|---|---|
Toggle Hitboxes Toggle Hitboxes
|
f.5B
|
|
|---|---|
Toggle Hitboxes Toggle Hitboxes
|
6B
|
|
|---|---|
Toggle Hitboxes Toggle Hitboxes
|
c.5C
|
|
|---|---|
Toggle Hitboxes Toggle Hitboxes
|
f.5C
|
|
|---|---|
Toggle Hitboxes Toggle Hitboxes
|
Crouching
2A
|
|
|---|---|
Toggle Hitboxes Toggle Hitboxes
|
2B
|
|
|---|---|
Toggle Hitboxes Toggle Hitboxes
|
2C
|
|
|---|---|
Toggle Hitboxes Toggle Hitboxes
|
3C
|
|
|---|---|
Toggle Hitboxes Toggle Hitboxes
|
Jumping
j.8A
|
|
|---|---|
Toggle Hitboxes Toggle Hitboxes
|
j.7/9A
|
|
|---|---|
Toggle Hitboxes Toggle Hitboxes
|
j.8B
|
|
|---|---|
Toggle Hitboxes Toggle Hitboxes
|
j.7/9B
|
|
|---|---|
Toggle Hitboxes Toggle Hitboxes
|
j.8C
|
|
|---|---|
Toggle Hitboxes Toggle Hitboxes
|
j.7/9C
|
|
|---|---|
Toggle Hitboxes Toggle Hitboxes
|
Throw
Throw Whiff animation Whiff animation
|
|---|
Special Moves
Lucifer Blade 1st 「ルシファーブレード 1st」
236A/B/C |
|---|
Lucifer Blade 2nd 「ルシファーブレード 2nd」
236X-236A/B/C |
|---|
Lucifer Blade 3rd 「ルシファーブレード 3rd」
236X-236X-236A/B/C |
|---|
Magic Circle 「マジックサークル」 ― 421A/B/C
421A/B/C |
|---|
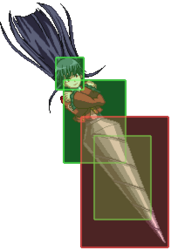
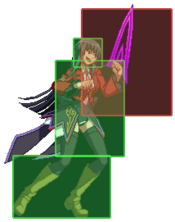
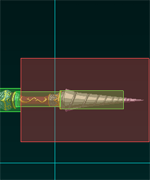
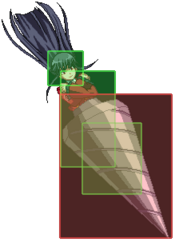
Stake of Pride 「傲慢なる杭」 (j.)214A/B/C Ground version Ground version Aerial version Aerial version
|
|---|
SP Supers
Lucifer Blade: 4th 「ルシファーブレード4th」
236A+B |
|---|
Teleport Circle 「テレポートサークル」
421A+B |
|---|
The Sacrifice-Gouging Stake of Pride 「傲慢なる生贄抉りの杭」
(j.)214A+B |
|---|
Level 2 Super
The Proud Eldest Daughter's Murder Spree 「傲慢なる長女の殺人劇」
236236C |
|---|
Meta Super
Seven Sisters of Purgatory, to me! 「煉獄の七姉妹、ここに!」 641236C during MetaWorld Projectile Projectile
|
|---|
Frame Data
  KD = Knockdown
                              |          Frames             |  Frame Advantage |
              Attack  | Damage|Startup*| Active  | Recovery |On Hit | On Block | Notes
               Throw  ------------------------------------------------------------------
                 B+C  |  300  |  0-1   |    ?    |    ?     |  TKD  |          |29 Duration on Whiff
             Normals  ------------------------------------------------------------------
                  5A  |   54  |    4   |    5    |    3     |  +2   |   +2     |
                  2A  |   54  |    4   |    5    |    4     |  +1   |   +1     |
                c.5B  |  150  |    7   |    5    |   15     |  -4   |   -6     |
                f.5B  |  123  |    8   |    8    |   22     | -14   |  -16     |
                  2B  |  135  |    8   |    5    |   14     |  -3   |   -5     |
                c.5C  | 129x2 |    8   |  4(5)5  |   37     | -17   |  -20     |
                f.5C  |  240  |   12   |   12    |   22     |  -9   |  -12     |
                  2C  |  240  |   13   |   10    |   12     |  UKD  | -12/-3   |
               j8.5A  |   60  |    3   |   10    |    3     |       |          |
               j8.5B  |  150  |    7   |    4    |    6     |       |          |
               j8.5C  |  252  |   11   |    4    |   10     |       |          |
           j(7/9).5A  |   60  |    6   |    8    |    3     |       |          |
           j(7/9).5B  |  150  |    9   |    4    |    7     |       |          |
           j(7/9).5C  |  201  |   11   |    3    |    8     |       |          |
     Command Normals  ------------------------------------------------------------------
                  6A  |   66  |    6   |    3    |    9     |  -2   |   -2     |
                  6B  |  180  |   17   |   13    |    9     | +3/+15|  +0/+12  |
                  3C  |  270  |   18   |    8    |   23     | launch|   +0     |
             Specials ------------------------------------------------------------------
                236A:                                               |   -4     |
               236AA:                                               |   -3?    |
              236AAA:                                               |   -25?   |
                236B:                                               |   -5     |
               236BB:                                               |   -4     |
              236BBB:                                               |   -25?   |
                236C:                                               |   -9?    |
               236CC:                                               |   -9?    |
              236CCC:                                               |   -25?   |
                421A:                                               |   -8     |
                421B:                                               |   -8     |
                421C:                                               |   -8     |
            214A/B/C:                                               |          |
              j.214A:                                               |   -1?    |
              j.214B:                                               |   -2?    |
              j.214C:                                               |   -4     |
        SPs and Meta ------------------------------------------------------------------
            236XXA+B:                                               |   -26?   |
              421A+B:                                               |   -16    |
              214A+B:                                               |          |
            j.214A+B:                                               |   +7     |
             236236C:                                               |   -5     |
        Meta 641236C:                                               |   -28?   |
General Strategy
Feel free to edit this part of the wiki with your tips/strats on how to best use Lucifer.
- Coming Soon
Team Building
Feel free to edit this part of the wiki with your tips/strats what partners are best for Lucifer to use.
The information displayed here is from the 2022 Team Tier List from the Ougon Discord Thus, it is open to change, but it should work as a building block for people looking for team pairing ideas. If you are a player of any of the teams and want to change anything feel free to do so.
Reasons to choose Lucifer for your team
- Lucifer is a very similar character to Kanon, and most of his strenghts and weaknesses like good neutral and movement, but bad defensive options still apply to Lucifer. She specializes more in a dominant ground game and better rushdown rather than a more balanced approach like Kanon. Her 2B, 2C, and teleport can tag opponents from far away. Her ability is also a very useful ability for combos and pressure, and tends to allow for combos that would otherwise need meter to stun or get more reward, do that by default. Her 6B is a very good overhead that is + on block if spaced and allows to link after, and can even cross-up in some oki set-ups. As Previously said, just like Kanon, she suffers from a very demanding gameplan, and unlike Kanon, lacks reliable anti airs to stop aerial approaches, so she needs to do hard call-outs most of the time to stop opponents from jumping.
- If you need a summary as to who to choose in a team, Lucifer is a Point character that tends to benefit more proactive and predictive play, while Kanon is a Point who benefits a more reactive and counterplay based approach.
Combos
Feel free to edit this part of the wiki with other combos to use, ranging from BnBs to optimized.
| Combo | Damage | Cost | Meter Gain | Location |
|---|---|---|---|---|
| 2A > 2B > 5B > 5C > 236C~236C~236C | 839 | 0 | 99% | Anywhere |
|
Lucifer's staple BnB. | ||||
| 2A > 2B > 5B > f.5C > 2C | 718 | 0 | 50% | Anywhere |
|
Alternative BnB for max range confirms. | ||||
| 2A > 2B > 5B > 5C > 66 > f.5C > 3C > j.9C > j.9B > 214C | 1420 | 0 | 101% | Midscreen Corner |
|
Meterless dash cancel combo that build 1 full bar. You must get a Far 5C after the dash cancel so you can combo into 3C, also you have to slightly delay the "j.9C > j.9B" so that the opponent is not too high or too below you so that 214C doesnt whiff. | ||||
| 2A > 2B > 5B > 5C > metaDeclare xx 66 2A > 2B > 5B > 5C > 236C 236C attackTouch(partner) (...) attackTouch(Lucifer) 2A > 2B > 5B > 5C > metaSuper | X | 1SP | X | Anywhere |
|
Extremely basic Meta World BnB that makes use of Lucifer's ability.
| ||||
| 2A > 2B > 5B > 5C > 2C > metaDeclare xx dash 3C > j9.C > j9.B > land dash 6A > j8.C xx land metaSuper | 1SP | Anywhere | ||
|
High execution combo that looks amazing and is surprisingly practical.
| ||||
| 2A > 2B > 5B > 5C dashCancel (instant)f.5C > 3C metaDeclare xx dash 3C xx 3C > j9.C > j9.B > land dash 6A > j8.C > land metaSuper | 1SP | Anywhere | ||
|
A variation of the high execution combo.
| ||||
| 2A > 2B > 5B > 5C > 2C > metaDeclare xx dash 3C > j8.C > land [2A 5A/6A j.8C > land]xN > metaSuper | 1SP | Corner | ||
|
A corner-only variation of the high execution combo.
| ||||
| 2A > 2B > 5B > 5C > dashCancel (instant)f.5C > 3C > metaDeclare xx dash 3C xx 3C > j8.C > land [2A 5A/6A j8.C land]xN > metaSuper | 1SP | Corner | ||
|
Another corner variation.
| ||||
