Ougon Musou Kyoku/Lambdadelta: Difference between revisions
KingFossil (talk | contribs) |
|||
| (71 intermediate revisions by 8 users not shown) | |||
| Line 1: | Line 1: | ||
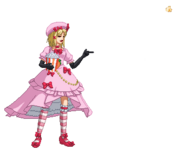
[[ | [[File:LambdaDelta-Framed.png|<center><font size="2"><b>Lambdadelta, the Witch of Certainty</b></font></center>|frame|right]] | ||
==Background== | |||
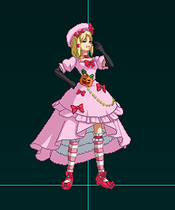
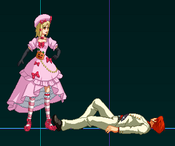
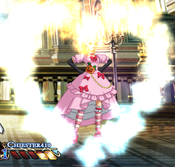
Lambdadelta, the Witch of Certainty used to be known as the most powerful witch in the universe, but was defeated by Bernkastel in "another game". She is also known as the Witch of the Absolute and her "magic of certainty" allows her to kill anyone with an absolute result. Lambdadelta, despite being a witch of unimaginable power, spends her time zoning and utilizing traps to fight her foes, as well as wasting a lot of food. | |||
==Introduction== | ==Introduction== | ||
{{ProConTable | |||
|pros= | |||
*'''Disgustingly good set-play:''' With a 214X protecting her from mashing, constant high/lows, and an incredibly good MetaSuper, Lambda turne into a demon once she has gotten a knockdown. | |||
*'''Can fill the screen with traps:''' 214X combined with Black Hole force the opponent to traverse a field full of practical landmines, while negating her opponents of a fullscreen game with 22X | |||
*'''Very high damage:''' Damage that comes from her already great mix up, which just adds to the fear factor. | |||
''' | |cons= | ||
*'''Very meter reliant:''' Her good options all require meter, making her a resource hog. | |||
*'''Bad pokes:''' Aside from her 3C, her ground game is not very good. She can be annoying with her projectiles, but they don't lead to much | |||
*'''Weak to rushdown:''' Horrible to whiff specials, bad pokes, and low health combine to make a character that can be shut down quickly if the opponent gets in | |||
}} | |||
Health: 1200 | Health: 1200 | ||
| Line 30: | Line 25: | ||
==Changes== | ==Changes== | ||
'''Patch 2.30''' | '''Patch 2.30'''<br> | ||
+ UltraPER adjusted. Rather than being a 3 second duration ability, Lambdadelta's ability is now a single, instant use ability with a longer duration in order to prevent other characters' abilities from being useless.<br> | + UltraPER adjusted. Rather than being a 3 second duration ability, Lambdadelta's ability is now a single, instant use ability with a longer duration in order to prevent other characters' abilities from being useless.<br> | ||
- J.2C has been nerfed so it is harder to combo after on couchers.<br> | - J.2C has been nerfed so it is harder to combo after on couchers.<br> | ||
| Line 39: | Line 33: | ||
==Ability== | ==Ability== | ||
''UltraPER'' | ''UltraPER'' - Empties Lambda's Break Limit bar. | ||
==Move List== | ==Move List== | ||
===Normal Moves=== | ===Normal Moves=== | ||
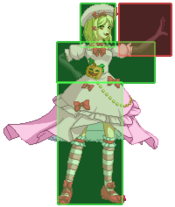
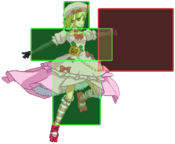
====Standing==== | |||
{| | {{MoveData | ||
| | |image=Lambda-c5A-Raw.png | ||
| | |hitbox=Lambdadelta-C5A.png | ||
|caption= | |||
Lambda | |name=c.5A | ||
|input= | |||
|data= | |||
{{AttackData-Ougon | |||
|damage=54 | |||
|recdamage= x | |||
|startup=4 | |||
|active=1 | |||
|recovery=7 | |||
|guard=HL | |||
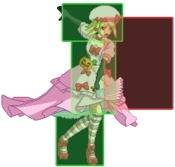
|cancel=(J), Special, SP, Meta | |||
|adv hit=+2 | |||
|adv block=+2 | |||
|invul= x | |||
|description=*Lambda flings her arm at the opponents face. | |||
}} | |||
}} | |||
{{MoveData | |||
|image=Lambda-f5A-Raw.png | |||
|hitbox=F5A.png | |||
|caption= | |||
|name=f.5A | |||
|input= | |||
|data= | |||
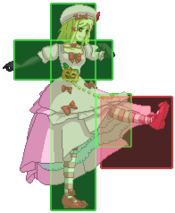
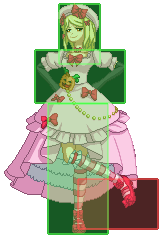
{{AttackData-Ougon | |||
|damage=54 | |||
|recdamage= x | |||
|startup=6 | |||
|active=3 | |||
|recovery=3 | |||
|guard=HL | |||
|cancel=(J), Special, SP, Meta | |||
|adv hit=+4 | |||
|adv block=+4 | |||
|invul= x | |||
|description=*Lambda swipes at the air with her hand. Whiffs on crouchers. | |||
}} | |||
}} | |||
{{MoveData | |||
|image=Lambda-c5B-Raw.png | |||
|hitbox=Lambdadelta-C5B.png | |||
|caption= | |||
|name=c.5B | |||
|input= | |||
|data= | |||
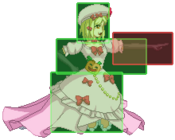
{{AttackData-Ougon | |||
|damage=150 | |||
|recdamage= x | |||
|startup=8 | |||
|active=4 | |||
|recovery=9 | |||
|guard=HL | |||
|cancel=(J), Special, SP, Meta | |||
|adv hit=+3 | |||
|adv block=+1 | |||
|invul= x | |||
|description=*Lambda does a normal kick to the knees. | |||
}} | |||
}} | |||
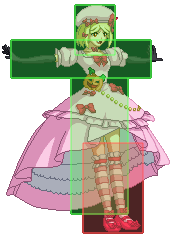
|- | {{MoveData | ||
| | |image=Lambda-f5B-Raw.png | ||
| | |hitbox=Lambdadelta-F5B.png | ||
--- | |caption= | ||
|name=f.5B | |||
|input= | |||
|data= | |||
{{AttackData-Ougon | |||
|damage=135 | |||
|recdamage= x | |||
|startup=6 | |||
|active=8 | |||
|recovery=12 | |||
|guard=HL | |||
|cancel=(J), Special, SP, Meta | |||
|adv hit=-4/+3 | |||
|adv block=-6/+1 | |||
|invul= x | |||
|description=*Lambda takes a step forward as she pushes outwards with her hands. | |||
}} | |||
}} | |||
|- | {{MoveData | ||
| | |image=Lambdadelta-6B.png | ||
| | |caption= | ||
|name=6B | |||
Lambda | |input= | ||
|data= | |||
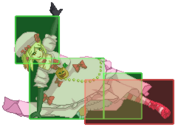
{{AttackData-Ougon | |||
|damage=90 | |||
|recdamage=x | |||
|startup=13 | |||
|active=? | |||
|recovery=23 | |||
|guard=HL | |||
|cancel=x | |||
|adv hit=? | |||
|adv block=? | |||
|invul= x | |||
|description=*Lambda throws a popcorn with a long parabolic direction. Cannot be cancelled. | |||
}} | |||
}} | |||
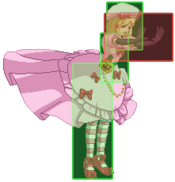
|- | {{MoveData | ||
| | |image=Lambda-c5C-Raw.png | ||
| | |hitbox=Lambdadelta-C5C.png | ||
- | |caption= | ||
|name=c.5C | |||
|input= | |||
|data= | |||
{{AttackData-Ougon | |||
|damage=240 | |||
|recdamage= x | |||
|startup=12 | |||
|active=12 | |||
|recovery=12 | |||
|guard=HL | |||
|cancel=(J), Special, SP, Meta, Dash | |||
|adv hit=+1/+12 | |||
|adv block=-2/+9 | |||
|invul= x | |||
|description=*Lambda makes a small candy explosion. | |||
}} | |||
}} | |||
{{MoveData | |||
|image=Lambda-f5C-Raw.png | |||
|hitbox=Lambdadelta-F5C.png | |||
|caption= | |||
|name=f.5C | |||
|input= | |||
|data= | |||
{{AttackData-Ougon | |||
|damage=240 | |||
|recdamage= x | |||
|startup=12 | |||
|active=2 | |||
|recovery=19 | |||
|guard=HL | |||
|cancel=(J), Special, SP, Meta, Dash | |||
|adv hit=+4 | |||
|adv block=+1 | |||
|invul= x | |||
|description=*Lambda takes a step forward, then hits the opponent with a super paper fan. | |||
}} | |||
}} | |||
{{MoveData | |||
|image=Lambda-6C-Raw.png | |||
|hitbox=Lambdadelta-6C.png | |||
|caption= | |||
|name=6C | |||
|input= | |||
|data= | |||
{{AttackData-Ougon | |||
|damage=225 | |||
|recdamage= x | |||
|startup=11 | |||
|active=9 | |||
|recovery=8 | |||
|guard=L | |||
|cancel=(J), Special, SP, Meta, Dash | |||
|adv hit=KD | |||
|adv block=+5 | |||
|invul= x | |||
|description=*Lambda makes the opponent trip with a low quick kick. It's a deceptive low. Knocks down. | |||
}} | |||
}} | |||
====Crouching==== | |||
{{MoveData | |||
|image=Lambda-2A-Raw.png | |||
|hitbox=Lambdadelta-2A.png | |||
|caption= | |||
|name=2A | |||
|input= | |||
|data= | |||
{{AttackData-Ougon | |||
|damage=45 | |||
|recdamage= x | |||
|startup=4 | |||
|active=3 | |||
|recovery=5 | |||
|guard=HL | |||
|cancel=Special, SP, Meta | |||
|adv hit=+2 | |||
|adv block=+2 | |||
|invul= x | |||
|description=*Lambda does a low version of f.5A. | |||
}} | |||
}} | |||
{{MoveData | |||
|image=Lambda-2B-Raw.png | |||
|hitbox=Lambdadelta-2B.png | |||
|caption= | |||
|name=2B | |||
|input= | |||
|data= | |||
{{AttackData-Ougon | |||
|damage=165 | |||
|recdamage= x | |||
|startup=6 | |||
|active=8 | |||
|recovery=12 | |||
|guard=L | |||
|cancel=Special, SP, Meta | |||
|adv hit=-4 | |||
|adv block=-6 | |||
|invul= x | |||
|description=*Lambda attacks by sticking her foot out for a low kick. | |||
}} | |||
}} | |||
{{MoveData | |||
|image=Lambdadelta-3B.png | |||
|caption= | |||
|name=3B | |||
|input= | |||
|data= | |||
{{AttackData-Ougon | |||
|damage=90 | |||
|recdamage= x | |||
|startup=13 | |||
|active=? | |||
|recovery=23 | |||
|guard=HL | |||
|cancel=x | |||
|adv hit=? | |||
|adv block=? | |||
|invul= x | |||
|description=*Similar to 6B, but the popcorn travels lower. Cannot be cancelled. | |||
}} | |||
}} | |||
{{MoveData | |||
|image=Lambda-2C-Raw.png | |||
|hitbox=Lambdadelta-2C.png | |||
|caption= | |||
|name=2C | |||
|input= | |||
|data= | |||
{{AttackData-Ougon | |||
|damage=225 | |||
|recdamage= x | |||
|startup=14 | |||
|active=6 | |||
|recovery=7 | |||
|guard=L | |||
|cancel=Special, SP, Meta | |||
|adv hit=KD | |||
|adv block=+9/+14 | |||
|invul= x | |||
|description=*Lambda causes a ground explosion with very good horizontal range. Knocks down. | |||
}} | |||
}} | |||
{{MoveData | |||
|image=Lambda-3C-Raw.png | |||
|hitbox=Lambdadelta-3C.png | |||
|caption= | |||
|name=3C | |||
|input= | |||
|data= | |||
{{AttackData-Ougon | |||
|damage=240 | |||
|recdamage= x | |||
|startup=11 | |||
|active=15 | |||
|recovery=18 | |||
|guard=L | |||
|cancel=Meta | |||
|adv hit=KD | |||
|adv block=-11/+3 | |||
|invul= x | |||
|description=*Lambda slides across the ground. Knocks down. | |||
*Her hurtbox during this move is low enough to dodge most mids and highs. | |||
}} | |||
}} | |||
====Jumping==== | |||
{{MoveData | |||
|image=Lambda-J8A-Raw.png | |||
|hitbox=Lambdadelta-J8A.png | |||
|caption= | |||
|name=j.8A | |||
|input= | |||
|data= | |||
{{AttackData-Ougon | |||
|damage=60 | |||
|recdamage= x | |||
|startup=3 | |||
|active=6 | |||
|recovery=6 | |||
|guard=H | |||
|cancel=x | |||
|adv hit=? | |||
|adv block=? | |||
|invul= x | |||
|description=*Lambda holds her skirt. | |||
}} | |||
}} | |||
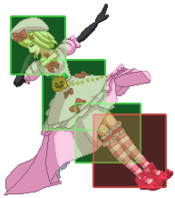
|- | {{MoveData | ||
| | |image=Lambda-J79A-Raw.png | ||
| | |hitbox=Lambdadelta-J79A.png | ||
- | |caption= | ||
|name=j.7/9A | |||
|input= | |||
|data= | |||
{{AttackData-Ougon | |||
|damage=60 | |||
|recdamage= x | |||
|startup=3 | |||
|active=6 | |||
|recovery=6 | |||
|guard=H | |||
|cancel=x | |||
|adv hit=? | |||
|adv block=? | |||
|invul= x | |||
|description=*Lambda sticks her foot out. | |||
}} | |||
}} | |||
|- | {{MoveData | ||
| | |image=Lambda-J8B-Raw.png | ||
| | |hitbox=Lambdadelta-J8B.png | ||
- | |caption= | ||
|name=j.8B | |||
|input= | |||
|data= | |||
{{AttackData-Ougon | |||
|damage=150 | |||
|recdamage= x | |||
|startup=7 | |||
|active=5 | |||
|recovery=11 | |||
|guard=H | |||
|cancel=x | |||
|adv hit=? | |||
|adv block=? | |||
|invul= x | |||
|description=*Lambda does a punch in the air. | |||
}} | |||
}} | |||
{{MoveData | |||
|image=Lambda-J79B-Raw.png | |||
|hitbox=Lambdadelta-J79B.png | |||
|caption= | |||
|name=j.7/9B | |||
|input= | |||
|data= | |||
{{AttackData-Ougon | |||
|damage=150 | |||
|recdamage= x | |||
|startup=8 | |||
|active=9 | |||
|recovery=6 | |||
|guard=H | |||
|cancel= x | |||
|adv hit=? | |||
|adv block=? | |||
|invul= x | |||
|description=*Lambda does a kick in the air. | |||
}} | |||
}} | |||
{{MoveData | |||
|image=Lambda-J8C-Raw.png | |||
|hitbox=Lambdadelta-J8C.png | |||
|caption= | |||
|name=j.8C | |||
|input= | |||
|data= | |||
{{AttackData-Ougon | |||
|damage=252 | |||
|recdamage= x | |||
|startup=10 | |||
|active=8 | |||
|recovery=17 | |||
|guard=H | |||
|cancel=Special, SP | |||
|adv hit=? | |||
|adv blovk=? | |||
|invul= x | |||
|description=*Lambda creates a small candy explosion by her hand. | |||
}} | |||
}} | |||
|- | {{MoveData | ||
| | |image=Lambda-J79C-Raw.png | ||
| | |hitbox=Lambdadelta-J79C.png | ||
- | |caption= | ||
|name=j.7/9C | |||
|input= | |||
|data= | |||
{{AttackData-Ougon | |||
|damage=225 | |||
|recdamage= x | |||
|startup=12 | |||
|active=12 | |||
|recovery=6 | |||
|guard=H | |||
|cancel= x | |||
|adv hit=? | |||
|adv block=? | |||
|invul= x | |||
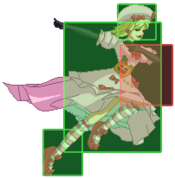
|description=*Lambda sticks out both her legs at a lower diagonal position and spins in the air. | |||
*Slightly long active frames. | |||
}} | |||
}} | |||
|- | {{MoveData | ||
| | |image=Lambda-J2C-Raw.png | ||
| | |hitbox=Lambdadelta-J2C.png | ||
|caption= | |||
|name=j.2C | |||
|input= | |||
|data= | |||
{{AttackData-Ougon | |||
|damage=180 | |||
|recdamage= x | |||
|startup=14 | |||
|active=9 | |||
|recovery=[0]8 | |||
|guard=H | |||
|cancel= x | |||
|adv hit=? | |||
|adv block=? | |||
|invul= x | |||
|description=*A divekick which slightly moves Lambda forwards. If it hits, it bounces Lambda a small distance, allowing her to use more jumping attacks. | |||
*Can be used at any time during Lambda's jump. | |||
*If fast enough, Lambda can link a j.A > j.B on crouching opponents or a j.B > j.C on standing opponents to continue the combo, making this move a deadly move to use in mix-ups | |||
}} | |||
}} | |||
===Throw=== | |||
{{MoveData | |||
|image=Lambdadelta-BCwhiff.png | |||
|image2=Lambdadelta-BC.png | |||
|image3=Lambdadelta-BC2.png | |||
|caption=Whiff animation | |||
|name=Throw | |||
|input=B+C | |||
|data= | |||
{{AttackData-Ougon | |||
|damage=300 | |||
|recdamage= x | |||
|startup=0-1 | |||
|active=? | |||
|recovery=30 (whiff) | |||
|guard=UNB | |||
|cancel= x | |||
|adv hit=KD | |||
|adv block=x | |||
|invul= x | |||
|description=*Lambda's throw. She transforms the opponent into a konpeito, then spits it out after chewing it, remarking how disgusting it tastes. | |||
*Can do an OTG route after it. | |||
}} | |||
}} | |||
|- | ===Special Moves=== | ||
| | {{MoveData | ||
| | |image=Lambdadelta-236A.png | ||
- | |image2=Lambdadelta-236B.png | ||
|image3=Lambdadelta-236C.png | |||
|caption=236A version | |||
|caption2=236B version | |||
|caption3=236C version | |||
| | |name='''Swee→ts♪ 「すぃ→⊃♪」''' | ||
| | |input=236A/B/C | ||
| | |data= | ||
{{AttackData-Ougon | |||
|version=236A | |||
|damage=300 | |||
|recdamage= x | |||
|startup=? | |||
|active=? | |||
|recovery=? | |||
|guard=HL | |||
|cancel= | |||
|adv hit=? | |||
|adv block=? | |||
|invul= x | |||
|description=*Lambda throws a candy projectile that floats on the screen forward. | |||
*A Version - Travels the longest distance and has the shortest startup. It will disappear on contact of a normal bullet. | |||
}} | |||
{{AttackData-Ougon | |||
|version=236B | |||
|damage=372 | |||
|recdamage= x | |||
|startup=? | |||
|active=? | |||
|recovery=? | |||
|guard=HL | |||
|cancel= | |||
|adv hit=? | |||
|adv block=? | |||
|invul= x | |||
|description=*B Version - Average Startup and Average Distance. It will disappear on contact of 2 normal bullets. | |||
}} | |||
{{AttackData-Ougon | |||
|version=236C | |||
|damage=450 | |||
|recdamage= x | |||
|startup=? | |||
|active=? | |||
|recovery=? | |||
|guard=HL | |||
|cancel= | |||
|adv hit=? | |||
|adv block=? | |||
|invul= x | |||
|description=*C Version - Shortest distance travelled and longest startup. It will disappear on contact of 3 normal bullets. | |||
}} | |||
}} | |||
{{MoveData | |||
| | |image=Lambdadelta-22X.png | ||
| | |caption= | ||
- | |name='''Hea→rtwa→rm 「は→とぅぉ→む」''' | ||
|input=22A/B/C | |||
|data= | |||
{{AttackData-Ougon | |||
|damage=0 | |||
|recdamage= x | |||
|startup=? | |||
|active=? | |||
|recovery=? | |||
|guard=x | |||
|cancel= | |||
|adv hit=x | |||
|adv block=x | |||
|invul= x | |||
|description=*Lambda covers herself in an heart shaped barrier that nullifies opponent's projectiles. All versions appear identical. | |||
*When you successfully nullify a projectile your secondary character gets a good amount of meter. | |||
*Seems like it can erase projectiless anywhere on the screen no matter the distance. | |||
}} | |||
}} | |||
|- | {{MoveData | ||
| | |image=Lambdadelta-214A.png | ||
| | |image2=Lambdadelta-214B.png | ||
---- | |image3=Lambdadelta-214C.png | ||
Lambda | |caption=214A version | ||
|caption2=214B version | |||
|caption3=214C version | |||
|name='''Koωpoito 「こω∧oぃとぅ」''' | |||
|input=214A/B/C | |||
|data= | |||
{{AttackData-Ougon | |||
|version=214A | |||
|damage=240 | |||
|recdamage= x | |||
|startup=? | |||
|active=? | |||
|recovery=? | |||
|guard=HL | |||
|cancel= | |||
|adv hit=? | |||
|adv block=? | |||
|invul=? | |||
|description=*Lambda shoots a candy projectile that explodes after floating with a parabolic direction after a brief period of time, depending on the button pressed. | |||
*A Version - Launched the farthest distance from Lambda and closest to the ground. Capable of hitting sliding, crouching and standing opponents. | |||
}} | |||
{{AttackData-Ougon | |||
|version=214B | |||
|damage=240 | |||
|recdamage= x | |||
|startup=? | |||
|active=? | |||
|recovery=? | |||
|guard=HL | |||
|cancel= | |||
|adv hit=? | |||
|adv block=? | |||
|invul= x | |||
|description=*B Version - Launched a medium distance away and at about standing height. Can be crouched and slid under, but can counter some jumpers. | |||
}} | |||
{{AttackData-Ougon | |||
|version=214C | |||
|damage=240 | |||
|recdamage= x | |||
|startup=? | |||
|active=? | |||
|recovery=? | |||
|guard=HL | |||
|cancel= | |||
|adv hit=? | |||
|adv block=? | |||
|invul= x | |||
|description=*C Version - Launched the closest to Lambda and higher than other versions. Very decent anti air and can keep the enemy from jumping out. | |||
}} | |||
}} | |||
|} | {{MoveData | ||
|image=Lambdadelta-63214SP.png | |||
|image2=Lambdadelta-63214SP2.png | |||
|caption= | |||
|name='''Bl〃ack Ho→le 「ふ〃らっ<ほ→る」''' | |||
|input=63214A/B/C | |||
|data= | |||
{{AttackData-Ougon | |||
|version=63214A | |||
|damage=x | |||
|recdamage= x | |||
|startup=? | |||
|active=180 | |||
|recovery=60 | |||
|guard=x | |||
|cancel= | |||
|adv hit=x | |||
|adv block=x | |||
|invul= x | |||
|description=*Lambda summons a black hole in front of her that nullifies projectiles and has slowly pulls the enemy towards it. | |||
*A Version - Shortest startup, shortest duration. the duration is 3 seconds long. the recovery is about 1 second long. | |||
}} | |||
{{AttackData-Ougon | |||
|version=63214B | |||
|damage=x | |||
|recdamage= x | |||
|startup=? | |||
|active=240 | |||
|recovery=90 | |||
|guard=x | |||
|cancel= | |||
|adv hit=x | |||
|adv block=x | |||
|invul= x | |||
|description=*B Version - Medium startup, average duration. the duration is 4 seconds long. the recovery is about 1.5 seconds long. | |||
}} | |||
{{AttackData-Ougon | |||
|version=63214C | |||
|damage=x | |||
|recdamage= x | |||
|startup=? | |||
|active=300 | |||
|recovery=120 | |||
|guard=x | |||
|cancel= | |||
|adv hit=x | |||
|adv block=x | |||
|invul= x | |||
|description=*C Version - Longest startup, longest duration. the duration is 5 seconds long. the recovery is about 2 second long. | |||
}} | |||
}} | |||
=== | ===SP Moves=== | ||
-- | {{MoveData | ||
|image=Lambdadelta-236SP.png | |||
|caption= | |||
|name='''Big Swee→ts♪ 「ぉっきなすぃ→⊃♪」''' | |||
|input=236A+B | |||
|data= | |||
{{AttackData-Ougon | |||
|damage=? | |||
|recdamage= x | |||
|startup=? | |||
|active=? | |||
|recovery=? | |||
|guard=HL | |||
|cancel= | |||
|adv hit=KD | |||
|adv block=? | |||
|invul= x | |||
|description=*Lambda throws a slowly traveling pumpkin ahead of her fullscreen that bursts into treats on impact. | |||
*If the pumpkin is hit while it's traveling, the treats will explode anyways. | |||
*The treats fly away in random directions, so same damage every time is not guaranteed. | |||
}} | |||
}} | |||
{{MoveData | |||
|image=Lambdadelta-22SP.png | |||
|caption= | |||
|name='''Ultra-He→artwa→rm♪ 「超は→とぅぉ→むっ♪」''' | |||
|input=22A+B | |||
|data= | |||
{{AttackData-Ougon | |||
|damage=60 | |||
|recdamage= x | |||
|startup=4 | |||
|active=? | |||
|recovery=? | |||
|guard=HL | |||
|cancel= | |||
|adv hit=KD | |||
|adv block=+8 | |||
|invul=? | |||
|description=*Lambda covers herself in a different variety of hearts, causing a wallslam on the opponent on hit. | |||
*Invincible on startup and very fast, while still able to erase projectile anywhere on the screen. | |||
}} | |||
}} | |||
{{MoveData | |||
|image=Lambdadelta-214SP.png | |||
|caption= | |||
|name='''Big Koωpoito♪ 「ぉっきなこω∧oぃとぅ♪」''' | |||
|input=214A+B | |||
|data= | |||
{{AttackData-Ougon | |||
|damage=420 | |||
|recdamage= x | |||
|startup=? | |||
|active=? | |||
|recovery=? | |||
|guard=KD | |||
|cancel= | |||
|adv hit=KD | |||
|adv block=? | |||
|invul= x | |||
|description=*Lambda winds up a bigger konpeito. If it touches the opponent, it launches them into the air into a juggle state. | |||
*Great for oki setups and keepaway strats. | |||
}} | |||
}} | |||
|- | {{MoveData | ||
| | |image=Lambdadelta-63214SP.png | ||
| | |image2=Lambdadelta-63214SP2.png | ||
|caption= | |||
|name='''Swee→t Ho→le~♪ 「すぃ→とほ→る~♪」''' | |||
|input=63214A+B | |||
|data= | |||
{{AttackData-Ougon | |||
| | |damage=? | ||
|recdamage= x | |||
|startup=? | |||
- | |active=? | ||
|recovery=? | |||
|guard=HL | |||
| | |cancel= | ||
| | |adv hit=KD | ||
|adv block=? | |||
|invul= x | |||
|description=*Lambda summons a black hole, which after a short delay starts sucking candy into it. The candy's pattern seems somewhat randomized and will do damage on hit. | |||
| | *If Lambda is hit during the late phase of this move, the candy will stop. | ||
| | }} | ||
| | }} | ||
| | |||
| | |||
| | |||
| | |||
| | |||
Lambda | |||
===Level 2 Supers=== | ===Level 2 Supers=== | ||
- | {{MoveData | ||
|image=Lambdadelta-236236C.png | |||
{| | |name='''RaU〃ow☆Fireworks 「にU〃ぃЗ☆はなひ〃」''' | ||
| | |input=236236C | ||
| | |data= | ||
{{AttackData-Ougon | |||
|damage=? | |||
|recdamage x | |||
|startup=6 | |||
|active=12 | |||
|recovery=25 | |||
|guard=HL | |||
|cancel= | |||
|adv hit=KD | |||
|adv block=? | |||
|invul= x | |||
|description=*Lambdadelta charges forward and on contact, she spins a black hole at their opponent and launches them with an explosion. | |||
*Can set-up a MetaSuper after. | |||
}} | |||
}} | |||
===Meta Super=== | ===Meta Super=== | ||
- | {{MoveData | ||
|image=Lambdadelta-MetaSuper.png | |||
|name='''CanU☆Comet 「ぉかU☆すぃせぃ!!」''' | |||
| | |input=641236C during MetaWorld | ||
| | |data= | ||
{{AttackData-Ougon | |||
|damage=? | |||
Lambda summons down a candy meteor after a delay, which travels downwards slowly at an angle. Does | |recdamage x | ||
|startup=? | |||
|active=? | |||
|recovery=? | |||
|guard=HL | |||
|cancel= | |||
|adv hit=KD | |||
|adv block=? | |||
|invul= x | |||
|description=*Lambda summons down a candy meteor after a delay, which travels downwards slowly at an angle. | |||
*Does about 60%-70% guard break, making this a very scary move to block. | |||
*Puts the opponent in a juggle state while knocking them back. | |||
}} | |||
}} | |||
== Frame Data == | == Frame Data == | ||
KD = Knockdown | |||
| Frames | Frame Advantage | | |||
Attack | Damage|Startup*| Active | Recovery |On Hit | On Block | Notes | Attack | Damage|Startup*| Active | Recovery |On Hit | On Block | Notes | ||
Throw ------------------------------------------------------------------ | Throw ------------------------------------------------------------------ | ||
B+C | | B+C | 300 | 0-1 | ? | ? | UKD | |30 Duration on Whiff | ||
Normals ------------------------------------------------------------------ | Normals ------------------------------------------------------------------ | ||
c.5A | 54 | | c.5A | 54 | 4 | 1 | 7 | +2 | +2 | | ||
f.5A | 54 | | f.5A | 54 | 6 | 3 | 3 | +4 | +4 | | ||
2A | 45 | | 2A | 45 | 4 | 3 | 5 | +2 | +2 | | ||
c.5B | 150 | | c.5B | 150 | 8 | 4 | 9 | +3 | +1 | | ||
f.5B | 135 | | f.5B | 135 | 6 | 8 | 12 | -4/+3 | -6/+1 | | ||
2B | 165 | | 2B | 165 | 6 | 8 | 12 | -4 | -6 | | ||
c.5C | 240 | | c.5C | 240 | 12 | 12 | 12 | +1/+12| -2/+9 | | ||
f.5C | 240 | | f.5C | 240 | 12 | 2 | 19 | +4 | +1 | | ||
2C | 225 | | 2C | 225 | 14 | 6 | 7 | UKD | +9/+14 | | ||
j.5A | 60 | | j.5A | 60 | 3 | 6 | 6 | | | | ||
j8.5B | 150 | | j8.5B | 150 | 7 | 5 | 11 | | | | ||
j8.5C | 252 | | j8.5C | 252 | 10 | 8 | 17 | | | | ||
j(7/9).5B | 150 | | j(7/9).5B | 150 | 8 | 9 | 6 | | | | ||
j(7/9).5C | 225 | | j(7/9).5C | 225 | 12 | 12 | 6 | | | | ||
Command Normals ------------------------------------------------------------------ | Command Normals ------------------------------------------------------------------ | ||
6B | | 6B | 90 | 13 | - | 23 | | |See Note S | ||
6C | 225 | | 6C | 225 | 11 | 9 | 8 | UKD | +5 | | ||
3B | | 3B | 90 | 13 | - | 23 | | |See Note S | ||
3C | 240 | | 3C | 240 | 11 | 15 | 18 | UKD | -11/+3 | | ||
j.2C | | j.2C | 180 | 14 | 9* | 0[8] | | |See Note T | ||
Note S: Popcorn Projectile is independant from LambdaDelta. | |||
Popcorn appears on frame 13, but is only active from frame 14. | |||
It is active until it either hits the opponent or exits the screen. | |||
Note T: Has a recovery animation on hit/block that makes LambdaDelta move upwards a bit. | |||
This changes the move's recovery. Recovery duration on hit/block is listed in brackets. | |||
LambdaDelta can perform any available air actions after the end of this recovery (except another j.2C). | |||
*Animation-wise; it is active until LambdaDelta lands. | |||
==Strategy== | |||
''Feel free to edit this part of the wiki with your tips/strats on how to use Lambda and her strategy vs specific characters. Remember I'm watching you.'' | |||
''' | ''Coming Soon'' | ||
== | ==Team Building== | ||
''' | ''Feel free to edit this part of the wiki with your tips/strats what partners are best for Lambda to use. Remember I'm watching you.'' | ||
The information displayed here is from the 2022 [https://docs.google.com/spreadsheets/d/1XDgSDY3CVSySpuVgcf4qTxLy-mXrv1hdEZVWqmDchKs/edit?usp=sharing Team Tier List from the Ougon Discord] Thus, it is open to change, but it should work as a building block for people looking for team pairing ideas. If you are a player of any of the teams and want to change anything feel free to do so. | |||
''' | '''<big>Reasons to choose Lambdadelta for your team</big>''' | ||
*Lambdadelta's mix-up and damage potential are amongst the highest in the entire game. Her lockdown potential, both in pressure, and in neutral thanks to 214X series, making her overall gameplan very frustrating and doesn't allow the opponent to make many mistakes. However, the same can be said for Lambdadelta. She relies on meter immensely, as most hits without meter don't do much damage or lead into much set-play. Opponents with a meter advantage put a hard stop on most of her plan. Her pokes and abare options are also really subpar, and combined with her low health, Lambdadelta can be as easily shutdown as she can do herself. | |||
*She benefits from partners that can help her reliance on meter and who can help her transition into her nightmarish pressure game easier. | |||
= | {| class="wikitable" | ||
''' | |+ | ||
* | |- | ||
* | | [[File:ANGLAM.png|frameless]] || '''<big>Lambdadelta/Ange</big>''' || | ||
*StunBoost can help Lambda begin her setups, can loop stun. | |||
*Its fragility and bad response to pressure is an issue. | |||
* | *Relies too much on guardbreak and momentum. Just use Jess or Beato. | ||
|- | |||
''' | | [[File:BATLAMB.png|frameless]] || '''<big>Lambdadelta/Battler</big>''' || | ||
*Bad synergy, Lambda likes a partner who can stun. Hard to hit, but try Jessica instead. | |||
''' | *No reason to pick Lambda over Beatrice here. | ||
|- | |||
''' | | [[File:LAMBBAT.png|frameless]] || '''<big>Lambdadelta/Black Battler</big>''' || | ||
*Same issues as Bat/Lam but also unbearably fragile, just use Beato. | |||
*Lambda can use Massacre to an alright degree but she probably still prefers Resurrection. | |||
|- | |||
| [[File:BETLAM.png|frameless]] || '''<big>Lambdadelta/Beatrice</big>''' || | |||
*These two guardbreak and loop momentum better than literally any other team. Beato adds a whole dimension of damage to Lambda’s comet and SP konpeito setups. | |||
*Furthermore Lambda’s uniquely overpowering role when she has meter advantage pairs perfectly with Beato’s playstyle of giving her partner SP. She can also build up SP for Beato better than most partners. *This team can complete a foolproof setplay sequence that does way too much damage, and then go directly into projectile stalling. Minor mistakes from the opponent are also punished harshly, so stagger is the order of the day. | |||
*Despite all this, meterless these two don’t have as much to brag about, and their health is lowish, so they’re weak to rushdown. | |||
|- | |||
| [[File:LAMBERN.png|frameless]] || '''<big>Lambdadelta/Bernkastel</big>''' || | |||
*An unfortunately poor pairing, the playstyles for these two are similar and different in all the wrong ways. | |||
*Bern’s juggles that almost always corner carry don’t give enough time for Lambda to come in, backdash and safely use comet if the opponent is stunned. *Bern’s more patient neutral doesn’t flow well into Lambda’s preference for rushdown, and the two struggle against other rushdown teams due to a lack of meterless reversals and low health. | |||
*However, Bern can capitalise on Attack Touches into blocked comet a little better than other characters can, which is nice. | |||
*Expect to see a lot of repetitive corner antics with these two. | |||
|- | |||
| [[File:LAMCHIE.png|frameless]] || '''<big>Lambdadelta/Chiester 410</big>''' || | |||
*A very fun team but it's made a bit irrelevant due to Beato/Lam being a thing. | |||
*Comet will break the opponent’s guard every time with BreakBoost no matter how much their capacity increases by. Only Dlanor can block it with her Cornelia/Gertrude buffs. | |||
* | *410’s MetaSuper has interesting interactions with comet and can force a break even at fullscreen with no combo into the setplay, but this is partly based on RNG which isn’t that great. | ||
* | *They struggle with damage and meterless play otherwise, but their neutral is strong (if annoying). | ||
* | |- | ||
* | | [[File:LAMDLA.png|frameless]] || '''<big>Lambdadelta/Dlanor</big>''' || | ||
* | *Decent bulk but Lambda isn’t really about stall despite her annoying setplay. Dlanor seems to be a straight downgrade from Will here. | ||
* | *Cornelia/Gertrude combined with UltraPER make Dlanor resist guardbreak, a big part of the metagame, well but these two just have no offensive synergy. | ||
* | |- | ||
| [[File:LAMERIK.png|frameless]] || '''<big>Lambdadelta/Erika</big>''' || | |||
*No synergy, middling damage. Erika can capitalise on comet if it doesn’t stun, but there’s little reason to pick her over Will or 410. | |||
* | *She has bad stun and corner carry too. | ||
* | |- | ||
* | | [[File:EVABET.png|frameless]] || '''<big>Lambdadelta/EVA-Beatrice</big>''' || | ||
*Both decent characters but completely overshadowed by other choices for one another. | |||
*Berserk improves precious comet damage before guard capacity increases and Eva can combo off comet somewhat. But both prefer Beato. | |||
Lambdadelta | |- | ||
| [[File:LAMGEOR.png|frameless]] || '''<big>Lambdadelta/George</big>''' || | |||
*Bad damage, guardbreak reliant, fragile, pretty bad meterless. | |||
*No moveset synergy. Ability synergy on paper but this doesn’t really influence the match very frequently. | |||
|- | |||
| [[File:LAMJESS.png|frameless]] || '''<big>Lambdadelta/Jessica</big>''' || | |||
*A pretty fun team, just not for the opponent. Jessica’s corner carry and high stun give Lambdadelta plenty of opportunities to start on her powerful setplay, and ShaveBoost not only increases the damage of these setups, but enables them to keep doing a little even when the opponent’s guard capacity has increased. | |||
*This team revolves around guardbreaking with a bit of mixup added in, so it’s pretty dishonest. However it can struggle in neutral; teams like Bat/Rono or Ange/Rono give these two trouble. Nevertheless both characters do so much damage and stun, they can blowopen any team as long as you play right. Compared to its closest analogue Jess/Beato, you can play a little more defensively at times, and focus more on mixup. " | |||
< | |- | ||
| [[File:LAMKAN.png|frameless]] || '''<big>Lambdadelta/Kanon</big>''' || | |||
*Silent Attack can make a difference to Lambda, who tends to keep up pressure of some sort for the entire match. But this team’s fragile and both want a more damaging partner. | |||
*Guardbreak reliant. | |||
|- | |||
| [[File:LAMLUCI.png|frameless]] || '''<big>Lambdadelta/Lucifer</big>''' || | |||
*Fragile, damage issues, will rely too much on guardbreak. | |||
*Decent mixup. There’s no need for both chars to be so fast. Just replace one with Beato. | |||
< | |- | ||
| [[File:LAMRON.png|frameless]] || '''<big>Lambdadelta/Ronove</big>''' || | |||
*CounterBoost capitalises on Lambdadela’s projectiles, especially her konpeito series and MetaSuper. She gets a lot of counterhits, and the threat of being punished will make opponents even less willing to try and fight back against her setplay. | |||
*Ronove can add some unprorated damage to her inevitable stuns, and slowly generate an SP lead for the two. | |||
*Both characters are hard to approach and Ronove’s high health gives Lambdadelta a bit more room for error than usual. | |||
*Compared to Beato/Lam, this team has more reliable and damaging neutral but a little less capacity for intense corner pressure. Similar to them, this pair struggles a bit when they have no meter. | |||
|- | |||
| [[File:ROLAMB.png|frameless]] || '''<big>Lambdadelta/Rosa</big>''' || | |||
*Lambda’s constant guardbreaking wastes Detachment, which she doesn’t really need anyway. | |||
*Eva is a better partner for Rosa, Lambda wants a neutral partner. | |||
|- | |||
| [[File:LAMSHAN.png|frameless]] || '''<big>Lambdadelta/Shannon</big>''' || | |||
*Shannon is the worst partner for Lambda as she lacks good stun and corner carry. She can capitalise on comet to some extent but fails in every other area. | |||
*Absolutely no practical reason to use her over Beato, although AutoGuard Lambda is kind of fun. | |||
|- | |||
| [[File:LAMVIR.png|frameless]] || '''<big>Lambdadelta/Virgilia</big>''' || | |||
*Fine, but Beato/Lambda is too much better. | |||
*No meterless reversals. | |||
*Lia can capitalise on comet but this ends when the opponent is stunned, which will be soon. | |||
|- | |||
| [[File:LAMWILL.png|frameless]] || '''<big>Lambdadelta/Willard</big>''' || | |||
*While Will can capitalise on comet breaks better than everyone but Beato, he is just outclassed by Beato in that way and almost every other as a partner for Lambda. | |||
*His unprorated damage is less important for her as she thrives on forced reset combos, and she beats everyone in a 5SP confrontation anyway so there is no need to generate a lead instead of using towers. | |||
*His ability to approach isn’t particularly necessary as Lambda doesn’t struggle with this, and he has no good guardbreak setups himself, so he would prefer a partner who confirms instead of who forces blocking like Lambda tends to. | |||
|} | |||
==Sample Combos== | |||
{{ComboTable-MBTL | |||
| data = | |||
{{ComboData-MBTL | |||
| combo = 2A > 2B > 5B > f.5C > 2C > 214A/B/C/A+B | |||
| cost = 0/1SP | |||
| metergain = 50% | |||
| oppmetergain = | |||
| damage = 746 | |||
| location = {{P-UNI|anywhere}} | |||
| notes = Basic konpeito BnB oki setup. | |||
}} | |||
{{ComboData-MBTL | |||
| combo = 2A > 2B > 5B > f.5C > 2C > 236A | |||
| cost = 0 | |||
| metergain = 60% | |||
| oppmetergain = | |||
| damage = 1016 | |||
| location = {{P-UNI|anywhere}} | |||
| notes = Basic BnB for damage. Better to end in 214x oki instead, but this exists if you want to use it. | |||
}} | |||
{{ComboData-MBTL | |||
| combo = 2A > 2B > 5B > f.5C > 3C > OTG 5B > 2B > 6C > 2C > 236C | |||
| cost = 0 | |||
| metergain = 110% | |||
| oppmetergain = | |||
| damage = 1087 | |||
| location = {{P-UNI|anywhere}} | |||
| notes = Combo ending into fireball oki. The metergain value includes the fireball gain (pretty much the same gain on hit or block) | |||
}} | |||
{{ComboData-MBTL | |||
| combo = 2A > 2B > 5B > f.5C > 3C > OTG 5B > 2B > 6C > 2C > 214x | |||
| cost = 0 | |||
| metergain = 95% | |||
| oppmetergain = | |||
| damage = 1087 | |||
| location = {{P-UNI|anywhere}} | |||
| notes = Combo ending into konpeito oki. | |||
}} | |||
{{ComboData-MBTL | |||
| combo = 2A > 2B > 5B > f.5C > 2C, 66 > 5B > f.5C > j9.B > j9.C | |||
| cost = 0 | |||
| metergain = 99% | |||
| oppmetergain = | |||
| damage = 1398 | |||
| location = {{P-UNI|anywhere}} | |||
| notes = A simple extension to the BnB combo as the opponent is floating off of 2C. | |||
::*Outside the corner you might need to superjump the j9.B. | |||
::*The dash is NOT a dash cancel but a link, so theres a strict timing involved. | |||
::*If done in the corner, you can replace the j9.B > j9.C with j8.B > j8.C. | |||
}} | |||
{{ComboData-MBTL | |||
| combo = j.2C > j.A > j.B > 2A > 2B > 5B > f.5C > 2C > 66 > 5B > f.5C > j9.B > j9.C | |||
| cost = 0 | |||
| metergain = 99% | |||
| oppmetergain = | |||
| damage = 1987 | |||
| location = {{P-UNI|anywhere}}+{{P-UNI|crouching}} | |||
| notes = A sample combo that can be used on a crouching opponent after you hit them with j.2C. | |||
::*j.2C must be done immediately and the j.A must be timed accurately as well for this combo to work. | |||
::*If done in the corner, you can replace the j9.B > j9.C with j8.B > j8.C. | |||
}} | |||
{{ComboData-MBTL | |||
| combo = j.2C > j.B > j.C > 2A > 2B > 5B > f.5C > 2C > 66 > 5B > f.5C > j9.B > j9.C | |||
| cost = | |||
| metergain = | |||
| oppmetergain = | |||
| damage = | |||
| location = {{P-UNI|anywhere}} | |||
| notes = Another sample that can be used on a standing opponent after you hit them with j.2C. | |||
::*j.2C must be done almost immediately, and the j.B must be timed accurate for this combo to work. | |||
::*If done in the corner, you can replace the j9.B > j9.C with j8.B > j8.C. | |||
}} | |||
{{ComboData-MBTL | |||
| combo = Stun Opponent > j.C > j.2C > j.B > j.C > 2A > 2B > 5B > f.5C > 2C > 66 > 5B > f.5C > j9.B > j9.C | |||
| cost = | |||
| metergain = | |||
| oppmetergain = | |||
| damage = | |||
| location = {{P-UNI|anywhere}} | |||
| notes = A sample combo you can use post-stun. | |||
::*j.C must hit the opponent while Lambda is close to the ground for this combo to work. | |||
::*If done in the corner, you can replace the j9.B > j9.C with j8.B > j8.C. | |||
}} | |||
{{ComboData-MBTL | |||
| combo = | |||
| cost = | |||
| metergain = | |||
| oppmetergain = | |||
| damage = | |||
| location = | |||
| notes = | |||
}} | |||
}} | |||
===Video Examples=== | |||
<youtube>https://youtu.be/-xLJPsAwZjs</youtube> | |||
{{OMK}} | {{Navbox-OMK}} | ||
[[Category:Ougon Musou Kyoku]] | [[Category:Ougon Musou Kyoku]] | ||
[[Category:Lambdadelta]] | |||
Latest revision as of 17:25, 22 May 2024
Background
Lambdadelta, the Witch of Certainty used to be known as the most powerful witch in the universe, but was defeated by Bernkastel in "another game". She is also known as the Witch of the Absolute and her "magic of certainty" allows her to kill anyone with an absolute result. Lambdadelta, despite being a witch of unimaginable power, spends her time zoning and utilizing traps to fight her foes, as well as wasting a lot of food.
Introduction
| Strengths | Weaknesses |
|---|---|
|
|
Health: 1200
Changes
Patch 2.30
+ UltraPER adjusted. Rather than being a 3 second duration ability, Lambdadelta's ability is now a single, instant use ability with a longer duration in order to prevent other characters' abilities from being useless.
- J.2C has been nerfed so it is harder to combo after on couchers.
? Black Hole, Konpeitou have been adjusted.
+ Metasuper no longer messes up it's own juggle.
? J.B has been adjusted.
Ability
UltraPER - Empties Lambda's Break Limit bar.
Move List
Normal Moves
Standing
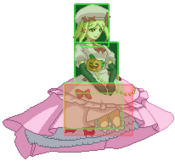
c.5A
|
|
|---|---|
Toggle Hitboxes Toggle Hitboxes
|
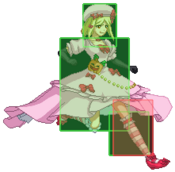
f.5A
|
|
|---|---|
Toggle Hitboxes Toggle Hitboxes
|
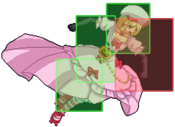
c.5B
|
|
|---|---|
Toggle Hitboxes Toggle Hitboxes
|
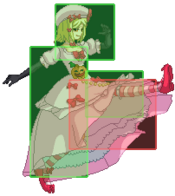
f.5B
|
|
|---|---|
Toggle Hitboxes Toggle Hitboxes
|
6B
|
|---|
c.5C
|
|
|---|---|
Toggle Hitboxes Toggle Hitboxes
|
f.5C
|
|
|---|---|
Toggle Hitboxes Toggle Hitboxes
|
6C
|
|
|---|---|
Toggle Hitboxes Toggle Hitboxes
|
Crouching
2A
|
|
|---|---|
Toggle Hitboxes Toggle Hitboxes
|
2B
|
|
|---|---|
Toggle Hitboxes Toggle Hitboxes
|
3B
|
|---|
2C
|
|
|---|---|
Toggle Hitboxes Toggle Hitboxes
|
3C
|
|
|---|---|
Toggle Hitboxes Toggle Hitboxes
|
Jumping
j.8A
|
|
|---|---|
Toggle Hitboxes Toggle Hitboxes
|
j.7/9A
|
|
|---|---|
Toggle Hitboxes Toggle Hitboxes
|
j.8B
|
|
|---|---|
Toggle Hitboxes Toggle Hitboxes
|
j.7/9B
|
|
|---|---|
Toggle Hitboxes Toggle Hitboxes
|
j.8C
|
|
|---|---|
Toggle Hitboxes Toggle Hitboxes
|
j.7/9C
|
|
|---|---|
Toggle Hitboxes Toggle Hitboxes
|
j.2C
|
|
|---|---|
Toggle Hitboxes Toggle Hitboxes
|
Throw
Throw B+C Whiff animation Whiff animation
|
|---|
Special Moves
Swee→ts♪ 「すぃ→⊃♪」 236A/B/C 236A version 236A version 236B version 236B version 236C version 236C version
|
|---|
Hea→rtwa→rm 「は→とぅぉ→む」
22A/B/C |
|---|
Koωpoito 「こω∧oぃとぅ」 214A/B/C 214A version 214A version 214B version 214B version 214C version 214C version
|
|---|
Bl〃ack Ho→le 「ふ〃らっ<ほ→る」
63214A/B/C |
|---|
SP Moves
Big Swee→ts♪ 「ぉっきなすぃ→⊃♪」
236A+B |
|---|
Ultra-He→artwa→rm♪ 「超は→とぅぉ→むっ♪」
22A+B |
|---|
Big Koωpoito♪ 「ぉっきなこω∧oぃとぅ♪」
214A+B |
|---|
Swee→t Ho→le~♪ 「すぃ→とほ→る~♪」
63214A+B |
|---|
Level 2 Supers
RaU〃ow☆Fireworks 「にU〃ぃЗ☆はなひ〃」
236236C |
|---|
Meta Super
CanU☆Comet 「ぉかU☆すぃせぃ!!」
641236C during MetaWorld |
|---|
Frame Data
  KD = Knockdown
                             |          Frames             |  Frame Advantage |
              Attack  | Damage|Startup*| Active  | Recovery |On Hit | On Block | Notes
               Throw  ------------------------------------------------------------------
                 B+C  |  300  |  0-1   |    ?    |    ?     |  UKD  |          |30 Duration on Whiff
             Normals  ------------------------------------------------------------------
                c.5A  |   54  |    4   |    1    |    7     |  +2   |   +2     |
                f.5A  |   54  |    6   |    3    |    3     |  +4   |   +4     |
                  2A  |   45  |    4   |    3    |    5     |  +2   |   +2     |
                c.5B  |  150  |    8   |    4    |    9     |  +3   |   +1     |
                f.5B  |  135  |    6   |    8    |   12     | -4/+3 |  -6/+1   |
                  2B  |  165  |    6   |    8    |   12     |  -4   |   -6     |
                c.5C  |  240  |   12   |   12    |   12     | +1/+12|  -2/+9   |
                f.5C  |  240  |   12   |    2    |   19     |  +4   |   +1     |
                  2C  |  225  |   14   |    6    |    7     |  UKD  |  +9/+14  |
                j.5A  |   60  |    3   |    6    |    6     |       |          |
               j8.5B  |  150  |    7   |    5    |   11     |       |          |
               j8.5C  |  252  |   10   |    8    |   17     |       |          |
           j(7/9).5B  |  150  |    8   |    9    |    6     |       |          |
           j(7/9).5C  |  225  |   12   |   12    |    6     |       |          |
     Command Normals  ------------------------------------------------------------------
                  6B  |   90  |   13   |    -    |   23     |       |          |See Note S
                  6C  |  225  |   11   |    9    |    8     |  UKD  |   +5     |
                  3B  |   90  |   13   |    -    |   23     |       |          |See Note S
                  3C  |  240  |   11   |   15    |   18     |  UKD  | -11/+3   |
                j.2C  |  180  |   14   |    9*   |    0[8]  |       |          |See Note T

  Note S: Popcorn Projectile is independant from LambdaDelta.
       Popcorn appears on frame 13, but is only active from frame 14.
       It is active until it either hits the opponent or exits the screen.

  Note T: Has a recovery animation on hit/block that makes LambdaDelta move upwards a bit.
       This changes the move's recovery. Recovery duration on hit/block is listed in brackets.
       LambdaDelta can perform any available air actions after the end of this recovery (except another j.2C).
       *Animation-wise; it is active until LambdaDelta lands.
Strategy
Feel free to edit this part of the wiki with your tips/strats on how to use Lambda and her strategy vs specific characters. Remember I'm watching you.
Coming Soon
Team Building
Feel free to edit this part of the wiki with your tips/strats what partners are best for Lambda to use. Remember I'm watching you.
The information displayed here is from the 2022 Team Tier List from the Ougon Discord Thus, it is open to change, but it should work as a building block for people looking for team pairing ideas. If you are a player of any of the teams and want to change anything feel free to do so.
Reasons to choose Lambdadelta for your team
- Lambdadelta's mix-up and damage potential are amongst the highest in the entire game. Her lockdown potential, both in pressure, and in neutral thanks to 214X series, making her overall gameplan very frustrating and doesn't allow the opponent to make many mistakes. However, the same can be said for Lambdadelta. She relies on meter immensely, as most hits without meter don't do much damage or lead into much set-play. Opponents with a meter advantage put a hard stop on most of her plan. Her pokes and abare options are also really subpar, and combined with her low health, Lambdadelta can be as easily shutdown as she can do herself.
- She benefits from partners that can help her reliance on meter and who can help her transition into her nightmarish pressure game easier.
Sample Combos
| Combo | Damage | Cost | Meter Gain | Location |
|---|---|---|---|---|
| 2A > 2B > 5B > f.5C > 2C > 214A/B/C/A+B | 746 | 0/1SP | 50% | Anywhere |
|
Basic konpeito BnB oki setup. | ||||
| 2A > 2B > 5B > f.5C > 2C > 236A | 1016 | 0 | 60% | Anywhere |
|
Basic BnB for damage. Better to end in 214x oki instead, but this exists if you want to use it. | ||||
| 2A > 2B > 5B > f.5C > 3C > OTG 5B > 2B > 6C > 2C > 236C | 1087 | 0 | 110% | Anywhere |
|
Combo ending into fireball oki. The metergain value includes the fireball gain (pretty much the same gain on hit or block) | ||||
| 2A > 2B > 5B > f.5C > 3C > OTG 5B > 2B > 6C > 2C > 214x | 1087 | 0 | 95% | Anywhere |
|
Combo ending into konpeito oki. | ||||
| 2A > 2B > 5B > f.5C > 2C, 66 > 5B > f.5C > j9.B > j9.C | 1398 | 0 | 99% | Anywhere |
|
A simple extension to the BnB combo as the opponent is floating off of 2C.
| ||||
| j.2C > j.A > j.B > 2A > 2B > 5B > f.5C > 2C > 66 > 5B > f.5C > j9.B > j9.C | 1987 | 0 | 99% | Anywhere+Crouching |
|
A sample combo that can be used on a crouching opponent after you hit them with j.2C.
| ||||
| j.2C > j.B > j.C > 2A > 2B > 5B > f.5C > 2C > 66 > 5B > f.5C > j9.B > j9.C | Anywhere | |||
|
Another sample that can be used on a standing opponent after you hit them with j.2C.
| ||||
| Stun Opponent > j.C > j.2C > j.B > j.C > 2A > 2B > 5B > f.5C > 2C > 66 > 5B > f.5C > j9.B > j9.C | Anywhere | |||
|
A sample combo you can use post-stun.
| ||||


