Ougon Musou Kyoku/Dlanor A. Knox: Difference between revisions
KingFossil (talk | contribs) |
|||
| (128 intermediate revisions by 12 users not shown) | |||
| Line 1: | Line 1: | ||
[[ | [[File:Dlanor_framed.jpg|<center><font size="2"><b>Dlanor A Knox</b></font></center>|frame|right]] | ||
==Background== | |||
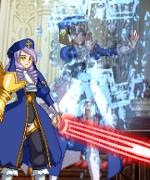
Dlanor A. Knox is the Head Inquisitor, known as "Dlanor of the Ten Wedges" or "Death Sentence Dlanor". She possesses two swords, the Red Key and the Blue Key, whose functions are essentially the same as the Red and Blue Truths. | |||
Summoned by Erika Furudo during the events of EP5 and EP6 to deny Beatrice and Battler's gameboard. | |||
==Introduction== | ==Introduction== | ||
Health = 1500 | |||
{{ProConTable | |||
|pros= | |||
*'''Long range normals allows Dlanor to pressure opponents with her superior spacing capabilities.''' | |||
*'''High health''' | |||
*'''Very good ability''' | |||
*'''Good damage potential with command grab''' | |||
|cons= | |||
*'''Terrible movement and extremely slow normals''' | |||
*'''Only has one tool to deal with zoners''' | |||
}} | |||
==Ability== | |||
''Armor Boost'' - Reduces damage taken by 50%. Command grabs are unaffected by this ability. | |||
Dlanor | ==Move List== | ||
===Normal Moves=== | |||
====Standing==== | |||
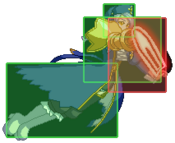
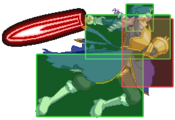
{{MoveData | |||
|image=Dlanor-5A-Raw.png | |||
|hitbox=Dlanor-5A.png | |||
|caption= | |||
|name=5A | |||
|input= | |||
|data= | |||
{{AttackData-Ougon | |||
|damage=66 | |||
|recdamage= x | |||
|startup=4 | |||
|active=3 | |||
|recovery=5 | |||
|guard=HL | |||
|cancel=(J), Special, SP, Meta | |||
|adv hit=+2 | |||
|adv block=+2 | |||
|invul= x | |||
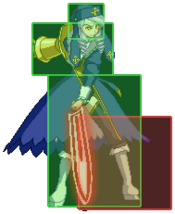
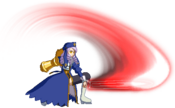
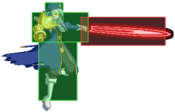
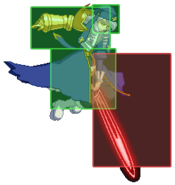
|description=*Dlanor swipes forward with her hand. | |||
*Whiffs on crouching opponents. | |||
}} | |||
}} | |||
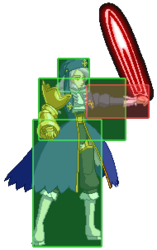
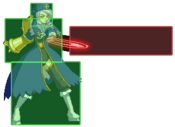
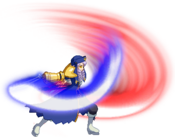
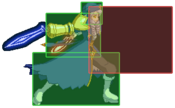
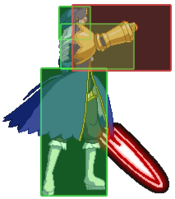
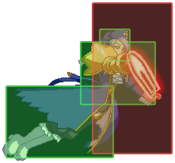
{{MoveData | |||
- | |image=Dlanor-n5B-Raw.png | ||
- | |hitbox=Dlanor-c5B.png | ||
- Special | |caption= | ||
|name=c.5B | |||
|input= | |||
|data= | |||
{{AttackData-Ougon | |||
|damage=150 | |||
|recdamage= x | |||
|startup=7 | |||
|active=6 | |||
|recovery=8 | |||
|guard=HL | |||
|cancel=(J), Special, SP, Meta | |||
|adv hit=+2 | |||
|adv block=±0 | |||
|invul= x | |||
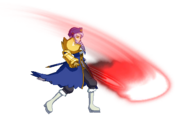
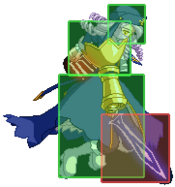
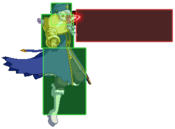
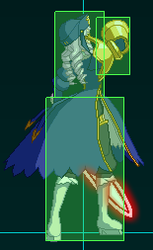
|description=*Dlanor stabs forward with her dagger of blue truth. | |||
}} | |||
}} | |||
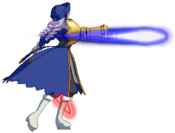
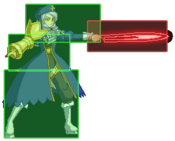
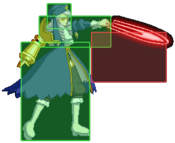
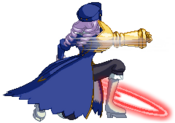
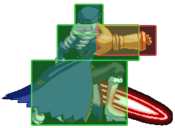
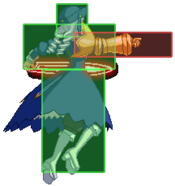
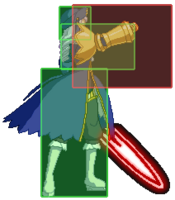
{{MoveData | |||
|image=Dlanor-f5B-Raw.png | |||
|hitbox=Dlanor-f5B.png | |||
|hitbox2=Dlanor-f5B2.png | |||
|caption= | |||
|name=f.5B | |||
|input= | |||
|data= | |||
{{AttackData-Ougon | |||
|damage=186 | |||
|recdamage= x | |||
|startup=11 | |||
|active=3 | |||
|recovery=13 | |||
|guard=HL | |||
|cancel=(J), Special, SP, Meta | |||
|adv hit=±0 | |||
|adv block=-2 | |||
|invul= x | |||
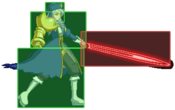
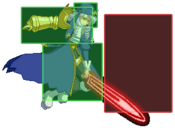
|description=*Dlanor makes a wide horizontal slash with her longsword. | |||
}} | |||
}} | |||
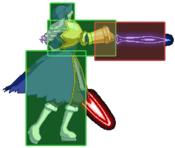
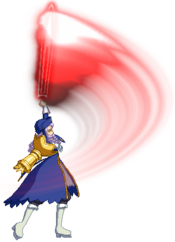
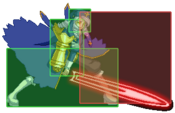
== | {{MoveData | ||
|image=Dlanor-6B-Raw.png | |||
|hitbox=Dlanor-6B.png | |||
|hitbox2=Dlanor-6B2.png | |||
|hitbox3=Dlanor-6B3.png | |||
|hitbox4=Dlanor-6B4.png | |||
|caption= | |||
|name=6B | |||
|input= | |||
|data= | |||
{{AttackData-Ougon | |||
|damage=210 | |||
|recdamage= x | |||
|startup=9 | |||
|active=5 | |||
|recovery=17 | |||
|guard=HL | |||
|cancel=(J), Special, SP, Meta | |||
|adv hit=-6 | |||
|adv block=-8 | |||
|invul= x | |||
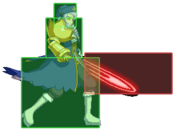
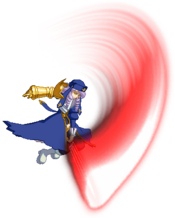
|description=*Dlanor swings her long-sword upwards. | |||
*Launches opponent into a juggle state if it hits an airborne opponent. | |||
}} | |||
}} | |||
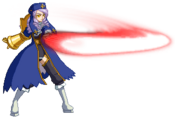
+ | {{MoveData | ||
|image=Dlanor-n5C-Raw.png | |||
|hitbox=Dlanor-c5C.png | |||
|hitbox2=Dlanor-c5C2.png | |||
|hitbox3=Dlanor-c5C3.png | |||
|caption= | |||
|name=c.5C | |||
|input= | |||
|data= | |||
{{AttackData-Ougon | |||
|damage=315 | |||
|recdamage= x | |||
|startup=16 | |||
|active=4 | |||
|recovery=18[16] | |||
|guard=HL | |||
|cancel=(J), Special, SP, Meta, Dash | |||
|adv hit=+3 | |||
|adv block=+5 | |||
|invul= x | |||
|description=*Dlanor swings her long-sword down on the opponent. | |||
*Cannot be GTed at the first stage. | |||
}} | |||
}} | |||
== | {{MoveData | ||
|image=Dlanor-5C-Raw.png | |||
|hitbox=Dlanor-f5C.png | |||
|hitbox2=Dlanor-f5C2.png | |||
|caption= | |||
|name=f.5C | |||
|input= | |||
|data= | |||
{{AttackData-Ougon | |||
|damage=384 | |||
|recdamage= x | |||
|startup=16 | |||
|active=2 | |||
|recovery=21[17] | |||
|guard=L | |||
|cancel=Meta | |||
|adv hit=KD | |||
|adv block=+4 | |||
|invul= x | |||
|description=*Dlanor makes a slash downwards with her longsword. | |||
*Cannot be canceled into another normal or special afterwards. | |||
*Cannot be GTed. | |||
}} | |||
}} | |||
{| | {{MoveData | ||
| | |image=Dlanor-6C-Raw.png | ||
| | |hitbox=Dlanor-6C.png | ||
- | |caption= | ||
Dlanor | |name=6C | ||
|input= | |||
|data= | |||
{{AttackData-Ougon | |||
|damage=330 | |||
|recdamage= x | |||
|startup=25 | |||
|active=2 | |||
|recovery=12 | |||
|guard=H | |||
|cancel=Meta | |||
|adv hit=WS | |||
|adv block=+8 | |||
|invul= x | |||
|description=*Dlanor makes a downward slash with her longsword and dagger simultaneously. | |||
*Hits overhead | |||
}} | |||
}} | |||
====Crouching==== | |||
|- | {{MoveData | ||
| | |image=Dlanor-2A-Raw.png | ||
| | |hitbox=Dlanor-2A.png | ||
- | |caption= | ||
Dlanor swipes with her gauntlet hand. | |name=2A | ||
|input= | |||
|data= | |||
{{AttackData-Ougon | |||
|damage=69 | |||
|recdamage= x | |||
|startup=6 | |||
|active=5 | |||
|recovery=5 | |||
|guard=HL | |||
|cancel=Special, SP, Meta | |||
|adv hit=±0 | |||
|adv block=±0 | |||
|invul= x | |||
|description=*Dlanor swipes with her gauntlet hand. | |||
}} | |||
}} | |||
|- | {{MoveData | ||
| | |image=Dlanor-2B-Raw.png | ||
| | |hitbox=Dlanor-2B.png | ||
--- | |caption= | ||
Dlanor | |name=2B | ||
|input= | |||
|data= | |||
{{AttackData-Ougon | |||
|damage=186 | |||
|recdamage x | |||
|startup=8 | |||
|active=1 | |||
|recovery=17 | |||
|guard=L | |||
|cancel=Special, SP, Meta | |||
|adv hit=-2 | |||
|adv block=-4 | |||
|invul= x | |||
|description=*Dlanor swings her sword horizontally while crouching, rather low to the ground. | |||
}} | |||
}} | |||
|- | {{MoveData | ||
| | |image=Dlanor-2C-Raw.png | ||
| | |hitbox=Dlanor-2C.png | ||
- | |hitbox2=Dlanor-2C2.png | ||
Dlanor | |hitbox3=Dlanor-2C3.png | ||
|caption= | |||
|name=2C | |||
|input= | |||
|data= | |||
{{AttackData-Ougon | |||
|damage=264 | |||
|recdamage x | |||
|startup=13 | |||
|active=3 | |||
|recovery=19 | |||
|guard=L | |||
|cancel=Special, SP, Meta | |||
|adv hit=KD | |||
|adv block=±0 | |||
|invul= x | |||
|description=*Dlanor sweeps the opponent off their feet with her longsword. | |||
}} | |||
}} | |||
====Jumping==== | |||
|- | {{MoveData | ||
| | |image=Dlanor-J8A-Raw.png | ||
| | |hitbox=Dlanor-JA.png | ||
- | |caption= | ||
Dlanor | |name=j.A | ||
|input= | |||
|data= | |||
{{AttackData-Ougon | |||
|damage=60 | |||
|recdamage= x | |||
|startup=5 | |||
|active=12 | |||
|recovery=6 | |||
|guard=H | |||
|cancel=Special, SP | |||
|adv hit=? | |||
|adv block=? | |||
|invul= x | |||
|description=*Dlanor sticks her dagger out in a down-forward direction. | |||
}} | |||
}} | |||
|- | {{MoveData | ||
| | |image=Dlanor-J8B-Raw.png | ||
| | |hitbox=Dlanor-J8B.png | ||
- | |caption= | ||
Dlanor | |name=j.8B | ||
|input= | |||
|data= | |||
{{AttackData-Ougon | |||
|damage=165 | |||
|recdamage= x | |||
|startup=8 | |||
|active=6 | |||
|recovery=10 | |||
|guard=H | |||
|cancel=Special, SP | |||
|adv hit=? | |||
|adv block=? | |||
|invul= x | |||
|description=*Dlanor jabs her sword upwards. | |||
}} | |||
}} | |||
{{MoveData | |||
|image=Dlanor-J79B-Raw.png | |||
|hitbox=Dlanor-J79B.png | |||
|caption= | |||
|name=j.7/9B | |||
|input= | |||
|data= | |||
{{AttackData-Ougon | |||
|damage=150 | |||
|recdamage x | |||
|startup=8 | |||
|active=6 | |||
|recovery=6 | |||
|guard=H | |||
|cancel=Special, SP | |||
|adv hit=? | |||
|adv block=? | |||
|invul= x | |||
|description=*Dlanor stabs forward with her sword. | |||
*Cannot be canceled into special. | |||
}} | |||
}} | |||
{{MoveData | |||
|image=Dlanor-J8C-Raw.png | |||
|hitbox=Dlanor-J8C.png | |||
|hitbox2=Dlanor-J8C2.png | |||
|caption= | |||
|name=j.8C | |||
|input= | |||
|data= | |||
{{AttackData-Ougon | |||
|damage=270 | |||
|recdamage x | |||
|startup=11 | |||
|active=4 | |||
|recovery=12 | |||
|guard=H | |||
|cancel=Special, SP | |||
|adv hit=? | |||
|adv block=? | |||
|invul= x | |||
|description=*Dlanor swings her longsword horizontally. | |||
}} | |||
}} | |||
|- | {{MoveData | ||
| | |image=Dlanor-J79C-Raw.png | ||
| | |hitbox=Dlanor-J79C.png | ||
- | |hitbox2=Dlanor-J79C2.png | ||
Dlanor | |caption= | ||
|name=j.7/9C | |||
|input= | |||
|data= | |||
{{AttackData-Ougon | |||
|damage=294 | |||
|recdamage x | |||
|startup=12 | |||
|active=5 | |||
|recovery=11 | |||
|guard=H | |||
|cancel=Special, SP | |||
|adv hit=? | |||
|adv block=? | |||
|invul= x | |||
|description=*Dlanor swings her sword downwards. | |||
}} | |||
}} | |||
===Throw=== | |||
|- | {{MoveData | ||
| | |image=Dlanor-BCwhiff.png | ||
| | |image2=Dlanor-BC.png | ||
-- | |image3=Dlanor-BC2.png | ||
Dlanor | |caption=Whiff animation | ||
|name=Throw | |||
|input=B+C | |||
|data= | |||
{{AttackData-Ougon | |||
|damage=360 | |||
|recdamage x | |||
|startup=0-1 | |||
|active= x | |||
|recovery=30 (if whiffed) | |||
|guard=UNB | |||
|cancel= | |||
|adv hit= | |||
|adv block= | |||
|invul= x | |||
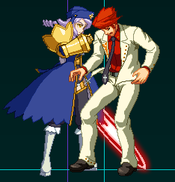
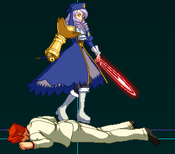
|description=*Dlanor grabs the opponent and knocks them to the ground, walking all over them. | |||
*Switches positions with the opponent. | |||
}} | |||
}} | |||
===Special Moves=== | |||
{{MoveData | |||
|image=Dlanor-22ABC.png | |||
|caption= | |||
|name='''Jungfrau Cornelia (Maiden Cornelia) 「ユングフラウ・コーネリア」''' | |||
|input=22A/B/C | |||
|data= | |||
{{AttackData-Ougon | |||
|damage= x | |||
|recdamage= x | |||
|startup=? | |||
|active=x | |||
|recovery=41 (total) | |||
|guard= x | |||
|cancel= | |||
|adv hit= x | |||
|adv block=x | |||
|invul= x | |||
|description=*Dlanor summons Cornelia, who produces a shield for her which negates most projectiles. | |||
*Does not negate Rosa's shotgun, Virgilia's Gungnir, nor any projectiles that have similar properties. | |||
*Cornelia stays in the field forever unless she is manually dismissed by repeating the input, Dlanor takes a hit, or Dlanor performs her Meta Super. | |||
*Dlanor cannot perform 623A+B while Cornelia is present. | |||
*While Cornelia is out, damage done to Dlanor's Break Limit is reduced by 25%. | |||
}} | |||
}} | |||
{{MoveData | |||
|image=Dlanor-623X.png | |||
|caption= | |||
|name='''Kirsch Eisen (Cherry Iron) 「キルシュアイゼン」''' | |||
|input=623A/B/C | |||
|data= | |||
{{AttackData-Ougon | |||
|version=A | |||
|damage=99 | |||
|recdamage= x | |||
|startup=15 | |||
|active=16 | |||
|recovery=16 | |||
|guard=HL | |||
|cancel= | |||
|adv hit=-2 | |||
|adv block=-5 | |||
|invul= x | |||
|description=*Dlanor charges forward a certain distance, gaining autoguard for a short time at startup. | |||
*Distance traveled is dependent on button pressed. | |||
*Dlanor will not stop her forward momentum even if she hits the opponent. | |||
}} | |||
{{AttackData-Ougon | |||
|version=B | |||
|damage=123 | |||
|recdamage= x | |||
|startup=15 | |||
|active=16 | |||
|recovery=15 | |||
|guard=HL | |||
|cancel= | |||
|adv hit=-6 | |||
|adv block=-9 | |||
|invul= x | |||
|description=* | |||
}} | |||
{{AttackData-Ougon | |||
|version=C | |||
|damage=147 | |||
|recdamage= x | |||
|startup=15 | |||
|active=16 | |||
|recovery=14 | |||
|guard=HL | |||
|cancel= | |||
|adv hit=-9 | |||
|adv block=-13 | |||
|invul= x | |||
|description=* | |||
}} | |||
}} | |||
{{MoveData | |||
|image=Dlanor-63214X.png | |||
|caption= | |||
|name='''The Knox Decalogue 「ノックス十戒」''' | |||
|input=63214A/B/C | |||
|data= | |||
{{AttackData-Ougon | |||
|damage=600/495 | |||
|recdamage= x | |||
|startup=1 | |||
|active=4 | |||
|recovery=? | |||
|guard=UNB, HL | |||
|cancel= | |||
|adv hit=KD | |||
|adv block= x | |||
|invul= x | |||
|description=*Dlanor grabs the opponent, jumps in the air, and impales them with her sword. Knocks down. | |||
*In addition to being a normal grab on frame 1, it functions as a hitgrab on frame 5. The hitgrab part has more range, but does less damage and is -2 on block. | |||
*Because part of it has a hit, you can combo into it. Its damage is not reduced by combo count, making it an excellent ender. | |||
*Despite not having any inv, can be used as a reversal as it grabs on frame 1 and grab checks happen before hit checks. | |||
}} | |||
}} | |||
{{MoveData | |||
|image=Dlanor-J63214X.png | |||
|caption= | |||
|name='''Turm Träne (Tower Tear) 「トゥルムトレーネ」''' | |||
|input=j.63214A/B/C | |||
|data= | |||
{{AttackData-Ougon | |||
|damage=562 | |||
|recdamage= x | |||
|startup=1 | |||
|active=5 | |||
|recovery=? | |||
|guard=UNB | |||
|cancel= | |||
|adv hit= KD | |||
|adv block= x | |||
|invul= x | |||
|description=*Dlanor grabs the opponent in the air, stabs them with her longsword and slams them into the ground. | |||
*Will never hit or grab grounded opponents. | |||
*Depending on button pressed, Dlanor will launch herself a very small distance into the air before grabbing. | |||
*Like the ground throw, its damage is not reduced by combo count, so it's a great ender. It's more damaging than the ground version, but harder to follow up off of if not done in the corner. | |||
*Every version is identical | |||
}} | |||
}} | |||
===SP Supers=== | |||
| | {{MoveData | ||
| | |image=Dlanor-22SP.png | ||
- | |caption= | ||
Dlanor | |name='''Jungfrau Gertrude (Maiden Gertrude) 「ユングフラウ・ガートルード」''' | ||
|input=22A+B | |||
|data= | |||
{{AttackData-Ougon | |||
|damage= x | |||
|recdamage= x | |||
|startup=? | |||
|active=x | |||
|recovery=? | |||
|guard= x | |||
|cancel= | |||
|adv hit= x | |||
|adv block=x | |||
|invul= x | |||
|description=*Dlanor summons Gertrude instead of Cornelia who negates most projectiles. | |||
*Does not negate Rosa's shotgun, Virgilia's Gungnir, nor any projectiles that have similar properties. | |||
*Gertrude will disappear after 12 seconds, is manually dismissed by repeating the input, or Dlanor performs her Meta Super. | |||
*Dlanor cannot perform 623A+B while Gertrude is present. | |||
*Reduces damage to Dlanor's Break Limit by 75%. | |||
*Overall fairly fast to fully animate, so you can use it to extend after 2C when you can't meta by canceling into it and linking a 5B or 2B | |||
}} | |||
}} | |||
{{MoveData | |||
| | |image=Dlanor-623SP.png | ||
| | |caption= | ||
--- | |name='''Eiserne Jungfrau (Iron Maiden) 「アイゼルネ・ユングフラウ」''' | ||
Dlanor | |input=623A+B | ||
|data= | |||
{{AttackData-Ougon | |||
|damage=198 | |||
|recdamage= x | |||
|startup=8 | |||
|active=14 | |||
|recovery=9 | |||
|guard=HL | |||
|cancel= | |||
|adv hit=KD | |||
|adv block=-28 | |||
|invul= 1-20 | |||
|description=*Dlanor summons both Gertrude and Cornelia, using their shielding to extend her charge distance to almost fully across the screen. | |||
*Dlanor is fully invincible during the animation. | |||
*This move cannot be used if either Cornelia or Gertrude are present. | |||
}} | |||
}} | |||
{{MoveData | |||
| | |image=Dlanor-63214SP.png | ||
| | |caption= | ||
- | |name='''The Knox Decalogue: Original 「ノックス十戒・原典」''' | ||
Dlanor | |input=63214A+B | ||
|data= | |||
{{AttackData-Ougon | |||
|damage=810/720 | |||
|recdamage= x | |||
|startup=1 | |||
|active=4 | |||
|recovery=? | |||
|guard=UNB | |||
|cancel= | |||
|adv hit=KD | |||
|adv block= x | |||
|invul= x | |||
|description=*Dlanor grabs the opponent, jumps higher into the air, then impales them with her sword. Knocks down. | |||
*All the utility of the normal version, but the hitgrab part is moved from frame 5 to frame 1, allowing it to catch people out of jump startup and function as a reversal even if the opponent is not in throw range. | |||
*Still doesn't have any invincible frames, so if used as a reversal against meaty attacks if grab part doesn't hit it will simply trade and you won't transition to the hitgrab part (but they probably won't get a followup either). | |||
*Very good after sliding into throw range with a dashing meta declare; you can use the meta flash time to visually confirm if the opponent is in jump startup and use this to catch them, or go for the normal version if they aren't and you want to save meter + the extra damage won't kill them. | |||
}} | |||
}} | |||
{{MoveData | |||
| | |image=Dlanor-J63214X.png | ||
| | |caption= | ||
- | |name='''Maelstrom Träne (Maelstrom Tear) 「メイルシュトロームトレーネ」''' | ||
Dlanor | |input=j.63214A+B | ||
|data= | |||
{{AttackData-Ougon | |||
|damage=855 | |||
|recdamage= x | |||
|startup=1 | |||
|active=5 | |||
|recovery=? | |||
|guard=UNB | |||
|cancel= | |||
|adv hit= KD | |||
|adv block= x | |||
|invul= x | |||
|description=*Dlanor does a command grab in the air, impaling the opponent and spinning them around before slamming them to the ground. | |||
*Will never hit or grab grounded opponents. | |||
*Like the other grabs, its damage doesn't scale with hitcount. Generally Dlanor's strongest combo ender. | |||
*Recovers faster than j.63214A/B/C on hit, giving more advantage in the corner (enough to OTG with 2C after it if you want.) Also sends the opponent further away midscreen, though, and the time needed to dash up afterward means you still don't get a setup there. | |||
}} | |||
}} | |||
===Level 2 Super=== | |||
{{MoveData | |||
|image=DlanorSP2.png | |||
|hitbox=Dlanor-236236C.png | |||
|caption= | |||
|name='''Roter Schlüssel (Red Key) 「ロートシュリュッセル」''' | |||
|input=236236C | |||
|data= | |||
{{AttackData-Ougon | |||
|damage=762 | |||
|recdamage x | |||
|startup=35 | |||
|active=? | |||
|recovery=? | |||
|guard=HL | |||
|cancel= | |||
|adv hit=KD | |||
|adv block=-8 | |||
|invul= x | |||
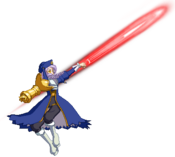
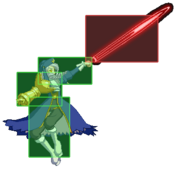
|description=*Dlanor jumps forward and slams her sword on the ground knocking back the opponent. | |||
*Does very high stun damage to the opponent. | |||
*Can link a 63214x or another SP2 if done in the corner. | |||
*Can also knock lying opponents off the ground. | |||
}} | |||
}} | |||
|} | ===Meta Super=== | ||
{{MoveData | |||
|image=Dlanor-MetaSuper.png | |||
|name='''Heilig Todesurteil (Holy Death Sentence) 「ヘイリッヒ・トーデスルタイル」''' | |||
|input=641236C during MetaWorld | |||
|data= | |||
{{AttackData-Ougon | |||
|damage=634 | |||
|recdamage x | |||
|startup=8 | |||
|active=? | |||
|recovery=? | |||
|guard=HL | |||
|cancel= | |||
|adv hit=KD | |||
|adv block=+8 | |||
|invul= x | |||
|description=*Dlanor charges forward a short distance. If it lands, a cutscene plays as she does her infamous "Die the Deaths" scene, knocking the opponent back. | |||
*Can link a 63214x afterwards if done in the corner. | |||
}} | |||
}} | |||
=== | ===Princess Moves=== | ||
---- | ---- | ||
<div class="mw-collapsible mw-collapsed"> | |||
====Standing==== | |||
{{MoveData | |||
|image=Dlanor-5A.png | |||
|image2=Dlanor-c5B.png | |||
|image3=Dlanor-2C.png | |||
|image4=Dlanor-6C.png | |||
|caption=5A | |||
|caption2=5AA | |||
|caption3=5AAA | |||
|caption4=5AAAA | |||
|name='''Standing Auto Combo''' | |||
|input= | |||
|data= | |||
{{AttackData-Ougon | |||
|damage=66 | |||
|recdamage= x | |||
|startup=4 | |||
|active=3 | |||
|recovery=5 | |||
|guard=HL | |||
|cancel=(J), Special, SP, Meta | |||
|adv hit=+2 | |||
|adv block=+2 | |||
|invul= x | |||
|description=*Dlanor swipes forward with her hand. | |||
*Whiffs on crouching opponents. | |||
}} | |||
{{AttackData-Ougon | |||
|damage=150 | |||
|recdamage= x | |||
|startup=7 | |||
|active=6 | |||
|recovery=8 | |||
|guard=HL | |||
|cancel=(J), Special, SP, Meta | |||
|adv hit=+2 | |||
|adv block=±0 | |||
|invul= x | |||
|description=*Dlanor stabs forward with her dagger of blue truth. | |||
}} | |||
|} | {{AttackData-Ougon | ||
|damage=264 | |||
|recdamage x | |||
|startup=13 | |||
|active=3 | |||
|recovery=19 | |||
|guard=L | |||
|cancel=Special, SP, Meta | |||
|adv hit=KD | |||
|adv block=±0 | |||
|invul= x | |||
|description=*Dlanor sweeps the opponent off their feet with her longsword. | |||
}} | |||
===Special | {{AttackData-Ougon | ||
|damage=330 | |||
|recdamage= x | |||
|startup=25 | |||
|active=2 | |||
|recovery=12 | |||
|guard=H | |||
|cancel= Special, SP, Meta | |||
|adv hit=WS | |||
|adv block=+8 | |||
|invul= x | |||
|description=*Dlanor makes a downward slash with her longsword and dagger simultaneously. | |||
*Hits overhead | |||
*Really HighDamage AutoCombo | |||
*In corner can be linked in 5A | |||
}} | |||
}} | |||
{| | {{MoveData | ||
| | |image=Dlanor-6C.png | ||
| | |caption=Go on child and make the 50/50 | ||
|name=4A | |||
Dlanor | |input= | ||
|data= | |||
{{AttackData-Ougon | |||
|damage=330 | |||
|recdamage= x | |||
|startup=25 | |||
|active=2 | |||
|recovery=12 | |||
|guard=H | |||
|cancel= Special, SP, Meta | |||
|adv hit=WS | |||
|adv block=+8 | |||
|invul= x | |||
|description=*Dlanor makes a downward slash with her longsword and dagger simultaneously. | |||
*Hits overhead | |||
*HighDamage Starter | |||
*In corner can be linked in 5A | |||
}} | |||
}} | |||
====crouching==== | |||
|- | {{MoveData | ||
| | |image=Dlanor-2A.png | ||
| | |image2=Dlanor-2B.png | ||
- | |image3=Dlanor-2C.png | ||
|image4=Dlanor-623X.png | |||
|caption=5A | |||
|caption2=5AA | |||
* | |caption3=5AAA | ||
|caption4=5AAAA | |||
|name='''Crouching Auto Combo''' | |||
|input= | |||
|data= | |||
{{AttackData-Ougon | |||
|damage=69 | |||
|recdamage= x | |||
|startup=6 | |||
|active=5 | |||
|recovery=5 | |||
|guard=HL | |||
|cancel=Special, SP, Meta | |||
|adv hit=±0 | |||
|adv block=±0 | |||
|invul= x | |||
|description=*Dlanor swipes with her gauntlet hand. | |||
}} | |||
{{AttackData-Ougon | |||
|damage=186 | |||
|recdamage x | |||
|startup=8 | |||
|active=1 | |||
|recovery=17 | |||
|guard=L | |||
|cancel=Special, SP, Meta | |||
|adv hit=-2 | |||
|adv block=-4 | |||
|invul= x | |||
|description=*Dlanor swings her sword horizontally while crouching, rather low to the ground. | |||
}} | |||
| | {{AttackData-Ougon | ||
| | |damage=264 | ||
| | |recdamage x | ||
|startup=13 | |||
Dlanor | |active=3 | ||
|recovery=19 | |||
|guard=L | |||
|cancel=Special, SP, Meta | |||
|adv hit=KD | |||
|adv block=±0 | |||
|invul= x | |||
|description=*Dlanor sweeps the opponent off their feet with her longsword. | |||
*In corner can be linked in 5A | |||
*Easily punished by Guard Touch | |||
}} | |||
{{AttackData-Ougon | |||
|version=B | |||
|damage=123 | |||
|recdamage= x | |||
|startup=15 | |||
|active=16 | |||
|recovery=15 | |||
|guard=HL | |||
|cancel= | |||
|adv hit=? | |||
|adv block=? | |||
|invul= x | |||
|description=*Sometimes can be linked in 5B | |||
}} | |||
}} | |||
{{MoveData | |||
|image=Dlanor-2C.png | |||
|caption= The other 50/50 | |||
|name=3A | |||
|input= | |||
|data= | |||
{{AttackData-Ougon | |||
|damage=264 | |||
|recdamage x | |||
|startup=13 | |||
|active=3 | |||
|recovery=19 | |||
|guard=L | |||
|cancel=Special, SP, Meta | |||
|adv hit=KD | |||
|adv block=±0 | |||
|invul= x | |||
|description=*Dlanor sweeps the opponent off their feet with her longsword. | |||
*In Corner can be linked in 5A | |||
*Can be +1 on block (Does not change anything, but +1 it's +1) | |||
*Easily punished by Guard Touch | |||
}} | |||
}} | |||
====Jumping==== | |||
|- | {{MoveData | ||
| | |image=Dlanor-J8B.png | ||
| | |image2=Dlanor-J8C.png | ||
- | |caption= j.8A | ||
Dlanor | |caption2= j.8AA | ||
|name='''Neutral Jumping Auto Combo''' | |||
|input= | |||
* | |data= | ||
{{AttackData-Ougon | |||
|damage=165 | |||
|recdamage= x | |||
|startup=8 | |||
|active=6 | |||
|recovery=10 | |||
|guard=H | |||
|cancel=Special, SP | |||
|adv hit=? | |||
|adv block=? | |||
|invul= x | |||
|description=*Dlanor jabs her sword upwards. | |||
}} | |||
{{AttackData-Ougon | |||
|damage=270 | |||
|recdamage x | |||
|startup=11 | |||
|active=4 | |||
|recovery=12 | |||
|guard=H | |||
|cancel=Special, SP | |||
|adv hit=? | |||
|adv block=? | |||
|invul= x | |||
|description=*Dlanor swings her longsword horizontally. | |||
}} | |||
}} | |||
{{MoveData | |||
|image=Dlanor-J79B.png | |||
* | |image2=Dlanor-J79C.png | ||
|caption= j.79A | |||
|caption2= j.79AA | |||
|name='''7/9 Jumping Auto Combo''' | |||
|input= | |||
|data= | |||
{{AttackData-Ougon | |||
|damage=150 | |||
|recdamage x | |||
|startup=8 | |||
|active=6 | |||
|recovery=6 | |||
|guard=H | |||
|cancel=Special, SP | |||
|adv hit=? | |||
|adv block=? | |||
|invul= x | |||
|description=*Dlanor stabs forward with her sword. | |||
}} | |||
{{AttackData-Ougon | |||
|damage=294 | |||
|recdamage x | |||
|startup=12 | |||
|active=5 | |||
|recovery=11 | |||
|guard=H | |||
|cancel=Special, SP | |||
|adv hit=? | |||
|adv block=? | |||
|invul= x | |||
|description=*Dlanor swings her sword downwards. | |||
}} | |||
}} | |||
|} | {{MoveData | ||
|image=Dlanor-J79C.png | |||
|caption= Another weird 50/50 | |||
|name=j.2A | |||
|input= | |||
|data= | |||
{{AttackData-Ougon | |||
|damage=294 | |||
|recdamage x | |||
|startup=12 | |||
|active=5 | |||
|recovery=11 | |||
|guard=H | |||
|cancel=Special, SP | |||
|adv hit=? | |||
|adv block=? | |||
|invul= x | |||
|description=*Dlanor swings her sword downwards. | |||
*One of the most powerful normal in the game, but in princess mode can be more dangerous for the simple reason that this move can be done in any jump input, then 6628j.2A it's a 50/50 that can even be whiffed and gain attempt to command grab. | |||
*It's a safe jump after the command grab. | |||
*Can be cancelled in j.4B to maintain momentum or cancel the recoverys frame and create a new 50/50 situation. | |||
*Can be cancelled in j.5B to bait throw OS and gain a full combo punish. | |||
*Can be whiffed to bait Guard Touch and gain a full punish because of the input will become the Normal Touch. | |||
*Can cross up + whiffed to bait the Assault Touch input and gain a full punishment because the input will become the Normal Touch. | |||
*Repeat | |||
*It's the best spot that Dlanor can be and be done in anywhere the screen after the command grab, even in the corner. | |||
*Backdash loses to all these options. | |||
*Notes: In Normal Mode, this 50/50 is possible, but much worse than in Princess Mode, needs to be REALLY PERFECT and cannot be done in neutral jump. | |||
}} | |||
}} | |||
=== | ====Specials Moves==== | ||
---- | ---- | ||
{ | {{MoveData | ||
| | |image=Dlanor-22ABC.png | ||
| | |caption= | ||
- | |name='''Jungfrau Cornelia (Maiden Cornelia) 「ユングフラウ・コーネリア」''' | ||
Dlanor summons | |input=2B | ||
|data= | |||
{{AttackData-Ougon | |||
|damage= x | |||
|recdamage= x | |||
|startup=? | |||
|active=x | |||
|recovery=41 (total) | |||
|guard= x | |||
|cancel= | |||
|adv hit= x | |||
|adv block=x | |||
|invul= x | |||
|description=*Dlanor summons Cornelia, who produces a shield for her which negates most projectiles. | |||
*Does not negate Rosa's shotgun, Virgilia's Gungnir, nor any projectiles that have similar properties. | |||
*Cornelia stays in the field forever unless she is manually dismissed by repeating the input, Dlanor takes a hit, or Dlanor performs her Meta Super. | |||
*Dlanor cannot perform 6A+B while Cornelia is present. | |||
*While Cornelia is out, damage done to Dlanor's Break Limit is reduced by 25%. | |||
}} | |||
}} | |||
{{MoveData | |||
|image=Dlanor-623X.png | |||
|caption= | |||
|name='''Kirsch Eisen (Cherry Iron) 「キルシュアイゼン」''' | |||
|input=4B/6B | |||
|data= | |||
{{AttackData-Ougon | |||
|version=A | |||
|damage=99 | |||
|recdamage= x | |||
|startup=15 | |||
|active=16 | |||
|recovery=16 | |||
|guard=HL | |||
|cancel= | |||
|adv hit=? | |||
|adv block=? | |||
|invul= x | |||
|description=*Dlanor charges forward a certain distance, gaining autoguard for a short time at startup. | |||
*Distance traveled is dependent on the direction pressed. | |||
*Dlanor will not stop her forward momentum even if she hits the opponent. | |||
*Very easy to abuse in neutral. | |||
*Really good option after Dash. | |||
- on hit if very close | |||
+ on block if very far away | |||
*Safe on block in any situation | |||
}} | |||
{{AttackData-Ougon | |||
|version=C | |||
|damage=147 | |||
|recdamage= x | |||
|startup=15 | |||
|active=16 | |||
|recovery=14 | |||
|guard=HL | |||
|cancel= | |||
|adv hit=? | |||
|adv block=? | |||
|invul= x | |||
|description=* UNSAFE on hit if very close | |||
* + on block if very far | |||
* - on hit depends for the distance (but the command grab resolve this problem) | |||
}} | |||
}} | |||
{{MoveData | |||
|image=Dlanor-63214X.png | |||
|caption= | |||
|name='''The Knox Decalogue 「ノックス十戒」''' | |||
|input=5B | |||
|data= | |||
{{AttackData-Ougon | |||
|damage=600/495 | |||
|recdamage= x | |||
|startup=1 | |||
|active=4 | |||
|recovery=? | |||
|guard=UNB, HL | |||
|cancel= | |||
|adv hit=KD | |||
|adv block= x | |||
|invul= x | |||
|description=*Dlanor grabs the opponent, jumps in the air, and impales them with her sword. Knocks down. | |||
*THE BEST SPECIAL BUTTON OF ALL PRINCESS MODE, it's extremely powerful to use her stupid command grab with 1 button to create a 50/50 situation. | |||
*Really easy to abuse in neutral. | |||
*Dash Grab situation is even more powerful. | |||
*Can be used as an anti-air, but it's only decent, use j.5B instead. | |||
*In addition to being a normal grab on frame 1, it works as a hitgrab on frame 5. The hitgrab part has more range, but does less damage and is -2 on block. | |||
*Because part of it has a hit, you can combo into it. Its damage is not reduced by combo count, making it an excellent ender. | |||
*Despite having no inv, can be used as a reversal as it grabs on frame 1 and grab checks happen before hit checks, BUT needs to be 1 frame perfect to be used as a reversal (Princess Mode stuff). | |||
}} | |||
}} | |||
{{MoveData | |||
|image=Dlanor-J63214X.png | |||
|caption= | |||
|name='''Turm Träne (Tower Tear) 「トゥルムトレーネ」''' | |||
|input=j.4B/j.5B/j.6B | |||
|data= | |||
{{AttackData-Ougon | |||
|damage=562 | |||
|recdamage= x | |||
|startup=1 | |||
|active=5 | |||
|recovery=? | |||
|guard=UNB | |||
|cancel= | |||
|adv hit= KD | |||
|adv block= x | |||
|invul= x | |||
|description=*Dlanor grabs the opponent in the air, stabs them with her longsword and slams them into the ground. | |||
*Will never hit or grab grounded opponents. | |||
*Depending on which button you press, Dlanor may or may not launch herself a small distance into the air before grabbing. | |||
*Like the ground throw, its damage is not reduced by combo count, so it's a great ender. It's more damaging than the ground version, but harder to follow up off of if not done in the corner. | |||
*Since Dlanor loses her anti-air button, j.5B will save you a lot of time with the easy access command grab in Princess mode. | |||
*Can be done really close to the ground, a really good option for crazy scrambles | |||
}} | |||
}} | |||
====SP Moves==== | |||
---- | ---- | ||
{{MoveData | |||
* | |image=Dlanor-22SP.png | ||
* | |caption= | ||
|name='''Jungfrau Gertrude (Maiden Gertrude) 「ユングフラウ・ガートルード」''' | |||
|input=2A+B | |||
|data= | |||
{{AttackData-Ougon | |||
|damage= x | |||
|recdamage= x | |||
|startup=? | |||
|active=x | |||
|recovery=? | |||
|guard= x | |||
|cancel= | |||
|adv hit= x | |||
|adv block=x | |||
|invul= x | |||
|description=*Dlanor summons Gertrude instead of Cornelia who negates most projectiles. | |||
*Does not negate Rosa's shotgun, Virgilia's Gungnir, nor any projectiles that have similar properties. | |||
*Gertrude will disappear after 12 seconds, is manually dismissed by repeating the input, or Dlanor performs her Meta Super. | |||
*Dlanor cannot perform 6A+B while Gertrude is present. | |||
*Reduces damage to Dlanor's Break Limit by 75%. | |||
*Overall fairly fast to fully animate, so you can use it to extend after 2C when you can't meta by canceling into it and linking dash a 5A | |||
}} | |||
}} | |||
{{MoveData | |||
|image=Dlanor-623SP.png | |||
|caption= | |||
|name='''Eiserne Jungfrau (Iron Maiden) 「アイゼルネ・ユングフラウ」''' | |||
|input=4/6 A+B | |||
|data= | |||
{{AttackData-Ougon | |||
|damage=198 | |||
|recdamage= x | |||
|startup=8 | |||
|active=14 | |||
|recovery=9 | |||
|guard=HL | |||
|cancel= | |||
|adv hit=KD | |||
|adv block=? | |||
|invul= 1-20 | |||
|description=*Dlanor summons both Gertrude and Cornelia, using their shielding to extend her charge distance to almost fully across the screen. | |||
*Dlanor is almost full invincible during the animation, it's really hard to punish. | |||
*This move cannot be used if either Cornelia or Gertrude are present. | |||
*Really easy acess to skip neutral and gain a corner carry | |||
*Really good reversal, can counter play a lot of Meta supers and specials. | |||
}} | |||
}} | |||
=== | {{MoveData | ||
|image=Dlanor-63214X.png | |||
|caption= | |||
|name='''The Knox Decalogue: Original 「ノックス十戒・原典」''' | |||
|input=5A+B | |||
|data= | |||
{{AttackData-Ougon | |||
|damage=810/720 | |||
|recdamage= x | |||
|startup=1 | |||
|active=4 | |||
|recovery=? | |||
|guard=UNB | |||
|cancel= | |||
|adv hit=KD | |||
|adv block= x | |||
|invul= x | |||
|description=*Dlanor grabs the opponent, jumps higher into the air, then impales them with her sword. Knocks down. | |||
*All the utility of the normal version, but the hitgrab part is moved from frame 5 to frame 1, allowing it to catch people out of jump startup and function as a reversal even if the opponent is not in throw range. | |||
*Still doesn't have any invincible frames, so if used as a reversal against meaty attacks if grab part doesn't hit it will simply trade and you won't transition to the hitgrab part (but they probably won't get a followup either and it's very hard to use as a reversal in Princess Mode). | |||
*Very good after sliding into throw range with a dashing meta declare; you can use the meta flash time to visually confirm if the opponent is in jump startup and use this to catch them, or go for the normal version if they aren't and you want to save meter + the extra damage won't kill them. | |||
}} | |||
}} | |||
{{MoveData | |||
|image=Dlanor-J63214X.png | |||
|caption= | |||
|name='''Maelstrom Träne (Maelstrom Tear) 「メイルシュトロームトレーネ」''' | |||
|input=j.4/5/6 A+B | |||
|data= | |||
{{AttackData-Ougon | |||
|damage=855 | |||
|recdamage= x | |||
|startup=1 | |||
|active=5 | |||
|recovery=? | |||
|guard=UNB | |||
|cancel= | |||
|adv hit= KD | |||
|adv block= x | |||
|invul= x | |||
|description=*Dlanor does a command grab in the air, impaling the opponent and spinning them around before slamming them to the ground. | |||
*Will never hit or grab grounded opponents. | |||
*Like the other grabs, its damage doesn't scale with hitcount. Generally Dlanor's strongest combo ender. | |||
*Recovers faster than j.5B on hit, giving more advantage in the corner (enough to OTG with 2C after it if you want.) Also sends the opponent further away midscreen, though, and the time needed to dash up afterward means you still don't get a setup there. | |||
*Can be use as an air-to-air option. | |||
}} | |||
}} | |||
====Level 2 Super==== | |||
---- | ---- | ||
===Meta Super=== | {{MoveData | ||
|image=Dlanor-236236C.png | |||
|caption= | |||
|name='''Roter Schlüssel (Red Key) 「ロートシュリュッセル」''' | |||
|input= Hold [A] | |||
|data= | |||
{{AttackData-Ougon | |||
|damage=762 | |||
|recdamage x | |||
|startup=? | |||
|active=? | |||
|recovery=? | |||
|guard=HL | |||
|cancel= | |||
|adv hit=KD | |||
|adv block=? | |||
|invul= x | |||
|description=*Dlanor jumps forward and slams her sword on the ground knocking back the opponent. | |||
*Does very high stun damage to the opponent. | |||
*Can be use in middle screen after the standing autocombo, because you can Dash holding [A] | |||
*Can link a 5B or 5SP or another SP2 if done in the corner. | |||
*Can also knock lying opponents off the ground. | |||
*Really easy combo extension | |||
}} | |||
}} | |||
====Meta Super==== | |||
---- | ---- | ||
{ | {{MoveData | ||
| | |image=Dlanor-MetaSuper.png | ||
| | |name='''Heilig Todesurteil (Holy Death Sentence) 「ヘイリッヒ・トーデスルタイル」''' | ||
- | |input=A+B+C during MetaWorld | ||
Dlanor charges forward a short distance. If it lands, a cutscene plays as she does her infamous | |data= | ||
{{AttackData-Ougon | |||
|damage=634 | |||
|recdamage x | |||
|startup=? | |||
|active=? | |||
|recovery=? | |||
|guard=HL | |||
|cancel= | |||
|adv hit=KD | |||
|adv block=? | |||
|invul= x | |||
|description=*Dlanor charges forward a short distance. If it lands, a cutscene plays as she does her infamous "Die the Deaths" scene, knocking the opponent back. | |||
*Can link a 5B afterwards if done in the corner. | |||
*VERY VERY VERY EASY to abuse in princess mode, A+B+C. | |||
*Can dash before activation to gain some momentum, and it's really important to use it after the combo ends for shorten the distance. | |||
*Can take more than half a bar of chip damage just by repeating this move. | |||
}} | |||
}} | |||
</div> | |||
| | ==Frame Data== | ||
KD = Knockdown | |||
| Frames | Frame Advantage | | |||
Attack | Damage|Startup*| Active | Recovery |On Hit | On Block | Notes | |||
Throw ------------------------------------------------------------------ | |||
B+C | 360 | 0-1 | ? | ? | UKD | |Switches Sides; 30 Duration on Whiff | |||
Normals ------------------------------------------------------------------ | |||
5A | 66 | 4 | 3 | 5 | +2 | +2 | | |||
2A | 69 | 6 | 5 | 5 | +0 | +0 | | |||
c.5B | 150 | 7 | 6 | 8 | +2 | +0 | | |||
f.5B | 186 | 11 | 3 | 13 | +0 | -2 | | |||
2B | 186 | 8 | 1 | 17 | -2 | -4 | | |||
c.5C | 315 | 16 | 4 | 18[16] | +3 | +5 |See Note L | |||
f.5C | 384 | 16 | 2 | 21[17] | UKD | +4 |See Note L | |||
2C | 264 | 13 | 3 | 19 | UKD | +0 | | |||
j.5A | 60 | 5 | 12 | 6 | | | | |||
j8.5B | 165 | 8 | 6 | 10 | | | | |||
j8.5C | 270 | 11 | 4 | 12 | | | | |||
j(7/9).5B | 150 | 8 | 6 | 6 | | | | |||
j(7/9).5C | 294 | 12 | 5 | 11 | | | | |||
Command Normals ------------------------------------------------------------------ | |||
6B | 210 | 9 | 5 | 17 | -6 | -8 | | |||
6C | 330 | 25 | 2 | 12 | WS | +8 | | |||
Specials ------------------------------------------------------------------ | |||
623A | 99 | ? | ? | ? | ? | ? | | |||
623B | 123 | ? | ? | ? | ? | ? | | |||
623C | 147 | ? | ? | ? | ? | ? | | |||
j.63214A | 562 | ? | ? | ? | KD | -- | | |||
j.63214B | 562 | ? | ? | ? | KD | -- | | |||
j.63214C | 562 | ? | ? | ? | KD | -- | | |||
63214A |600/495| ? | ? | ? | KD | ? | | |||
63214B |600/495| ? | ? | ? | KD | ? | | |||
63214C |600/495| ? | ? | ? | KD | ? | | |||
22A | -- | ? | ? | ? | KD | -- | | |||
22B | -- | ? | ? | ? | KD | -- | | |||
22C | -- | ? | ? | ? | KD | -- | | |||
SPs and Meta ------------------------------------------------------------------ | |||
623A+B | 198 | ? | ? | ? | KD | ? | | |||
j.63214A+B | 855 | ? | ? | ? | KD | -- | | |||
63214A+B |810/720| ? | ? | ? | KD | ? | | |||
22A+B | -- | ? | ? | ? | KD | -- | | |||
236x2C | 762 | ? | ? | ? | KD | ? | | |||
641236C | 634 | ? | ? | ? | KD | ? | | |||
Note L: Has a different recovery animation on block, which plays on the first frame after block. | |||
This changes the move's recovery. Recovery duration on block is listed in brackets. | |||
==General Strategy== | ==General Strategy== | ||
Dlanor is a grappler | Dlanor is a grappler whose gameplan revolves around her 63214X command throws, which are fast, deal very high unscaled damage, function as threatening reversal options and lead to effective okizeme even midscreen. | ||
* | Dlanor has slow movement speed and a low jump arc. However, she has large buttons and access to several strong specialised tools with which she can assert herself in neutral; | ||
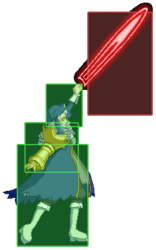
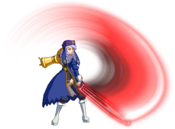
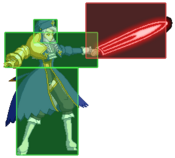
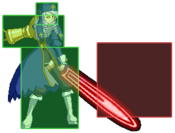
* | *'''9j.C j.B''' | ||
:A strong approach tool which will beat out a surprising number of options and has solid reward on hit. Less effective vs some characters whose pokes incidentally anti-air such as Will 2C. Note that j.B will tend to whiff on crouching opponents, besides on tall characters such as Beatrice, Virgilia, Ronove, Will and EVA-Beatrice. | |||
* | *'''6B''' | ||
:A 9f anti-air which covers an enormous space in front of and above Dlanor. Because of how high it launches on air hit, it is possible to convert even after committing to a string like 6B > 2B. All of these factors make 6B an extremely powerful poke and pre-emptive anti-air in general. | |||
:This button becomes even more powerful in meta world, where 6B > MetaSuper provides all the benefits of 6B > 2B and 6B > 623A cancels while also being extremely plus on block. | |||
*'''22X ''(Jungfrau Cornelia)''''' | |||
:A projectile shield which floats in front of Dlanor. Though it is ineffective vs some projectiles such as Virgilia’s Gungnir (41236X) or Rosa’s rifle shots (236X), it will negate most other projectiles entirely, allowing Dlanor to move forwards through them. Importantly, however, the shield moves a little slower than Dlanor’s dash speed - so dashing for too long will cause her to move in front of it and become vulnerable to projectiles again. In addition, 22X will absorb some reversals such as Beatrice 623X if spaced correctly. | |||
*'''623X''' | |||
:Forward moving attack with one hit of armor. Though it can be difficult to time, it can potentially allow Dlanor to push through opponent pokes or projectiles like Virgilia’s Gungnir if used correctly. | |||
:The SP version is even more powerful, and can be used on reaction to many projectiles at up to 3/4 screen length away to charge through and push the opponent into the corner. Even lasers with a lot of active frames such as Battler 236SP and meta super will lose consistently to this; however, it cannot be used if 22X or 22SP is active. | |||
*'''Meta Declare''' | |||
:Dlanor’s meta declare has no unique properties of its own compared to other characters, but is nonetheless a particularly powerful tool for her in neutral (as well as in pressure and defense). By declaring mid-dash, she will slide forwards during the declare freeze, putting her closer to the opponent – if close enough, her 63214X is guaranteed to hit if the opponent wasn’t already jumping, with no counterplay possible for the opponent. If the opponent is already airborne, declare freeze gives you plenty of time to visually confirm the situation and choose an appropriate option, from 5A and 6B to 63214SP or even tk.63214X/SP depending on their height, spacing and current action. | |||
Additionally, it is important to keep in mind normal touch and assault touch as neutral options. Both will activate Dlanor’s Armor Boost and bring in her partner, who will ideally be able to cover for the matchups and neutral situations that Dlanor struggles in. Armor Boost aids in this, skewing risk/reward in the favour of Dlanor’s partner for a full 15 seconds and enabling them to take greater risks to land a hit and attack touch Dlanor back in later. | |||
==Team Building== | |||
''Feel free to edit this part of the wiki with your tips/strats what partners are best for Lambda to use. Remember I'm watching you.'' | |||
The information displayed here is from the 2022 [https://docs.google.com/spreadsheets/d/1XDgSDY3CVSySpuVgcf4qTxLy-mXrv1hdEZVWqmDchKs/edit?usp=sharing Team Tier List from the Ougon Discord] Thus, it is open to change, but it should work as a building block for people looking for team pairing ideas. If you are a player of any of the teams and want to change anything feel free to do so. | |||
Dlanor | '''<big>Reasons to choose Dlanor for a team</big>''' | ||
*Dlanor's ability to end combos in unscaled throw enders even vs airborne enemies makes her a very consistent damage dealer even with partners that tend to scale their combos easily. Her ''Armor Boost'' ability is an incredible passive for twisting risk/reward in your favor, moreso considering her very good normals for the archetype. Alas, Dlanor's damage by herself is not that high, and her ability to combo for her pokes is more limited than other characters with similar range. Her bad movement is also exploitable by many characters. | |||
*Anyone whose combos are on the weaker side or who like to play a bit gutsy when getting in will get particular benefit from pairing with Dlanor. | |||
Dlanor | {| class="wikitable" | ||
|+ | |||
|- | |||
| [[File:ANGDLA.png|frameless]] || '''<big>Dlanor/Ange</big>''' || | |||
*Unprorated damage is welcome for Ange, but there’s no reason to pick Dlanor over Rono and these two find it hard to approach certain characters. | |||
|- | |||
| [[File:BATDLA.png|frameless]] || '''<big>Dlanor/Battler</big>''' || | |||
*Plays similarly to Bat/Shan, again there is little reason to pick Dlanor over Ronove for Battler and the combination between ArmorBoost and Resurrection is overkill. | |||
*Might be a funny team if you want to win through timeout, but Dlanor/Bern means there’s a better option even for that. | |||
|- | |||
| [[File:DLABBAT.png|frameless]] || '''<big>Dlanor/Black Battler</big>''' || | |||
*"BB’s fragility is somewhat assisted by ArmorBoost but Bat/Dlanor is a lot better since Dlanor likes to stall. | |||
*Shines neither offensively nor defensively. Bat/Eva or Bat/Rono are similar but much better. | |||
|- | |||
| [[File:BETDLAN.png|frameless]] || '''<big>Dlanor/Beatrice</big>''' || | |||
*Worse neutral and damage than Beato/Will. Can barely approach. | |||
*Dlanor appreciates the free SP2 but George or BB are better for that. Free Dlanor grabs are nice and give Beato some SP back. | |||
|- | |||
| [[File:DLABERN.png|frameless]] || '''<big>Dlanor/Bernkastel</big>''' || | |||
*One of the most oppressive teams in the game and one of Bernkastel’s bulkiest options. 15-second ArmorBoost MetaBoost Bern is a massive obstacle to the opponent doing anything, and Dlanor is no weak link when played carefully. She can also tack on a bit of damage or stun to Bern’s combos and build meter advantage for her. | |||
*This team is SP-reliant because neither character has a reliable reversal, so you’ll be relying on MetaWorld to stay safe. | |||
*You can collect chip damage and SP and wear out the timer by spamming Dlanor’s MetaSuper, which blockstrings into itself. You can also intermittently add a surprise normal in so you actually build up guard capacity. | |||
*Compared to Will/Bern, it’s more defensive and has more room for error. | |||
|- | |||
| [[File:DLACHIE.png|frameless]] || '''<big>Dlanor/Chiester 410</big>''' || | |||
*Another Dlanor team that likes to win by timeout. 410 is hard to hit and ArmorBoost only exacerbates her frustrating bulk, and Dlanor’s large normals combined with BreakBoost gives her a kind of brute force. | |||
*Nevertheless this team struggles with damage, at least without somemeter-hungry plays from Dlanor. Dlanor doesn’t seem to have any special interaction with 410’s MetaSuper. | |||
*It’s hard to pick 410 over Bern for her here. | |||
|- | |||
| [[File:DLAERIK.png|frameless]] || '''<big>Dlanor/Erika</big>''' || | |||
*A team with a lot of staying power and unprorated damage, but Dlanor prefers Bern and Erika prefers Will. | |||
*These two can find it hard to keepmomentum. Erika’s ability also shortens ArmorBoost’s duration off of MetaDeclare, which isn’t a huge dealbreaker but it doesn’t help either. | |||
*Their somewhat unorthodox movesets don’t do a lot to complement one another, although both have fairly fast overheads and can be hard to approach for some characters. | |||
*Damage is an issue. | |||
|- | |||
| [[File:EVADLA.png|frameless]] || '''<big>Dlanor/EVA-Beatrice</big>''' || | |||
*Hits hard and is bulky, but these two have no reason to pick each other. | |||
*Dlanor’s main damage comes from grabs which aren’t affected by Berserk. | |||
|- | |||
| [[File:DLAGEOR.png|frameless]] || '''<big>Dlanor/George</big>''' || | |||
*There is no reason to pick George as the one to handle neutral for Dlanor, Battler and Bern are both much better options for speed and approaching ability. | |||
*15-second ArmorBoost is nice as always though. Dlanor’s damage pales in comparison to Beato’s in practical play. | |||
|- | |||
| [[File:DLAJESS.png|frameless]] || '''<big>Dlanor/Jessica</big>''' || | |||
*Solid, but there’s no suitable reason to pick Dlanor over Beato, or Will for that matter. This team has better defenses than either but Jess isn’t exactly built for defensive play. | |||
*Dlanor can tack on a little unprorated damage to Jess’s high damage combos that tend to stun, but she can do thisherself with chip damage from her MetaSuper, so it’s not a truly unique advantage although it is more generally usable. | |||
*ShaveBoost combined withDlanor’s MetaSuper spam blockstring is pretty funny though, and has some utility. | |||
|- | |||
| [[File:DLAKAN.png|frameless]] || '''<big>Dlanor/Kanon</big>''' || | |||
*Overshadowed by Kan/Will. Kanon doesn’t want ArmorBoost, he wants someone who can play rushdown with him. Dlanor drops momentum too often. | |||
|- | |||
| [[File:LAMDLA.png|frameless]] || '''<big>Dlanor/Lambdadelta</big>''' || | |||
*Decent bulk but Lambda isn’t really about stall despite her annoying setplay. Dlanor seems to be a straight downgrade from Will here. | |||
*Cornelia/Gertrude combined with UltraPER make Dlanor resist guardbreak, a big part of the metagame, well but these two just have no offensive synergy. | |||
|- | |||
| [[File:DLALUCI.png|frameless]] || '''<big>Dlanor/Lucifer</big>''' || | |||
*A fair dynamic but completely outclassed by Luci/Will. | |||
*Can be more defensive but this doesn’t suit Luci or her ability. No good reversal. | |||
|- | |||
| [[File:DLARON.png|frameless]] || '''<big>Dlanor/Ronove</big>''' || | |||
*Too slow, can barely approach, Dlanor is quite possibly the worst CounterBoost user, characters share a weakness to zoning. | |||
*Their bulk is overkill because they can’t retaliate for most of the damage they take. | |||
|- | |||
| [[File:ROSDLA.png|frameless]] || '''<big>Dlanor/Rosa</big>''' || | |||
*No gameplan, find it hard to approach, won’t keep up with fast characters. Dlanor is a terrible Detachment user. | |||
*Pretty good bulk and can play defensively kind of well. | |||
|- | |||
| [[File:DLASHAN.png|frameless]] || '''<big>Dlanor/Shannon</big>''' || | |||
*Terrible ability to approach, both are slow with limited neutrals, Dlanor can’t corner carry consistently, damage tends to fall short compared to other teams, the double defensive abilities are overkill. | |||
*Has some comeback game at least. Use Will/Shan instead if that's what you are looking for. | |||
|- | |||
| [[File:DLAVIR.png|frameless]] || '''<big>Dlanor/Virgilia</big>''' || | |||
*Far too slow but can be decent at stall. Find it very hard to approach. | |||
*No real combo synergy. Too easy to lose momentum. Dlanor sucks at corner carry. | |||
|- | |||
| [[File:DLAWILL.png|frameless]] || '''<big>Dlanor/Willard</big>''' || | |||
*Lots of unprorated damage and high potential for really long, costly, damaging combos, but Will/Eri is probably the better option for that due to Erika’s better neutral. | |||
*Neither of these two really gain much from one another’s ability; Will is a bit more of a rushdown character. Neither have a super great reversal either. *Bern probably suits Dlanor more as a high damage juggler due to ability synergy; the bit of extra unprorated damage can be left to Dlanor herself. | |||
|} | |||
==Combos== | |||
''Feel free to edit this part of the wiki with your tips/strats on how to use Dlanor. Remember I'm watching you.'' | |||
Dlanor does not have much variety when it comes to her combos, but they deal very large amounts of damage to make up for it. In particular, her j.63214X air command throws deal enormous unscaled damage, making them very strong combo enders. | |||
Any combo using meta declare will have its SP cost listed assuming the opponent does not counterdeclare. Be aware of opponent meter and the actual cost of meta declaring when using these combos in games. | |||
Notation key:<br> | |||
- '''7/8/9sj''' means a highjump/superjump (performed by inputting 27, 28 or 29 in quick succession)<br> | |||
- '''>''' means cancelling the first move into the second. <br> | |||
- ''',''' means a link - wait for the first move to finish before inputting the second.<br> | |||
''' | {{ComboTable-MBTL | ||
| data = | |||
{{ComboData-MBTL | |||
| combo = 9j.CB land... | |||
| cost = 0 | |||
| metergain = 10% | |||
| oppmetergain = | |||
| damage = 444 | |||
| location = {{P-UNI|anywhere}} | |||
| notes = The j.9C must be input at the apex of Dlanor's jump arc, otherwise the j.9B will not be able to connect. In neutral, this is an effective counter poke which will beat out a surprising number of options. Not a traditional jump in, however, as the jB will whiff on crouching opponents in most situations. | |||
}} | |||
{{ComboData-MBTL | |||
| combo = OTG 2B > 2C | |||
| cost = 0 | |||
| metergain = | |||
| oppmetergain = | |||
| damage = 200 | |||
| location = {{P-UNI|anywhere}} | |||
| notes = You might need to omit the 2B if Dlanor is unable to recover in time. The later you use this OTG string in a combo, the less damage it will deal. | |||
}} | |||
{{ComboData-MBTL | |||
| combo = 5B > 2B > 2C > 623B, 63214X [http://youtu.be/kGBFFkNms78] | |||
| cost = 0 | |||
| metergain = 99% | |||
| oppmetergain = | |||
| damage = 1218 | |||
| location = {{P-UNI|midscreen}} | |||
| notes = Very high damage character specific midscreen combo which deals an enormous amount of damage for very little effort and no meter usage. If using a 9jCB starter, omit 5B and go straight into 2B 2C. Also works on some other characters, but with very specific spacing requirements. | |||
::*Midscreen only. | |||
::*Character specific: works on ''Lucifer, Rosa, Erika, Will, Lambdadelta'' | |||
}} | |||
{{ComboData-MBTL | |||
| combo = 5B > 2B > 2C > 623A, 63214X [http://youtu.be/43eXkTLgD4Y] | |||
| cost = 0 | |||
| metergain = 99% | |||
| oppmetergain = | |||
| damage = 1194 | |||
| location = {{P-UNI|corner}} | |||
| notes = Corner variation of the above combo which is significantly stable, working on a majority of the cast. Also works on some characters not listed above, but only at extremely specific spacings. '''63214SP''' ender works on everybody and deals '''1419''' damage. | |||
::*Corner only. | |||
::*Character specific: works on ''Kanon, Lucifer, Ronove, Shannon, George, Jessica, Rosa, Erika, Dlanor, Will, Lambdadelta'' | |||
::*Can also work on ''Battler, Chiester 410, Black Battler, Bernkastel'' at further spacings. | |||
}} | |||
{{ComboData-MBTL | |||
| combo = 5B > 2B > 2C > 63214X/63214SP [http://youtu.be/gYJ-y1X7KjE] | |||
| cost = 0SP/1SP | |||
| metergain = 95%/95% | |||
| oppmetergain = | |||
| damage = 1095/1320 | |||
| location = {{P-UNI|anywhere}} | |||
| notes = Even with a simple starter, a basic metered ender makes Dlanor's damage output very high. Only connects at closer spacings. | |||
}} | |||
{{ComboData-MBTL | |||
| combo = 5B > 2B > 2C > metaDeclare, dash 9j.ABC, dash 63214X/SP [https://youtu.be/IicdPvn9vT0] | |||
| cost = 1SP/2SP | |||
| metergain = 99%/99% | |||
| oppmetergain = | |||
| damage = 1599/1824 | |||
| location = {{P-UNI|anywhere}} | |||
| notes = Corner carry combo into 63214X ender for okizeme. Against some thin characters such as Jessica, use j.ACB instead. Somewhat difficult, but very stable and works even from a max range 2C > declare as demonstrated in the linked video. | |||
}} | |||
{{ComboData-MBTL | |||
| combo = 5B > 2B > 2C > metaDeclare, dash 5B > 9sj.BC > j.63214X/SP [http://youtu.be/Z7BerxNJaoI] | |||
| cost = 1SP/2SP | |||
| metergain = 105%/105% | |||
| oppmetergain = | |||
| damage = 1792/2085 | |||
| location = {{P-UNI|anywhere}} | |||
| notes = High damage ender sacrificing 63214X oki for damage. If near corner, you can get the best of both worlds by replacing j.63214X/SP with dash 63214X/SP. | |||
}} | |||
{{ComboData-MBTL | |||
| combo = 5B > 2B > 2C > (metaDeclare,) metaSuper, 63214SP [http://youtu.be/ci3iKUuf9gY] | |||
| cost = 2SP | |||
| metergain = 180% | |||
| oppmetergain = | |||
| damage = 1905 | |||
| location = {{P-UNI|corner}} | |||
| notes = If you run out of SP before the 63214SP at the end, you can instead do 63214X as an ender (damage goes down to '''1680'''). It is, however, ''much'' easier to land an SP command grab than it is to land a non-SP one. | |||
This combo can also be performed midscreen; however, depending on the opponent, metaDeclare before metaSuper can be necessary rather than optional, and it will be impossible to land the command grab ender - reducing damage to '''1185'''. | |||
}} | |||
{{ComboData-MBTL | |||
| combo = 5B > 2B > 2C > metaDeclare, 6C > metaSuper, 63214SP [http://youtu.be/dSY4OCD2cC4] | |||
| cost = 2SP | |||
| metergain = 180% | |||
| oppmetergain = | |||
| damage = 2218 | |||
| location = {{P-UNI|corner}} | |||
| notes = Higher damage variation of the above combo in case you have Meta Gauge available. If you run out of SP before the 63214SP at the end, you can instead do 63214X as an ender for '''1993''' damage, though this is significantly more difficult. With Beatrice as your partner, this route is obsoleted by SP2 routes thanks to ''Infinity SP''. | |||
}} | |||
{{ComboData-MBTL | |||
| combo = 5B > 2B > 2C > SP2, 63214X/SP [http://youtu.be/ZP-kBrhh-pA] | |||
| cost = 2SP/3SP | |||
| metergain = 99%/99% | |||
| oppmetergain = | |||
| damage = 1857/2082 | |||
| location = {{P-UNI|corner}} | |||
| notes = An easy confirm into Dlanor's fantastic SP2. This combo is a guaranteed stun on most characters with a jump-in or if Dlanor comes in with an Attack Touch. | |||
}} | |||
{{ComboData-MBTL | |||
| combo = 5B > 2B > 2C > SP2, SP2, 63214X/SP [http://youtu.be/OKFOQoqX1Ec] | |||
| cost = 4SP/5SP | |||
| metergain = 99%/99% | |||
| oppmetergain = | |||
| damage = 2543/2768 | |||
| location = {{P-UNI|corner}} | |||
| notes = Dlanor's SP2 can be linked into itself for massive damage. The second SP2 will connect OTG, relaunching the opponent. Guaranteed stun on all characters. | |||
}} | |||
{{ComboData-MBTL | |||
| combo = 5B > 2B > 2C > metaDeclare, dash 2B > 6B, SP2, SP2, 63214X [https://youtu.be/322CJZjABh4] | |||
| cost = 5SP | |||
| metergain = 101% | |||
| oppmetergain = | |||
| damage = 2920 | |||
| location = {{P-UNI|midscreen}}{{P-UNI|corner}} | |||
| notes = A full resource dump to guarantee stun on any character, working from even quite far away from the corner. The dash 2B 6B not only adds a lot of extra corner carry, but adds almost 300 damage to the combo. At further spacings or for an easier combo, omit the 2B and just do dash 6B instead. With all combos using 6B into SP2, be sure to delay the SP2 a little so it doesn't whiff. | |||
::*3SP with Beatrice partner. | |||
}} | |||
{{ComboData-MBTL | |||
| combo = 6C > metaDeclare, dash 2B > cl.5C > 7sj.BC > j.63214X/SP [https://youtu.be/fPbU2eiHzCM] | |||
| cost = 1SP/2SP | |||
| metergain = 101%/101% | |||
| oppmetergain = | |||
| damage = 1837/2130 | |||
| location = {{P-UNI|corner}} | |||
| notes = Standard 6C > meta declare combo. If not quite in corner, use 9sj instead. | |||
}} | |||
{{ComboData-MBTL | |||
| combo = | |||
| cost = | |||
| metergain = | |||
| oppmetergain = | |||
| damage = | |||
| location = | |||
| notes = | |||
}} | |||
}} | |||
===Anti Air Combos=== | |||
When using 6B to anti-air predictively, you can do 6B 2B to continue your string on hit or block if the opponent does not jump. If this anti-airs, 2B will whiff and recover fast enough to still allow some of the followups listed below, depending on the opponent's height and horizontal distance. | |||
''' | {{ComboTable-MBTL | ||
| data = | |||
{{ComboData-MBTL | |||
| combo = AA 6B, dash 6B > 63214X [http://youtu.be/yXNvdXoOIJw] | |||
| cost = 0 | |||
| metergain = 80% | |||
| oppmetergain = | |||
| damage = 894 | |||
| location = {{P-UNI|anywhere}} | |||
| notes = Dlanor's easiest confirm off of an anti-air 6B hit. The dashes after the 6Bs are only necessary midscreen; in the corner, you can simply omit them. | |||
}} | |||
{{ComboData-MBTL | |||
| combo = AA 6B, dash cl.5B > cl.5C > 9j.BC j.63214C [http://youtu.be/EI31U67I8TY] | |||
| cost = 0 | |||
| metergain = 101% | |||
| oppmetergain = | |||
| damage = 1681 | |||
| location = {{P-UNI|anywhere}} | |||
| notes = Highest damage confirm off of an anti-air 6B hit. Hitting with the entire air string is difficult - as such, you can omit the 9j.BC and go straight into the j.63214C ender, lowering the damage output to '''1237'''. | |||
}} | |||
{{ComboData-MBTL | |||
| combo = AA 6B, dash 6B > 623A(whiff), 63214X [https://youtu.be/L1m-36ojbM8] | |||
| cost = 0 | |||
| metergain = 80% | |||
| oppmetergain = | |||
| damage = 894 | |||
| location = {{P-UNI|anywhere}} | |||
| notes = Interesting route using a whiffed 623A to gain extra distance. Requires quite specific height and spacing. | |||
}} | |||
{{ComboData-MBTL | |||
| combo = AA 6B, dash 6B > 9sj delay j.63214C [https://youtu.be/csYzD2orhpQ] | |||
| cost = 0 | |||
| metergain = 90% | |||
| oppmetergain = | |||
| damage = 961 | |||
| location = {{P-UNI|anywhere}} | |||
| notes = Surprisingly stable route, provided that the second 6B hits close horizontally (regardless of height). Air throw timing depends on opponent height, but is quite easy to visually confirm. | |||
}} | |||
{{ComboData-MBTL | |||
| combo = AA 6B, dash 6B > 63214SP [http://youtu.be/1qemTx5iz7U] | |||
| cost = 1SP | |||
| metergain = 80% | |||
| oppmetergain = | |||
| damage = 1119 | |||
| location = {{P-UNI|anywhere}} | |||
| notes = Dlanor's easiest metered confirm off of an anti-air 6B hit. The dashes after the 6Bs are only necessary midscreen; in the corner, you can simply omit them. | |||
}} | |||
{{ComboData-MBTL | |||
| combo = AA 6B, dash 5B > cl.5C > 9sj.BC > j.63214C/SP [http://youtu.be/9uSVq-Qqe-s] | |||
| cost = 0SP/1SP | |||
| metergain = 101%/101% | |||
| oppmetergain = | |||
| damage = 1681/1974 | |||
| location = {{P-UNI|anywhere}} | |||
| notes = Highest damage 1SP damage confirm from anti-air 6B. Quite difficult, being hard to connect depending on opponent's character, or the height and distance of the 6B hit. | |||
}} | |||
{{ComboData-MBTL | |||
| combo = AA 6B, dash 6B, SP2 [http://youtu.be/FgkUN7jVxqM] | |||
| cost = 2SP | |||
| metergain = 20% | |||
| oppmetergain = | |||
| damage = 1161 | |||
| location = {{P-UNI|anywhere}} | |||
| notes = Rather high damage off of an anti-air 6B, but that's not what this combo is for. This combo has ''amazing'' corner carry - it will almost always push your opponent into the corner, which is exactly where Dlanor wants them. | |||
::*If you do this combo in the corner or near it and provided that you have the meter, you can further increase the damage dealt with '''SP2, 63214X/SP''' ('''2342/2567'''). | |||
}} | |||
{{ComboData-MBTL | |||
| combo = AA 6B > (metadeclare,) metasuper (whiff), 6B > 9sj delay j.63214C [https://youtu.be/_W92U7war9c] | |||
| cost = 1SP | |||
| metergain = | |||
| oppmetergain = | |||
| damage = 961 | |||
| location = {{P-UNI|anywhere}} | |||
| notes = An example of an anti air route from a 6B > metasuper (whiff) starter - all of the above routes will be possible with this sort of starter depending on spacing and opponent height. | |||
}} | |||
{{ComboData-MBTL | |||
| combo = | |||
| cost = | |||
| metergain = | |||
| oppmetergain = | |||
| damage = | |||
| location = | |||
| notes = | |||
}} | |||
}} | |||
''' | ===Sweep > Attack Touch=== | ||
All of the combos below are performed off of a '''sweep → attackTouch''' starter. The damage numbers shown are those of Dlanor's portion only; actual practical damage values will differ based on the full starter due to damage scaling. | |||
''' | {{ComboTable-MBTL | ||
| data = | |||
{{ComboData-MBTL | |||
| combo = ...AttackTouch, dash 9j.ABC, dash 63214X/SP [https://youtu.be/cigdHgF8mu0] | |||
| cost = 0/1SP | |||
| metergain = | |||
| oppmetergain = | |||
| damage = 1011/1191 | |||
| location = {{P-UNI|anywhere}} | |||
| notes = Corner carry/okizeme followup, sacrificing some damage compared to j.63214X enders for better 63214X okizeme. On thin characters like Jessica, do 9j.ACB instead. Learning this is highly recommended. | |||
}} | |||
{{ComboData-MBTL | |||
| combo = ...AttackTouch, dash 2B > cl.5C > 9sj.BC > j.63214C/SP [https://youtu.be/IVW0p-qqmQc] | |||
| cost = 0/1SP | |||
| metergain = | |||
| oppmetergain = | |||
| damage = 1418/1652 | |||
| location = {{P-UNI|midscreen}} | |||
| notes = Maximum damage 0-1SP midscreen followup. Also works in the corner vs most characters, dropping only on thin characters like Jessica and Lambdadelta. If close to but not quite in corner, end with '''dash 63214X/SP''' instead of j63214C/SP for a better knockdown but slightly less damage. Learning this is highly recommended. | |||
::*Universal midscreen, character specific in corner. | |||
}} | |||
{{ComboData-MBTL | |||
| combo = ...AttackTouch, dash 2B > cl.5C > 7sj.BC > j.63214C/SP [https://youtu.be/8rm-D4cjEP0] | |||
| cost = 0/1SP | |||
| metergain = | |||
| oppmetergain = | |||
| damage = 1418/1652 | |||
| location = {{P-UNI|corner}} | |||
| notes = Maximum damage 0-1SP corner followup - corner variant of the above combo. Because super jumping forwards in corner causes this to drop on some characters, we super jump backwards instead for a universal corner combo that works on everybody for no damage loss. Like the above two combos, learning this ender is highly recommended. | |||
}} | |||
{{ComboData-MBTL | |||
| combo = ...AttackTouch, cl.5C > 9sj.BC > j.63214X/SP [http://youtu.be/pMdpE0XRRSA] | |||
| cost = 0/1SP | |||
| metergain = | |||
| oppmetergain = | |||
| damage = 1249/1483 | |||
| location = {{P-UNI|anywhere}} | |||
| notes = Much easier but still high damage 0SP or 1SP route. Input cl.5C immediately upon landing. As above, use 7sj in corner instead to prevent drops on Jessica, Lambdadelta ETC. | |||
}} | |||
{{ComboData-MBTL | |||
| combo = ...AttackTouch, dash 2B > 6B, SP2, SP2, 63214X, OTG 2C [https://youtu.be/CdSmAQ6wpLQ] | |||
| cost = 4SP | |||
| metergain = | |||
| oppmetergain = | |||
| damage = 2190 | |||
| location = {{P-UNI|corner}} | |||
| notes = Resource dump into stun. Dash 2B 6B adds a lot of damage and corner carry. For an easier combo, omit dash 2B and go straight into 6B, SP2 after attack touch. | |||
}} | |||
{{ComboData-MBTL | |||
| combo = ...AttackTouch, dash metaDeclare, 2B > cl.5C > 9sj.BC > j.63214C/SP [https://youtu.be/qt4bzBmqg1M] | |||
| cost = 1SP/2SP | |||
| metergain = | |||
| oppmetergain = | |||
| damage = 1418/1652 | |||
| location = {{P-UNI|anywhere}} | |||
| notes = Sideswap using the slide during meta declare. | |||
}} | |||
{{ComboData-MBTL | |||
| combo = ...AttackTouch, dash metaDeclare, 2B > 6B, SP2, SP2, 63214X, 2C [https://youtu.be/2Mz2IfnIMyg] | |||
| cost = 5SP | |||
| metergain = | |||
| oppmetergain = | |||
| damage = 2190 (before stun) | |||
| location = | |||
| notes = Guaranteed stun sideswap combo using the slide during meta declare. Works even at a surprising distance from the corner- if your teammate is roughly 1/3 of the stage away from the corner when attack touch is used, this combo will still work. | |||
::*Works only with '''teammate's back close to corner''' | |||
}} | |||
{{ComboData-MBTL | |||
| combo = ...AttackTouch, 63214X/SP [http://youtu.be/5CfHT6bI3wQ] | |||
| cost = 0/1SP | |||
| metergain = | |||
| oppmetergain = | |||
| damage = 588/788 | |||
| location = {{P-UNI|anywhere}} | |||
| notes = Beginner ender for a reasonable amount of damage. | |||
}} | |||
{{ComboData-MBTL | |||
| combo = ...AttackTouch, 6B > 9sj, j.63214X/SP [http://youtu.be/Lob5NppckQo] | |||
| cost = 0/1SP | |||
| metergain = | |||
| oppmetergain = | |||
| damage = 810/1014 | |||
| location = {{P-UNI|anywhere}} | |||
| notes = Slightly harder variation of the above, but it deals a fair amount more damage. | |||
}} | |||
{{ComboData-MBTL | |||
| combo = | |||
| cost = | |||
| metergain = | |||
| oppmetergain = | |||
| damage = | |||
| location = | |||
| notes = | |||
}} | |||
}} | |||
''' | ===Will's SP Cancel=== | ||
Willard's Ability, ''SP Cancel'', is very useful for Dlanor, making her 623X moves much easier to combo after they hit with and enabling her to connect with ''two'' metaSupers in the corner. | |||
''' | *'''...metaSuper, 22SP > (SPCancel)metaSuper''' [http://youtu.be/g3utbv9DyF4] | ||
:- Costs '''1SP'''. | |||
:- Requires '''active Meta World''' (obviously). | |||
:- '''Corner''' only. | |||
:- Damage: '''~800''' | |||
:Due to the way damage scaling works in this game (combos that last longer than 15 hits start to scale heavily), the second metaSuper will not actually increase the damage output exponentially - the initial hit actually hits the opponent OTG (halving the damage dealt), and by the time it actually deals its damage, even without a lead-in the combo counter is already at ''46''. Still, it can be useful to add just a bit more in. | |||
''' | *'''...623C > (SPCancel)63214SP''' [http://youtu.be/gx4DJTithS4] | ||
:- Costs '''1SP'''. | |||
:- Works '''anywhere''' | |||
:- Damage: '''754''' | |||
:There is no reason to use 623A or 623B when you have access to SP Cancel. 623C deals the most damage of all three, so it is highly recommended you use it over the others. | |||
*'''... 2C > metaDeclare, dash 2B > 2C > j.8B > j.8C land 623A (whiff) instant (SPCancel)metaSuper, 63214SP''' | |||
:- Costs '''2SP'''. | |||
:- '''Corner''' only. | |||
:- Damage: ~2472 | |||
:- In practical terms, '''this combo is a major reason why you'd consider Willard.''' Whiffing 623A to proc SP Cancel puts them in a juggle state at a time you could normally only get a throw; adding a free meta super before that throw means a massive damage increase over your damage without SP Cancel, without spending any more meter than you normally would in this situation. As a bonus, it tends to stun off of better starters; A full combo from a jump-in will stun anyone. You need to input 623A and cancel out of it very quickly so they don't land, though, and make sure not to superjump. | |||
*'''... 2C > metaDeclare, 6C > 623C > delay (SPCancel)metaSuper, 63214SP''' | |||
---- | :- Costs '''2SP'''. | ||
:- Works '''35% from the corner and closer.''' | |||
:- Damage: ~2046 | |||
:- This route offers a fairly significant increase in the damage you can get while pressing to the corner. If slightly further from the corner, it can still work by whiff cancelling 623C to metaSuper to pick up OTG; this lowers the damage to ~1915. | |||
*''' | *'''... 2C > 623SP (whiff), dash up sliding metaDeclare, 22SP > (SPCancel)metaSuper, 63214SP''' | ||
:- Costs '''4SP'''. | |||
:- Works '''50% to 85% from the corner.''' | |||
:- Damage: ~1783 | |||
:- Not more damage, but much more range, allowing you to corner carry from almost anywhere even when touch is down. Pretty meter-heavy, but very flashy. | |||
*'''623C > (SPCancel)22SP, dash 5A > 2B > 2C > attackTouch or metaDeclare | |||
:- Costs '''1SP or 2SP'''. | |||
*''' | :- Works '''anywhere''' | ||
:- Damage: 663 to start | |||
: With SP Cancel ready, 623C turns into a reasonable grounded poke, being a forward-moving armored move that you can link from and which gives pressure if blocked. | |||
===Video Examples=== | |||
====Normal Mode==== | |||
---- | ---- | ||
<youtube>https://youtu.be/dq6mRyLjX4g</youtube> | |||
====Princess Mode==== | |||
---- | ---- | ||
<youtube>https://youtu.be/wQyV9d5YYDU</youtube> | |||
{{OMK}} | {{Navbox-OMK}} | ||
[[Category:Ougon Musou Kyoku]] | [[Category:Ougon Musou Kyoku]] | ||
[[Category:Dlanor A. Knox]] | |||
Latest revision as of 15:03, 24 March 2024
Background
Dlanor A. Knox is the Head Inquisitor, known as "Dlanor of the Ten Wedges" or "Death Sentence Dlanor". She possesses two swords, the Red Key and the Blue Key, whose functions are essentially the same as the Red and Blue Truths. Summoned by Erika Furudo during the events of EP5 and EP6 to deny Beatrice and Battler's gameboard.
Introduction
Health = 1500
| Strengths | Weaknesses |
|---|---|
|
|
Ability
Armor Boost - Reduces damage taken by 50%. Command grabs are unaffected by this ability.
Move List
Normal Moves
Standing
5A
|
|
|---|---|
Toggle Hitboxes Toggle Hitboxes
|
c.5B
|
|
|---|---|
Toggle Hitboxes Toggle Hitboxes
|
f.5B
|
|
|---|---|
Toggle Hitboxes Toggle Hitboxes
|
6B
|
|
|---|---|
Toggle Hitboxes Toggle Hitboxes
|
c.5C
|
|
|---|---|
Toggle Hitboxes Toggle Hitboxes
|
f.5C
|
|
|---|---|
Toggle Hitboxes Toggle Hitboxes
|
6C
|
|
|---|---|
Toggle Hitboxes Toggle Hitboxes
|
Crouching
2A
|
|
|---|---|
Toggle Hitboxes Toggle Hitboxes
|
2B
|
|
|---|---|
Toggle Hitboxes Toggle Hitboxes
|
2C
|
|
|---|---|
Toggle Hitboxes Toggle Hitboxes
|
Jumping
j.A
|
|
|---|---|
Toggle Hitboxes Toggle Hitboxes
|
j.8B
|
|
|---|---|
Toggle Hitboxes Toggle Hitboxes
|
j.7/9B
|
|
|---|---|
Toggle Hitboxes Toggle Hitboxes
|
j.8C
|
|
|---|---|
Toggle Hitboxes Toggle Hitboxes
|
j.7/9C
|
|
|---|---|
Toggle Hitboxes Toggle Hitboxes
|
Throw
Throw B+C Whiff animation Whiff animation
|
|---|
Special Moves
Jungfrau Cornelia (Maiden Cornelia) 「ユングフラウ・コーネリア」
22A/B/C |
|---|
Kirsch Eisen (Cherry Iron) 「キルシュアイゼン」
623A/B/C |
|---|
The Knox Decalogue 「ノックス十戒」
63214A/B/C |
|---|
Turm Träne (Tower Tear) 「トゥルムトレーネ」
j.63214A/B/C |
|---|
SP Supers
Jungfrau Gertrude (Maiden Gertrude) 「ユングフラウ・ガートルード」
22A+B |
|---|
Eiserne Jungfrau (Iron Maiden) 「アイゼルネ・ユングフラウ」
623A+B |
|---|
The Knox Decalogue: Original 「ノックス十戒・原典」
63214A+B |
|---|
Maelstrom Träne (Maelstrom Tear) 「メイルシュトロームトレーネ」
j.63214A+B |
|---|
Level 2 Super
Roter Schlüssel (Red Key) 「ロートシュリュッセル」
236236C |
|
|---|---|
Toggle Hitboxes Toggle Hitboxes
|
Meta Super
Heilig Todesurteil (Holy Death Sentence) 「ヘイリッヒ・トーデスルタイル」
641236C during MetaWorld |
|---|
Princess Moves
Standing
Standing Auto Combo 5A 5A 5AA 5AA 5AAA 5AAA 5AAAA 5AAAA
|
|---|
4A Go on child and make the 50/50 Go on child and make the 50/50
|
|---|
crouching
Crouching Auto Combo 5A 5A 5AA 5AA 5AAA 5AAA 5AAAA 5AAAA
|
|---|
3A The other 50/50 The other 50/50
|
|---|
Jumping
Neutral Jumping Auto Combo j.8A j.8A j.8AA j.8AA
|
|---|
7/9 Jumping Auto Combo j.79A j.79A j.79AA j.79AA
|
|---|
j.2A Another weird 50/50 Another weird 50/50
|
|---|
Specials Moves
Jungfrau Cornelia (Maiden Cornelia) 「ユングフラウ・コーネリア」
2B |
|---|
Kirsch Eisen (Cherry Iron) 「キルシュアイゼン」
4B/6B |
|---|
The Knox Decalogue 「ノックス十戒」
5B |
|---|
Turm Träne (Tower Tear) 「トゥルムトレーネ」
j.4B/j.5B/j.6B |
|---|
SP Moves
Jungfrau Gertrude (Maiden Gertrude) 「ユングフラウ・ガートルード」
2A+B |
|---|
Eiserne Jungfrau (Iron Maiden) 「アイゼルネ・ユングフラウ」
4/6 A+B |
|---|
The Knox Decalogue: Original 「ノックス十戒・原典」
5A+B |
|---|
Maelstrom Träne (Maelstrom Tear) 「メイルシュトロームトレーネ」
j.4/5/6 A+B |
|---|
Level 2 Super
Roter Schlüssel (Red Key) 「ロートシュリュッセル」
Hold [A] |
|---|
Meta Super
Heilig Todesurteil (Holy Death Sentence) 「ヘイリッヒ・トーデスルタイル」
A+B+C during MetaWorld |
|---|
Frame Data
      KD = Knockdown
                              |          Frames             |  Frame Advantage |
              Attack  | Damage|Startup*| Active  | Recovery |On Hit | On Block | Notes
               Throw  ------------------------------------------------------------------
                 B+C  |  360  |  0-1   |    ?    |    ?     |  UKD  |          |Switches Sides; 30 Duration on Whiff
             Normals  ------------------------------------------------------------------
                  5A  |   66  |    4   |    3    |    5     |  +2   |   +2     |
                  2A  |   69  |    6   |    5    |    5     |  +0   |   +0     |
                c.5B  |  150  |    7   |    6    |    8     |  +2   |   +0     |
                f.5B  |  186  |   11   |    3    |   13     |  +0   |   -2     |
                  2B  |  186  |    8   |    1    |   17     |  -2   |   -4     |
                c.5C  |  315  |   16   |    4    |   18[16] |  +3   |   +5     |See Note L
                f.5C  |  384  |   16   |    2    |   21[17] |  UKD  |   +4     |See Note L
                  2C  |  264  |   13   |    3    |   19     |  UKD  |   +0     |
                j.5A  |   60  |    5   |   12    |    6     |       |          |
               j8.5B  |  165  |    8   |    6    |   10     |       |          |
               j8.5C  |  270  |   11   |    4    |   12     |       |          |
           j(7/9).5B  |  150  |    8   |    6    |    6     |       |          |
           j(7/9).5C  |  294  |   12   |    5    |   11     |       |          |
     Command Normals  ------------------------------------------------------------------
                  6B  |  210  |    9   |    5    |   17     |  -6   |   -8     |
                  6C  |  330  |   25   |    2    |   12     |   WS  |   +8     |
            Specials  ------------------------------------------------------------------
                623A  |   99  |    ?   |    ?    |    ?     |   ?   |     ?    |
                623B  |  123  |    ?   |    ?    |    ?     |   ?   |     ?    |
                623C  |  147  |    ?   |    ?    |    ?     |   ?   |     ?    |
            j.63214A  |  562  |    ?   |    ?    |    ?     |  KD   |    --    |
            j.63214B  |  562  |    ?   |    ?    |    ?     |  KD   |    --    |
            j.63214C  |  562  |    ?   |    ?    |    ?     |  KD   |    --    |
              63214A  |600/495|    ?   |    ?    |    ?     |  KD   |     ?    |
              63214B  |600/495|    ?   |    ?    |    ?     |  KD   |     ?    |
              63214C  |600/495|    ?   |    ?    |    ?     |  KD   |     ?    |
                 22A  |   --  |    ?   |    ?    |    ?     |  KD   |    --    |
                 22B  |   --  |    ?   |    ?    |    ?     |  KD   |    --    |
                 22C  |   --  |    ?   |    ?    |    ?     |  KD   |    --    |
       SPs and Meta  ------------------------------------------------------------------
              623A+B  |  198  |    ?   |    ?    |    ?     |  KD   |     ?    |
          j.63214A+B  |  855  |    ?   |    ?    |    ?     |  KD   |    --    |
            63214A+B  |810/720|    ?   |    ?    |    ?     |  KD   |     ?    |
               22A+B  |   --  |    ?   |    ?    |    ?     |  KD   |    --    |
              236x2C  |  762  |    ?   |    ?    |    ?     |  KD   |     ?    |
             641236C  |  634  |    ?   |    ?    |    ?     |  KD   |     ?    |

      Note L: Has a different recovery animation on block, which plays on the first frame after block.
       This changes the move's recovery. Recovery duration on block is listed in brackets.
General Strategy
Dlanor is a grappler whose gameplan revolves around her 63214X command throws, which are fast, deal very high unscaled damage, function as threatening reversal options and lead to effective okizeme even midscreen.
Dlanor has slow movement speed and a low jump arc. However, she has large buttons and access to several strong specialised tools with which she can assert herself in neutral;
- 9j.C j.B
- A strong approach tool which will beat out a surprising number of options and has solid reward on hit. Less effective vs some characters whose pokes incidentally anti-air such as Will 2C. Note that j.B will tend to whiff on crouching opponents, besides on tall characters such as Beatrice, Virgilia, Ronove, Will and EVA-Beatrice.
- 6B
- A 9f anti-air which covers an enormous space in front of and above Dlanor. Because of how high it launches on air hit, it is possible to convert even after committing to a string like 6B > 2B. All of these factors make 6B an extremely powerful poke and pre-emptive anti-air in general.
- This button becomes even more powerful in meta world, where 6B > MetaSuper provides all the benefits of 6B > 2B and 6B > 623A cancels while also being extremely plus on block.
- 22X (Jungfrau Cornelia)
- A projectile shield which floats in front of Dlanor. Though it is ineffective vs some projectiles such as Virgilia’s Gungnir (41236X) or Rosa’s rifle shots (236X), it will negate most other projectiles entirely, allowing Dlanor to move forwards through them. Importantly, however, the shield moves a little slower than Dlanor’s dash speed - so dashing for too long will cause her to move in front of it and become vulnerable to projectiles again. In addition, 22X will absorb some reversals such as Beatrice 623X if spaced correctly.
- 623X
- Forward moving attack with one hit of armor. Though it can be difficult to time, it can potentially allow Dlanor to push through opponent pokes or projectiles like Virgilia’s Gungnir if used correctly.
- The SP version is even more powerful, and can be used on reaction to many projectiles at up to 3/4 screen length away to charge through and push the opponent into the corner. Even lasers with a lot of active frames such as Battler 236SP and meta super will lose consistently to this; however, it cannot be used if 22X or 22SP is active.
- Meta Declare
- Dlanor’s meta declare has no unique properties of its own compared to other characters, but is nonetheless a particularly powerful tool for her in neutral (as well as in pressure and defense). By declaring mid-dash, she will slide forwards during the declare freeze, putting her closer to the opponent – if close enough, her 63214X is guaranteed to hit if the opponent wasn’t already jumping, with no counterplay possible for the opponent. If the opponent is already airborne, declare freeze gives you plenty of time to visually confirm the situation and choose an appropriate option, from 5A and 6B to 63214SP or even tk.63214X/SP depending on their height, spacing and current action.
Additionally, it is important to keep in mind normal touch and assault touch as neutral options. Both will activate Dlanor’s Armor Boost and bring in her partner, who will ideally be able to cover for the matchups and neutral situations that Dlanor struggles in. Armor Boost aids in this, skewing risk/reward in the favour of Dlanor’s partner for a full 15 seconds and enabling them to take greater risks to land a hit and attack touch Dlanor back in later.
Team Building
Feel free to edit this part of the wiki with your tips/strats what partners are best for Lambda to use. Remember I'm watching you.
The information displayed here is from the 2022 Team Tier List from the Ougon Discord Thus, it is open to change, but it should work as a building block for people looking for team pairing ideas. If you are a player of any of the teams and want to change anything feel free to do so.
Reasons to choose Dlanor for a team
- Dlanor's ability to end combos in unscaled throw enders even vs airborne enemies makes her a very consistent damage dealer even with partners that tend to scale their combos easily. Her Armor Boost ability is an incredible passive for twisting risk/reward in your favor, moreso considering her very good normals for the archetype. Alas, Dlanor's damage by herself is not that high, and her ability to combo for her pokes is more limited than other characters with similar range. Her bad movement is also exploitable by many characters.
- Anyone whose combos are on the weaker side or who like to play a bit gutsy when getting in will get particular benefit from pairing with Dlanor.
Combos
Feel free to edit this part of the wiki with your tips/strats on how to use Dlanor. Remember I'm watching you.
Dlanor does not have much variety when it comes to her combos, but they deal very large amounts of damage to make up for it. In particular, her j.63214X air command throws deal enormous unscaled damage, making them very strong combo enders.
Any combo using meta declare will have its SP cost listed assuming the opponent does not counterdeclare. Be aware of opponent meter and the actual cost of meta declaring when using these combos in games.
Notation key:
- 7/8/9sj means a highjump/superjump (performed by inputting 27, 28 or 29 in quick succession)
- > means cancelling the first move into the second.
- , means a link - wait for the first move to finish before inputting the second.
| Combo | Damage | Cost | Meter Gain | Location |
|---|---|---|---|---|
| 9j.CB land... | 444 | 0 | 10% | Anywhere |
|
The j.9C must be input at the apex of Dlanor's jump arc, otherwise the j.9B will not be able to connect. In neutral, this is an effective counter poke which will beat out a surprising number of options. Not a traditional jump in, however, as the jB will whiff on crouching opponents in most situations. | ||||
| OTG 2B > 2C | 200 | 0 | Anywhere | |
|
You might need to omit the 2B if Dlanor is unable to recover in time. The later you use this OTG string in a combo, the less damage it will deal. | ||||
| 5B > 2B > 2C > 623B, 63214X [1] | 1218 | 0 | 99% | Midscreen |
|
Very high damage character specific midscreen combo which deals an enormous amount of damage for very little effort and no meter usage. If using a 9jCB starter, omit 5B and go straight into 2B 2C. Also works on some other characters, but with very specific spacing requirements.
| ||||
| 5B > 2B > 2C > 623A, 63214X [2] | 1194 | 0 | 99% | Corner |
|
Corner variation of the above combo which is significantly stable, working on a majority of the cast. Also works on some characters not listed above, but only at extremely specific spacings. 63214SP ender works on everybody and deals 1419 damage.
| ||||
| 5B > 2B > 2C > 63214X/63214SP [3] | 1095/1320 | 0SP/1SP | 95%/95% | Anywhere |
|
Even with a simple starter, a basic metered ender makes Dlanor's damage output very high. Only connects at closer spacings. | ||||
| 5B > 2B > 2C > metaDeclare, dash 9j.ABC, dash 63214X/SP [4] | 1599/1824 | 1SP/2SP | 99%/99% | Anywhere |
|
Corner carry combo into 63214X ender for okizeme. Against some thin characters such as Jessica, use j.ACB instead. Somewhat difficult, but very stable and works even from a max range 2C > declare as demonstrated in the linked video. | ||||
| 5B > 2B > 2C > metaDeclare, dash 5B > 9sj.BC > j.63214X/SP [5] | 1792/2085 | 1SP/2SP | 105%/105% | Anywhere |
|
High damage ender sacrificing 63214X oki for damage. If near corner, you can get the best of both worlds by replacing j.63214X/SP with dash 63214X/SP. | ||||
| 5B > 2B > 2C > (metaDeclare,) metaSuper, 63214SP [6] | 1905 | 2SP | 180% | Corner |
|
If you run out of SP before the 63214SP at the end, you can instead do 63214X as an ender (damage goes down to 1680). It is, however, much easier to land an SP command grab than it is to land a non-SP one. This combo can also be performed midscreen; however, depending on the opponent, metaDeclare before metaSuper can be necessary rather than optional, and it will be impossible to land the command grab ender - reducing damage to 1185. | ||||
| 5B > 2B > 2C > metaDeclare, 6C > metaSuper, 63214SP [7] | 2218 | 2SP | 180% | Corner |
|
Higher damage variation of the above combo in case you have Meta Gauge available. If you run out of SP before the 63214SP at the end, you can instead do 63214X as an ender for 1993 damage, though this is significantly more difficult. With Beatrice as your partner, this route is obsoleted by SP2 routes thanks to Infinity SP. | ||||
| 5B > 2B > 2C > SP2, 63214X/SP [8] | 1857/2082 | 2SP/3SP | 99%/99% | Corner |
|
An easy confirm into Dlanor's fantastic SP2. This combo is a guaranteed stun on most characters with a jump-in or if Dlanor comes in with an Attack Touch. | ||||
| 5B > 2B > 2C > SP2, SP2, 63214X/SP [9] | 2543/2768 | 4SP/5SP | 99%/99% | Corner |
|
Dlanor's SP2 can be linked into itself for massive damage. The second SP2 will connect OTG, relaunching the opponent. Guaranteed stun on all characters. | ||||
| 5B > 2B > 2C > metaDeclare, dash 2B > 6B, SP2, SP2, 63214X [10] | 2920 | 5SP | 101% | MidscreenCorner |
|
A full resource dump to guarantee stun on any character, working from even quite far away from the corner. The dash 2B 6B not only adds a lot of extra corner carry, but adds almost 300 damage to the combo. At further spacings or for an easier combo, omit the 2B and just do dash 6B instead. With all combos using 6B into SP2, be sure to delay the SP2 a little so it doesn't whiff.
| ||||
| 6C > metaDeclare, dash 2B > cl.5C > 7sj.BC > j.63214X/SP [11] | 1837/2130 | 1SP/2SP | 101%/101% | Corner |
|
Standard 6C > meta declare combo. If not quite in corner, use 9sj instead. | ||||
Anti Air Combos
When using 6B to anti-air predictively, you can do 6B 2B to continue your string on hit or block if the opponent does not jump. If this anti-airs, 2B will whiff and recover fast enough to still allow some of the followups listed below, depending on the opponent's height and horizontal distance.
| Combo | Damage | Cost | Meter Gain | Location |
|---|---|---|---|---|
| AA 6B, dash 6B > 63214X [12] | 894 | 0 | 80% | Anywhere |
|
Dlanor's easiest confirm off of an anti-air 6B hit. The dashes after the 6Bs are only necessary midscreen; in the corner, you can simply omit them. | ||||
| AA 6B, dash cl.5B > cl.5C > 9j.BC j.63214C [13] | 1681 | 0 | 101% | Anywhere |
|
Highest damage confirm off of an anti-air 6B hit. Hitting with the entire air string is difficult - as such, you can omit the 9j.BC and go straight into the j.63214C ender, lowering the damage output to 1237. | ||||
| AA 6B, dash 6B > 623A(whiff), 63214X [14] | 894 | 0 | 80% | Anywhere |
|
Interesting route using a whiffed 623A to gain extra distance. Requires quite specific height and spacing. | ||||
| AA 6B, dash 6B > 9sj delay j.63214C [15] | 961 | 0 | 90% | Anywhere |
|
Surprisingly stable route, provided that the second 6B hits close horizontally (regardless of height). Air throw timing depends on opponent height, but is quite easy to visually confirm. | ||||
| AA 6B, dash 6B > 63214SP [16] | 1119 | 1SP | 80% | Anywhere |
|
Dlanor's easiest metered confirm off of an anti-air 6B hit. The dashes after the 6Bs are only necessary midscreen; in the corner, you can simply omit them. | ||||
| AA 6B, dash 5B > cl.5C > 9sj.BC > j.63214C/SP [17] | 1681/1974 | 0SP/1SP | 101%/101% | Anywhere |
|
Highest damage 1SP damage confirm from anti-air 6B. Quite difficult, being hard to connect depending on opponent's character, or the height and distance of the 6B hit. | ||||
| AA 6B, dash 6B, SP2 [18] | 1161 | 2SP | 20% | Anywhere |
|
Rather high damage off of an anti-air 6B, but that's not what this combo is for. This combo has amazing corner carry - it will almost always push your opponent into the corner, which is exactly where Dlanor wants them.
| ||||
| AA 6B > (metadeclare,) metasuper (whiff), 6B > 9sj delay j.63214C [19] | 961 | 1SP | Anywhere | |
|
An example of an anti air route from a 6B > metasuper (whiff) starter - all of the above routes will be possible with this sort of starter depending on spacing and opponent height. | ||||
Sweep > Attack Touch
All of the combos below are performed off of a sweep → attackTouch starter. The damage numbers shown are those of Dlanor's portion only; actual practical damage values will differ based on the full starter due to damage scaling.
| Combo | Damage | Cost | Meter Gain | Location |
|---|---|---|---|---|
| ...AttackTouch, dash 9j.ABC, dash 63214X/SP [20] | 1011/1191 | 0/1SP | Anywhere | |
|
Corner carry/okizeme followup, sacrificing some damage compared to j.63214X enders for better 63214X okizeme. On thin characters like Jessica, do 9j.ACB instead. Learning this is highly recommended. | ||||
| ...AttackTouch, dash 2B > cl.5C > 9sj.BC > j.63214C/SP [21] | 1418/1652 | 0/1SP | Midscreen | |
|
Maximum damage 0-1SP midscreen followup. Also works in the corner vs most characters, dropping only on thin characters like Jessica and Lambdadelta. If close to but not quite in corner, end with dash 63214X/SP instead of j63214C/SP for a better knockdown but slightly less damage. Learning this is highly recommended.
| ||||
| ...AttackTouch, dash 2B > cl.5C > 7sj.BC > j.63214C/SP [22] | 1418/1652 | 0/1SP | Corner | |
|
Maximum damage 0-1SP corner followup - corner variant of the above combo. Because super jumping forwards in corner causes this to drop on some characters, we super jump backwards instead for a universal corner combo that works on everybody for no damage loss. Like the above two combos, learning this ender is highly recommended. | ||||
| ...AttackTouch, cl.5C > 9sj.BC > j.63214X/SP [23] | 1249/1483 | 0/1SP | Anywhere | |
|
Much easier but still high damage 0SP or 1SP route. Input cl.5C immediately upon landing. As above, use 7sj in corner instead to prevent drops on Jessica, Lambdadelta ETC. | ||||
| ...AttackTouch, dash 2B > 6B, SP2, SP2, 63214X, OTG 2C [24] | 2190 | 4SP | Corner | |
|
Resource dump into stun. Dash 2B 6B adds a lot of damage and corner carry. For an easier combo, omit dash 2B and go straight into 6B, SP2 after attack touch. | ||||
| ...AttackTouch, dash metaDeclare, 2B > cl.5C > 9sj.BC > j.63214C/SP [25] | 1418/1652 | 1SP/2SP | Anywhere | |
|
Sideswap using the slide during meta declare. | ||||
| ...AttackTouch, dash metaDeclare, 2B > 6B, SP2, SP2, 63214X, 2C [26] | 2190 (before stun) | 5SP | ||
|
Guaranteed stun sideswap combo using the slide during meta declare. Works even at a surprising distance from the corner- if your teammate is roughly 1/3 of the stage away from the corner when attack touch is used, this combo will still work.
| ||||
| ...AttackTouch, 63214X/SP [27] | 588/788 | 0/1SP | Anywhere | |
|
Beginner ender for a reasonable amount of damage. | ||||
| ...AttackTouch, 6B > 9sj, j.63214X/SP [28] | 810/1014 | 0/1SP | Anywhere | |
|
Slightly harder variation of the above, but it deals a fair amount more damage. | ||||
Will's SP Cancel
Willard's Ability, SP Cancel, is very useful for Dlanor, making her 623X moves much easier to combo after they hit with and enabling her to connect with two metaSupers in the corner.
- ...metaSuper, 22SP > (SPCancel)metaSuper [29]
- - Costs 1SP.
- - Requires active Meta World (obviously).
- - Corner only.
- - Damage: ~800
- Due to the way damage scaling works in this game (combos that last longer than 15 hits start to scale heavily), the second metaSuper will not actually increase the damage output exponentially - the initial hit actually hits the opponent OTG (halving the damage dealt), and by the time it actually deals its damage, even without a lead-in the combo counter is already at 46. Still, it can be useful to add just a bit more in.
- ...623C > (SPCancel)63214SP [30]
- - Costs 1SP.
- - Works anywhere
- - Damage: 754
- There is no reason to use 623A or 623B when you have access to SP Cancel. 623C deals the most damage of all three, so it is highly recommended you use it over the others.
- ... 2C > metaDeclare, dash 2B > 2C > j.8B > j.8C land 623A (whiff) instant (SPCancel)metaSuper, 63214SP
- - Costs 2SP.
- - Corner only.
- - Damage: ~2472
- - In practical terms, this combo is a major reason why you'd consider Willard. Whiffing 623A to proc SP Cancel puts them in a juggle state at a time you could normally only get a throw; adding a free meta super before that throw means a massive damage increase over your damage without SP Cancel, without spending any more meter than you normally would in this situation. As a bonus, it tends to stun off of better starters; A full combo from a jump-in will stun anyone. You need to input 623A and cancel out of it very quickly so they don't land, though, and make sure not to superjump.
- ... 2C > metaDeclare, 6C > 623C > delay (SPCancel)metaSuper, 63214SP
- - Costs 2SP.
- - Works 35% from the corner and closer.
- - Damage: ~2046
- - This route offers a fairly significant increase in the damage you can get while pressing to the corner. If slightly further from the corner, it can still work by whiff cancelling 623C to metaSuper to pick up OTG; this lowers the damage to ~1915.
- ... 2C > 623SP (whiff), dash up sliding metaDeclare, 22SP > (SPCancel)metaSuper, 63214SP
- - Costs 4SP.
- - Works 50% to 85% from the corner.
- - Damage: ~1783
- - Not more damage, but much more range, allowing you to corner carry from almost anywhere even when touch is down. Pretty meter-heavy, but very flashy.
- 623C > (SPCancel)22SP, dash 5A > 2B > 2C > attackTouch or metaDeclare
- - Costs 1SP or 2SP.
- - Works anywhere
- - Damage: 663 to start
- With SP Cancel ready, 623C turns into a reasonable grounded poke, being a forward-moving armored move that you can link from and which gives pressure if blocked.

