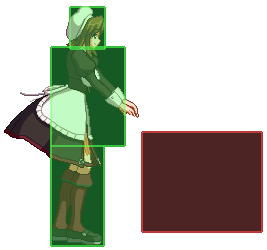
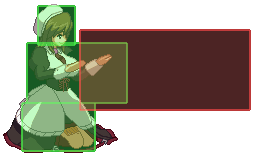
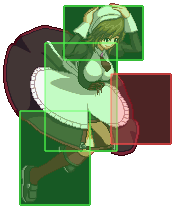
Ougon Musou Kyoku/Shannon
Introduction
One of the two servants present at Rokkenjima at the time of the serial killings, the other being her "younger brother" Kanon. Shannon does not play much of a role in Ougon Musou Kyoku, with her most significant story route being her ascension from furniture to human along with Kanon. However, due to her constant breaking of mirrors she has 1000 years bad luck.
Shannon is a character that is reasonably good at zoning, with barriers and seagulls covering a lot of space in addition to some good anti-airs. Shannon's greatest strength, however, comes from her knockdown pressure, especially in the corner. Shannon's throw causes a particularly long knockdown, and is easy to setup in the middle of her blockstrings. Shannon suffers from her poor movement options, as well as limited damage at midscreen.
Pros
+ Strong throw game
+ Decent knockdown pressure
+ Good corner mixups
+ Higher than average health
+ Plenty of zoning and anti-zoning techniques
+ Seagulls are good tools for okizeme and combos
Cons
- Poor movement options
- Midscreen damage isn't very impressive
- Advanced combos require a high level of execution
- Poor range on most of her normals and special moves
- Very corner reliant
- Corner damage is mediocre at best
Health - 1550.
Ability
Auto-Guard
You will automatically block for a period of time. This can help you defend while inputting reversals and even while dashing.
When in effect, a pink magic circle will appear below the player character.
Move List
Normal Moves
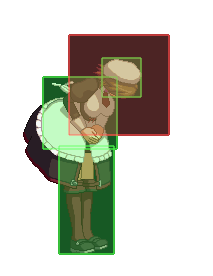
| 【5A】
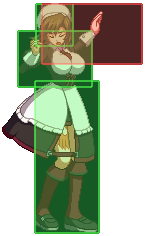
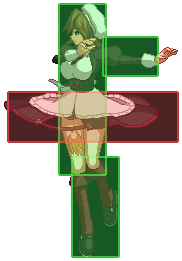
A girlish slap attack. 2 hits, 86 damage. Can be cancelled halfway through, though most combos require the 2nd hit's superior hitstun. Hits mid.
| |
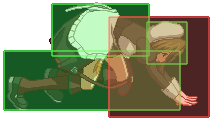
| 【2A】
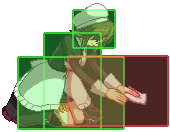
A floor-scrubbing attack. Hits low. ordinary 2a.
| |
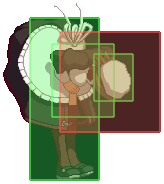
| 【5B】
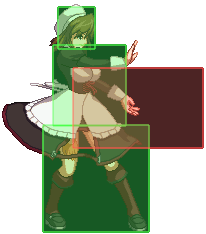
A shove attack. Pushes Shannon backwards slightly. Hits mid.
| |
| 【f.5B】
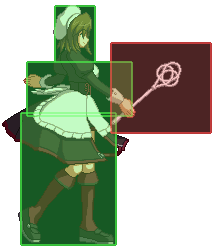
Attacks with a carpet beater, used whenever Shannon isn't in range for 5B. decent range. Hits mid.
| |
| 【6B】
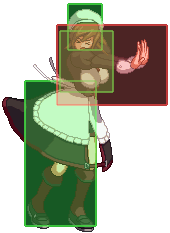
Gomenasai! A two-hit bow, 180 damage. Both hit high. Cannot chain into other melee attacks. an overhead that is similar to jessica's 6b. rather hard to telegraph.
| |
| 【3B】
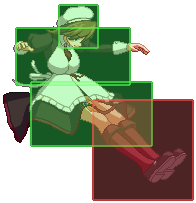
Another floor-scrubbing attack that scoots Shannon forward roughly 3 character lengths. Given her short crouching hitbox, this lets Shannon safely crawl under most projectiles. Forces knockdown on hit. Hits low. sliding move. you can attack touch after this move to expand on the damage.
| |
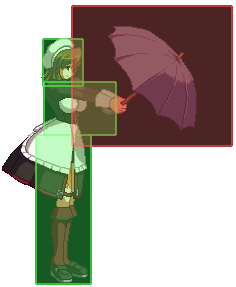
| 【5C】
Attack by opening an umbrella. Hits mid. Very short-range with strange combo eccentricities, but it does fair damage. launches the opponent high up if it hits as an anti air. not used very often.
| |
| 【f.5C】
Attacks with a serving cart. 2 hits, 270 damage. Hits mid. fairly good move. one of Shannon's better move and will be used very often in combos.. this normal can be cancelled, but it can only be cancelled on the first hit - regardless of what you cancel into, Shannon lets go of the cart and it continues to chain into its second attack independently, which opens up a variety of situations:
Combos into: 236, 214AB (range dependent), Promised Lightning, Attack Touch
| |
| 【6C】
A clumsy trip that spills cutlery in front of Shannon. Doesn't combo anything, but since the hitbox is in the cutlery, it has a very long range, though poor recovery. Whiffs on crouchers at certain ranges you can combo it into a 2a but its very hard. odd sort of loop can be done from this as it launches rather high if the opponent is caught by it while they are in the air and it can be comboed into 5b and than another 6c.
| |
| 【2C】
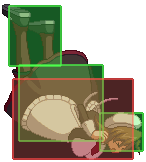
A low-hitting rug attack. It has two hits, one on the carpet's ascent and one on the descent, but if the ascent scores a hit the descent won't hit. Second hit forces knockdown. if it hits later on in the move's ascent it will lauch the opponent high into the air (similar to C.5c). if it hits just as it starts the descent it will hit but leave the opponent standing. rather odd move as the damage also varies on the stages.
| |
| 【j.A】
An aerial poke as Shannon struggles to keep her skirts down. Long hitframes but negligible hitstun, almost impossible to combo from. Hits high.
| |
| 【j.B】
A downwards smack with a serving tray. Hits high. good to start up air combos with.
| |
| 【j.8C】
Shannon does a small twirl with the hitbox around her skirt. Hits high. rather odd move. very similar to Lucifer's J8.B.
| |
| 【j.79C】
Shannon does a forwards flip, slamming her shoes down. The hitbox is around her shoes, but the startup frames are lengthy. great for combos as it combos quite easily from jB and has good hitstun allowing you to easily carry on with a ground string. Hits high.
| |
| 【j.2C】
A downwards bodyslam. Hitbox lasts until Shannon lands and has a decent, comboable hitstun. does not combo from J.B however this move is great for crossups as the active frames last for a very very long time and the hitbox has a wide range making it rather easy to use as a crossup attack. |
Frame data
                          |          Frames             |  Frame Advantage |
              Attack  | Damage|Startup*| Active  | Recovery |On Hit | On Block | Notes
               Throw  ------------------------------------------------------------------
                 B+C  |   ?   |  0-1   |    ?    |    ?     |   KD  |          |50 Duration on Whiff
             Normals  ------------------------------------------------------------------
                c.5A  | 42,42 |    5   |  2(6)2  |   12     |   ?   |    ?     |
                f.5A  |   54  |    5   |    4    |   10     |   ?   |    ?     |
                  2A  |   69  |    6   |    4    |    5     |   ?   |    ?     |
                c.5B  |  150  |    5   |    4    |   17     |   ?   |    ?     |
                f.5B  |  150  |    8   |    4    |   17     |   ?   |    ?     |
                  2B  |  171  |    9   |    4    |    9     |   ?   |    ?     |
                c.5C  |  270  |   11   |   12    |   18     |   ?   |    ?     |
                f.5C  | 120,? |   14   |    3    |   33     |   ?   |    ?     |Missing data for 2nd (projectile) hit
                  2C  |210-150|   10   |3,4,4,4,2|   30     |   ?   |    ?     |Hits Only Once, See Note B
                j.5A  |   60  |    4   |    9    |    6     |   ?   |    ?     |
                j.5B  |  150  |   11   |    8    |    4     |   ?   |    ?     |
               j8.5C  |  252  |   11   |   24    |    3     |   ?   |    ?     |
           j(7/9).5C  |  252  |   15   |    7    |    8     |   ?   |    ?     |
     Command Normals  ------------------------------------------------------------------
                  6B  |   90  |   22   |    8    |   17     |   ?   |    ?     |
                  6C  |    ?  |    ?   |    ?    |    ?     |   ?   |    ?     |46 Duration
                  3B  |  180  |   14   |   28    |   20     |   ?   |    ?     |
                  3C  |    ?  |    ?   |    ?    |    ?     |   ?   |    ?     |46 Duration
                j.2C  |  270  |   16   |   12    |    3     |   ?   |    ?     |
Note B: Hits only once; Each hit has different damage (210, 180, 180, 150, 150) and different properties.
       Still need to test properties, but different hits seem to have different amounts of launch?
       Seems to also differ if the opponent is airborn, grounded, or already knocked-down.
Special Moves
| Magic Barrier 「魔法障壁」 ― 236ABC
Conjures a pink octagonal barrier in front of Shannon. Barriers can be shattered by projectiles (consuming them in the process) or by melee hits. The shield will float slowly forwards for roughly 3 seconds before vanishing on its own. Input determines barrier distance.
| |
| Capture Barrier 「捕縛障壁」 ― 623ABC
Shannon conjures a small burst of magic in front of herself. Enemies that step into the range are grappled in a capture barrier and receive damage as it shatters. Though it appears to be a throw at first glance, it can be blocked.
| |
| To Feed (the seagulls)「エサやり」 ― 214ABC
Shannon baits a seagull onto the stage with some bread. The seagull causes little damage but covers a wide area, in addition to absorbing projectiles. Only one seagull can be on stage at a time, and this move cannot be input until the old one has left the stage entirely. Depending on where the camera is positioned, this can be a deceptively long time. Input determines how far in front of Shannon the seagull will fly before returning.
| |
| Protective Barrier 「守護障壁」 ― 22ABC
Swiftly conjures a protective barrier. 5 frame startup with some invincibility frames(?), but a very slow recovery. The barrier guards against projectiles while it's active, and touching it will damage enemies. Higher inputs cause more damage but have a longer recovery time.
|
SP Supers
| Absolute Barrier 「絶対障壁」 ― 236A+B
Summons a stronger octagon barrier in front of of Shannon. The barrier is larger, lasts longer and moves a larger distance before it vanishes. As the barrier damages the enemy (or otherwise receives hits due to blocking a projectile) it will gradually lose health until it shatters. It can take 5 hits total, for 600 damage if they all land on an enemy. May stun the enemy. Melee attacks do not damage the shield.
| |
| Enhanced Capture Barrier 「強化捕縛障壁」 ― 623A+B
A stronger version of the original capture barrier. 11 hits, 576 damage.
| |
| It's Not A Hat?! 「帽子じゃなかった?!」 ― 214A+B
A larger seagull nabs Shannon's hat and charges head-on at an enemy. 5 hits, 540 damage. While it has limited combo potential, the startup is very fast and the seagull does not vanish when Shannon is hit, so it can be used to preemptively stuff an incoming combo. The most important feature of this skill is that it causes immense barrier damage - at the beginning of a match this amounts to 75% of the guard meter.
| |
| Absolute Protection Barrier 「絶対守護障壁」 ― 22A+B
A larger, more powerful version of the original 22ABC barrier. 8 hits, 660 damage. May stun the enemy. The first few hits (prior to the barrier being raised) hit low. Multiple characters in the cast cannot punish this move.
|
Level 2 Super
| You should say "No" in bad situations. 「嫌な時は嫌と言いますね」 ― 236236C
A rush towards the enemy, followed by a slapdown. 15 hits, 647 damage. Blockable and can be interrupted by stray or delayed projectiles (Ange summons and seagulls in particular).
|
Meta Super
| Promised Lightning 「契約の落雷」 ― 641236C
Yakusoku wo mamorimashita, Beatrice-sama!
|
Combos
| Standing | ||||||||||||
| 5B 2B f.5C - 570 damage Notes: Don't do this. See below. | ||||||||||||
| 2B 5B 5C 236B - 4 hits, 945 damage Notes: 5B-2B openers place Shannon in f.5C range, killing her combo potential. Use 2B-5B instead. | ||||||||||||
| 5A 5B 5C 236B - 4 hits, 837 damage Notes: Cancel immediately out of 5A, as the second hit will push the enemy too far back. | ||||||||||||
| Corner | ||||||||||||
| 5A 5B 5C 236AB - 5 hit, 1062 damage Notes: A simple corner combo. If they're stunned during one of the barrier's hits, you can safely input 9 j.9B/C for additional damage on the way down without breaking it. | ||||||||||||
| j.5B j9.C 2A 2B 2C 641236C - 9 hits, 1671 damage Notes: A jumpin that leads into metafield. 2B->2C may be unreliable. | ||||||||||||
| 2C 623AB(xN) Notes: 623AB corner loop. By the 3rd 623AB, proration really sets in, setting the combo in the 34-hit, 1600 damage range. | ||||||||||||
| [Air Hit 2A > c.5B > 632146C]xN Notes: Shannon's theoretical Meta loop. Her Meta-Super starts up fast enough for it to juggle off of all of her ground normals, even 5A, and it's possible to link back into 2A after the Meta-Super. I haven't been able to pull this off yet (it's without a doubt her hardest combo), but there's no reason as to why it shouldn't work. | ||||||||||||
| SP Cancel Combos | ||||||||||||
| 5B 2C META Dash 5B 5C 214A SPCancel 641236C Gull Impact 641236C - 13 Hits, 2469 Damage Notes: Extremely strict timing as it relies on the seagull perfectly knocking the enemy into the second meta super, but tremendous damage for just 1SP. Builds enormous amounts of stun and allows the meta super followup of your choice. | ||||||||||||
| ...641236C 22C SPCancel 641236C - 9 Hits, 1928 Damage without leadin. Notes: A simple and important link to learn when using Willard with Shannon, he always lets you double up on your meta super so take advantage of it. | ||||||||||||
| ...641236C 623AB 22C SPCancel 641236C 623AB 22C - 32 Hits, 3019 Damage without leadin. Notes: A variation of the above link that uses 2 additional SP. If you only have 1 SP, omit the 623AB 22C between the meta supers. The 623AB 22C meta super finisher can be used with any meta super, not just ones with SPCancel active. This combo generates immense stun and can deal even more amazing damage with a proper set up from Will. | ||||||||||||
| SP Cancel Links | ||||||||||||
| ...22ABC SPCancel (641236C) 623AB... - 12 Hits, 909 Damage without leadin. Damage varies based on version of 22. Notes: An extremely important link to learn that lets you launch into your 623AB corner loop at any time, you can even combo 623AB into 22ABC if you want to tack some bonus damage to a 623AB loop in progress. You can optionally cancel the 22 into your meta super before resuming the 623AB loop, but that does require you to already be in meta. | ||||||||||||
| ...22AB SPCancel 641236C... - 12 hits, 1500 damage without leadin. Notes: This may seem like a useless link, but 22AB is usable in almost any situation 2C can be used to launch your enemy for significantly more damage and is fantastic damage for 1SP. This link can also be used when using 22AB for guard breaking and the barrier expansion happens to launch the enemy. | ||||||||||||
| ...236236C SPCancel 641236C... - 19 Hits, 1439 Damage without leadin. Notes: Rather situational, but useful in those situations where you use 236236C for punishing or bonus combo damage. Has rather strict timing too, if used too early it will whiff, if used too late, the enemy may escape OTG status. This link does still seem rather useless, but it's normally quite impossible to combo anything from 236236C and this cancel allows you to use any followups you may usually use after a meta super like a 623AB loop. Her 236236C also generates a large amount of stun. | ||||||||||||
| 214ABC SPCancel 22AB/623AB/236AB/236236C/641236C Notes: These links are just wise to learn. When setting up seagulls in the meta world or with just SPCancel ready, the opponent may attempt to counterattack during the gull startup and any of these skills can be used to counter their advance, 22AB or 641236C probably being the best choice against jumpins because of their invulnerability and high vertical reach and 22AB, 623AB and 236236C best used against ground attackers to counter their dash in.
Pressure Strings and Mixups
|

