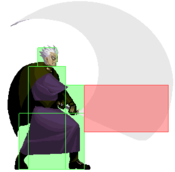
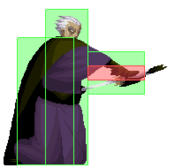
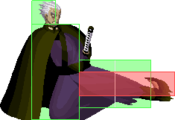
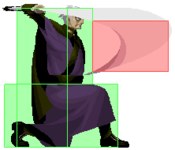
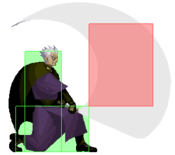
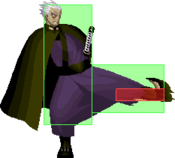
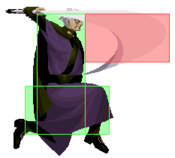
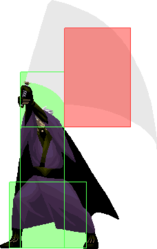
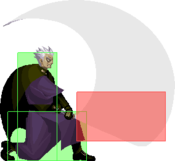
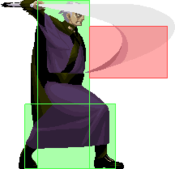
Akatsuki Blitzkampf/Fritz
Background
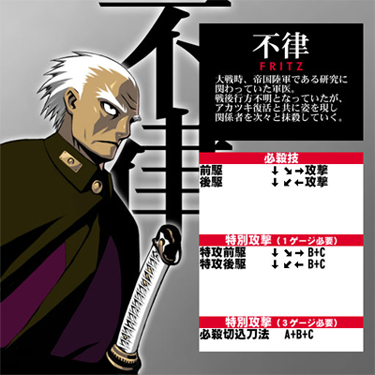
A military surgeon who was involved in a research from the Imperial Army during the Great War. Although he was missing after the war, he reappears with Akatsuki's comeback and starts to eliminate those involved one by one. (from character selection screen)
Read the translation of his arcade mode!
Introduction
Fritz is the kind of character for those who like to trick their opponents into making mistakes and then come down on their heads with brutal punishment. Fritz forces his opponents to think hard and play carefully, unless they want to lose a good chunk of their health in a matter of seconds and 3 bloody slashes.
On the other hand, Fritz is forced to parry and/or use EX dashes in order to get out of extreme pressure (especially when cornered), simply because he's out of options as his attempts at countering will prove futile.
A good number of Fritz's normals act as special moves and deal guard damage.
Similar to: Samurai Shodown, Nagoriyuki
| Strengths | Weaknesses |
|---|---|
|
|
All damage values below were tested on Akatsuki with 1.000 armor ratio and full life on both sides (remember about "Health difference" and "Guts" systems)
Character Summary
- Special Moves
- 236A/B/C (EX OK) - Maegake: Forward dash
- 214A/B/C (EX OK) - Ushirogake: Backwards dash
- Level 3 Super
- A+B+C - Hissatsu Kirikomi Touhou: High damage slash, but hard to combo
- Unique Attacks
- 4B, 4C, j.2A/B/C
- Armor Ratio = 1.000
- Walking Speed = 5.0 dots/F
- Retreating Speed = 4.0 dots/F
- Jump Startup = 3F
- Backdash Duration = 18F
Basic BNB: 5B > 5C
Metered BNB: j.B > 2A > A+B+C
Notes on Ausf. Achse
Universal Changes
The nerfs to reflector combos affect him more since the latter are very important to his defence.
Character Changes
Gains a taunt with a hitbox. Does no hitstun or blockstun and barely any damage.
4B does 200 less damage (1600-1400).
His level 3 received a couple nerfs. It can now be guarded and the initial hit does 800 less damage (2000-1200).
The movement speed of his teleports is now slower.
His diagonal j.B got a new animation, and while it can't be verified, possibly a larger hitbox.
His standing reflector don't bounces an opponent as high, making level 3 combos a little harder.
His aerial reflector bounces an opponent higher, making level 3 combos easier and close 5C follow-up guaranteed.
The landing recovery of both versions of j.B can be special/super canceled now.
Universal Mechanics
Reflectors
Standing Reflector
4/5/6+B+C |
|---|
Crouching Reflector
1/2/3+B+C |
|---|
Jumping Reflector
7/8/9+B+C |
|---|
Throws
Standing Throw
|
|---|
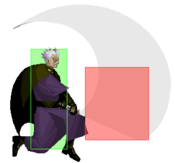
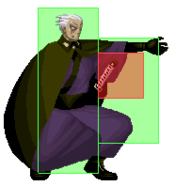
Aerial Throw Go into training mode and do this throw, it's amazing. Go into training mode and do this throw, it's amazing.
|
|---|
Normal Moves
5A (close)
|
|---|
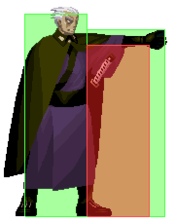
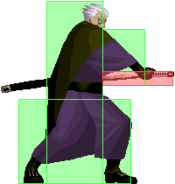
5A (far) This hitbox is actually real. This hitbox is actually real.
|
|---|
5B (close)
|
|---|
5B (far)
|
|---|
5C (close)
|
|---|
5C (far)
|
|---|
2A
|
|---|
2B (close)
|
|---|
2B (far)
|
|---|
2C (close)
|
|---|
2C (far)
|
|---|
j.A
|
|---|
j.B
|
|---|
nj.B
|
|---|
j.C
|
|---|
Command Normals
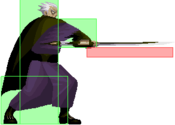
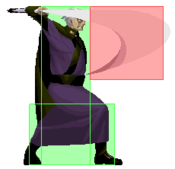
破天 - Haten
4B |
|---|
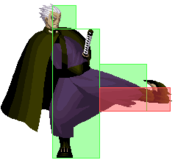
玉光 - Gyokkou
4C |
|---|
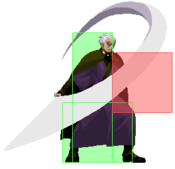
天駆 - Amagake
j.2A/B/C |
|---|
Special Moves
前駆 - Maegake
236+A/B/C/B+C |
|---|
後駆 - Ushirogake
214+A/B/C/B+C |
|---|
Super Move
必殺切込刀法 - Hissatsu Kirikomi Touhou
A+B+C |
|---|
General Strategy
Neutral
Fritz's plan in neutral is pretty simple. Abuse his huge buttons in mid range and catch opponents off guard with his varying options. The safest poke to throw out is f.5A. Compared to his other far normals, f.5A has a low whiff recovery, and still has decent range and a disjointed hitbox. However, it is a far less rewarding than his other tools. f.2C is generally the next best neutral tool. It's an incredibly fast and long ranged low that very often will catch opponents standing. This move alone can make an opponent afraid to stand too much against Fritz. Unfortunately, it has a huge amount of whiff recovery, making it a fairly easy punish, especially if the opponent jumps in on you when you try to do it. Once the opponent is worried about having to block low, you can add f.5C to your neutral. f.5C also has huge range, mainly since Fritz walks a good distance before swinging his sword, but has a lot of startup, making it vulnerable to being hit out of startup. Most importantly though, it hits overhead, so when the opponent starts crouch blocking to avoid f.2C, this can catch them off guard. f.5C also has other more niche uses, such as using it after reflecting a projectile since from most ranges it will reach the opponent. Note, despite how the move looks, f.5C will often whiff on jumping opponents too, leaving it wide open for a whiff punish. Other strong neutral tools are his f.5B/2B. Effectively the same move, they have a deceivingly large amount of range since Fritz moves forward a good distance before swinging the sword, and are also pretty fast. They can be used for poking as well, although they too have long whiff recovery, but are especially good as punish tools. They lead to good damage especially on counter hits so they're a strong tool in general. 4C, while generally more of a mixup tool, also has use in neutral. Due to the hop back it can be used to catch overly aggressive opponents, and is relatively safe on whiff so it normally doesn't hurt to just throw it out. Similar to f.5C, it tends to whiff on jumping opponents so be careful about that. Incorporating his teleports in neutral, while not as important as his normals, can also be powerful. The meterless teleports don't have invincibility, but against some characters and respectful opponents, his forward teleport can close distance quickly. If close enough to the opponent after the teleport, you can often go for a throw. You can also use 236+B+C to go through any active hitboxes like a projectile and still reach the opponent, although since the opponent will recover before the animation ends, they'll be at an advantage and this is more of a gimmick than anything else. The backwards teleport dash, while not as useful, can be used to escape from pressure situations outside of corner.
Anti-Air
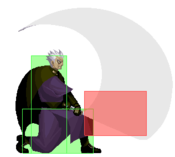
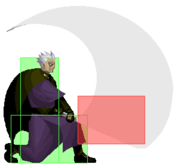
Fritz's anti-air game is very strong, although there is some flaws to it. 4B of course is the main anti-air, with a huge disjointed vertical hitbox that's not lacking in horizontal reach either. 4B has a few issues though. Like his other sword normals, 4B has a huge amount of recovery on whiff. It also doesn't make his hurtbox any smaller, meaning sometimes in spite of the huge hitbox it will get beaten out or trade (although trading can be beneficial). It's also slow enough that it can be hard to use on reaction, although it's definitely possible. Fritz doesn't actually have any other buttons particularly good for anti-air, although f.5B can sometimes catch jumpers, but his air to air game is pretty strong as can be read below.
Air Game
Fritz's air normals while unique are strong for their purposes. j.A is small but still has use in air to air and is his safest aerial to land with. Notably, j.A can be canceled into j.2X, meaning it can be used for some hard to deal with left right mixups (i.e. air to air j.A then mix between j.2A or j.2C to land to the left or right of the opponent before they can touch the ground). nj.B and j.B are in practice the same move, although j.B has a bigger hitbox and hurtbox. Being the giant disjointed normals they are, they're great for air to air, possibly the best air to air normals in the game. While it is hard to combo off air to air j.B, with the right air momentum and spacing it's possible. When used on landing, j.B launches opponents rather than keeping them standing. This can lead to combo extensions, and is the only consistent way to combo into his level 3 for huge damage. However, j.B has landing recovery, even on whiff, meaning it is possible to whiff punish and won't always be plus if blocked on landing. j.C is not very good overall. While it may initially look like a good landing aerial since it's safe on block and does big damage if it does hit, the move is so incredibly telegraphed no good player should be getting hit by it. Some players will just reflect it on reaction since it obviously isn't a reflector safe jump. Additionally, it has huge recovery on whiff, making it easy to whiff punish like his other big normals. j.C really should be avoided, as it doesn't serve much purpose.
Offense and Okizeme
Fritz has fairly strong pressure once he can secure a knockdown close enough to the opponent. His general mixup tools are f.2C, f.5C, 4C, and throw. Fritz has two lows, those being c.2B and f.2C. c.2B, while requiring you to be close to the opponent, is very plus on hit or block, even more so if meatied. This means that regardless if it hits, you are put in a favorable situation. From here, you can either walk up and c.2B again for plus frames, throw, f.2B if you read the opponent doing an option besides block, or high/low mix with 4C and f.2C. This is a very good mixup that you should setup when possible. c.5B can also start this mixup but it isn't as plus as c.2B. f.2C is slower but does a lot more damage, gives a knockdown, and can be spaced to be safe from some reversals. The range also means you can do it from a more distant knockdown where you otherwise wouldn't be able to do c.2B. 4C and f.5C are both overheads, but there are different situations to use them. f.5C hits harder and has more range, but is notably slower and is very susceptible to reversals or reflector. However, it's range allows you to use it for high/low pressure along with f.2C from a range, making even more distant knockdowns dangerous. However, if you're close enough for it, 4C is the better option. It's faster and harder to react to, not as much but still decent range, and most importantly since it hops backwards, a large number of reversals will whiff against it. This makes it incredibly valuable for mixup. Once the opponent is worried about blocking and starts respecting you, Fritz can incorporate his throw mixups. As described earlier, Fritz can setup tick throw from c.2B or c.5B, although he can also use j.A. You can also of course simply do throw without anything before it. The final aspect of his mixup game is his teleport dashes. While it's fairly reactable and gimmicky, you can use the teleport dashes to side switch. 236+B will cross over and keep you close while 236+A will do a fake. From there you can either go for one of his other regular mixups. This is of course fairly reactable, but it will work every once in a while. What's less reactable though is his j.2X crossups. Regardless of the version used, j.2X has the same animation, making it much harder to read (particularly in Ausf Achse where 236+X and 214+X were slowed down), and as described earlier thanks to j.A there's ways to setup outside of just on knockdown, although that works just as well. Combining all these options together can make things very tough for the opponent.
Defense
Fritz's defensive options aren't the best. 236+B+C and 214+B+C are effectively get out of jail free cards. For one bar, you get a fully invincible dash that can't be punished, and can be used to escape the corner or pressure. This is very strong. However, besides these Fritz can't really deal with pressure well. He has the universal options in 2A mash and reflector, but these have weaknesses of course, and his 2A and reflectors aren't especially strong compared to anyone else in the cast. This means that without meter, Fritz has weak defense and has to respect the opponent frequently, which is especially tough against some characters like Sai or Marilyn. And while 236+B+C and 214+B+C can't be punished, this comes at the cost of them not actually stopping the opponent, meaning some characters with good movement or specials that quickly move them across the screen, like Sai and Murakumo, can chase him down when he uses these options and force him to block something.
Overview
Fritz is a neutral focused character with a simple but effective gameplan. He's great at controlling space, but requires patience to find opening to deal huge damage. He also has weaker defensive options, meaning he can have trouble with character who have strong offensive tools. Still, if you are a fan of dealing huge damage in one or two hits and playing characters with a focus on strong neutral game, then you will likely enjoy Fritz.
Combos
Midscreen
- 2A x N
- When the opponent gets close, just mash 2A on them until it stops working. Mainly just to get the opponent off you. Can actually hit Tank 11 times with it.
- j.B > f.2B > 2C
- Main conversion from j.B. Does pretty good damage.
- j.B > 2A > A+B+C
- Main level 3 confirm combo. Does great damage and is a great way to use meter since Fritz doesn't use meter too often.
Corner
- j.B > c.5A/c.5B > j.A+B
- Corner j.B confirm. Barely does more damage and is harder but gives a hard knockdown. You can use c.5B on most characters but a few need c.5A.
- j.B > c.5A/c.5B/2A > f.2B > 2C
- Corner damage focused combo.
- j.B > c.5B > Micro Walk 2A > 2A > A+B+C
- Corner level 3 combo. Does slightly more damage than the midscreen version.
- j.B > c.5B > 2A > 236B > 2A > 2A > 2A > A+B+C
- Incredibly difficult combo for max damage. Really not worth going for since it's not a major damage increase, but it looks sick.
Reflectors
- Reflector > f.2B > 2C
- Main reflector combo, does decent damage.
- Reflector > f.2C
- Reflector combo for when you're too far from the opponent to combo into f.2B.
- Reflector > Micro Walk 2A > A+B+C
- Level 3 reflector combo. A good way to meter dump if you're just holding onto 3 bars since it'll still deal good damage.
Ausf Achse Combos
None of Fritz's combos are changed, although reflector combos are a little tighter.
Frame Data
source
KD - Knockdown
VA - Variable
*UV - value(s) marked with "?" in the table is/are unverified
x~yF - a period from frame "x" till frame "y"
^ - knocks away
                       |     Frames      |  Frame Advantage  |
               Attack  | Total | Startup | On Hit | On Block | Notes
Throws and Reflectors  ---------------------------------------
            4/5/6+A+B  |  20   |    5    |   KD   |    --    |
          j.4/5/6+A+B  |  18   |    3    |   KD   |    --    |
                5+B+C  |  25   |    7    |   KD   |   -12^   |
                c.B+C  |  25   |    7    |   KD   |   -12^   |
                j.B+C  |   ?   |    7    |   KD   |     ?    |
                  A+C  |  49   |   --    |   --   |    --    | cancellable after 33F
              Normals  ---------------------------------------
             close 5A  |  15   |    4    |   +0   |    +0    |
               far 5A  |  24   |   11    |   -2   |   -10^   |
             close 5B  |  16   |    5    |   +4   |    +2    |
               far 5B  |  45   |   13    |   KD   |   -10^   |
             close 5C  |  45   |   17    |   KD   |   -12^   |
               far 5C  |  64   |   25    |   KD   |   -12^   |
                  c.A  |  15   |    4    |   +0   |    +0    |
            close c.B  |  15   |    5    |   +5   |    +3    |
              far c.B  |  34   |    9    |   KD   |   -10^   |
            close c.C  |  40   |   17    |   KD   |   -12^   |
              far c.C  |  54   |   11    |   KD   |   -12^   |
                  j.A  |  16   |    5    |   VA   |    VA    |
                 7/9B  |  VA   |    9    |   KD   |    VA    | landing recovery 12F
                   8B  |  VA   |    5    |   KD   |    VA    | landing recovery 12F
                  j.C  |  VA   |    4*   |   KD   |   -12^   | landing recovery 29F, *4th frame upon landing
              5B > 5C  |   ?   |    ?    |   KD   |     ?    |
            c.B > c.C  |   ?   |    ?    |   KD   |     ?    |
      Command Normals  ---------------------------------------
                   4B  |  53   |   10    |   KD   |   -10^   |
                   4C  |  52   |   27    |   KD   |   -12^   |
                 j.2A  |  VA   |   --    |   --   |    --    | landing recovery 8F
                 j.2B  |  VA   |   --    |   --   |    --    | landing recovery 8F
                 j.2C  |  VA   |   --    |   --   |    --    | landing recovery 8F
             Specials  ---------------------------------------
                236+A  |  14   |   --    |   --   |    --    |
                236+B  |  14   |   --    |   --   |    --    |
                236+C  |  24   |   --    |   --   |    --    |
                214+A  |  14   |   --    |   --   |    --    |
                214+B  |  14   |   --    |   --   |    --    |
                214+C  |  24   |   --    |   --   |    --    |
       EX and Level 3  ---------------------------------------
              236+B+C  |  45   |   --    |   --   |    --    | all frames invincible
              214+B+C  |  55   |   --    |   --   |    --    | all frames invincible
                A+B+C  |  61   |   17    |   KD   |    --    | superflash 40F, 1~7F invincible
Trivia
- Much of Fritz's details are based on Mori Ōgai [1] who was a Japanese Army Surgeon general officer, translator, novelist and poet. He is responsible of introducing German literary works in Japan with his translations. The name is exactly the same as Mori's second son Furitsu (不律) which is a kanji spelling of the German name Fritz.
