Matrimelee/Elias
Introduction
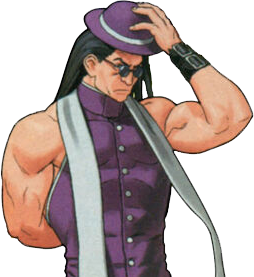
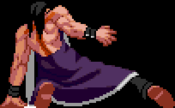
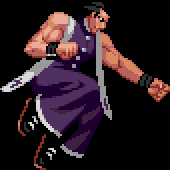
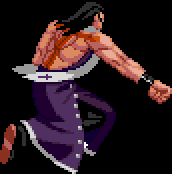
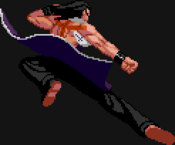
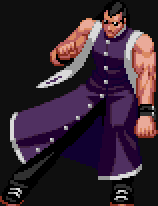
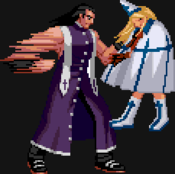
Elias participated in the Matrimelee tournament to take care of Anny Hamilton due to his friendship with the Hamilton family who gave a big donation to his church in the past. Now, Elias is a spiritual guide to Anny and can be found inside of Anny's waiting room. Elias will fight in Anny's place since she is taking a shower.
Overview
| Strengths | Weaknesses |
|---|---|
|
|
Strategy
Elias is a neutral monster but can play defensively and offensively as well. It is best for Elias to adjust to the flow of the match; switching between offensive and defensive play.
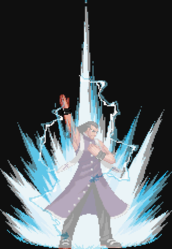
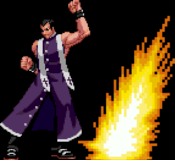
Elias has great normals, specials, and supers. Rushing down is good, but risky for Elias thanks to how hard it is for 9.D to cross-up. However, he can still get thanks to his great 2.B and 5.B. Elias's 2.B has massive frame advantage, hitstun, can set up a tic grab, a low-overhead mixup, or a walk-up command grab. 2.B has such a good frame advantage you can mix it up regularly. Alternatively, you can also get in using 236.A in fullscreen and move in with it. It's best to use this on Okizeme so the opponent is forced to roll or block it. Be careful though, 236.A/C (Holy Flare) has some long start-up frames and can easily be roll punished. Elias's dashing normals are also a decent way of getting in at opponents. Be very careful of these match-ups: Kanji, Clara, Hikaru and Ume/Tane can low profile your cl.5C, 5.C, Dashing A/C, Dashing B/D and guard cancel. These characters can easily whiff punish these moves, so use 2.C as an alternative.
Elias can also play defensively but relies on neutral spacing. 8.B is your goto normal for anti-airs and air-to-airs. 2.CD is air unblockable and leads to a juggle combo, but has slow start-up and must be used to read a jump-in. Alternatively, you can also use 41236.B/D (hell or Heaven) or 632146.A (Stress Shot) to catch a jump-in and regain health but these moves can be hit out of easily by higher priority normals. If your opponent is point blank or you're backed in a corner, do not jump unless it's to punish. Use your 2.B, 2.C and a well-timed guard cancel to escape the corner.
Elias's combos are rather easy and can allow for him to set-up some healing and a nice chunk of damage, too. Always try to heal unless it's to kill. Every little bit of health helps and could even land you a perfect in some cases. However, there are situations where you don't want to use your healing moves and that's in block strings. You'll want to use 3.B xx 214.A (Magnus) to end your blockstring since few characters can punish. I honestly can't find a use for 214.C (Heavy Magnus) since it's impossible to combo into thanks to its slight forward dash before the projectile comes out. Avoid using. Another thing to avoid, do not do the dash 214.A/C (dash magnus) in the corner. Dashing 214.A/C (Dashing Magnus) is unsafe on hit in the corner due to the 2nd hit whiffing. Most importantly, do not use Elias's 632146.C (Ippatsu Ougi). It's a big waste of meter due to it doing the exact same damage, healing rate, and properties of the 632146.A (Stress Shot). Juggles are a bit of a sore spot for Elias due to windows being tighter. If you ever land a juggle, like 2.CD > 3.B, you must delay 3.B and it'll only confirm off of the 2nd hit. Juggles are insanely simple but require the knowledge on how to do them properly.
In conclusion, remember to adapt to the match, always heal, use your 2.B & 5.B, remember the match-ups where you can't use GC, cl.5c, etc, don't use Ippatsu Ougi, and "Give Them A Lesson".
Normal Moves
Standing Normals
5.A
|
|---|
5.B
|
|---|
5.C
|
|---|
5.D
|
|---|
5.CD
|
|---|
Close Standing Normals
cl.5A
|
|---|
cl.5B
|
|---|
cl.5C First hit First hit Second hit Second hit
|
|---|
cl.5D
|
|---|
Crouching Normals
2.A
|
|---|
2.B
|
|---|
2.C First hit First hit Second hit Second hit
|
|---|
2.D
|
|---|
2.CD
|
|---|
Jumping Normals
8.A
|
|---|
8.B
|
|---|
8.C
|
|---|
8.D
|
|---|
7.D or 9.D
|
|---|
Command Normals
6.A Start-up Start-up Hit Hit
|
|---|
3.B First hit First hit Second hit Second hit
|
|---|
Dash Normals
66.B or 66.D
|
|---|
66.B or 66.D
|
|---|
Rage Explosion, Guard Cancel & Grabs
Grab 4.C or 6.C 4.C or 6.C
|
|---|
Guard Cancel First hit First hit Second hit Second hit
|
5.CD On Block |
|---|
Rage Explosion
|
|---|
Special Moves
Holy Flare
236.A or 236.C Start-up Start-up Projectile Projectile
|
|---|
Magnus
214.A or 214.C
|
|---|
Dash 214.A or 214.C
|
|---|
Hell or Heaven
41236.B or 41236.D start-up start-up on hit on hit
|
|---|
Sinful
623.A or 623.C
|
|---|
Super Moves
Stress Shot & Ippatsu Ougi
632146.A or 632146.C First hit First hit Second hit Second hit
|
Maximum Delirum |
|---|
Combos
| Combo | Total Damage | Permanant Damage | Notes | ||
| Basic Combos | |||||
| 9.D >> 2.B > 2.B > 3.B (1 hit) xx 41236.B | 43 | 21 | |||
| 9.D >> 2.B > 2.B > 3.B xx 214.A | 46 | 23 | |||
| 9.D >> 2.B > 2.B > 3.B (1 hit) xx 623.A | 42 | 21 | |||
| 9.D >> 2.B > 2.B > 3.B xx 632146.A | 59 | 29 | Requires 1 Stress Meter. | ||
| 9.D >> 2.C > 3.B (1 hit) xx 41236.B | 46 | 23 | |||
| 9.D >> 2.C > 3.B xx 214.A | 50 | 25 | |||
| 9.D >> 2.C > 3.B xx 632146.A | 64 | 32 | Requires 1 Stress Meter. | ||
| 9.D >> 66.P xx 41236.B | 47 | 23 | |||
| 9.D >> 66.P xx 214.P | 43 | 21 | DO NOT DO IN CORNER, 2ND HIT OF DASH 214.K WHIFFS AND IS UNSAFE! | ||
| 9.D >> 66.P xx 632146.A | 63 | 31 | Requires 1 Stress Meter | ||
| 9.D >> 66.P > 3.B (1 hit) xx 41236.B | 47 | 23 | |||
| 9.D >> 66.P > 3.B xx 214.A | 52 | 26 | |||
| 9.D >> 66.P > 3.B xx 632146.A | 66 | 33 | Requires 1 Stress Meter. | ||
| 9.D >> 2.CD xx 41236.B | 46 | 23 | |||
| 9.D >> 2.CD xx 214.A | 43 | 21 | |||
| 9.D >> 2.CD xx 632146.A | 64 | 32 | Requires 1 Stress Meter. | ||
| 6.A xx 214.A | 27 | 18 | |||
| 6.A xx 623.A | 29T | 14P | |||
| 6.A xx 632146.A | 47 | 23 | Requires 1 Stress Meter. | ||
| Intermediate Combos | |||||
| 9.D >> cl.5C > 3.B (1 hit) xx 41236.B | 38 | 19 | Does not work in the corner, 3.B whiffs. | ||
| 9.D >> cl.5C > 3.B (1 hit) xx 214.A | 43 | 21 | Does not work in the corner, 3.B whiffs. | ||
| 9.D >> cl.5C > 3.B xx 632146.A | 64 | 32 | Does not work in the corner, 3.B whiffs. Requires 1 Stress Meter. | ||
| 9.D >> cl.5C > C xx 632146.A | 58 | 29 | Requires 1 Stress Meter. | ||
| 9.D >> cl.5C (1 hit) > C > 3.B (1 hit) xx 41236.B | 44 | 22 | |||
| 9.D >> cl.5C (1 hit) > C > 3.B (1 hit) xx 214.A | 46 | 23 | |||
| 9.D >> cl.5C (1 hit) > C > 3.B xx 632146.A | 59 | 29 | Requires 1 Stress Meter | ||
| 9.D >> 2.CD > 3.B xx 214.A | 46 | 23 | Delay 3.B, 1st hit whiffs. | ||
| 9.D >> 2.CD > 3.B xx 632146.A | 59 | 28 | Delay 3.B, 1st hit whiffs. Requires 1 Stress Meter. | ||
| 9.D >> 2.CD > 3.B xx 41236.B | 48 | 24 | Delay 3.B, 1st hit whiffs. Corner Only. | ||
| Advanced Combos | |||||
| 9.D >> 2.A ~> 5.C xx 632146.A | 55 | 27 | Requires 1 Stress Meter. 2.A ~> 5.C is a Rapid Chain Cancel. | ||
| 2.A ~> cl.5C (1 hit) > C > 3.B xx 214.A | 35 | 17 | 2.A ~> cl.5C is a Rapid Chain Cancel. | ||
| 2.A ~> cl.5C (1 hit) > C > 3.B xx 632146.A | 49 | 24 | Requires 1 Stress Meter. 2.A ~> cl.5C is a Rapid Chain Cancel. | ||
| 2.A ~> cl.5C (1 hit) > C > 3.B xx 41236.B | 33 | 16 | 2.A ~> cl.5C is a Rapid Chain Cancel. | ||
| 5.A ~> 2.C > 3.B xx 214.A | 39 | 19 | 5.A ~> 2.C is a Rapid Chain Cancel. | ||
| 5.A ~> 2.C > 3.B xx 632146.A | 53 | 26 | Requires 1 Stress Meter. 5.A ~> 2.C is a Rapid Chain Cancel. | ||
| 2.A > 2.A ~> 5.B > 3.B xx 214.A | 33 | 16 | 2.A ~> 5.B is a Rapid Chain Cancel. | ||
| 2.A > 2.A ~> 5.B > 3.B (1 hit) xx 41236.B | 48 | 24 | 2.A ~> 5.B is a Rapid Chain Cancel. | ||
| 2.A ~> cl.5D > 3.B xx 214.A | 41 | 20 | 2.A ~> cl.5D is a Rapid Chain Cancel. | ||
| 2.A ~> cl.5D > 3.B xx 41236.B | 36 | 18 | 2.A ~> cl.5D is a Rapid Chain Cancel. | ||
| 2.A ~> cl.5D > 3.B xx 632146.A | 55 | 27 | Requires 1 Stress Meter. 2.A ~> cl.5D is a Rapid Chain Cancel. | ||
| 2.A ~> cl.5C > 3.B xx 214.A | 40 | 20 | Corner only. 2.A ~> cl.5C is a Rapid Chain Cancel. | ||
| 2.A ~> cl.5C > 3.B (1 hit) xx 41236.B | 35 | 17 | Corner only. 2.A ~> cl.5C is a Rapid Chain Cancel. | ||
| 2.A ~> cl.5C > 3.B xx 632146.A | 53 | 26 | Corner only. Requires 1 Stress Meter 2.A ~> cl.5C is a Rapid Chain Cancel. | ||
| 236.A >> 66.K | 35 | 17 | Must immediately run after 236.A to follow-up. Fullscreen Only. | ||
| 236.A >> 66.P xx 214.P | 43 | 21 | Must immediately run after 236.A to follow-up. Fullscreen Only. | ||
| 236.A >> 66.P xx 632146.A | 63 | 31 | Must immediately run after 236.A to follow-up. Fullscreen Only. Requires 1 Stress Meter. | ||
