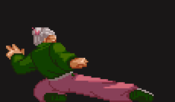
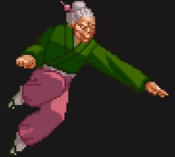
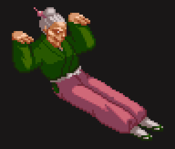
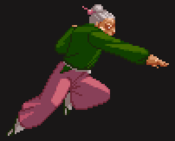
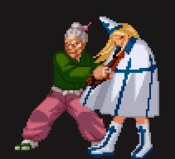
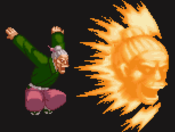
Matrimelee/Tane

From Mizuumi Wiki
Jump to navigation Jump to search
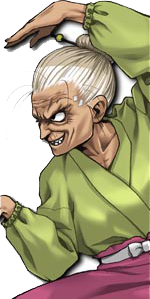
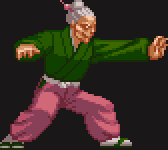
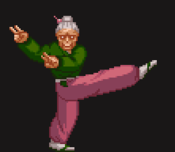
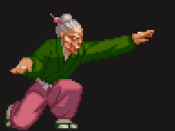
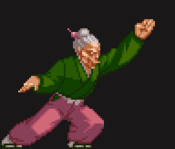
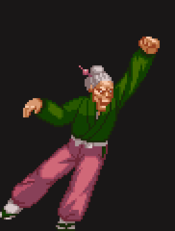
Tane Goketsu
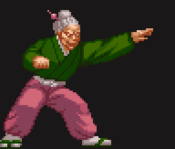
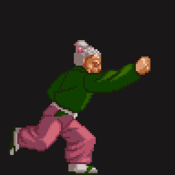
Colors

Introduction

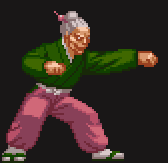
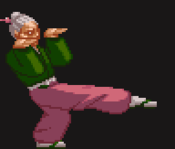
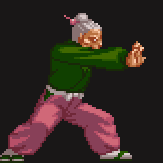
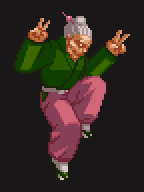
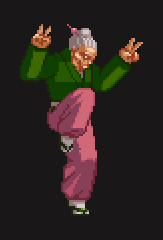
Tane, formerly known as Otane, received an invitation for a fighting tournament from a King of a Certain Country. Tane hasn't been happy around the time of receiving the invitation. The winner was promised true happiness and Tane was willing to do her best to win.

Overview

Strengths Weaknesses
  • Extremely fast 2.B.
  • Easy cross-up potential with 9.C.
  • Good 2.C anti-air.
  • Great 66.K. Extremely active and can end certain juggle combos.
  • Best command grab in the game.
  • Very good damage on all combos.
  • Versatile Stress Shot Super that can allow for full screen punishes.
  • Extremely damaging Stress Shot corner loops.
  • Instant overhead options for most characters.
  • j.2B jump loops.
  • Small hurtbox. Hard to cross-up.
  • Air throw back turns the opponent if they don't recover.
  • Most normals and specials are extremely unsafe on block.
  • No reliable block strings.
  • 66.P is extremely short and has significant start-up frames.
  • [4]6.D is difficult to use in combos thanks to it's longer start-up.
  • [4]6.B/D is punishable on block or on reaction with supers.
  • [4]6.A/C can be punished on reaction at close/mid-screen.
  • [2]8.B/D is not air unblockable, has an extremely long charge time, and does small amount damage.
  • Lacks any significant range without her Stress Shot Super.
  • Ippatsu Ougi super is extremely difficult to set-up and combo into.
  • Kinjite Super only does an extra 15 damage at the cost of 3 Stress Meter.

Strategy

Tane can play in various ways. From playing defensively to offensive. Tane can easily play offensive thanks to her short hurtbox, fast run speed and her crouch walking; Tane can easily close the distance between the opponent. Tane also benefits greatly from her Stress Shot super. Doing 60 damage raw, this super is a devastating full screen punish tool that can also be used to end combos with, and be looped in the corner for massive damage. Adding to her Stress Shot corner loops, Tane can also loop 9.A > j.2B on crouching characters and standing Kanji. Tane's offensive power is extremely strong and versatile thanks to these two loops. Tane can also play defensively very well. Using her [2]8.B/D and 2.C she can keep the opponent out of the air easily. If Tane lands an anti-air 2.C, she can combo into her Stress Shot super for extra damage. Additionaly, Tane's small hurtbox can allow her to walk under jump-ins and cross-under the opponent. Adding onto Tane's great rushdown, she has a command grab (63214.A/C). This command grab is possibly the best in the game thanks to it's large damage and positioning. It's excellent to open up defensive opponents or to finish a combo with. If the command grab is landed in the corner, you can follow it up with a dash punch or even a Stress Shot super.

Tane does have a few major flaws you will need to keep in mind too. Her [4]6.A/C's projectile has an arc on it and can be easily punished on start-up and on whiff. However, if it is done at the right distance it can be followed up with a hyper hop or a dashing punch. [4]6.A/C is a very high risk high reward special that should be used sparringly. Her short range can be very crippling against characters with longer normals or better defensive options. You will have to take risks with her command grab, trying to cross-up or doing an empty jump into 2.B. Speaking of Tane's short range, don't use [4]6.B/D like a fireball. It can be passed through with supers, jumped over, rolled through or block punished. Use it to end combos, not to space with. Keep in mind, j.2B is not a free entry tool. It's punishable on block. Try to avoid using her Ippatsu Ougi and Kinjite supers since her Stress Shot super is just too good to not use. Her Ippatsu Ougi is nearly impossible to land thanks to it's huge start-up time and Kinjite does 15 more damage than a single Stress Shot super.

Normal Moves

Far Standing Normals

5.A
MM Tane 5A.png
Total Damage Permanent Damage Cancel Guard Gauge Startup Active Recovery Hit Adv Block Adv
5 2 Self
Special
Super
Mid - - - - - -

Air Unblockable.
An extremely fast standing jab.


5.B
MM Tane 5B.png
Total Damage Permanent Damage Cancel Guard Gauge Startup Active Recovery Hit Adv Block Adv
10 5 Self
Special
Super
Mid - - - - - -

Air Unblockable
An odd light kick that slides forward and chains into itself.


5.C
MM Tane 5C.png
Total Damage Permanent Damage Cancel Guard Gauge Startup Active Recovery Hit Adv Block Adv
15 7 Special
Super
Mid - - - - - -

Air Unblockable.


5.D
MM Tane 5D.png
Total Damage Permanent Damage Cancel Guard Gauge Startup Active Recovery Hit Adv Block Adv
18 9 Special
Super
Mid - - - - - -

Air Unblockable.
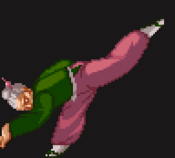
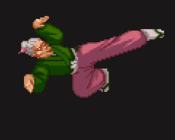
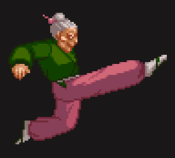
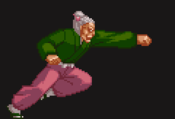
The flying grandma kick!! Can be canceled into Tane's Stress Shot on hit. Unsafe on block. Not a reliable poke.


Close Standing Normals

cl.5A
MM Tane cl5A.png
Total Damage Permanent Damage Cancel Guard Gauge Startup Active Recovery Hit Adv Block Adv
5 2 Self
Special
Super
Mid - - - - - -

Air Unblockable.
Another extremely fast jab.


cl.5B
MM Tane cl5B.png
Total Damage Permanent Damage Cancel Guard Gauge Startup Active Recovery Hit Adv Block Adv
8 4 Special
Super
Mid - - - - - -

Not much use outside of 2.B being able to natrually chain into cl.5B.


cl.5C
MM Tane cl5C 1.png
First hit
First hit
MM Tane cl5C.png
Second hit
Second hit
Total Damage Permanent Damage Cancel Guard Gauge Startup Active Recovery Hit Adv Block Adv
14 (7 per hit) 7 Special
Super
Mid - - - - - -

Air Unblockable.
One of tane's best moves to use for combos. If you press C again you'll get an additional palm strike for 7 extra damage at the cost of pushback. It's best not to do this unless it's in the corner or you may drop the combo.


cl.5D
MM Tane cl5D.png
Total Damage Permanent Damage Cancel Guard Gauge Startup Active Recovery Hit Adv Block Adv
15 7 Special
Super
Mid - - - - - -

Air Unblockable.
Not much use for cl.5D since it cannot be linked into 3.C. It's also kind of scary if you look at it too long.


Crouching Normals

2.A
MM Tane 2A.png
Total Damage Permanent Damage Cancel Guard Gauge Startup Active Recovery Hit Adv Block Adv
5 2 Self
Super
Super
Mid - - - - - -

Air Unblockable.
Another one of Tane's extremely fast jabs.


2.B
MM Tane 2B.png
Total Damage Permanent Damage Cancel Guard Gauge Startup Active Recovery Hit Adv Block Adv
8 4 Special
Super
Low - - - - - -

Tane's best move. This 2.B may be short but it's extremely fast and can start a combo. 2.B self chains into cl.5B.


2.C
MM Tane 2C.png
Total Damage Permanent Damage Cancel Guard Gauge Startup Active Recovery Hit Adv Block Adv
15 7 Special
Super
Mid - - - - - -

Air Unblockable.
Tane's go to anti-air normal. Using it to anti air can lead to a 236-236.C or a [2]8.B.


2.D
MM Tane 2D.png
Total Damage Permanent Damage Cancel Guard Gauge Startup Active Recovery Hit Adv Block Adv
18 9 Special
Super
Low - - - - - -

This sweep slides forward a bit.

Jumping Normals

8.A
MM Tane 8A.png
Total Damage Permanent Damage Cancel Guard Gauge Startup Active Recovery Hit Adv Block Adv
8 4 Air Command Normal High - - - - - -

A decent air to air and quick jumping attack that can be used as an instant overhead for some characters.


8.B
MM Tane 8B.png
Total Damage Permanent Damage Cancel Guard Gauge Startup Active Recovery Hit Adv Block Adv
10 5 Air Command Normal High - - - - - -

Not as fast as 8.A, but it can be used as an instant overhead for some shorter characters.


8.C
MM Tane 8C.png
Total Damage Permanent Damage Cancel Guard Gauge Startup Active Recovery Hit Adv Block Adv
13 7 Air Command Normal High - - - - - -

Good air to air.


8.D
MM Tane 8D.png
Total Damage Permanent Damage Cancel Guard Gauge Startup Active Recovery Hit Adv Block Adv
15 7 Air Command Normal High - - - - - -

A decent air to air but it much slower than 8.C.


7.C or 9.C
MM Tane 79C.png
Total Damage Permanent Damage Cancel Guard Gauge Startup Active Recovery Hit Adv Block Adv
13 7 Air Command Normal High - - - - - -

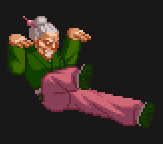
Tane's go to cross-up tool. Thanks to the hurtbox and collision shifting, it's very easy to cross-up opponents with this move.


7.D or 9.D
MM Tane 79D.png
Total Damage Permanent Damage Cancel Guard Gauge Startup Active Recovery Hit Adv Block Adv
16 (8 per hit) 8 Air Command Normal High - - - - - -

An extremely hop tool thanks to it's multiple hits which can put the opponent in hitstun while your hop recovers. Use this if you don't want to cross-up.


Command Normals

3.C
MM Tane CMD 3C.png
Total Damage Permanent Damage Cancel Guard Gauge Startup Active Recovery Hit Adv Block Adv
24 (6 per hit) 12 Special
Super
Mid - - - - - -

Air Unblockable.
Tane's main combo extension tool. If canceled on the first hit in the corner, Tane's Stress Shot corner loops can be done.


j.2B
MM Tane CMD j2b.png
First hit
First hit
MM Tane CMD j2b 1.png
Second hit if j.2B is done high enough.
Total Damage Permanent Damage Cancel Guard Gauge Startup Active Recovery Hit Adv Block Adv
10 5 N/A High - - - - - -

Used to add extra damage to jump-ins. Unsafe on block. Has an additional hit and damage if done from a higher point. (See below)

Total Damage Permanent Damage Cancel Guard Gauge Startup Active Recovery Hit Adv Block Adv
18 (2 hits) 9 N/A High - - - - - -

The second hit of j.2B is dependant on height and will not come out of Tane lands too soon. If the 2nd hit lands, it causes a knockdown.


Dash Normals

66.P
MM Tane 66P.png
Total Damage Permanent Damage Cancel Guard Gauge Startup Active Recovery Hit Adv Block Adv
16 8 Special
Super
Mid - - - - - -

Air Unblockable.


66.K
MM Tane 66K.png
Total Damage Permanent Damage Cancel Guard Gauge Startup Active Recovery Hit Adv Block Adv
24 12 - - - - - - - -

Air Unblockable.
Shortens Tane's hurtbox. Great for ending super loops with.

Great Attacks

5.CD
MM Tane 5CD.png
Total Damage Permanent Damage Cancel Guard Gauge Startup Active Recovery Hit Adv Block Adv
24 24 Special
Super
Mid - - - - - -

Air Unblockable.
This move has some decent horizontal range thanks to the step Tane takes before the move becomes active. This move also takes a while to come out for the same reason.


2.CD
MM Tane 2CD.png
Total Damage Permanent Damage Cancel Guard Gauge Startup Active Recovery Hit Adv Block Adv
16 8 Special
Super
Low - - - - - -

Air Unblockable.
Decent anti-air. Takes much longer to start-up compared to 2.C. This move is cruicial for Tane's 3 Stress Meter corner loops since it launches the opponent on hit.


Throws, Rage Explosion & Guard Cancel

Throws
MM Tane GroundGrab.png
4/6.C
4/6.C
MM Tane AirGrab.png
j.6C
j.6C
Total Damage Permanent Damage Cancel Guard Gauge Startup Active Recovery Hit Adv Block Adv
20 10 N/A Throw - - - - - -

A note to remember about the air throw, it backturns on landing. Forcing the opponent to block the oppisate way.


Guard Cancel
MM Tane 5CD.png
5.CD on block
Total Damage Permanent Damage Cancel Guard Gauge Startup Active Recovery Hit Adv Block Adv
12 6 Special
Super
Mid - - - - - -

Requires 1 Stress Meter to do and can only be done on block.


Rage Explosion
MM Tane RageExplosion.png
Total Damage Permanent Damage Cancel Guard Gauge Startup Active Recovery Hit Adv Block Adv
6 3 N/A Mid - - - - - -

Air Unblockable.
Can only be done by building one Stress Meter. Launches into a juggle state on hit.

Special Moves

Rock Pulverizer Denture

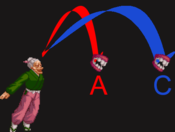
[4]6.A or [4]6.C
MM Tane 46P.png
Total Damage Permanent Damage Cancel Guard Gauge Startup Active Recovery Hit Adv Block Adv
16 8 N/A Mid - - - - - -

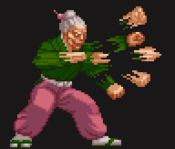
Odd arcing projectile that can be followed up for combos. Huge risk/reward thanks to it's huge start-up and the denture's arcs but can be used to deny jump-ins.

Heaven's Dance Kick

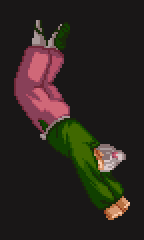
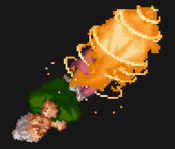
[2]8.B
MM Tane 28B.png
Total Damage Permanent Damage Cancel Guard Gauge Startup Active Recovery Hit Adv Block Adv
5 2 N/A Mid - - - - - -

Start-up invincible and only hits once.


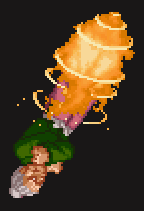
[2]8.D
MM Tane 28D.png
Total Damage Permanent Damage Cancel Guard Gauge Startup Active Recovery Hit Adv Block Adv
12 6 N/A Mid - - - - - -

Start-up invincible and only hits twice. Has a different angle compared to the light version.

Intimidating Face Attack

[4]6.B
MM Tane 46K.png
Total Damage Permanent Damage Cancel Guard Gauge Startup Active Recovery Hit Adv Block Adv
16 8 N/A Mid - - - - - -

Not good for controlling space. Unsafe on block and can be punished by supers. Use it to end combos.


[4]6.D
MM Tane 46K.png
Total Damage Permanent Damage Cancel Guard Gauge Startup Active Recovery Hit Adv Block Adv
18 9 N/A Mid - - - - - -

Hits twice. Not good for controlling space. Unsafe on block and can be punished by supers. Much harder to use in combos thanks to it's longer start-up.

Swirling Meator Bullets

63214.A or 63214.C
MM Tane 63214P.png
The Grab
The Grab
MM Tane 63214P 2.png
The hits
The hits
Total Damage Permanent Damage Cancel Guard Gauge Startup Active Recovery Hit Adv Block Adv
28 14 N/A N/A
(Command Grab)
- - - - - -

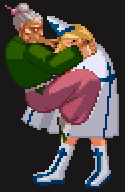
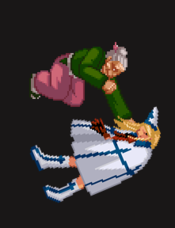
Extremely good command grab. Can be used to start or end combos. IPS doesn't like the command grab's projectiles and tends to knockdown before the attack is finished so it's best to optimize your hits so you don't get punished.

Super Moves

Stress Shot

236-236.C
MM Tane 236236C.png
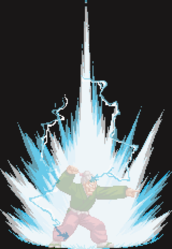
Goketsu Intimidating Face Attack!!
Total Damage Permanent Damage Cancel Guard Gauge Startup Active Recovery Hit Adv Block Adv
60 30 N/A Mid - - - - - -

Air Unblockable. Ignores Projectiles.
Tane's most versatile super that can be used to corner loop, punish and juggle into itself.

Ippatsu Ougi

4146.C
MM Tane 4146C.png
Absolute Demon Palm!!
Total Damage Permanent Damage Cancel Guard Gauge Startup Active Recovery Hit Adv Block Adv
60 30 N/A Unblockable - - - - - -

Thanks to its huge start-up it's very hard to use this super.

Kinjite

236-236-236.C
MM Tane 236236236C.png
Super Goketsu Intimidating Face Attack!!
Total Damage Permanent Damage Cancel Guard Gauge Startup Active Recovery Hit Adv Block Adv
75 60 N/A Mid - - - - - -

Air Unblockable.
Just like the Stress Shot but instead, it's three projectiles. Difficult to combo into, it barely does extra damage, and its utility is limited compared to the Stress Shot Super.

Combos

Combo Total Damage Permanent Damage Notes
Basic Combos
9.D >> cl.5C (2 hits) > 3.C (4 hits) xx [4]6.B 45 22 Charge [4]6.B during 3.C and release on the fourth hit.
9.D >> cl.5C (2 hits) > 3.C (4 hits) xx 63214.C 54 27 The Last hit of 63214.C will knockdown.
9.D >> cl.5C (2 hits) > 3.C (4 hits) xx 236-236.C 59 28 Requires 1 Stress Meter.
9.D >> 2.B > B > 5.D > 3.C (4 hits) xx [4]6.B 45 22 Charge [4]6.B during 3.C and release on the fourth hit.
9.D >> 2.B > B > 5.D > 3.C (2 hits) xx 236-236.C 60 30 Requires 1 Stress Meter.
9.C >> 66.P > 3.C (4 hits) xx 63214.C 65 32 9.C must hit late in order to chain into 66.P.
9.C >> 66.P > 3.C (4 hits) xx [4]6.C 51 25 Charge [4]6.B during 3.C and release on the fourth hit. 9.C must hit late in order to chain into 66.P.
9.C >> 66.P > 3.C (4 hits) xx 236-236.C 73 36 Requires 1 Stress Meter. 9.C must hit late in order to chain into 66.P.
9.D > j.2B >> cl.5C (2 hits) > 3.C (4 hits) xx [4]6.B 45 22 Charge [4]6.B during 3.C and release on the fourth hit.
9.D > j.2B >> cl.5C (2 hits) > 3.C (4 hits) xx [4]6.B 50 25 Charge [4]6.B during 3.C and release on the fourth hit.
9.D > j.2B >> cl.5C (2 hits) > 3.C (4 hits) xx 63214.C 49 24 63214.C will knockdown before the special is finished.
9.D > j.2B >> cl.5C (2 hits) > 3.C (4 hits) xx 236-236.C 71 Requires 1 Stress Meter.
9.D > j.2B >> 2.B > B > 5.D > 3.C (4 hits) xx [4]6.B 57 28 Charge [4]6.B during 3.C and release on the fourth hit.
9.D > j.2B >> 2.B > B > 5.D > 3.C (4 hits) xx 236-236.C 74 37 Requires 1 Stress Meter.
Intermediate Combos
[4]6.C >> 66.P > 3.C (4 hits) xx [4]6.B 54 27 [4]6.C needs to be done at fullscreen.
[4]6.C >> 66.P > 3.C (4 hits) xx 63214.C 70 35 [4]6.C needs to be done at fullscreen.
[4]6.C >> 66.P > 3.C (4 hits) xx 236-236.C 76 38 Requires 1 Stress Meter. [4]6.C needs to be done at fullscreen.
(Corner Only)9.D >> cl.5D xx 63214.C >> 66.K 55 27 Must be in the corner since 63214.C side switches.
(Corner Only) 63214.C >> 5.D xx 236-236.C 67 33 Requires 1 Stress Meter. Must be in the corner since 63214.C side switches.
(Corner Only) 9.D >> cl.5C (2 hits) > 3.C (1 hit) xx 236-236.C >> 5.C xx 236-236.C 91 45 Requires 2 Stress Meter. Other characters can take more hits of 3.C and still link Stress Shot. 1 hit of 3.C is universal for all characters.
Advanced Combos
(Corner Only) 9.D >> 2.CD > 3.C (2 hits) xx 236-236.C >> 66.K 71 35 Requires 1 Stress Meter.
(Corner Only) 9.D >> 2.CD xx 236-236.C >> 5.D xx 236-236.C >> 66.K 110 55 Requires 2 Stress Meter. Two bar route that ends with a knockdown.
(Corner Only) 9.D >> 2.CD xx 236-236.C >> 5.D xx 236-236.C >> 5.D xx 236-236.C >> 5.D 131 65 Requires 3 Stress Meter.
(Corner Only) 9.D >> 2.CD xx 236-236-236.C 89 44 Requires 3 Stress Meter.
Character Specific Combos
(Corner Only)9.A > j.2B >> 9.A > j.2B >> 9.A > j.2B >> 9.A > j.2B >> 9.A > j.2B 53 26 Can only be done on mid-screen on standing Kanji. Corner only for Reiji, Keith, Anny, Saizo, Poochy, Chinnen. Can also be done on crouching Olof.
(Corner Only) 9.D (2 hits) > j.2B >> 9.B > j.2B >> 9.B > j.2B >> cl.5C (2 hits) > C > 3.C (3 hits) xx 236-236.C 105 52 Requires 1 stress Meter.Can only be done on standing Kanji, Anny, White, Jimmy, Jones, Elias, Saizo.
(Corner Only) 9.D (2 hits) > j.2B >> 9.B > j.2B >> 9.B > j.2B >> cl.5C (1 hit) xx 236-236.C >> 5.C xx 236-236.C 112 56 Requires 2 Stress Meter. Can only be done on Kanji, Anny, White, Jimmy, Jones, Elias, Saizo.
(Corner Only) 9.D (2 hits) > j.2B >> 9.B > j.2B >> cl.5C (1 hit) xx 236-236.C >> 5.C xx 236-236.C >> 5.D xx 236-236.C 114 57 Requires 3 Stress Meter. Can only be done on standing Kanji, Anny, White, Jimmy, Jones, Elias, Saizo.
(Corner Only) 9.D (2 hits) > j.2B >> 9.B > j.2B >> 9.B > j.2B >> 9.B > j.2B xx 236-236.C >> 66.K 97 48 Requires 1 stress Meter.Can only be done on standing Kanji, Anny, White, Jimmy, Jones, Elias, Saizo.
Chinnen, Poochy & Saizo Specific Combos
(Corner Only)9.D >> 2.CD xx [4]6.C >> cl.5C (2 hits) > C > 3.C (4 hits) xx 236-236.C > 5.C > 3.C (4 hits) xx [4]6.C 117 58 Requires 1 Stress Meter.
(Corner Only)9.D >> 2.CD > 3.C (4 hits) xx 236-236.C > 5.C > 3.C (4 hits) xx 236-236.C >> 5.D xx 236-236.C 144 72 Requires 3 Stress meter.


Additional Character Resources

Tane Basic Combo Video

https://youtu.be/AgR2YvKTzps

Tane Advanced Combos Video
https://youtu.be/KkOO1M980rM
General
FAQ
Controls
Menus
HUD
Glossary
System
Characters
Anny
Buntaro
Chinnen
Clara
Elias
Hikaru
Jimmy
Jones
Kanji
Keith
Lynn
Olof
Poochy
Reiji
Saizo
Sissy
Shintaro
Tane
Ume
White