Matrimelee/Keith
Jump to navigation
Jump to search
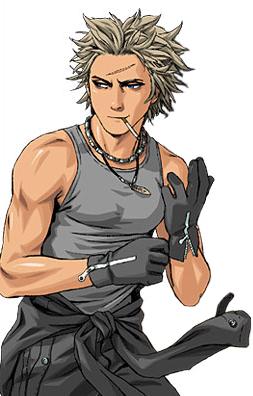

Keith Wayne

Introduction
Keith was invited to the Matrimeleee tournament and read that the winner will be married to a young princess. Knowing pretty girls being his weak point, Keith doesn't hesitate in participating.
Overview
| Strengths | Weaknesses |
|---|---|
|
|
Strategy
Building...
Normal Moves
Far Standing Normals
5.A  |
|---|
5.B  |
|---|
5.C  |
|---|
5.D  |
|---|
5.CD  |
|---|
Close Standing Normals
cl.5A  |
|---|
cl.5B  |
|---|
cl.5C  First hit First hit  Second hit Second hit
|
|---|
cl.5D  |
|---|
Crouching Normals
2.A  |
|---|
2.B  |
|---|
2.C  |
|---|
2.D  |
|---|
2.CD  |
|---|
Jumping Normals
8.A  |
|---|
8.B  |
|---|
8.C  |
|---|
8.D  |
|---|
7.D or 9.D  |
|---|
Command Normals
6.B  Start-up Start-up  Hit Hit
|
|---|
6.D  |
|---|
Dash Normals
66.A or 66.C  |
|---|
66.B or 66.D  |
|---|
Misc Normals & Grabs
Grabs  4/6.C or j.6C 4/6.C or j.6C
|
|---|
Rage Explosion  |
|---|
Guard Cancel 5.CD On Block 5.CD On Block
|
|---|
Special Moves
Rolling Cannon
214.B  |
|---|
214.D |
|---|
Dash 214.B or 214.D  |
|---|
Knuckle Bomber
[4]6.A  First hit First hit  Second hit Second hit
|
|---|
[4]6.C First hit First hit  Second hit Second hit  Third hit Third hit
|
|---|
Lightning Slash
214.A or 214.C  |
|---|
Spiral Kick
236.B  |
|---|
236.D |
|---|
236.D > 236.D  First hit First hit  Second hit Second hit
|
|---|
236.D > 236.D > 236.D  |
|---|
236.D > 236.D > 236.B  |
|---|
Air Spiral Kick
j.236.B |
|---|
j.236.D First hit First hit Second hit Second hit Third hit Third hit
|
|---|
Super Moves
Stress Shot
214-1236.C  First 3 hits First 3 hits  Final hit Final hit
|
Final Crash Bomber |
|---|
> 214-1236.C |
|---|
Ippatsu Ougi
236-236.C  First hit First hit  Second hit Second hit
|
Rising Volcano |
|---|
Combos
| Combo | Total Damage | Permanent Damage | Notes | ||
| Basic Combos | |||||
| 9.D >> 2.B > 2.B xx [4]6.A | 37 | 18 | |||
| 9.D >> 2.B > 2.B xx 236.B | 37 | 18 | |||
| 9.D >> cl.5C (1 hit) xx 236.D > 236.D > 236.D | 38 | 19 | |||
| 9.D >> cl.5C (2 hit) > C > 6.D xx 236.B | 45 | 22 | |||
| 9.D >> cl.5C (2 hit) > C > 6.D xx 214.D | 45 | 22 | 214.D may hit less times on crouching characters. | ||
| 9.D >> cl.5C (2 hits) > C > 6.D xx [4]6.A | 45 | 22 | |||
| 9.D >> cl.5C (2 hit) > C > 6.D xx 214-1236.C | 63 | 31 | Requires 1 Stress Meter. | ||
| 9.D >> cl.5B > D xx 236.D > 236.D > 236.D | 45 | 22 | |||
| 9.D >> cl.5B > D > 6.D xx 236.B | 46 | 23 | |||
| 9.D >> cl.5B > D > 6.D xx 214.D | 49 | 24 | 214.D may hit less times on crouching characters. | ||
| 9.D >> cl.5B > D > 6.D xx 214-1236.C | 65 | 32 | Requires 1 Stress Meter. | ||
| 9.D >> cl.5B > D xx 236-236.C >> Air Grab | 72 | 31 | Requires 2 Stress Meter. | ||
| (juggle) cl.5D xx 214.D | 36 | 18 | Great anti-cross-up. | ||
| (juggle) cl.C(2hit) > C xx 214.D | 44 | 22 | |||
| (juggle) cl.C(2hit) > C xx [4]6.A | 39 | 20 | |||
| Intermediate Combos | |||||
| (Cross-up) 9.D >> 2.B > 2.B > 2.B > 2.B xx [4]6.A | 45 | 22 | |||
| (cross-up) 9.D >> cl.5B > D > 6.D xx 236.D > 236.D > 236.D | 52 | 26 | |||
| (Cross-up) 9.D >> 2.C > C xx 236.D > 236.D > 236.D | 50 | 25 | |||
| (Cross-up) 9.D >> 2.C > C > 6.D xx 236.B | 52 | 26 | |||
| (Cross-up) 9.D >> 2.C > C > 6.D xx 214.D | 55 | 27 | |||
| (Cross-up) 9.D >> 2.C > C > 6.D xx 214-1236.C | 71 | 35 | Requires 1 Stress Meter. | ||
| (cross-up) 9.D >. 2.C > C xx 236-236.C >> Air Grab | 78 | 39 | Requires 2 Stress Meter. | ||
| 9.D >> h.9.D xx j.236.B | 41 | 20 | You must hop to connect the 2nd 9.D. | ||
| 9.C >> 2.CD xx [4]6.D | 47 | 23 | |||
| Advanced Combos | |||||
| 9.D >> cl.5A > cl.5A ~> 2.B xx [4]6.A | 34 | 17 | cl.5A ~> 2.B is a P-Link. | ||
| (Cross-up)9.D >> 2.B ~> cl.5C (2 hits) > C > 6.D xx [4]6.A | 57 | 28 | 2.B ~ cl.5C is a P-Link. | ||
| (Cross-up)9.D >> 2.B ~> cl.5C (2 hits) > C > 6.D xx 236.B | 57 | 28 | 2.B ~ cl.5C is a P-Link. | ||
| (Cross-up)9.D >> 2.B ~> cl.5C (2 hits) > C > 6.D xx 214.D | 57 | 28 | 2.B ~ cl.5C is a P-Link. | ||
| (Cross-up)9.D >> 2.B ~> cl.5C (2 hits) > C > 6.D xx 214-1236.C | 72 | 36 | 2.B ~ cl.5C is a P-Link. | ||
| Saizo, Poochy & Chinnen Specific Combos | |||||
| 9.C >> 2.CD > 6.D xx 214.D | 51 | 25 | |||
| 9.C >> 2.CD > 6.D xx 236.B | 48 | 24 | |||
| (Corner Only) 9.C >> 2.CD > 6.D xx 236-236.C >> Air Grab | 81 | 40 | |||
| (Corner Only) 9.C >> 2.CD xx 214.A >> cl.5C (1 hit) > C xx 214-1236.C | 72 | 36 | |||
Additional Character Resources
- Keith Basic, Intermediate & Advanced Combos (Nearly all of Keith's combos packed into a video)


