|
|
| Line 285: |
Line 285: |
| |data= | | |data= |
| {{AttackData-Matrim | | {{AttackData-Matrim |
| |Total Damage= | | |Total Damage=20 |
| |Permanent Damage= | | |Permanent Damage=10 |
| |Guard=Mid | | |Guard=Mid |
| |Gauge | | |Gauge |
Revision as of 23:53, 9 July 2020

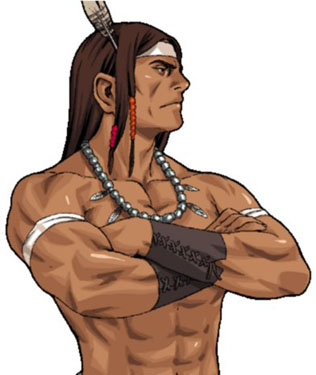
White Buffalo
Introduction
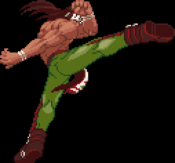
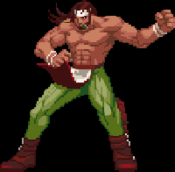
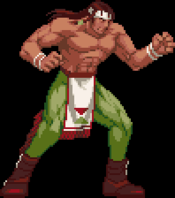
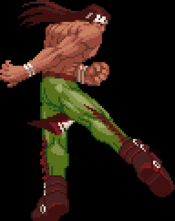
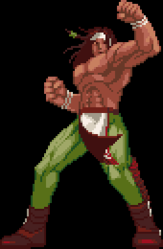
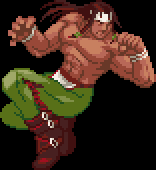
White Buffalo is a pure-hearted man who appreciates the little things in life. He does not speak much, so people write him off as serious and stoic. But, in reality, he is naive and clumsy which is why he prefers not to speak much. White is also an avid collector of shiny and interesting objects such as jewelry, shiny objects, wooden carvings, etc. White entered the Matrimelee tournament in hopes of earning a bride and adding new objects to his collection.
Overview
White is a slow charge character that hits like a freight train. One combo will easily drain an opponent's life down by 1/3rd or more. White also holds the highest health pool of 180. However, White is insanely slow. Having the slowest run and walk speed it cripples his attempts at getting in and can easily be avoided by some characters with faster walk speeds or longer normals.
| Strengths |
Weaknesses
|
- Easy combos with massive damage.
- Good anti-air Stress Shot.
- Access to Hard WallSlams to set-up okizeme.
- 9.D is extremely long and can cross-up and convert into combos.
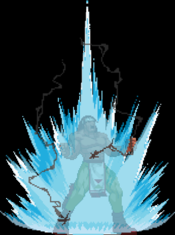
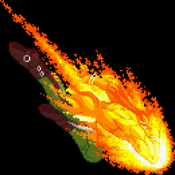
- Buffalo Storm destroys active projectiles and remains active.
- Buffalo Storm's release is a great anti-air.
- Heavy Arrow shot is an extremely fast projectile. Good for fullscreen zoning or punishes.
|
- Extremely slow walk and run speed.
- Very slow recovery on all attacks.
- All heavy normals, supers and specials are unsafe on block.
- Projectiles can be easily rolled, jumped over, or ignored by invincibility frames.
- Can easily be stuffed out by better normals and attacks.
- Little to no mix-up potential.
- Very weak ground game due to his short normals.
- Counter has a large startup, few active frames, and recovery frames.
- Arrow shot is unsafe point-blank.
|
Strategy
White is not the best character. He has extremely slow walk/run speed and slow move recovery. In order to make up for his extremely slow speed, he has to play extremely smart and calculate the risk of approaching.
Approaching an opponent with White is extremely difficult due to his slow speed. But, White can get in with his 9.D. White's 9.D has an extremely large hitbox and can cross-up. For a grounded approach, using 2.A or 2.B is your best and safest option. You can cancel both normals into light Tackle Blow, which Hard Wall Slams and can give access to a cross-up attempt. White can also use light Buffalo Storm and follow the projectile. Forcing them to block, jump or roll the Buffalo projectile. This sets up a grab, an anti-air juggle, or even a cross-up. Once you do manage to approach and hit the opponent it is crucial that you know White's combo options and routes so you can capitalize on his big damage and take the life lead. You will have to be very careful if your opponent blocks White's attacks he is VERY MINUS on block for all special attacks and supers.
White's Heavy Buffalo Storm is excellent for playing defensively. You can hold it and release it whenever you want. Both versions of Buffalo Storm have a great anti-air kick that is active upon releasing the special. White's level 1 Stress Shot is also excellent at catching jump-ins due to it being air unblockable. White's Stress Shot is also a projectile, so if White ever gets hit it'll trade for big counter hit damage. However, the level 1 is extremely unsafe on whiff and block. It's an easy punish for those who are patient so use it sparingly. White also has a great Standing CD, or great attack. It's extremely fast, causes a hard wall slam, and is special cancelable. Use his standing Great Attack to check unsafe approaches.
White is a very heavy hitter with simple combos. But, he's super slow, very unsafe on block, and lacks solid approach options; if your opponent doesn't know the matchup it'll be easy. If they do, expect a difficult time winning.
Normal Moves
Far Standing Normals
5.A
|
| Total Damage
|
Permanent Damage
|
Cancel
|
Guard
|
Gauge
|
Startup
|
Active
|
Recovery
|
Hit Adv
|
Block Adv
|
| 4
|
2
|
Special
Super
Rapid Chain
|
Mid
|
-
|
-
|
-
|
-
|
-
|
-
|
Overshadowed by 2.A. Links off of cl.5A.
|
|
5.B
|
| Total Damage
|
Permanent Damage
|
Cancel
|
Guard
|
Gauge
|
Startup
|
Active
|
Recovery
|
Hit Adv
|
Block Adv
|
| 12
|
6
|
Special
|
Mid
|
-
|
-
|
-
|
-
|
-
|
-
|
Overshadowed by 2.B. Use sparingly.
|
|
5.C
|
| Total Damage
|
Permanent Damage
|
Cancel
|
Guard
|
Gauge
|
Startup
|
Active
|
Recovery
|
Hit Adv
|
Block Adv
|
| 20
|
10
|
Special
Super
|
Mid
|
-
|
-
|
-
|
-
|
-
|
-
|
Not used often and overshadowed by cl.5C. Can only cancel into Arrow Shot. Unsafe on block. (Unsure about advantage)
|
|
5.D
|
| Total Damage
|
Permanent Damage
|
Cancel
|
Guard
|
Gauge
|
Startup
|
Active
|
Recovery
|
Hit Adv
|
Block Adv
|
| 22
|
11
|
Special
Super
|
Mid
|
-
|
-
|
-
|
-
|
-
|
-
|
Extremely long hitbox & hurtbox. Hard to combo into anything. Unsafe on block. (unsure about advantage).
|
|
5.CD
|
| Total Damage
|
Permanent Damage
|
Cancel
|
Guard
|
Gauge
|
Startup
|
Active
|
Recovery
|
Hit Adv
|
Block Adv
|
| 27
|
13
|
Special
Super
|
Mid
|
-
|
-
|
-
|
-
|
-
|
-
|
Hard Wallslam on hit. It can be canceled into specials or supers on hit/block.
|
|
Close Stand Normals
cl.5A
|
| Total Damage
|
Permanent Damage
|
Cancel
|
Guard
|
Gauge
|
Startup
|
Active
|
Recovery
|
Hit Adv
|
Block Adv
|
| 5
|
2
|
Self
Special
Super
|
Mid
|
-
|
-
|
-
|
-
|
-
|
-
|
One of White's best normals. Extremely fast jabs that can link into supers or specials.
|
|
cl.5B
|
| Total Damage
|
Permanent Damage
|
Cancel
|
Guard
|
Gauge
|
Startup
|
Active
|
Recovery
|
Hit Adv
|
Block Adv
|
| 10
|
5
|
Special
Super
|
Low
|
-
|
-
|
-
|
-
|
-
|
-
|
One of White's few low hitting normals. Links into command normals, specials, supers, etc
|
|
cl.5C
|
| Total Damage
|
Permanent Damage
|
Cancel
|
Guard
|
Gauge
|
Startup
|
Active
|
Recovery
|
Hit Adv
|
Block Adv
|
| 20
|
10
|
Special
Super
|
Mid
|
-
|
-
|
-
|
-
|
-
|
-
|
White's best normal. Great Juggle tool. Hits twice.
|
|
cl.5D First hit First hit Second hit Second hit
|
| Total Damage
|
Permanent Damage
|
Cancel
|
Guard
|
Gauge
|
Startup
|
Active
|
Recovery
|
Hit Adv
|
Block Adv
|
| 20
|
10
|
Special
Super
|
Mid
|
-
|
-
|
-
|
-
|
-
|
-
|
Can chain into 5D on hit/block. Substitute for cl.5C for more raw damage. Unsafe on block/whiff. (Unsure about advantage)
|
|
Crouching Normals
2.A
|
| Total Damage
|
Permanent Damage
|
Cancel
|
Guard
|
Gauge
|
Startup
|
Active
|
Recovery
|
Hit Adv
|
Block Adv
|
| 5
|
2
|
Self
Special
Super
|
Mid
|
-
|
-
|
-
|
-
|
-
|
-
|
One of White's best normals. Extremely fast jabs.
|
|
2.B
|
| Total Damage
|
Permanent Damage
|
Cancel
|
Guard
|
Gauge
|
Startup
|
Active
|
Recovery
|
Hit Adv
|
Block Adv
|
| 10
|
5
|
Special
Super
|
Low
|
-
|
-
|
-
|
-
|
-
|
-
|
One of White's few low normals. It's a go-to move for where 2.A can't reach.
|
|
2.C
|
| Total Damage
|
Permanent Damage
|
Cancel
|
Guard
|
Gauge
|
Startup
|
Active
|
Recovery
|
Hit Adv
|
Block Adv
|
| 20
|
10
|
Special
Super
|
Mid
|
-
|
-
|
-
|
-
|
-
|
-
|
Decently long crouching normal, slightly more range than 2.B.
|
|
2.D
|
| Total Damage
|
Permanent Damage
|
Cancel
|
Guard
|
Gauge
|
Startup
|
Active
|
Recovery
|
Hit Adv
|
Block Adv
|
| 22
|
11
|
Special
Super
|
Low
|
-
|
-
|
-
|
-
|
-
|
-
|
|
|
|
2.CD
|
| Total Damage
|
Permanent Damage
|
Cancel
|
Guard
|
Gauge
|
Startup
|
Active
|
Recovery
|
Hit Adv
|
Block Adv
|
| 20
|
10
|
Special
Super
|
Low
|
-
|
-
|
-
|
-
|
-
|
-
|
Launches. It can be used to set-up juggles.
|
|
Dashing Normals
66.P
|
| Total Damage
|
Permanent Damage
|
Cancel
|
Guard
|
Gauge
|
Startup
|
Active
|
Recovery
|
Hit Adv
|
Block Adv
|
| 20
|
10
|
-
|
Mid
|
-
|
-
|
-
|
-
|
-
|
-
|
Great grounded punish tool. Can link into specials and supers.
|
|
66.K
|
| Total Damage
|
Permanent Damage
|
Cancel
|
Guard
|
Gauge
|
Startup
|
Active
|
Recovery
|
Hit Adv
|
Block Adv
|
| 26
|
13
|
Special
Super
|
Mid
|
-
|
-
|
-
|
-
|
-
|
-
|
Better range and damage than 66.P. Knocks down on hit.
|
|
Command Normals
3.A
|
| Total Damage
|
Permanent Damage
|
Cancel
|
Guard
|
Gauge
|
Startup
|
Active
|
Recovery
|
Hit Adv
|
Block Adv
|
| 18
|
9
|
Special
Super
|
Mid
|
-
|
-
|
-
|
-
|
-
|
-
|
White's main combo ender before a special or super.
|
|
6.B
|
| Total Damage
|
Permanent Damage
|
Cancel
|
Guard
|
Gauge
|
Startup
|
Active
|
Recovery
|
Hit Adv
|
Block Adv
|
| 20
|
10
|
No
|
Mid
|
-
|
-
|
-
|
-
|
-
|
-
|
High counter command normal. Extremely slow start-up and quick active frames. Avoid uisng.
|
|
Jumping Normals
8.A
|
| Total Damage
|
Permanent Damage
|
Cancel
|
Guard
|
Gauge
|
Startup
|
Active
|
Recovery
|
Hit Adv
|
Block Adv
|
| 10
|
5
|
Air Special
|
High
|
-
|
-
|
-
|
-
|
-
|
-
|
|
|
|
8.B
|
| Total Damage
|
Permanent Damage
|
Cancel
|
Guard
|
Gauge
|
Startup
|
Active
|
Recovery
|
Hit Adv
|
Block Adv
|
| -
|
-
|
Air Special
|
High
|
-
|
-
|
-
|
-
|
-
|
-
|
Good for hop normal to cancel into Flying Elbow.
|
|
8.C
|
| Total Damage
|
Permanent Damage
|
Cancel
|
Guard
|
Gauge
|
Startup
|
Active
|
Recovery
|
Hit Adv
|
Block Adv
|
| 16
|
8
|
Air Special
|
High
|
-
|
-
|
-
|
-
|
-
|
-
|
Has less pushback compared to 8.D
|
|
8.D
|
| Total Damage
|
Permanent Damage
|
Cancel
|
Guard
|
Gauge
|
Startup
|
Active
|
Recovery
|
Hit Adv
|
Block Adv
|
| 18
|
9
|
Air Special
|
High
|
-
|
-
|
-
|
-
|
-
|
-
|
Excellent Air to Air. Use 9.D for jump-ins.
|
|
7/9.D
|
| Total Damage
|
Permanent Damage
|
Cancel
|
Guard
|
Gauge
|
Startup
|
Active
|
Recovery
|
Hit Adv
|
Block Adv
|
| 18
|
9
|
Air Special
|
High
|
-
|
-
|
-
|
-
|
-
|
-
|
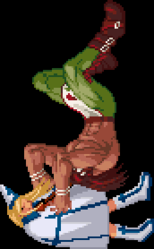
Extremely strong cross-up normal. Huge hitbox, too.
|
|
Misc Normals & Grabs
Rage Explosion
|
| Total Damage
|
Permanent Damage
|
Cancel
|
Guard
|
Gauge
|
Startup
|
Active
|
Recovery
|
Hit Adv
|
Block Adv
|
| 6
|
3
|
No
|
Mid
|
-
|
-
|
-
|
-
|
-
|
-
|
Requires 1 Stress Meter to active. Air unblockable; creates a juggle on hit.
|
|
Throw (Grounded/Air)
|
| Total Damage
|
Permanent Damage
|
Cancel
|
Guard
|
Gauge
|
Startup
|
Active
|
Recovery
|
Hit Adv
|
Block Adv
|
| 20
|
10
|
No
|
Grab
|
-
|
-
|
-
|
-
|
-
|
-
|
|
Guard Cancel
|
| Total Damage
|
Permanent Damage
|
Cancel
|
Guard
|
Gauge
|
Startup
|
Active
|
Recovery
|
Hit Adv
|
Block Adv
|
| 8
|
8
|
No
|
Mid
|
-
|
-
|
-
|
-
|
-
|
-
|
Requires 1 Stress Meter. Can only be done on block.
|
|
Special Moves
Arrow Shot
236.A/C Arrow Shot Arrow Shot
|
| Total Damage
|
Permanent Damage
|
Cancel
|
Guard
|
Gauge
|
Startup
|
Active
|
Recovery
|
Hit Adv
|
Block Adv
|
| 16
|
8
|
No
|
Mid
|
-
|
-
|
-
|
-
|
-
|
-
|
Heavy version's arrow is faster.
|
|
Tackle Blow
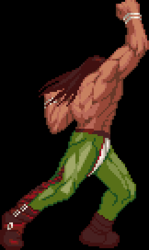
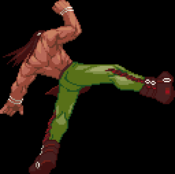
[4]6.A Light Tackle Blow Light Tackle Blow Second hit Second hit
|
| Total Damage
|
Permanent Damage
|
Cancel
|
Guard
|
Gauge
|
Startup
|
Active
|
Recovery
|
Hit Adv
|
Block Adv
|
| 23
|
23
|
No
|
Mid
|
-
|
-
|
-
|
-
|
-
|
-
|
Hard Wall Slam.; Air unblockable.
Great for ending combos.
|
|
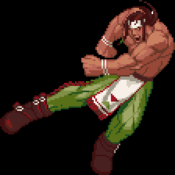
[4]6.C Heavy Tackle Blow Heavy Tackle Blow Second hit Second hit Optional 623.C Follow-up Optional 623.C Follow-up
|
| Total Damage
|
Permanent Damage
|
Cancel
|
Guard
|
Gauge
|
Startup
|
Active
|
Recovery
|
Hit Adv
|
Block Adv
|
| 25
|
25
|
Special
|
Mid
|
-
|
-
|
-
|
-
|
-
|
-
|
hard Wall Slam; Air Unblockable.
Can also be canceled using 623.C on the first hit.
|
| Total Damage
|
Permanent Damage
|
Cancel
|
Guard
|
Gauge
|
Startup
|
Active
|
Recovery
|
Hit Adv
|
Block Adv
|
| 10
|
5
|
No
|
Mid
|
-
|
-
|
-
|
-
|
-
|
-
|
Can only be done on the first hit of Heavy Tackle Blow.
Launches for an air grab follow-up.
|
|
Buffalo Storm
[4]6.B/D Buffalo Storm Buffalo Storm
|
| Total Damage
|
Permanent Damage
|
Cancel
|
Guard
|
Gauge
|
Startup
|
Active
|
Recovery
|
Hit Adv
|
Block Adv
|
| 20
|
10
|
No
|
Mid
|
-
|
-
|
-
|
-
|
-
|
-
|
Air Unblockable.
Has a great anti-air kick upon releasing the Buffalo. Projectile has super high priority and destroys other projectiles.
Holding down D during the charge doubles the damage.
|
|
Flying Elbow
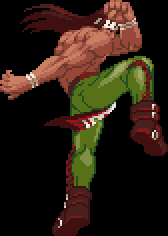
j.214.A/C Light Flying Elbow Light Flying Elbow Heavy Flying Elbow Heavy Flying Elbow
|
| Total Damage
|
Permanent Damage
|
Cancel
|
Guard
|
Gauge
|
Startup
|
Active
|
Recovery
|
Hit Adv
|
Block Adv
|
| 24
|
12
|
No
|
High
|
-
|
-
|
-
|
-
|
-
|
-
|
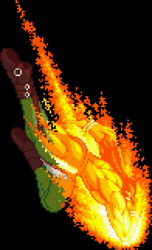
Use sparingly. It can be used as a surprise overhead and cannot be used in combos.
|
|
Super Moves
Stress Shot
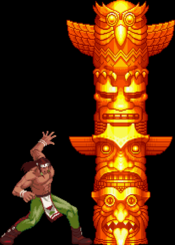
236-3214.C Tornado Pole Tornado Pole
|
| Total Damage
|
Permanent Damage
|
Cancel
|
Guard
|
Gauge
|
Startup
|
Active
|
Recovery
|
Hit Adv
|
Block Adv
|
| 60
|
30
|
No
|
Mid
|
-
|
-
|
-
|
-
|
-
|
-
|
Air Unblockable. High priority projectile.
|
|
Ippatsu Ougi
63214-63214.C Guardian Bomb Guardian Bomb
|
| Total Damage
|
Permanent Damage
|
Cancel
|
Guard
|
Gauge
|
Startup
|
Active
|
Recovery
|
Hit Adv
|
Block Adv
|
| 89
|
45
|
No
|
No
|
-
|
-
|
-
|
-
|
-
|
-
|
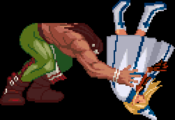
Command Grab; Soft Wall Slam.
It can be comboed into.
|
|
Combos
