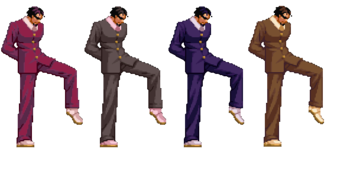
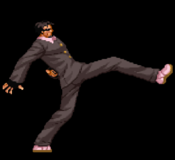
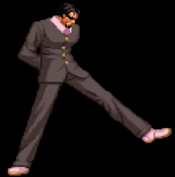
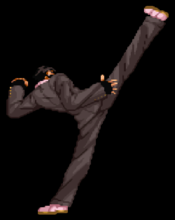
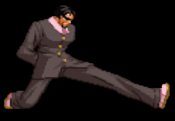
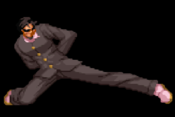
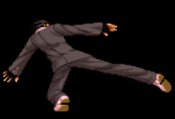
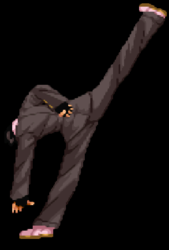
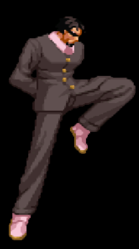
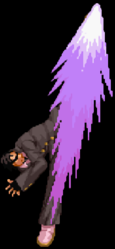
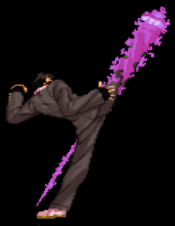
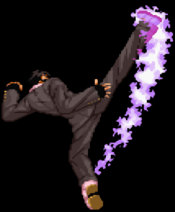
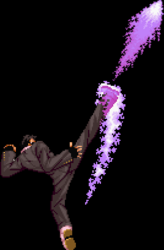
Matrimelee/Olof: Difference between revisions
Jump to navigation
Jump to search
(→Combos) |
|||
| (31 intermediate revisions by 2 users not shown) | |||
| Line 6: | Line 6: | ||
Perfect footwork and equipped with kicks that have several miles of range. | Perfect footwork and equipped with kicks that have several miles of range. | ||
Olof is the bodyguard of Princess Sissy. He is asked to enter the tournament for her pleasure, to test himself. Even though one of his arms is wounded and bandaged, he is powerful enough to defeat opponents with only his legs. He is often calm and reserved, and he is very chivalrous | Olof is the bodyguard of Princess Sissy. He is asked to enter the tournament for her pleasure, to test himself. Even though one of his arms is wounded and bandaged, he is powerful enough to defeat opponents with only his legs. He is often calm and reserved, and he is very chivalrous toward women. | ||
==Overview== | ==Overview== | ||
| Line 14: | Line 14: | ||
|- style="vertical-align:top;text-align:left" | |- style="vertical-align:top;text-align:left" | ||
| style="width: 50%;"| | | style="width: 50%;"| | ||
* | *Strong normals all around | ||
* | *cl.A is a standing low. | ||
* | *2nd largest 2.CD in the game | ||
* | *j.214.D loops for big damage | ||
* | *hop 9.D > D can set-up j.214.D loops and a corner carry. | ||
* | *Fast 623.B for catching jump-ins or bad Oki attempts | ||
*6.A is extremely versatile and can be canceled out of any normal. | |||
*Fake Ippatsu Ougi can be used to cancel the recovery of moves, making them safe or extending a combo. It can even punish Guard Cancels. | |||
| style="width: 50%;"| | | style="width: 50%;"| | ||
* | *Low damage output without j.214.D loops. | ||
*Stress Shot is unsafe on hit. | |||
*Ippatsu Ougi can be hit out of or easily avoided. | |||
* | *On hit, the Ippatsu Ougi drains 40HP but cannot kill Olof. | ||
* | *Fake Ippatsu Ougi requires 2 or more Stress Meter to use. | ||
* | *The first hit of 3.B struggles to hit crouchers. | ||
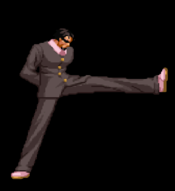
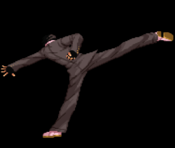
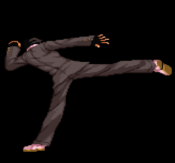
* | *236.A/B/C/D have extremely long hurt boxes and long recovery times. | ||
* | *Slowest 66.P in the game. | ||
* | *No reliable options to escape the corner without meter for Guard Cancels. | ||
* | |||
* | |||
|- | |- | ||
|} | |} | ||
| Line 37: | Line 37: | ||
==Strategy== | ==Strategy== | ||
(Rebuilding...) | |||
==Normal Moves== | ==Normal Moves== | ||
| Line 65: | Line 48: | ||
|image=Matrimelee Olof 5A.png | |image=Matrimelee Olof 5A.png | ||
|caption= | |caption= | ||
|name= | |name=5.A | ||
|data= | |data= | ||
{{AttackData-Matrim | {{AttackData-Matrim | ||
| Line 78: | Line 61: | ||
|Hit Adv= | |Hit Adv= | ||
|Block Adv= | |Block Adv= | ||
|description= Fast and has a nice range. Olof's main standing poke wich can be comboed into 214B or 236A easily. | |description=Air Unblockable.<br>Fast and has a nice range. Olof's main standing poke wich can be comboed into 214B or 236A easily. | ||
}} | }} | ||
}} | }} | ||
| Line 85: | Line 68: | ||
|image=Matrimelee_Olof_5B.png | |image=Matrimelee_Olof_5B.png | ||
|caption= | |caption= | ||
|name= | |name=5.B | ||
|data= | |data= | ||
{{AttackData-Matrim | {{AttackData-Matrim | ||
| Line 98: | Line 81: | ||
|Hit Adv= | |Hit Adv= | ||
|Block Adv= | |Block Adv= | ||
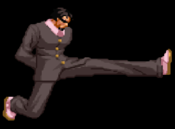
|description= Another good poke, it hits slightly higher and comes out a tiny bit slower than 5A but it causes double the damage. Can work as a late Anti-Air but Olof has better options. | |description= Air Unblockable.<br>Another good poke, it hits slightly higher and comes out a tiny bit slower than 5A but it causes double the damage. Can work as a late Anti-Air but Olof has better options. | ||
}} | }} | ||
}} | }} | ||
| Line 105: | Line 88: | ||
|image=Matrimelee_Olof_5C.png | |image=Matrimelee_Olof_5C.png | ||
|caption= | |caption= | ||
|name= | |name=5.C | ||
|data= | |data= | ||
{{AttackData-Matrim | {{AttackData-Matrim | ||
| Line 118: | Line 101: | ||
|Hit Adv= | |Hit Adv= | ||
|Block Adv= | |Block Adv= | ||
|description= This kick is pretty odd, comes out relatively fast, has a good range and hits upwards, but the recovery makes it pretty unsafe for throw it often as it can be jumped out and you will get punished for it. The best use for this one is to stop foward dashes or as a late Anti-Air. | |description= Air Unblockable.<br>This kick is pretty odd, comes out relatively fast, has a good range and hits upwards, but the recovery makes it pretty unsafe for throw it often as it can be jumped out and you will get punished for it. The best use for this one is to stop foward dashes or as a late Anti-Air. | ||
}} | }} | ||
}} | }} | ||
| Line 125: | Line 108: | ||
|image=Matrimelee_Olof_5D.png | |image=Matrimelee_Olof_5D.png | ||
|caption= | |caption= | ||
|name= | |name=5.D | ||
|data= | |data= | ||
{{AttackData-Matrim | {{AttackData-Matrim | ||
| Line 138: | Line 121: | ||
|Hit Adv= | |Hit Adv= | ||
|Block Adv= | |Block Adv= | ||
|description= Another odd kick, shares the same problems as 5C but it can't be used as a late Anti-Air since it hits straight foward. Comes out kind of slow too, so you probably won't be using this one too much. | |description=Air Unblockable.<br> Another odd kick, shares the same problems as 5C but it can't be used as a late Anti-Air since it hits straight foward. Comes out kind of slow too, so you probably won't be using this one too much. | ||
}} | }} | ||
}} | }} | ||
| Line 145: | Line 128: | ||
|image=Matrimelee_Olof_5CD.png | |image=Matrimelee_Olof_5CD.png | ||
|caption= | |caption= | ||
|name= | |name=5.CD | ||
|data= | |data= | ||
{{AttackData-Matrim | {{AttackData-Matrim | ||
| Line 158: | Line 141: | ||
|Hit Adv= | |Hit Adv= | ||
|Block Adv= | |Block Adv= | ||
|description= Comes out slow and the range is shorter than his other standing normals, but causes good damage and is wall slam as any 5CD, but is not that good so you won't be using this one outside punishes to prepare your 50/50. | |description= Air Unblockable.<br>Comes out slow and the range is shorter than his other standing normals, but causes good damage and is wall slam as any 5CD, but is not that good so you won't be using this one outside punishes to prepare your 50/50. | ||
}} | }} | ||
}} | }} | ||
===Close Standing Normals=== | ===Close Standing Normals=== | ||
| Line 169: | Line 151: | ||
|image=Matrimelee_Olof_cl.5A.png | |image=Matrimelee_Olof_cl.5A.png | ||
|caption= | |caption= | ||
|name=cl. | |name=cl.5A | ||
|data= | |data= | ||
{{AttackData-Matrim | {{AttackData-Matrim | ||
| Line 176: | Line 158: | ||
|Guard= Low | |Guard= Low | ||
|Gauge= | |Gauge= | ||
|Cancel= Self-Cancel<br>Special<br>Super | |Cancel= Self-Cancel<br>[https://wiki.gbl.gg/w/Matrimelee/System#CPS-1_Chains '''Rapid Chain'''] <br>Special<br>Super | ||
|Startup= | |Startup= | ||
|Active= | |Active= | ||
| Line 189: | Line 171: | ||
|image=Matrimelee_Olof_cl.5B.png | |image=Matrimelee_Olof_cl.5B.png | ||
|caption= | |caption= | ||
|name=cl. | |name=cl.5B | ||
|data= | |data= | ||
{{AttackData-Matrim | {{AttackData-Matrim | ||
| Line 202: | Line 184: | ||
|Hit Adv= | |Hit Adv= | ||
|Block Adv= | |Block Adv= | ||
|description= Olof's 2nd main combo tool. Comes out really fast, can be chained into itself up to 4 times and does nice damage. You want to use this each time you are close to the opponent. | |description= Air Unblockable. Natrually chains into 5.B.<br>Olof's 2nd main combo tool. Comes out really fast, can be chained into itself up to 4 times and does nice damage. You want to use this each time you are close to the opponent. | ||
}} | }} | ||
}} | }} | ||
| Line 216: | Line 198: | ||
|Guard= Mid | |Guard= Mid | ||
|Gauge= | |Gauge= | ||
|Cancel= Special<br>Super | |Cancel=Special<br>Super | ||
|Startup= | |Startup= | ||
|Active= | |Active= | ||
| Line 222: | Line 204: | ||
|Hit Adv= | |Hit Adv= | ||
|Block Adv= | |Block Adv= | ||
|description= | |description= Air Unblockable. Natrually Chains into cl.5D.<br> Nice close anti-air that's excellent for juggles but hard to use for anything else. | ||
}} | }} | ||
}} | }} | ||
| Line 243: | Line 224: | ||
|Hit Adv= | |Hit Adv= | ||
|Block Adv= | |Block Adv= | ||
|description= Pretty much cl.C with better vertical range, but this one comes out slower and has even worse horizontal range | |description=Air Unblockable. Gains a knockdown if chained from cl.5C.<br>Pretty much cl.C with better vertical range, but this one comes out slower and has even worse horizontal range. | ||
}} | }} | ||
}} | }} | ||
| Line 253: | Line 234: | ||
|image=Matrimelee Olof 2A.png | |image=Matrimelee Olof 2A.png | ||
|caption= | |caption= | ||
|name= | |name=2.A | ||
|data= | |data= | ||
{{AttackData-Matrim | {{AttackData-Matrim | ||
| Line 266: | Line 247: | ||
|Hit Adv= | |Hit Adv= | ||
|Block Adv= | |Block Adv= | ||
|description= | |description= 5.A with a slightly more range and slower start-up. Too slow to actually combo into anything. | ||
}} | }} | ||
}} | }} | ||
| Line 273: | Line 254: | ||
|image=Matrimelee Olof 2B.png | |image=Matrimelee Olof 2B.png | ||
|caption= | |caption= | ||
|name= | |name=2.B | ||
|data= | |data= | ||
{{AttackData-Matrim | {{AttackData-Matrim | ||
| Line 286: | Line 267: | ||
|Hit Adv= | |Hit Adv= | ||
|Block Adv= | |Block Adv= | ||
|description= Olof's main crouching normal, | |description= Olof's main crouching normal, fast and has nice range that can lead into basic combos. Thanks to it's range 2.B is used for low/high mix-ups with 6.A. | ||
}} | }} | ||
}} | }} | ||
| Line 293: | Line 274: | ||
|image=Matrimelee Olof 2C.png | |image=Matrimelee Olof 2C.png | ||
|caption= | |caption= | ||
|name= | |name=2.C | ||
|data= | |data= | ||
{{AttackData-Matrim | {{AttackData-Matrim | ||
| Line 306: | Line 287: | ||
|Hit Adv= | |Hit Adv= | ||
|Block Adv= | |Block Adv= | ||
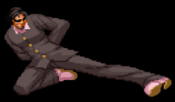
|description=Sliding kick | |description=Sliding kick. Pretty usefull during combos and 50/50s. Not useful for anti-airs but is very useful for juggles. | ||
}} | }} | ||
}} | }} | ||
| Line 313: | Line 294: | ||
|image=Matrimelee Olof 2D.png | |image=Matrimelee Olof 2D.png | ||
|caption= | |caption= | ||
|name= | |name=2.D | ||
|data= | |data= | ||
{{AttackData-Matrim | {{AttackData-Matrim | ||
| Line 326: | Line 307: | ||
|Hit Adv= | |Hit Adv= | ||
|Block Adv= | |Block Adv= | ||
|description= Long range sweep | |description= Long range sweep. Excellent punish tool that completely outranges most sweeps. | ||
}} | }} | ||
}} | }} | ||
| Line 333: | Line 314: | ||
|image=Matrimelee Olof 2CD.png | |image=Matrimelee Olof 2CD.png | ||
|caption= | |caption= | ||
|name= | |name=2.CD | ||
|data= | |data= | ||
{{AttackData-Matrim | {{AttackData-Matrim | ||
| Line 346: | Line 327: | ||
|Hit Adv= | |Hit Adv= | ||
|Block Adv= | |Block Adv= | ||
|description= Slow and has almost no horizontal range, | |description= Air Unblockable.<br>Slow and has almost no horizontal range. However it has great vertical range, is an excellent anti-air and sets-up Olof's super combos or juggle loops. Shares the same start-up animation as his 2.D. | ||
}} | }} | ||
}} | }} | ||
| Line 356: | Line 337: | ||
|image=Matrimelee Olof 9A.png | |image=Matrimelee Olof 9A.png | ||
|caption= | |caption= | ||
|name= | |name=8.A | ||
|data= | |data= | ||
{{AttackData-Matrim | {{AttackData-Matrim | ||
| Line 376: | Line 357: | ||
|image=Matrimelee Olof 9B.png | |image=Matrimelee Olof 9B.png | ||
|caption= | |caption= | ||
|name= | |name=8.B | ||
|data= | |data= | ||
{{AttackData-Matrim | {{AttackData-Matrim | ||
| Line 392: | Line 373: | ||
}} | }} | ||
}} | }} | ||
<font style="visibility:hidden" size="0"> | |||
<font style="visibility:hidden" size="0">8C</font> | |||
{{MoveData | {{MoveData | ||
|image=Matrimelee Olof | |image=Matrimelee Olof 8C.png | ||
|caption= | |caption= | ||
|name= | |name=8.C | ||
|data= | |data= | ||
{{AttackData-Matrim | {{AttackData-Matrim | ||
|Total Damage= | |Total Damage= 12 | ||
|Permanent Damage= | |Permanent Damage= 6 | ||
|Guard= High | |Guard= High | ||
|Gauge= | |Gauge= | ||
| Line 409: | Line 391: | ||
|Hit Adv= | |Hit Adv= | ||
|Block Adv= | |Block Adv= | ||
|description= | |description= This one has the same uses as j.C, but even more limited since it hits almost straight upwards. | ||
}} | |||
}} | |||
<font style="visibility:hidden" size="0">8D</font> | |||
{{MoveData | |||
|image=Matrimelee Olof 8D.png | |||
|caption= | |||
|name=8.D | |||
|data= | |||
{{AttackData-Matrim | |||
|Total Damage= 17 | |||
|Permanent Damage= 8 | |||
|Guard= High | |||
|Gauge | |||
|Cancel= Air Special | |||
|Startup= | |||
|Active= | |||
|Recovery= | |||
|Hit Adv= | |||
|Block Adv= | |||
|description= Pretty much a straight version of j.C. | |||
}} | }} | ||
}} | }} | ||
<font style="visibility:hidden" size="0"> | <font style="visibility:hidden" size="0">j.C</font> | ||
{{MoveData | {{MoveData | ||
|image=Matrimelee Olof | |image=Matrimelee Olof 9C.png | ||
|caption= | |caption= | ||
|name= | |name=7.C ''or'' 9.C | ||
|data= | |data= | ||
{{AttackData-Matrim | {{AttackData-Matrim | ||
|Total Damage= | |Total Damage= 14 | ||
|Permanent Damage= | |Permanent Damage= 7 | ||
|Guard= High | |Guard= High | ||
|Gauge= | |Gauge= | ||
| Line 429: | Line 431: | ||
|Hit Adv= | |Hit Adv= | ||
|Block Adv= | |Block Adv= | ||
|description= | |description= Comes out fast and does good damage, but it hits upwards so is only usefull during certain air to air situations or for juggles. Good normal but its limited on his uses. | ||
}} | }} | ||
}} | }} | ||
| Line 437: | Line 439: | ||
|caption= First kick | |caption= First kick | ||
|image2= Matrimelee Olof 9D 2.png | |image2= Matrimelee Olof 9D 2.png | ||
|caption2= Second kick | |caption2= Second kick<br>(7/9.D > D) | ||
|name= | |name=7.D ''or'' 9.D | ||
|data= | |data= | ||
{{AttackData-Matrim | {{AttackData-Matrim | ||
|Total Damage= | |Total Damage= 16 | ||
|Permanent Damage= 7 | |Permanent Damage=7 | ||
|Guard= High | |Guard= High | ||
|Gauge | |Gauge | ||
|Cancel= Air Special<br>Chain | |Cancel= Air Special<br>Self-Chain | ||
|Startup= | |Startup= | ||
|Active= | |Active= | ||
| Line 451: | Line 453: | ||
|Hit Adv= | |Hit Adv= | ||
|Block Adv= | |Block Adv= | ||
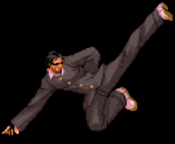
|description= Olof's oddest normal by far. It comes out with delay so it requires | |description= Olof's oddest normal by far. It comes out with delay so it requires good timing to be used on air to ground combos or air to air. Self Chains by pressing D again, see below. | ||
if you hit the D button again after the j.D connects he will do a 2nd kick with almost the same properties but coming out faster enough to combo from the first hit. This is good on paper but on practice is kinda unorthodox to be used consistently, especially against short characters like Oume. | |||
}} | }} | ||
{{AttackData-Matrim | {{AttackData-Matrim | ||
|Total Damage= | |Total Damage=21 | ||
|Permanent Damage= | |Permanent Damage=10 | ||
|Guard= High | |Guard= High | ||
|Gauge | |Gauge | ||
| Line 471: | Line 467: | ||
|Hit Adv= | |Hit Adv= | ||
|Block Adv= | |Block Adv= | ||
|description= | |description=Chains off of 7.D or 9.D. Increases the damage of the jump-in but can easily whiff on short characters like Ume, Tane, Hikaru, etc. Damage is a total of both hits. | ||
}} | }} | ||
}} | }} | ||
| Line 481: | Line 477: | ||
|image=Matrimelee_Olof_66A-C.png | |image=Matrimelee_Olof_66A-C.png | ||
|caption= | |caption= | ||
|name= | |name=66.A ''or'' 66.C | ||
|data= | |data= | ||
{{AttackData-Matrim | {{AttackData-Matrim | ||
| Line 501: | Line 497: | ||
|image=Matrimelee Olof 66B-D.png | |image=Matrimelee Olof 66B-D.png | ||
|caption= | |caption= | ||
|name= | |name=66.B ''or'' 66.D | ||
|data= | |data= | ||
{{AttackData-Matrim | {{AttackData-Matrim | ||
| Line 514: | Line 510: | ||
|Hit Adv= | |Hit Adv= | ||
|Block Adv= | |Block Adv= | ||
|description= Comes out kind of fast wich makes it a good punish option if you can't get anything else. It can be countered easely on reaction so be carefull about that. | |description= Air Unblockable.<br>Comes out kind of fast wich makes it a good punish option if you can't get anything else. It can be countered easely on reaction so be carefull about that. | ||
}} | }} | ||
}} | }} | ||
| Line 524: | Line 520: | ||
|image=Matrimelee Olof 6A.png | |image=Matrimelee Olof 6A.png | ||
|caption= | |caption= | ||
|name= | |name=6.A | ||
|data= | |data= | ||
{{AttackData-Matrim | {{AttackData-Matrim | ||
| Line 537: | Line 533: | ||
|Hit Adv= | |Hit Adv= | ||
|Block Adv= | |Block Adv= | ||
|description=Overhead Axe Kick with a good amount of stun that allows you to combo into 623B from close range or 214C from far range. It comes out kind of slow but is safe on block. Part of the Ippatsu Ougi Setup. | |description=Air Unblockable.<br>Overhead Axe Kick with a good amount of stun that allows you to combo into 623B from close range or 214C from far range. It comes out kind of slow but is safe on block. Part of the Ippatsu Ougi Setup. | ||
}} | }} | ||
}} | }} | ||
| Line 549: | Line 545: | ||
|data= | |data= | ||
{{AttackData-Matrim | {{AttackData-Matrim | ||
|Total Damage= 11 | |Total Damage= 11 1st<br>5 2nd | ||
|Permanent Damage= 5 | |Permanent Damage= 5 1st<br>2 2nd | ||
|Guard= Mid | |Guard= Mid | ||
|Gauge= | |Gauge= | ||
| Line 559: | Line 555: | ||
|Hit Adv= | |Hit Adv= | ||
|Block Adv= | |Block Adv= | ||
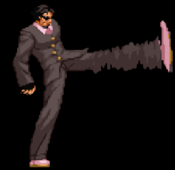
|description= This move is Olof's main combo tool, You will be using this move very often due to how good of a tool it is. It's basically a multi-tool used for special cancels, juggles, etc. (See [https://wiki.gbl.gg/w/Matrimelee/Olof#Combos '''Combos'''] for examples.) If blocked, 3.B can be canceled into 236.B to be made safe by the projectile's pushback. Since it is a multi-hit command normal, the 2nd kick can be used for gimmicks such as baiting the opponent's Guard Cancel and then canceling into Stress Shot to punish.<br> | |description= Air Unblockable.<br>This move is Olof's main combo tool, You will be using this move very often due to how good of a tool it is. It's basically a multi-tool used for special cancels, juggles, etc. (See [https://wiki.gbl.gg/w/Matrimelee/Olof#Combos '''Combos'''] for examples.) If blocked, 3.B can be canceled into 236.B to be made safe by the projectile's pushback. Since it is a multi-hit command normal, the 2nd kick can be used for gimmicks such as baiting the opponent's Guard Cancel and then canceling into Stress Shot to punish.<br> | ||
At a distance, 3.B can also whiff on crouching Tane, Ume, Clara, and Hikaru. You will need to adjust combos for these characters when they're crouching. | At a distance, 3.B can also whiff on crouching Tane, Ume, Clara, and Hikaru. You will need to adjust combos for these characters when they're crouching. | ||
:A common trick is to cancel cl.B into this move and then cancel the 1st kick into 214.D for nice damage and Wall Slam. | : A common trick is to cancel cl.B into this move and then cancel the 1st kick into 214.D for nice damage and Wall Slam. | ||
:In more advanced levels you can cancel the 1st kick into 4146.A to negate the recovery and extend your combo. | : In more advanced levels you can cancel the 1st kick into 4146.A to negate the recovery and extend your combo. | ||
}} | }} | ||
| Line 574: | Line 570: | ||
{{MoveData | {{MoveData | ||
|image=Matrimelee Olof Auto counter.png | |image=Matrimelee Olof Auto counter.png | ||
|caption= | |caption= Stance when counter is ready | ||
|name= Counter Trick | |name= Counter Trick | ||
|data= | |data= | ||
| Line 582: | Line 578: | ||
|Guard= High | |Guard= High | ||
|Gauge= | |Gauge= | ||
|Cancel= | |Cancel=Special<br>Super | ||
|Startup= | |Startup= | ||
|Active= | |Active= | ||
| Line 588: | Line 584: | ||
|Hit Adv= | |Hit Adv= | ||
|Block Adv= | |Block Adv= | ||
|description= | |description= To trigger this counter you must '''stand idle''' for 4 long seconds. This Mid counter has very limited uses and isn't great thanks to it's time requirement. It can easily counter hit one hit specials or dash moves but falls short to low attacks or rapid multi-hit attacks. It's only real use is tricking someone new into triggering it... | ||
}} | }} | ||
}} | }} | ||
===Battle=== | ===Battle=== | ||
| Line 600: | Line 597: | ||
|image3=Matrimelee Olof 236D.png | |image3=Matrimelee Olof 236D.png | ||
|caption3= D Sends the projectile upwards with a 35° angle aproximately. | |caption3= D Sends the projectile upwards with a 35° angle aproximately. | ||
|name=Battle (Битва) | |name=236.A/B/C/D | ||
|data=Battle (Битва) | |||
{{AttackData-Matrim | {{AttackData-Matrim | ||
|Total Damage= 15 | |Total Damage= 15 | ||
| Line 607: | Line 604: | ||
|Guard= Mid | |Guard= Mid | ||
|Gauge= | |Gauge= | ||
|Cancel= | |Cancel=N/A | ||
|Startup= | |Startup= | ||
|Active= | |Active= | ||
| Line 614: | Line 611: | ||
|Block Adv= | |Block Adv= | ||
|description= All the versions of this projectile comes out relatively fast but have bad recovery times wich limits their usefullness. | |description= All the versions of this projectile comes out relatively fast but have bad recovery times wich limits their usefullness. | ||
: | :*236.B is used in his 50/50 set-ups. | ||
:*236.D is used to read and deny jump-ins. | |||
}} | }} | ||
}} | }} | ||
===Sanctions=== | ===Sanctions=== | ||
{{MoveData | {{MoveData | ||
|image=Matrimelee_Olof_623C-D.png | |image=Matrimelee_Olof_623C-D.png | ||
|caption= | |caption=First hit | ||
|name=Sanctions (санкций) | |name=623.B ''or'' 623.D | ||
|image2=MM_Olof_623K_Overhead.png | |||
|caption2=Final hit | |||
|data=Sanctions (санкций) | |||
{{AttackData-Matrim | {{AttackData-Matrim | ||
|Total Damage= | |Total Damage=10 | ||
|Permanent Damage= | |Permanent Damage=10 | ||
|Guard= Mid | |Guard= Mid/High | ||
|Gauge= | |Gauge= | ||
|Cancel= | |Cancel=N/A | ||
|Startup= | |||
|Active= | |||
|Recovery= | |||
|Hit Adv= | |||
|Block Adv= | |||
|description= Decent DP with a tricky overhead landing attack. Mostly used to end combos and occasionally used to anti-air jump-ins.<br> | |||
623.B comes out a little quicker but has the worst vertical range. Hits twice, second hit is an overhead. | |||
}} | |||
{{AttackData-Matrim | |||
|Total Damage=22 | |||
|Permanent Damage=11 | |||
|Guard= Mid/High | |||
|Gauge= | |||
|Cancel=N/A | |||
|Startup= | |||
|Active= | |||
|Recovery= | |||
|Hit Adv= | |||
|Block Adv= | |||
|description= 623.D has much more vertical range and is slightly slower. Hits three times, 3rd hit is an overhead. | |||
}} | |||
{{AttackData-Matrim | |||
|Total Damage=30 | |||
|Permanent Damage=30 | |||
|Guard= Mid/High | |||
|Gauge= | |||
|Cancel=N/A | |||
|Startup= | |Startup= | ||
|Active= | |Active= | ||
| Line 635: | Line 663: | ||
|Hit Adv= | |Hit Adv= | ||
|Block Adv= | |Block Adv= | ||
|description= | |description=Dash 623.K has the best vertical range and a ton of air time. Hits 5 times, 5th hit is an overhead. | ||
}} | }} | ||
}} | }} | ||
| Line 649: | Line 674: | ||
|image2=Matrimelee Olof 214A-C 2.png | |image2=Matrimelee Olof 214A-C 2.png | ||
|caption2= Second Kick | |caption2= Second Kick | ||
|name=Sudden Attack (внезапное нападение) | |name=214.B ''or'' 214.D | ||
|data=Sudden Attack (внезапное нападение) | |||
{{AttackData-Matrim | {{AttackData-Matrim | ||
|Total Damage= | |Total Damage=20 | ||
|Permanent Damage= | |Permanent Damage=10 | ||
|Guard= Mid | |Guard= Mid | ||
|Gauge= | |Gauge= | ||
|Cancel= | |Cancel=N/A | ||
|Startup= | |||
|Active= | |||
|Recovery= | |||
|Hit Adv= | |||
|Block Adv= | |||
|description=First hit is air unblockable.<br>The light version is the fastest and can combo off of most normals; but is a Soft WallSlam on hit, which allows the opponent to recovery roll after the WallSlam. | |||
}} | |||
{{AttackData-Matrim | |||
|Total Damage=22 | |||
|Permanent Damage=22 | |||
|Guard=Mid | |||
|Gauge= | |||
|Cancel=N/A | |||
|Startup= | |||
|Active= | |||
|Recovery= | |||
|Hit Adv= | |||
|Block Adv= | |||
|description=First hit is air unblockable.<br> Just like 214.B but faster, does slightly more damage and actually creates a Hard WallSlam on hit. However, it's a little harder to combo into. | |||
}} | |||
{{AttackData-Matrim | |||
|Total Damage=30 | |||
|Permanent Damage=30 | |||
|Guard=Mid | |||
|Gauge | |||
|Cancel=N/A | |||
|Startup= | |Startup= | ||
|Active= | |Active= | ||
| Line 662: | Line 713: | ||
|Hit Adv= | |Hit Adv= | ||
|Block Adv= | |Block Adv= | ||
|description= | |description=Air Unblockable.<br> Dash Enhanced 214.K strengthens the move, adding an additional kick and creates a Hard WallSlam on hit. It is much harder to combo into. | ||
}} | }} | ||
}} | }} | ||
| Line 674: | Line 724: | ||
|image2=Matrimelee Olof J.214B-D 2.png | |image2=Matrimelee Olof J.214B-D 2.png | ||
|caption2= Second Kick | |caption2= Second Kick | ||
|name=By The Squares (По Квадратам) | |name=j.214.B ''or'' j.214.D | ||
|data=By The Squares (По Квадратам) | |||
{{AttackData-Matrim | {{AttackData-Matrim | ||
|Total Damage= | |Total Damage=20 | ||
|Permanent Damage= 10 | |Permanent Damage= 10 | ||
|Guard= Mid | |Guard= Mid | ||
|Gauge= | |Gauge= | ||
|Cancel= | |Cancel=N/A | ||
|Startup= | |||
|Active= | |||
|Recovery= | |||
|Hit Adv= | |||
|Block Adv= | |||
|description= The air version of 214.K but with different properties. This move launches the opponent for a juggle instead of causing a Hard WallSlam.<br> | |||
The first kick is horizontal, so it's very easy to catch the opponent with. However, this move is really hard to use against grounded because the 2nd kick will miss if executed too soon. | |||
:*The light version does the same amount of damage but doesn't launch as high as the heavy version nor does it have a follow-up. | |||
:*The heavy version is faster, launches higher, and has a follow-up which is listed below. | |||
}} | |||
}} | |||
{{MoveData | |||
|image=MM_Olof_J214D_Followup.png | |||
|caption=Follow-up to j.214.D | |||
|name=j.214.D > 214.D | |||
|data= | |||
{{AttackData-Matrim | |||
|Total Damage=27 | |||
|Permanent Damage=13 | |||
|Guard=Mid | |||
|Gauge= | |||
|Cancel=N/A | |||
|Startup= | |Startup= | ||
|Active= | |Active= | ||
| Line 687: | Line 760: | ||
|Hit Adv= | |Hit Adv= | ||
|Block Adv= | |Block Adv= | ||
|description= | |description=Follow-up to J.214.D Just input 214.D immediately after to do an extra kick that fires an upward projectile, knocking the opponent out of the air.<br>Damge is totaled with j.214.D. | ||
}} | }} | ||
}} | }} | ||
| Line 695: | Line 766: | ||
==Super Moves== | ==Super Moves== | ||
=== | ===Stress Shot=== | ||
{{MoveData | {{MoveData | ||
| Line 701: | Line 772: | ||
|caption= Dashing | |caption= Dashing | ||
|image2=Matrimelee Olof cl.5D.png | |image2=Matrimelee Olof cl.5D.png | ||
|caption2= | |caption2= First hit | ||
|name= | |name=236-3214.D | ||
|data=Blockade (Блокада) | |||
{{AttackData-Matrim | {{AttackData-Matrim | ||
|Total Damage= 50 | |Total Damage= 50 | ||
| Line 709: | Line 780: | ||
|Guard= Mid | |Guard= Mid | ||
|Gauge= | |Gauge= | ||
|Cancel= | |Cancel=N/A | ||
|Startup= | |Startup= | ||
|Active= | |Active= | ||
| Line 715: | Line 786: | ||
|Hit Adv= | |Hit Adv= | ||
|Block Adv= | |Block Adv= | ||
|description= After the flash, Olof dashes | |description= Air Unblockable.<br> | ||
After the super flash, Olof dashes up with a kick similar to his cl.5D. If the kick connects, Olof will throw his sunglasses into the air and unleash a 14 hit storm of kicks and finish with a launching kick. Olof will then catch his sunglasses, putting them back on. The starting dash is start-up invincible and can be used as a great mid-ranged punish tool, however, his invincibility ends when the first starting kick comes out. Easily one of the coolest supers in the game. Landing this requires hard read or a set-up using 2.CD. | |||
}} | }} | ||
}} | }} | ||
=== | ===Ippatsu Ougi=== | ||
{{MoveData | {{MoveData | ||
|image=Matrimelee Olof Ippatsu Ougi.png | |image=Matrimelee Olof Ippatsu Ougi.png | ||
|caption= Very extreme punch | |caption= Very extreme punch<br>(really big punch) | ||
|name= | |name=4146.C | ||
|data=In An Extreme Case (Крайний Случай) | |||
{{AttackData-Matrim | {{AttackData-Matrim | ||
|Total Damage= 90 | |Total Damage= 90 | ||
| Line 730: | Line 803: | ||
|Guard= Unblockable | |Guard= Unblockable | ||
|Gauge= | |Gauge= | ||
|Cancel= | |Cancel=N/A | ||
|Startup= | |Startup= | ||
|Active= | |Active= | ||
| Line 736: | Line 809: | ||
|Hit Adv= | |Hit Adv= | ||
|Block Adv= | |Block Adv= | ||
|description= This move | |description= Olof punches you really hard.<br> | ||
: | This move is extremely hard to land and requires special set-ups. Thanks to its massive amount of invincibility frames and extreme length, it can be used as a tool to read oncoming attacks. There are a few drawbacks to this super:<br> | ||
: | :*On hit, Olof takes 40 points of damage. This health is recoverable and it cannot KO Olof. | ||
:*Easy to avoid. All back dashes have invincibility frames and can easily be avoided raw. | |||
:*This super puts his hitbox in a very weird state and is sort of a pseudo-jump. When Olof recovers, he must always recover to the same spot making weird scenarios. Here is an example of the move [https://twitter.com/royshark/status/1275883496884576262 '''teleporting Hikaru'''] to the other side of the screen. <br> | |||
Olof also has a '''fake-out''' version of this super that allows him to cancel the recovery of moves. | |||
:*Input '''4146.A''' to use his fake-out version. This only consumes ''1 Stress Meter''. | |||
:*Used for his Advanced combos. Super stylish combos utilize this tool | |||
}} | }} | ||
}} | }} | ||
| Line 752: | Line 832: | ||
| colspan="6" align="center" | '''BnB Combos''' | | colspan="6" align="center" | '''BnB Combos''' | ||
|- | |- | ||
|cl. | |cl.a > cl.a > cl.a xx 214.B | ||
| | |30 | ||
| | |15 | ||
| | | | ||
|- | |- | ||
|cl. | |cl.a > cl.a > cl.a > 3.b (1 hit) xx 214.D | ||
| | |35 | ||
| | |35 | ||
| | | | ||
|- | |- | ||
|cl. | |cl.b > cl.b > cl.b > B > 3.B (1 hit) xx 214.D | ||
| | |33 | ||
| | |33 | ||
| | |Tap B, don't mash or the combo will shorten. | ||
|- | |- | ||
|6.A xx 214.D | |6.A xx 214.D | ||
| | |32 | ||
| | |32 | ||
| | |||
|- | |||
|6.A > 5.A > 3.B (1 hit) xx 214.D | |||
|36 | |||
|36 | |||
| | | | ||
|- | |- | ||
|9.B | |9.B > cl.B > B xx 214.D | ||
| | |34 | ||
| | |34 | ||
| | | | ||
|- | |- | ||
|9.B | |9.B > cl.B xx 623.D | ||
| | |31 | ||
| | |15 | ||
| | | | ||
|- | |- | ||
|9.B | |9.B > cl.C > 3.B (1 hit) xx 214.D | ||
| | |38 | ||
| | |38 | ||
| | | | ||
|- | |- | ||
|2.CD xx | |2.CD xx 236-3214.D | ||
| | |62 | ||
| | |31 | ||
|Requires 1 Stress Meter. | |Requires 1 Stress Meter. Cancel immediately on hit. Punishable on hit, use to kill. | ||
|- | |- | ||
|2.CD xx 4146.C | |2.CD xx 4146.C | ||
| | |80 | ||
| | |40 | ||
|Requires 2 Stress Meter. | |Requires 2 Stress Meter. Cancel immediately on hit. Hurts yourself for 40HP, use to kill | ||
|- | |- | ||
| colspan="6" align="center" | '''Intermediate Combos''' | | colspan="6" align="center" | '''Intermediate Combos''' | ||
|- | |- | ||
| | |h.9.D > D > j.214.D > 2.C > 3.B (1 hit) xx 623.D | ||
| | |54 | ||
| | |27 | ||
| | |hop 9.D must hit low for this to work. Works mid-screen. | ||
|- | |- | ||
| | |(Corner Only) h.9.D > D xx J.214.D > cl.C > D | ||
| | |48 | ||
| | |24 | ||
| | | | ||
|- | |- | ||
| | |9.D > D >> 2.CD xx 236-3214.D | ||
| | |72 | ||
| | |36 | ||
| | |Requires 1 Stress Meter. Cancel immediately on hit. Punishable on hit, use to kill. | ||
|- | |- | ||
| | |9.D > D > 2.CD xx 4146.C | ||
| | |81 | ||
| | |40 | ||
| | |Requires 2 Stress Meter. Cancel immediately on hit. Hurts yourself for 40HP, use to kill | ||
|- | |- | ||
| | | colspan="6" align="center" | '''Advanced Combos''' | ||
| | |||
|- | |- | ||
| | |9.B > cl.A ~> 2.B xx 214.D | ||
| | |38 | ||
| | |19 | ||
| | |cl.A ~> 2.B requires a P-Link | ||
|- | |- | ||
| | |9.B > cl.A ~> 2.C xx 214.D | ||
| | |43 | ||
| | |43 | ||
|cl.A ~> 2.C requires a P-Link | |||
|- | |- | ||
| | |9.B > cl.A ~> 2.C > 6.A xx 214.D | ||
| | |47 | ||
| | |47 | ||
|cl.C | |cl.A ~> 2.C requires a P-Link. | ||
|- | |- | ||
| | |h.9.D > D xx J.214.D >> 623.D | ||
| | |47 | ||
| | |23 | ||
| | | | ||
|- | |- | ||
|9.D > D | |(Corner Only) 9.D > D > 2.CD xx 4146.A >> 623.K | ||
| | |51 | ||
| | |25 | ||
|Requires 1 Stress Meter. | |You must instantly cancel your run to connect EX dp. Requires 1 Stress Meter. | ||
|- | |- | ||
| | |66.P xx 4146.A > 2.C > 3.B (1 hit) xx 4146.A > 2.B > 3.B xx 236.B | ||
|53 | |||
|26 | |||
|Requires 2 Stress Meter. | |||
| | |||
| | |||
| | |||
|- | |- | ||
|h.9.D > D xx j.214.D > j.214.D (x4) > 214.D | |||
|98 | |||
|49 | |||
|All j.214.D after the first one must be done instantly after leaving the ground. TAS combo? | |||
|} | |} | ||
Latest revision as of 15:32, 13 December 2020
Introduction
Perfect footwork and equipped with kicks that have several miles of range.
Olof is the bodyguard of Princess Sissy. He is asked to enter the tournament for her pleasure, to test himself. Even though one of his arms is wounded and bandaged, he is powerful enough to defeat opponents with only his legs. He is often calm and reserved, and he is very chivalrous toward women.
Overview
| Strengths | Weaknesses |
|---|---|
|
|
Strategy
(Rebuilding...)
Normal Moves
Standing Normals
Note: Despite the appearances, none of the Olof's standing normals can be crouched.
5A
5.A
|
|---|
5B
5.B
|
|---|
5C
5.C
|
|---|
5D
5.D
|
|---|
5CD
5.CD
|
|---|
Close Standing Normals
cl.5A
cl.5A
|
|---|
cl.5B
cl.5B
|
|---|
cl.5C
cl.C
|
|---|
cl.5D
cl.D
|
|---|
Crouching Normals
2A
2.A
|
|---|
2B
2.B
|
|---|
2C
2.C
|
|---|
2D
2.D
|
|---|
2CD
2.CD
|
|---|
Jumping Normals
j.A
8.A
|
|---|
j.B
8.B
|
|---|
8C
8.C
|
|---|
8D
8.D
|
|---|
j.C
7.C or 9.C
|
|---|
j.D
7.D or 9.D First kick First kick Second kick (7/9.D > D) Second kick
(7/9.D > D) |
|---|
Dashing Normals
66P
66.A or 66.C
|
|---|
66K
66.B or 66.D
|
|---|
Command Normals
6A
6.A
|
|---|
5A
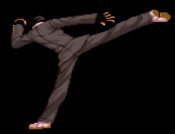
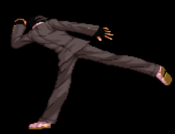
3.B First kick First kick Second Kick Second Kick
|
|---|
Special Moves
Counter Trick
Counter Trick Stance when counter is ready Stance when counter is ready
|
|---|
Battle
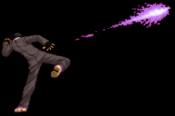
236.A/B/C/D A Sends the projectile straight foward, C version is faster A Sends the projectile straight foward, C version is faster B Sends the projectile downards, expands when touches the ground B Sends the projectile downards, expands when touches the ground D Sends the projectile upwards with a 35° angle aproximately. D Sends the projectile upwards with a 35° angle aproximately.
|
Battle (Битва) |
|---|
Sanctions
623.B or 623.D First hit First hit Final hit Final hit
|
Sanctions (санкций) |
|---|
Sudden Attack
214.B or 214.D First Kick First Kick Second Kick Second Kick
|
Sudden Attack (внезапное нападение) |
|---|
By The Squares
j.214.B or j.214.D First Kick First Kick Second Kick Second Kick
|
By The Squares (По Квадратам) |
|---|
j.214.D > 214.D Follow-up to j.214.D Follow-up to j.214.D
|
|---|
Super Moves
Stress Shot
236-3214.D Dashing Dashing First hit First hit
|
Blockade (Блокада) |
|---|
Ippatsu Ougi
4146.C Very extreme punch (really big punch) Very extreme punch
(really big punch) |
In An Extreme Case (Крайний Случай) |
|---|
Combos
| Combo | Total Damage | Permanant Damage | Notes | ||
| BnB Combos | |||||
| cl.a > cl.a > cl.a xx 214.B | 30 | 15 | |||
| cl.a > cl.a > cl.a > 3.b (1 hit) xx 214.D | 35 | 35 | |||
| cl.b > cl.b > cl.b > B > 3.B (1 hit) xx 214.D | 33 | 33 | Tap B, don't mash or the combo will shorten. | ||
| 6.A xx 214.D | 32 | 32 | |||
| 6.A > 5.A > 3.B (1 hit) xx 214.D | 36 | 36 | |||
| 9.B > cl.B > B xx 214.D | 34 | 34 | |||
| 9.B > cl.B xx 623.D | 31 | 15 | |||
| 9.B > cl.C > 3.B (1 hit) xx 214.D | 38 | 38 | |||
| 2.CD xx 236-3214.D | 62 | 31 | Requires 1 Stress Meter. Cancel immediately on hit. Punishable on hit, use to kill. | ||
| 2.CD xx 4146.C | 80 | 40 | Requires 2 Stress Meter. Cancel immediately on hit. Hurts yourself for 40HP, use to kill | ||
| Intermediate Combos | |||||
| h.9.D > D > j.214.D > 2.C > 3.B (1 hit) xx 623.D | 54 | 27 | hop 9.D must hit low for this to work. Works mid-screen. | ||
| (Corner Only) h.9.D > D xx J.214.D > cl.C > D | 48 | 24 | |||
| 9.D > D >> 2.CD xx 236-3214.D | 72 | 36 | Requires 1 Stress Meter. Cancel immediately on hit. Punishable on hit, use to kill. | ||
| 9.D > D > 2.CD xx 4146.C | 81 | 40 | Requires 2 Stress Meter. Cancel immediately on hit. Hurts yourself for 40HP, use to kill | ||
| Advanced Combos | |||||
| 9.B > cl.A ~> 2.B xx 214.D | 38 | 19 | cl.A ~> 2.B requires a P-Link | ||
| 9.B > cl.A ~> 2.C xx 214.D | 43 | 43 | cl.A ~> 2.C requires a P-Link | ||
| 9.B > cl.A ~> 2.C > 6.A xx 214.D | 47 | 47 | cl.A ~> 2.C requires a P-Link. | ||
| h.9.D > D xx J.214.D >> 623.D | 47 | 23 | |||
| (Corner Only) 9.D > D > 2.CD xx 4146.A >> 623.K | 51 | 25 | You must instantly cancel your run to connect EX dp. Requires 1 Stress Meter. | ||
| 66.P xx 4146.A > 2.C > 3.B (1 hit) xx 4146.A > 2.B > 3.B xx 236.B | 53 | 26 | Requires 2 Stress Meter. | ||
| h.9.D > D xx j.214.D > j.214.D (x4) > 214.D | 98 | 49 | All j.214.D after the first one must be done instantly after leaving the ground. TAS combo? | ||

