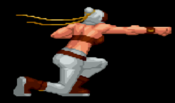
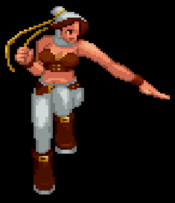
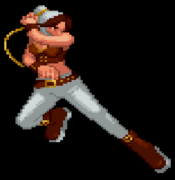
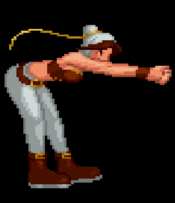
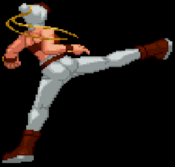
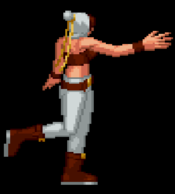
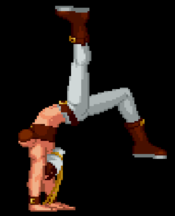
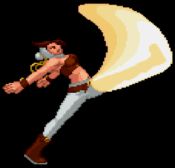
Matrimelee/Anny: Difference between revisions
m (→Close Standing) |
m (→Introduction) |
||
| (41 intermediate revisions by 3 users not shown) | |||
| Line 1: | Line 1: | ||
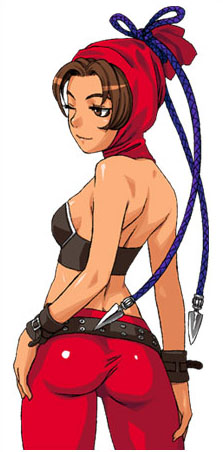
[[Image:anny_portrait.jpg| | [[Image:anny_portrait.jpg|400px|thumb|right|Anny Hamilton]] | ||
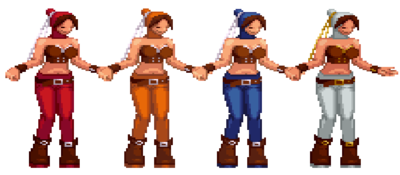
[[Image:Anny Palettes.png|400px|thumb|right|Color]] | [[Image:Anny Palettes.png|400px|thumb|right|Color]] | ||
{{TOClimit|3}} | |||
== Introduction == | == Introduction == | ||
Anny was invited to the Matrimelee tournament with the prize of getting engaged to the prince of a | Anny was invited to the Matrimelee tournament with the prize of getting engaged to the prince of a certain country. She didn't have any interest in getting involved until she later found out that Keith Wayne was invited to participate. When Anny found out about Keith's decision to participate she entered the tournament to stop Keith from winning in a brunt of jealousy. | ||
== Overview == | == Overview == | ||
| Line 11: | Line 12: | ||
|- style="vertical-align:top;text-align:left" | |- style="vertical-align:top;text-align:left" | ||
| style="width: 50%;"| | | style="width: 50%;"| | ||
* | * Long A and B normals that are excellent poking tools. | ||
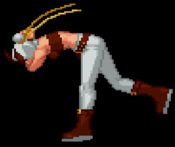
* | * Decently fast 6.B overhead that can be canceled out of most moves. | ||
* | * Ippatsu Ougi can combo from almost any normal. | ||
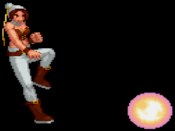
* Swannie Crash is | * Swannie Crash is a rather large projectile with decent recovery frames. | ||
* Excellent 9.C. Can | * Excellent 9.C with extremely good range and hitbox. Can also easily cross-up. | ||
* | * Stress Shot deals 50 permanent damage if landed. | ||
* Rainbow Rise (C and Dash versions) can be followed up by an air grab in the corner for additional damage. | |||
| style="width: 50%;"| | | style="width: 50%;"| | ||
* Low damage output without meter or counter hits. | * Low damage output without meter or counter hits. | ||
* | * 2.CD and 5.CD have slow startup. | ||
* No | * No quick Anti-Airs. | ||
* Limited Combo Potential. | * Limited Combo Potential. | ||
* | * Anny Dynamic is punishable on hit. | ||
* 6.B | * 6.B can be beaten out by faster moves. | ||
* Stress Shot cannot be comboed into due to her roll start-up | * Stress Shot cannot be comboed into due to her roll start-up. | ||
* Her pressure can easily be jumped or rolled | * Stress Shot can be easily escaped if jumped out of or if Anny is grabbed during her roll start-up. | ||
* Photon Burst | * Her zoning pressure can easily be jumped over or rolled through. | ||
* Photon Burst is high risk, low reward. | |||
|- | |- | ||
|} | |} | ||
| Line 34: | Line 35: | ||
== Strategy == | == Strategy == | ||
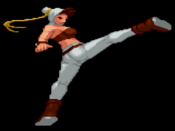
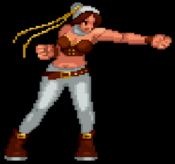
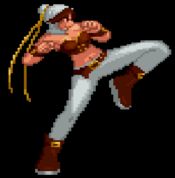
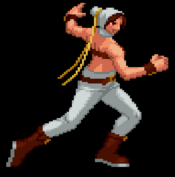
You will need to be on your toes playing Anny. She is very limited in | You will need to be on your toes playing Anny. She's essentially a zoner with dangerous 6.B confirms. However, Anny is very limited in zoning, thanks to rolls and back dashes, so close range conditioning is your best option for any major damage. She can use her 236.A/C and 5.B, which is an amazingly long poke, to keep the opponent properly spaced. Photon burst, j.236.A/C is punishable at point-blank ranges but can be done at full-screen to bait approaches. However, be warned photon burst is highly punishable if the opponent rolls or does a super jump. It's important to not overdo your zoning so the opponent doesn't catch on. It is also very important to deny jump-ins with 2.CD, since you can reset an opponent back to neutral off of a punish confirm. If they do manage to get close, mix it up with her 6.B overhead. Anny's 6.B can link into 623.C and 46.A-13.C (level 2 super). If you can condition your opponent into blocking low and staying still thanks to the fear of a 6.A overhead; you can now use your 63214-63214.C (level 1 super) command grab to get some solid 50 permanent damage in. However, this isn't guaranteed and your opponent can jump and easily punish if they identify the command grab's start-up roll. If you manage to get cornered, do not use your projectiles or DP unless it's in a combo. You'll get punished a lot more easier. In the corner, you'll want to rely on your close-up options, like 6.B and Anny's long A/B normals, to get out. | ||
Anny | Anny can play somewhat aggressively if the opponent allows it to happen or doesn't know how to deal with Anny. Anny's 9.C is an amazing button and can easily cross-up for a full combo. Anny's combo game is rather limited but isn't entirely grounded like some of the other characters. Her 3.A, 2.CD and 6.B can catch jumps from opponents trying to jump away and land a 623.C (heavy rainbow rise) afterward. If you somehow manage to corner someone as Anny, your combo game is dramatically increased thanks to 623.C (heavy rainbow rise) having a grab follow-up in the corner and instant overhead 8.C. But, it's rare to get someone cornered with Anny. | ||
In Summary, play keep away, use your long A/B poke normals, use 6.B to mix the opponent up when they get close, condition them to crouch block to land your command grab super, and don't use projectiles point-blank. | |||
==Move List== | |||
=== Far Standing Normals === | === Far Standing Normals === | ||
===== <span class="invisible-header"></span> ===== | |||
< | |||
{{MoveData | {{MoveData | ||
|image=Matrimelee_Anny_5A.png | |image=Matrimelee_Anny_5A.png | ||
| Line 63: | Line 65: | ||
}} | }} | ||
< | ===== <span class="invisible-header"></span> ===== | ||
{{MoveData | {{MoveData | ||
|image=Matrimelee_Anny_5B.png | |image=Matrimelee_Anny_5B.png | ||
| Line 84: | Line 86: | ||
}} | }} | ||
< | ===== <span class="invisible-header"></span> ===== | ||
{{MoveData | {{MoveData | ||
|image=Matrimelee_Anny_5C.png | |image=Matrimelee_Anny_5C.png | ||
| Line 105: | Line 107: | ||
}} | }} | ||
< | ===== <span class="invisible-header"></span> ===== | ||
{{MoveData | {{MoveData | ||
|image=Matrimelee_Anny_5D.png | |image=Matrimelee_Anny_5D.png | ||
| Line 127: | Line 129: | ||
=== Close Standing Normals === | === Close Standing Normals === | ||
===== <span class="invisible-header"></span> ===== | |||
< | |||
{{MoveData | {{MoveData | ||
|image=Matrimelee_Anny_clA.png | |image=Matrimelee_Anny_clA.png | ||
| Line 149: | Line 150: | ||
}} | }} | ||
< | ===== <span class="invisible-header"></span> ===== | ||
{{MoveData | {{MoveData | ||
|image=Matrimelee_Anny_clB.png | |image=Matrimelee_Anny_clB.png | ||
| Line 170: | Line 171: | ||
}} | }} | ||
< | ===== <span class="invisible-header"></span> ===== | ||
{{MoveData | {{MoveData | ||
|image=Matrimelee_Anny_clC 1.png | |image=Matrimelee_Anny_clC 1.png | ||
| Line 193: | Line 194: | ||
}} | }} | ||
< | ===== <span class="invisible-header"></span> ===== | ||
{{MoveData | {{MoveData | ||
|image=Matrimelee_Anny_clD.png | |image=Matrimelee_Anny_clD.png | ||
| Line 214: | Line 215: | ||
}} | }} | ||
=== Crouching === | === Crouching Normals === | ||
===== <span class="invisible-header"></span> ===== | |||
< | |||
{{MoveData | {{MoveData | ||
|image=Matrimelee_Anny_2A.png | |image=Matrimelee_Anny_2A.png | ||
| Line 237: | Line 237: | ||
}} | }} | ||
< | ===== <span class="invisible-header"></span> ===== | ||
{{MoveData | {{MoveData | ||
|image=Matrimelee_Anny_2B.png | |image=Matrimelee_Anny_2B.png | ||
| Line 258: | Line 258: | ||
}} | }} | ||
< | ===== <span class="invisible-header"></span> ===== | ||
{{MoveData | {{MoveData | ||
|image=Matrimelee_Anny_2C.png | |image=Matrimelee_Anny_2C.png | ||
| Line 279: | Line 279: | ||
}} | }} | ||
< | ===== <span class="invisible-header"></span> ===== | ||
{{MoveData | {{MoveData | ||
|image=Matrimelee_Anny_2D.png | |image=Matrimelee_Anny_2D.png | ||
|caption= | |caption= | ||
|name= | |name=2.D | ||
|data= | |data= | ||
{{AttackData-Matrim | {{AttackData-Matrim | ||
| Line 300: | Line 300: | ||
}} | }} | ||
=== Jumping === | === Jumping Normals=== | ||
===== <span class="invisible-header"></span> ===== | |||
< | |||
{{MoveData | {{MoveData | ||
|image=Matrimelee_Anny_8A.png | |image=Matrimelee_Anny_8A.png | ||
|caption= | |caption= | ||
|name= | |name=8.A | ||
|data= | |data= | ||
{{AttackData-Matrim | {{AttackData-Matrim | ||
| Line 319: | Line 318: | ||
|Hit Adv= | |Hit Adv= | ||
|Block Adv= | |Block Adv= | ||
|description= | |description=Extremely active but has little hitstun. Decent air to air but can get stuffed out by better air normals. Can cross-up. | ||
}} | }} | ||
}} | }} | ||
< | ===== <span class="invisible-header"></span> ===== | ||
{{MoveData | {{MoveData | ||
|image=Matrimelee_Anny_8B.png | |image=Matrimelee_Anny_8B.png | ||
|caption= | |caption= | ||
|name= | |name=8.B | ||
|data= | |data= | ||
{{AttackData-Matrim | {{AttackData-Matrim | ||
| Line 340: | Line 339: | ||
|Hit Adv= | |Hit Adv= | ||
|Block Adv= | |Block Adv= | ||
|description= Anny's best | |description=Anny's best jump normal. Good vertical range hitbox but has less hitstun than 8.C and 8.D. Can cross-up. | ||
}} | }} | ||
}} | }} | ||
< | ===== <span class="invisible-header"></span> ===== | ||
{{MoveData | {{MoveData | ||
|image=Matrimelee_Anny_8C.png | |image=Matrimelee_Anny_8C.png | ||
|caption= | |caption= | ||
|name= | |name=8.C | ||
|data= | |data= | ||
{{AttackData-Matrim | {{AttackData-Matrim | ||
| Line 361: | Line 360: | ||
|Hit Adv= | |Hit Adv= | ||
|Block Adv= | |Block Adv= | ||
|description= | |description= Decent air normal that can be used for instant overheads. | ||
}} | }} | ||
}} | }} | ||
< | ===== <span class="invisible-header"></span> ===== | ||
{{MoveData | {{MoveData | ||
|image=Matrimelee_Anny_8D.png | |image=Matrimelee_Anny_8D.png | ||
|caption= | |caption= | ||
|name= | |name=8.D | ||
|data= | |data= | ||
{{AttackData-Matrim | {{AttackData-Matrim | ||
| Line 382: | Line 381: | ||
|Hit Adv= | |Hit Adv= | ||
|Block Adv= | |Block Adv= | ||
|description= | |description=Has more horizontal range than 8.B but less vertical range. | ||
}} | }} | ||
}} | }} | ||
< | ===== <span class="invisible-header"></span> ===== | ||
{{MoveData | {{MoveData | ||
|image=Matrimelee_Anny_9C.png | |image=Matrimelee_Anny_9C.png | ||
|caption= | |caption= | ||
|name= | |name=7.C ''or'' 9.C | ||
|data= | |data= | ||
{{AttackData-Matrim | {{AttackData-Matrim | ||
| Line 403: | Line 402: | ||
|Hit Adv= | |Hit Adv= | ||
|Block Adv= | |Block Adv= | ||
|description= | |description= Excellent jump button. It has excellent horizontal range and can be used in hyper hop combos. Can cross-up. | ||
}} | }} | ||
}} | }} | ||
< | ===== <span class="invisible-header"></span> ===== | ||
{{MoveData | {{MoveData | ||
|image=Matrimelee_Anny_9D.png | |image=Matrimelee_Anny_9D.png | ||
|caption= | |caption= | ||
|name= | |name=7.C ''or'' 9.D | ||
|data= | |data= | ||
{{AttackData-Matrim | {{AttackData-Matrim | ||
| Line 424: | Line 423: | ||
|Hit Adv= | |Hit Adv= | ||
|Block Adv= | |Block Adv= | ||
|description= | |description=Extremely good air-to-air option but a sub-par jump-in. Can cross-up. | ||
}} | }} | ||
}} | }} | ||
=== Dashing Normals === | === Dashing Normals === | ||
===== <span class="invisible-header"></span> ===== | |||
< | |||
{{MoveData | {{MoveData | ||
|image=Matrimelee_Anny_66A.png | |image=Matrimelee_Anny_66A.png | ||
|caption= | |caption= | ||
|name= | |name=66.A ''or'' C | ||
|data= | |data= | ||
{{AttackData-Matrim | {{AttackData-Matrim | ||
| Line 447: | Line 445: | ||
|Hit Adv= | |Hit Adv= | ||
|Block Adv= | |Block Adv= | ||
|description= | |description=The BIG Slap. Similar to 5.C but slides further. Great to confirm a dash enhanced 623.A/C. | ||
}} | }} | ||
}} | }} | ||
< | ===== <span class="invisible-header"></span> ===== | ||
{{MoveData | {{MoveData | ||
|image=Matrimelee_Anny_66D.png | |image=Matrimelee_Anny_66D.png | ||
|caption= | |caption= | ||
|name= | |name=66.B ''or'' D | ||
|data= | |data= | ||
{{AttackData-Matrim | {{AttackData-Matrim | ||
| Line 468: | Line 466: | ||
|Hit Adv= | |Hit Adv= | ||
|Block Adv= | |Block Adv= | ||
|description= | |description=Same as 5.D but with some sliding and extra damage. Nice range for punishes. | ||
}} | }} | ||
}} | }} | ||
=== Command Normals === | === Command Normals === | ||
===== <span class="invisible-header"></span> ===== | |||
< | |||
{{MoveData | {{MoveData | ||
|image=Matrimelee_Anny_3A.png | |image=Matrimelee_Anny_3A.png | ||
|caption= | |caption= | ||
|name= | |name=3.A | ||
|data= | |data= | ||
{{AttackData-Matrim | {{AttackData-Matrim | ||
| Line 491: | Line 488: | ||
|Hit Adv= | |Hit Adv= | ||
|Block Adv= | |Block Adv= | ||
|description= | |description=Air Unblockable.<br>Mainly used to extend combos but can be used as a psuedo anti-air. However, it's difficult to use as an anti-air due to it's forward slide. Can combo into all specials excluding photon burst. | ||
}} | }} | ||
}} | }} | ||
< | ===== <span class="invisible-header"></span> ===== | ||
{{MoveData | {{MoveData | ||
|image=Matrimelee_Anny_6B 1.png | |image=Matrimelee_Anny_6B 1.png | ||
| Line 501: | Line 498: | ||
|image2=Matrimelee_Anny_6B 2.png | |image2=Matrimelee_Anny_6B 2.png | ||
|caption2= Second Kick | |caption2= Second Kick | ||
|name= | |name=6.B | ||
|data= | |data= | ||
{{AttackData-Matrim | {{AttackData-Matrim | ||
|Total Damage= | |Total Damage=15 | ||
|Permanent Damage= | |Permanent Damage=7 | ||
|Guard=High | |Guard=High | ||
|Gauge= | |Gauge= | ||
|Cancel=Special<br>Super | |Cancel=Special<br>Super | ||
|Startup= | |Startup= | ||
|Active= | |Active= | ||
| Line 514: | Line 511: | ||
|Hit Adv= | |Hit Adv= | ||
|Block Adv= | |Block Adv= | ||
|description= | |description=Air Unblockable.<br>Decently quick overhead that can be used to extend combos. Essential tool for Anny's offensive game, both to mix up and extend combos. Can lead to different combo enders from midscreen based on if one or two hits connect. | ||
}} | }} | ||
}} | }} | ||
== Special Moves == | === Special Moves === | ||
===== <span class="invisible-header"></span> ===== | |||
=== | |||
< | |||
{{MoveData | {{MoveData | ||
|image=Matrimelee_Anny_236AC.png | |image=Matrimelee_Anny_236AC.png | ||
|caption= | |caption= | ||
|name= | |name=Swannie Crash | ||
|data= | |subtitle=236.A/C | ||
|data= | |||
{{AttackData-Matrim | {{AttackData-Matrim | ||
|Total Damage=16 | |Total Damage=16 | ||
| Line 533: | Line 528: | ||
|Guard=Mid | |Guard=Mid | ||
|Gauge= | |Gauge= | ||
|Cancel= | |Cancel=N/A | ||
|Startup= | |Startup= | ||
|Active= | |Active= | ||
| Line 539: | Line 534: | ||
|Hit Adv= | |Hit Adv= | ||
|Block Adv= | |Block Adv= | ||
|description= | |description=Decently fast projectile that has two versions. | ||
: | : 236.B comes out horizontally. | ||
: 236.D starts horizontally but travels up into the corner. | |||
}} | }} | ||
}} | }} | ||
=== | ===== <span class="invisible-header"></span> ===== | ||
< | |||
{{MoveData | {{MoveData | ||
|image=Matrimelee_Anny_6236AC.png | | name = Rainbow Rise | ||
|caption=The hitbox follows the rainbow. | | input = 623.P | ||
| | | subtitle = | ||
|data= | | image = Matrimelee_Anny_6236AC.png | ||
| caption = The hitbox follows the rainbow. | |||
| linkname = | |||
| data = | |||
{{AttackData-Matrim | |||
| version = 623 A | |||
|Total Damage = 23 | |||
|Permanent Damage = 12 | |||
|Guard = Mid | |||
|Gauge = | |||
|Cancel = N/A | |||
|Startup = | |||
|Active = | |||
|Recovery = | |||
|Hit Adv = | |||
|Block Adv = | |||
|description = 2 hits. Beats out most jump-ins but can trade with better priority normals. | |||
}} | }} | ||
{{AttackData-Matrim | |||
{{ | | header = no | ||
| | | version = 623 C | ||
| | |Total Damage = 23 | ||
|Permanent Damage = 12 | |||
|Guard = Mid | |||
|Gauge = | |||
|Cancel = N/A | |||
|Startup = | |||
|Active = | |||
|Recovery = | |||
|Hit Adv = | |||
|Block Adv = | |||
|description = Same damage as A version but better vertical range and slightly slower startup. Can be followed up with an air grab in the corner. | |||
}} | }} | ||
{{AttackData-Matrim | |||
{{ | | header = no | ||
| version = Dashing 623 P | |||
| | |Total Damage = 28 | ||
| | |Permanent Damage = 14 | ||
|Guard = Mid | |||
|Gauge = | |||
|Cancel = N/A | |||
|Startup = | |||
|Active = | |||
|Recovery = | |||
|Hit Adv = | |||
|Block Adv = | |||
|description = It's best to only use this during combos due to it's large recovery. Can be followed up with an air grab in the corner. | |||
}} | }} | ||
}} | }} | ||
=== | ===== <span class="invisible-header"></span> ===== | ||
< | |||
{{MoveData | {{MoveData | ||
|image=Matrimelee_Anny_(D) D.png | | name = Anny Dynamic | ||
| | | input = [D] (X second hold) | ||
| | | subtitle = | ||
| | | image = Matrimelee_Anny_(D) D.png | ||
| image2 = Matrimelee_Anny_(D) D 2.png | |||
| caption = | |||
| linkname = | |||
| data = | |||
{{AttackData-Matrim | |||
| version = [D] (2 second hold) | |||
|Total Damage = 18 | |||
|Permanent Damage = 9 | |||
|Guard = High | |||
|Gauge = | |||
|Cancel = | |||
|Startup = | |||
|Active = | |||
|Recovery = | |||
|Hit Adv = -12 | |||
|Block Adv = | |||
|description = Must hold D for 2 in game seconds then release for the special to come out and launch the kick. Punishable both on block and on hit, so it should be avoided entirely. Can be used as a combo ender if you want to style. Safest from max range, but it's still punishable. | |||
}} | |||
{{AttackData-Matrim | {{AttackData-Matrim | ||
| header = no | |||
| version = [D] (4 second hold) | |||
|Total Damage = 25 | |||
|Permanent Damage = 12 | |||
|Guard = High | |||
|Gauge = | |||
|Cancel = | |||
|Startup = | |||
|Active = | |||
|Recovery = | |||
|Hit Adv = -9 | |||
|Block Adv = | |||
|description = If you hold D for more than 4 seconds Anny will release a boosted version of the move, doing more damage. Punishable both on block and on hit. Slightly safer than the 2 second version, but it's still -9 on hit. Can be used as a combo ender if you want to style. Safest from max range, but it's still punishable. | |||
}} | }} | ||
{{AttackData-Matrim | {{AttackData-Matrim | ||
| header = no | |||
| version = [D] (15 second hold) | |||
|Total Damage = 35 | |||
|Permanent Damage = 18 | |||
|Guard = High | |||
|Gauge = | |||
|Cancel = | |||
|Startup = | |||
|Active = | |||
|Recovery = | |||
|Hit Adv = | |||
|Block Adv = | |||
|description = If you hold D for more than 15 seconds Anny will release an even more boosted version of the move, doing the most damage. Safe on hit since it causes knockdown. Can be used as a combo ender if you want to style, but good luck actually holding D for 15 seconds. | |||
}} | }} | ||
}} | }} | ||
=== | ===== <span class="invisible-header"></span> ===== | ||
< | |||
{{MoveData | {{MoveData | ||
|image=Matrimelee_Anny_J.236AC.png | |image=Matrimelee_Anny_J.236AC.png | ||
|caption= | |caption= | ||
|name=J. | |name=Photon Burst | ||
|data= | |subtitle=J.236.A/C | ||
|data= | |||
{{AttackData-Matrim | {{AttackData-Matrim | ||
|Total Damage=16 | |Total Damage=16 | ||
| Line 667: | Line 669: | ||
|Hit Adv= | |Hit Adv= | ||
|Block Adv= | |Block Adv= | ||
|description=Anny will throw an energy ball to the ground, despite the | |description=Anny will throw an energy ball to the ground, despite the appearances this move is NOT an overhead. Has landing recovery frames no matter the jump height. Cannot be comboed into. | ||
: J. | : J.236.A will throw the projectile close to Anny | ||
: J. | : J.236.C will aim to the corner. | ||
}} | }} | ||
}} | }} | ||
== Super Moves == | === Super Moves === | ||
===== <span class="invisible-header"></span> ===== | |||
=== | |||
< | |||
{{MoveData | {{MoveData | ||
|image=Matrimelee_Anny_6321463214C.png | |image=Matrimelee_Anny_6321463214C.png | ||
|caption= | |caption=Cosmic Throw | ||
|name= | |name=Stress Shot | ||
|data= | |subtitle=63214~63214 C | ||
|data= | |||
{{AttackData-Matrim | {{AttackData-Matrim | ||
|Total Damage=50 | |Total Damage=50 | ||
| Line 688: | Line 688: | ||
|Guard=Grab | |Guard=Grab | ||
|Gauge= | |Gauge= | ||
|Cancel= | |Cancel=N/A | ||
|Startup= | |Startup= | ||
|Active= | |Active= | ||
| Line 694: | Line 694: | ||
|Hit Adv= | |Hit Adv= | ||
|Block Adv= | |Block Adv= | ||
|description=Anny will roll | |description=Anny will roll forward before grabbing the opponent. Has some start-up invincibility but can be grabbed like a normal roll. Cannot be comboed into. | ||
}} | }} | ||
}} | }} | ||
=== | ===== <span class="invisible-header"></span> ===== | ||
< | |||
{{MoveData | {{MoveData | ||
|image=Matrimelee_Anny_46A13C 1.png | |image=Matrimelee_Anny_46A13C 1.png | ||
|caption= | |caption=Angel Breath | ||
|image2=Matrimelee_Anny_46A13C 2.png | |image2=Matrimelee_Anny_46A13C 2.png | ||
|caption2= | |caption2=on hit | ||
|name= | |name=Ippatsu Ougi | ||
|data= | |subtitle=46A-13.C | ||
|data= | |||
{{AttackData-Matrim | {{AttackData-Matrim | ||
|Total Damage= | |Total Damage=70 | ||
|Permanent Damage= | |Permanent Damage=35 | ||
|Guard=Unblockable | |Guard=Unblockable | ||
|Gauge= | |Gauge= | ||
|Cancel= | |Cancel=N/A | ||
|Startup= | |Startup= | ||
|Active= | |Active= | ||
| Line 719: | Line 718: | ||
|Hit Adv= | |Hit Adv= | ||
|Block Adv= | |Block Adv= | ||
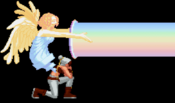
|description= | |description=Possibly the coolest super in the game. Excellent to end combos with but can be very tricky to land if you're not used to the motion. You can hold A to make it easier to input. | ||
}} | }} | ||
}} | }} | ||
| Line 727: | Line 725: | ||
{| border="1em" cellpadding="3" cellspacing="0" | {| border="1em" cellpadding="3" cellspacing="0" | ||
| align="center" style="background:#f0f0f0;"|'''Combo''' | | align="center" style="background:#f0f0f0;"|'''Combo''' | ||
| align="center" style="background:#f0f0f0;"|'''Damage''' | | align="center" style="background:#f0f0f0;"|'''Total Damage''' | ||
| align="center" style="background:#f0f0f0;"|'''Permanent Damage''' | |||
| align="center" style="background:#f0f0f0;"|'''Notes''' | | align="center" style="background:#f0f0f0;"|'''Notes''' | ||
|- | |- | ||
| colspan="6" align="center" | '''Combos''' | | colspan="6" align="center" | '''Basic Combos''' | ||
|- | |- | ||
| | |9.C >> 5.A > 5.A > C xx 236.C | ||
|34 | |||
|17 | |||
| | | | ||
|- | |- | ||
| | |9.C >> 5.A > 5.A > C xx 623.C | ||
|30 | |||
|15 | |||
|623.C can be followed up with an air throw in the corner for an additional 10 damage. | |||
|- | |||
|9.C >> cl.5C (1 hit) > 3.A xx 236.C | |||
|37 | |||
|18 | |||
| | | | ||
|- | |||
|9.C >> cl.5C (1 hit) > 3.A xx 623.C | |||
|34 | |||
|17 | |||
|623.C can be followed up with an air throw in the corner for an additional 10 damage. | |||
|- | |||
|9.C >> 2.A > 3.A xx 623.C | |||
|34 | |||
|17 | |||
|623.C can be followed up with an air throw in the corner for an additional 10 damage. | |||
|- | |||
|9.C >> 2.B > D xx 236.C | |||
|37 | |||
|18 | |||
| | | | ||
|- | |- | ||
| | |9.C >> 5.A > 5.A > C xx 46.A-13.C | ||
| | |69 | ||
| | |34 | ||
|Requires 2 Stress Meter. | |||
|- | |||
| colspan="6" align="center" | '''Intermediate Combos''' | |||
|- | |||
|9.D >> 2.CD (1 hit) > 6.B (2 hits) xx 623.C | |||
|42 | |||
|21 | |||
|623.C can be followed up with an air throw in the corner for an additional 10 damage. | |||
|- | |||
|9.D >> 2.CD (1 hit) > 6.B (2 hits) xx 46.A-13.C | |||
|77 | |||
|38 | |||
|Requires 2 Stress Meter. | |||
|- | |||
|[D] 9.C >. cl.5C (1 hit) > 3.A xx ]D[ | |||
|38 | |||
|19 | |||
|Hold D for 2 seconds. Punishable on hit. | |||
|- | |||
|[D] 9.C >. cl.5C (1 hit) > 3.A xx ]D[ | |||
|42 | |||
|21 | |||
|Hold D for 4 seconds. | |||
|- | |||
|[D] 9.C >> 5.A > 5.A > C xx ]D[ | |||
|34 | |||
|17 | |||
|Hold D for 2 seconds. Punishable on hit. | |||
|- | |||
|[D] 9.C >> 5.A > 5.A > C xx ]D[ | |||
|38 | |||
|19 | |||
|Hold D for more than 4 seconds. | |||
|- | |||
| colspan="6" align="center" | '''Advanced Combos''' | |||
|- | |- | ||
| | |(Cross-up) 9.C >> 5.A ~> 2.B > D xx 236.C | ||
| | |38 | ||
| | |19 | ||
|5.A ~> 2.B is a P-Link. | |||
|- | |- | ||
| | |9.C >> 5.A ~> 2.B > 3.A xx 236.C | ||
| | |41 | ||
| | |20 | ||
|5.A ~> 2.B is a P-Link. | |||
|- | |- | ||
| | |9.C >> 5.A ~> 2.B xx 623.C | ||
|36 | |||
|18 | |||
|5.A ~> 2.B is a P-Link. 623.C can be followed up with an air throw in the corner for an additional 10 damage. | |||
|- | |- | ||
| | |9.C >> 5.A ~> 2.B > 3.A xx 46.A-13.C | ||
| | |74 | ||
| | |37 | ||
|5.A ~> 2.B is a P-Link. Requires 2 Stress Meter. | |||
|- | |- | ||
| | |9.C >> 66.P xx 623.P | ||
| | |47 | ||
| | |23 | ||
|623.P can be followed up with an air throw in the corner for an additional 10 damage. | |||
|- | |- | ||
|} | |} | ||
{{Matrimelee}} | {{Matrimelee}} | ||
[[Category:Matrimelee]] | [[Category:Matrimelee]] | ||
Latest revision as of 09:56, 21 May 2022
Introduction
Anny was invited to the Matrimelee tournament with the prize of getting engaged to the prince of a certain country. She didn't have any interest in getting involved until she later found out that Keith Wayne was invited to participate. When Anny found out about Keith's decision to participate she entered the tournament to stop Keith from winning in a brunt of jealousy.
Overview
| Strengths | Weaknesses |
|---|---|
|
|
Strategy
You will need to be on your toes playing Anny. She's essentially a zoner with dangerous 6.B confirms. However, Anny is very limited in zoning, thanks to rolls and back dashes, so close range conditioning is your best option for any major damage. She can use her 236.A/C and 5.B, which is an amazingly long poke, to keep the opponent properly spaced. Photon burst, j.236.A/C is punishable at point-blank ranges but can be done at full-screen to bait approaches. However, be warned photon burst is highly punishable if the opponent rolls or does a super jump. It's important to not overdo your zoning so the opponent doesn't catch on. It is also very important to deny jump-ins with 2.CD, since you can reset an opponent back to neutral off of a punish confirm. If they do manage to get close, mix it up with her 6.B overhead. Anny's 6.B can link into 623.C and 46.A-13.C (level 2 super). If you can condition your opponent into blocking low and staying still thanks to the fear of a 6.A overhead; you can now use your 63214-63214.C (level 1 super) command grab to get some solid 50 permanent damage in. However, this isn't guaranteed and your opponent can jump and easily punish if they identify the command grab's start-up roll. If you manage to get cornered, do not use your projectiles or DP unless it's in a combo. You'll get punished a lot more easier. In the corner, you'll want to rely on your close-up options, like 6.B and Anny's long A/B normals, to get out.
Anny can play somewhat aggressively if the opponent allows it to happen or doesn't know how to deal with Anny. Anny's 9.C is an amazing button and can easily cross-up for a full combo. Anny's combo game is rather limited but isn't entirely grounded like some of the other characters. Her 3.A, 2.CD and 6.B can catch jumps from opponents trying to jump away and land a 623.C (heavy rainbow rise) afterward. If you somehow manage to corner someone as Anny, your combo game is dramatically increased thanks to 623.C (heavy rainbow rise) having a grab follow-up in the corner and instant overhead 8.C. But, it's rare to get someone cornered with Anny.
In Summary, play keep away, use your long A/B poke normals, use 6.B to mix the opponent up when they get close, condition them to crouch block to land your command grab super, and don't use projectiles point-blank.
Move List
Far Standing Normals
5.A
|
|---|
5.B
|
|---|
5.C
|
|---|
5.D
|
|---|
Close Standing Normals
cl.5A
|
|---|
cl.5B
|
|---|
cl.5C First Hit First Hit Second Hit Second Hit
|
|---|
cl.5D
|
|---|
Crouching Normals
2.A
|
|---|
2.B
|
|---|
2.C
|
|---|
2.D
|
|---|
Jumping Normals
8.A
|
|---|
8.B
|
|---|
8.C
|
|---|
8.D
|
|---|
7.C or 9.C
|
|---|
7.C or 9.D
|
|---|
Dashing Normals
66.A or C
|
|---|
66.B or D
|
|---|
Command Normals
3.A
|
|---|
6.B First Kick First Kick Second Kick Second Kick
|
|---|
Special Moves
Swannie Crash
236.A/C |
|---|
Rainbow Rise 623.P The hitbox follows the rainbow. The hitbox follows the rainbow.
|
|---|
Anny Dynamic
[D] (X second hold) |
|---|
Photon Burst
J.236.A/C |
|---|
Super Moves
Stress Shot 63214~63214 C Cosmic Throw Cosmic Throw
|
|---|
Ippatsu Ougi 46A-13.C Angel Breath Angel Breath on hit on hit
|
|---|
Combos
| Combo | Total Damage | Permanent Damage | Notes | ||
| Basic Combos | |||||
| 9.C >> 5.A > 5.A > C xx 236.C | 34 | 17 | |||
| 9.C >> 5.A > 5.A > C xx 623.C | 30 | 15 | 623.C can be followed up with an air throw in the corner for an additional 10 damage. | ||
| 9.C >> cl.5C (1 hit) > 3.A xx 236.C | 37 | 18 | |||
| 9.C >> cl.5C (1 hit) > 3.A xx 623.C | 34 | 17 | 623.C can be followed up with an air throw in the corner for an additional 10 damage. | ||
| 9.C >> 2.A > 3.A xx 623.C | 34 | 17 | 623.C can be followed up with an air throw in the corner for an additional 10 damage. | ||
| 9.C >> 2.B > D xx 236.C | 37 | 18 | |||
| 9.C >> 5.A > 5.A > C xx 46.A-13.C | 69 | 34 | Requires 2 Stress Meter. | ||
| Intermediate Combos | |||||
| 9.D >> 2.CD (1 hit) > 6.B (2 hits) xx 623.C | 42 | 21 | 623.C can be followed up with an air throw in the corner for an additional 10 damage. | ||
| 9.D >> 2.CD (1 hit) > 6.B (2 hits) xx 46.A-13.C | 77 | 38 | Requires 2 Stress Meter. | ||
| [D] 9.C >. cl.5C (1 hit) > 3.A xx ]D[ | 38 | 19 | Hold D for 2 seconds. Punishable on hit. | ||
| [D] 9.C >. cl.5C (1 hit) > 3.A xx ]D[ | 42 | 21 | Hold D for 4 seconds. | ||
| [D] 9.C >> 5.A > 5.A > C xx ]D[ | 34 | 17 | Hold D for 2 seconds. Punishable on hit. | ||
| [D] 9.C >> 5.A > 5.A > C xx ]D[ | 38 | 19 | Hold D for more than 4 seconds. | ||
| Advanced Combos | |||||
| (Cross-up) 9.C >> 5.A ~> 2.B > D xx 236.C | 38 | 19 | 5.A ~> 2.B is a P-Link. | ||
| 9.C >> 5.A ~> 2.B > 3.A xx 236.C | 41 | 20 | 5.A ~> 2.B is a P-Link. | ||
| 9.C >> 5.A ~> 2.B xx 623.C | 36 | 18 | 5.A ~> 2.B is a P-Link. 623.C can be followed up with an air throw in the corner for an additional 10 damage. | ||
| 9.C >> 5.A ~> 2.B > 3.A xx 46.A-13.C | 74 | 37 | 5.A ~> 2.B is a P-Link. Requires 2 Stress Meter. | ||
| 9.C >> 66.P xx 623.P | 47 | 23 | 623.P can be followed up with an air throw in the corner for an additional 10 damage. | ||
