Super Smash Bros. Crusade/Bowser: Difference between revisions
(Created page with "<center><font size="4"><b>Mario (Super Mario Bros.)</b></br>Nintendo</font></center>|thumb|right File:SSBC_Mario_Icon.png|<center><i>Series...") |
m (→Gallery) |
||
| (25 intermediate revisions by 4 users not shown) | |||
| Line 1: | Line 1: | ||
{{CharacterInfobox-SSBC | |||
|name=Bowser | |||
|IP=Super Mario Bros. | |||
|company=Nintendo | |||
|portrait=SSBC_Bowser_Portrait.png | |||
|stockIcon=SSBC_Bowser_Stock.png | |||
|seriesIcon=SSBC_Mario_Icon.png | |||
}} | |||
==Introduction== | ==Introduction== | ||
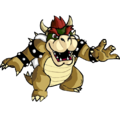
''' | {{Character Label|Super Smash Bros. Crusade|Bowser|22px|SSBC_Bowser_Stock.png|label=Bowser}}'''(クッパ, Koopa)''' is the supreme ruler of the Koopa Troop and known better as the King of the Koopas. As the main antagonist of {{Character Label|Super Smash Bros. Crusade|Mario|22px|SSBC_Mario_Stock.png|label=Mario}}, he pulls all kinds of tricks since his debut to ensure{{Character Label|Super Smash Bros. Crusade|Peach|22px|SSBC_Peach_Stock.png|label=Princess Peach}} is his and his alone, whether it's by his strength and fire breathing abilities, or all sorts of machinery. In this game, he relies on his brute strength to power through the competition above all else. | ||
{{CharacterVersusTheme-SSBC | |||
| charaName = Bowser | |||
| stockIcon = SSBC_Bowser_Stock.png | |||
| themeTitle = Bowser's Fury (Phase 1) | |||
| themeSource = Super Mario 3D World + Bowser's Fury | |||
| themeLogo = SSBC_Mario_Icon.png | |||
| remixArtist = Nintendo | |||
| remixLogo = SSBC_Music_Icon.png | |||
| youtube = https://www.youtube.com/watch?v=N_z9S7inxZg | |||
}} | |||
==Overview== | ==Overview== | ||
=== | {{Attributes-SSBC | ||
| character = Bowser | |||
| name = Bowser | |||
| stockIcon = SSBC_Bowser_Stock.png | |||
| weight = 0.36 | |||
| gravity = 0.25 | |||
| maxJumps = 3.0 | |||
| walkSpeed = 2.1 | |||
| runStart = 2.4 | |||
| runAccel = 0.3 | |||
| runSpeed = 3.5 | |||
| friction = 1.35 | |||
| jumpMomentum = 0.5 | |||
| jumpSpeed = 6.25 | |||
| midJumpSpeed = 6.0 | |||
| shortHopSpeed = 3.3 | |||
| airSpeed = 2.2 | |||
'''* | | fallSpeed = 3.2 | ||
'''* | | fastFall = 1.5 | ||
| airAccel = 0.17 | |||
| airFriction = 0.1 | |||
| airDash = 8.0 | |||
| canCrawl = yes | |||
| canWallJump = no | |||
| canWallCling = no | |||
| canWallClimb = no | |||
| canFloat = no | |||
| canGlide = no | |||
| canDJC = no | |||
| canZAir = no | |||
}} | |||
'''* Archetype:''' <br> | |||
'''* Availability:''' Default<br> | |||
=== | ===Game Plan=== | ||
"3 good things about the character". "Unique Mechanic". | |||
"1-3 bad things". | |||
Quick overview/ Description of | |||
* Tilts are... | |||
* Smashes are... | |||
* Aerials are... | |||
* Throws are... | |||
* For Neutral, character does thing | |||
* For Advantage, character does thing | |||
* For Disadvantage, character does thing | |||
"Character is for you if:" | |||
* Archetype | |||
* Game plan | |||
* Pros | |||
''For a more in depth overview of the character, guides and a matchup spread, go to '''[[Super Smash Bros. Crusade/Bowser/Competitive|Bowser: Competitive Overview]]''' | |||
| | |||
| | {{KirbyCopyAbility-SSBC | ||
| name = Bowser | |||
| stockIcon = SSBC_Bowser_Stock.png | |||
| icon = SSBC_Kirby_CopyAbility_Fire.png | |||
| ability = Fire | |||
| description = Based on Bowser's most iconic attack being his Fire Breath | |||
}} | |||
{{HomeStage-SSBC | |||
| charaName = Bowser | |||
| stockIcon = SSBC_Bowser_Stock.png | |||
| stageName = Bowser's Castle | |||
| stageLogo = SSBC_Mario_Icon.png | |||
| stageIcon = SSBC_BowsersCastle_StageIcon.png | |||
}} | }} | ||
| Line 48: | Line 97: | ||
{{MoveData | {{MoveData | ||
|image= | |image= | ||
|caption= | |caption=''5A.'' | ||
|name=Jab 1 | |name=Jab 1 | ||
|data= | |data= | ||
{{AttackData-SSBC | {{AttackData-SSBC | ||
| Line 64: | Line 112: | ||
|Active=4 | |Active=4 | ||
|Priority=1 | |Priority=1 | ||
|description= | |description= Jab | ||
}} | }} | ||
}} | }} | ||
| Line 70: | Line 118: | ||
{{MoveData | {{MoveData | ||
|image= | |image= | ||
|caption= | |caption=''5A.5A.'' | ||
|name=Jab 2 | |name=Jab 2 | ||
|data= | |data= | ||
{{AttackData-SSBC | {{AttackData-SSBC | ||
| Line 86: | Line 133: | ||
|Active=4 | |Active=4 | ||
|Priority=1 | |Priority=1 | ||
|description= | |description= Jab | ||
}} | }} | ||
}} | }} | ||
| Line 92: | Line 139: | ||
{{MoveData | {{MoveData | ||
|image= | |image= | ||
|caption= | |caption=5A.5A.5A. | ||
|name=Jab 3 | |name=Jab 3 | ||
|data= | |data= | ||
{{AttackData-SSBC | {{AttackData-SSBC | ||
| Line 108: | Line 154: | ||
|Active=4 | |Active=4 | ||
|Priority=1 | |Priority=1 | ||
|description= | |description=Jab | ||
}} | }} | ||
}} | }} | ||
====== <font style="visibility:hidden" size="0">Tilts</font> ====== | |||
{{MoveData | {{MoveData | ||
|image= | |image= | ||
|caption= | |caption=''6A.'' | ||
|name=Side Tilt | |name=Side Tilt | ||
|data= | |data= | ||
{{AttackData-SSBC | {{AttackData-SSBC | ||
| Line 131: | Line 176: | ||
|Active=4 | |Active=4 | ||
|Priority=1 | |Priority=1 | ||
|description= | |description=Tilt | ||
}} | }} | ||
}} | }} | ||
{{MoveData | {{MoveData | ||
|image= | |image= | ||
|caption= | |caption=''8A.'' | ||
|name=Up Tilt | |name=Up Tilt | ||
|data= | |data= | ||
{{AttackData-SSBC | {{AttackData-SSBC | ||
| Line 152: | Line 196: | ||
|Active=4 | |Active=4 | ||
|Priority=1 | |Priority=1 | ||
|description= | |description=Tilt | ||
}} | }} | ||
}} | }} | ||
{{MoveData | {{MoveData | ||
|image= | |image= | ||
|caption= | |caption=''2A.'' | ||
|name=Down Tilt<br> | |name=Down Tilt<br> | ||
|data= | |data= | ||
{{AttackData-SSBC | {{AttackData-SSBC | ||
| Line 173: | Line 216: | ||
|Active=4 | |Active=4 | ||
|Priority=1 | |Priority=1 | ||
|description= | |description=Tilt | ||
}} | }} | ||
}} | }} | ||
====== <font style="visibility:hidden" size="0">Smash Attacks</font> ====== | |||
{{MoveData | {{MoveData | ||
|image= | |image= | ||
|caption= | |caption=''6C.'' | ||
|name=Side Smash<br> | |name=Side Smash<br> | ||
|data= | |data= | ||
{{AttackData-SSBC | {{AttackData-SSBC | ||
| Line 196: | Line 238: | ||
|Active=4 | |Active=4 | ||
|Priority=1 | |Priority=1 | ||
|description= | |description=Smash | ||
}} | }} | ||
}} | }} | ||
{{MoveData | {{MoveData | ||
|image= | |image= | ||
|caption= | |caption=''8C.'' | ||
|name=Up Smash | |name=Up Smash | ||
|data= | |data= | ||
{{AttackData-SSBC | {{AttackData-SSBC | ||
| Line 217: | Line 258: | ||
|Active=4 | |Active=4 | ||
|Priority=1 | |Priority=1 | ||
|description= | |description=Smash | ||
}} | }} | ||
}} | }} | ||
{{MoveData | {{MoveData | ||
|image= | |image= | ||
|caption= | |caption=''2C.'' | ||
|name=Down Smash | |name=Down Smash | ||
|data= | |data= | ||
{{AttackData-SSBC | {{AttackData-SSBC | ||
| Line 238: | Line 278: | ||
|Active=4 | |Active=4 | ||
|Priority=1 | |Priority=1 | ||
|description= | |description=Smash | ||
}} | }} | ||
}} | }} | ||
| Line 245: | Line 285: | ||
{{MoveData | {{MoveData | ||
|image= | |image= | ||
|caption= | |caption=''(During Dash/Run) A.'' | ||
|name=Dash Attack | |name=Dash Attack | ||
|data= | |data= | ||
{{AttackData-SSBC | {{AttackData-SSBC | ||
| Line 261: | Line 300: | ||
|Active=4 | |Active=4 | ||
|Priority=1 | |Priority=1 | ||
|description= | |description=Dsh Atk | ||
}} | }} | ||
}} | }} | ||
====== <font style="visibility:hidden" size="0">Aerials</font> ====== | |||
{{MoveData | {{MoveData | ||
|image= | |image= | ||
|caption= | |caption=''(Air) 5A.'' | ||
|name=Neutral Air | |name=Neutral Air | ||
|data= | |data= | ||
{{AttackData-SSBC | {{AttackData-SSBC | ||
| Line 284: | Line 322: | ||
|Active=4 | |Active=4 | ||
|Priority=1 | |Priority=1 | ||
|description= | |description=Aerial | ||
}} | }} | ||
}} | }} | ||
{{MoveData | {{MoveData | ||
|image= | |image= | ||
|caption= | |caption=''(Air) 6A.'' | ||
|name=Forward Air | |name=Forward Air | ||
|data= | |data= | ||
{{AttackData-SSBC | {{AttackData-SSBC | ||
| Line 305: | Line 342: | ||
|Active=4 | |Active=4 | ||
|Priority=1 | |Priority=1 | ||
|description= | |description=Aerial | ||
}} | }} | ||
}} | }} | ||
{{MoveData | {{MoveData | ||
|image= | |image= | ||
|caption= | |caption=''(Air) 4A.'' | ||
|name=Back Air | |name=Back Air | ||
|data= | |data= | ||
{{AttackData-SSBC | {{AttackData-SSBC | ||
| Line 326: | Line 362: | ||
|Active=4 | |Active=4 | ||
|Priority=1 | |Priority=1 | ||
|description= | |description=Aerial | ||
}} | }} | ||
}} | }} | ||
{{MoveData | {{MoveData | ||
|image= | |image= | ||
|caption= | |caption=''(Air) 8A.'' | ||
|name=Up Air | |name=Up Air | ||
|data= | |data= | ||
{{AttackData-SSBC | {{AttackData-SSBC | ||
| Line 347: | Line 382: | ||
|Active=4 | |Active=4 | ||
|Priority=1 | |Priority=1 | ||
|description= | |description=Aerial | ||
}} | }} | ||
}} | }} | ||
{{MoveData | {{MoveData | ||
|image= | |image= | ||
|caption= | |caption=''(Air) 2A.'' | ||
|name=Down Air | |name=Down Air | ||
|data= | |data= | ||
{{AttackData-SSBC | {{AttackData-SSBC | ||
| Line 368: | Line 402: | ||
|Active=4 | |Active=4 | ||
|Priority=1 | |Priority=1 | ||
|description= | |description=Aerial | ||
}} | }} | ||
}} | }} | ||
| Line 374: | Line 408: | ||
{{MoveData | {{MoveData | ||
|image= | |image= | ||
|caption= | |caption=''(Grounded) 5Z. or 6Z.'' | ||
|name=Grab | |name=Grab | ||
|data= | |data= | ||
{{AttackData-SSBC | {{AttackData-SSBC | ||
| Line 395: | Line 428: | ||
{{MoveData | {{MoveData | ||
|image= | |image= | ||
|caption= | |caption=''(During Grab) 5A.'' | ||
|name=Pummel | |name=Pummel | ||
|data= | |data= | ||
{{AttackData-SSBC | {{AttackData-SSBC | ||
| Line 411: | Line 443: | ||
|Active=4 | |Active=4 | ||
|Priority=1 | |Priority=1 | ||
|description= | |description=Pummel | ||
}} | }} | ||
}} | }} | ||
| Line 418: | Line 450: | ||
{{MoveData | {{MoveData | ||
|image= | |image= | ||
|caption= | |caption=''(During Grab) 6.'' | ||
|name=Forward Throw | |name=Forward Throw | ||
|data= | |data= | ||
{{AttackData-SSBC | {{AttackData-SSBC | ||
| Line 434: | Line 465: | ||
|Active=4 | |Active=4 | ||
|Priority=1 | |Priority=1 | ||
|description= | |description=Throw | ||
}} | }} | ||
}} | }} | ||
{{MoveData | {{MoveData | ||
|image= | |image= | ||
|caption= | |caption=''(During Grab) 4.'' | ||
|name=Back Throw | |name=Back Throw | ||
|data= | |data= | ||
{{AttackData-SSBC | {{AttackData-SSBC | ||
| Line 455: | Line 485: | ||
|Active=4 | |Active=4 | ||
|Priority=1 | |Priority=1 | ||
|description= | |description=Throw | ||
}} | }} | ||
}} | }} | ||
{{MoveData | {{MoveData | ||
|image= | |image= | ||
|caption= | |caption=''(During Grab) 8.'' | ||
|name=Up Throw | |name=Up Throw | ||
|data= | |data= | ||
{{AttackData-SSBC | {{AttackData-SSBC | ||
| Line 476: | Line 505: | ||
|Active=4 | |Active=4 | ||
|Priority=1 | |Priority=1 | ||
|description= | |description=Throw | ||
}} | }} | ||
}} | }} | ||
{{MoveData | {{MoveData | ||
|image= | |image= | ||
|caption= | |caption=''(During Grab) 2.'' | ||
|name=Down Throw | |name=Down Throw | ||
|data= | |data= | ||
{{AttackData-SSBC | {{AttackData-SSBC | ||
| Line 497: | Line 525: | ||
|Active=4 | |Active=4 | ||
|Priority=1 | |Priority=1 | ||
|description= | |description=Throw | ||
}} | }} | ||
}} | }} | ||
| Line 504: | Line 532: | ||
{{MoveData | {{MoveData | ||
|image= | |image= | ||
|caption= | |caption=''5B. (Neutral Special)'' | ||
|name= | |name=Fire Breath | ||
|data= | |data= | ||
{{AttackData-SSBC | {{AttackData-SSBC | ||
| Line 520: | Line 547: | ||
|Active=4 | |Active=4 | ||
|Priority=1 | |Priority=1 | ||
|description= | |description= Bowser expels a stream of fire from his mouth that decreases over time for as long as you hold the button. In this game, this pushes out the opponent more than it does officially, along with expiring quicker, which makes this a relatively niche option for range, unlike it's official counterpart. That being said, it's not completely disregarded for this purpose, and can be used to close the gap. | ||
}} | }} | ||
}} | }} | ||
{{MoveData | {{MoveData | ||
|image= | |image= | ||
|caption= | |caption=''6B. (Side Special)'' | ||
|name= | |name=Koopa Klaw | ||
|data= | |data= | ||
{{AttackData-SSBC | {{AttackData-SSBC | ||
| Line 541: | Line 567: | ||
|Active=4 | |Active=4 | ||
|Priority=1 | |Priority=1 | ||
|description= | |description=Bowser throws his arm forward in an attempt to grab the opponent. If it succeeds, he holds you in place for a short moment. Opponents can mash out of it. Has a pummel (a quick bite attack), a forward throw and a back throw that can be used. If opponents are too far away, this turns into a simple claw slash that has potential to KO. This move is also relatively niche in Bowser's toolkit, as many would opt for his reliable strength and KO ability rather than a command grab that has seen better days. | ||
}} | }} | ||
}} | }} | ||
{{MoveData | {{MoveData | ||
|image= | |image= | ||
|caption= | |caption=''8B. (Up Special)'' | ||
|name= | |name=Whirling Fortress | ||
|data= | |data= | ||
{{AttackData-SSBC | {{AttackData-SSBC | ||
| Line 562: | Line 587: | ||
|Active=4 | |Active=4 | ||
|Priority=1 | |Priority=1 | ||
|description= | |description=Withdraws into his shell and spirals rapidly. This hits multiple times both grounded in midair. More reliable on the ground than it is midair. | ||
}} | }} | ||
}} | }} | ||
{{MoveData | {{MoveData | ||
|image= | |image= | ||
|caption= | |caption=''2B. (Down Special)'' | ||
|name= | |name=Bowser Bomb | ||
|data= | |data= | ||
{{AttackData-SSBC | {{AttackData-SSBC | ||
| Line 583: | Line 607: | ||
|Active=4 | |Active=4 | ||
|Priority=1 | |Priority=1 | ||
|description= | |description=A ground pound manoeuvre. Bowser leaps in the air horns first before slamming back down to the ground. This move has impressive KO power and skips the leap portion midair as you're already in the air before you fall. Perhaps the most useful of the four specials other than Whirling Fortress for recovery, and generally the most used special move of the four. | ||
}} | }} | ||
}} | }} | ||
| Line 590: | Line 614: | ||
{{MoveData | {{MoveData | ||
|image= | |image= | ||
|caption= | |caption=''5B. (Full Meter)'' | ||
|name= | |name=Final Smash:<br> | ||
Giga Bowser | |||
|data= | |data= | ||
{{AttackData-SSBC | {{AttackData-SSBC | ||
| Line 606: | Line 630: | ||
|Active=- | |Active=- | ||
|Priority=- | |Priority=- | ||
|description= | |description= Bowser transforms into Giga Bowser, increasing in size and his stats changing drastically. He's not very scary in this game due to having the same base sprite and attacks but even stronger than before, but while he lacks in style he makes up for in making pure chaos and stacking results perfectly in your favour. | ||
}} | }} | ||
}} | }} | ||
==Alternate Costumes== | ==Alternate Costumes== | ||
{{ColorGallery | filePrefix= | {{ColorGallery | filePrefix=SSBC_Bowser_Color_| imagewidths=457 |imageheights=449 | showtext=yes | colors= | ||
{{ColorGallery/Color|1}} | {{ColorGallery/Color|1| text=Default (Green) }} | ||
{{ColorGallery/Color|2}} | {{ColorGallery/Color|2| text=Red }} | ||
{{ColorGallery/Color|3}} | {{ColorGallery/Color|3| text=Blue }} | ||
{{ColorGallery/Color|4}} | {{ColorGallery/Color|4| text=Yellow }} | ||
{{ColorGallery/Color|5}} | {{ColorGallery/Color|5| text=Black }} | ||
{{ColorGallery/Color|6}} | {{ColorGallery/Color|6| text=Dry Bowser }} | ||
{{ColorGallery/Color|7}} | {{ColorGallery/Color|7| text=Dark Bowser }} | ||
{{ColorGallery/Color|8}} | {{ColorGallery/Color|8| text=Pink }} | ||
{{ColorGallery/Color|9| text=Giga Bowser }} | |||
{{ColorGallery/Color|10| text=Meowser }} | |||
{{ColorGallery/Color|11| text=Fury Bowser }} | |||
{{ColorGallery/Color|12| text=Fake Bowser (SMB: The Lost Levels)}} | |||
{{ColorGallery/Color|13| text=King Koopa (DIC Entertainment)}} | |||
{{ColorGallery/Color|14| text=Wart }} | |||
{{ColorGallery/Color|15| text=Peach }} | |||
{{ColorGallery/Color|16| text=Midbus }} | |||
{{ColorGallery/Color|17| text=Player 2 (Yoshi's Cookie) }} | |||
{{ColorGallery/Color|18| text=Ganon (The Legend of Zelda) }} | |||
{{ColorGallery/Color|19| text=Demise (Skyward Sword) }} | |||
{{ColorGallery/Color|20| text=Drednaw (Pokemon) }} | |||
{{ColorGallery/Color|21| text=Zavok (Sonic the Hedgehog) }} | |||
{{ColorGallery/Color|22| text=Gomorrah (Bayonetta) }} | |||
{{ColorGallery/Color|23| text=Strider (Bayonetta 3) }} | |||
{{ColorGallery/Color|24| text=Moon Devourer (Punisher Gray Raven) }} | |||
{{ColorGallery/Color|25| text=Mountain of Smiling Bodies (Library of Ruina) }} | |||
{{ColorGallery/Color|26| text=Context }} | |||
}} | }} | ||
==Gallery== | |||
<gallery> | |||
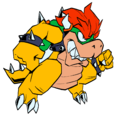
SSBC_Bowser_PromoArt_Triforceriku.png|Promo Art by Triforceriku | |||
SSBC_Bowser_Changelog_Banner.png|Changelog Banner | |||
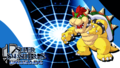
SSBC_Bowser_Wallpaper.png|Wallpaper | |||
SSBC_Bowser_CSSArtv090_GigaBoots.png|Character Portrait 0.9.0 by GigaBoots | |||
</gallery> | |||
==Trivia== | ==Trivia== | ||
Latest revision as of 19:00, 26 March 2024
| Bowser Super Mario Bros. (Nintendo) |

|
|---|---|

| |
Introduction
xSSBC_Bowser_Stock.png Bowser(クッパ, Koopa) is the supreme ruler of the Koopa Troop and known better as the King of the Koopas. As the main antagonist of xSSBC_Mario_Stock.png Mario, he pulls all kinds of tricks since his debut to ensurexSSBC_Peach_Stock.png Princess Peach is his and his alone, whether it's by his strength and fire breathing abilities, or all sorts of machinery. In this game, he relies on his brute strength to power through the competition above all else.
| Versus Theme | Bowser's Fury (Phase 1) | Super Mario 3D World + Bowser's Fury
|
Nintendo
|
|---|
Overview
| Max Jumps | Weight | Gravity | Friction |
|---|---|---|---|
| 3.0 Average |
0.36 Super Heavyweight |
0.25 Very High |
1.35 |
| Walk Speed | Run Start Speed | Run Acceleration | Run Speed |
| 2.1 Average |
2.4 Slow |
0.3 |
3.5 |
| Jump Momentum | Jump Speed | Mid Jump Speed | Short Hop Speed |
| 0.5 |
6.25 |
6.0 |
3.3 |
| Air Speed | Fall Speed | Fast Fall Multiplier | Airdash Speed |
| 2.2 |
3.2 |
1.5 |
8.0 Average |
| Air Acceleration | Air Friction | Special Actions | |
| 0.17 |
0.1 |
Crawl | |
* Archetype:
* Availability: Default
Game Plan
"3 good things about the character". "Unique Mechanic".
"1-3 bad things".
Quick overview/ Description of
- Tilts are...
- Smashes are...
- Aerials are...
- Throws are...
- For Neutral, character does thing
- For Advantage, character does thing
- For Disadvantage, character does thing
"Character is for you if:"
- Archetype
- Game plan
- Pros
For a more in depth overview of the character, guides and a matchup spread, go to Bowser: Competitive Overview
| Kirby Copy Ability | Fire |
Based on Bowser's most iconic attack being his Fire Breath |
|---|
| Home Stage | 
|
Bowser's Castle |
|---|
Moveset
Normals
Jab 1 5A. 5A.
|
|---|
Jab 2 5A.5A. 5A.5A.
|
|---|
Jab 3 5A.5A.5A. 5A.5A.5A.
|
|---|
Tilts
Side Tilt 6A. 6A.
|
|---|
Up Tilt 8A. 8A.
|
|---|
Down Tilt 2A. 2A.
|
|---|
Smash Attacks
Side Smash 6C. 6C.
|
|---|
Up Smash 8C. 8C.
|
|---|
Down Smash 2C. 2C.
|
|---|
Dash Attack (During Dash/Run) A. (During Dash/Run) A.
|
|---|
Aerials
Neutral Air (Air) 5A. (Air) 5A.
|
|---|
Forward Air (Air) 6A. (Air) 6A.
|
|---|
Back Air (Air) 4A. (Air) 4A.
|
|---|
Up Air (Air) 8A. (Air) 8A.
|
|---|
Down Air (Air) 2A. (Air) 2A.
|
|---|
Grabs
Grab (Grounded) 5Z. or 6Z. (Grounded) 5Z. or 6Z.
|
|---|
Pummel (During Grab) 5A. (During Grab) 5A.
|
|---|
Forward Throw (During Grab) 6. (During Grab) 6.
|
|---|
Back Throw (During Grab) 4. (During Grab) 4.
|
|---|
Up Throw (During Grab) 8. (During Grab) 8.
|
|---|
Down Throw (During Grab) 2. (During Grab) 2.
|
|---|
Specials
Fire Breath 5B. (Neutral Special) 5B. (Neutral Special)
|
|---|
Koopa Klaw 6B. (Side Special) 6B. (Side Special)
|
|---|
Whirling Fortress 8B. (Up Special) 8B. (Up Special)
|
|---|
Bowser Bomb 2B. (Down Special) 2B. (Down Special)
|
|---|
Final Smash
Final Smash: Giga Bowser 5B. (Full Meter) 5B. (Full Meter)
|
|---|
Alternate Costumes


Gallery
Promo Art by Triforceriku
Changelog Banner
Wallpaper
Character Portrait 0.9.0 by GigaBoots


Trivia
- Fun Fact Here
- Fun Fact Here too


