Matrimelee/White
Jump to navigation
Jump to search
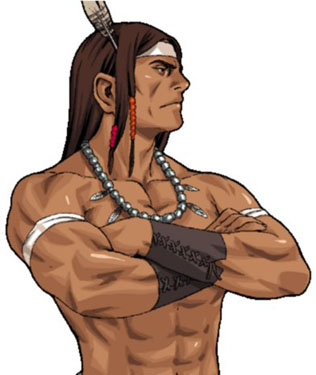

White Buffalo
Overview
White is a slow charge & grappler character that hits like a train. One combo will easily drain an opponent's life down by 1/3rd or more. White also holds the highest health pool of 180. However, White is insanely slow. Having the slowest run and walk speed it cripples his attempts at getting in and can easily be avoided by some characters with faster walk speeds or longer normals.
| Strengths | Weaknesses |
|---|---|
|
|
Strategy
TBD.
Normal Moves
Far Standing Normals
5.A  |
|---|
5.B  |
|---|
5.C  |
|---|
5.D  |
|---|
5.CD  |
|---|
Close Stand Normals
cl.5A  |
|---|
cl.5B  |
|---|
cl.5C  |
|---|
cl.5D  First hit First hit  Second hit Second hit
|
|---|
Crouching Normals
2.A  |
|---|
2.B  |
|---|
2.C  |
|---|
2.D  |
|---|
2.CD  |
|---|
Dashing Normals
66.P  |
|---|
66.K  |
|---|
Command Normals
3.A  |
|---|
6.B  |
|---|
Jumping Normals
8.A  |
|---|
8.B  |
|---|
8.C  |
|---|
8.D  |
|---|
7/9.D  |
|---|
Misc Normals & Grabs
Rage Explosion  |
|---|
Throw (Grounded/Air)  |
|---|
Guard Cancel |
|---|
Special Moves
| Special | Damage | Chip | Guard | Meter | Notes |
| Arrow Shot | |||||
| Arrow Shot A 236.A |
8P/16R | 2P/3R | 8G | 10M | (need to make a list of which characters can crouch this) |
| Arrow Shot C 236.C |
8P/16R | 2P/3R | 8G | 10M | |
| Tackle Blow | |||||
| Tackle Blow A (charge)4~6.A |
23P | 3P/5R | 17G | 10M | Hard Wall Slam; 2 Hits; Air Unblockable |
| Tackle Blow C (charge)4~6.C |
25P | 3P/5R | 20G | 10M | Hard Wall Slam; 2 Hits; Air Unblockable 1st Hit Cancels to follow Up |
| Tackle Blow C + (charge)4~6.C -> 623.C |
5P/10R | 2P/3R | 15G | 15M | Launcher; Air Unblockable; Only allows for air-throw follow up |
| Buffalo Storm | |||||
| Buffalo Storm (Kick) (charge)4~6.B/D |
10P/20R | 2P/3R | 12G | 10M | Air Unblockable |
| Buffalo Storm (Buffalo) (charge)4~6.D |
20P/40R | 3P/6R | 12G | 30M | |
| Flying Elbow | |||||
| Flying Elbow A j214.A |
12P/24R | 2P/3R | 12G | 10M | Hits High |
| Flying Elbow C j214.C |
12P/24R | 2P/3R | 12G | 10M | Hits High |
Super Moves
| Super | Damage | Chip | Guard | Meter | Notes |
| STRESS SHOT: Pole Tornado | |||||
| Pole Tornado 236-3214.C |
30P/60R | 6P/11R | 20G | 30M | 5 Hits; Air Unblockable |
| IPPATSU OUGI: Bomb Guardian | |||||
| Bomb Guardian 63214-63214.C |
45P/89R | ~ | ~ | 5M | Soft Wall Slam; Unblockable; No Meter on Whiff If whiffed from full screen, there is no Super Flash, but meter is lost. |
Combos
| Combo | Total Damage | Permanent Damage | Notes | Demonstration | |
| Basic Combos | |||||
| 9.D >> cl.A > cl.A > 5.A xx [4]6.A | 39T | 39P | Hard WallSlam. | ||
| 9.D >> cl.D > D xx [4]6.C | 53T | 53P | Hard Wallslam. | ||
| 9.D > cl.C > 3.A xx [4]6.C | 59T | 59P | Hard Wallslam. | ||
| (juggle) cl.C > 3.A xx 236.P | 46T | 23P | |||
| (juggle) cl.C > 3.A xx [5]6.A | 51T | 51P | |||
| 9.D > cl.C > 3.A xx 236-3214.C | 77T | 39P | Requires 1 Stress Meter | ||
| 9.D > cl.C > 3.A xx 63214-63214.C | 88T | 44P | Requires 2 Stress Meter. | ||
| Intermediate Combos | |||||
| 9.D > cl.A > 5.A >> 2.B xx [4]6.A | 42T | 42P | 5.A >> 2.B Requires a Rapid Chain Cancel. | ||
| 9.D > cl.C (2hit) > 3.A xx [4]6.C xx 623.C >> Air Throw | 62T | 31P | Cancel [4]6.C on the first hit. | ||
| Advanced Combos | |||||
| 9.D >> 6[6].P xx 63214-63214.C | 101T | 50P | Only works on crouching Reiji. | ||


