Matrimelee/Tane
Jump to navigation
Jump to search
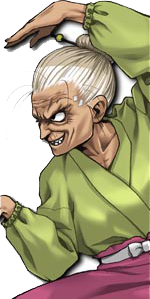

Tane Goketsu
This page is under construuction
Introduction
Tane, formerly known as Otane, received an invitation for a fighting tournament from a King of a Certain Country. Tane hasn't been happy around the time of receiving the invitation. The winner was promised true happiness and Tane was willing to do her best to win.
Overview
| Strengths | Weaknesses |
|---|---|
|
|
Strategy
Normal Moves
Coming soon...
Special Moves
Rock Pulverizer Denture
[4]6.A or [4]6.C
|
|---|
Heaven's Dance Kick
[2]8.B
|
|---|
[2]8.D
|
|---|
Intimidating Face Attack
[4]6.B
|
|---|
[4]6.D
|
|---|
Swirling Meator Bullets
63214.A or 63214.C
|
|---|
Super Moves
Stress Shot
236-236.C
|
Goketsu Intimidating Face Attack!! |
|---|
Ippatsu Ougi
4146.C
|
Absolute Demon Palm!! |
|---|
Kinjite
236-236-236.C
|
Super Goketsu Intimidating Face Attack!! |
|---|
Combos
| Combo | Total Damage | Permanent Damage | Notes | ||
| Basic Combos | |||||
| 9.D >> cl.5C (2 hits) > 3.C (4 hits) xx [4]6.B | 45 | 22 | Charge [4]6.B during 3.C and release on the fourth hit. | ||
| 9.D >> cl.5C (2 hits) > 3.C (4 hits) xx 63214.C | 54 | 27 | The Last hit of 63214.C will knockdown. | ||
| 9.D >> cl.5C (2 hits) > 3.C (4 hits) xx 236-236.C | 59 | 28 | Requires 1 Stress Meter. | ||
| 9.D >> 2.B > B > 5.D > 3.C (4 hits) xx [4]6.B | 45 | 22 | Charge [4]6.B during 3.C and release on the fourth hit. | ||
| 9.D >> 2.B > B > 5.D > 3.C (2 hits) xx 236-236.C | 60 | 30 | Requires 1 Stress Meter. | ||
| 9.C >> 66.P > 3.C (4 hits) xx 63214.C | 65 | 32 | 9.C must hit late in order to chain into 66.P. | ||
| 9.C >> 66.P > 3.C (4 hits) xx [4]6.C | 51 | 25 | Charge [4]6.B during 3.C and release on the fourth hit. 9.C must hit late in order to chain into 66.P. | ||
| 9.C >> 66.P > 3.C (4 hits) xx 236-236.C | 73 | 36 | Requires 1 Stress Meter. 9.C must hit late in order to chain into 66.P. | ||
| 9.D > j.2B >> cl.5C (2 hits) > 3.C (4 hits) xx [4]6.B | 45 | 22 | Charge [4]6.B during 3.C and release on the fourth hit. | ||
| 9.D > j.2B >> cl.5C (2 hits) > 3.C (4 hits) xx [4]6.B | 50 | 25 | Charge [4]6.B during 3.C and release on the fourth hit. | ||
| 9.D > j.2B >> cl.5C (2 hits) > 3.C (4 hits) xx 63214.C | 49 | 24 | 63214.C will knockdown before the special is finished. | ||
| 9.D > j.2B >> cl.5C (2 hits) > 3.C (4 hits) xx 236-236.C | 71 | Requires 1 Stress Meter. | |||
| 9.D > j.2B >> 2.B > B > 5.D > 3.C (4 hits) xx [4]6.B | 57 | 28 | Charge [4]6.B during 3.C and release on the fourth hit. | ||
| 9.D > j.2B >> 2.B > B > 5.D > 3.C (4 hits) xx 236-236.C | 74 | 37 | Requires 1 Stress Meter. | ||
| Intermediate Combos | |||||
| [4]6.C >> 66.P > 3.C (4 hits) xx [4]6.B | 54 | 27 | [4]6.C needs to be done at fullscreen. | ||
| [4]6.C >> 66.P > 3.C (4 hits) xx 63214.C | 70 | 35 | [4]6.C needs to be done at fullscreen. | ||
| [4]6.C >> 66.P > 3.C (4 hits) xx 236-236.C | 76 | 38 | Requires 1 Stress Meter. [4]6.C needs to be done at fullscreen. | ||
| (Corner Only)9.D >> cl.5D xx 63214.C >> 66.K | 55 | 27 | Must be in the corner since 63214.C side switches. | ||
| (Corner Only) 63214.C >> 5.D xx 236-236.C | 67 | 33 | Requires 1 Stress Meter. Must be in the corner since 63214.C side switches. | ||
| (Corner Only) 9.D >> cl.5C (2 hits) > 3.C (1 hit) xx 236-236.C >> 5.C xx 236-236.C | 91 | 45 | Requires 2 Stress Meter. Other characters can take more hits of 3.C and still link Stress Shot. 1 hit of 3.C is universal for all characters. | ||
| Advanced Combos | |||||
| (Corner Only) 9.D >> 2.CD > 3.C (2 hits) xx 236-236.C >> 66.K | 71 | 35 | Requires 1 Stress Meter. | ||
| (Corner Only) 9.D >> 2.CD xx 236-236.C >> 5.D xx 236-236.C >> 66.K | 110 | 55 | Requires 2 Stress Meter. Two bar route that ends with a knockdown. | ||
| (Corner Only) 9.D >> 2.CD xx 236-236.C >> 5.D xx 236-236.C >> 5.D xx 236-236.C >> 5.D | 131 | 65 | Requires 3 Stress Meter. | ||
| (Corner Only) 9.D >> 2.CD xx 236-236-236.C | 89 | 44 | Requires 3 Stress Meter. | ||
| Character Specific Combos | |||||
| (Corner Only)9.A > j.2B >> 9.A > j.2B >> 9.A > j.2B >> 9.A > j.2B >> 9.A > j.2B | 53 | 26 | Can only be done on mid-screen on standing Kanji. Corner only for Reiji, Keith, Anny, Saizo, Poochy, Chinnen. Can also be done on crouching Olof. | ||
| (Corner Only) 9.D (2 hits) > j.2B >> 9.B > j.2B >> 9.B > j.2B >> cl.5C (2 hits) > C > 3.C (3 hits) xx 236-236.C | 105 | 52 | Requires 1 stress Meter.Can only be done on standing Kanji, Anny, White, Jimmy, Jones, Elias, Saizo. | ||
| (Corner Only) 9.D (2 hits) > j.2B >> 9.B > j.2B >> 9.B > j.2B >> cl.5C (1 hit) xx 236-236.C >> 5.C xx 236-236.C | 112 | 56 | Requires 2 Stress Meter. Can only be done on Kanji, Anny, White, Jimmy, Jones, Elias, Saizo. | ||
| (Corner Only) 9.D (2 hits) > j.2B >> 9.B > j.2B >> cl.5C (1 hit) xx 236-236.C >> 5.C xx 236-236.C >> 5.D xx 236-236.C | 114 | 57 | Requires 3 Stress Meter. Can only be done on standing Kanji, Anny, White, Jimmy, Jones, Elias, Saizo. | ||
| (Corner Only) 9.D (2 hits) > j.2B >> 9.B > j.2B >> 9.B > j.2B >> 9.B > j.2B xx 236-236.C >> 66.K | 97 | 48 | Requires 1 stress Meter.Can only be done on standing Kanji, Anny, White, Jimmy, Jones, Elias, Saizo. | ||
| Chinnen, Poochy & Saizo Specific Combos | |||||
| (Corner Only)9.D >> 2.CD xx [4]6.C >> cl.5C (2 hits) > C > 3.C (4 hits) xx 236-236.C > 5.C > 3.C (4 hits) xx [4]6.C | 117 | 58 | Requires 1 Stress Meter. | ||
| (Corner Only)9.D >> 2.CD > 3.C (4 hits) xx 236-236.C > 5.C > 3.C (4 hits) xx 236-236.C >> 5.D xx 236-236.C | 144 | 72 | Requires 3 Stress meter. | ||


