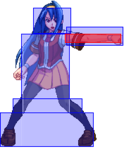
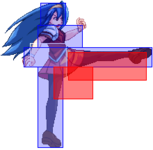
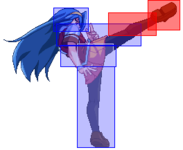
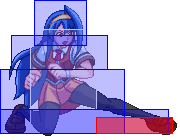
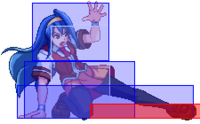
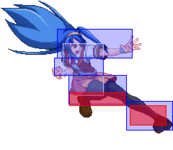
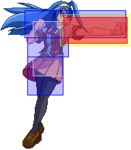
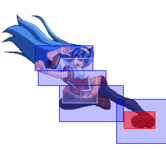
Arcana Heart 3/AH3LM/Saki Tsuzura
Outdated Version
|
Introduction
Saki Tsuzura, known throughout the series for her iconic fantastic flashkick and her j.3C (formerly j.2B) overhead divekick. She's also the charge character of the series, with charge motions you probably didn't even know existed! Saki is a solid, well-rounded character whose biggest weakness is her inability to win by simply pressing good buttons. Is she the right character for you? Here are some pros and cons to choosing Saki out of the 23 characters in the game:
Pros/Strengths
- Flashkick.
- Most combos are easy and universal.
- Meterless BnBs deal good damage.
- High/low and left/right mixup options.
- Meterless pressure reset options.
- No terrible matchups.
- Works well with almost any Arcana.
Cons/Weaknesses
- Average health and damage.
- Below average normals.
- Combos don't end in hard knockdown.
- Most mixups are reactable, not "50/50".
Additional Resources
Strategy
TODO
Arcana Selection
(TODO: update this section and the sections below for LOVEMAX)
As a well-rounded character, Saki has no large weaknesses that must be covered by her Arcana. You can probably make almost any Arcana work with her. A valid strategy is to pick Love or Flower and use it primarily for its fast burst recharge and other passive abilities.
That said, there are gaps that can be filled by an appropriate Arcana. Below is a brief list of common reasons for Saki's most popular Arcana picks:
- Better combos.
- Better mixup options.
- Fast burst recharge time.
- Projectiles and other long-range attacks.
Recommended Picks
Arguably Saki's most popular Arcana (especially in LOVE MAX), Love offers a combination of great passive abilities and useful Arcana moves. Saki doesn't rely on Extend Force for her combos, so she can take full advantage of Love's fast burst recharge time. Love is also the overall best Arcana for meter-building and recharge. Although Saki doesn't rely heavily on meter, she can always make use of it. With 2 bars, she can guard cancel forwards, flashkick, and homing cancel afterwards to make it safe and even continue pressure on block. She can also convert any flashkick on hit in any situation into good damage. Love gives Saki two long-range zoning tools: Love ball (236E) and Love laser (623E). While she doesn't have many setups using Love's triple-ball super (236236E), she can sometimes use the super Love laser (641236E) after Ar Eadbair (236A+B) for significantly more damage.
A great general-purpose Arcana; there's really no downside to Love!
Japanese players who frequently use Love include:
- Tanukichi 「たぬきち」 (AH3) - always
- Anan 「アナン」 (AH3LM) - always(?)
- RANTAMA (AH3LM) - always(?)
TODO
While Love and Wind are both strong, well-rounded picks, Wind requires a greater commitment than Love. Wind's unique triple-jump, fast-fall, and pushblock abilities lead to different combos, hit-confirms, and offensive and defensive tactics compared to Love and other Arcanas. If you're going to choose Wind, don't plan to use other Arcanas as counterpicks: stick with Wind and master it!
Japanese players who frequently use Wind include:
- Zyaku (AH3, AH3LM) - always
Flower provides very useful passive abilities and some extra mixup potential. Like Love, Saki can burst liberally with Flower: it has the fastest burst recharge time, and Saki doesn't suffer much from not having Extend Force. Flower's unique no-counter-hits ability prevents Saki from taking extra damage when she would otherwise be counter-hit. This is not uncommon due to Saki's low-tier air normals and the cases where she can be counter-hit out of 5C when attempting to clash with a jump-in. Vs Scharlachrot, Saki has the option to plant flowers in a corner and just sit on them to build meter. (Note that with the Flower Arcana, you gain ZERO meter from blocking attacks!) In some situations, Saki can use Flower's multilayer super (236236E) to lock-down opponents and force them to block a high/low mixup.
Although it lacks some of the advantages of Love, Flower offers different advantages to make up for it. Whether they actually make up for it or not is debateable. E.g. instead of using Flower's no-counter-hits ability, a Saki player could be more careful with their button-presses. And while a forced high/low mixup using multilayer (236236E) sounds great, like the triple Love ball super (236236E), Saki's combos usually don't leave her in a good position to use these supers to full effect.
Flower is definitely a top pick for starters, but a more experienced player may choose it only in some matchups.
Japanese players who frequently use Flower include:
- Shiro Aran 「白アラン」 (AH3) - matchup-dependent
TODO
Plant can be your main Arcana, or it can be a counterpick for specific matchups. However, it can be difficult to switch between Plant and Love or Flower because of their different combo routes. With Plant, you always want to use 2A 2B 5C so that you can get meterless vine (236E) combos or Ground EFC combos. With Love or Flower, you'll often be using 2A 2B 2C instead since you frequently won't have Extend Force available. If you use the wrong combo route with either Plant or Love/Flower, you can end up wasting meter, getting less damage, and/or getting a worse mixup after the combo is over. In short, being a Plant specialist pays off.
Japanese players who frequently use Plant include:
- Shiro Aran 「白アラン」 (AH3) - matchup-dependent
Move List
Note: Saki's complete frame data can be found here: Saki's Frame Data
Normal Moves
|
5A |
|
|
5B |
|
|
6B |
|
|
5C |
|
|
6C |
|
|
5E |
|
|
2A |
|
|
2B |
|
|
2C |
|
|
2E |
|
|
j.A |
|
|
j.B |
|
|
j.4B |
|
|
j.2B |
|
|
j.C |
|
|
j.2C |
|
|
j.E |
|
Special Moves
|
Claimh Solais |
|
|
|
|
FLASHKICK! The A version is Saki's best air-unblockable move, although you often need 2 bars to get decent damage from it. It has upper body invul but can be hit by deep jump-ins. Its hitboxes and fast start-up (hits on frame 5) make it great for hitting cross-up attempts. The B version is Saki's best general-purpose reversal, but it can trade with high attacks and jump-ins. Up close, you get better damage from [2]8B than from [2]8C using 1 or 2 bars. The C version has the longest start-up (hits on frame 9) and invulnerability. It can beat other characters' DPs and it is difficult to evade with 4D. It can be crossed-up very easily by jump-ins and many attacks will clash with it, so it is best used in situations where the long start-up and/or complete invulnerability are required. If any version is blocked on the ground, j.5HC j.A and j.3HC 2A both yield tight blockstrings if done as early as possible. If the opponent is close enough, these also combo on hit and on counter-hit, respectively. | |||
|
Brionac |
|
|
|
|
Horizontal rush kick. The A and B versions can be used to reset pressure, though not as well as j.2C. If the opponent 4GCs the previous hit, [4]6A will whiff and be punished but [4]6B can hit them during the recovery of 4GC. Notice that the opponent actually recovers faster if they get hit than if they block this move. On hit or block, you can EFC upon landing to recover much earlier and possibly even continue a combo. | |||
|
(in air) Brionac |
|
|
|
|
Air horizontal rush kick. Surprisingly, its frame data is significantly different from the ground version. E.g. all of the air versions start up 1 to 4 frames faster than their respective ground versions. The A version hits on frame 12 and is Saki's best special-cancel after a 4GC. However, 4GC j.[4]6A leaves Saki at frame disadvantage on hit and on block unless you HC or EFC it. Oddly, this move can be EFC'd only if it is done just above the ground, e.g. at 4GC height. All versions can be used as an air movement option and can possibly surprise someone air-to-air. In particular, characters who fly at you with clash frames (Heart, Kira, etc.) won't be able to clash with air-to-air j.[4]6C. | |||
|
Gorm Glas |
|
|
|
|
Yes, you have to hold forwards to charge this move! Fortunately, there is enough time to charge this move if you start holding forwards between 2B and 2C, then late-cancel 2C into [6]4C. This move is used in most of Saki's best combos: learning to hold forward on hit will reward you with better damage and meter gain. You will almost always use the C version because it starts up the fastest. The lower body invul on the A version seems like it'd be useful, but sadly, the invul ends 1 frame before the active frames begin, so Saki can still be hit out of the A version by an unfortunately-timed low attack. You might think 6GC clash [6]4A would be useful since it will (probably) beat the opponent's 2A, but the opponent will usually get 5A or 2B after a clash in this situation, both of which will likely beat Saki's [6]4A. This move is -10 and completely uncancellable on block! Although many players won't punish it (some characters can't punish it without guard cancelling), it is actually less safe on block than a flashkick with meter to homing cancel it. So make sure you use this move only after a hit-confirm. E.g. after hitting the opponent with j.2B, the long hitstun actually gives you enough time to wait and hit-confirm before comboing into [6]4C: you don't need to do it right away! | |||
|
Orna |
| ||
|
Yup, an up charge. Fortunately, the game allows you to do ground normals while holding up to charge this move. E.g. to execute combos like [6]4C 5C [8]2C, you hold up during the animation of [6]4C and continue holding up during 5C: you won't jump as long as you press 5C at roughly the right time. There are many ways to hide your up-charge and surprise the opponent with this overhead. For example: during 5B 5C, during [4]6B, while falling after an air combo, during neutral homing, during a high enough divekick, during an Arcana special, etc. Be creative! The different versions of this move travel different horizontal distances before the kick. The A version hits opponents just in front of Saki. The B and C versions travel farther and can be used as a cross-up overheads at very specific distances. It is surprisingly difficult to cross-up with this move. Often when it looks like a cross-up, it is actually omni-blockable, i.e. it can be blocked both left and right. You can test your cross-up overhead setups by recording the training dummy executing a setup, then playing it back and attempting to block it yourself to see if it is indeed a cross-up. On block, after you recover in the air, you will be at a -5 frame disadvantage. However, on hit or block, you can EFC this move as it hits the ground. | |||
|
(in air) Fragarach |
|
| |
|
Saki's air combo ender. All versions do the same damage: the only differences are the start-up times and the distances they travel forward. You will usually end combos with the A version, never the B version, and sometimes the C version. The C version is useful for 3 reasons: it's more likely to hit in the corner, it's more likely to combo into j.214A+B in the corner, and it (and the B version) recover 2 frames faster than the A version. Because this move does so much damage and knocks down, you should always end Saki's air combos with it (and optionally cancel into j.214A+B for extra damage). Only some Arcana-specific air combos have better enders. All versions of this move leave you at frame advantage if blocked air-to-air. However, if you land before you recover, then you will end up at a large disadvantage. You can "tiger-knee" this move on the ground for a fast overhead, but it will be unsafe on hit (if they neutral tech immediately) and on block unless you homing cancel it. You can input 62369A/B/C or 6412369A/B/C to do this move as close to the ground as possible. Unlike Saki's flashkicks, the hitboxes on this move are deceptively small. Vertically they extend to the bottom of Saki's foot, but horizontally they extend about one third through the blue crescent. There are no hitboxes at her feet or behind her. | |||
|
La'a |
| ||
|
Saki's command roll (technically a judo forward ukemi). It won't escape meaty attacks or throws, but from frame 3 on, it will evade most air attacks and can't be thrown: only low attacks will hit it. TODO | |||
Brionac 「ブリューナク」 - [4]6ABC
|
Claimh Solais 「クラウ・ソラス」 - [2]8ABC
|
Orna 「オルナ」 - [8]2ABC
|
Gorm Glas 「ゴームグラス」 - [6]4ABC
|
Fragarach 「フラガラッハ」 - J623ABC
|
La'a 「ルァハ」 - 214ABC
|
Super Moves
Liath Fail 「リア・ファイル」 - 214A+B
|
Ar Eadbair 「エル・イードヴァル」 - 236A+B
|
Critical Heart
Gulff・Dagda 「ガルフ・ダグザ」 - 632146A+B [+] 2A 2B 5B 5C 5E 2E 5D 5B 5C 8C 2C 5E
   Conditions: In EF or almost charged.
   1. After the superflash and rush, leave the stick at [2] and mash every button but D.
   2. After confirming that 2E hit (The vertical kick) press D.
      After this, keep the stick buffered at [8].
   3. If you followed the opponent, leave the stick up and mash BCE.
   4. When you confirm that 8C hit, jam the stick down to 2 and resume mashing BCE.
   5. If the E finisher hits, congratulations, you've just Gulff・Dagda'd
|
Combos
General Notes
- Generally, Saki's combos are not character-specific and they will work with any Arcana except Earth and Time. The combos below are not character-specific unless otherwise specified.
- When you're practicing combos, I recommend practicing against the following characters:
- Akane: j.4B whiffs against her more easily than other characters. You also get consistent damage numbers because her guts don't start until she's down to 20% health. (Besides, it's more fun to beat up the top tiers!)
- Dorothy: corner combos whiff against her more easily than other characters.
- Fiona: attacks whiff under airborne Fiona that won't whiff against other characters. If you make your own combo, be sure to test it against Fiona!
- All damage numbers below were found vs Earth Akane, whose guts do not reduce the damage dealt. All non-Arcana-specific EF damage numbers were found using the Love Arcana.
- Can't find the combos you're looking for? Looking for optimal combos? Check out the combo threads on the Saki forum! HomingCancel.com Saki Forum
Notation Notes
If you don't know numpad notation, you should look it up first!
- > - Doesn't mean anything! I use these to make combos easier to read.
- [2]8C - Hold 2 (or 1, or 3) before this part of the combo, then input 8C here to flashkick!
- EFC - Extend Force cancel: input A+B+C on the ground during a combo.
- 6HC - Forward homing cancel: input 6D during a combo.
- 5HC~[9] - Input 5D then hold 9 immediately AFTER pressing D.
- j9 - Jump cancel by inputting 9.
- sj9 - Super jump cancel with 9, e.g. input 529.
- j.A j.B dj.A dj.B dj.C - Input A B while airborne, double jump cancel by inputting 9, and input A B C.
- j.623C - Input 623C while airborne.
- dj.623C - Same as above. The "dj" just reminds you that you've used your double jump.
- (nothing / dj.214A+B) - Optional input: either do nothing, or input the 214A+B super.
- 1 bar 6598 dmg / 2 bars 7838 dmg - Meter consumption and damage dealt depend on which option you chose, e.g. nothing or 214A+B super.
Easiest Combos To Learn
First time playing Saki? Use these combos!
|
A B C Flashkick Super - 1 bar 6210 dmg 2A 2B 2C [2]8C (2 hits) j.214A+B
|
|
A B C Brionac Super - 1 bar 6049 dmg 2A 2B 2C [4]6B j.214A+B
|
|
5C Brionac Super - 1 bar 6274 dmg 2A 2B 5C [4]6B j.236A+B
|
|
Bad Homing Cancel Combo - 1 bar 6485 dmg / 2 bars 7725 dmg 2A 2B 2C 6HC > 5A 6C j9 > j.A j.B j.4B dj.A dj.B dj.C dj.623C (nothing / dj.214A+B)
|
|
Bad Extend Force Cancel Combo - 0 bars 6634 dmg / 1 bar 7660 dmg 2A 2B 2C EFC > 5A 6B 6C j9 > j.C j.A j.B dj.A dj.B dj.C dj.623C (nothing / dj.214A+B)
|
Basic Combos Without [6]4C And EFC
Saki's best combos use [6]4C and EFC. In fact, you might want to just skip this section and go straight to the bread-and-butters below! But sometimes you just don't have forward charge and don't have EFC either. That's where these basic combos are useful.
|
Basic Brionac HC Combo - 1 bar 7244 dmg / 2 bar 8484 dmg 2A 2B 2C [4]6B 5HC~[9] > j.B j.C land j9 > j.A j.4B dj.B dj.C dj.623C (nothing / dj.214A+B) |
|
Meterless Brionac Combo - 0 bars 6983 dmg 2A 2B 2C [4]6B land > 5A 6C j9 > (short delay) j.B j.4B dj.B dj.C dj.623A
|
|
Basic 2C HC Combo - 1 bar 7626 dmg 2A 2B 2C 6HC > 6B 6C j9 > short delay j.2C land > 5A 6C j9 > j.A j.B j.4B dj.B dj.C dj.623A
|
|
Oops, I Pressed 5C Without EFC Or Charge! - 1 bar 6318 dmg / 2 bars 7826 dmg 2A 5B 5C 6HC > 2A 2B 2C [6]4C (land [2]8A / j.8HC j.B j.4B dj.A dj.B dj.C dj.623C)
|
|
Optimal 5C No EFC Combo - 1 bar 6758 dmg / 2 bars 8584 dmg 2A 5B 5C [4]6B land 214A+B (nothing / j.5HC~8 j.A j.B j.4B dj.A dj.B dj.C dj.623A)
|
High-Damage, Easy-To-Learn Bread And Butters
These combos are the most training-mode-time-efficient combos to learn. They deal high, often close-to-optimal damage. They always end with knockdown. They are generally universal and work regardless of character and screen position (unless otherwise noted). They are simplified somewhat so that you can learn a smaller # of combo routes.
|
Meterless ABC BnB - 0 bars 7450 dmg / 1 bar 8700 dmg 2A 2B 2C [6]4C > land 6C j9 > j.A j.4B dj.B dj.C dj.623C (nothing / dj.214A+B)
|
|
AAABC BnB - 1 bar 7551 dmg / 2 bars 8791 dmg 2A 2A 2A 2B 2C [6]4C j.3HC land 6C j9 > j.A j.4B dj.B dj.C dj.623C (nothing / dj.214A+B)
|
|
BnB Starting From Many Hits - 1 bar 8199 dmg / 2 bars 9439 dmg j.2B land 2A 2A 2B 2C [6]4C j.8HC > j.B j.4B dj.A dj.B dj.C dj.623C (nothing / dj.214A+B)
|
|
EFC Ground BnB - 0 bars 7630 dmg 2A 5B 5C EFC dash > 6B 5C sj9 j.2C j.B land dash > 6B 5C 2C short delay [4]6C (OTG)
|
|
High Damage Meterless BnB - 0 bars 11991 dmg 6B [6]4C > land 5C [8]2C airdash j.B j.4B land 6C j9 > j.A j.4B dj.B dj.C dj.623A
|
|
High Damage EFC BnB With Super - 1 bar 13322 dmg 6B [6]4C > land 5C [8]2C EFC dash > delay 6B 6C j9 > j.C j.4B j.C j.623C j.214A+B
|
|
Neutral Throw BnB - 1 bar 6818 dmg / 2 bar 8058 dmg 5A+D (3 hits) 6HC [6]4C > land 6C j9 > j.A j.4B dj.B dj.C dj.623C (nothing / dj.214A+B) |
|
Claimh Solais (Flashkick) Starter BnB - 1 bar 7460 dmg / 2 bars 9870 dmg [2]8B j.5HC~8 > j.A j.4B dj.B dj.C dj.623C (nothing / dj.214A+B)
|
|
Claimh Solais Liath Fail Starter BnB - 2 bars 8991 dmg / 3 bars 10786 dmg [2]8C (2 hits) j.214A+B (6 hits) j.5HC~8 > short delay j.A j.4B dj.A dj.B dj.C dj.623C (nothing / dj.214A+B)
|
|
Orna Starter BnB - 0 bars 8446 dmg / 1 bar 9786 dmg [8]2x > delay j.4B land 6C sj9 > j.A j.B j.4B dj.A dj.B dj.C dj.623C (nothing / dj.214A+B)
|
Advanced, Alternative Combo Routes
(NOTE: this section is under renovation.)
|
Optimal EFC Ground Combo Starting From EF 5B - 0 bars 10067 dmg 214C EFC 5B 5C sj9 j.2C j.B land dash > 6B 5C sj9 j.2C j.B land dash > 6B 5C 2C short delay [4]6C (OTG)
|
|
Optimal 5C Brionac EFC Combo - 0 bars 9055 dmg 2A 5B 5C [4]6B land EFC [6]4C land 6C sj9 > j.C j.A j.C j.4B dj.A dj.B dj.C dj.623A
|
|
Max Damage Meterless Combo - 0 bars 12166 dmg 6B [6]4C > land 5C [8]2C airdash j.A j.C land sj9 > j.A j.B j.4B dj.B dj.C dj.623A
|
|
High Damage Midscreen EFC BnB - 0 bars 12903 dmg 6B [6]4C > land 5C [8]2C EFC dash > 6B 6C j9 > j.C j.E j.4B dj.A dj.B dj.C dj.623A
|
|
Max Damage Midscreen EFC Combo - 0 bars 13541 dmg 6B [6]4C > land 5C [8]2C EFC 2[E] land > j8 j.5D~D > j.C j.E j.A j.C j.A dj.A dj.B dj.C dj.623A
|
|
Max Damage Midscreen EFC Combo With Super - 1 bar 13912 dmg 6B [6]4C > land 5C [8]2C EFC 2[E] land > j8 j.5D~D > j.C j.E j.A j.C j.623C j.214A+B
|
|
Orna Starter EFC BnB - 0 bars 9784 dmg / 1 bar 10949 dmg [8]2x EFC 6B 5C > short delay [8]2C airdash j.B j.4B land 6C sj9 > j.C j.4B j.C j.623C (nothing / j.214A+B) |
|
Air-Unblockable 6C BnB - 0 bars 9126 dmg / 1 bar 10411 dmg (vs low airborne) 6C j9 > short delay j.2C land > delay [6]4C land > 6C j9 > j.A j.4B dj.B dj.C dj.623C (nothing / dj.214A+B)
|
Arcana-Specific Combos (OLD)
The combos below are from the OLD Combos section. This section needs to be updated.
Plant Arcana
- 2A > 5B > 5C > 236E > 5B > 6B > 6C > [jc] > jA > jB > j4B > [jc] > jB > jC > j623A
- 7745 dmg.
- Easy, meterless target combo with Vine.
- Against Fiona, omit the 5B after Vine.
- 236E > [6]4A > 6C > [jc] > jA > j4B > [jc] > jB > jC > j623X (> j214A+B)
- 9323 dmg.
- 10988 dmg with Liath Fail.
- Easy, good-damage combo after Vine.
- 236E > 6B > 6C > [jc] > j2C > land > 5B > 6B > 6C > jA > jB > j4B > [jc] > jB > jC > j623A
- 10290 dmg.
- Harder combo after Vine. If Vine hits the opponent at max range, then you need to 6HC/EFC it.
- 2A > 5B > 5C > EFC > dash > 6B > 5C > [sjc] > instant-air j2C > jB > land > dash > 6B > 5C > 2C > delay [2]8B (OTG) j214214E
- 7398 dmg.
- Ground EFC combo that can lead to a high+low unblockable with a plant seed in the corner.
- If you start this combo near your own corner, end it with [4]6C (OTG) j214214E instead.
- Delay the [2]8B until you see them bounce off the ground.
- If you replace [2]8B with 5C [sjc], you are pushed farther back and you will get 2 seeds on the ground instead of 1.

