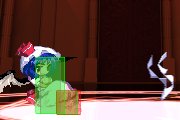
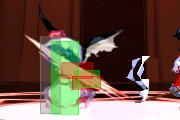
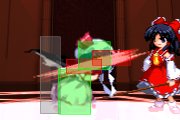
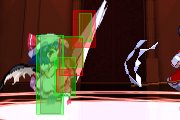
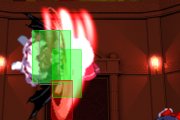
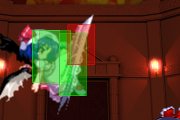
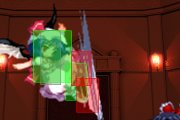
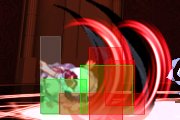
Immaterial and Missing Power/Remilia Scarlet
Introduction
- More info: Touhou Wiki
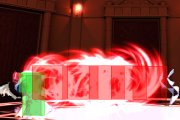
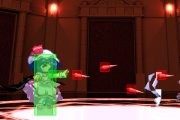
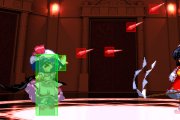
Remilia Scarlet, the Scarlet Devil with the ability to manipulate fate. In the game of IaMP she is nowhere as powerful but still ranks among the stronger of the characters due to her aggressive moveset and high speed. With the ability to airdash three times instead of two and a special ground dash that leaves her bereft of graze attacks, Remilia's playstyle may be familiar to those who play other fighting games and is simple yet effective in the context of IaMP.
Remi's bomb is unique in that it "hits" before resetting point items, meaning all bullets converted by a bomb hitting are counted towards your point item stock when you bombed. If you would gain enough point items from this to gain another bomb, you get the bomb item which will then collect after consuming your current bomb. If you convert enough bullets, you can even get two bombs back with one. This puts extra emphasis on keeping count of your point items, as Remi is also highly reliant on bombs for a big part of her gameplan.
Remi might be your character if you enjoy being annoying and hovering just out of range, going (and walking!) really fast, don't mind a bit (but not too much) of an execution threshold and feel like a few extra lessons on bomb economy. Remi's combo execution is mainly adjusting juggle timings and heights, while her corner pressure loop demands a lot of very tight execution and frame perfect cancels, however it is not absolutely essential to her, and straight up does not work in some matchups.
Tier wise, Remi sits squarely outside S tier, just below the top three. She has drawbacks, severe ones even, but is overall strong enough where it matters to be able to play around them.
Pros:
- High mobility, exceptional walkspeed, short. Excellent walkunder potential.
- Can easily spirit crush after cornering opponent.
- Fast, immediate bullet coverage.
- Does not give many point items.
- Bomb converts bullets before resetting point item count.
- Very strong aerials from above.
- Extremely strong against people who don't understand her.
- Consistently solid damage, high damage floor and good damage ceiling.
Cons:
- Chugs bombs like water.
- Bullets are fast but have narrow angles.
- Not spectacular air to air, has some issues gaining altitude.
- Suboptimal grounded graze options.
- Movement is fast, but also extremely fixed.
- Pressure is somewhat weak outside of her loop.
- Has an extremely nonthreatening deadzone from which she cannot convert at all, which is not immediately obvious.
- Not nearly as overwhelming against opponents who figure her out.
Moves
Melee
| 5A
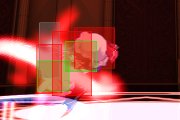
[ Mid | Damage: 180 | Startup: 6 | Active: 3 | Hit: +2 | Block: +1 ] Quick high jab. Tied for your fastest normal with 6B, 5A also mashes into itself and goes into your basic BnB. Fast, +1, excellent reward on corner aerial tag, solid damage on grounded hit. Using this to check the opponent at close range is a solid gameplan, but remember that most low profile moves will dodge this clean. Will not confirm into 6A properly at roughly over half its max range, so keep that in mind and don't kill yourself trying. If you get to pick your choice of corner guardbreak normal, it doesn't get much better than this. | |
| 5B
[ Stagger Low | Damage: 850 | Startup: 10 | Active: 2 | Hit: +5 | Block: +4 ] Short twirling sweep. Very low horizontal range, but is +4, a heavy and an unreactable stagger low. Is airtight into 236C when close enough, and is unmashable into practically anything. Can be used before 6A when bridging your DB loop into 236A against some characters for a bunch of extra damage. | |
| 2A
[ Mid | Damage: 700 | Startup: 10 | Active: 2 | Hit: D | Block: 0 ] Big swat. When you need to disrespect something outside your usual range, it'll probably be with this. Can somewhat double as a low profile antiair at further horizontal ranges due to the disjointed hitbox next to her head. At 10 frames it's pretty fast for its size and 0 on block with plenty of pushback, leaving you in a pretty nice position. Can be airteched on normal hit, so beware of characters like Youmu teching towards you from it. Full untech on counterhit and combos into 236A in the corner. While the range you want to use this is usually not somewhere you can get 236C airtight from, you can still apply 5C 236A frametraps if your opponent disrespects your position after. | |
| 2B
[ Clean Low | Damage: 900 | Startup: 15 | Active: 16 | Hit: D | Block: -6 ] Slow starting, fast moving Bison slide. Is also a heavy and a clean low. While you walk fast, this is one of your only forms of actual fast grounded movement, and is a solid substitute for dashunders other characters can do. You can also try to clip landings with this. Do remember that 2B is only bomb or supercancelable, though it is plus at further ranges. You can still frametrap with bombs (or Cross supers if you're 110% sure they're gonna mash). Actually comboable into 5A on counterhit from the very tip of its range. Can whiffpunish certain very long moves (Alice 2A) on reaction, so keep your eyes open for those. While this rarely goes into actual damage, the knockdown is just as precious due to Remi's bomb-centric gameplan. | |
| 6A
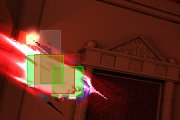
[ Mid, | Damage: 400+500 | Startup: 8, 18 | Active: 2, 2 | Hit: 0 | Block: -1 ] Step forward into mid into high. Key part of your combos. Canceled into from 5A for your typical BnB, as well as used to bridge into 236A from j.B or DB loop. Is only -1, and potentially 0, making for a nice stagger tool when coupled with the forward momentum. This move is a medium, so it will not string properly into 236C, though you can occasionally cancel the first hit into it if your opponent's not ready. Canceling the first hit is a good strategy in general, throwing off opponent timing and letting you get away with things a medium would definitely not string properly into. | |
| 6B
[ Stagger High | Damage: 750 | Startup: 6 | Active: 3 | Hit: D | Block: -2 ] Snappy antiair kick. Is as fast as 5A but cannot be low profiled, making it a powerful substitute in matchups where this might happen. Very good guardbreak tool, combos into 623B with a slight delay, as well as itself on low hit and Cross at any height. Hurtboxes aren't spectacular, but it goes high and doubles as your fastest button that's both easy to confirm and hits too low to lowprofile. | |
| j.5A / 6DA
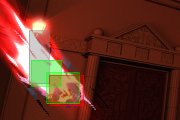
[ Clean High | Damage: 800 | Startup: 10 | Active: 2 | Hit: | Block: -6 ] Textbook downward jumpin. Hitbox is only in front and below. Beats an alarming amount of moves air to air if done from directly above. This is your jumpin of choice from dash, but beware as reckless DA usage can be simply walked or dashed under, putting yourself in the corner if you get too trigger happy with it. While DA might look oppressive, predictable uses can be easily counterpoked due to the 10f startup added onto your dash. Functionally no difference on counterhit. | |
| j.5B / 6DB
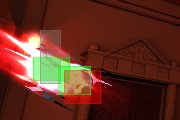
[ Clean High | Damage: 450+450 | Startup: 8, 16 | Active: 2, 2 | Hit: | Block: +4 ] Aerial axe kick, first hit floats, second hit downs. One of your most important moves. Hitbox is not spectacular, but hitting the tip from below is a very awkward angle to contest, so you can still snipe a lot of aerials if you space it right. First hit only DB is the backbone of your combos and the source of most of your damage. While it's part of the exclusive +4 air normals club, DB into DB is extremely mashable by everyone who isn't completely helpless in the air. On counterhit, first hit floats with full untech while second hit causes a massive bounce that must be confirmed much later than it initially seems. | |
| 22A
[ Clean High | Damage: 950 | Startup: 25 | Active: 2 | Hit: D | Block: -7 ] Good mash check. At 25f of extremely visible startup, it's not the best overhead, but makes for a solid frametrap if your opponent's buffering a bit too much graze expecting 236C. While it is -7, the pushback will more often than not keep you safe. Has a blowback effect similar to a much bigger 2A, and wallbounces in the corner. Combos into Spear series at midscreen. | |
| 22B
[ Clean Low | Damage: 850 | Startup: 25 | Active: | Hit: D | Block: -21 ] Nobody expects this move, and for a reason. This is technically your longest reaching physical move, somewhat like a really big 2B. Absolutely terrible on block, you will need resources to not die afterwards. 22B can never be plus and very rarely even borderline safe, and it's about as visible as 22A is. Decent if your opponent's asleep or you absolutely need a frametrap shaped exactly like 22B. Has a very long launch and hitconfirms even if YOU'RE asleep, so that's a plus. Can actually go inside some DP's. |
Bullets
| 5C
Shotgun with kinda clunky recovery and cancel points. You'll usually prefer the aerial versions. You can cancel into 236A to catch overeager graze attempts. | |
| 2C
5C angled way upwards, decent antiair. Very late cancel window and recovery, though. Doesn't always see use, but don't forget about it. | |
| 6C
Almost identical to 2C but flies at a slightly lower angle. Like Sakuya's 6C, it should only be used as anticipatory anti-air at far distances because of the angle. | |
| j.5C / 6DC
5C's better, smarter and stronger cousin. Has low density, but the sheer volume of bullets means some might still go through. A good answer to many aerial games, because of Remilia's ability to dash three times (she can just dash cancel and fire another wave, or follow up with an aerial attack). Has a pretty solid momentum canceling recoil effect, so you can vary your airdash trajectory and provide cover both at once while approaching. While the spirit cost isn't huge, constantly j.C'ing is a quick ticket to no spirit, so be careful. Coupled with your three airdashes, j.C enables a potentially very unpredictable air game. | |
| j.2C / 6D2C
j.C but coming down. This and j.A are your jumpins of choice. Can be used to force movement that you can clip with airdash j.B, cover yourself from backjumps, and it even combos into j.A and a ground combo from alarming heights. This move loves you, and you should love it back. Remember that bullet started combos don't usually scale all too well, so outside of killing you probably don't want to bomb them. | |
| f.2A
Swirlies. Decent recovery and VERY early cancel point (first active frame onwards). Costed pretty high at around 25% spirit, though. Good move in grounded matchups vs lower range characters. | |
| f.5A
Rapidfire vulcan. Has a pretty wild spread, so it doesn't always put even a single bullet where you want it to. Very low spirit cost, decent recovery, variable duration. Special cancelable anytime after the first shot, so be ready with a DP if you see a particularly optimistic approach. | |
| f.6A
45 degree upwards firing f.A. Holding this makes for a reasonable antiair from long range if your opponent sits in its angle. | |
| fj.5A
f.A but aerial. Takes a while to start falling again, so be careful. Needs to be VERY far to come out, so j.C is a lot more reliable most of the time. Doing an instant rising fj.A puts you at an excellent glide height, giving you more options than you'd think. | |
| fj.2A
Like fj.A, but shoots downward. With how good j2C is, this move is largely situational. | |
| f.5B
Very dense single spear. Can counterhit for a knockdown. Not the best bullet in the world, but the raw density of it can prove useful at times. | |
| f.2B
Backhop into fj.2B. Has an extremely short graze window on startup, but rarely long enough to be practical. Rarely sees use. | |
| fj.5B
Aerial f.B. Shares the j.C series' recoil effect. | |
| fj.2B
Aerial fj.B but downwards. Treat it like any other f.B series bullet. |
Specials
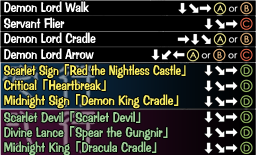
| Demon Lord Walk - 236AB
Forward dashing graze attack substitute. 236A is one hop, while 236B is two hops. The hitbox is between entry and exit points only, so even if you land right on the opponent, you won't hit at tip range. This also applies to 236B, so the little gap between hops is also vulnerable. Hits mid, unsafe on block, but fast and grazes while grounded. Largely combo filler, but you can frametrap and disrespect bullets with it just as well. Most of the time a super will do more damage than a bomb during declare, meaning you should just save your bomb, however Cross 1 gains a lot of extra damage from 22C 2A 6B, and if you'll kill it's obviously worth it. 236A is comboable on counterhit, but requires some adjustments. See Combos section for details. | |
| Servant Flier - 236C
Two waves of f.B spears. Is -1 on block at point blank uncanceled, and airtight into j.2C and a redash when canceled properly. Scary move, key pressure enabler. If you can get this out in neutral, the ground is effectively yours due to how much bullet density you put down. Reserve this move mainly for long range or pressure. | |
| Demon Lord Cradle - 623AB
Very solid DP. Both versions are physical invulnerable, neither grazes. 623A is shorter, but safer and can counterhit, comboing into 6A (or 5B) in the corner on a high counterhit. 623B is hilariously unsafe, cannot counterhit and is airtechable slightly before you get to land. It is also much bigger, and does a very solid 1100 damage by itself. It's a DP, so use it like one. 623B is also a solid combo ender, due to both its high base damage and height. 623B is also essential in the Alice matchup, as it can actually disrespect a lot of her spacing based, otherwise unsafe pressure. | |
| Demon Lord Arrow - 214ABC
Wallcling into dive. This is NOT one of your staple moves. 214A will go to the middle of the screen, and 214B near your own corner. 214C is slower, but homes onto the opponent's position. 214C can never track above roughly your airdash angle, so be careful. A and B are fast, and have fixed destinations, making them decent positioning tools, while C is more of a gimmick or Hail Mary play. While Arrow does not have notable landing recovery on whiff, you go into a big bounce effect on block, similar to Marisa's broom or Suika's DB, with the difference that you have absolutely no cancel from this whatsoever, and are extremely punishable on block. Does notable spirit damage on airblock, so you can sometimes aircrush with C. Each version is very plus on hit, letting you combo off regular and counterhit, depending on how close you land. |
Spellcards
ALL of Remi's spellcards are Type-3. Spear series is not a regular bullet and Cradle series is not physical.
| Scarlet Sign "Red the Nightless Castle"
Giant fully invulnerable 6f Type-3 cross. Airblockable so not recommended unless your opponent's airdash sucks or you can aircrush. Always comboable from antiair 6B. Excellent bomb substitute as a combo ender, and adds a LOT of damage when combined with one. Heartbreak's middling numbers and Cradle's situationality make this your general level 1 spell of choice. You can be cheeky with this since it is a proper reversal, but the risk reward means you really shouldn't try anything too cute. Hilariously unsafe, to the point where you'll still eat a solid punish if you crush with it perfectly. At least you'll get to land first so it won't hurt quite as much. |
||
| Scarlet Devil "Scarlet Devil"
Red but bigger in every way. More hits, more hitbox, more damage, more minus frames. Deals significantly less extra damage with a bomb investment, so don't bother unless you need the extra 300 or so damage. Your usual Level 2 spell is a tossup between this and Gungnir. |
||
| Critical "Heart Break"
Big Type-3 spear. Costs 40% spirit to use and to block. Not as good as its Level 2 variant, and Red is such an overall good level 1 spell that this rarely sees use. Full graze. |
||
| Divine Spear "Spear the Gungnir"
Gigantic spear. Can't be lowprofiled except by very specific moves at very specific distances. 70% spirit to use and to block, does an immense 3k(!) raw. Full graze like its Level 1 counterpart. Crushes after almost any spirit damage. Sees a lot more use than Heartbreak, just beware of self draining with this. You will need to bomb longer combos to tack this on at the end. |
||
| Midnight Sign "Demon King Cradle"
Fastest move in the game at 3f startup, this alone justifies picking Cradle in matchups where you need to deal with things that are just barely safe otherwise. Physical invulnerable up to active, does not graze. Can also be used for bootleg timestop (detailed below). There is practically no occasion your opponent can't get their favorite punish on this if it doesn't hit properly though. |
||
| Midnight King "Dracula Cradle"
Cradle 1 but bigger. Solid contender for most punishable move in the game. The Cradle series in general adds notably less damage than the other spells as combo enders. You'll have to delay this after 236A due to how fast this is. |
Combos
Essential Combos Video by Toho
Remi's actual combos are fairly simple, and can be divided into two core routes:
- ...6A 236A...
- DB(1) x3-4 6A 236A... (DB loop)
Basically everything goes into 6A 236A and it's what you'll usually take if you can't get the DB loop instead. You can hitconfirm into it from 5A or 5AA if you're close enough, and will be your grounded route of choice.
The DB loop is what you want and what most of your damage will ideally come from. The trick is pressing B after the peak of your dash, so that only the first hit gets to come out so the second hit doesn't knock down.
Keep an eye on your opponent's height and delay your first few reps accordingly, j.B(1) has enough hitstun to afford this. You can go for more than 4 loops, but at this point you can't properly transition into 6A anymore.
- (ground to air) 5A x [n] 6A 236A... A guard break combo in the corner only. This counters opponents who are fond of jumping out of the corner; you can stagger the 5A timing to confirm block or hit easily. The maximum recommended number of 5As in a practical match is roughly 6, though 10 is possible (but at 10 the 6A no longer combos due to the opponent being too high). Not a common combo but something to keep in the arsenal should the situation arise. Standard combo enders apply. The ease of this combo depends greatly on character, for instance getting even the usual 6 reps on Suika is already a pain, while Sakuya is comparatively much easier to get 7+ reps on. Some characters will also let you get a 5B 6A pickup for a lot of extra damage:
- 5A x4 5B: Works on everyone but Suika, Sakuya, Yukari and Patch.
- 5A x5 5B: Works on Reimu, Meiling.
- 5B Pickup
- You can transition your DB loop into 5B 6A instead of just 6A for about 400 free damage on certain characters. For most of them, you'll want to delay your 6A, sometimes by quite a bit, because of how much 5B pops up.
Marisa, Meiling and Patch do not require delaying. Does not work on Suika or Yukari. Can work on Sakuya in theory but very tight, not even worth the effort.
- Other starters
- (6B) 236C hjc9/(8) j.B (5A 6A 236A)
- In case your 236C string actually hits. If 6B hits in the corner, instead hjc directly up. If 236C hits grounded, you can link 5A 6A 236A afterwards. Bombing is usually not worth it after, since the bullets destroy damage and hitstun scaling.
- 6B...
- 6B 623B/Cross - Grounded hit. For damage. 623B does a lot of damage (1100).
- 236A... - Delay a LOT. Only works on grounded hit. Character specific. Is trivial on Marisa, which salvages the matchup.
- j.B - Kinda tight but resourceless knockdown from 6B.
- 2C - Doubles as a tech trap.
- 214A - Only works when cornered yourself.
- (near corner) 236A CH DB(1) 6A 236A 22C...
236A CH has a big untechable bounce but surprisingly bad starter proration, so you can't actually properly DB loop from it. You can still milk it for the proper 3k by doing a single DB, then going directly into 6A 236A and bombing instead.
- Enders
- These are all possible enders for the combos listed above.
- ... 22C j.B: Usual finisher. Guaranteed knockdown, works anywhere. Note that in some fringe cases if you've somehow managed to do 5+ DB loops before the bomb, hitstun scaling can still make this drop.
- ... 22C 6DB j.B: This is her corner finisher. Recommended highly because it deals more damage than a simple j.B and still allows you to maintain the knockdown. Against opponents who tech out of the corner you can use 6DA on wakeup to cross them up, you can backdash and do f.2A for meaty bullet pressure if they don't tech. Does not work if you do more than 3 DB reps.
- ... 22C 2A 6B (2C/Cross): Done easiest in the corner but also possible outside (walk backwards slightly if you do this in the corner and omit 2C, which is a tech punish setup midscreen). The sacrifice you make for damage is that the opponent will be airborne at an angle Remilia cannot easily control, as well as not achieving knockdown which results in lost point items for her bombs. Usage is generally only recommended sparingly, reserved for ending the round/match or against an opponent who techs into 2C, which you can then cancel into 236C to keep them airblocking for further pressure. Its also possible to combo into Cross spellcard from this. Note that while doing 22C 2A 6B into Cross 1 adds a very significant 800 or so damage compared to simply canceling into Cross directly, the same string into Cross 2 only adds about 200 damage, making the bomb investment not really worth it unless you're going to kill with it.
- ... 22C 22a: Another midscreen finisher. Does slightly more damage than her regular finisher, and knocks the opponent closer to the corner although be careful..done too close to the corner it will cause wallbounce allowing them to airtech. Use this if you want to combo into Spear spellcard afterwards.
- ... 22C 5B 6A: Big big damage on whoever this works. Very tricky to learn, but still worth knowing. Usual 5B character specific timings apply. Will whiff completely on Suika and Yukari. Does not guarantee knockdown either so its best saved for finishing rounds, spellcard combos, or if you're confident in your tech punishing. Combos into Cross and Cradle spellcards for huge damage.
- ... 22C 5B 6A 623B: You better kill with this one.
(air to air) 6DB (walk forward) 6B (pause) 623B: This is the alternate to the 6DB loop for situations where Remilia is too close to the opponent or the opponent is too low for a 6DB loop. Timing is tricky at first for the 623B to land, just remember to let the opponent fall further to the ground if your 623B is not landing, and to do 623B as Remilia retracts her leg from the 6B. Done properly, you will be at a slight disadvantage if the opponent techs but will be able to block and backdash their retaliation. The damage is a compromise between her normal 236A BnB and her 6DB loop but has the advantage of being her only BnB that doesn't require a bomb.
Strategy
General
While Remi's design initially screams rushdown, and she's definitely not uncomfortable at point blank, she has issues sustaining any kind of credible close range threat that isn't her corner loop. While both 6B and 5B grant you a heavy spirit damage high/low, 5B is 10 frames, requires you to be point blank and isn't cancelable into, giving precious little incentive to low block due to needing to walk up and 5B raw, which isn't exactly the safest option.
What she does excel at, though, is being very annoying and disruptive just outside poke range. Her fast but fixed movement gets to shine here, as do tools like f.2A and glide j.B, as well as strong counterpokes like 2A and 2B. The biggest weakness to her DA, the ability to dash/walk under it without issue, is also mostly gone at just tip range.
Further than this, her f.A series is also very annoying and very good at catching your opponent setting up bullets, either forcing movement or getting you more sweet, sweet point items. It's also worth noting that doing a rising jf.A as early as possible naturally leaves you at a height where your second airdash will glide for almost its whole distance, which is great. Just remember that jf.A requires you to be way further than a grounded f.A, so you don't do a random rising j.A and kill yourself.
Bootleg Timestop
Eating a bullet during the superflash of either Cradle spell will cause everything else to freeze accordingly, but Remi herself can move freely until superflash ends.
This opens up a lot of potential opportunities to either escape pressure or even punish certain bullets on hit. There are four major points to be aware of if considering this:
- Superflash isn't exactly long. If you find a long range timestop, you can probably cover some ground, but punishing is out of the window.
- Block inputs are not ignored during superflash, so the opponent can still block if they're not in recovery or some other state.
- Eating a bullet that knocks down or otherwise has enough hitstun to negate your advantage like this is just a waste of a stock.
- You still take damage doing this, as you actually do eat the bullet. Decide if you can spare the health first.
- Superflash isn't exactly long. If you find a long range timestop, you can probably cover some ground, but punishing is out of the window.
This gives Cradle a lot of extra value in matchups where you see a lot of low hitstun bullets (Reimu needles, Alice, Youmu f.B, butterflies, Yukari f.A)
Gliding
Landing during airdash momentum will cause you to slide across the ground for a fixed distance in a sort of freely cancelable graze state.
You can freely block and do grounded moves at any point during this state, giving Remi an actual sustained grounded graze option, which she otherwise sorely lacks.
You are however, for all other intents and purposes, still aerial. You still cannot block air unblockables, and being hit will act as if you were air to aired at that height. Beware of good air to air conversions.
Canceling this state in any way forfeits your graze, so make sure you actually go through whatever bullets you aim for with it first unless you actually want to eat them.
Remi will high profile a lot of very low hitting moves while gliding, meaning moves like Yuyu 2B will whiff completely. Just make sure you dodge the whole move before pressing a button and forfeiting your glide state.
Rushdown
Remilia's HJC rushdown works the same as anyone else's, but is distilled down to very simple, effective strings that do deceptive amounts of spirit damage. Your pressure is largely enabled by the constant threat of 236C loop and your strong stagger high/low game. Remi is good at traditional stagger pressure and frametraps, but knowing the actual threats in her offense will help you understand how to actually catch people doing stuff with it.
- What you get damage from
These are your prime threats. You're either looking for these or to enable enemy escape options that lose to these. Remi is unconventionally good against jumpouts and weak to more horizontal escapes, so keep that in mind.
- DA/j.B(1) jumpin (big) - beats mash, crushed downback, loses to dash/walk
- 5A low corner juggle (big) - beats jumpout, loses to lowprofile
- DB air hit (big) - beats jumpout, does nothing to any other option
- 236A CH in/near corner (big) - beats mash, jumpout
- 623A high CH - it's a dp
- 6B 236A on characters it works against (key route vs low profile characters)
- 5A/6A point blank, 5B overall (medium-big with bomb) - works as a frametrap
- 2B max range CH (medium with bomb) - more of a neutral option but beats stuff
- 6B any hit with Cross declared (medium) - stable option, beats a lot
- j2C jumpin (medium) - beats bullets, early antiairs
- 6B delay 623B (decent, leads to awkward tech)
- What you get knockdowns from
Options that don't lead to significant damage but reset the situation. Knockdowns are precious to Remi due to her crippling bomb addiction.
- 6B 236C hj9.b (confirmable)
- 2B (bomb/spell to add damage)
- 22A no bounce/22B (no)
- 236A/B normal hit (bomb/spell for damage)
- f2A (can add iad j.B(1) into stuff)
- 623A (decent on hit)
- Things that are not scary
These are the options any defending opponent wants to limit you to. These lead to either piddly damage or acceptable damage but very awkward airtechs/knockdowns out of the corner and not on your terms.
- 6A 70% to max range - Either you hit 6A(1) and push yourself out of the second hit, or you whiff 1 and hit 2. Neither gives you enough time to clear the buffer for a clean 236A on reaction.
- 5A over half range - Not mashable into itself, pushes you into 6A's bad range as mentioned above.
- 236A CH at any range you don't get to combo it properly - This is one of Remi's most awkward starters and leads to nothing outside its very specific spacing.
- Guardbreak 6B without spell - Still better than nothing, but the resulting airtech is awkward for you.
- 5C - stray bullets aren't reasonably confirmable unless you see it long in advance and do little damage. Not scary, but not bad for you.
Overall, your threat of damage is at its most awkward around halfway to 6A's max range, as none of your usual grounded starters combo properly anymore, you're too close to reliably dash reset and slower, longer options like 2B and 236A can theoretically still be mashed out. j.B, high reward as it is, is also very narrow, only beating jumping and doing nothing at all to any other option. At closer ranges you can threaten a lot, and at slightly longer ranges you have lower commitment options like f2A open, you can do dash jumpins without cornering yourself free and you're not at immediate risk of taking damage.
- Sample strings
- 5A 6A... or 5B... or 6B... or 5B 6B... or 2A...
- Stop: END. Staggering bullets in your HJC rushdown will make opponents hesitate when trying to escape.
- 22A: END. Opponent is free to escape, use only to stop opponents who graze attack frequently.
- 22B: END. This option is subpar, make sure you have a bomb if you use this or you'll be eating damage.
- 5C... or 236C...
- 236A (can only be used with 5C): END. If you have a bomb you can go for a CH O-bomb versus a poke-happy opponent, but generally you're safe on block. This option punishes people who react late to the 5C with a HJ or a graze attack.
- HJC9 j.A/B: END. Momentum restarts, you are in the beginning situation again to try another mixup.
- HJC7 j.2C: END. Momentum is reset, this option allows opponent to graze out of pressure. If they remain blocking then do j.6D and restart, otherwise back off with j.4D. However, when done properly (extremely tight) from a 236C this string is airtight and gives you massive frame advantage for another free mixup. Point blank and corner only.
- HJC8 j.2C: END. Used mostly midscreen, but opponents have a lot of ways to escape this one so it's dangerous.
- HJC7 j.6D j.B: END. Momentum restarts, opponent can graze out but this option is slightly tighter than j.2C assuming they are blocking and not sticking pokes out. Best used in corner as it can be escaped or countered outside.
The Loop
5B/6B 236C hjc7 j.2C j.6D j.B land
- As mentioned above, Remi has a technically airtight, but very difficult spirit positive corner loop. Airtight on almost the entire cast, does considerable spirit damage, and is spirit positive, meaning you can crush with it fairly well. Actually connecting a point blank 236C isn't the most realistic thing, however it is airtight off any heavy (type C) normal, namely 5B/6B, which also adds an additional chunk of spirit damage on wrongblock just in case.
- You absolutely have to be point blank so the spears hit instantly as they appear, without needing to travel, to be airtight. The hjc needs to be done ASAP as does the j.2C. How tight j.2C is depends on how tall and/or fat the opposing character is. For this reason this does not work on Meiling and is a one frame timing against Youmu.
- Characters by degree of difficulty: Meiling (can never work) > Suika > Youmu (1F window) > Yuyuko > Sakuya > Reimu > (Marisa, Alice, Remi) > Patch > Yukari (almost easy)
Match ups
| vs Reimu:
It's EoSD all over again. Reimu's j.A and wide bullet coverage really suck for you. Glide judiciously and stay low, you never want to be at medium-far range in angles Reimu has direct bullet coverage in. Really comboable hurtbox though, you get any and every possible combo route on Reimu you could ever dream of, including the exclusive 5A x5 5B juggle. |
| vs Marisa:
Textbook hit and run matchup. Don't be close, especially not on her terms.
|
| vs Sakuya:
Folds pretty hard on defense, but neutral is still suffering. Threatens a wider range than Marisa. If the Marisa matchup was hit-and-run, this is relentless offense.
Beware of f.A around declare time, your declare is stupid slow. Don't be above her. Has some genuinely idiotic lowprofile moves, so be aware of those. Be careful when gliding, 5A is death. |
| vs Alice:
623B disrespects a lot of Alice's spacing based otherwise unsafe stuff. 2B can whiffpunish her 2A on reaction. f2A is really good here, as is f.A if she backs off to set up. |
| vs Patchouli:
Patch doesn't have a lot of answers to just plain old stagger pressure AND has the most forgiving 5B pickup hurtbox, so offense is Christmas for you. Hope you're good at gliding, because you're gonna be popping a lot of bubbles. Don't even try to beat her bullets head on. Her ground dash also has some stupid very late recovery thing, so always expect a jump or move from it. |
| vs Youmu:
Test of patience. Hover around 2B range. Do not let her set up f.B. Air to air is suicide. Don't dash or try to force pressure on her. Try to duck her aerials if she does a lot of rising j.A. This matchup is definitely in your favor, as Youmu has issues finding damage on you unless you voluntarily challenge her in the air for some reason, which is one way to end the round extremely fast. f.2A and 2B are really good here. Loop is unreliable. |
| vs Remilia:
6B |
| vs Yuyuko:
You don't get in, she doesn't get butterflies. Too tall to dash crossup. Nobody gets to play. Cradle punishes 2A on hit as well as fits into the gap from any cancel. Don't be too active inside her DB range and don't stick your hand into 6B and you'll be fine. |
| vs Yukari:
Big, fat, slow, be careful approaching though. Solid candidate for Cradle pick. Don't let her declare and don't ever let Ran touch you. 6B is a strong lowprofile so your 5A isn't free. |
| vs Suika:
Beware of lowprofile. Do not dash towards. Respect backrun cancel and d3A at all times. Using 2B is scary. Hard to loop. |
| vs Meiling:
Strong DP, big damage advantage, equally fast and Meiling's few bullets don't really hurt your movement. Free on paper, but you still have to win first. Funnily enough, immune to the loop. |
Frame Data
                                                              Block   Hit     CH
Motion     Damage     Proration   Startup  Active  Duration   Adv     Adv     Adv   Untech  Guard   Type
------------------------------------------------------------------------------------------------------------
 5A         180        98%          6        3       14        +1      +2      X     25      Mid     A
 2A         700        90%          10       2       32        0       D       D     25      Mid     C
 6A         400+500    95%+95%      8, 18    2, 2    34        -1      0       +7    25+25   Mid,    B
                                                                                             High    B
 5B         850        90%          10       2       28        +4      +5      +16   35      Low     C
 2B         900        85%          15       16      43        -6      D       D     40      Low     C
 6B         750        90%          6        3       30        -2      D       X     40      High    C
 22A        950        75%          25       2       54        -7      D       D     60      High    C
 22B        850        75%          25       25      68        -21     D       D     60      Low     C
 j.5A       800        90%          10       2       35        -6                    40      High    B
 j.5B       450+450    92%+95%      8, 16    2, 2    31        +4                    40, 40  High    B
 22C (N)    0          80%          12       3       42        -8      D       X     oo      Mid     C
 22C (O)    500        80%          12       3       37        -3      D       D     oo      Mid     C
 22C (D)    0          80%          12       3       58        -24     D       D     oo      Mid     C
 22D        x          x            30       x       128       x       x       x             x       x
- Properties
- 22C (N/D): 1-14F invincible
                                                              Block   Hit     CH
Motion     Damage     Proration   Startup  Active  Duration   Adv     Adv     Adv   Untech  Cancel  Type
------------------------------------------------------------------------------------------------------------
 5C         100*8      96%*8        19       oo      42        -8      -7      X     15      29      B
 6C         100*8      96%*8        19       oo      42        -8      -7      X     15      29      B
 2C         100*8      96%*8        19       oo      48        -14     -13     X     15      32      B
 j.5C       100*8      96%*8        13       oo      44                        X     15      20      B
 j.2C       100*8      96%*8        13       oo      44                        X     15      20      B
 f.5A       100*1-7    98%*1-7      12       oo      29                        X     15      16      B
 f.2A       200*3      93%*3        12       60      35                        X     15      13      B
 f.6A       100*1-7    98%*1-7      12       oo      29                        X     15      16      B
 fj.5A      100*1-7    98%*1-7      8        oo      24                        X     15      16      B
 fj.2A      100*1-7    98%*1-7      8        oo      24                        X     15      27      C
 f.5B       600        85%          18       oo      53                D       D     40      31      C
 f.2B       600        85%          17       oo      55                D       D     40      27      C
 fj.5B      600        85%          17       oo      47                D       D     40      27      C
 fj.2B      600        85%          17       oo      35                D       D     40      27      C
- Properties
- f.5A: Up to 7 waves
- f.6A: Up to 7 waves
- fj.A: Up to 7 waves
- fj.2A: Up to 7 waves
- f.2B: 1-3F graze
                                                              Block   Hit     CH
Motion     Damage     Proration   Startup  Active  Duration   Adv     Adv     Adv   Untech  Cancel  Type
------------------------------------------------------------------------------------------------------------
 236A       900        85%          14       6       46        -12     D       D     40      25      C
 236B       600+600    90%+90%      15, 38   6, 6    88        -21     D       D     40+40   26,49-88 C
 623A       750        85%          10       8       52        -19     D       D     40              C
 623B       1100       85%          10       16      83        -51     D       X     40              C
 214A       950        85%          36       land                      D       D     40              C
 214B       950        85%          36       land                      D       D     40              C
 214C       950        85%          36       land                      D       D     40              C
 236C       150*8      92%*8        22, 37   oo      62        -1      -5      X     25      36      B
- Properties
- 236A: 1-19F graze, rush ends on block
- 236B: 1-20F, 27-43F graze, rush ends on block
- 623A: 1-13F melee invincible
- 623B: 1-17F melee invincible
- 214A: 1-?F graze, rebounds on block
- 214B: 1-?F graze, rebounds on block
- 214C: 1-?F graze, rebounds on block
- 236C: Partner 4F hitstop on hit, partner 9F hitstop on block, 20F formation, 21F 36F discharge
                                                                     Block   Hit     CH
Card         Damage       Proration     Startup     Active  Total    Adv     Adv     Adv   Untech  Type
------------------------------------------------------------------------------------------------------------
 Cross Lv1    150*12      98%*12         1,6(7)      90      174      -91     D       D     oo      C
 Cross Lv2    150*20      98%*20         1,8(9)      150     238      -104    D       D     oo      C
 Spear Lv1    1750        75%            1,19(20)    oo      60       -18     D       X     oo      C
 Spear Lv2    3100        50%            1,19(20)    oo      60       -18     D       X     oo      C
 Spin Lv1     100*20      98%*20         1,3(4)      40      105      -66     D       X     oo      C
 Spin Lv2     120*28      98%*28         1,3(4)      40      131      -94     D       X     oo      C
- Properties:
- Cross Lv1: Partner 4F hitstop on hit, 1-?F invincible
- Cross Lv2: Partner 4F hitstop on hit, 1-?F invincible
- Spear Lv1: 1-47F graze
- Spear Lv2: 1-47F graze
- Spin Lv1: Attacks come in 2F intervals after the first, 1-?F melee invincible
- Spin Lv2: Attacks come in 2F intervals after the first, 1-?F melee invincible
Motion    Startup   Active   Recovery  Graze      Cancel   Guard   Invulnerable
------------------------------------------------------------------------------------------------------------
 7/8/9     5         x        x         x          6+       6+      x
 7D/8D/9D  5         x        x         1-15       6+       16+     x
 6D        8         20       8         1-35       9, 29    28+     7-8
 4D        6         14       10        1-21       x        x       1-6
 j.6D      8         8        x         1-25       17+      17+     x
 j.4D      9         9        x         1-27       19+      19+     x

