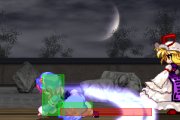
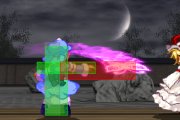
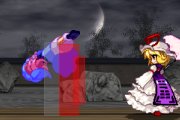
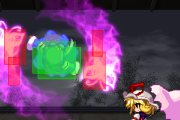
Immaterial and Missing Power/Yuyuko Saigyouji
Introduction
- More info: Touhou Wiki
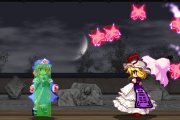
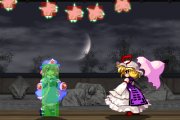
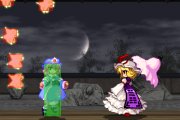
Yuyuko Saigyouji is a ghost who has the power to instantly invoke death in humans, but prefers to - apparently - do so through swarms of multi-colored butterflies.
Yuyuko has a very strong ground game with a fast ground dash and good ground normals (actually somewhat poor in many matchups unfortunately due to inferior hitboxes). On the other hand, her aerials are very slow making her vulnerable in the air without cover fire. Playing Yuyuko properly requires a patient mindset and a good sense of movement and footsies.
Yuyuko is able to turtle in the air to an extent (matchup dependent) because of her good high jump and air projectiles that keep her floating. Her projectiles travel slow, and are large - which is particularly useful in IaMP. However her bullets are also slow to come out so you need a lot of distance or a knockdown to get them out. And she has several moves that are basically useless.
Yuyuko's pressure is usually considered "Passive Aggressive", she can stay in for a long time but lacks the tools to quickly open up a player who is willing to patiently block. Because of the passive-aggressive nature of Yuyu's pressure, she also excels at baiting out reversals and other various escape options.
You might consider playing Yuyuko if you are looking for a patient ground based character that doesn't rely on rushdown.
Pros:
- Big pokes with excellent hitboxes.
- Very lengthy graze on dash and fast, big graze attacks.
- Very high damage ceiling.
- Butterflies provide amazing cover fire.
- Cancelable, fully invulnerable one button reversal that can be used while crushed.
- Crushes are great on block.
- Good at stalling in the air.
- Good guardbreak game and reward.
- Wavedash!
Cons:
- Slow aerials and terrible airdash recovery, practically helpless air to air.
- 6B has negative horizontal range, can just lose to good hitboxes despite the right read.
- No half decent immediately active bullets.
- Very high damage ceiling but kinda middling damage from typical neutral situations.
- Only real mashable light is terrible on block and hit.
- Weak antiair game in the situations you actually want them.
- Part of the big girls club, tall and fat means stuff that shouldn't work works on you.
- Alice is arguably one of the worst matchups in the game.
Moves
Melee
| 5A
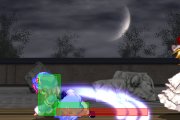
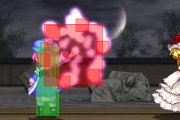
[ Mid | Damage: 650 | Startup: 7 | Active: 6 | Hit: +4 | Block: +3 ] One of the better 5A attacks in the game, this move is good at nearly everything. Works as an anti air against a badly spaced jumpin or airdash approach. Useful in pressure due to frame advantage. Confirms into a small combo on counterhit. This poke is pretty good overall, when in doubt just 5A. At point blank range, this move can be crouched under by everyone except Patchouli, Yukari, and Meirin. What keeps this move from being really good is that it's not only crouchable, but many if not most characters can flat out go under it with a low profile attack. With perfect spacing, the slightly lower hitbox near the end will punish many (but not all) low profile attacks. | |
| 5B
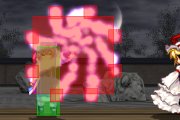
[ Stagger High | Damage: 950 | Startup: 12 | Active: X | Hit: -6 | Block: -7 ] Hits on both sides, Yuyuko will actually hop off the ground for a bit. Can be canceled upon landing (e.g. into 6B to punish any sort of retaliation). Not a reccomended button to push between the late cancel point and bad recovery. But it's not completely useless, it can be used on guard crushed opponents for a high option. This move often comes out when you input 6B right after getting crossed up which is sometimes nice, as it hits behind Yuyuko. | |
| 2A
[ Clean Low | Damage: 220 | Startup: 6 | Active: 3 | Hit: -4 | Block: -5 ] Yuyuko's fastest melee, a quick low jab. The most important thing about this move is that it doesn't wiff crouchers at point blank (unlike 5A). Unfortunately even if you punish a low profile attack with 2A Yuyuko gets only a very small amount of damage from it. An alright button for mashing out due to decent startup and low profile. Disadvantageous on block, but chains into itself, so you can stagger it fairly effectively. Unfortunately the bad recovery means it's not as useful in pressure as it could be and you cannot followup with any sort of real combo unless there's butterflies on the screen. However canceling 2A into 6A will stuff many retaliations. Between proper staggers and canceling into 6A cancels this move can actually be used in pressure. | |
| 2B
[ Clean Low | Damage: 1100 | Startup: 15 | Active: 3 | Hit: X | Block: -7 ] A low sweep with huge range, but extra slow startup. Obviously really useful for footsies, not many characters other than Yukari and Alice can boast that type of reach. Other than punishing wiffed attacks, 2B also has pretty decent canceling options. 2B late cancel into 6A will catch any attempt to move or attack, which can build you respect for putting out some butterflies on the screen when blocked. Normally used for punishment against grounded opponents when there's enough time for it to come out. | |
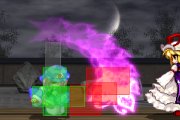
| 6A
[ Stagger High | Damage: 1000 | Startup: 17 | Active: 6 | Hit: -8 | Block: -9 ] Big slow sideways butterfly swipe. This move moves Yuyuko forward and that taken into consideration has nearly as much range as her 2B. 6A reels on ground counterhit, This move has a stronger hitbox than her 5A against crouching opponents, but many moves can still go right under it. There's also some moves that will get stuffed during the startup but not in the active frames, so proper timing is important. Due to very poor startup, you don't often want to use this move outside of canceling into it - however there's some limited use in the corner if you have butterflies out (stopping jumpouts from outside of 5A range). Even with that taken into consideration, this is still one of Yuyu's crucial melee moves. It's her only command normal she can safely cancel into and it does hefty spirit damage on wrong-block. From a good distance you can cancel 6A into 236S and still be safe if you HJC7. Midscreen 6A > 412A is a useful frame trap, and in the corner 22A can be used as a more threatening cancel. | |
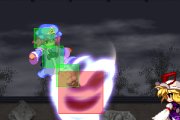
| 6B
[ Stagger High | Damage: 1000 | Startup: 10 | Active: 6 | Hit: -18 | Block: -19 ] This move is affectionately known as "The Flip", and is one of the few reversals in the game with complete invulnerability to all types of attacks. Unfortunately that does not mean that it's your standard "Dragon Punch" type reversal. Flip will wiff entirely on a neutral opponent. On wiff Flip will move Yuyuko back a fair amount, meaning that it's not always free to punish but is indeed quite punishable due to the long recovery. In the corner since Yuyuko cannot move back any further, Flip's effective range is increased significantly, however it's also more unsafe. The actual use of Flip is more akin to a 1-button counter than a DP, because in most situations you actually have to catch your opponent doing an attack for it to connect. There's a situational "Safe Flip" setup in the corner that involves doing 6B right as the opponent would block a butterfly (this extends their hitbox slightly) - so if they do an attack they get hit and if they block you can still cancel the Flip. On ground reversal you normally want to cancel into 412A which will combo and knock them down. Flip is also useful as an anti-air. A well timed Flip will anti air nearly any reckless approach. On anti-air you normally want to cancel into 236S to put some bullets on the screen as 412A does not reliably combo off anti-air 6B. Unfortunately since IaMP has 2 airdashes, it's very easy to bait flip by airdashing backwards, then airdashing back in to punish after it wiffs. This is even easier for characters who have a j.2C that floats them in the air (i.e. Sakuya, Reimu, Marisa, Reimu, Yukari, and Patch j.6C). You can retaliate to these sort of baits with another one of her anti air moves (5A, 66B), but it's quite risky as these are also very much punishable if done at the wrong time. | |
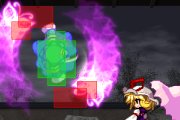
| j.5A
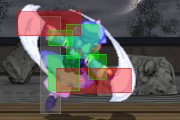
[ Clean High | Damage: 1200 | Startup: 15 | Active: X | Hit: X | Block: -17 ] A two-butterfly circular spin. Huge move that hits on almost all sides and crosses up. Groundslams on aerial counterhit and reels on grounded counterhit. Also high damage, what a great move! Not really, this move has effectively the worst startup in the game of any air normal. Comes out one frame faster than her j.B, but doesn't cover all the areas at once (slowly rotates). It also has a blind spot at point blank in the air. Reckless use of this move is just asking to get hit by a better air normal. That does not mean this move is useless with bullets on the screen to prevent the opponent from attacking with melee, the fact this move covers a huge area makes it great for forcing a block / hit. It also has use when used alongside good spacing, like moving back and throwing out j.A preemptively against an approaching opponent. | |
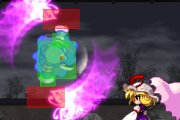
| j.5B
[ Clean High | Damage: 350*4 | Startup: 16 | Active: X | Hit: X | Block: -4 ] Shares a similar sluggish startup to j.A, but instead of hitting on all sides it hits around Yuyuko's feet for the whole time. Slow startup aside, the hitbox is very strong and the active frames last forever, making it a real threat to someone stuck on the ground. Good to use from IADs, and can be used instead of j.A in situations where you have more control and know it should hit. Sometimes a HJ8 j.B can stop someone from jumping at you (of course since it's Yuyuko it's recommended your reserve this option for when you have cover fire). j.B is also very scary to block due to hitting 4 times (varies on height), and generating huge frame advantage on block. Even from a blocked HJ9 j.B (yes that does hit standing opponents and even some crouching!), she still has some frame advantage. When pressuring, IAD j.B is a large threat and you should use it when you get the chance. | |
| 22A
[ Clean High | Damage: 1100 | Startup: 24 | Active: 4 | Hit: D | Block: -1 ] Groundslam on counterhit. Yuyuko's high guard crush, as guard crushes go it comes out with barely passable speed, and is very safe at only -1F. Deceptively, the hitbox doesn't even go as high a 5A, but it won't wiff crouchers and can still catch jumpouts after 6A when canceled early enough (doesn't work midscreen if done from too far or delayed too much due to pushback). | |
| 22B
[ Clean Low | Damage: 1100 | Startup: 27 | Active: 4 | Hit: D | Block: -3 ] Yuyuko's low guardcrush. Slower, more recovery, and smaller hitbox than 22A. Fortunately 22B's startup is more subtle than 22A's meaning that it can still be wrongblocked practically. This move does have 1 very useful property - unlike 22A, this attack doesn't extend Yuyu's hittable box, making it great for punishing pokes from a safe distance. At perfect distance it can even punish a N-bomb. | |
| 6DA
[ Mid | Damage: 250*3 | Startup: 16 | Active: X | Hit: -4 | Block: -5 ] Hits 3 times and is special cancelable on each hit. The forward momentum makes it useful in a couple setups, but it's a pretty garbage move overall. If you want to poke someone you should Dash then halt and use 5A instead. No graze frames. | |
| 6DB
[ Stagger High | Damage: 950 | Startup: 12 | Active: X | Hit: X | Block: -7 ] Similar in appearance to Yuyuko's 5B, except this version is much better. This move has a larger hitbox, and excellent graze frames. Bad on block (punishable at point blank), but still safe and even potentially frame advantage when spaced well or meaty. Wallslams on counterhit. The hixbox on 6DB goes up high enough that it covers the area that most characters like to run their HJC and IAD rushdown sequences in, so when timed right, you can use it to hit your opponent out of pressure, either when they are shooting bullets or unable to counter with a melee. However, the usefulness of it varies on matchup, for example, 6DB is very effective against Yukari's aerials (with exception of j.2A), but very ineffective against Patchouli's j.B. | |
| 3DA
[ Clean High | Damage: 900 | Startup: 22 | Active: 3 | Hit: X | Block: -8 ] Groundslams on counterhit. Unlike 22A, 3DA actually hits very high, and is Yuyuko's highest hitting melee attack. On the other hand, it is very slow to come out and cannot be canceled into giving it very limited uses. Even though you can't anti air with it, it can still be used on someone who is rising in the air. Normally you want to 6DB instead. On a guard crushed opponent, this is a threatening high attack after a dash-in. O-bomb frame trap after this move can be fairly effective, but normally you don't want to do 3DA where it will be blocked anyway. | |
| 3DB
[ Clean Low | Damage: 900 | Startup: 14 | Active: 3 | Hit: X | Block: -7 ] A little faster and a little less damaging than 2B. The combination of graze and huge range + momentum make this move great for hitting your opponent out of carelessly tossed bullets. Also good for punishing from outside of 2B range. Pretty simple but one of Yuyuko's most important moves. Another noteworthy property is that since this move both causes Yuyuko to crouch and move forward, it can be used to slide under opponents air attacks in situations where dashing doesn't bring her low enough. |
Bullets
| 5C
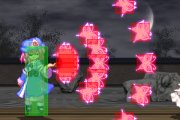
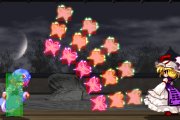
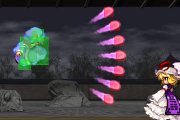
Fan-shaped butterfly wave. The butterflies fire in three waves, each wave contains five butterflies. The angle of the butterflies is shaped like a fan (diagonally upwards, downwards, and strait forwards). Yuyuko can cancel this attack into a high jump or special move any time after the first wave leaves her palm. This attack can be useful for covering a lot of the field with bullets, especially when combined with Yuyuko's 236 series. Though not usually used as often as her 236s and j.C, this move still has very good coverage. And if you have time to get it out, can be a real annoyance for opponents trying to approach you from the air. | |
| j.5C
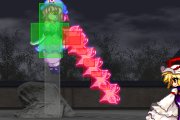
Very similar to Yuyuko's 5C, only aerial and with green butterflies instead of pink. This move preserves the aerial momentum Yuyuko had when she started while active, so if you use it while jumping up, you will continue to float up while shooting the butterflies. This move is special and airdash cancelable on all 3 of the shots. If you land while firing them it also turns into a ground bullet type attack, giving you more cancel options, though you will probably not see it used often for this. Normally you use this move for spacing and timing because of how well it controls your air movement. It's also very useful for turtling up in the air as if the opponent wants to hit you there, they have to either shoot bullets which you can graze, or melee which bears the threat of you air dash canceling and hitting them with j.A while they are trapped in your bullets. This is probably Yuyuko's single most important normal bullet. | |
| 2C
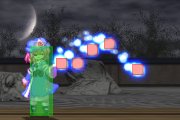
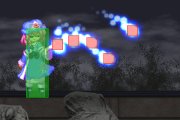
Yuyuko spins vertically into the air while firing seven butterflies horizontally in rapid succession on her way up, which creates a diagonal wave of butterflies. This move cannot be canceled until the last butterfly is fired, leaving Yuyuko very vulnerable. You can use it while dashing to make Yuyuko move forward while firing, though it really does not help at all. The best use for this move is to surprise your opponent because they would probably never expect a good player to use it. And if you do try to use it consistently, they can simply graze it on reaction since only the first couple of butterflies will actually hit them. | |
| 6C
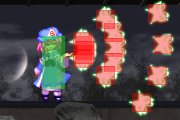
Eight butterflies spout horizontally from her palm. The butterflies are all fired at once, but each butterfly has a different acceleration, causing them to spread out, and if blocked cause a lot of blockstun. However, since it can easily be reacted to as well as crouched under, it's not a very crucial move for Yuyuko. However, it can be very effective if they are already block some other butterflies that were on screen to further pressure, or against scared opponents. If they act predictably however, you have a few options that make it fairly decent. At the right range, if the opponent likes to mash dash attack or D6 in response, you can cancel into 412A and beat that attempt. Another option is to use the fairly safe HJ7 to get out of range, then D6 and j.B to keep pressure. 6C can also be used to cover a horizontal area of the screen. However, for all of 6C's abilities, Yuyuko usually has better options involving 236s or 623s. The primary actual use of this move is to continue pressure off a stagger hit, normally 6A. | |
| f.2B
A backflip that causes a butterfly burst that drains about 30% spirit. Three waves of butterflies with five butterflies in each wave erupt from her body. The butterflies are angled in a fan shape tilted upward with coverage similar to 5C. Though it covers a very large area of the screen very quickly, it's not able to be canceled so you are a sitting duck after using it. f.2B is effective when used sparingly as a surprise anti air. This move also costs a lot of spirit so be wary not to self crush yourself with it. | |
| f.5A
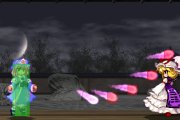
Five purple wisp fan-shot. Each wisp travels in a straight line, the angle of the shot begins above head level and fans downward, causing all but the first 2 or 3 wisps to be pretty much useless. Not only that, but the area it covers is only directly in front of her, making it's effective uses very limited. All it's really good for is throwing out some annoying projectiles before doing a 236s or HJC, though the moderate speed can be good for denying your opponent from declaring. | |
| f.2A
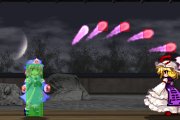
Similar to her f.5A, but the first shot shoots out at an upward angle and all the following wisps shoot up higher. Can be canceled on any shot, and do not actually have active hitboxes until they have been on screen for a bit. This move is an excellent mid to full screen anti air because of how quickly you can cancel it. You also have multiple options, such as f.2A -> 236s HJ7 and backoff, or f.2A -> HJ8 j.C to avoid the incoming aerial. In fact it cancels fast enough that you can cancel it on one shot into 236s when you would normally 236s just to get a bullet on screen in case the opponent jumps. | |
| fj.5A
Seven purple wisps fan-shot. The angle of the wisps is shaped like a fan. Unlike the grounded versions, all of these wisps come out at once, making it a pretty useful move. It's main use is to collide with enemy bullets while covering a wide area on the screen, however because the shots are rather small they can sometimes be used offensively to pass through enemy bullet waves, such as against Yukari's fj.A bullets. Because it neutralizes Yuyuko's jump momentum this can also provide a moment for Yuyuko to "hang" in the air, which can be useful for timing and positioning purposes. This move in general is a great way to pester opponents who set up bullet strings from far away. | |
| f.5B
Five blue wisps drift gently from Yuyuko's hand one at a time. Yuyuko can cancel the attack into a high jump or special any time after the first wisp leaves her palm. The wisps will go right through enemy bullets, and not trade with them. However, this move is actually very bad, for several reasons. It comes out very slow, they move very slow, and the trajectory of the wisps is not even consistent. | |
| fj.5B
This is basically her f.B only in the air. The best use for this move is trying to do j.B and not being close enough. Good distance judging can help you to avoid this. |
Specials
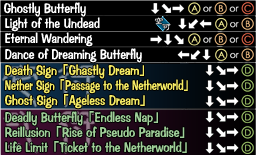
| Ghostly Butterfly -- 236ABC
Yuyuko fires out five butterflies that drain 25% spirit. Depending on the version used, the color and positioning will be different, but with all three versions the butterflies will not actually have a hitbox until they hit the edge of the screen, at which point they will materialize and home in on the opponent. Butterflies that have not yet hit the edge of the screen will not disappear when Yuyuko is hit, but they will if they have already materialized.
| |
| Light of the Undead -- 214AB (air):
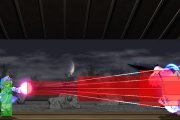
Yuyuko fires a full-screen beam of light. This is one of the few bullet moves that can induce counterhit, though this doesn't actually help you in any way. This move is far too slow to be a staple in Yuyuko's game, as it can easily be grazed on reaction even at full screen. But it's not completely useless. You can use this move to tag people out of telegraphed full screen bullet attempts since once it starts up it covers a whole horizontal area of the screen. This move also has a very long recovery and should be HJC'd, or air dash canceled if done in the air. Can also be used to punish wiffed supers full screen.
| |
| Eternal Wandering -- 623ABC
Yuyuko lifts her hand up and releases a ring of ghosts. This move is not anti-air unless you see them coming a mile away. All three versions are mostly useless midscreen. More information on how to use this special effectively in the bullet mixups section.
| |
| Dance of Dreaming Butterfly -- 412AB
Commonly known as the "fanspin". Yuyuko rushes forward with a pose similar in appearance to her ground dash animation, then spreads her arms with a fan in each hand and twirls at an angle, large butterflies appear overlapping the fans and spin with her. The visible difference between her regular dash and the start of this move is the dust cloud that occurs behind her when she begins the move. The primary use for this move is actually for combos, and spellcard setup. This move is also lifted slightly off the ground and can pass over some low attacks, such as Sakuya's 2B. Both versions of this move are unsafe on block, so you should have either a spellcard or bomb in stock to make it safe.
|
Spellcards
| Ring 1 - Death Sign "Ghastly Dream"
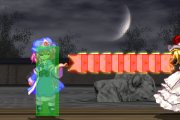
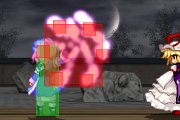
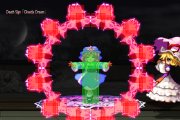
Probably the best Lv1 Spellcard Yuyuko has. Yuyuko unleashes a Ring of butterflies which traverse outwards until they reach the edge of the screen. These butterflies count as projectiles, so they can be grazed. However, they will destroy any bullets that trade. The closer you are to the enemy, the more damage you can pile on, simply because the butterflies start out very tightly compressed and then spread out as they accelerate. The move also has full invincibility frames on startup, it can possibly be used as a reversal (though the fact that it has long recovery and is grazeable limits it in this department). Although it should be used at fairly close range so that it can connect with the opponent before their recovery ends. Against airborne opponents this move is very effective, as it will continue to push them up into the air, letting you do whatever you want to them. The best use for this spellcard is the "guaranteed crush string", which is getting the opponent to block a heavy melee midscreen at point blank (6DA[first hit], 412s are probably the most effective as they move Yuyuko forward). And once they are being pushed back a simple 214B should finish off the rest of their spirit. If you are far from the wall they are being pushed to, you can actually dash forward a bit before doing 214B so that when you HJC it you can use the frame advantage to make them block a j.B. This move has a very long recovery so it should be used with care. If used at point blank in the corner on block, it is also unsafe. However, if used just a bit out from the corner where it's barely still airtight, you can still be at a frame advantage when it's over.
|
||
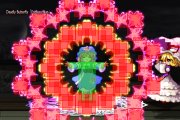
| Ring 2 - Deadly Butterfly "Endless Nap"
Essentially the same as the first version, except Yuyuko unleashes two rings of butterflies; one pink, one yellow (so "Ghastly Dream" on steroids, basically). It retains identical properties, but simply covers more ground and deals more damage. Because it has two rings it can keep the opponent in blockstun for even longer, which means it can push a grounded blocking opponent back further or keep an airborne opponent up in the air longer and be more difficult to pass through in the air. A notable difference to the first version is when used as a follow-up to a heavy melee midscreen at point blank (such as 412B). The increased butterfly density from two rings at that proximity will result in butterflies interrupting eachother's pushback, allowing the opponent to pass through the rings while blocking, ending their blockstun prematurely. Because of longer recovery time of the move and the shorter blockstun duration, follow-ups for this super are much more difficult compared to the first version when used at midscreen.
|
||
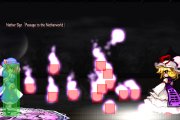
| Ghosts 1 - Nether Sign "Passage to the Netherworld"
Simply the worst Lv1 Spellcard Yuyuko has. Don't ever bother ever using this card unless you're sandbagging. It's a trail of wisps that float into the air and linger for a moment. The wisps appear at somewhat random locations, and their trajectory is also somewhat random, which causes combos to fail and block strings to get grazed randomly. Due to it's inconsistencies this Spellcard is not reliable or useful, so don't pick it.
|
||
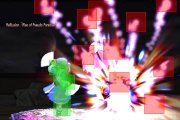
| Ghosts 2 - Reillusion "Rise of Pseudo Paradise"
Very useful spellcard. It's debatable whether this card or the Ring card is Yuyuko's best level two card. Yuyuko strikes a pose and a white glow appears below the opponent and spews forth a steady eruption of wisps like a geyser. The wisps fire at such a rapid rate that it can keep an opponent in hit or block stun for a rather long time, allowing Yuyuko to maneuver around and attack the opponent while they are trapped. This allows you to tack on extra damage on hit or go for a guard crush mixup on block, or even string another Spellcard cast after the first is finished and continue looping for even more damage and/or mixups. The white glow will initially appear where the opponent was when the Spellcard was activated so it can be used from any distance, however the wisps can be grazed so it's much more useful in combos or blockstrings and mostly useful near the corner. The white glow will also track the opponent very slowly, so if the opponent moves during the super it will move slowly in that direction and continue to shoot wisps. This Spellcard is primarily only consistent near the corner and is useful on hit or block. In the corner it is possible to set up off of any of Yuyuko's blocked Heavy attacks, such as blocked: 2B, 6A, 6B, 22A, 22B, 33A, 33B, 66A (third hit), 412s, and 214s. If connected with a heavy attack in the corner on block it can not be grazed because there won't be a gap between the Heavy melee and the wisps. On hit it is possible to combo it from: 6A, 6B, 22B, 66A (third hit), 412s, and 214s. And it is also possible to juggle with it midscreen or corner off a counterhit or bomb, or juggle with it in the corner with one of Yuyuko's juggle combos. You can also make 6B very dangerous wit this move using 6B 412A 236D. In order to use this midscreen on block Yuyuko must be very close (point blank) to the opponent when the spellcard activates in order to bypass the knockback. Otherwise the knockback will cause the opponent to slide away from where the eruption starts which will usually allow them to graze the rest of the wisps. Generally Yuyuko's 412s or D3B are useful for this because they move her forward. Because the Spellcard keeps the opponent trapped in block-stun for so long it is a good idea to try and do a high/low mixup in order to guard crush the opponent while they are blocking the wisps, or optionally use 214s lasers for a guaranteed crush. Here is 2 simple examples assuming they are already blocking the ghosts:
You can also use this move full screen with 214B (3 hits) for meaty or fullscreen punish when their back is near the wall.
|
||
| Poison 1 - Ghost Sign "Ageless Dream"
Yuyuko swings her hand back, and then swings her hand forward and releases a quick moving wisp at the opponent. The wisp only fires at ~45 degrees up or down towards the other player. If blocked it basically does nothing. On hit it causes minor damage, then eight blue spirits will appear and circle the opponent slowly fading away. These spirits drain recoverable life over time. They will stop draining life if Yuyuko is hit. They can drain up to about 1900 recoverable damage (unprorated). Of course the damage is unrecoverable if they have already declared. Also remember that the after effect of poison cannot actually kill them, you will have to deal the final blow. This move combos off just about anything so long as the opponent is close enough so that the trajectory is correct. Because the spirits drain life and can be removed by hitting Yuyuko, this usually provokes the opponent into taking an offensive action against Yuyuko, which can be exploited by either countering with Yuyuko's defensive moves or turtling in the air with her floaty hj.C. The metagame effect of this spellcard is that it can force your opponent to set early to recover the large amount of unprorated damage they just took. This card can also be used after melee attacks that are punishable to make them safe. It's actually slightly disadvantageous on block, but since you can still use it at longer distances, and it's a projectile, it takes time to reach and can be "pseudo advantageous" on block. This allows you to continue pressure where you would normally have to back off. Note that poison has a much wider range of distances where you can use it safely than Rings.
|
||
| Poison 2 - Life Limit "Ticket to the Netherworld"
Essentially the same as the Level 1 version, but stronger. If it hits, the poison spirits will appear as large purple spirits (instead of small blue ones) and drain more life. The amount of recoverable life they drain if they are left to disappear on their own is roughly around 3100 damage. It shares the same comboability and uses as it's Level 1 version. |
Combos
Groundslam combos: For when you catch people pushing buttons.
- 22A/3DA/j.A 5A 5A 5A 6A 412A 22C IABD j.A/22A Combo confirmed off a groundslam counterhit in the corner.
- j.A IAD/hj9 j.B 5A 5A 6A 412A 22c IABD j.A/22A Combo confirmed off a groundslam counterhit j.A in or near the corner, probably Yuyuko's most damaging practical combo. Note that j.A has a higher groundslam than Yuyuko's other moves.
- j.A IAD/hj9 j.B 5A 6A 236A Basically the previous combo when you are not close enough to the corner to land a fanspin.
- j.A/22A/3DA j.A/j.B Sometimes you just can't land anything else.
Guard Break 5A: Yuyuko's 5A hits high and is very practical for guard breaking airborne opponents.
- 5A 5A 5A 5A 5A 6A 412A 22C IABD j.A/22A Corner only, you can also start this combo with a counterhit 5A against an airborne opponent, but the juggle remains the same.
- 5A 6A 412A 22C IABD j.A/22A For when you aren't close enough to the corner for another 5a to juggle, but close enough for fanspin.
- 5A 6A 236s For midscreen.
- 5a 412A 22C IABD j.A/22A Variant midscreen combo for a bit more damage, not exactly the greatest use of a bomb, but if you need the extra bit of damage it's worth it.
Ground Combos: Nothing too groundbreaking here, but Yuyuko can get decent damage off most hits.
- 2B 6A Connects anywhere, 2 button presses for ~2000 damage, not a bad deal. Good for punishing, and catching guard crushed opponents off guard. The 6A can be canceled into 236s for okizeme.
- 2B 6A 22C 5A 6A/6B 412A Corner variant for ~1500 more damage, but does not guarantee knockdown unless you go for double bomb, which isn't worth the damage most of the time.
- 5A 6A 412A Off a counterhit 5A (non-juggled). It's not hard at all to get a counterhit 5A with Yuyuko, so learning to confirm this is useful. Can be O-bombed for a bit more damage if needed.
- 6A 412A Combos without counterhit, but if you get a counterhit 6A (causes reeling) it's very easy to confirm into 412A.
- 2B 6B 412A Point blank, corner only. Not exactly useful, since it involves using the slow 2B in your opponents face, but at least it looks cool.
- 2B 6A 412A Off a counterhit 2B in the corner.
Bullet Started Combos: Normally people don't just sit there and let you hit them with bullets. Though there's situations where it can happen.
- 623B 5A 5A 6A 412A 623A/B is a very useful corner pressuring tool. If your opponent happens to get hit by one, it juggles.
- 623A 2A 6A 412A The timing on this is kind of weird, but if you hit with a 623A you can at least try to juggle into 2A.
- 214B HJC9 j.A/j.B: Hopefully you're not running point blank laser outside of setups. But if for some reason they don't block it, here you go.
- 623C HJ9 IAD6 j.B 2B 6A 623C is better than point blank laser, but it's similar in the way you probably won't get random hits with it.
- 6C IAD j.B 2B 6A You can confirm into this if the opponent is getting hit by random butterflies that happen to be hitting your opponent fairly easily, or if your opponent lets go of block when you're using 6C in stagger.
Note on 22C enders: 22A and j.A garuntee knockdown. IABD j.A is the best ender in many cases because it guarantees knockdown, and cancels on landing, letting you make the most of your okizeme, where a regular or HJ j.A would leave you in the air for quite some time. 22A is good in situations where IABD j.A would wiff, as it still has a fast recovery. If you hit them ~2 or less times, the proration is low enough to juggle 5A into 6A, allowing for some alternate enders, such as 5A 6A midscreen, or 5A 6A 412A in the corner.
Also note that 22C optional enders were not applied to every combo here, and can always be added on for more damage or guaranteed knockdown when needed.
Strategies
Spellcard Selection
Level One cards: Her best picks for level one are either Ring or Poison.
- Ring is useful midscreen on block. It's also comboable for minor damage. It can be used as a reversal, but since it can be grazed it's usefulness in that department is limited. When used at the right distance in the corner you can actually go into Ring seamlessly and still be at a frame advantage when it is over, though you cannot go for the full crush string.
- Poison is probably overall more useful in the corner than rings, and is also quite strong in combos although it's air techable. The damage is unprorated, and the spike in recoverable damage can force your opponent to set early. You can use it as a replacement for an O-bomb on melee block anywhere, even from a distance where rings would not be airtight or safe. This could actually be more useful than rings in some matchups, though it depends on the players.
Level Two cards: Her best pick is level 2 ghosts, hands down.
- Ghosts is useful in the corner on block. It traps the opponent in blockstun so you can do mixups. It's also easily comboable.
Gaining Momentum
Yuyuko's slow moving and slow to come out bullets make it seem like it would be hard to gain momentum. However, most of them cover a very large area, and once you get enough out you can really make it hard for your opponent to move without getting pinned down
The general formula for putting bullets on the screen is Ground bullet -> 236s -> HJC -> Aerial bullet. You can omit any of these steps. Here's a couple simple examples:
f.2A 236A IABD land: Throws out a bit of anti air and some delayed cover fire while keeping you near the ground. Most useful against airborne opponents.
236A HJ8 j.C: Puts out some delayed cover fire as well as some direct coverage to you while you're in the air. Most useful against grounded opponents.
There is really too many possibilities to list here, you should just adapt your bullet strings to the situation. See the bullet and special move sections for more details on the uses of the different bullets.
Once you have enough bullets on screen, you have a couple of options. The most straight forward is to try to get your opponent to block a j.A (air to air, or air to ground), or any other melee attack that you can make work for the situation really. The other is to try to sneak in something that will knock them down so you can get okizeme, such as an anti air 6DB or 3DA. You can also try to sneak up on them with a 3DB. Psychic fullscreen laser, or your opponent messing up and getting hit by random bullets are other easy ways you can score a knockdown.
It's important to realize that since one of Yuyuko's main zoning tools, 236s has such a long delay, you shouldn't expect just one set to be enough for you to move in. You may have to go through several bullet rotations before it's actually safe to move in. Yuyuko's also has the graze to support this, as it has longer graze frames than most other dashes, so she is able to zone for a very long time without having to block a bullet. This is where most of the "passive" part of Yuyuko's passive-aggressive playstyle comes from.
Stagger
This is a pretty basic fighting game technique, and a very important part of Yuyuko's pressure. Staggering also compliments high/low mixup, both of which play a big role in the "aggressive" part of Yuyuko's passive-aggressive playstyle.
Even without intentionally staggering, most of Yuyuko's attack strings have gaps in them where the opponent can try to move or poke, but get hit. She also has many options to intentionally leave gaps for them to move, hopefully causing them to block for longer. Allowing you to go for stronger mixup and pressure. There is only so much you can learn about stagger pressure just from reading, as all players react differently, but here is some of Yuyuko's most useful staggers.
One very commonly used, and strong stagger mixup of Yuyuko's is 5A -> 6A/6D 2A/5A. The threat of Yuyuko 6A will keep people sitting still a lot, once you have this respect, you want to further your pressure so that you can get some real damage in. 5A also has frame advantage, so it's bad for your opponent to poke or move after it. Dashing forward and doing 2A/5A moves you in closer, and allows for further pressure.
2A also staggers into itself very well (i.e. 2AA..2A 6D 2A). Some people will get tired of this and try to jump out. 2A 6A will stop air techs as well as most pokes.
Another move you can go into from 5A is 2B. This requires one of a couple of things though. Either that your opponent is already scared of 6A, or that you have butterflies on screen to keep them from moving. 2B is most often used to go into 6A. Canceling 2B into 6A right away is not very effective, but by delaying it a small bit, it suddenly becomes a very strong tool for catching movement and pokes.
Once you get to 6A, you're starting to reach the end of your pressure, as 6A when uncanceled is quite disadvantageous on block. 6A 22A is not seamless when canceled right away, and will catch HJ attempts in a very rewarding fashion. You can delay this move a bit hoping they do something, but if they HJ right away and you delay the 22A, it will probably not catch them. Once you get to 6A you want to start thinking about different, non-stagger ways to continue your pressure, and should probably go for a high/low guardcrush, 623A/B in the corner, or butterflies into HJC.
Also note that Blocking to bait reversals is a very important part of effectively staggering.
High/Low mixup
This is another pretty basic technique, the idea being to throw in a low attack where your opponent is usually expecting a high, or visa versa. You should try to be creative with your high/low mixup, but not so creative that you end up leaving huge gaps in your strings.
Here are some examples:
6A 22A vs 6A 22b Yuyuko 101, 6A has strong blockstun, and canceling it into a 22 right away doesn't leave a lot of room for retaliation. This is straight up 50/50, though not particularly strong because it's very possible to block Yuyuko's guard crushes on reaction when anticipated.
5A (22B/2B) vs 5A (22A/6A) 5A 6A is the default, it keeps them from moving. 2B has better cancel options than 22B, but 22B is an instant crush. There's not much of a reason to use 22A over 6A since 6A has much stronger options, unless they are being very paranoid about your lows.
2A...2A vs 2A 6A Not the worlds most beautiful mixup, but it can be quite effective. You can also do a random number of 2A's into a 6A to keep them guessing. Some people will just try to block all the 2A's high in anticipation of the 6A, so you can cancel 2A into 22B, though the gap here is rather large. You can also just keep chaining 2A into itself, then dash forward and 2A more.
Fake j.A 2A This is very hard to react to, and is good for getting in damage or finishing off guardcrushed opponents. Normally done with a very low IAD j.A so that you land before j.A has completely started up, and then chain 2A into itself. Even if they do somehow block this right, you can continue pressure off your 2A.
IAD j.B Yuyuko's aerial melee attacks have a lot of blockstun, especially j.B. Not only that, but j.B hits multiple times, and you can make it hit more or less depending on the height you use it from. There is a ton of mixup you can do off a blocked j.B, usually 2a or 6a, though 2b is also a good option. You can even land and IAD for another j.B right away to bait for reversals. If you have butterflies on screen, repeated IAD j.B is a good way to push your opponent into the corner as well.
Bullet Mixups
Though Yuyuko's bullet mixups aren't the strongest compared to most characters, they are still a fairly important part of her rushdown and pressuring, especially in the corner with 623s and 236s.
623ABC: Very important move in maintaining Yuyuko's corner (not midscreen as it will push them out of range) pressure. You can use this move to replace the guardcrush that would normally be the end of your pressure string with a bullet type attack that is advantageous on block, and puts you at a good distance to keep going.
- A version: 6A/2B 623A is probably Yuyuko's only airtight string and puts her in a good position. You can also go into this move from 5A and 2A, though it's no longer airtight, it's still fast enough that if you have your opponent respecting your melee, they will probably block it. This move normally puts Yuyuko at the perfect range for a 5A, and since it has +1 frame advantage, there is very little your opponent can do about it other than block, bomb/reversal. If you read a bomb/reversal you can block or flip it, depending on if flip will work or not. Once you have them respecting your 623A 5A, you can go for mixup off this move with moderation. If you are close enough you can also go into 2A instead of 5A.
- B version: Very similar to the A version, but it has slower startup, and a bit more range. The slow startup means this move is not airtight off 6A/2B. Same uses, but can be used from slightly further.
- C Version: This version is even slower (43F startup) which means it's very easy to graze. However, it is unique in that it can be high jump canceled, and the wisps stay out. This move is not very useful practically unless you have the opponent respecting your A/B wheel wisps, and it doesn't even do as much spirit damage as the B version. However, you can HJ7 j.6D j.B once it's blocked and continue pressure seamlessly.
6C: This move is too slow to be used out in the open except for very sparingly, and it pales in comparison to Yuyuko's 623s and 236s options. Though you can mix it in once in awhile depending on your opponent and matchup (i.e. Yukari can simply 6B under it and hit you). Exactly how to use this move is described in the bullet section.
236ABC Normally you go into this move after 2B or 6A where you have a good amount of blockstun out and your opponent is expecting another melee. In the corner 236A is usually the most useful since they will provide the most direct cover. However, 236C can provide some very prolonged pressure if you have some other butterflies on screen already to make them safe to use.
Here's some options off butterfly butterflies:
- IABD j.A Catches a lot of attempts to dash forward right away, but a lot of characters can just hit you with a dashing attack here.
- HJ7 j.4D j.A Used to outrange your oppononent and get ahead of their dash, then either hit them or force them to block. After blocking the j.A hopefully the butterflies will hit, and you can push them back into the corner with an IAD j.B.
- HJ9 j.A Works only in the corner, beats pretty much any HJ8 attempt and most jumpouts, though a lot of characters can beat this by doing HJ9 j.A/B, that loses to simply waiting, and is not a good option for them.
- HJ7 j.C Don't know what they'll do? Then play it safe and get out some bullet cover.
Okizeme
Yuyuko probably has some of the simplest okizeme in the game. She can take a long time to gain momentum, so once you have it you want to keep it for as long as possible. Most of the time it's simply shoot appropriate 236s butterflies, then HJC in the appropriate direction to place a meaty j.A or j.B for them to block. You also have options involving air blocking and j.C to bait for bombs or wakeup reversals, other baiting options include fake or safe j.A/B. You can also easily go for crossup j.A in many situations. If you get out 236s early enough, you can choose to go for a ground based meaty instead.
Point blank in corner
- 236A Hits meaty, probably the best option here, but does not cover forward tech.
- 236C Doesn't hit meaty, but is still a good option as it provides extended pressure after your meaty j.B is blocked, also works if they roll forward out of the corner.
Near wall
- 236A One of, if not Yuyuko's best okizeme option. The 236A don't hit meaty, but they hit right after a j.B allowing you to IAD and follow up with another j.B, effectively pushing them into the corner. This also works against people rolling out of the corner so long as you have a bit of distance from the wall.
- 236C Similar to 236C in the corner, not as strong in this situation but it coves rolls forward better if they're not rolling out of the corner.
Midscreen
Honestly it doesn't make a very big difference, and it's extremely situational. Try to use your experience to decide whether to use 236A or 236C, neither are usually a bad option midscreen. Though you may be hard pressed to get meaty j.B and bullets on screen at the same time if they roll too far. You may or may not want to give up one for the other.
Tech Punishing
Yuyuko's butterflies often interrupt combos and allow your opponent to tech out, and is just something you have to get used to. If they tech close enough to the ground they are in your 5A and tech punish is free since it will guard break them. However, if they are higher in the air, your best option is to read this and get a j.A out ahead of time, ideally an IABD j.A as it leaves you in a much better position. A lot of the time none of these are possible, and Yuyuko must just deal with it. It's much better to play it safe in this situation and get out some more butterflies to maintain momentum, or somehow get yourself into an advantageous position. Overall, Yuyuko's air tech punish game is very weak.
Miscellaneous
Wave Dashing: Yuyuko's forward ground dash starts out moving very fast, but slows down the further it goes. You can move along the ground faster by dashing a short distance, then stopping by holding 4 or 3, then dashing again. This is a basic technique for any Yuyuko player since she is stronger on the ground than in the air.
Sliding 6D HJ9: If Yuyuko attacks with a jumping melee after a 6D HJ9 and lands crouching she will automatically track the opponent and slide forward a bit. Yuyuko will always slide toward the opponent even after a crossup. The only real use for this is to continue your ground based melee attacks for longer by negating some of the pushback, though it's good to notice when it happens, so that you can adjust your strings accordingly.
IABD j.A: One of Yuyuko's blind spots is the space in front and above her. It's difficult to effectively control this space because the only ground melee moves that can hit that area are her 6DB and 3DA, both of which are particularly slow. Although Yuyuko is able to anti-air opponents with her 6B or 5A, it's not possible to anti-air with these moves against projectiles, or longer ranged melee. Yuyuko can loosely control this area with IABD j.A, though it is not something you can do at the last moment. Another advantage of IABD j.A to control this area is that Yuyuko quickly recovers from it by landing, so it's not a big deal if it misses, and you have time to do whatever you want if it hits.
6B Flip Fishing: You can sparingly use Flip to stuff pokes against your disadvantageous/unsafe attacks. It's an easy tactic for the opponent to read, but if they are being overly aggressive, it is a good way to keep them in check, or catch them off guard if you have not been using it very often. Moves than you would normally do this with are 5B, 33B, 412A, 22A, 22B, and sometimes 6DB. Note that 6DB is punishable on point blank block, so flipping will not make it safe, and if you aren't point blank the distance from your opponent will make flip ineffective against most melee. This tactic is very easily countered by simply not poking aggressively, as flip is far more punishable on wiff than any of the attacks listed earlier are on block.
Videos
For match videos, search Youtube for "<player name> Yuyuko", "<player name> IaMP", or something like that. The biggest Yuyuko player in japan is Ame (アメ), Kat is another good player. Other good players who don't main Yuyu have played her in tournies as well, so you should be able to find plenty of videos.
Yuyuko combos and spell card uses: http://www.youtube.com/watch?v=_EKEsQU8w7k
Short Ame playlist: http://www.youtube.com/view_play_list?p=1885733F737C9B6D
Matchups
| vs Reimu:
Reimu can pester you with bullets constantly, making it very hard to get your own out. But once you do, they normally trade in your favor. Reimu's 236s are very weak at penetrating your bullets, but her f.A, f.B, and C type bullets can easily sneak through your waves of butterflies, so watch out for those. You need to graze a lot in this matchup, and avoid getting pinned down until Reimu starts to run low on spirit and can't pester you with bullets anymore. |
| vs Marisa:
Marisa's puffballs can destroy entire waves of your butterflies in one fell swoop. You can try to protect your butterflies by blowing up the puffballs early with a f.A type bullet, or 214s. You can also graze the puffballs to disable them, though be careful because if they are fj.2B puffballs they will still detonate when they hit the ground. Marisa 6B will also beat many of your melee straight up because of it's speed and low hittable box. 6B can counterhit you out of your guard crushes, as well as go under your 5A except for near it's maximum range. |
| vs Sakuya:
Almost all of Sakuya's bullets have superior density and speed to yours, giving her a large advantage in dotsies. Her j.A has a very long reach and can sometimes outrange your j.A. Her 6B and 66B aren't a huge problem for Yuyuko, because Yuyu has several melee that can easily beat it when timed right, including 5B, 6DB, 5A, and of course 6B. |
| vs Alice:
Alice has a one up on Yuyuko in terms of range, and can basically keep you out all day with her j.A, 2A, and 3DA. She can also make it very difficult for Yuyuko to get out bullets since she can simply melee you out of them a lot of the time. This is one of Yuyuko's worst matchups, and requires that you basically have infinite patience and wait for Alice to mess up and wiff a 2A or something. Alice of course is weak on the defensive, so she will try to bomb you off, if you can bait these well and not let up once you get in, a couple knockdowns could mean victory for you. |
| vs Patchouli:
Patchouli has the best dotsies in the game, your best bullet options against her are 236A (sneak in behind her) and f.A (quick to come out and small hitbox). Fortunately, Yuyuko has the best graze in the game, so it's ok that she's out bulleted. Make sure to watch for when she tries to approach with a j.Book, so that you aren't caught grazing. 6DB is out-hitboxed by Patchouli j.B, making it a very risky anti air in this matchup. Once you get in, not even your 5A can be ducked, and you can really do whatever you want. Patchouli has 623A to get you off, easy to counter if you read it, by doing either a 6C, 214s, or wavedash 5A. |
| vs Youmu:
Youmu air techs 3 frames faster than any other characters in the game, and also has the fastest aerial melee in the game, making it even harder for you to effectively tech punish. Your bullets and range are superior so you can zone her quite well, but once you get in close she has the option of going under your 5A/6A with her 2B. Youmu's 2C can also be used to easily anti air your naked jumpins at the right angle, and also has a very long range on the ground, which could mess up your footsies. 2B is very useful for catching backdash happy Youmu's. She can seemingly graze through your j.C and hit you out of it, but I'm pretty sure that's a netplay gimmick, you should be able to j.4/6D j.A it. |
| vs Remilia:
This is another terrible matchup for Yuyuko, your j.A is useless air to air since Remilia can simply backdash and use j.C. In fact half of your melee attempts can easily be beaten by her C, which, by the way, also makes it extremely hard to get out bullets because of the speed, spread, and density of them. Her dash forward goes over your 5A which is incredibly annoying. She can also be very hard for Yuyuko to pin down because of her 3 air dashes. The only real tradeoff here is that Yuyuko's 6DB covers most of the angles that Remilia can approach from. |
| vs Yuyuko:
Flip is an easy anti air for naked jumpins, so don't jumpin naked. 6DB can anti air low aerial approaches pretty effectively because of Yuyu's aerial attack speed. A lot of tricks with backwords j.A that worked before won't work anymore. 5A guard break is also very safe here. In short, Yuyuko has a ton of anti air options against herself, so try to avoid the temptation to take to the skies carelessly. |
| vs Yukari:
Yukari's 6B has massive range and goes under 5A when you don't have enough frame advantage (though unlike other pancake moves, it's a bit slower with 12F startup), so avoid using it there. 6B can also punish low uncovered airdash attempts, and 2B can anti air you at the right angle. Yukari's f.A type bullets cover a huge area and have a ton of density, you can think of them as superior to your C type bullets, so use another bullet such as 236A or f.A when she's using f.A. 6DB is very effective against most of Yukari's aerial attacks the exception being j.2A, which she will probably not use much outside of blockstrings due to how unsafe it is. |
| vs Suika:
Suika's 2B and 2A are more of those moves that can go under your 5A and 6A at times, especially 2B because of it's quick startup. Her j.B has deceptively large range, making 5A anti air pretty risky. Suika's 3DA is a strong anti air, so you should be very careful about your jumpins. Suika's C type bullets don't trade, and her other bullets don't trade well, so your cover fire is very effective. But of course, Suika C type bullets have more time to get out since your bullets are slow, making them also very effective. |
| vs Meiling:
You have superior bullets, range, and ground footsies. Beware her incredibly annoying frame traps, but flip can beat those. NOTE: For all of those goddamn moves that go under your 5A/6A, you'll need to run a lot of 2A when close, and 2B when further. This does not mean you should simply avoid using 5A/6A altogether, they will of course still be very useful in strings. Max range 5A normally does not suffer from the same weakness as it's close up counterpart because of how the hitbox goes down a bit near the end, and should be used as often as you can to discourage your opponent from trying to out-hitbox all of your attacks, giving you more options. |
Frame Data
                                                              Block   Hit     CH
Motion     Damage     Proration   Startup  Active  Duration   Adv     Adv     Adv   Untech  Guard   Type
------------------------------------------------------------------------------------------------------------
 5A         650        88%          7        6       19        +3      +4      +11   35      Mid     B
 2A         220        98%          6        3       20        -5      -4      X     25      Low     A
 6A         1000       90%          17       6       48        -9      -8      +3    40      High    C
 5B         950        90%          12       12      41        -7      -6      +5    35      High    C
 2B         1100       85%          15       3       44        -7      X       X     40      Low     C
 6B         1000       90%          10       6       51        -19     -18     -7    40      High    C
 6DA        250*3      96%*3        16       18      55        -5      -4      -4    35*3    Mid     B,B,C
 6DB        950        80%          12       12      41        -7      X       X     35      High    C
 3DA        900        75%          22       3       52        -8      X       X     40      High    C
 3DB        900        85%          14       3       43        -7      X       X     40      Low     C
 22A        1100       80%          24       4       47        -1      D       D     120     High    C
 22B        1100       75%          27       4       52        -3      D       D     40      Low     C
 j.5A       1200       85%          15       9       51        -17     X       X     40      High    C
 j.5B       350*4      96%*4        16       14      48        -4      X       X     35      High    C
 22C (N)    0          80%          12       3       45        -11     D       X     oo      Mid     C
 22C (O)    500        80%          12       3       37        -3      D       D     oo      Mid     C
 22C (D)    0          80%          12       3       61        -27     D       D     oo      Mid     C
 22D        x          x            26       x       95        x       x       x             x       x
- Properties
- 6A: staggers
- 5B: 10-34F airborne, 36F+ cancellable, staggers
- 6B: 1-12F invincible
- 66B: 1-23F graze, 10-34F airborne, staggers
- 33A: 1-24F graze
- 33B: 1-16F graze
- j.B: 2F hitstop
- 22C (N/D): 1-14F invincible
                                                              Block   Hit     CH
Motion     Damage     Proration   Startup  Active  Duration   Adv     Adv     Adv   Untech  Cancel  Type
------------------------------------------------------------------------------------------------------------
 5C         100*15     97%*15       30       oo      79        -4      -3      X     25      36      B
 6C         100*8      97%*8        30               79        -34     -33     X     25      36      B
 2C         100*7      97%*7        11       oo      83                        X     25      39      B
 j.5C       100*15     97%*15       30       oo      79        -3      -3      X     25      36      B
 f.5A       250*5      95%*5        30       oo      45                        X     25      23      B
 f.2A       250*5      95%*5        28       oo      47                        X     25      14      B
 fj.5A      200*5      98%*5        13       oo      34                              40      14      B
 f.5B       200*5      92%*5        29               77                        X     25      34      B
 f.2B       100*15     97%*15       10       oo      48                        X     25      X       B
 fj.5B      200*5      92%*5        29               77                        X     25      34      B
- Properties
- 2C: 10-76F airborne
- f.5A: 15, 20, 25, 30, 35, 40F bullet discharge
- f.6A: 13, 18, 23, 28, 33, 38F bullet discharge
- f.2B: Uncancellable
- Any B: Cannot be neutralized
                                                              Block   Hit     CH
Motion     Damage     Proration   Startup  Active  Duration   Adv     Adv     Adv   Untech  Cancel  Type
------------------------------------------------------------------------------------------------------------
 236ABC     100*5      97%*5        *                53                        X     25      25      B
 214A       900        85%          37               75        -16     D       D     40      42      C
 214B       500*3      95%*3        43               91        -2      D       D     40*3    48      C
 623A       150*5      96%*5        19               70        +1      D       X     40*5    52      C
 623B       170*7      96%*7        26               93        +1      D       X     40*7    75      C
 623C       100*8      94%*8        43               114       *       *       X     60*8    48      B
 412A       750        80%          19       12      57        -16     D       D     40              C
 412B       900        80%          31       24      88        -34     D       D     40              C
- Properties
- 236ABC: Startup is situational, 17F discharge, attack begins when butterflies touch edges
- 214B: 4F hitstop
- 623A: When hit, 2F hitstop
- 623B: When hit, 2F hitstop
- 623C: 31F discharge, block and hit adv situational
- 412A: 0F hitstop
- 412B: 0F hitstop, 1-54F graze
                                                                     Block   Hit     CH
Card         Damage       Proration     Startup     Active  Total    Adv     Adv     Adv   Untech  Type
------------------------------------------------------------------------------------------------------------
 Ring Lv1     80*48       98%*48         6,10(16)    oo      80       ???     D       X     25      C
 Ring Lv2     60*96       99%*96         6,10(16)    oo      93       ???     D       X     25      C
 Ghosts Lv1   150*n       98%*n          1,20~(21~)          72       ???     D       X     60      C
 Ghosts Lv2   25*60       99.5%*n        1,21(22)            72       +++     D       X     60      C
 Poison Lv1   100         90%            6,5(11)     oo      37       -4      -3      X     10      C
 Poison Lv2   100         90%            6,5(11)     oo      37       -4      -3      X     10      C
- Properties
- Ring Lv1: 7F discharge, partner 4F hitstop, 1-19F invincible, block advantage varies
- Ring Lv2: First ring 7F discharge, second ring 16F discharge, partner 4F hitstop, 1-19F invincible, block advantage varies
- Ghosts Lv1: Bullets are created randomly (position, speed, angle), block advantage varies
- Ghosts Lv2: Partner 4F hitstop, bullets are created randomly, rapid hits keep opponent in block stun
- Poison Lv1: 9F discharge, drains recoverable life on hit until spirits vanish, spirits vanish over time or if Yuyuko is hit
- Poison Lv2: 9F discharge, drains recoverable life on hit until spirits vanish, spirits vanish over time or if Yuyuko is hit
Motion    Startup   Active   Recovery  Graze      Cancel   Guard   Invulnerable
------------------------------------------------------------------------------------------------------------
 7/8/9     5         x        x         x          6+       6+      x
 7D/8D/9D  5         x        x         1-20       6+       21+     x
 6D        3         11~51    12        1-(13~53)  1+       15+     x
 4D        2         20       6         1-22       10-22    x       1-9
 j.6D      9         21       x         1-29       10+      30+     x
 j.4D      6         20       x         1-26       7+       27+     x
