Vampire Savior/Zabel: Difference between revisions
| Line 9: | Line 9: | ||
Primary objective: IAD j.d.HP/j.LK, short short super. | Primary objective: IAD j.d.HP/j.LK, short short super. | ||
His | His Strengths | ||
* Has literally every tool in the game minus a true projectile | * Has literally every tool in the game minus a true projectile | ||
* Very fast movement with a very fast air dash | * Very fast movement with a very fast air dash | ||
| Line 21: | Line 21: | ||
His | His Weaknesses | ||
* He is only restricted by the player and their execution | * He is only restricted by the player and their execution | ||
* Below average life | * Below average life | ||
Revision as of 12:56, 16 April 2021
Introduction
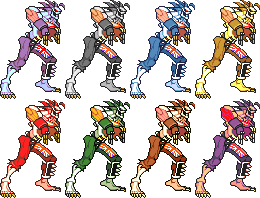
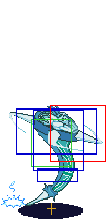
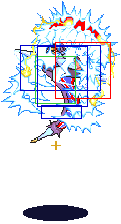
Zabel Zarock (ザベル), the Zombie. He is undoubtedly the best character in the game. Zabel has pretty much all the tools he needs to handle every situation and is almost as good of a turtler as a rushdown character. He is very interesting to play but is not as easy to learn as other characters. To be good, you need to master every option that he has, and he has quite a lot of them. To play Zabel you will generally want to get close and then trap the opponent with a poke that gives frame adv. and then applying his incredibly good high/low/cmd-throw game. Also, one should never hesitate to abuse of his air mobility and jumping attacks. Extremely strong and versatile, he is usually considered top tier, his only downfall may be his low stamina.
Primary objective: IAD j.d.HP/j.LK, short short super.
His Strengths
- Has literally every tool in the game minus a true projectile
- Very fast movement with a very fast air dash
- Has Dhalsim-Style normals that be used both in air and on the ground
- Has high damage combos, easily netting him 40% a combo
- Can play any style he desires effectively.
- Mixup is insanely powerful
- HAS AN UNBLOCKABLE JUMP LK IF AIMED, AND CAN SET THIS UP IN MULTIPLE WAYS
- HAS A CROUCH WALK AND CROUCH DASH
- HAS A GUARD CANCEL THAT YOU CANNOT ROLL OUT OF IF HE DOES THE ES VERSION
His Weaknesses
- He is only restricted by the player and their execution
- Below average life
Movement
Walk: Zabel's walk speed is about average.
Crouch: Zabel can crouch forward and backward by holding 3 or 1. Crouching has higher speed than walking. Crawling seems to eliminate Zabel's landing recovery from jumps, which is moderately useful.
Dash: Zabel crouches forward at higher speed. While dashing pressing any attack button will make Zabel perform the crouching version of the attack with some added momentum. This attack loses its ability to cancel and chain though. The dash can also be canceled by pressing 4. When the dash ends Zabel will stand up for some frames before he can crouch back again.
Jump: Zabel's jump distance is rather short.
Air dash: Pressing 44 or 66 in the air will make Zabel air dash. Pressing 4 or any attack button during the air dash will make Zabel fall down while performing the attack. Zabel can't airblock or chain during the air dash. If Zabel air dashes backward then his air 2K moves will also moves him backwards. The motion for an instant air dash (IAD) is 956. If done quickly enough Zabel will dash very close to the ground. Then you can cancel the IAD into another normal to make an air attack (must be blocked high) very close to the ground. This is a huge part of Zabel's pressure/mixup game, it helps him cover grounds quickly and makes blocking his attack strings incredibly difficult. Last note, IADs are obviously anti-low but can also hover above some standing moves, even when the IAD is done as low as possible (Aulbath's far stand HK comes to mind).
Normal Moves
All damage values obtained when performed on Demitri. All hit/guard advantage values performed from point blank range, with additional situational values noted below.
Standing Normals
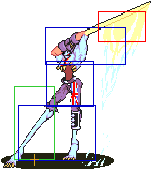
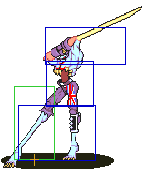
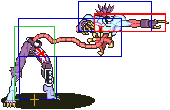
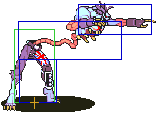
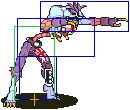
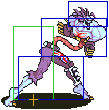
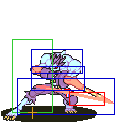
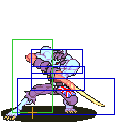
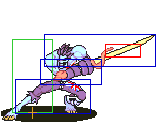
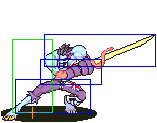
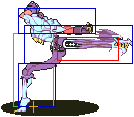
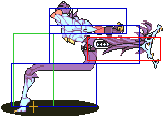
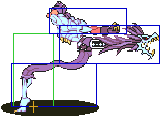
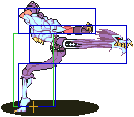
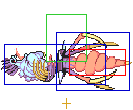
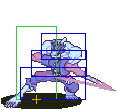
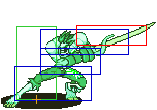
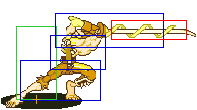
Forward Standing Normals
Crouching Normals
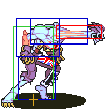
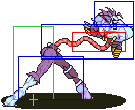
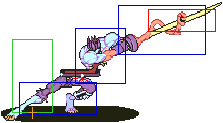
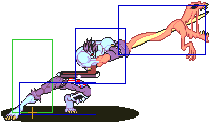
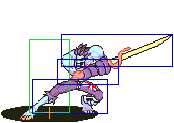
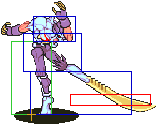
| Crouching Light Punch | ||||
| Damage | 3/7 | 1f |
5f |
8f
|
| Hit Advantage | +6 | |||
| Guard Advantage | +5 | |||
| Renda Bonus | H:+9 G:+8 | |||
| Rapid Cancel | Yes | |||
| Special Cancel | Yes | |||
| Meter Gain | W:0/G:3/H:6 | |||
| Start/Active/Recovery Frames | 4 | 3 | 7 | |
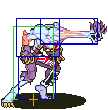
| Crouching Medium Punch | ||||||
| Damage | 9/14 | 1f |
3f |
6f |
9f |
19f
|
| Hit Advantage | 0 | |||||
| Guard Advantage | -1 | |||||
| Renda Bonus | None | |||||
| Rapid Cancel | No | |||||
| Special Cancel | Yes | |||||
| Meter Gain | W:3/G:9/H:15 | |||||
| Start/Active/Recovery Frames | 5 | 3 | 18 | |||
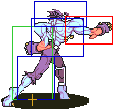
| Crouching Light Kick | ||||
| Damage | 3/6 | 1f |
5f |
8f
|
| Hit Advantage | +5 | |||
| Guard Advantage | +4 | |||
| Renda Bonus | H:+8/G:+7 | |||
| Rapid Cancel | Yes | |||
| Special Cancel | Yes | |||
| Meter Gain | W:0/G:3/H:6 | |||
| Start/Active/Recovery Frames | 4 | 3 | 8 | |
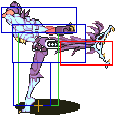
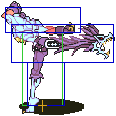
Jumping Normals
| Jumping Medium Punch | ||||||
| Damage | 10/16 | 1f |
5f |
7f |
11f |
16f
|
| Special Cancel | Yes | |||||
| Meter Gain | W:3/G:9/H:15 | |||||
| Start/Active/Recovery Frames | 4 | 6 | 5 | 1 (+4 Frames of Full Guard) | ||
| Jumping Hard Punch | |||||
| Damage | 13/20 | 1f |
7f |
11f |
18f
|
| Special Cancel | No | ||||
| Meter Gain | W:6/G:15/H:24 | ||||
| Start/Active/Recovery Frames | 6 | 4 | 8 | ||
| Jumping Light Kick | |||||||
| Damage | 4/8 | 1f |
4f |
7f |
10f
| ||
| Special Cancel | Yes | ||||||
| Meter Gain | W:0/G:3/H:6 | ||||||
| Start/Active/Recovery Frames | 3 | 3 | 3 | 4 | |||
| Jumping Medium Kick | ||||||||
| Damage | 9/15 | 1f |
5f |
7f |
11f
| |||
| Special Cancel | Yes | |||||||
| Meter Gain | W:3/G:9/H:15 | |||||||
| Start/Active/Recovery Frames | 4 | 6 | 4 | |||||
Command Jumping Normals
| Jumping Down Medium Punch - j2.MP | |||||||
| Damage | 8/14 | 1f |
3f |
5f |
7f |
11f |
16f
|
| Special Cancel | Yes | ||||||
| Meter Gain | W:3/G:9/H:15 | ||||||
| Start/Active/Recovery Frames | 4 | 6 | 6 | ||||
| Jumping Down Hard Punch - j2.HP | ||||||
| Damage | 11/18 | 1f |
5f |
7f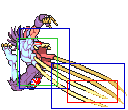 |
11f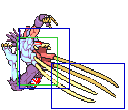 |
15f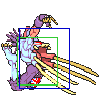
|
| Special Cancel | No | |||||
| Meter Gain | W:6/G:15/H:24 | |||||
| Start/Active/Recovery Frames | 6 | 4 | 5 | |||
old data
Note: Every "stretched" move is chain cancellable. Every dashing move is a crouched one, and keep a bit (or a lot, depend of the length of the hitting frames) of the dash's momentum. Air dashed drills keep the dash's momentum too.
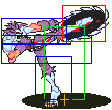
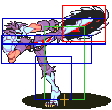
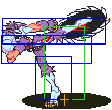
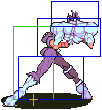
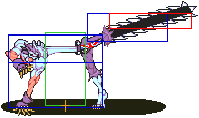
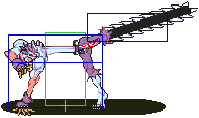
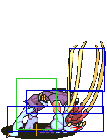
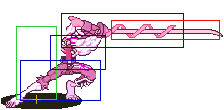
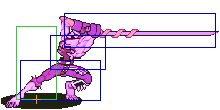
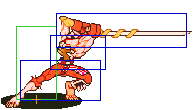
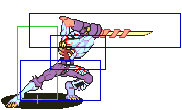
HP: Upward hitting move, GREAT anti air. Not much more to say about this move. Not safe. Better used when chained into stand HK, makes it less punishable.
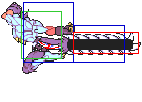
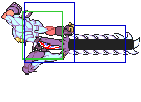
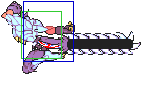
HK: Interesting move. High kick, Zabel's foot turn into a saw. Zabel's hitbox go back a bit while doing it, which makes it a good anti air.
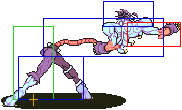
f.LP: Zabel stretches and poke. Good move for poking, better if cancelled into c.lk after either hit or guard. Can work better as an anti IAD than stand lp (highly situational) and is useful in combos. Good reach, special cancellable. Many chars can crouch under it.
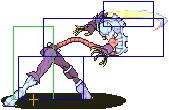
f.HP: 3 hit stretching move. Somewhat useful in chains as it creates a delay in the chain. Kinda slow, Tech hit/guard cancel all day on it.
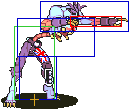
c.LP: Low jab, very good move (lots of + frames either on hit or guard). Move of choice when ground dashing. One of Zabel's fastest move. Main starter of his up close high/low game due to it's frame advantage. Special cancellable.
c.MP: Low hook, hits mid. Can be linked from cr.lp x 2. Special cancellable.
c.LK: Good move. Low kick, hits low, starter of 95% of his ground combos. Really low frame advantage on hit and guard. Still, a good (great?) move. Special cancellable.
c.HK: Sliding saw, hits low, goes under a lot of projectiles. Non cancellable.
j.MP: Great move, best used on air to air when your opponent is above you. Happens a lot since you will IAD pretty often. Can go for the unblockable when it hits that way. Big hitbox, can be use to whiff on purpose and mix up. Special cancellable. Full guard after it's recovery.
j.HP: Chest bones again. Good air to air move when opponent is above, but why use this when you can use j.MP. Usually used whiffed to build meter.
j.LK: Only one use for this move: unblockable. It's a good move but it would probably never be used if it weren't for the unblockable. The move's last hitting frames is unblockable, learn setups to land that one frame only on an opponent. Special cancellable.
j.MK: Good move, good reach. Zabel attacks with the bone form his shin. Good move overall. Special cancellable.
j.d.MP: Excellent move overall. Same attack but angled downward. Hits farther than j.MP, probably his best air to ground move. Can be used as an instant overhead against some chars. Special cancellable, Full guard after it's recovery. Move of choice for chicken guarding.
j.d.HP: Chest bones part 3. Arguably his best IAD move. Not cancellable. Not much else to say. Learn to instant IAD j.d.HP, it is required to play him decently. Random note: If you do not IAD as fast as possible, IAD j.d.hp will whiff against a crouching Q-Bee ; the timing to land a IAD j.d.MP against her is more lenient, but j.d.HP has more hitstun.
j.d.LK: Downward drill. Land the closest of the 3 drills. Can be used in IADs. Best use as an IAD against Q-Bee (if you cannot land iad j.d.MP/j.d.HP) or as a setup for the unblockable. Fast, can be chained into but not from, not cancellable. The drill of choice (if you miss your IAD you won't fly for half an hour, with the others you will).
j.d.MK: Downward drill, moderate distance. Wouldn't use it if I were you. See LK drill for info.
j.d.HK: Downward drill, goes the farthest. Shitty outside IADs. See LK drill for info.
Special note about "Full Guard": What is full guard? Well it's a bug on Zabel's jumping LP's and MP's that allows him to guard EVERYTHING while airborne if guardable after the recovery of these moves. That includes guarding moves that you are not supposed to guard while airborne (ie. every single grounded normal move) - https://twitter.com/shu180sx/status/926116428985405440
Pursuit Attack
Zabel hovers and stomps you multiple times (normal 3 times, EX 6 times). As all pursuits, can be whiffed to get closer and go straight into mixups, but Zabel's kinda slow... Don't do it often.
Throws
Special Moves
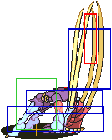
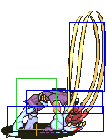
| Death Hurricane - 214 LK/MK/HK/ES (Filler Information Below) | |||||||
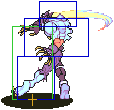
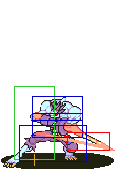
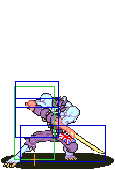
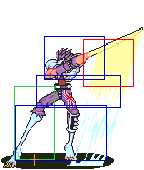
| Damage | 15/21 | 1f File:Zabel hurricane 1.png |
5f File:Zabel hurricane 2.png |
8f File:Zabel hurricane 3.png |
11f File:Zabel hurricane 4.png |
8f File:Zabel hurricane 5.png |
11f File:Zabel hurricane 6.png |
| Chip Damage | Per Hit:0/2 | ||||||
| Hit Advantage | Knockdown | ||||||
| Guard Advantage | ? | ||||||
| Meter Gain | None | ||||||
| Start/Active/Recovery Frames | ?? | 1 | ?? | (Grounded) ?? | |||
|
Spinning move. Fast enough, short one is pretty safe.
| |||||||
| Hell Gate - 41236 LK/MK/HK (Filler Information Below) | |||||||
| Meter Gain | 12 | 1f File:Zabel hellgate 1.png |
44f File:Zabel hellgate 2.png |
58f File:Zabel hellgate 3.png |
??f File:Zabel hellgate 4.png |
8f File:Zabel hellgate 5.png | |
| Start/Active/Recovery Frames | 57 | 6 | |||||
|
Teleport. Invincible from the 1st frame. Strength determines where you'll reappear, no matter which side you're on. No ES.
| |||||||
Death Phrase - 623K (GC):
- Guard Cancel, that can only be used as a Guard Cancel, there is no normal special move version of this attack.
- (Any Version) Fast, knocks down.
- (ES Version) Adds a second untechable hit. This move is quite important for Zabel due to the opponent not being able to ground roll after the second hit, which can potentially set up his unblockable j.LK.
Ultimate Revenge - 623K (DFGC):
- A Guard Cancel only available while in Dark Force mode. The hitbox on this one is worse than his regular Guard Cancel. Unblockable (is this true?). No ES.
EX Moves
| Death Voltage (Air) - air 63214 KK | ||||
| Air version has 5f pre-attack frames, with 32 active frames. | ||||
Dark Force
Final Transformation: Ultimate Undead - Same strength P + K
- (Any Version) Gold Chainsaw mode. Zabel gets a new set of attacks, while losing his special moves and throws, and his dash becomes a hop rather than his normal crawl. While in dark force mode Zabel's normals do white (recoverable) damage on block. DF-Zabel has a unique Guard-Cancel animation
- Dark Force Combos
Combos
Basic Combos
- 2.LK > 2.MP > 2.MK > 2.HK
- 23 red/40 white
- Zabel's most basic, close range knockdown combo. Works on the entire cast. You can subsitute 2.MP for 5.MP for an extra point of damage.
- 2.LK > 2.MP > 2.MK > 6.HK
- ?? red/?? white
- There will be times you can connect the first three hits but realize you're too far away for a 2.HK sweep to combo. If you catch the opponent standing you can opt to this combo instead, as 6.HK will not hit crouching opponents besides Bishamon and Victor.
- 2.LK > 2.MK > 2.HK
- ?? red/?? white
- A basic combo you can do when you're too far away to get all four hits in the combo above.
- 2.LK > 2.LK xx 63214.KK
- ?? red/?? white
- A combo into Death Voltage. It does less damage and the knockdown isn't as favorable, but it's a little easier to combo into than Evil Scream due to the much faster start up. For this combo and the one below you can instead start with 2.LK > 5.LK instead. While 5.LK does not hit low, it has the slightly more range than 2.LK and it may be easier for some to do the special cancel from a neutral position.
- 2.LK > 2.LK xx 64.PP
- ?? red/?? white
- Evil Scream is generally the best move to combo into. It is the most damaging option, and with how with how it behaves on hit sets up the same type of knockdown each time, making okizeme easier. When comboing into Evil Scream from light attacks it requires at least two light attacks, as the move is too slow to otherwise combo without the added renda bonus frames. Evil Scream will not hit crouching Gallon and Q-Bee.
Strategies
Matchups
ANAKARIS (8-2): Anakaris for Zabel is a pretty easy matchup overall, which shouldn't be too surprising given his strong offense and Anakaris's inability to defend against it. However, you do need to know how to pressure him the right way to make the match free, as Anakaris has many tricks to pull when he gets his turn. Continuous dashing light attacks and renda s.LPs give Anak hell. He cannot pushblock or throw, so pressuring him with these can render him unable to retaliate. As these do no chip and you are always prone to input errors, you mostly mix these in with other mixups in order to hold him down while you get your damage. He can't damage you if he can't play, after all. If Anak gets away, he will most likely be throwing out his own limbs and zoning with curses to make his opening, so don't let him get away with it. His jump arc can be easily followed and chased with your long normals. If he tries cursing from far away, just teleport under him and go up for the attack. (Be aware that grounded AAs may not work, as him performing aerial special moves allows him to air-block this). If Anak knocks you down, you will be subjected to a mix of pretty much every type of pressure in the game. Anak has fast overheads in the Pyramid Dive, dash pressure in his lights, and far reaching lows to keep you from getting out unscathed. Just do your best to block and push him back out. Once he is away from you, continue dominating with your superior normals. c.HP and s.HP will most likely be your best AAs due to how Anak jumps. The only real way you can lose is if the Anak is much better than you overall or you stick limbs into Curses. Don't do that. Anak is now on top of you, and if they were ES Curses, he gets to punt you for a bunch of free damage.
VICTOR (7.5-2.5): Victor has high-priority normals with lengthy hitstun, super fast command grabs and a very tough to beat Air-to-Ground move in diagonal j.HP. Thankfully, he does not have the mobility to exploit them to their full potential, so it isn't hard to keep him out of range of these. You can often get by against poor Victor by running away and sticking him with a limb when there is an opening to do so. Zabel can travel so fast and Victor's dash is so bad that it's a feasible strat. His high defense and white health can make this long, but it's safe. Crouching VIctor is huge, so j.HK pressure is super good against him. It always catches him crouching, and his tall height allows you to do it at heights such that he really has to guess how many times it will hit before you do your lows. If he can't GC, j.HK all day for pressure. Ideal AA is s.HP and c.HP. Challenging j.HP is very risky due to its huge priority, so you don't want to AA late or use the other ones to challenge it for nothing in return. Victor's AAs are a big problem due to the electricity giving them hefty hitstun. If he gets on top of you due to them, wait out his jumps, then hold down back. If he tries a command throw, you will often just crawl out of range and net yourself the chance for a free punish. If he does lows instead, you're good. Mega Forehead does have upper body invincibility, so that on wakeup could theoretically beat the j.LK unblockable. However, due to the slow startup and invincibility positions, if this beats you, you probably weren't getting an unblockable or comboing off of it anyways.
MORRIGAN (7-3): Morrigan in this game comes off as mostly underwhelming, but she isn't as free to Zabel as you might think. The obvious issue is Shadow Blade. A proper DP that can stop IAD approaches, and reversal DP will always beat the j.LK unblockable. This makes meaty pressure difficult, but a baited DP does mean a free Death Voltage for you. Morrigan will likely stay back and throw fireballs to build meter for her gameplan. This is exactly what you want. If she's not fullscreen, an IAD will go over grounded fireballs and net you a free hit that could be a combo if you got close enough. Air fireballs are windows to jump in and close the distance she wants to have. s.HK is her only real way to shove you out, but it does do a good job at beating IADs, so be wary if she catches on to your habits. Once Morrigan has meter, her options become actually bothersome to you. ES DPs do much more damage, ES Fists are harder to go over and still get the combo, and she gets some burst damage in Darkness Illusion, which can be reasonably comboed into. As long as you can make her have a hard time gaining and using that meter correctly, you are mostly in the clear as far as surprises go. c.HP is the preferred AA due to her having air normals that don't hit far enough downwards to beat it. If she's dashing at you, s.LP and your standing heavy kicks are much better for stopping her approach. Don't stick limbs into ES attacks. They hurt.
LILITH (7-3): The big differences in this matchup from Morrigan comes from Lilith having a proper grounded dash, superjumps, and a shorter range fireball with high frame advantage. All of this is more suited to landing her Illusion super, so you are largely going on the same principles as with Morrigan: Don't let her get meter. s.HP and c.HP are favored much more due to Lilith's jump height, but be wary if she superjumps with meter. LI can autocorrect and catch the extended hurtboxes if you whiff for a full punish, so in this case it may be wiser to just dash under her. As her fireball has so little range, she will be a lot more about coming to you to deal damage. Use your limbs to beat her out and prevent her from getting close. Remember that she has no standing overheads, so be ready with GCs and pushblocks to fight her off of you. As with Morrigan, her reversal DPs can let her break the j.LK unblockable. Don't stick limbs into Puppet Show. It looks embarassing. Just harrass with your normals safely.
JEDAH (7.5-2.5): Jedah is a pretty easy matchup for Zabel. His tall height, projected hurtboxes on his attacks and more aerial based approaches leave him prime to waste with AAs and Death Voltage. His defense is bad, so heavy pressure wins the day here. Bait his AAs and hit their hurtboxes for big damage. Anytime he air-dashes from farther than half screen, you get a free opportunity to Death Voltage him. Jedah jumps incredibly high. So high, in fact, that the peak of it can go over every AA in Zabel's arsenal barring Death Voltage, and if he's jumping back or in the corner he's probably going to block that. You may need to do your AAs a bit later than usual as a result. s.HP is best for intercepting his jumps, and 6.HK is useful when he's far. When Jedah is doing dash pressure with j.HP, you can often hit him between reps with s.LP and knock him out of it. If he tries to do it with j.HK, this may be a bit harder, so focus on pushblocking or GC'ing that. If you are going to airdash into a pinwheel, Skull Sting might have a use in getting you around it. Barring that, try and stick a limb into it if there is no other option, especially if it is ES. The limb hurtbox will disappear and you might get knockded down in a single hit, saving you from the wheel's full damage. The worst thing Jedah can do to Zabel is activate his Dark Force. It gives him fast access to highly damaging loops and it is very hard to punish him for attempting it. As it starts his offense, you may get a free Death Voltage while he fies forwards, then you can pursuit to waste the timer. Punishes when it deactivates aren't guaranteed, but just trying to meaty him is a good bet to make sure he doesn't get away for free.
DEMITRI (6.5-3.5): The way in which Demitri is built is going to slow the pace of the match dramatically, so don't rush it. Like with Morrigan, you want him throwing grounded fireballs for free ways to get in. Air fireballs do intercept the airdash, but you can just dash under those. Against ground fireballs, it is also possible to dash 2.HK under them when close and knock Demitri down, but this is risky. Absolutely respect Demon Cradle. Not even Zabel can disregard it. It ruins the j.LK unblockable and will make it Demitri's turn everytime he lands it. Sticking out limbs mindlessly gives him the chance to go on his offense, so be cautious and get a feel for how he likes to use it. If Demitri gets on top of you, you can safely block low unless he is jumping, in which case stand until he is low enough that he can't chain attacks anymore. He has nothing on the ground that can really blow you util he gets 2 meters. 2 meters is when he gets access to Midnight Pleasure, a suped up version of his normal super throw that eats nearly half your health and comes out way too fast to react to. If you are out of range for his close HP, you may wish to just jump when you think he'll pop it. Make sure you are out of sweep range for this if you do so. If he dashes and buffers it, doing Death Voltage to catch him reappearing will beat it. However, this 100% loses to dashing Demon Cradle, so it is a huge gamble. If you block a DP, just Voltage him. Punishing him is tough with the single frame of landing recovery, so just get the damage that you can. c.HP beats pretty much all of his approaches from the air. Don't stick limbs into Demon Cradle. Just don't do it.
LEI-LEI (6.5-3.5): Lei-Lei has a lot of high priority, huge range normals to throw around, so don't think you can always play safe with your stretch normals. j.MP is the main normal that will be likely to give you trouble. The match is going to be a lot of fading in and out to find openings in her normals for you to pin her down and go ham. The girl is very frail, so you won't need many openings to get ahead and make her struggle. Don't stick limbs into her items. If she throws a dizzy one and you stick a limb into it, you are in for a world of hurt. Remember that the Akuma statue all but guarantees that the next throw is a dizzy item, although they can occasionally show up at other times. c.HP is the perfect AA for intercepting Senpuu-Buu approaches. It cleanly hits her out of most normals if she does it close, and a dashing one will keep you safe if she hangs back with it. The Tenrai-Ha balls are actually somewhat easy to GC, so if she drops it and you block it, you have a lot of time to GC her as she follows them in. If Lei-Lei pops Dark Force, run and let her use it. The Hyper Armor makes it very tough to get your licks in. Wait for deactivation and stay in a position where you can sneak a limb in as it deactivates. If Death Voltage will kill her due to her lowered defense during it, feel free to go for it. She can't block during it.
- Tenraiha punishes — http://www.youtube.com/watch?v=SyM7vYK7BXg
FELICIA (6.5-3.5): Just like you, Felicia is blessed with good normals and is left with somewhat lackluster special moves (With the exception of Cat Spike). This is a matchup where you really want to know how your normals will interect with hers as a result. Felicia is very easy to j.LK unblockable due to her slow, easy-to-follow rolls. If you ES GC her, a straight jump up will put you in the perfect position to unblockable her as she gets up. Felica's jump arcs are very obnoxious to deal with, so you don't want to hesitate with your AAs. Stick with the big s.HP and c.HP and get her before she can come into j.HP range. If she tries wall jumping, s.HP is amazing to beat her with. Rolling Buckler won't be common from most good Felicias, but it does go under a lot of Zabel's pokes, so don't be throwing out limbs mindlessly. This also applies to Dancing Flash, which is even more dangerous to leave yourself open to. If Felicia puts you in the corner with Kitty Helper, you can try to reversal teleport to beat any of her oki tricks. If you are in the right corner, doing a glitch teleport (63214 KK) will put you far enough away from her that you shouldn't need to be worried about getting chased. Remember that hitting her will not nullify Alto (The kitten), so Death Voltaging isn't a free escape. Don't stick limbs into Please Help Me.
BULLETA (6.5-3.5): Bulleta's missiles do not dissappear if she gets hit. Be very wary of doing IADs if she is holding back, as her intercepting it means you get knocked down and she gets her time to play with her dash links and instant overheads. Like with other fireballs, you can 2.HK under the missles, and you'll usually clear them if you hit her. If she favors the missiles, play patient to neutralize them and close the distance. If she wants to exploit her dash pressure, put normals in her way and stop her. Once you can get on her, she has a lot of trouble escaping due to her poor GC, so never let up once you get an opening. There isn't really a lot to defending against her due to how fast she can move and put pressure on you. You just have to rely on instinct until you can push her off and resume your plans. Get good at IADing out of pushblock so you can go over the missiles she likes to end strings with and mess her up. Her double jump may make her arcs tough to AA, but s.HP and c.HP will beat her cleanly once she starts coming down. She usually won't stick with a single jump unless she's trying an instant overhead, and at that distance s.LP would be a much better AA. Don't stick limbs into Cruel Hunting.
BISHAMON (7-3): Super fun matchup. Having limbs that can outrange a sword is a great feeling, and abusing that along with Bishamon's ginormous crouching hitbox with be your key to victory in this fight. He doesn't have particularly good AAs to keep you out. Despite this, his AA normals are very good at stopping you from jumping out of his attack strings, and the advantage on his dashing normals can let him pin you down for long periods of time. This isn't too awful because you can block low for most of it (His dashback overheads can't turn into much damage). However, the real threat of this is that he gets lots of time to try his ES Spirit unblockable. If he gets you to block a raw s.HK (Far 2-handed stab down into your knees), the unblockable is set up. Get good with GCs and pushblocking early to stop him from getting that chance. One of the scariest things in this is Bish's pursuit. Not that it on its own is dangerous, but Bishamon travels extremely fast during it. He can do it as you are waking up for a free left/right mixup, which can end up just being a straight guess on your part in order to get out of it. Do not try to press buttons against this. Turning around in VSAV is hard, so if it crosses up you might attack in the wrong direction and he gets a free combo. Or you could just reversal teleport and hope he doesn't react to it. Bishamon won't usually jump a lot, but if he does you want s.HP for AA purposes. The sword still has really good range, so you want to thwart his jumps before he can get anywhere near you. Don't stick limbs into Spirits. It may not stun you, but you get knocked down and Bishamon can go into his pursuit shenanigans.
AULBATH (7-3): The curiously attractive fishman is another character that doesn't have a lot of good AAs, so IAD rushdown is pretty easy against him. Be sure not to be sticking limbs into his projectiles though, as they are free combos if you clip them. Thankfully, if you are deep in his grill, he won't be able to get them out fast enough to intercept you, and his GC is laughably slow. If he starts with the bubble traps, you can always reversal teleport out of what ever he does. If you are in the right corner, glitch teleport will probably deny his chance at any punishment for it. If you cannot reliably do reversals, you have to do a quick GC to hit him and stop the bubble. Be aware that hitting him during his Dark Force (On the crab) will not pop the bubble: He needs to go into hitstun for it to be nullified. Aulbath likes the air in this matchup, so you really want to be on point with your AAs. Typically, you can catch him early with c.HP, and sometimes s.HP if you are far enough from him. s.HK can also be used in a pinch if you can accept its pathetic damage.
GALLON (6-4): Gallon, like Jedah, can go over all of your AAs at the peak of his jump. Unlike Jedah, he packs comboable knockdown attacks, huge normals and can rip out half your life over simple mistakes with ES Beast Cannon. Thankfully, he still has mediocre AAs, so you can reasonably go about your normal IAD game without much hassle. The only AA you really have to worry about from him is close s.HK, and that only really becomes a problem in his Kick Throw OS and if he is on top of you already. Watch out for that one, and be ready with a reversal teleport or throw. Doing Death Voltage against Beast Cannon often results in a trade despite how big Beast Cannon's hurtbox is. However, this is a trade you absolutely want to take. Gallon takes huge damage and you get the chance at oki due to the lengthy electricution animation. Don't be too fast with it though. If Gallon knows its coming, his j.LK will usually somehow beat it out, and you waste valuable meter. Also, you obviously shouldn't do this if the Beast Cannon would make you lose a lifebar. Gallon's jumps are very difficult to intercept, but slightly delayed c.HPs work well in fending him off. If he is just dashing at you for pressure, you might be able to hit him out of it with s.LP if he is close enough. Gallon's walk makes him crouch, so many of your usual pokes can go straight over his head. You may want to consider zoning with Zabel's kicks more against him as a result, as these will always catch him. As an extension of the above, crouching Gallon cannot be hit with Evil Scream, so end your confirms in this match with Death Voltage to be safe. An odd thing the Gallon can do, if he is super skilled, is to do a cross-up dash attack and turn it into a combo into Moment Slice. It isn't common to see them do this, but Zabel is one of the few characters vulnerable to this setup, so it may come up on occasion. It does much more permanent damage than the usual ES Beast Cannon stuff. Don't stick limbs into Beast Cannon. He can still juggle you off of this if he beats out your limb.
Q. BEE (6-4): This is a very reasonable match up that ends up being incredibly annoying due to the fact that, when Q. Bee is crouching, Zabel cannot combo into any of his EX attacks. Zabel loses most of his opportunities for 50%-Life combos, so the match turns into more of a poking game. Q. Bee can crouch under a lot of limbs and has an array of huge normals to pester you right back as well. Fortunately, like her, you can crouch under them and whittle her health down with quick punishes. Q. Bee isn't very durable, so these small victories will really add up over time. Your hit-per-hit damage is still much higher than hers. If Q. Bee gets on the offensive, you'll be faced with a series of incredibly fast guesssing games against her homing dash high-low. There is really nothing you can do but guess right and push her out before she can get another chance at doing it. If she's not point blank, s.LP may help punch her off and give you your opening for big damage. She also has a flight Dark Force similar to Jedah, but hers is mostly used to run away, so you won't have to worry about mixups like that. Death Voltage is very useful in zapping the bug. If she decides to air dash from far away, she can't do anything but take a voltage. If she tries to get distance and throw out the Q Jelly, Death Voltage her fast. If she's hovering, you can Death Voltage her and the hover may bug out and not let her block it. Each one is almost a third of her health, so look for opportunities throughout the game when in neutral. Don't rely on this, or else you'll be wasting meter more than half the time and she has a chance to jump all over you. 6HK is incredibly helpful when she is far, as it beats pretty much all of her jumping normals, and her air dash will send her sailing straight into it at that position. If she's just neutral jumping, you want s.HP to hit her early. Don't stick limbs into C->R (The rush grab). It has a surprising habit of eating other normals and especially Zabel's huge hurtboxes.
SASQUATCH (6-4): The battle against the ball of cotton is mainly in your favor due to him being fat and vulnerable to the j.LK unblockable. Sasquatch packs high defense, very fast 50-50s with his dash, and even has combos that outdamage Zabel's due to the defense difference. The simple solution is to keep him out of his sweep range so he can't knock you down, but the short hops give him insane speed to deal with. Stretch normals are going to play an even bigger role in this match up than normal, as you'll need them to counter his hops and start taking the life lead. Outside of the short hops, Sas is very slow. He moves only in quick bursts, so you can beat him out in the mobility department. Keep your approaches varied and your escapes hard to follow. As long as you stay out of short hop range you have ways to counteract everything he can pull. Once Sas has meter, the match gets much harder. ES Big Towers forces you to IAD higher if you want to clear it, and getting skimmed by it means getting knocked down and subjected to Sas's big mixups and big damage. Look for big signs of him popping the towers, as you will get a big advantage if you can make him waste meter. The obvious sign is him hopping backwards, as there is usually no other reason for him to do this. Watch out for him buffering the necessary crouches in the hops. 6LP, 6MP, 6HP(Situational and risky), and 6.HK are the ideal normals to stop Sas from closing distance with the hops. If he's close, s.LP is the best bet to hit him out of it. If, for whatever reason, he decides to neutral jump towards you, c.HP beats pretty much anything he can do from there. His Dark Forces aren't very common, but the Super Armor one will actually prevent the second hit of Zabel's ES GC from knocking him down, so be aware of that. If Sas tries to gimmick you with Big Eisbahn (The Ice Puddle), remember that you have Skull Sting (2-8 K) to get you out of it if you think your air dash will send you into it. Don't stick limbs into any form of ice. It causes a very obvious knockdown animation that instantly tells Sas it's time for big mixups.
- Evil Scream unblockable loop — http://www.youtube.com/watch?v=PxaIZchP-rQ
- Death Voltage unblockable loop — http://www.youtube.com/watch?v=arJjQUlR-zM
- Unblockable loop in practice — http://www.youtube.com/watch?v=p_Rs0k-AIcE
- Corner Backwards Airdash Setup - https://twitter.com/VMP_KyleW/status/830983193499049986
ZABEL (5-5): The mirror matchup largely depends on how comfortable each Zabel is with their character, and who can get a handle on the other's habits first. Specifically, figure out how trigger happy he is with Death Voltage as soon as possible. You do not want to be sticking limbs into this, and figuring out how fast he is with popping meter on it will greatly help in limiting how often he can combo into his EXs on you for big damage. You can escape the j.LK unblockable with a reversal teleport.
Kaji comeback Wwww: - https://twitter.com/sakamoto7691/status/826470064798920704
Zabel Memos
- Character highlights from Twitter
- cr.lp, RENDA cr.lp LINK cr.mp is a 3-frame link while cr.lk, RENDA cr.lk LINK cr.mp is a 2-frame link. LP-version is easier
- From an air-dash, J.2K (Bee Drill) comes out faster. 4-frames total(?) startup
- ES-Guard Cancel sets up the Disable-Roll Bug, so setups for UB-J.lk are legit at this time. The setups do differ per character.
- Against Felicia - 8-jump, falling J.lk
- Dark Force Zabel does not have a taunt
- Zabel Can Renda cr.lp into dash links.
- There are a few vulnerable frames which Zabel can be hit out of his ES-GC & still connect combos
- Zabel has a corner infinite on standing Bishamon - it's very impractical
- Zabel has an infinite on standing Anakaris - it's very impractical
- 1998 Combo Video
Zabel Bugs
- Unblockable J.lk
- See the 5th Column Here -
- Corner setups that beat blocking
- Disable-Roll Bug
| Zabel | ES-Guard Cancel |
| Zabel ES-GC Interrupt into Evil Scream | https://twitter.com/VMP_KyleW/status/1019149321801891840 |
| Zabel ES-GC Interrupt into Death Voltage | https://twitter.com/VMP_KyleW/status/1019149001700999168 |
- Dizzy Bug
| Zabel Air-Throw | https://www.youtube.com/watch?v=FQhFbm4ehek |
| Zabel Air-Throw | https://twitter.com/egooolei/status/1021352306510446592 |
- Absolute Air Guard on J.mp, J.lp - Air Guard Restores Air Options & blocks UBs
- Dark Force Palette Bug
- While CPU Zabel is in Dark Force, do a command grab (as to not allow the character to leave dark force) then press start on player-2.
- Unblock ES-Guard Cancel Frames
- See The first chart here - Zabel is at frame 7
- Unblock ES-Guard Cancel Frames
- See The first chart here - Dark-Force Zabel is at frames 5-7
Notable Japan Players
Japanese Player Index: http://www21.atwiki.jp/vsplayer/pages/20.html
| Name (English) | Name (Japanese) | Color | Location | Contact | Notes |
|---|---|---|---|---|---|
| Komemaru | こめまる | MP |
Kanto Region | http://twitter.com/komemaru_z | #1 Zabel, from Tokyo |
| Sakai Hell Beat |
サカイ |
KK |
Kanto Region | #2 Zabel Switched to Demitri in 2017 | |
| T2ya Tetsuya |
— | LK |
Tokyo, Japan | http://twitter.com/t2ya55 | Legendary Zabel Retired T.O. for DCC-events |
| CAA | — | MP |
Kansai Region | Retired. | |
| Nan | ナン | LK |
Kansai Region | http://twitter.com/hanakozou | Best Bell in West Japan |
| Tkm | — | HK |
Niigata, Japan | http://twitter.com/Tkmiyasama | |
| Dekamelon | でかめろん デカメロン |
MK |
Kanto, Japan | http://twitter.com/Dekameronb | |
| Yamakawa | やまかわ | MP |
Kansai Region | https://twitter.com/yamakawa_zabel | |
| Ogawa | オガワ | MP |
Kanto Region | ||
| Aojiru | 青汁 | MK |
Kanto Region | https://twitter.com/aojiru_zabel | |
| Kuronu Chrono |
黒野 | HK |
Kanto, Japan | Organizes the New Comer Tournaments at Mikado | |
| Bega Vega |
ベガ | HP |
Kanto, Japan | https://www.youtube.com/channel/UCuNnv95STflv3tDNZmeGAAA | |
| Irifune | 入船 | MP |
Kanto, Japan |
