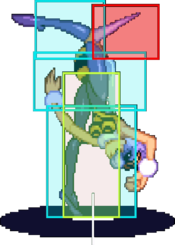
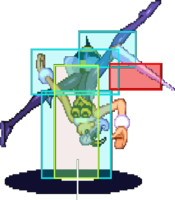
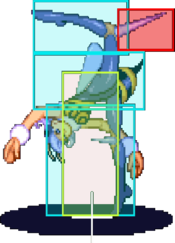
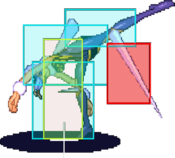
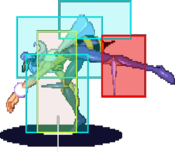
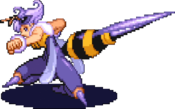
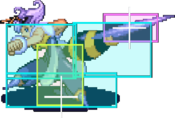
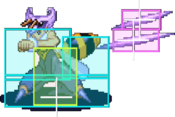
Vampire Savior/Q-Bee
Introduction
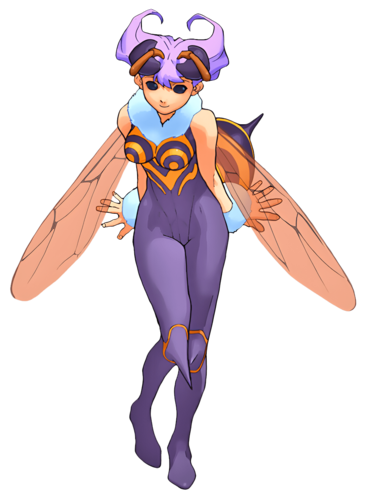
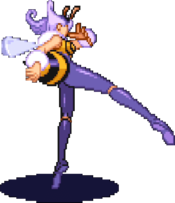
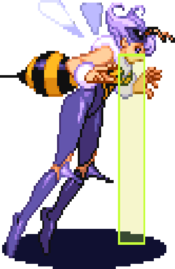
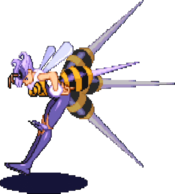
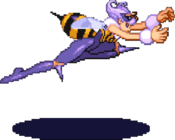
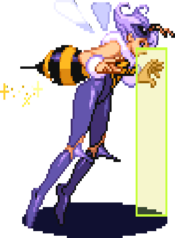
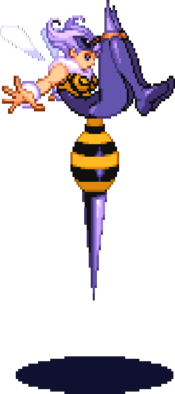
Q-Bee (キュービィ), the Soul Collector.
The Queen Bee of the Soul Bee species, a race that consumes souls to live. Q-Bee's race resided in the territory of the Dohma family, where they languished to near extinction during the period where Jedah was dead. Following Jedah's resurrection and his gathering of powerful souls in the Majigen, Q-Bee noticed the pooling of strong souls. She proceeded to ventured into the Majigen in order to gather souls she needed in order to alleviate the Soul Bees' hunger and restore their population.
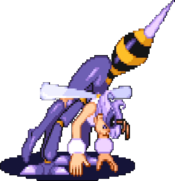
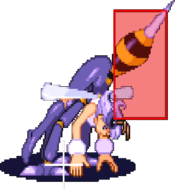
Q-Bee is a top-tier pixie who is considered third best. She has strong normals for pressure and owning neutral, excellent mobility, & an annoyingly small hurtbox while crouching. She does suffer from standard pixie issues like low damage, low health, & relying on universal mechanics for defense. If you enjoy rushing your opponent down with insanely fast IADs & poking with incredible normals than Q-bee is recommended for you.
Gameplay
Primary objective:
- Bully opponents with strong pokes in neutral
- Float at/over opponents & make opportunities with her homing air dash
- Once inside, use instant-air-dashes as oppressive high/low offense
- Loop high/low mix-ups on oki to keep the opponent in a vortex/blender
- Once the opponent has accrued considerable white life, confirm into ES C>R
- Use Q.J. as corner pressure to elevate your corner advantage
| Strengths | Weaknesses |
|---|---|
|
|
Movement
Walk: Average speed both forward and backward. While easy to overlook compared to her unique options for movement, walking with Q-Bee is still important for her counterpoke game and adjusting potential IAD angles.
Dash: Functions similarly to a standard ground dash but she will enter an inactionable slide that acts as a recovery for both the forward and backward version. Because of this slide she is unable to empty cancel her dashes by pressing the opposite direction but she can thankfully still cancel it with her standing normals, making it important to learn how to move around while dash canceling.
Jump: Slightly floaty, the forward version travels average distance while the backward version travels almost no distance. Very useful when combined with her float and strong air-to-ground normals.
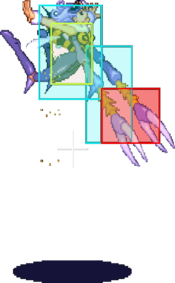
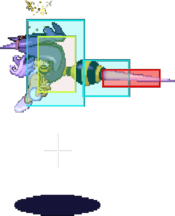
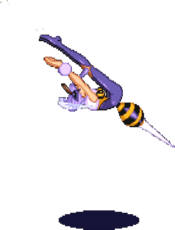
Air Dash: Perhaps Q-Bee’s single most defining tool, an airdash that locks on to the opponent’s current position and sends her there. From an instant air dash (IAD) Q-Bee is capable of extremely fast triangle jumps, giving her the fastest overheads in the game. While using her airdash counts as an air action and she can’t block after doing so you can cancel it into her three air okay special moves at any point in the air dash.
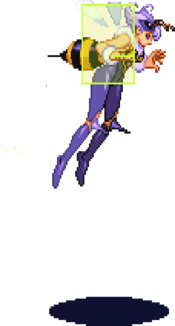
Float (hover) - hold 7/8/9: Q-Bee will stay suspended in the air either for a set amount of time or until the direction held is let go. Both the neutral and backward float are rather short but her forward float allows her to cover about half screen distance. Incredible tool for mobility, allows Q-Bee to both advance forward while being able to chicken guard potential threats. If there is a significant gap between air hits that allow QB to return to neutral, the second air hit will effectively guard break her.
Normal Moves
Standing Normals
5LP
| Startup | Active | Recovery | Hit Adv. | Block Adv. | Renda Bonus |
|---|---|---|---|---|---|
| 6 | 3 | 8 | 8 | 7 | H: 11 G: 10 |
| Guard | Cancel | Invuln | Red Damage | White Damage | Gauge |
| mid | yes | - | 7 | 3 | H: 6 G: 3 W: 0 |
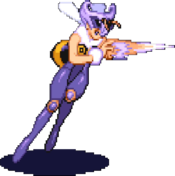
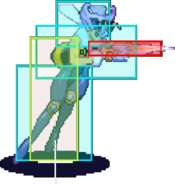
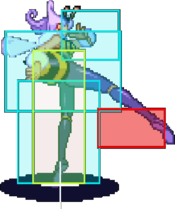
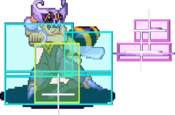
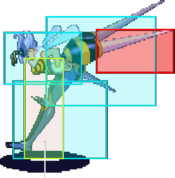
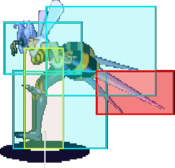
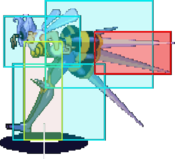
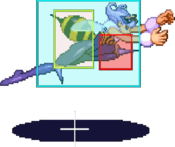
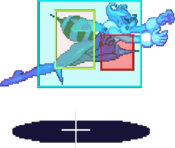
Slightly stubbier than the average jab. Uses for this normal include catching air approaches like short hops or airdashes, guardbreaking opponents airblocking directly in front of you, whiff punishing higher reaching pokes, or setting up tick throws. This normal becomes particularly strong against tall crouchers as it will not whiff on them no matter which state they’re in.
The following characters can not crouch under this normal: AN, AU, BI, DE, JE, and VI.5MP
| Startup | Active | Recovery | Hit Adv. | Block Adv. | Renda Bonus |
|---|---|---|---|---|---|
| 7 | 3 | 16 | 5 | 4 | N/A |
| Guard | Cancel | Invuln | Red Damage | White Damage | Gauge |
| mid | no | - | 16 | 7 | H: 15 G: 9 W: 3 |
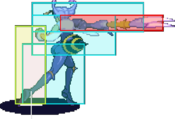
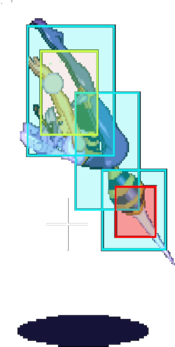
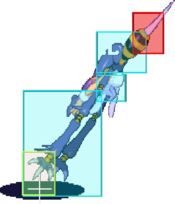
5HP
| Startup | Active | Recovery | Hit Adv. | Block Adv. | Renda Bonus |
|---|---|---|---|---|---|
| 13 | 29 | 21 | -3 | -4 | N/A |
| Guard | Cancel | Invuln | Red Damage | White Damage | Gauge |
| mid | no | - | 5x5 | 2x5 | H: 10+4x4 G: 8+2x4 W: 6 |
5LK
| Startup | Active | Recovery | Hit Adv. | Block Adv. | Renda Bonus |
|---|---|---|---|---|---|
| 5 | 4 | 8 | 4 | 3 | N/A |
| Guard | Cancel | Invuln | Red Damage | White Damage | Gauge |
| mid | yes | - | 7 | 3 | H: 6 G: 3 W: 0 |
5MK
| Startup | Active | Recovery | Hit Adv. | Block Adv. | Renda Bonus |
|---|---|---|---|---|---|
| 6 | 4 | 17 | 4 | 3 | N/A |
| Guard | Cancel | Invuln | Red Damage | White Damage | Gauge |
| mid | yes | - | 17 | 6 | H: 15 G: 9 W: 3 |
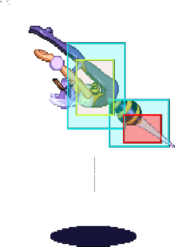
5HK
| Startup | Active | Recovery | Hit Adv. | Block Adv. | Renda Bonus |
|---|---|---|---|---|---|
| 9 | 2,2(4)3,2 | 23 | 0 | -1 | N/A |
| Guard | Cancel | Invuln | Red Damage | White Damage | Gauge |
| mid | no | - | 6x4 | 2x4 | H: 11+5+4+4 G: 8+2x3 W: 6 |
Crouching Normals
2LP
| Startup | Active | Recovery | Hit Adv. | Block Adv. | Renda Bonus |
|---|---|---|---|---|---|
| 6 | 3 | 9 | 4 | 3 | H: 7 G: 6 |
| Guard | Cancel | Invuln | Red Damage | White Damage | Gauge |
| low | yes | - | 7 | 3 | H: 6 G: 3 W: 0 |
2MP
| Startup | Active | Recovery | Hit Adv. | Block Adv. | Renda Bonus |
|---|---|---|---|---|---|
| 7 | 4 | 14 | 3 | 2 | N/A |
| Guard | Cancel | Invuln | Red Damage | White Damage | Gauge |
| low | yes | - | 16 | 6 | H: 15 G: 9 W: 3 |
2HP
| Startup | Active | Recovery | Hit Adv. | Block Adv. | Renda Bonus |
|---|---|---|---|---|---|
| 11 | 14 | 22 | 10 | 9 | N/A |
| Guard | Cancel | Invuln | Red Damage | White Damage | Gauge |
| mid | no | - | 7x3 | 3x3 | H: 12+6+6 G: 9+2x3 W: 6 |
2LK
| Startup | Active | Recovery | Hit Adv. | Block Adv. | Renda Bonus |
|---|---|---|---|---|---|
| 5 | 2 | 10 | 6 | 5 | N/A |
| Guard | Cancel | Invuln | Red Damage | White Damage | Gauge |
| low | yes | - | 6 | 2 | H: 6 G: 3 W: 0 |
2MK
| Startup | Active | Recovery | Hit Adv. | Block Adv. | Renda Bonus |
|---|---|---|---|---|---|
| 7 | 3 | 16 | 5 | 4 | N/A |
| Guard | Cancel | Invuln | Red Damage | White Damage | Gauge |
| mid | yes | - | 16 | 6 | H: 15 G: 9 W: 3 |
2HK
| Startup | Active | Recovery | Hit Adv. | Block Adv. | Renda Bonus |
|---|---|---|---|---|---|
| 8 | 13 | 22 | - | -7 | N/A |
| Guard | Cancel | Invuln | Red Damage | White Damage | Gauge |
| low | no | - | 20,16 | 9,7 | H: 24 G: 15 W: 6 |
Air Normals
J.LP
| Startup | Active | Recovery | Hit Adv. | Block Adv. | Renda Bonus |
|---|---|---|---|---|---|
| 5 | 3 | 5 | - | - | N/A |
| Guard | Cancel | Invuln | Red Damage | White Damage | Gauge |
| overhead | yes | - | 8 | 3 | H: 6 G: 3 W: 0 |
J.MP
| Startup | Active | Recovery | Hit Adv. | Block Adv. | Renda Bonus |
|---|---|---|---|---|---|
| 8 | 5 | 6 | - | - | N/A |
| Guard | Cancel | Invuln | Red Damage | White Damage | Gauge |
| overhead | yes | - | 16 | 7 | H: 15 G: 9 W: 3 |
J.HP
| Startup | Active | Recovery | Hit Adv. | Block Adv. | Renda Bonus |
|---|---|---|---|---|---|
| 24 | 13 | 18 | - | - | N/A |
| Guard | Cancel | Invuln | Red Damage | White Damage | Gauge |
| overhead | no | - | 6x4 | 3x4 | H: 10+4x3 G: 8+2x3 W: 6 |
J.LK
| Startup | Active | Recovery | Hit Adv. | Block Adv. | Renda Bonus |
|---|---|---|---|---|---|
| 5 | 4 | 8 | - | - | N/A |
| Guard | Cancel | Invuln | Red Damage | White Damage | Gauge |
| overhead | yes | - | 8 | 4 | H: 6 G: 3 W: 0 |
J.MK
| Startup | Active | Recovery | Hit Adv. | Block Adv. | Renda Bonus |
|---|---|---|---|---|---|
| 8 | 5 | 9 | - | - | N/A |
| Guard | Cancel | Invuln | Red Damage | White Damage | Gauge |
| overhead | yes | - | 17 | 6 | H: 15 G: 9 W: 3 |
J.HK
| Startup | Active | Recovery | Hit Adv. | Block Adv. | Renda Bonus |
|---|---|---|---|---|---|
| 10 | 4 | 11 | - | - | N/A |
| Guard | Cancel | Invuln | Red Damage | White Damage | Gauge |
| overhead | no | - | 22 | 8 | H: 24 G: 15 W: 6 |
Normal Throws
6MP or 6HP
| Startup | Active | Recovery | Hit Adv. | Block Adv. | Renda Bonus |
|---|---|---|---|---|---|
| 1 | - | 89 + landing 1 | - | - | N/A |
| Guard | Cancel | Invuln | Red Damage | White Damage | Gauge |
| throw | no | 1-88 whole body | 14+9 (14+4) | 5+3 (5+1) | H: 9 G: 0 W: 0 |
J.6P or J.4P
| Startup | Active | Recovery | Hit Adv. | Block Adv. | Renda Bonus |
|---|---|---|---|---|---|
| 1 | - | 83 + 1 + landing1 | - | - | N/A |
| Guard | Cancel | Invuln | Red Damage | White Damage | Gauge |
| throw | no | 1-83 whole body | 14+9 (14+4) | 5+3 (5+1) | H: 9 G: 0 W: 0 |
Special Moves
Delta A
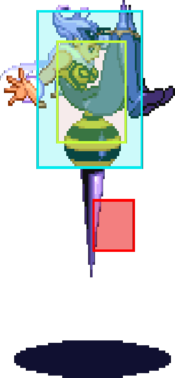
214LK
| Startup | Active | Recovery | Hit Adv. | Block Adv. | Renda Bonus |
|---|---|---|---|---|---|
| 45 | 11 | landing 1 | - | - | N/A |
| Guard | Cancel | Invuln | Red Damage | White Damage | Gauge |
| overhead | no | - | 21 | 5 | H: 21 G: 16 W: 12 |
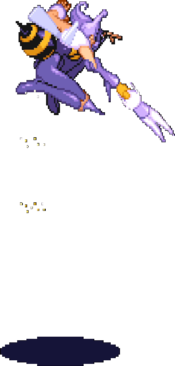
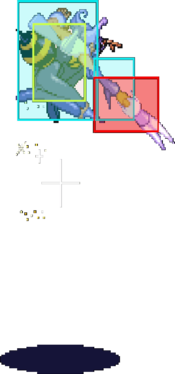
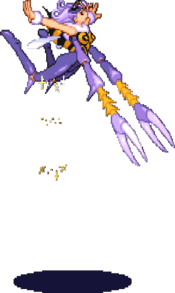
Shortest version, leaves Q-Bee near the corner. This version is generally suggested when trying to recover from an unintended airdash angle.
| Startup | Active | Recovery | Hit Adv. | Block Adv. | Renda Bonus |
|---|---|---|---|---|---|
| 45 | 13 | landing 1 | - | - | N/A |
| Guard | Cancel | Invuln | Red Damage | White Damage | Gauge |
| overhead | no | - | 23 | 6 | H: 21 G: 16 W: 12 |
Medium version, leaves Q-Bee around mid screen. Has no real uses.
| Startup | Active | Recovery | Hit Adv. | Block Adv. | Renda Bonus |
|---|---|---|---|---|---|
| 45 | 22 | landing 1 | - | - | N/A |
| Guard | Cancel | Invuln | Red Damage | White Damage | Gauge |
| overhead | no | - | 25 | 7 | H: 21 G: 16 W: 12 |
Longest version, leaves Q-Bee near the opposite side of the screen, similarly has no real uses
| Startup | Active | Recovery | Hit Adv. | Block Adv. | Renda Bonus |
|---|---|---|---|---|---|
| 45 | 17 | landing 1 | - | - | N/A |
| Guard | Cancel | Invuln | Red Damage | White Damage | Gauge |
| overhead | no | - | 28 | 8 | H: 0 G: 0 W: 0 |
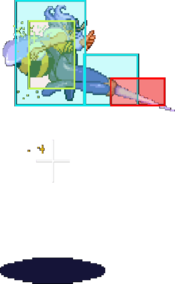
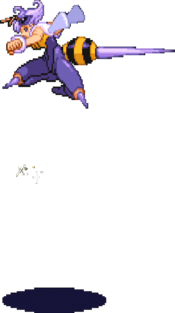
Slightly shorter range than the HK version, it will poison the opponent on hit which acts the same as a traditional stun state. If you somehow manage to hit the opponent on the ground with the QJ bubble and you happen to be at the right range for this, then this would be the best followup since it poisons the opponent allowing for an additional ground-based followup (or even another QJ). But don't expect to be using this often, if at all.
| Startup | Active | Recovery | Hit Adv. | Block Adv. | Renda Bonus |
|---|---|---|---|---|---|
| 35 ~ 45 | 11 | landing 1 | - | - | N/A |
| Guard | Cancel | Invuln | Red Damage | White Damage | Gauge |
| overhead | no | - | 21 | 5 | H: 21 G: 16 W: 12 |
| Startup | Active | Recovery | Hit Adv. | Block Adv. | Renda Bonus |
|---|---|---|---|---|---|
| 35 ~ 45 | 13 | landing 1 | - | - | N/A |
| Guard | Cancel | Invuln | Red Damage | White Damage | Gauge |
| overhead | no | - | 23 | 6 | H: 21 G: 16 W: 12 |
| Startup | Active | Recovery | Hit Adv. | Block Adv. | Renda Bonus |
|---|---|---|---|---|---|
| 35 ~ 45 | 22 | landing 1 | - | - | N/A |
| Guard | Cancel | Invuln | Red Damage | White Damage | Gauge |
| overhead | no | - | 25 | 7 | H: 21 G: 16 W: 12 |
| Startup | Active | Recovery | Hit Adv. | Block Adv. | Renda Bonus |
|---|---|---|---|---|---|
| 35 ~ 45 | 17 | landing 1 | - | - | N/A |
| Guard | Cancel | Invuln | Red Damage | White Damage | Gauge |
| overhead | no | - | 28 | 8 | H: 0 G: 0 W: 0 |
S x P
K,K,K,K,LK
| Startup | Active | Recovery | Hit Adv. | Block Adv. | Renda Bonus |
|---|---|---|---|---|---|
| 12 | 4(4)4 | 10 | 11 | 10 | N/A |
| Guard | Cancel | Invuln | Red Damage | White Damage | Gauge |
| mid | no | - | 8xn | 3xn | H: 9+6xn G: 9+3xn W: 9 |
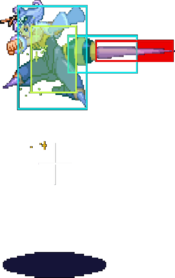
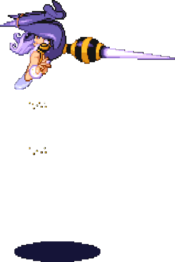
Slowest stings.
| Startup | Active | Recovery | Hit Adv. | Block Adv. | Renda Bonus |
|---|---|---|---|---|---|
| 13 | 3(3)3(3)1 | 10 | 14 | 13 | N/A |
| Guard | Cancel | Invuln | Red Damage | White Damage | Gauge |
| mid | no | - | 8xn | 3xn | H: 9+6xn G: 9+3xn W: 9 |
Medium stings, has the best frame advantage.
| Startup | Active | Recovery | Hit Adv. | Block Adv. | Renda Bonus |
|---|---|---|---|---|---|
| 15 | 2(3)2(3)2(1) | 10 | 12 | 11 | N/A |
| Guard | Cancel | Invuln | Red Damage | White Damage | Gauge |
| mid | no | - | 8xn | 3xn | H: 9+6xn G: 9+3xn W: 9 |
Fastest stings.
| Startup | Active | Recovery | Hit Adv. | Block Adv. | Renda Bonus |
|---|---|---|---|---|---|
| 12 | 4(4)4 | variable + landing 1 | 11 | 10 | N/A |
| Guard | Cancel | Invuln | Red Damage | White Damage | Gauge |
| mid | no | - | 8xn | 3xn | H: 9+6xn G: 9+3xn W: 9 |
| Startup | Active | Recovery | Hit Adv. | Block Adv. | Renda Bonus |
|---|---|---|---|---|---|
| 13 | 3(3)3(3)1 | variable + landing 1 | 14 | 13 | N/A |
| Guard | Cancel | Invuln | Red Damage | White Damage | Gauge |
| mid | no | - | 8xn | 3xn | H: 9+6xn G: 9+3xn W: 9 |
| Startup | Active | Recovery | Hit Adv. | Block Adv. | Renda Bonus |
|---|---|---|---|---|---|
| 15 | 2(3)2(3)2(1) | variable + landing 1 | 12 | 11 | N/A |
| Guard | Cancel | Invuln | Red Damage | White Damage | Gauge |
| mid | no | - | 8xn | 3xn | H: 9+6xn G: 9+3xn W: 9 |
Catch And Release
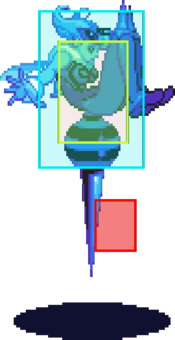
236LP
A blockable airborne grab, if this hits she will perform an extended version of her throw animation. This special has a rather generous amount of active frames allowing it to be used to whiff punish or low crush the opponent. Despite having some recovery on block it's a fairly safe move, making it not entirely necessary to hitconfirm. Thanks to a good hitbox and recovery it can be used as a counter poke, though it’s not something you want to abuse as if it fails you lose initiative/pressure.
| Startup | Active | Recovery | Hit Adv. | Block Adv. | Renda Bonus |
|---|---|---|---|---|---|
| 13 | 24 | 14 | - | -8 | N/A |
| Guard | Cancel | Invuln | Red Damage | White Damage | Gauge |
| mid | no | - | 8+3x3+11 | 2+1x3+3 | H: 22 G: 18 W: 18 |
Shortest version, moves Q-Bee 107 pixels forward. Nearly useless.
| Startup | Active | Recovery | Hit Adv. | Block Adv. | Renda Bonus |
|---|---|---|---|---|---|
| 13 | 26 | 14 | - | -8 | N/A |
| Guard | Cancel | Invuln | Red Damage | White Damage | Gauge |
| mid | no | - | 8+3x3+11 | 2+1x3+3 | H: 22 G: 18 W: 18 |
Medium version, moves Q-Bee 136 pixels forward. Similarly useless.
| Startup | Active | Recovery | Hit Adv. | Block Adv. | Renda Bonus |
|---|---|---|---|---|---|
| 13 | 28 | 14 | - | -8 | N/A |
| Guard | Cancel | Invuln | Red Damage | White Damage | Gauge |
| mid | no | - | 8+3x3+11 | 2+1x3+3 | H: 22 G: 18 W: 18 |
Longest version, moves Q-Bee 171 pixels forward. This is the most useful of the meterless versions and can allow her to cover a good amount of space and catch whiffed normals during their recovery.
| Startup | Active | Recovery | Hit Adv. | Block Adv. | Renda Bonus |
|---|---|---|---|---|---|
| 13 | 28 | 14 | - | -8 | N/A |
| Guard | Cancel | Invuln | Red Damage | White Damage | Gauge |
| mid | no | - | 8+33 | 2+8 | H: 0 G: 0 W: 0 |
The ES version of CR functions differently from the other versions. In this version Q-Bee will leave the opponent in an egg, allowing a significant amount of time for her to set up whatever oki she wants. This is especially effective against cornered opponents, where the typical follow up is her 623PP QJ super. Generally one would IAD j.LP/j.LK/j.MP > 2LP/2LK/2MP xx 41236PP, then immediate 623PP on recovery and go for more IAD mixups or anti-air while the opponent is blocking the bubble. If the opponent is hit on the ground by the bubble the best follow up is another C->R.
| Startup | Active | Recovery | Hit Adv. | Block Adv. | Renda Bonus |
|---|---|---|---|---|---|
| 13 | 24 | variable + landing 1 | - | -8 | N/A |
| Guard | Cancel | Invuln | Red Damage | White Damage | Gauge |
| mid | no | - | 8+3x3+11 | 2+1x3+3 | H: 22 G: 18 W: 18 |
| Startup | Active | Recovery | Hit Adv. | Block Adv. | Renda Bonus |
|---|---|---|---|---|---|
| 13 | 26 | variable + landing 1 | - | -8 | N/A |
| Guard | Cancel | Invuln | Red Damage | White Damage | Gauge |
| mid | no | - | 8+3x3+11 | 2+1x3+3 | H: 22 G: 18 W: 18 |
| Startup | Active | Recovery | Hit Adv. | Block Adv. | Renda Bonus |
|---|---|---|---|---|---|
| 13 | 28 | variable + landing 1 | - | -8 | N/A |
| Guard | Cancel | Invuln | Red Damage | White Damage | Gauge |
| mid | no | - | 8+3x3+11 | 2+1x3+3 | H: 22 G: 18 W: 18 |
| Startup | Active | Recovery | Hit Adv. | Block Adv. | Renda Bonus |
|---|---|---|---|---|---|
| 13 | 28 | variable + landing 1 | - | -8 | N/A |
| Guard | Cancel | Invuln | Red Damage | White Damage | Gauge |
| mid | no | - | 8+33 | 2+8 | H: 0 G: 0 W: 0 |
Guard Cancel
623K
| Startup | Active | Recovery | Hit Adv. | Block Adv. | Renda Bonus |
|---|---|---|---|---|---|
| 10 | 2(4)14 | 18 | - | -14 | N/A |
| Guard | Cancel | Invuln | Red Damage | White Damage | Gauge |
| mid | no | 1-13 whole body | 12,12 | 4,4 | H: 24 G: 21+3 W: 18 |
The invulnerability window lasts longer than the startup, but due to it's angle it's only ever used when the situation calls for it.
| Startup | Active | Recovery | Hit Adv. | Block Adv. | Renda Bonus |
|---|---|---|---|---|---|
| 10 | 2(4)14 | 18 | - | -14 | N/A |
| Guard | Cancel | Invuln | Red Damage | White Damage | Gauge |
| mid | no | 1-13 whole body | 19,19 | 4,4 | H: 0 G: 0 W: 0 |
Command Throw
632[4]P
| Startup | Active | Recovery | Hit Adv. | Block Adv. | Renda Bonus |
|---|---|---|---|---|---|
| 2 | 4 | 24 | - | - | N/A |
| Guard | Cancel | Invuln | Red Damage | White Damage | Gauge |
| throw | no | 1-20 whole body (on whiff) | 28 | 8 | H: 21 G: 0 W: 12 |
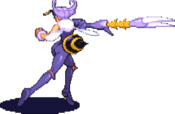
QB's command grab is one of the best in the game. While its startup does not provide any invulnerability, at only 2F it is difficult to punish and beats various options, allowing it to be used in the same vein as a reversal. Either she grabs the opponent or she does MP/HP when she can't grab the opponent. Because of the number of poor traits that 5HP possesses it's a good idea to use MP instead, because a failed command grab resulting in a 5MP is preferable to an accidental 5HP.
| Startup | Active | Recovery | Hit Adv. | Block Adv. | Renda Bonus |
|---|---|---|---|---|---|
| 2 | 10 | 27 | - | - | N/A |
| Guard | Cancel | Invuln | Red Damage | White Damage | Gauge |
| throw | no | 1-26 whole body (on whiff) | 10+10+13 | 3+3+4 | H: 0 G: 0 W: 0 |
Pursuits
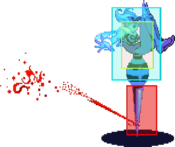
8P/K or 8KK/PP
| Startup | Active | Recovery | Hit Adv. | Block Adv. | Renda Bonus |
|---|---|---|---|---|---|
| 29 | 8 | landing 1 | - | - | N/A |
| Guard | Cancel | Invuln | Red Damage | White Damage | Gauge |
| mid | no | 1-4 feet | 6 | 6 | H: 24 G: 0 W: 6 |
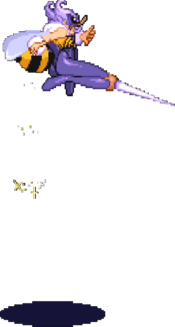
Q-Bee will lock on the opponent’s position and set her stinger in them. Travels fast with low damage, this pursuit is notable in that upon completing it Q-Bee will reset to her starting position no matter where she was. Because of this it’s suggested that when trying to use a whiffed pursuit to travel to the opponent’s position that you delay it as much as possible.
| Startup | Active | Recovery | Hit Adv. | Block Adv. | Renda Bonus |
|---|---|---|---|---|---|
| 29 | 8 | landing 1 | - | - | N/A |
| Guard | Cancel | Invuln | Red Damage | White Damage | Gauge |
| mid | no | 1-4 feet | 3x5 | 3x5 | H: 0 G: 0 W: 0 |
Ex Moves
623PP
| Startup | Active | Recovery | Hit Adv. | Block Adv. | Renda Bonus |
|---|---|---|---|---|---|
| 34 | 5 bounces, outside of screen | 69 | - | -1 | N/A |
| Guard | Cancel | Invuln | Red Damage | White Damage | Gauge |
| mid | no | - | 30 | 15 | H: 0 G: 0 W: 0 |
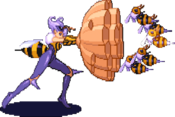
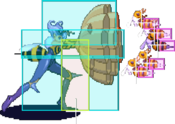
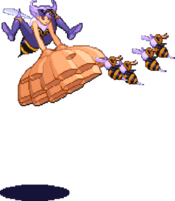
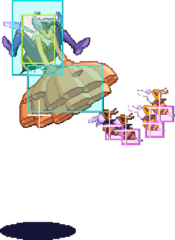
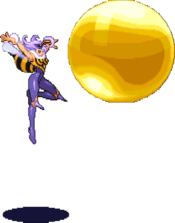
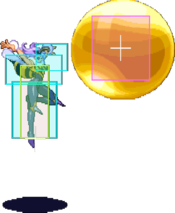
Q-Bee will summon a large honey bubble which she then throws, this bubble will proceed to bounce five times around the stage before deactivating and leaving the screen. This move will be neutralized if QB is hit during it. If a grounded opponent is hit they will be coated in the honey and stunned, allowing a follow up. The opponent is considered partially airborne while in the coated state, so any single hit attack will reset them (if it isn't a natural knockdown), if no attack is made they will be knocked down for no additional damage. Because of the one-hit rule, the best followup is CR, usually the ES version if meter is available. If the opponent is hit while airborne they will not be coated and simply knocked down instead. This move makes for a great okizeme move, but only in certain situations. A normal C->R and normal throw are not good setups because the opponent can tech forward and punish her. However, her ES C->R and O.M. moves make great setups because she won't be punishable during the bubble startup. Typically when used in neutral it will be used to antiair an opponent, cover her rushdown, or lock the opponent in airblock allowing a free guard crush.
| Startup | Active | Recovery | Hit Adv. | Block Adv. | Renda Bonus |
|---|---|---|---|---|---|
| 34 | 5 bounces, outside of screen | 52 + variable + landing 1 | - | -1 | N/A |
| Guard | Cancel | Invuln | Red Damage | White Damage | Gauge |
| mid | no | - | 30 | 15 | H: 0 G: 0 W: 0 |
412[6]KK
| Startup | Active | Recovery | Hit Adv. | Block Adv. | Renda Bonus |
|---|---|---|---|---|---|
| 39 | out of screen | 82-119 | - | 12 | N/A |
| Guard | Cancel | Invuln | Red Damage | White Damage | Gauge |
| mid | no | - | 2+2x12+11 | (1+1)x4+7 | H: 0 G: 0 W: 0 |
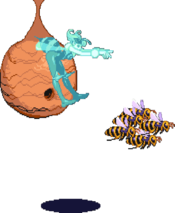
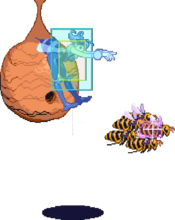
Q-Bee will fly toward the top of the screen and summon a hive that then has a group of bees travel in an arc around the screen. Generally unused, the arc in which the bees travel can not be controlled or altered and both the startup and recovery make it easy for the opponent to punish on reaction. It will only see occasional use as a hard read against committal options, such as Demitri’s forward dash.
| Startup | Active | Recovery | Hit Adv. | Block Adv. | Renda Bonus |
|---|---|---|---|---|---|
| 28-39 | out of screen | 71-119 | - | - | N/A |
| Guard | Cancel | Invuln | Red Damage | White Damage | Gauge |
| mid | no | - | 2+2x12+11 | (1+1)x4+7 | H: 0 G: 0 W: 0 |
Dark Force
Flight: I^2 - Same strength P + K:
- (Any Version): Upon activation Q-Bee will gain unlimited flight for a short period of time. Exclusive to DF is the ability to chain into and out of j.HP. While similar to Jedah’s DF, which is one of the best in the game, this DF goes mostly unused due to a few problems such as its extensive startup and losing access to both her air dash and her float. While it may still find some use for the invulnerability it grants general this DF should be avoided.
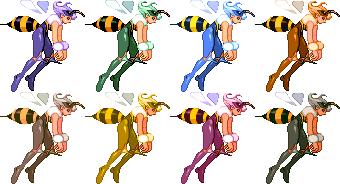
Colors
Notable Players
Japanese Player Index Old: http://www21.atwiki.jp/vsplayer/pages/22.html Modern: https://vampiresavior.info/player/
Japan
| Name (English) | Name (Japanese) | Color | Location | Contact | Notes |
|---|---|---|---|---|---|
| Sakamoto | さかもと | HP |
Kanto Region | http://twitter.com/sakamoto7691 https://www.youtube.com/channel/UCAu1kW9THjP-lNh3VOc_vnA |
One of the primary T.O.'s of JP-VSAV #01 Q-Bee Tokyo Community Leader. |
| OraOra | おらQ | MP |
Kanto Region | http://twitter.com/oraoraqbee | Used to be a GGPO regular under the name PPPPP. |
| Saito | 不能 -> 佐伯 -> サイトー |
KK |
Kanto Region | https://note.mu/horibotan/n/n34eaf52098f4 https://twitter.com/hunou |
Rookie champion is now a pro Saito is a popular JP family name |
| SIN | SIN | HP |
Kansai Region | Old-School, famous for going "giga mode". | |
| Panpiina | パンピーナ | LP |
Kyushu Region | ||
| Gyu-Bee | 牛-Bee | KK |
Kansai Region | ||
| Yankee | ヤンキー | KK |
Kanto Region | Retired | |
| Sanpai | 産廃 | LK |
Kanto Region | https://twitter.com/mo_error_mo (NSFW) | Mangaka and community artist. |
| Tsuchineko | 土猫 | HK |
Kanto Region | https://twitter.com/tutineko | Started around the release of Darkstalkers Resurrection with great success, seeing multiple notable placements. |
| Ninoude | にのうで | HK |
Osaka Region | https://twitter.com/ninoudez | One of the newer Q-Bee players, he's a regular at Athena Nihonbashi. |
North America
| Name (English) | Name (Japanese) | Color | Location | Contact | Notes |
|---|---|---|---|---|---|
| Hilary | ヒラリー | PP |
Seattle, USA | https://twitter.com/Hilarylifts | One of the Seattle Crew. Absolute weight lifting boss, and a strong Q-Bee player. |
| Sketch | スケッチ | LP |
New York, USA | https://twitter.com/SketchJP | Long time player with outstanding results. Loved Japan, and decided to make a food tour business because of it |
| BushidoBrooklyn | 武士道ブルックリン | LP |
New York, USA | https://twitter.com/BushidoBrooklyn | Recent player that had notable success. He's a regular player at New York events. |
| Yawn | ヤーウン | MP |
Texas, USA | ??? | Fightcade player that has been very successful. Plays with Snuggleguns at their local arcade. |
| N-Bee | エン・ビー | KK |
New York, USA | ??? | Strong player. Primary developer for the FC2 Advanced Training Script. |
| Moebius | モービアス | HK |
Chicago, USA | https://twitter.com/moebiusqbee | Chicago bee. Too busy grinding on Fightcade to think about improving. |
South America
| Name (English) | Name (Japanese) | Color | Location | Contact | Notes |
|---|---|---|---|---|---|
| Sagamin | サガミン | KK |
Brazil | https://twitter.com/sagaminus (Deactivated) | Retired. |
Europe
| Name (English) | Name (Japanese) | Color | Location | Contact | Notes |
|---|---|---|---|---|---|
| Dushni | KK |
France | https://twitter.com/DDushni | Real life beekeeper, has real life Q-Bee! | |
| FGHI-Trigger | PP |
France | https://twitter.com/BeatBy38_FGHI | Called "Fighter", significant contributor of the EU VSAV community |
