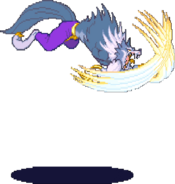
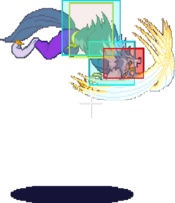
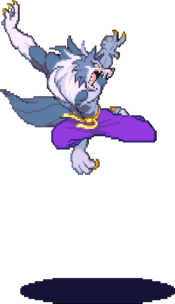
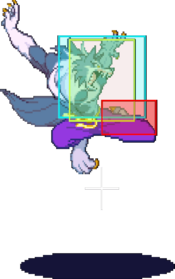
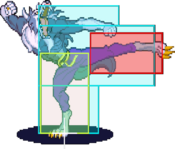
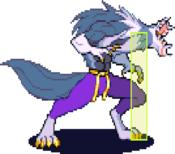
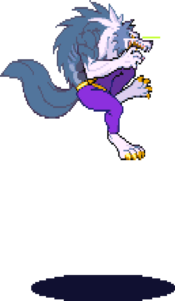
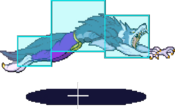
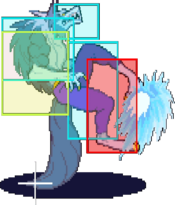
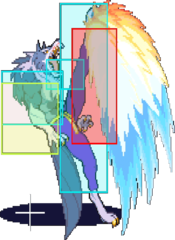
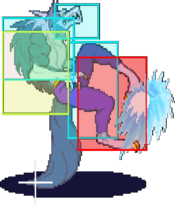
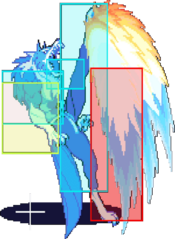
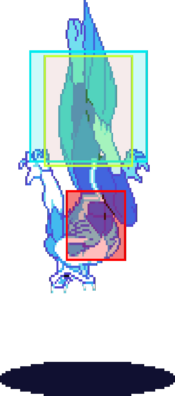
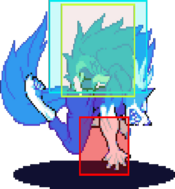
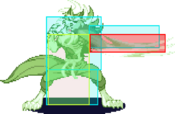
Vampire Savior/Gallon
Introduction
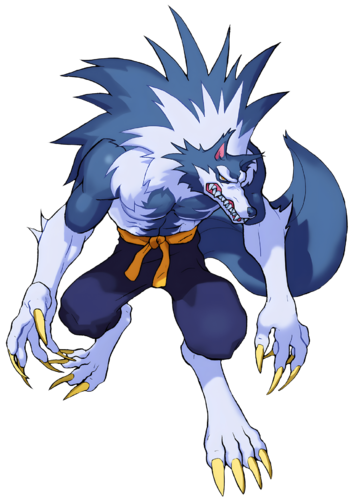
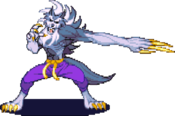
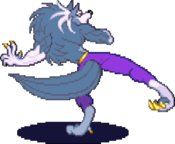
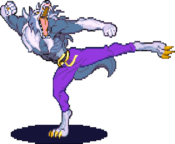
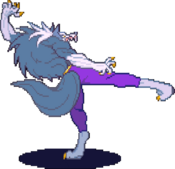
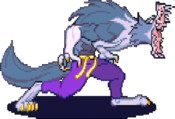
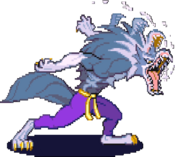
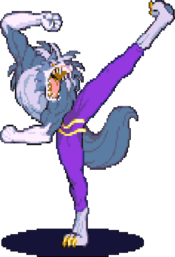
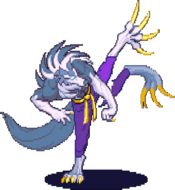
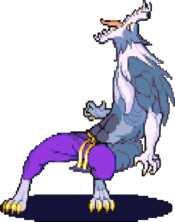
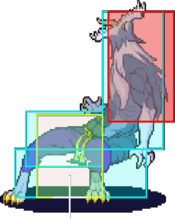
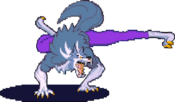
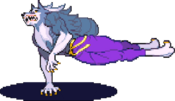
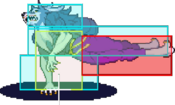
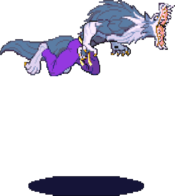
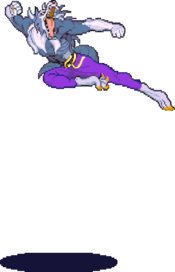
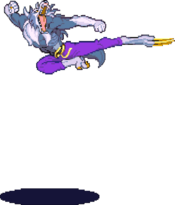
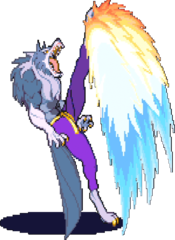
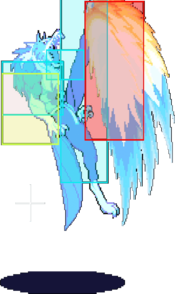
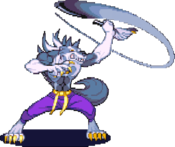
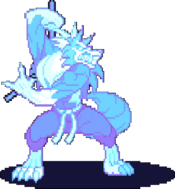
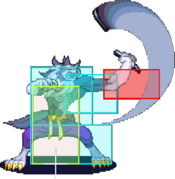
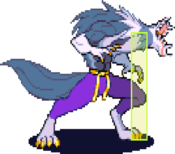
Gallon (ガロン), also known as Jon Talbain, the Werewolf.
Born to a human mother & a werewolf father, Gallon was astounded to learn of his status as a Darkstalker after first transforming during a full moon. With the passing of his mother & the disappearance of his father, Gallon was all alone in a world that despised his kind. Not wanting to be bested by human society's fears, he mastered martial arts in order to gain control over his primal instincts. Now dragged into the Majigen, Gallon must finally confront the darkness within him to take complete control of his human consciousness
Gallon is a top-tier character. His playstyle excels at footsies, jump-ins & throw traps. Gallon is a recommended starter character as he is easy to learn while offering technicalities to master.
Gameplay
Primary Objectives:
- Rely on your mobility to perfectly space your footsies, anti-airs, & okizeme
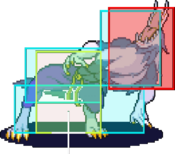
- Utilize the low-profile of his forward walk to add depth to your neutral & footsies
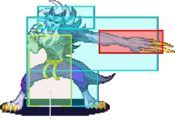
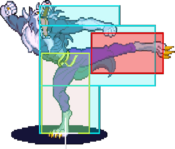
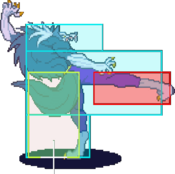
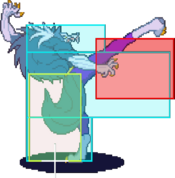
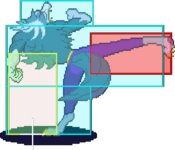
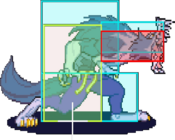
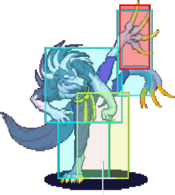
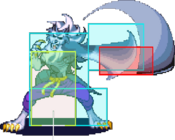
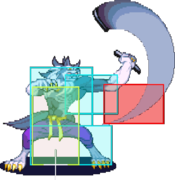
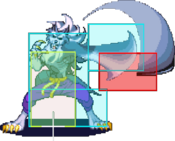
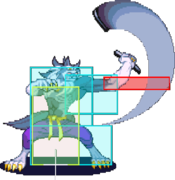
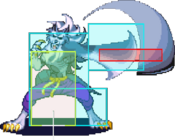
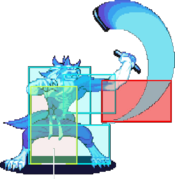
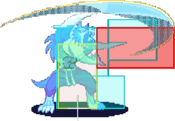
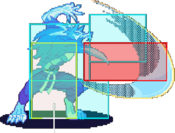
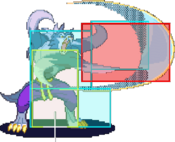
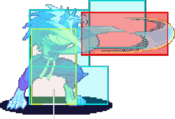
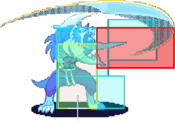
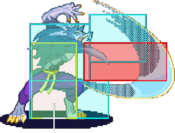
- Poke with amazing disjointed normals like 2MP, 2MK, 8HK, 8MK, 66MK, Beast Cannon, Air Beast Cannon, etc.
- Convert Beast Cannon opportunities into combo damage or offensive mix-ups like left/rights or frame traps
- Abuse OS command throw
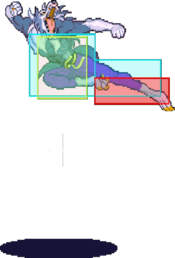
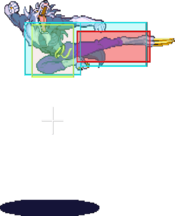
- Jump-in with 9HP, 9HK chain as often as possible. 9HP is an amazing air-to-ground + OS air-throw tool
| Strengths | Weaknesses |
|---|---|
|
|
Normal Moves
- Here is a Breakdown of Gallon's normal attacks; by KEN
Standing Normals
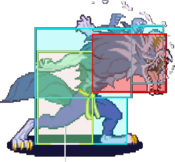
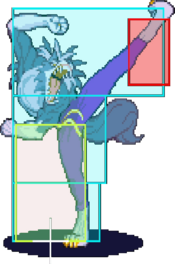
5LP
| Startup | Active | Recovery | Hit Adv. | Block Adv. | Renda Bonus |
|---|---|---|---|---|---|
| 4 | 3 | 7 | 6 | 5 | N/A |
| Guard | Cancel | Invuln | Red Damage | White Damage | Gauge |
| mid | yes | - | 8 | 4 | H: 6 G: 3 W: 0 |
5MP
| Startup | Active | Recovery | Hit Adv. | Block Adv. | Renda Bonus |
|---|---|---|---|---|---|
| 7 | 2 | 17 | 4 | 3 | N/A |
| Guard | Cancel | Invuln | Red Damage | White Damage | Gauge |
| mid | yes | - | 16 | 6 | H: 15 G: 9 W: 3 |
5HP
| Startup | Active | Recovery | Hit Adv. | Block Adv. | Renda Bonus |
|---|---|---|---|---|---|
| 9 | 3 | 19 | 6 | 4 | N/A |
| Guard | Cancel | Invuln | Red Damage | White Damage | Gauge |
| mid | no | - | 20 | 7 | H: 24 G: 15 W: 6 |
5LK
| Startup | Active | Recovery | Hit Adv. | Block Adv. | Renda Bonus |
|---|---|---|---|---|---|
| 5 | 3 | 8 | 5 | 4 | N/A |
| Guard | Cancel | Invuln | Red Damage | White Damage | Gauge |
| mid | yes | - | 8 | 4 | H: 6 G: 3 W: 0 |
5MK
| Startup | Active | Recovery | Hit Adv. | Block Adv. | Renda Bonus |
|---|---|---|---|---|---|
| 6 | 3 | 16 | 2 | 1 | N/A |
| Guard | Cancel | Invuln | Red Damage | White Damage | Gauge |
| mid | yes | - | 18 | 7 | H: 15 G: 9 W: 3 |
5HK
| Startup | Active | Recovery | Hit Adv. | Block Adv. | Renda Bonus |
|---|---|---|---|---|---|
| 9 | 3(3)3(4)3 | 22 | 0 | -1 | N/A |
| Guard | Cancel | Invuln | Red Damage | White Damage | Gauge |
| mid | no | - | 6+8+10 | 2+3+4 | H: 12+6+6 G: 9+3+3 W: 6 |
Close Normals
CL.5MP
| Startup | Active | Recovery | Hit Adv. | Block Adv. | Renda Bonus |
|---|---|---|---|---|---|
| 6 | 3 | 15 | 3 | 2 | N/A |
| Guard | Cancel | Invuln | Red Damage | White Damage | Gauge |
| mid | yes | - | 17 | 6 | H: 15 G: 9 W: 3 |
CL.5HP
| Startup | Active | Recovery | Hit Adv. | Block Adv. | Renda Bonus |
|---|---|---|---|---|---|
| 8 | 3 | 22 | 3 | 2 | N/A |
| Guard | Cancel | Invuln | Red Damage | White Damage | Gauge |
| mid | no | - | 21 | 7 | H: 24 G: 15 W: 6 |
CL.5LK
| Startup | Active | Recovery | Hit Adv. | Block Adv. | Renda Bonus |
|---|---|---|---|---|---|
| 5 | 3 | 10 | 3 | 2 | N/A |
| Guard | Cancel | Invuln | Red Damage | White Damage | Gauge |
| mid | yes | - | 8 | 3 | H: 6 G: 3 W: 0 |
CL.5HK
| Startup | Active | Recovery | Hit Adv. | Block Adv. | Renda Bonus |
|---|---|---|---|---|---|
| 7 | 4 | 28 | -3 | -4 | N/A |
| Guard | Cancel | Invuln | Red Damage | White Damage | Gauge |
| mid | no | - | 22 | 8 | H: 24 G: 15 W: 6 |
Crouching Normals
2LP
| Startup | Active | Recovery | Hit Adv. | Block Adv. | Renda Bonus |
|---|---|---|---|---|---|
| 5 | 3 | 8 | 5 | 4 | N/A |
| Guard | Cancel | Invuln | Red Damage | White Damage | Gauge |
| low | yes | - | 8 | 4 | H: 6 G: 3 W: 0 |
2MP
| Startup | Active | Recovery | Hit Adv. | Block Adv. | Renda Bonus |
|---|---|---|---|---|---|
| 8 | 3 | 20 | 1 | 0 | N/A |
| Guard | Cancel | Invuln | Red Damage | White Damage | Gauge |
| mid | no | - | 16 | 6 | H: 15 G: 9 W: 3 |
2HP
| Startup | Active | Recovery | Hit Adv. | Block Adv. | Renda Bonus |
|---|---|---|---|---|---|
| 9 | 5 | 28 | -8 | -9 | N/A |
| Guard | Cancel | Invuln | Red Damage | White Damage | Gauge |
| mid | no | - | 21 | 8 | H: 24 G: 15 W: 6 |
2LK
| Startup | Active | Recovery | Hit Adv. | Block Adv. | Renda Bonus |
|---|---|---|---|---|---|
| 5 | 3 | 8 | 5 | 4 | N/A |
| Guard | Cancel | Invuln | Red Damage | White Damage | Gauge |
| low | yes | - | 7 | 3 | H: 6 G: 3 W: 0 |
2MK
| Startup | Active | Recovery | Hit Adv. | Block Adv. | Renda Bonus |
|---|---|---|---|---|---|
| 7 | 3 | 18 | 3 | 2 | N/A |
| Guard | Cancel | Invuln | Red Damage | White Damage | Gauge |
| mid | yes | - | 16 | 7 | H: 15 G: 9 W: 3 |
2HK
| Startup | Active | Recovery | Hit Adv. | Block Adv. | Renda Bonus |
|---|---|---|---|---|---|
| 9 | 3 | 27 | - | -6 | N/A |
| Guard | Cancel | Invuln | Red Damage | White Damage | Gauge |
| low | no | - | 18 | 8 | H: 24 G: 15 W: 6 |
Air Normals
J.LP
| Startup | Active | Recovery | Hit Adv. | Block Adv. | Renda Bonus |
|---|---|---|---|---|---|
| 5 | 6 | 13 | - | - | N/A |
| Guard | Cancel | Invuln | Red Damage | White Damage | Gauge |
| overhead | yes | - | 8 | 4 | H: 6 G: 3 W: 0 |
As a jumping attack, this move doesn't have a lot of use. As with some of Gallon's other normals, it's not so much that it's a bad move as it is that Gallon just has even better options. It does have the fastest startup of Gallon's horizontal-reaching jump attacks, so it may be of use in like 1/100 matches?
As a dashing attack, this move sees a lot more use, thanks to the power of the the dash link [66LK, LP] against cornered opponents.J.MP
| Startup | Active | Recovery | Hit Adv. | Block Adv. | Renda Bonus |
|---|---|---|---|---|---|
| 6 | 6 | 7 | - | - | N/A |
| Guard | Cancel | Invuln | Red Damage | White Damage | Gauge |
| overhead | yes | - | 16 | 6 | H: 15 G: 9 W: 3 |
As a jumping attack, this move sees a bit of situational use in air-to-air defense, but its primary use is to lengthen your air chains for Chicken Guard mind games and setting up Guard Breaks.
As a dashing attack, this can be linked into dashing MK, but this is ultimately a rare occurrence; Gallon's dash attacks are pretty much exclusively used as overheads, and 66MP will whiff on crouching opponents. ...So, I guess what I'm trying to say is that the dashing version of this move has little-to-no practical use in a real match.J.HP
| Startup | Active | Recovery | Hit Adv. | Block Adv. | Renda Bonus |
|---|---|---|---|---|---|
| 7 | 5 | 8 | - | - | N/A |
| Guard | Cancel | Invuln | Red Damage | White Damage | Gauge |
| overhead | no | - | 21 | 8 | H: 24 G: 15 W: 6 |
As a jumping attack, this move is very powerful as a jump-in and will overwhelm many characters' anti-air defenses entirely when used in conjunction with crossup j.LK. If you anticipate a mistake from your opponent, it can be chained into j.HK before landing into a very big damage combo.
As a dashing attack, this attack is decent as a surprise finisher if you think it will end the match. Otherwise, it can be used as a meaty attack against opponents who like to roll back on wakeup. In that particular situation, it's pretty easy to follow it up with a chain combo or use it for a tick throw.J.LK
| Startup | Active | Recovery | Hit Adv. | Block Adv. | Renda Bonus |
|---|---|---|---|---|---|
| 5 | 6 | 4 | - | - | N/A |
| Guard | Cancel | Invuln | Red Damage | White Damage | Gauge |
| overhead | yes | - | 8 | 4 | H: 6 G: 3 W: 0 |
As a jumping attack, this is an extremely important jump-in. What it lacks in power compared to j.HP, it more than makes up for with its greater priority and superfluously easy crossup potential. It can be used as an ambiguous crossup after knocking down an opponent in the corner, and is generally the only reliable way to hit confirm into Moment Slice [Crossup j.LK, 2LP > 2MP xx Moment Slice]. Use this move liberally.
As a dashing attack, this move has a high amount of utility. It can be used in a short hop dash during Gallon's ground pressure game for some high/low mixup, and can also be used against cornered opponents to start a dash link [66LK, LP]. The dash link works on all but the shortest characters, but the flipside to this is that against those short characters, it's very easy for Gallon to do a crossup short hop attack.
Basically, this move rules. Do it.J.MK
| Startup | Active | Recovery | Hit Adv. | Block Adv. | Renda Bonus |
|---|---|---|---|---|---|
| 6 | 6 | 4 | - | - | N/A |
| Guard | Cancel | Invuln | Red Damage | White Damage | Gauge |
| overhead | yes | - | 16 | 7 | H: 15 G: 9 W: 3 |
As a jumping attack, this move is pretty important. Its reach and priority are very high, making it a good utility move in many situations. It also has crossup potential (albeit pretty low), and is part of Gallon's meter-building empty air chain (j.MK, j.HK). If Gallon connects with this move deep enough, it can also be comboed into a Beast Cannon.
As a dashing attack, this move is important for use as a short hop attack from ranges too far for the use of Dashing Short. It's also part of Gallon's other important Dash Link [66MK, LK], which works on taller characters in the corner AND midscreen. This makes the move a very important part of Gallon's ground pressure against tall characters.J.HK
| Startup | Active | Recovery | Hit Adv. | Block Adv. | Renda Bonus |
|---|---|---|---|---|---|
| 7 | 6 | 7 | - | - | N/A |
| Guard | Cancel | Invuln | Red Damage | White Damage | Gauge |
| overhead | no | - | 21 | 9 | H: 24 G: 15 W: 6 |
As a jumping attack, this move's primary use is for zoning in the air. It can be used as a jump-in in most matches, but it can and will whiff shorter characters, especially B.B Hood and Q-Bee. So, make sure to be conscientious when using this move against shorties.
As a dashing attack, it works pretty similarly to 66HP (gimmicky finisher, tick throw). It's not very good as a meaty for landing a chain combo afterwards, but it makes up for that with the gimmicky use of being able to hit people from far away for doing dumb stuff. See how long it takes a Q-Bee or Rapter player to wise up and stop doing IADs from full screen after pegging them with this move over and over again. Finally, this is a randomly good maneuver against Lilith, as Gallon can dash over a grounded Soul Flash from fullscreen and kick her in the face.Command Normals
6MK
| Startup | Active | Recovery | Hit Adv. | Block Adv. | Renda Bonus |
|---|---|---|---|---|---|
| 10 | 3 | 16 | 2 | 1 | N/A |
| Guard | Cancel | Invuln | Red Damage | White Damage | Gauge |
| mid | no | - | 18 | 7 | H: 15 G: 9 W: 3 |
Normal Throws
6MP or 6HP
| Startup | Active | Recovery | Hit Adv. | Block Adv. | Renda Bonus |
|---|---|---|---|---|---|
| 1 | - | 48 | - | - | N/A |
| Guard | Cancel | Invuln | Red Damage | White Damage | Gauge |
| throw | no | 1-47 whole body | 22 (11) | 8 (4) | H: 9 G: 0 W: 0 |
If you're smart, you won't be using this as much as Gallon's Kick Throw, since the Kick Throw has a built-in option select with c.5HK. Still, the Punch Throw is handy in very specific instances; particularly, if you anticipate a Tech Hit and you haven't buffered the motion for Wild Circular, Punch Throw is excellent in this situation because Gallon recovers from the throw very quickly. Conversely, Gallon's Kick Throw recovers just barely before his opponent gets back on the ground, so it doesn't leave Gallon a lot of breathing room to do much else except another throw. You won't be using this often, but don't forget about it, either.
This throw can also be used after Dark Force Activation to set up an unblockable.6MK or 6HK
| Startup | Active | Recovery | Hit Adv. | Block Adv. | Renda Bonus |
|---|---|---|---|---|---|
| 1 | - | 106 + landing 1 | - | - | N/A |
| Guard | Cancel | Invuln | Red Damage | White Damage | Gauge |
| throw | no | 1-105 whole body | 22 (11) | 8 (4) | H: 9 G: 0 W: 0 |
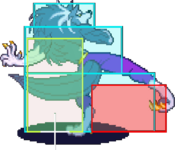
First rule: Always, always, always throw with HK. Using HK gives Gallon an Option Select; stay on the ground and get thrown, or jump and get reset immediately by c.5HK. Other than that, this throw is effective because of the horizontal space it covers, making it easy to put an opponent in the corner.
K-Throw places the opponent backwards, causing turn around frames & negating the opponents ability to perform a REVERSAL. If the K-Throw is used to complete the first bat, Gallon will be backwards & cannot complete a REVERSAL.J.6P or J.4P
| Startup | Active | Recovery | Hit Adv. | Block Adv. | Renda Bonus |
|---|---|---|---|---|---|
| 1 | - | 79 + 1 + turn 1 | - | - | N/A |
| Guard | Cancel | Invuln | Red Damage | White Damage | Gauge |
| throw | no | 1-79 whole body | 23 (11) | 8 (4) | H: 9 G: 0 W: 0 |
Special Moves
Quick Move
2KKK
| Startup | Active | Recovery | Hit Adv. | Block Adv. | Renda Bonus |
|---|---|---|---|---|---|
| - | - | 20 | - | - | N/A |
| Guard | Cancel | Invuln | Red Damage | White Damage | Gauge |
| - | - | 7-12 throw/feet | - | - | H: - G: - W: - |
This move is solely for positioning and does no damage. There is also no ES Version. Quick Move is a big part of Gallon's ground pressure game, because he can cancel certain ground normals into it. This allows him to repeatedly pressure with short, erratic block strings without pushing himself too far out of range to continue his rush. Incorporate this into your game, quick.
For you thrill-seekers who Do The Dew, Quick Move can cross to the other side of an opponent, regardless of their state (standing, crouching, knocked down). The next time you land Moment Slice, try corpse-hopping your opponent a few times to see if you can trick them into defending your next attack in the wrong direction.
Gallon can be thrown during startup & recovery frames of Quick Move. During the middle of Quick Move, Gallon is off the ground & throw vulnerable.Beast Cannon
236P
| Startup | Active | Recovery | Hit Adv. | Block Adv. | Renda Bonus |
|---|---|---|---|---|---|
| 14 | 30 | 1 + landing 12 | - | - | N/A |
| Guard | Cancel | Invuln | Red Damage | White Damage | Gauge |
| mid | no | - | 19 | 8 | H: 21 G: 16 W: 12 |
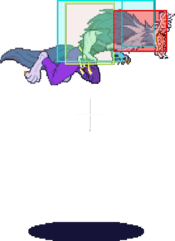
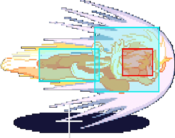
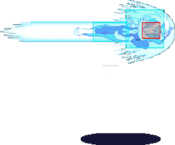
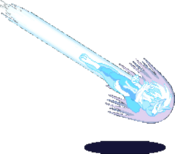
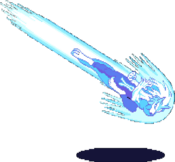
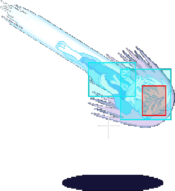
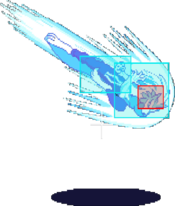
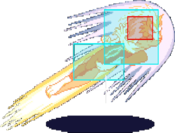
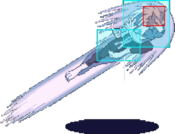
The normal Beast Cannon is an unappreciated move. The Beast Cannon attacks, for the uninitiated, will travel in one direction, and at any point, you can press a direction and punch to start traveling in that direction.
While it is definitely risky, you can use it for a variety of mixup, pressure, and spacing applications. You can attack with Beast Cannon, and on block, either move backward to avoid retaliation, cross behind them and THEN move backward for a cross-up, do a double-towards to punish slow normals, or even stop after the first one and throw them. If your opponent likes to try and counter between hits, you can do a double-towards where you intentionally don't connect the first one, throwing the usual timing off. You can use it to move forward and backwards in neutral situations to try and trick your opponent into making a reckless move.
Gallon is considered airborne for the entire duration of beats cannon. He cannot be throw
| Startup | Active | Recovery | Hit Adv. | Block Adv. | Renda Bonus |
|---|---|---|---|---|---|
| 14 | 30 | 1 + landing 12 | - | - | N/A |
| Guard | Cancel | Invuln | Red Damage | White Damage | Gauge |
| mid | no | - | 18 | 8 | H: 0 G: 0 W: 0 |
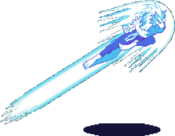
The ES Version of the horizontal Beast Cannon is outrageously amazing, and is the one you'll be doing a lot. It's the one you'll be comboing into off of ground normals, and it also has use as a corner escape, due to its long distance trajectory and quick travel time. Also, use it Psychic-Shoryuken style from full screen to punish any reckless movement from full screen whatsoever. For a fun game, see how many Rikuo players you can piss off by hitting this move full screen every time they do a plainly-telegraphed backwards jump and do the Poison Attack as soon as they land.
- Does not get traditionally Anti-Air'd
- Low-risk & Medium-reward
- Provides a new angle of approach
- Timing can vary to beat Tech-Hit attempts
- On hit, can easily combo into ES Climb Razor
- Landing during the active frames of the 2nd cannon is frame advantage. Gallon may make more offensive decisions.
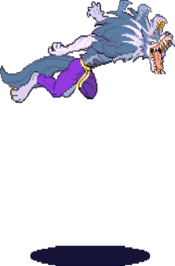
Air Beast Cannon
J.236P
| Startup | Active | Recovery | Hit Adv. | Block Adv. | Renda Bonus |
|---|---|---|---|---|---|
| 14 | until landing | landing 12 | - | - | N/A |
| Guard | Cancel | Invuln | Red Damage | White Damage | Gauge |
| mid | no | - | 19 | 8 | H: 21 G: 16 W: 12 |
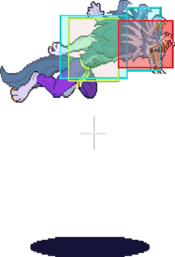
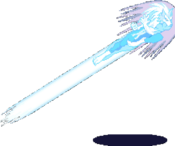
THIS move is the real hotness. In 'neutral' situations where neither character has the offensive advantage, you'll want to fish for knockdowns with this move. It's an easy way to get a knockdown without having to move into dangerous territory, and the cost of being knocked down against Gallon is so great that most opponents won't try and hit you out of it frequently. It's very safe on block unless you connect it very high up on a standing opponent, as well. Finally, it's very easy to juggle an ES Climb Razor after landing this move, making it his most important B&B Combo. I doubt I need to explain why getting the offensive advantage with a safe knockdown attack that leads to a braindead easy, two-move 40% damage combo is important to do, so use this a lot.
| Startup | Active | Recovery | Hit Adv. | Block Adv. | Renda Bonus |
|---|---|---|---|---|---|
| 14 | until landing | landing 12 | - | - | N/A |
| Guard | Cancel | Invuln | Red Damage | White Damage | Gauge |
| mid | no | - | 18 | 8 | H: 0 G: 0 W: 0 |
Diagonal Beast Cannon
623P
| Startup | Active | Recovery | Hit Adv. | Block Adv. | Renda Bonus |
|---|---|---|---|---|---|
| 14 | 30 | 20 + landing 12 | - | - | N/A |
| Guard | Cancel | Invuln | Red Damage | White Damage | Gauge |
| mid | no | - | 19 | 8 | H: 21 G: 16 W: 12 |
This variation isn't used a lot. HOWEVER, it's very important against IAD characters. It keeps them honest by keeping them from jumping on wakeup. The next time they try it, break out with this move immediately as they get up and watch them get knocked back down. Keep doing it until the learn to keep their feet planted firmly on the ground as they get up. You can also use this against Air-Dashers of any kind who like to commit to air-dashes from far away, as they won't be able to block it. This can be used similarly against any character if you think they will try and jump on wakeup or throw out a slow attack; however, it's pretty uncommon to use this in any situation other than against IAD characters.
| Startup | Active | Recovery | Hit Adv. | Block Adv. | Renda Bonus |
|---|---|---|---|---|---|
| 14 | 30 | 20 + landing 12 | - | - | N/A |
| Guard | Cancel | Invuln | Red Damage | White Damage | Gauge |
| mid | no | - | 18 | 8 | H: 0 G: 0 W: 0 |
Beast Cannon GC
623P
As a final note, this move is Gallon's Guard Cancel. This may sound cool at first, but keep in mind that GCs do half damage, so you don't actually have an epic 50%-life ES Guard Cancel. Also, the hitbox is really tiny, so don't even think about using it unless your opponent is right up in your grill.
| Startup | Active | Recovery | Hit Adv. | Block Adv. | Renda Bonus |
|---|---|---|---|---|---|
| 14 | 30 | 20 + landing 12 | - | - | N/A |
| Guard | Cancel | Invuln | Red Damage | White Damage | Gauge |
| mid | no | 1-15 whole body | 9 | 4 | H: 21 G: 16 W: 12 |
| Startup | Active | Recovery | Hit Adv. | Block Adv. | Renda Bonus |
|---|---|---|---|---|---|
| 14 | 30 | 20 + landing 12 | - | - | N/A |
| Guard | Cancel | Invuln | Red Damage | White Damage | Gauge |
| mid | no | 1-15 whole body | 9 | 4 | H: 0 G: 0 W: 0 |
Climb Razor
2[8]K
| Startup | Active | Recovery | Hit Adv. | Block Adv. | Renda Bonus |
|---|---|---|---|---|---|
| 5 | 6 | 24 + landing 12 | - | -18 | N/A |
| Guard | Cancel | Invuln | Red Damage | White Damage | Gauge |
| mid | no | 5-6 feet | 22,15 | 6,4 | H: 31 G: 26 W: 22 |
| Startup | Active | Recovery | Hit Adv. | Block Adv. | Renda Bonus |
|---|---|---|---|---|---|
| 5 | 8 | 27 + landing 12 | - | -23 | N/A |
| Guard | Cancel | Invuln | Red Damage | White Damage | Gauge |
| mid | no | 5-6 feet | 24,16 | 7,4 | H: 31 G: 26 W: 22 |
| Startup | Active | Recovery | Hit Adv. | Block Adv. | Renda Bonus |
|---|---|---|---|---|---|
| 5 | 10 | 29 + landing 12 | - | -27 | N/A |
| Guard | Cancel | Invuln | Red Damage | White Damage | Gauge |
| mid | no | 5-6 feet | 26,17 | 8,4 | H: 31 G: 26 W: 22 |
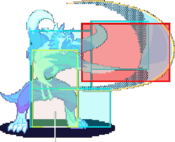
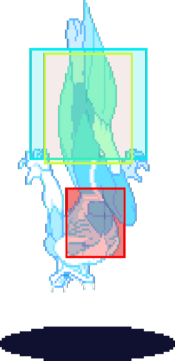
The normal Climb Razor is pretty bad. The only thing it really has going for it is that it's one of the few anti-air moves which is unblockable if the opponent is close to landing. If you look at the hitbox though, you'll notice the tradeoff is that the move has abysmal priority. There's only two times I ever use the normal version of Climb Razor:
An opponent is trying to jump over me and doesn't suspect I'll do anything. I'll just say right now that this pretty much never happens, but if it does, Climb Razor was tailor-made for that oddly-specific circumstance.
Building meter after landing Moment Slice. You can whiff two of these (Lk Version) after landing Moment Slice, but I generally do just one so that I have enough time to position myself accordingly afterwards.
| Startup | Active | Recovery | Hit Adv. | Block Adv. | Renda Bonus |
|---|---|---|---|---|---|
| 5 | 2,6,3 | 28 + landing 12 | - | -25 | N/A |
| Guard | Cancel | Invuln | Red Damage | White Damage | Gauge |
| mid | no | 5-6 feet | 21+11+11 | 5+3+3 | H: 0 G: 0 W: 0 |
Million Flicker
214LP
| Startup | Active | Recovery | Hit Adv. | Block Adv. | Renda Bonus |
|---|---|---|---|---|---|
| 11 | 3(12)3 | 18 | -3 | -4 | N/A |
| Guard | Cancel | Invuln | Red Damage | White Damage | Gauge |
| mid | no | - | 9xn | 4xn | H: 12+4xn G: 12+2xn W: 12 |
| Startup | Active | Recovery | Hit Adv. | Block Adv. | Renda Bonus |
|---|---|---|---|---|---|
| 11 | 3(12)3 | 18 | -3 | -4 | N/A |
| Guard | Cancel | Invuln | Red Damage | White Damage | Gauge |
| mid | no | - | 9xn | 4xn | H: 12+4xn G: 12+2xn W: 12 |
| Startup | Active | Recovery | Hit Adv. | Block Adv. | Renda Bonus |
|---|---|---|---|---|---|
| 11 | 3(12)3 | 18 | -3 | -4 | N/A |
| Guard | Cancel | Invuln | Red Damage | White Damage | Gauge |
| mid | no | - | 9xn | 4xn | H: 12+4xn G: 12+2xn W: 12 |
I'll admit, this move is pret-ty bad. ...But! As funny as it sounds, if you have the wiggle room to throw this move out (11 Frame Startup; compare that to Gallon's normals which average 6-7 Frame Startups), it's probably Gallon's safest anti-air. It also has the added bonuses of knocking down an airborne opponent and completely humiliating your opponent when they realize they got anti-aired by Million Flicker.
| Startup | Active | Recovery | Hit Adv. | Block Adv. | Renda Bonus |
|---|---|---|---|---|---|
| 11 | 3(11)3(10){3(4)}x7,3 | 23 | -44 | -45 | N/A |
| Guard | Cancel | Invuln | Red Damage | White Damage | Gauge |
| mid | no | - | 7x10 | 3x10 | H: 0 G: 0 W: 0 |
Wild Circular
632[4]K
| Startup | Active | Recovery | Hit Adv. | Block Adv. | Renda Bonus |
|---|---|---|---|---|---|
| 2 | 7 | 31 | - | - | N/A |
| Guard | Cancel | Invuln | Red Damage | White Damage | Gauge |
| throw | no | 1-9 whole body | 27 | 8 | H: 12 G: 0 W: 12 |
Gallon has one of the best Command Throws in the entire game. It has an excellent combination of quick startup, high amount of active grabbing frames (meaning you can be a bit sloppy in your timing), and invincible frames. It also has the built-in Option Select that his normal Kick Throw has, so long as you do it with Roundhouse. There are so many top-notch ways of griefing opponents with this move that I can't even hope to discuss them all in this tiny space. Just do this move, like, all the time. Trust me.
| Startup | Active | Recovery | Hit Adv. | Block Adv. | Renda Bonus |
|---|---|---|---|---|---|
| 2 | 7 | 31 | - | - | N/A |
| Guard | Cancel | Invuln | Red Damage | White Damage | Gauge |
| throw | no | 1-9 whole body | 10+21 | 4+5 | H: 0 G: 0 W: 0 |
Pursuits
8P or 8K
| Startup | Active | Recovery | Hit Adv. | Block Adv. | Renda Bonus |
|---|---|---|---|---|---|
| 28 | 9 | landing 1 | - | - | N/A |
| Guard | Cancel | Invuln | Red Damage | White Damage | Gauge |
| mid | no | - | 5 | 5 | H: 24 G: 0 W: 6 |
| Startup | Active | Recovery | Hit Adv. | Block Adv. | Renda Bonus |
|---|---|---|---|---|---|
| 28 | 9 | landing 1 | - | - | N/A |
| Guard | Cancel | Invuln | Red Damage | White Damage | Gauge |
| mid | no | - | 6+6 | 6+6 | H: 0 G: 0 W: 0 |
Gallon dives down on the foe with his fangs wide open. ES version adds in an extra knee drop. He then flips away from his opponent around 2 character lengths away.
Pretty crappy Pursuit overall. Slow travel time, and low damage because it's only one hit (ES Pursuit is still only two hits). It's still effective to use as a late Pursuit to stay on your opponent though, so be sure to learn the timing for that.Ex Moves
412[6]KK
| Startup | Active | Recovery | Hit Adv. | Block Adv. | Renda Bonus |
|---|---|---|---|---|---|
| 16 | off screen | 97-121 | - | -19 | N/A |
| Guard | Cancel | Invuln | Red Damage | White Damage | Gauge |
| mid | no | - | 13x3 | 5x3 | H: 0 G: 0 W: 0 |
As with most EX Attacks, this move is for specific situations. Dragon Cannon is very effective against opponents about to lose a lifebar. If you think your opponent is going to attack you - especially after a knockdown - throw this move out to punish them for making such a predictably desperate choice. For kicks, try doing this move if you think an opponent is going to roll behind you for a crossup Dragon Cannon.
Note: the game accepts 4123KK as the input for this move
https://youtu.be/cdGbY6fKCIE?t=6m6sLP,MP,Towards,LK,MK
| Startup | Active | Recovery | Hit Adv. | Block Adv. | Renda Bonus |
|---|---|---|---|---|---|
| 14 | 2 | 21 | - | 3 | N/A |
| Guard | Cancel | Invuln | Red Damage | White Damage | Gauge |
| mid | no | - | 3+35 | 1+7 | H: 0 G: 0 W: 0 |
Command Super. It's important to not that even though the move says to press towards your opponent (6), it can be any toward motion (6, 9, or 3), and you'll usually be comboing with Down-Towards (3).
Most command supers tend to be imperative to a character's game, but Gallon's is not. The main problem is that it's incredibly hard to hit-confirm; it's possible to do [2LP > 2MP xx Moment Slice]; but your opponent will be pushed too far away if you try to combo it off of a normal jump-in. To mitigate that, you could try [2LP/2LK xx Moment Slice], but that's still not all that easy to hit confirm (or to execute, for that matter).
There's only one situation where Moment Slice is easy to hit-confirm, and in that instance, it's very important to do land it as much as possible: when landing a crossup j.LK, do the combo [Crossup j.LK, 2LP > 2MP xx Moment Slice]. Doing Moment Slice when possible is important for Gallon, because it's his best method of dealing red (unrecoverable) damage.
This move can also be used in an option select after his 8j.LK crossup shenanigans. If you've knocked a cornered opponent down and you anticipate that they will roll towards you, jump straight up from the point where you think the roll will end, and do the following input: [j.LK, 2LP > 2MP, 3, 2LK > 2MK > 5HP].
If you crossed your opponent up successfully, you'll see [Crossup j.LK, 2LP > 2MP xx Moment Slice].
If you did not cross your opponent up, you'll get [j.LK, 2LP > 2MP > 2MK > 5HP].
Basically, go for this move if you land a cross-up, not so much if you didn't. Finally, this move will whiff crouching Q-Bee, so don't do it unless you get your jollies by doing elaborate whiff-to-throw setups.Dark Force
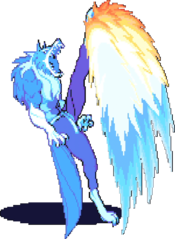
Illusion Attack: Mirage Body - Same strength P + K:
- (Any Version): Mirage Body causes all of Gallon's normals to hit multiple times at slightly staggered intervals, similar to a Variable Combo from Street Fighter Alpha 3. Gallon's Dark Force is crap as a pressure tool, because the duration is too short. If an opponent lands even one string or knockdown on Gallon, it's likely to run out and force a deactivate before he gets the chance to try and deactivate safely.
- Variance: Dark Force activation has (2) possible mirage patterns, each with a difference in the timing between Gallon starting an attack & the Mirage starting the same attack. Unfortunately, this makes all of Gallon's DF combos unreliable in a match as (1) version is perfect for links & the other is too slow.
- Pattern# 01 is a 9-frame delay
- Pattern# 02 is a 16-frame delay
- Either pattern can vary by +1-Frame
- Example Dark Force combos:
- It's best used as a a defensive tool, due to its prolonged invulnerability frames. Some common ways to set up a safe deactivate:
- Backdash j.HK, Deactivate
- Beast Cannon (towards, then away; 6, 4).
Colors
Notable Players
Japan
Japanese Player Index: http://www21.atwiki.jp/vsplayer/pages/15.html
| Name (English) | Name (Japanese) | Color | Location | Contact | Notes |
|---|---|---|---|---|---|
| Takahashi | たかはし | HK |
Kansai, Ibaraki | http://twitter.com/takahashigallon http://www.youtube.com/user/takahashi301 |
West Japan's most effective Gallon Technical & Strong |
| KEN | ケン | HP |
Kanto | http://twitter.com/KENGALLON http://blog.livedoor.jp/kengallon/ https://www.youtube.com/user/KENGALLON |
Tokyo Tournament Organizer Veteran Okizeme of Dark Force x Wild Circular https://twitter.com/KENGALLON/status/1040448260320587781 |
| BUZZ | バズ | MK |
Kanto | http://twitter.com/dance_gallon | Well known for violently shaking the whole arcade cabinet while playing, Unpredictable character movement |
| MAB | マブ | HK |
Tokyo | http://twitter.com/MABgallon | Nama Beeru |
| Mako | マコ | HK |
Nagoya | Uses Tiger-Knee Beast Canon as Zurashi | |
| Haneman | ハネマン | PP |
Yamagata | Retired | |
| Verti / Welch | ヴェルチ | MK |
Nagoya | Retired | |
| Ginsho | ぎんしょう/銀晶 | LP |
Tokyo | https://twitter.com/ginshogallon | |
| Love | あらげ | LP |
|||
| Cerberus | ケルベロス | KK |
https://twitter.com/cerberus0607 |
USA
| Name (English) | Name (Japanese) | Color | Location | Contact | Notes |
|---|---|---|---|---|---|
| Mini Maww | ミニマー | KK |
Ohio, USA | https://twitter.com/MiniMaww | One of the Nasty Boys. Throws a mean flying disc. |
| Hagure | はぐれ | PP |
California, USA | https://twitter.com/hagure | Community Organizer. Works too damn hard. |
| HardBread | ハードブレッド | MK |
New York, USA | https://twitter.com/HARD_BREAD | Long time player that has been very successful. Plays multiple games, and loves Dragon's Crown. |
| Mattocat | マトキャット | MK |
Indiana, USA | https://twitter.com/Mattocat | Long time commentator. VTubing cat that plays a dog. |
South America
| Name (English) | Name (Japanese) | Color | Location | Contact | Notes |
|---|---|---|---|---|---|
| Legoshi | レゴシ | HK |
Brazil | https://twitter.com/WulfusWolf | Frequent player on NekoPunchi's streams |
