Dengeki Bunko: Fighting Climax/Tomo Asama: Difference between revisions
(Add descriptions for Tomo's Assists) |
YURIWARRIOR (talk | contribs) (reformatted page to match new assist layout) |
||
| Line 2: | Line 2: | ||
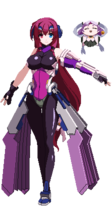
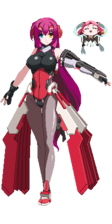
Tomo Asama (浅間 智) is originally from the light novel ''Kyoukai Senjou no Horizon''. | Tomo Asama (浅間 智) is originally from the light novel ''Kyoukai Senjou no Horizon''. | ||
=== | Tomo serves as fast neutral tool that can grant hard knockdown on grounded opponents. She's able to cover two different angles depending on whether you do 5S or 6S. She also works mostly commonly as a combo extension tool or an okizeme option for some trumped up characters. | ||
==Who Does This Assist Work Well With?== | |||
'''Note that, this section is for defined teams and does not dictate that the assist can only be ran with "x" characters. Despite the age of DFCI (and DFC in general), decently strong synergy has yet to be discovered which can rival most of the game's strong teams.''' | |||
===Asuna=== | |||
Tomo works for Asuna in a similar manner as Celty. It gives her neutral control, some trump install routes, and access to meter dump routings. Not a bad assist for her and according to some NA Asuna players, Tomo 5S is fast enough to call out Rusian 6S on reaction. | |||
===Kirino=== | |||
Tomo 5S works as a way for Kirino to cover her athlete's dash and 5[S] as a combo tool. | |||
===Shana=== | |||
Rarely used in JP play and worked on by NA player ADCT, Shana gains access to some very finnicky combo routings. Due to Shana being a top 3 solo character, she is able to make the assist work. | |||
===Yuuki=== | |||
Optimized entirely alone by JP player "Shijou", Yuuki/Tomo really shines in trump. Multiple meter-dump options as well as some okizeme options (high/low, left/right, etc). Their synergy in trump is so strong that you might be fooled into believing Tomo is stronger than she is. | |||
==Assist Moves== | ==Assist Moves== | ||
| Line 16: | Line 29: | ||
|recharge=2.75 seconds | |recharge=2.75 seconds | ||
|guard=HLA | |guard=HLA | ||
|description= | |description=Causes Tomo to appear and fire an arrow horizontally. | ||
* | * | ||
}} | }} | ||
| Line 30: | Line 43: | ||
|recharge=4.5 seconds | |recharge=4.5 seconds | ||
|guard=HLA | |guard=HLA | ||
|description= | |description=Causes Tomo to appear and charge up a delayed arrow shot. Launches on hit. | ||
* Longer startup compared to 5S | * Longer startup compared to 5S | ||
}} | }} | ||
| Line 44: | Line 57: | ||
|recharge=3 seconds | |recharge=3 seconds | ||
|guard=HLA | |guard=HLA | ||
|description= | |description=Causes Tomo to appear and fire an arrow upward at an angle. | ||
* Can hit standing opponent, but only if close up | * Can hit standing opponent, but only if close up | ||
}} | }} | ||
| Line 58: | Line 71: | ||
|recharge=4.5 seconds | |recharge=4.5 seconds | ||
|guard=HLA | |guard=HLA | ||
|description= | |description=Causes Tomo to appear and charge up a delayed arrow shot upwards. Launches on hit. | ||
* Can hit standing opponent, but only if close up | * Can hit standing opponent, but only if close up | ||
* Longer startup compared to 6S | * Longer startup compared to 6S | ||
| Line 73: | Line 86: | ||
|recharge=2 seconds | |recharge=2 seconds | ||
|guard=HLA | |guard=HLA | ||
|description= | |description=Fires a super charged arrow upward at an angle for 2 meter. | ||
* Enhance damage by pressing S during super flash at the cost of 1 meter. Can enhance up to 3 times (for a total of 5 meter spent) | * Enhance damage by pressing S during super flash at the cost of 1 meter. Can enhance up to 3 times (for a total of 5 meter spent) | ||
* Can hit standing opponent, but only if close up | * Can hit standing opponent, but only if close up | ||
| Line 107: | Line 120: | ||
|Color24= Color 24 | |Color24= Color 24 | ||
}} | }} | ||
{{DFCI}} | {{DFCI}} | ||
[[Category:Tomo Asama]] | [[Category:Tomo Asama]] | ||
[[Category:Dengeki Bunko: Fighting Climax Ignition]] | [[Category:Dengeki Bunko: Fighting Climax Ignition]] | ||
Revision as of 23:06, 23 July 2022
Introduction
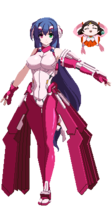
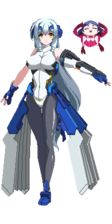
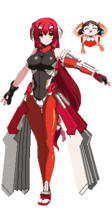
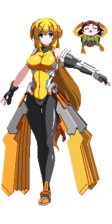
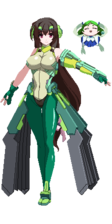
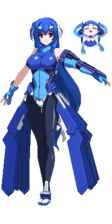
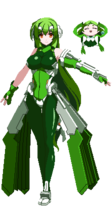
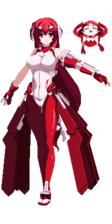
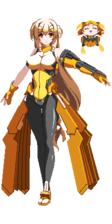
Tomo Asama (浅間 智) is originally from the light novel Kyoukai Senjou no Horizon.
Tomo serves as fast neutral tool that can grant hard knockdown on grounded opponents. She's able to cover two different angles depending on whether you do 5S or 6S. She also works mostly commonly as a combo extension tool or an okizeme option for some trumped up characters.
Who Does This Assist Work Well With?
Note that, this section is for defined teams and does not dictate that the assist can only be ran with "x" characters. Despite the age of DFCI (and DFC in general), decently strong synergy has yet to be discovered which can rival most of the game's strong teams.
Asuna
Tomo works for Asuna in a similar manner as Celty. It gives her neutral control, some trump install routes, and access to meter dump routings. Not a bad assist for her and according to some NA Asuna players, Tomo 5S is fast enough to call out Rusian 6S on reaction.
Kirino
Tomo 5S works as a way for Kirino to cover her athlete's dash and 5[S] as a combo tool.
Shana
Rarely used in JP play and worked on by NA player ADCT, Shana gains access to some very finnicky combo routings. Due to Shana being a top 3 solo character, she is able to make the assist work.
Yuuki
Optimized entirely alone by JP player "Shijou", Yuuki/Tomo really shines in trump. Multiple meter-dump options as well as some okizeme options (high/low, left/right, etc). Their synergy in trump is so strong that you might be fooled into believing Tomo is stronger than she is.
Assist Moves
| 5S |
|---|
| 5[S] |
|---|
| 6S |
|---|
| 6[S] |
|---|
| 41236S |
|---|
Colors
| Color 1 | Color 2 | Color 3 | Color 4 |
|---|---|---|---|
| Color 5 | Color 6 | Color 7 | Color 8 |
| Color 9 | Color 10 | Color 11 | Color 12 |
| Color 13 | Color 14 | Color 15 | Color 16 |
| Color 17 | Color 18 | Color 19 | Color 20 |
| Color 21 | Color 22 | Color 23 | Color 24 |


