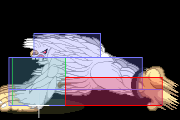
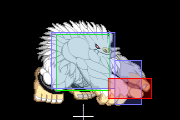
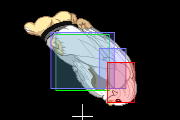
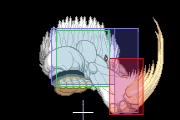
Vampire Savior/Sasquatch: Difference between revisions
| Line 263: | Line 263: | ||
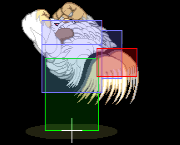
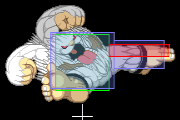
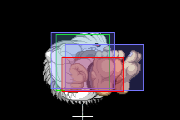
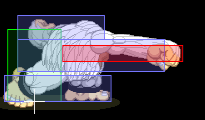
| width="" | [[image:sasquatch_normal_throw.png|center]] | | width="" | [[image:sasquatch_normal_throw.png|center]] | ||
| width="" style="background:#f0f0f0;"| '''Normal Throw (MP or HP)''' | | width="" style="background:#f0f0f0;"| '''Normal Throw (MP or HP)''' | ||
[ Startup:1 | Active:1 | Throw Tech:+11] | [ Startup:1 | Active:1 | Hit:Knockdown | Throw Tech:+11] | ||
One of the best normal throws in the game. Both MP and HP excellent option select into anti-air normals if the opponent jumps, and if they tech they are left close to Sasquatch and he has a good advantage. In the corner, Sasquatch is left right next to the opponent and can throw loop them as long as they keep throw teching. | One of the best normal throws in the game. Both MP and HP excellent option select into anti-air normals if the opponent jumps, and if they tech they are left close to Sasquatch and he has a good advantage. In the corner, Sasquatch is left right next to the opponent and can throw loop them as long as they keep throw teching. | ||
Sasquatch actually gets +12 on a throw tech from Jedah, Bulleta and Q-Bee. | |||
|- | |- | ||
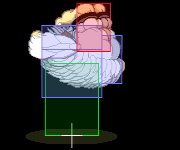
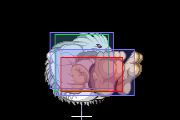
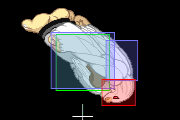
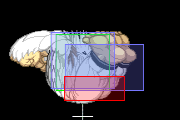
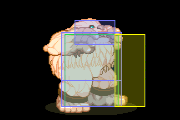
| width="" | [[image:sasquatch_air_throw.png|center]] | | width="" | [[image:sasquatch_air_throw.png|center]] | ||
| width="" | '''Air Throw (MP or HP)''' | | width="" | '''Air Throw (MP or HP)''' | ||
[ Startup:1 | Active:1 ] | [ Startup:1 | Active:1 | Hit:Knockdown | Throw Tech:-3] | ||
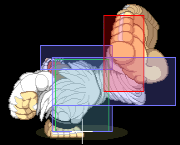
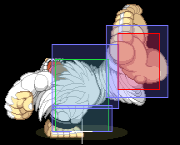
One of | One of the best air throws in the game. If you look at other characters air grabs, their grab 'box' is actually just a single pixel line. Sasquatch actually has a box for his air throw. | ||
|- | |- | ||
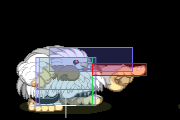
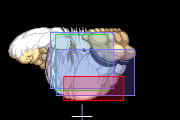
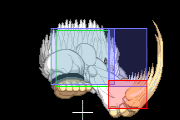
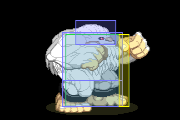
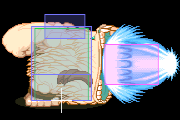
| width="" | [[image:sasquatch_bigbrunch.png|center]] | | width="" | [[image:sasquatch_bigbrunch.png|center]] | ||
| Line 291: | Line 292: | ||
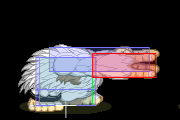
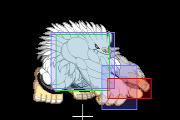
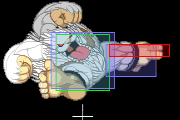
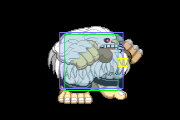
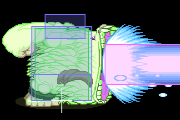
| width="" | [[image:sasquatch_bigswing.png|center]] | | width="" | [[image:sasquatch_bigswing.png|center]] | ||
| width="" | '''Big Swing - 360K''' | | width="" | '''Big Swing - 360K''' | ||
[ Startup:2 | Active:1 ] | [ Startup:2 | Active:1 | Total Frames:65 ] | ||
Good range, though not much reason to ever use this over Big Brunch, especially since this has a whiff animation as well. | |||
|- | |- | ||
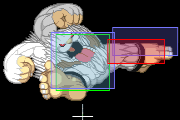
| width="" | LK Big Typhoon[[image:sasquatch_typhoon_lk.png|center]] MK Big Typhoon[[image:sasquatch_typhoon_mk.png|center]] HK Big Typhoon[[image:sasquatch_typhoon_hk.png|center]] [[image:sasquatch_typhoon_es_1.png|center]] [[image:sasquatch_typhoon_es_2.png|center]] | | width="" | LK Big Typhoon[[image:sasquatch_typhoon_lk.png|center]] MK Big Typhoon[[image:sasquatch_typhoon_mk.png|center]] HK Big Typhoon[[image:sasquatch_typhoon_hk.png|center]] [[image:sasquatch_typhoon_es_1.png|center]] [[image:sasquatch_typhoon_es_2.png|center]] | ||
Revision as of 11:33, 8 March 2014
Introduction
Sasquatch (サスカッチ), the Bigfoot. Abominable snowman is abominable.
Primary objective: Shorthop a lot, Big Brunch into retarded damage, and press buttons FTW.
Normal Moves
Standing Normals
| s.LP
Near s.LP [ Startup:5 | Active:3 | Hit:+8 | Block:+7 | Renda: H:+11 B:+10 ] Special Cancels/Rapid Cancels TEXT | |
| s.MP
[ Startup:6 | Active:3 | Hit:+5 | Block:+4 ] Special Cancels TEXT | |
| s.HP
[ Startup:8 | Active:5(3+2) | Hit:+6 | Block:-7 ] TEXT | |
| s.LK
Near s.LK [ Startup:5 | Active:3 | Hit:+7 | Block:+6 ] Special Cancels TEXT | |
| s.MK
[ Startup:7 | Active:3 | Hit: 0 | Block:-1 ] TEXT | |
| s.HK
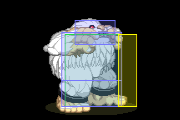
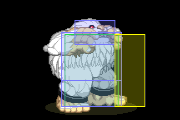
[ Startup:8 | Active:2/3 | Hit:+11 | Block:-2 ] The anti-air hitbox is active on the 12th frame. This move has a couple interesting properties. On the 8th frame it will go over lows, and even though Sasquatch is in the air, he is still considered grounded which means opponents cannot air block the anti-air. An interesting troll I saw SaviorMeister doing one day was whiffing this on his opponents wakeup. They'd wake up with a crouch LP or LK, which would whiff due to the lower body invincibility. He'd then recover and command throw them. Doesn't seem like it should be practical, and its not, but he made it work. |
Crouching Normals
| c.LP
[ Startup:5 | Active:3 | Hit:+6 | Block:+5 | Renda: H:+6 B:+5 ] Special Cancels/Rapid Cancels TEXT TEXT TEXT TEXT TEXT TEXT TEXT TEXT TEXT TEXT TEXT TEXT TEXT TEXT TEXT TEXT TEXT TEXT TEXT TEXT TEXT TEXT TEXT | |
| c.MP
[ Startup:6 | Active:3 | Hit:+4 | Block:+3 ] Special Cancels TEXT | |
| c.HP
[ Startup:7 | Active:2+3 | Hit:+3 | Block: 0 ] Anti-Air hitbox is active on the 11th frame. | |
| c.LK
[ Startup:5 | Active:3 | Hit:+5 | Block:+4 ] Foot invincible frames 4F-13F. Must block low.
| |
| c.MK
[ Startup:5 | Active:3 | Hit:+5 | Block:+4 ] Special Cancels Must block low. | |
| c.HK
[ Startup:10 | Active:4 | Hit:Knockdown | Block:-6 ] Must block low. |
Forward and Back Jumping Normals
| j.LP
[ Startup:5 | Active:6 ] Hitbox is positionally the same as neutral jump LP, but the hurtbox on the arm is positioned a bit further forward and higher. Decent range, and downward trajectory on the hitbox. This is extremely useful for both jump ins, air chains and air whiffing. One of Sasquatch's main short hop normals on grounded opponents. | |
| j.MP
[ Startup:6 | Active:6 ] Hitbox is positionally the same as neutral jump MP, but the hurtbox on the neck is positioned much further back and a bit lower. Due to how much further back it is I'd say it's superior to the neutral jump version. Great air normal, use often. It works extremely well for option select air throws as well. One of Sasquatch's main short hop normals on grounded opponents. | |
| j.HP
[ Startup:10 | Active:4 ] TEXT | |
| j.LK
[ Startup:5 | Active:6 ] TEXT | |
| j.MK
[ Startup:6 | Active:6 ] TEXT | |
| j.HK
[ Startup:7 | Active:6 ] TEXT |
Neutral Jump Jumping Normals
| j.LP
[ Startup:5 | Active:6 ] TEXT TEXT TEXT TEXT TEXT TEXT TEXT TEXT TEXT TEXT TEXT TEXT TEXT TEXT TEXT TEXT TEXT TEXT TEXT TEXT TEXT TEXT TEXT | |
| j.MP
[ Startup:6 | Active:6 ] TEXT | |
| j.HP
[ Startup:10 | Active:4 ] TEXT | |
| j.LK
[ Startup:5 | Active:6 ] TEXT | |
| j.MK
[ Startup:6 | Active:6 ] TEXT | |
| j.HK
[ Startup:8 | Active:6(3+3) ] TEXT |
Old Normal Moves Info
LP: Small range but comes out fast with huge priority. Use as combo starters or to jab people out of everything. Whiff crouching opponents. Cancelable.
MP: 'Talk to the hand' move. Huge hitbox, come out fast and cancelable. Sasquatch's key to stopping air guard, wake up meaty and huge combos.
HP: Uppercut. Stop jumps.
LK: Not much use. Cancelable.
MK: Whiff crouching opponents but pretty good range.
HK: Despite its look it's air unblockable. Decent meaty, and goes over low attacks
c.LP: Like LP but doesn't whiff crouching. Seems to have less range though. Cancelable
c.MP: Similar to MP. Trades range for shrunk hitbox. Cancelable.
c.HP: The flip. End combo with this instead of cr.HK if you don't want to knock down your opponent (allowing them to roll away) . Also decent anti air.
c.LK: Hits low. Move yourself a little forward (possible kara cancel for Big Brunch grab ?) . Good combo starter. Cancelable.
c.MK: The ass. Less range than MK, but now cancelable !
c.HK: Sas' sweep. Reach like half a screen. Great combo ender.
j.LP: Good for short hops. Also j.LP j.LK is a good jump in chain.
j.MP: Headbutt. Staple move in short hops. Big hitbox, good damage and stun.
j.HP: A knockdown attack. j.MP will probably lead to more damaging combos but this move is good for mindless long dash raids ... hmmm
j.LK: Nifty. Use this for short hops instead of the punches.
j.MK: Identical to the LK version ... I think it has more starting frames and hit harder. Possibly everything you can do with j.LK can be done with this instead.
j.HK: The butt. 2 hit, and can cross up. Very powerful move in rushes.
Command Normal Moves
P Throw: Sasquatch slams his opponent on the ground. Leaves them at a close enough distance to follow up with pressure if they neutral tech or tech towards you.
Air Throw: Regular air throw. Slams them to the ground.
Pursuit: Doesn't do much damage, but leaves you at a great position for pressure. The es version is faster and hits twice
Special Moves and Throws
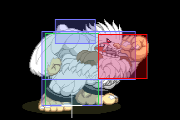
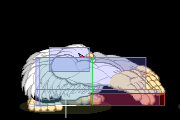
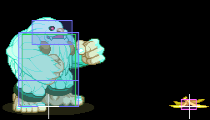
| Normal Throw (MP or HP)
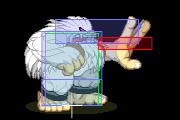
[ Startup:1 | Active:1 | Hit:Knockdown | Throw Tech:+11] One of the best normal throws in the game. Both MP and HP excellent option select into anti-air normals if the opponent jumps, and if they tech they are left close to Sasquatch and he has a good advantage. In the corner, Sasquatch is left right next to the opponent and can throw loop them as long as they keep throw teching. Sasquatch actually gets +12 on a throw tech from Jedah, Bulleta and Q-Bee. | |
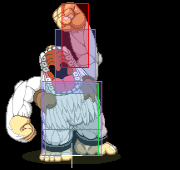
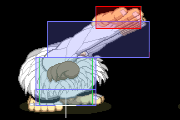
| Air Throw (MP or HP)
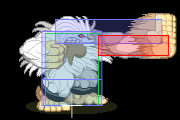
[ Startup:1 | Active:1 | Hit:Knockdown | Throw Tech:-3] One of the best air throws in the game. If you look at other characters air grabs, their grab 'box' is actually just a single pixel line. Sasquatch actually has a box for his air throw. | |
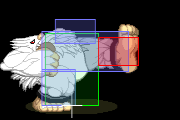
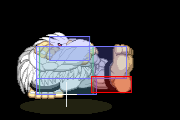
| Big Brunch - 63214P
[ Startup:2 | Active:1 ] An absolutely amazing command grab. When it connects, the opponent will be frozen and Sasquatch can hop in to get a free combo. This move is incredibly fast, and easily lets you confirm into an ES Big Typhoon for big damage. The only downside is that it is one of the few throws that always gives a whiff animation. The whiff animation is long enough that if someone neutral jumps they will have time to land on Sasquatch's head and punish. There is not any difference between the normal versions, and the ES Big Brunch does slightly more damage and freezes the opponent for longer. The main thing to keep in mind with this move is every character has a different freeze timing, and distance Sasquatch spits them out at. It is not at all consistent between characters. Check here for more information about the freeze times and distances for each characther:
| |
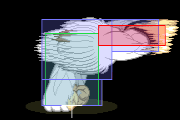
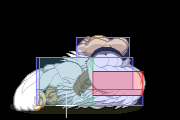
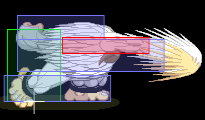
| Big Swing - 360K
[ Startup:2 | Active:1 | Total Frames:65 ] Good range, though not much reason to ever use this over Big Brunch, especially since this has a whiff animation as well. | |
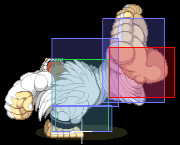
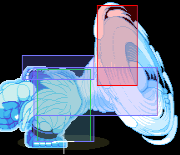
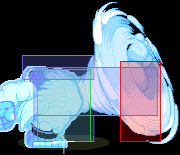
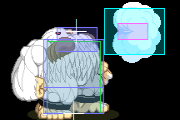
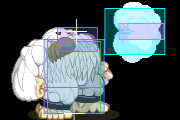
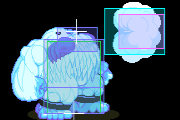
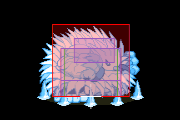
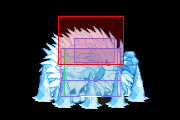
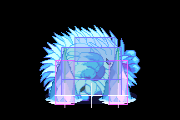
| LK Big Typhoon MK Big Typhoon HK Big Typhoon | Big Typhoon - 623K
LK Big Typhoon [ Startup:8 | Active:11 | Hit:-5 | Block:-6 ] One of Sasquatch's two useful versions of this move. Its useful as an anti-air, though it is air blockable. Most character's won't be able to punish it on block unless they have a way of altering their air movement, and even then it can tend to be a bit of a tight punish. Still, it hits a nice part on the screen, comes out fast, and recovers surprisingly quickly. Useful in certain situations and matchups. As a guard cancel this move has 9 frames of invincibility, which makes it invincible past start up. This means will not lose or trade unlike the other two normal version guard cancels. Also, it is the safest version on block at -6, which is potentially punishable but not quite easily. Besides those advantages, the problems are numerous. You'll still be at -5 on hit afterwards, which is potentially punishable. You'll have to watch out for this completely whiffing on small crouching opponents due to the high hitbox. And even as the fastest version of Big Typhoon, it is still slow for a guard cancel and easily baited. In the end, the guard cancel LK Big Typhoon has a little bit of use, but you may as well push block instead. MK Big Typhoon [ Startup:11 | Active:22 | Hit:+2 | Block:-15 ] Not much to say about this version. It is plus on hit unlike his other two Typhoons, which may actually be punished. (I'm not sure if the game will select the weaker or stronger version of a special if you don't have meter for ES, but I am considering using LK+MK or MK+HK on the basis on which button combination will give you MK Typhoon if you have no meter. With the idea that the game will select the version that gives you a decent frame advantage if you do not have meter for ES Big Typhoon. This is only if you somehow have issues paying attention to how much meter you currently have.) As a guard cancel, this move has 9 frames of invincibility, and with an 11 frame startup, there is a chance it may be stuffed. Not only that, the startup is so slow it is very easy to bait out. Out of the 3 normal versions of this move, it is plus on hit which is nice, you just just won't get the chance to make use of it. HK Big Typhoon [ Startup:10 | Active:33 | Hit:-5 | Block:-22 ] Not much to say about this one either. Does the most hits and damage of any of the normal versions, but you're better off comboing into a knockdown or resetting to keep your momentum going. As a guard cancel, this move has 9 frames of invincibility, and with a 10 frame start up, this has a high chance of trading. Plus the start up is so long it will be easy to bait out, at which point you're dealing with -22F on block. Not a good guard cancel. ES Big Typhoon [ Startup:9 | Active:48 | Hit:Knockdown | Block:-52 ] The most useful version of Big Typhoon. Does massive damage and is great as a finishing move. While you are advantageous on hit, recovery is long, and you have a very good chance of losing pressure after knocking down with this move. Its generally best used when finishing an opponent off. While it looks like it may have a decent anti-air hitbox, do not use it as such since it is still air blockable and the recovery is long. As a guard cancel, this move has 9 frames of invincibility, and with a 9 frame start up it has a single active frame before the invincibility putters out. This is his best guard cancel of all version of big typhoon by far, as it starts up second fastest, fully invincible and completely safe on hit. It even does semi-decent damage on hit for a guard cancel. If baited though, it is by far the easiest to punish so watch out what move you cancel from into this. |
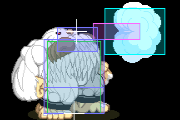
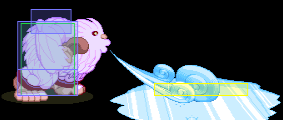
| LP Big Breath MP Big Breath HP Big Breath | Big Breath - 236P
[ Startup:X | Active:X | Hit:+X ] Sasquatch shoots a little bit of hot air at the opponent, and freezes them if they get hit by it. No range, but it negates fireballs, and builds meter fairly fast. EX version allows for an additional hit if you freeze them.
|
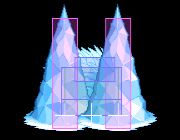
| Big Towers - 22P
LK Big Towers [ Startup:7 | Active:12 | Hit:+24 | Block:-8 ] MK Big Towers [ Startup:7 | Active:22 | Hit:+14 | Block:-18 ] HK Big Towers [ Startup:10 | Active:32 | Hit:+4 | Block:-28 ] The normal versions of Big Towers are very useful, and generally aren't given enough credit by the player base who ignores them for ES Big Towers. The anti-air hitboxes are great, and its active for ages. The only real downside is they are air blockable, and probably only a little bit more easily punishable on an air block than ES Big Towers. Its use as an anti-air is a bit matchup dependant. Generally it is extremely strong against Jedah, Morrigan, and a few other characters who have to end up committing to their air movement. Tossing out the super active HK Big Towers means you don't even really have to time it either. I've seen it work consistently on Demitri as well since none of his normals can get below the hitbox down to the hurtbox. The plus and block frames on hit and guard listed up above don't really tell the full story, since that is on grounded opponents, and this does not have much utility outside of anti-airs. On an air hit, this move does a knockdown. ES Big Towers [ Startup:9 | Active:6(Each Spike) | Hit:Knockdown | Block:-18 ] This is the move. Usually referred to as 'Ice Tower', it is one of the most frustrating things to deal with when fighting Sasquatch. It is multi-functional, since it works as: An anti-air(but still air blockable), a full screen punish, and a combo tool. Hell, I even just mash it as a reversal sometimes when I see my opponents timing is slightly off. It travels full screen extremely fast, both in front of and behind Sasquatch. This can be used to punish people throwing bad fireballs, or just jumping around pressing buttons at any position on the screen. Advantage from a knockdown on hit is huge. You get plenty of time to dash in from full screen and start applying pressure. Plus it does tons of damage to boot. This is not something you want to be hit by. As a combo tool, I've seen it used occasionally to get a knockdown after a Big Brunch, but when they don't want to deal with the poor advantage on knockdown that ES Big Typhoon gives. Though this is at a price of less damage. |
| Big Blow - 623P (hold P to charge)
[ Startup:X | Active:X | Hit:+X ] Winds his fist up and unleashes a long punch. Goes further the longer you hold the button. The longer you hold the button, the more unsafe it becomes on block. Es version fully charged hits 3 times. Really useless move. Takes too long to start up, and the unsafeness of it makes it worthless.
|
EX Moves
| Big Sledge - 720kk
[ Startup:2 | Active:1 ] TEXT | |
| Big Freezer - 41236pp
[ Startup:38 | Active:49 | Hit:Knockdown | Block:-25 ] Ice Beam. Generally ES Big Towers is favored over this by most players as it initially comes out much faster and is generally safer against opponents jumping in on you randomly. At full screen, I'm not quite sure which would reach the other end first, but I am inclined to say ES Big Towers would or it would be about even as Big Freezer doesn't travel quite as fast as it may seem. There are a few characters I'll occasionally use this on from full screen, such as Lei-Lei, Demitri, Morrigan or Jedah. Usually its just if they are jumping around doing dumb stuff. This move does slightly more damage than ES Big Towers, but its hard to say if you get any REAL benefit out of using it. Not sure of the comparative advantage on hit you get from this fullscreen compared to ES Big Towers either. |
| Big Eisbahn - 41236kk
[ Startup:45 | Active:67 | Total Frames on Whiff:120] The Puddle. Unblockable, super-active, character-detached ground grab. A very strong move, especially in the corner and the opponent is up-backing just outside of your anti-air range. They'll land on the ice sheet and be unable to escape. You can also set it up with a s.MP canceled into this. There isn't much of a gap to poke out, especially if you canceled from a s.MP that air resets. |
| Banana - 41236 + Start
[ Startup:70 | Active:179 | Hit:Knockdown | Regains Movement:74 ] Easter Egg EX Move. Unblockable. Causes knockdown on hit. |
Dark Force
Super Armor: Big Resistor / M.A.P.S. - Same strength P + K
- Big Resistor (Light or Medium Version/LP+LK or MP+MK: Super Armor: Big Resistor. Adds super armor (not hyper armor). Useful for getting out of traps. A decent option to use when being pressured, but only works on the ground. It also allows you to chain more attacks when dashing.
- M.A.P.S. (Heavy Version/HP+HK): Magical Avalanche Penguin Super-units. Summons an army of penguins to throw at your opponent. Toss penguins by hitting any punch. Penguins chip on block, and the distance depends on the strength of the punch button. Can be used on the ground and in the air
Movement
Walk: The forward walk speed is fairly average, but his backwards walk is a little slower.
Dash: Sasquatch takes a big leap at his opponent. Very easy to hit him out of a regular dash, but Sasquatch also has a shorthop. (Forward, Forward, Back). It shortens the total distance of the hop, but increases the speed greatly. A good portion of where his pressure game comes from.
Jump:
Strategies
You want to master Sasquatch's short hop (6,6,4). From the short hop Sasquatch can create a variety of fast, high priority overheads that also get him closer to the opponent! This leads to a multitude of mixups that all ends with painful combos.
Mixup :
MP : stop people from jumping away and air guard Sas' short hop attacks.
short hop MP/LP/LK link to ground combos : hits high
(empty short hop) cr.LK -> ground chain : hits low
(empty short hop) Big Brunch grab -> combo or just P throw : unblockable
Generally Sas is strong against practically anyone, and his game isn't too overly complicated either. In neutral situations space yourself out for your short hop attacks and sweep to hit at max range. Use MP and LP to defend yourself, or just stay back building meter with backdash HP and kara canceled breath.
Ice wave (22PP) is one of the tools to setup your pressure. Use it to catch Demitri spamming air fireballs, catching people off guard when they try to dash in, etc even anti air. Don't be too predictable though, this move is easily react to from a good distance. Don't spam it, decent players won't try to counterattack Sas after one Ice wave, you're just wasting meters.
Once you've knocked them into the corner, keep them there as long as possible. Air throw to keep them from chickenguard jumping out, if they tech it then either sweep, MP or prepare for a command grab. Also ending combos with cr.HP is a pretty good idea to end combos, it prevents rolling, after the reset a random sweep can catch desperate players offguard. MP is still your main sort of annoyance, cancel into sweep if you see your opponent block it high. Once you've maintained good pressure, keep hopping.
Also the Whale super thingie ... it's a big gimmick (you can really get killed for using it) but it's incredibly effective to throw out once in awhile when you're pressuring your opponent. When you've trained your opponent to stay defensive when you're at hop distance, throw out a MP xx this super and it'll break their guard. If you haven't used it a lot, you might just pull this off TWICE in a match.
Combos
For most combos you can replace the short hop with a jump in (j.LP j.LK, j.MP j.MK etc) or a Big Brunch grab.
short hop MP, land cr.LK MP cr.MK cr.HK : depending on how your opponent blocks you might use MK instead of cr.MK for extra range.
short hop MK, land MP cr.HK : longer distance hop combo (after a Big Brunch grab for exmaple)
short hop MK, land MP xx 623KK : costs 1 meter, more damage than the above
short hop cross up HK, land -> ground combo
The above combos are Sas' BnB. There are some other random stuff that Sas can do though :
236PP, wait a while, short hop combo : ES ice breath allows a follow up combo, but if you attack the frozen opponent too early you'll only get one hit follow up.
LP LP (or cr.LP cr.LP) xx 623KK
activate super armor Dark Force, long hop [LP LK MP MK HK ], land, ground combo : Sas' super armor DF allows him to chain air normals during his dashes.
Matchups
Frame Data
Normals
| Move | Startup | Hit
Advantage |
Block
Advantage |
Meter
Whiff/Block/Hit |
Guard | Cancel | Notes |
| n.LP | 5 | +8 | +7 | 0/3/6 | Mid | Yes/Rapid | Renda+: H: +11F G: +10F |
| n.MP | 6 | +5 | +4 | 3/9/15 | Mid | yes | |
| n.HP | 8 | +6 | -7 | 6/15/24 | Mid | no | |
| n.LK | 5 | +7 | +6 | 0/3/6 | Mid | yes | |
| n.MK | 7 | 0 | -1 | 3/9/15 | Mid | no | |
| n.HK | 8 | +11 | 0 | 6/15+9/24 | Mid | no | |
| LP | 5 | +5 | +4 | 0/3/6 | Mid | yes/rapid | Renda+: H:+8F G:+7F |
| MP | 6 | +5 | +4 | 3/9/15 | Mid | yes | |
| HP | 8 | +6 | -7 | 6/15/24 | Mid | no | |
| LK | 5 | +5 | +4 | 0/3/6 | Mid | yes | |
| MK | 7 | 0 | -1 | 3/9/15 | Mid | no | |
| HK | 8 | +11 | 0 | 6/15+9/24 | Mid | no |
| Move | Startup | Hit
Advantage |
Block
Advantage |
Meter
Whiff/Block/Hit |
Guard | Cancel | Notes |
| c.LP | 5 | +6 | +5 | 0/3/6 | Mid | yes | Renda+: H:+9F G:+8F |
| c.MP | 6 | +4 | +3 | 3/9/15 | Mid | yes | |
| c.HP | 7 | +3 | -6 | 6/15+9/24 | Mid | no | |
| c.LK | 5 | +5 | +4 | 0/3/6 | Low | no | |
| c.MK | 6 | +5 | +4 | 3/9/15 | Low | yes | |
| c.HK | 10 | Down | -6 | 6/15/24 | Low | no |
| Move | Startup | Meter
Whiff/Block/Hit |
Guard | Cancel | Notes |
| j.LP | 5 | 0/3/6 | High | no | |
| j.MP | 6 | 3/9/15 | High | no | |
| j.HP | 10 | 6/15/24 | High | no | |
| j.LK | 5 | 0/3/6 | High | no | |
| j.MK | 6 | 3/9/15 | High | no | |
| j.HK | 8 | 6/10+4/15+9 | High | no |
Specials
| Move | Startup | Hit
Advantage |
Block
Advantage |
Meter
Whiff/Block/Hit |
Guard | Notes |
| 236LP | 28 | +60 | +24 | 12/12/12 | Mid | |
| 236MP | 28 | +60 | +24 | 12/12/12 | Mid | |
| 236HP | 30 | +62 | +26 | 12/12/12 | Mid | |
| 236PP | 30 | +103 | +26 | 0/0/0 | Mid | |
| 623LP | 18~ | down | -19 | 18/22/26 | Mid | |
| 623MP | 37~ | down | -31 | 18/22/26 | Mid | |
| 623HP | 69~ | down | -47 | 18/22/26 | Mid | |
| 623PP | 22~ | down | -45 | 0/0/0 | Mid | |
| 623LK | 8 | -5 | -6 | 18/19+1/21+3 | Mid | |
| 623MK | 11 | +2 | -15 | 18/19+1+1/21+3+3 | Mid | |
| 623HK | 10 | -5 | -22 | 18/19+1x3/21+3x3 | Mid | |
| 623KK | 9 | down | -52 | 0/0/0 | Mid | |
| 22LP | 7 | +24 | -8 | 18/21/24 | Mid | |
| 22MP | 7 | +14 | -18 | 18/21/24 | Mid | |
| 22HP | 10 | +4 | -28 | 18/21/24 | Mid | |
| 22PP | 9 | down | -18 | 0/0/0 | Mid | |
| 624MP | 2 | variable | - | 12/22 | Throw | Causes Freeze |
| 624HP | 2 | variable | - | 12/22 | Throw | Opponent can mash out |
| 624PP | 2 | variable | - | 0/0 | Throw | |
| 360MK | 2 | down | - | 12/42 | Throw | |
| 360HK | 2 | down | - | 12/42 | Throw | |
| 360KK | 2 | down | - | 0/0 | Throw |
Supers
| Move | Gauge | Startup | Hit
Advantage |
Block
Advantage |
Guard | Notes |
| 426PP | 1 | 38 | Knockdown | -25 | Mid | |
| 426KK | 1 | 45 | Knockdown | - | Unblockable | |
| 426[Start] | 1 | 70 | Knockdown | - | Unblockable | |
| 720KK | 1 | 2 | Knockdown | - | Throw |
Notable Players
DD
TKO
Sasuni (さす兄)
Nasu (ナス)
Kuma (クマ)
Haitani
