|
|
| Line 49: |
Line 49: |
| ===Normal Moves=== | | ===Normal Moves=== |
| {{DFC-Move | | {{DFC-Move |
| |image=DFCI.Yukina.5A.jpg | | |image=DFCI.Yukina.5A.png |
| |caption= | | |caption= |
| |name=5A | | |name=5A |
| Line 67: |
Line 67: |
| }} | | }} |
| {{DFC-Move | | {{DFC-Move |
| |image=DFCI.Yukina.2A.jpg | | |image=DFCI.Yukina.2A.png |
| |caption= | | |caption= |
| |name=2A | | |name=2A |
| Line 87: |
Line 87: |
| }} | | }} |
| {{DFC-Move | | {{DFC-Move |
| |image=DFCI.Yukina.5B.jpg | | |image=DFCI.Yukina.5B.png |
| |caption= | | |caption= |
| |name=5B | | |name=5B |
| Line 105: |
Line 105: |
| }} | | }} |
| {{DFC-Move | | {{DFC-Move |
| |image=DFCI.Yukina.2B.jpg | | |image=DFCI.Yukina.2B.png |
| |caption= | | |caption= |
| |name=2B | | |name=2B |
| Line 123: |
Line 123: |
| }} | | }} |
| {{DFC-Move | | {{DFC-Move |
| |image=DFCI.Yukina.5C.jpg | | |image=DFCI.Yukina.5C.png |
| |caption= | | |caption= |
| |name=5C | | |name=5C |
| Line 142: |
Line 142: |
| }} | | }} |
| {{DFC-Move | | {{DFC-Move |
| |image=DFCI.Yukina.2C.jpg | | |image=DFCI.Yukina.2C.png |
| |caption= | | |caption= |
| |name=2C | | |name=2C |
| Line 160: |
Line 160: |
| }} | | }} |
| {{DFC-Move | | {{DFC-Move |
| |image=DFCI.Yukina.jA.jpg | | |image=DFCI.Yukina.jA.png |
| |caption= | | |caption= |
| |name=j.A | | |name=j.A |
| Line 179: |
Line 179: |
| }} | | }} |
| {{DFC-Move | | {{DFC-Move |
| |image=DFCI.Yukina.jB.jpg | | |image=DFCI.Yukina.jB.png |
| |caption= | | |caption= |
| |name=j.B | | |name=j.B |
| Line 199: |
Line 199: |
| }} | | }} |
| {{DFC-Move | | {{DFC-Move |
| |image=DFCI.Yukina.jC.jpg | | |image=DFCI.Yukina.jC.png |
| |caption= | | |caption= |
| |name=j.C | | |name=j.C |
Revision as of 11:02, 30 October 2022
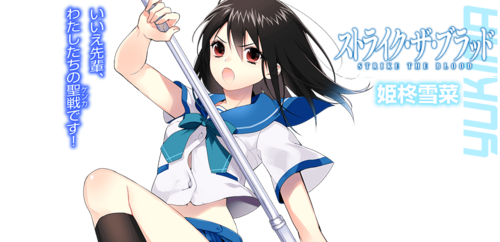
Yukina Himeragi (姫柊雪菜)
No, senpai, this is our battle! Introduction
Sword Shaman and classmate of Kojou sent to observe the Fourth Progenitor. She wields a lance called Sekkarou that can destroy even an elder vampire.
Originally from the light novel series Strike the Blood.
Gameplay
Yukina is a lance wielder with impressive range and control of mid-range combat. In exchange, the start-up of her moves trend toward the slower end. Her air normals, combined with three available jumps and a Climax Art Super that can be activated in mid-air, give her commendable command of the air. Yukina's most unique ability is her Potential, which eliminates the pushblock effects of Reflection Guard for 20 seconds when active. In this state, Yukina can comfortably play in close quarters and frustrate the opponent.
Yukina Gameplay Sample
Pros
- Excels at mid-range with her far-reaching ground normals, forcing most foes to take to the air to approach her, where she has parity or greater.
- Relatively reliable anti-air with 2C, checking how opponents approach past her lance
- Extremely powerful Potential ability that eliminates the opponent’s strongest defensive option
- Unique air-enabled Climax Art makes every stray air conversion a potentially devastating confirm
- Has access to three jumps
Cons
- Run speed and frame data are on the slower side
- Can struggle against zoners as well as fast rushdown characters
- Special moves are overall mediocre without the threat of resources (Meter, Blast, Assist call)
- Can appear underwhelming without Potential active
Recommended Assists
Celty - Celty is part neutral tool and part setplay staple. 5S is a giant hitbox in front of you that zooms across the screen with only 10 frame start-up. It's great for scrambles, mid-screen stand-offs, and quick punishes into hard knockdown. For Yukina, it also provides an extra threat behind her 236X > X string. 6S is a giant anti-air bike that hits twice to afford you two opportunities to run cross-ups or tick throws.
Dokuro - Dokuro-chan is both a powerful neutral tool and a damaging combo extender. 5S is DFCI's greatest anti-air, covering the entire vertical space two character lengths in front of you. This is perfect for catching jump-outs on your offense, and clipping jump-happy opponents on your defense. 6S is a full-screen projectile. Just in case.
Mashiro - Mashiro serves as both a potent neutral tool and potentially terrifying setplay. 5S unleashes a murder of baumkuchen that fiendishly roll forward, serving as a projectile to front your approach or as a combo extender. 6S sets out four cats that serve as both ample tick throw and high-low set-ups as well as checks against the opponent’s movement and pokes as you close in.
Potentials
Universal Potential: Increases damage dealt by 10% for 20 seconds when health falls under 30%. If behind in rounds won, increases damage dealt by 20% instead.
Character Potential: Use 2 EX Special Attacks to disable the opponent's use of Reflection Guard (while the pushback effect is negated, it is still possible for the opponent to use Reflection Guard to avoid air unblockable attacks) for 20 seconds. Can be activated once a round.
Move List
L = Low, H = High, A = Air
JC = Jump Cancel, SC = Support Cancel, EX = EX Cancel
ISC = Impact Skill Cancel, TCC = Trump Card Cancel, CAC = Climax Art Cancel
Startup includes the first active frame.
Normal Moves
| 5A
|
| Damage
|
Startup
|
Active
|
Recovery
|
Frame Adv
|
Cancels
|
Guard
|
Hitbox
|
| 300
|
7
|
2
|
15
|
-4
+8 (JC)
|
JC, SC, EX, ISC, TCC, CAC
|
HLA
|
-
|
- Standard forward poke with Yukina's halberd, not a low
- Can be jump cancelled
|
|
| 2A
|
| Damage
|
Startup
|
Active
|
Recovery
|
Frame Adv
|
Cancels
|
Guard
|
Hitbox
|
| 250
|
6
|
3
|
16
|
-6
|
SC, EX, ISC, TCC, CAC
|
LA
|
-
|
- Crouching halberd poke, hits low
- Can be self cancelled
- Chains into itself 3 times
- Primary combo starter
|
|
| 5B
|
| Damage
|
Startup
|
Active
|
Recovery
|
Frame Adv
|
Cancels
|
Guard
|
Hitbox
|
| 500
|
9
|
3
|
19
|
-7
+10 (JC)
|
JC, SC, EX, ISC, TCC, CAC
|
HL
|
-
|
- Yukina turns around while attacking her opponent with her halberd
- Can be jump cancelled
|
|
| 2B
|
| Damage
|
Startup
|
Active
|
Recovery
|
Frame Adv
|
Cancels
|
Guard
|
Hitbox
|
| 450
|
10
|
3
|
19
|
-7
+10(JC)
|
JC, SC, EX, ISC, TCC, CAC
|
HL
|
-
|
- Yukina spins her halberd while crouching, hits mid but is air unblockable.
- Can be jump cancelled.
|
|
| 5C
|
| Damage
|
Startup
|
Active
|
Recovery
|
Frame Adv
|
Cancels
|
Guard
|
Hitbox
|
| 700
|
11
|
4
|
21
|
-8
|
SC, EX, ISC, TCC, CAC
|
HLA
|
-
|
- Horizontal slash at the knees, not a low hit
- Can be special cancel-able
- Range is as long as Shana's 5C
|
|
| 2C
|
| Damage
|
Startup
|
Active
|
Recovery
|
Frame Adv
|
Cancels
|
Guard
|
Hitbox
|
| 700
|
11
|
4
|
21
|
-8
|
SC, EX, ISC, TCC, CAC
|
LA
|
-
|
- Sweep attack
- Smaller range than 5C
|
|
| j.A
|
| Damage
|
Startup
|
Active
|
Recovery
|
Frame Adv
|
Cancels
|
Guard
|
Hitbox
|
| 250
|
7
|
2
|
X+2
|
Varies
|
JC, SC, EX, CAC
|
HA
|
-
|
- Yukina does a downward diagonal strike with her halberd
- Best air-to-air option, given the speed
- Can be jump cancelled
|
|
| j.B
|
| Damage
|
Startup
|
Active
|
Recovery
|
Frame Adv
|
Cancels
|
Guard
|
Hitbox
|
| 450
|
9
|
3
|
X+3
|
Varies
|
JC, SC, EX, CAC
|
HA
|
-
|
- Aerial downward strike with her halberd
- Most useful for jump ins and reverse beat double overheads
- Only button with the possibility of hitting behind her
- Can be jump cancelled
|
|
| j.C
|
| Damage
|
Startup
|
Active
|
Recovery
|
Frame Adv
|
Cancels
|
Guard
|
Hitbox
|
| 650
|
11
|
4
|
X+4
|
Varies
|
JC, SC, EX, CAC
|
HA
|
-
|
- Yukina swings her halberd with a crescent slash in the air
- Longer range than her 5B
- Good for jump ins and can net more damage, naturally
- Despite the arc, the move does not hit behind her
- Can be jump cancelled
|
|
Special Moves
Wild Strike
「牙撃 -ワイルドストライク-」
236X
|
| Version
|
Damage
|
Startup
|
Active
|
Recovery
|
Frame Adv
|
Cancels
|
Guard
|
Hitbox
|
| A
|
700
|
13
|
4
|
27
|
-14
|
SC, EX, TCC, CAC
|
HLA
|
-
|
A stationary forward thrust- fairly fast startup and hits midscreen
|
| Version
|
Damage
|
Startup
|
Active
|
Recovery
|
Frame Adv
|
Cancels
|
Guard
|
Hitbox
|
| B
|
750
|
12
|
4
|
33
|
-20
|
SC, EX, TCC, CAC
|
HLA
|
-
|
Same as A version, but moves her forward a very short distance
|
| Version
|
Damage
|
Startup
|
Active
|
Recovery
|
Frame Adv
|
Cancels
|
Guard
|
Hitbox
|
| C
|
800
|
11
|
4
|
37
|
-24
|
SC, EX, TCC, CAC
|
HLA
|
-
|
Moves her a decent distance forward, technically has fastest startup out of the three, but also has the most recovery.
|
| Version
|
Damage
|
Startup
|
Active
|
Recovery
|
Frame Adv
|
Cancels
|
Guard
|
Hitbox
|
| EX
|
1400
|
11
|
4
|
62
|
Lance only: -33
With Follow-up: -14
|
SC, TCC, CAC
|
HLA
|
-
|
Adds 2A+B to the move as a follow-up and knocks the opponent away, wall bounces if done in the corner
- Possible setups in the corner, but generally not used
- Adds 10% to Burst meter on execution, regardless of hit/block/whiff
|
|
Hikiyoseru
(Pull In)
「引き寄せる」
A, B, or C after
Wild Strike
|
| Damage
|
Startup
|
Active
|
Recovery
|
Frame Adv
|
Cancels
|
Guard
|
Hitbox
|
A: 400
B: 480
C: 560
|
A: 5
B: 6
C: 7
|
4
|
A: 28
B: 29
C: 30
|
A: -9
B: -10
C: -11
|
SC, EX, TCC, CAC
|
HLA
|
-
|
Pulls the opponent in and knocks them down in front of you
|
|
Arrow Strike
「空撃 -アローストライク-」
214X
|
| Version
|
Damage
|
Startup
|
Active
|
Recovery
|
Frame Adv
|
Cancels
|
Guard
|
Hitbox
|
| A
|
700
|
21
|
11
|
26
|
-10 or worse
|
SC, EX, CAC
|
HLA
|
-
|
Yukina rises into the air and lunges forward with her spear. When Yukina reaches the apex of her hop, you can cancel that animation into the A, B, or C follow-ups immediately on hit or on whiff. You can also use the follow-ups after lunging forward from 214X.
|
| Version
|
Damage
|
Startup
|
Active
|
Recovery
|
Frame Adv
|
Cancels
|
Guard
|
Hitbox
|
| B
|
700
|
23
|
13
|
31
|
-15 or worse
|
SC, EX, CAC
|
HLA
|
-
|
Nearly identical to the A version, but Yukina rises to roughly the opponent's head's height before lunging.
|
| Version
|
Damage
|
Startup
|
Active
|
Recovery
|
Frame Adv
|
Cancels
|
Guard
|
Hitbox
|
| C
|
700
|
25
|
15
|
34
|
-15 or worse
|
SC, EX, CAC
|
HLA
|
-
|
Yukina rises to about her jump height before lunging forward with her spear. Technically only hits airborne opponents.
|
| Version
|
Damage
|
Startup
|
Active
|
Recovery
|
Frame Adv
|
Cancels
|
Guard
|
Hitbox
|
| EX
|
1457
|
12
|
9
|
49
|
-5
|
SC, CAC
|
HLA
|
-
|
The move starts similar to the B version, but Yukina will always follow up with Kahou Tosshin. The follow up creates a large ground shockwave surrounding Yukina.
- Adds 10% to Burst meter on execution, regardless of hit/block/whiff
|
|
Zenpou Tosshin (Forward Charge)
「前方突進」
A
After 214X
|
| Damage
|
Startup
|
Active
|
Recovery
|
Frame Adv
|
Cancels
|
Guard
|
Hitbox
|
| 900
|
14
|
8
|
X+26
|
-32 or worse
|
SC, EX, CAC
|
HLA
|
-
|
The A follow-up to her 214X series. You can easily traverse a whole screen using this after a 214. Highly unsafe on block, however.
|
|
Kahou Tosshin (Descending Rush)
「下方突進」
B or C
After 214X
|
| Damage
|
Startup
|
Active
|
Recovery
|
Frame Adv
|
Cancels
|
Guard
|
Hitbox
|
| 700
|
B: 26
[B]/[C]: 39
C: 29
|
B: 4
[B]: 5
C/[C]: 6
|
B/C: X+28
[B]/[C]: X+26
|
B: -5
[B]: +3
C: -7
[C]: +1
|
SC, EX, TCC, CAC
|
HLA
|
-
|
A downward pierce usable on hit or whiff on 214X. The B version is active roughly at head height, whereas the C version rises further up before Yukina strikes downward. Fully charging the move provides frame advantage on block.
|
|
Heavy Strike
「重撃 -ヘビーストライク-」
j.236X
|
| Version
|
Damage
|
Startup
|
Active
|
Recovery
|
Frame Adv
|
Cancels
|
Guard
|
Hitbox
|
| A
|
A: 700
[A]: 800
|
A: 17
[A]: 32
|
7
|
A: 31
[A]: 25
|
A: -10
[A]: +2 to -2
|
SC, EX, TCC, CAC
|
HLA
|
-
|
Functionally the same as Yukina's B or C follow-ups to her 214X series, except that you can do in from a free air state. You can charge the move to make it safer.
|
| Version
|
Damage
|
Startup
|
Active
|
Recovery
|
Frame Adv
|
Cancels
|
Guard
|
Hitbox
|
| B
|
B: 700
[B]: 800
|
B: 24
[A]: 39
|
8
|
B: 28
[B]: 22
|
B: -7
[B]: +2 to +1
|
SC, EX, TCC, CAC
|
HLA
|
-
|
Almost the same as the A version, but Yukina rises further up before attacking. Fully charging the move guarantees plus frames.
|
| Version
|
Damage
|
Startup
|
Active
|
Recovery
|
Frame Adv
|
Cancels
|
Guard
|
Hitbox
|
| C
|
C: 700
[C]: 800
|
C: 27
[C]: 42
|
6
|
C: 28
[C]: 22
|
C: -6
[C]: +3 to +1
|
SC, EX, TCC, CAC
|
HLA
|
-
|
Yukina rises to the top of the screen before charging downward.
|
| Version
|
Damage
|
Startup
|
Active
|
Recovery
|
Frame Adv
|
Cancels
|
Guard
|
Hitbox
|
| EX
|
1354
|
8
|
6
|
18
|
+6
|
SC, TCC, CAC
|
HLA
|
-
|
The quickest version of Heavy Strike. It hits twice, with the second hit causing a shockwave on the ground.
- Adds 10% to Burst meter on execution, regardless of hit/block/whiff
|
|
Universal Mechanics
Throw
6C or 4C
|
| Damage
|
Startup
|
Active
|
Recovery
|
Frame Adv
|
Cancels
|
Guard
|
Hitbox
|
| 1100
|
4
|
1
|
99
|
+33 (hit)
|
SC, EX, TCC, CAC
|
N/A
|
-
|
Knocks the opponent back. It's somewhat difficult to follow up as Yukina shoves them too far back.
- Both versions can be canceled into EX Wild Strike and EX Arrow Strike
- Both versions can be canceled into Strike the Blood and Sacred Howling
|
|
Impact Skill
Twin Strike
「双撃 -ツインストライク-」
5A+B
|
| Damage
|
Startup
|
Active
|
Recovery
|
Frame Adv
|
Cancels
|
Guard
|
Hitbox
|
| 1096
|
12
|
8
|
73
|
-33
|
SC, EX, TCC, CAC
(hit only)
|
HLA
|
-
|
Yukina slashes forward twice, then hops back in recoil.
|
|
Impact Skill
Young Thunder
「若雷」
2A+B
|
| Damage
|
Startup
|
Active
|
Recovery
|
Frame Adv
|
Cancels
|
Guard
|
Hitbox
|
| 1100
|
12
|
4
|
38
|
-27
|
SC, EX, TCC, CAC
|
HLA
|
-
|
A standing "reversal." Good reach 45 degrees above and before her, but somewhat easy to safe jump.
|
|
Impact Break
4A+B
|
| Damage
|
Startup
|
Active
|
Recovery
|
Frame Adv
|
Cancels
|
Guard
|
Hitbox
|
First hit: 900
Launcher: 800
|
First hit: 22
Launcher: 9
|
First hit: 8
Launcher: 2
|
First hit: 14
Launcher: 50
|
First hit: -2
Launcher: -37
|
First hit: N/A
Launcher: SC, EX, TCC, CAC
(hit only)
|
First hit: HA
Launcher: HLA
|
-
|
Standard universal overhead. Although it looks similar to Yukina's j.B, the horizontal range is slightly smaller.
|
|
Trump Card
Howl of the Wolf
「狼の咆哮」
5A+C
|
| Damage
|
Startup
|
Active
|
Recovery
|
Frame Adv
|
Cancels
|
Guard
|
Hitbox
|
| 3000
|
25
|
3
|
51
|
-27
|
N/A
|
H
|
-
|
Yukina slashes downward with her spear, sending the opponent flying. Both an overhead and air unblockable move, as with all trumps.
- Has a bit of a slow startup
- Best used as a combo ender after you've activated her character potential
- Vertical deadzone right above her, not the best anti-air in the world
- Around same range as 5C
|
|
Climax Arts
Strike the Blood
「神槍解放 -ストライク・ザ・ブラッド-」
41236B+C
Air O.K.
|
| Damage
|
Startup
|
Active
|
Recovery
|
Frame Adv
|
Cancels
|
Guard
|
Hitbox
|
| 3510
|
13
|
2
|
X+21
|
-41 or worse
|
N/A
|
HLA
|
-
|
Yukina jumps into the air and does a crescent slash- if it connects she does a brief incantation followed by a rising slash
- Not safe on block, use only as a combo ender
- Can be performed in the air
- If done point blank, she'll end up behind the opponent- midscreen she'll land directly right in front of them
|
|
Sacred Howling
「雪霞繚乱 -セイクリッド・ハウリング-」
63214B+C
|
| Damage
|
Startup
|
Active
|
Recovery
|
Frame Adv
|
Cancels
|
Guard
|
Hitbox
|
| 2960
|
7
|
23
|
20
|
-28
|
N/A
|
HLA
|
-
|
Yukina runs forward after a quick incantation, if she hits the opponent she follows up with a series of strikes that knocks the opponent airborne
- Not a command grab
- Adds 20% to Burst meter on execution, regardless of hit/block/whiff
|
|
Combos
Midscreen
5A/2A Starter
- Note: You can always trump after any of the 214/j.236EXs to either do extra damage and/or activate the trump+potential combo
- Note: These also work in the corner
- Note: (2A >) simply indicates that if you do start 2A, follow-up with 5A afterwards. It still works.
- (2A >) 5A > 5B > j.A > j.B > j.C > jc > j.A > j.B > j.C > 5A > 5B > 5C > 236C > C
- Standard BnB on standing opponents. Can go into EX and Climax Art after Wild Strike
- You have to delay the second j.A slightly to get this combo to work
- Can work with 2A starter
- (2A >) 5A > 5B > j.A > j.B > j.C > 5A > 5B > 5C > 236C > C
- Same premise, but without the second jump cancel
- (2A >) 5A > 5B > 5C > 5A+B > j.236EX > 5B > 2C > 5A+B > 214EX
- Uses two to four bars, depending on if you choose to Climax Art or not. Optimal damage +/- 100 damage
- (2A >) 5A > 5B > 5C > 236C > C > Combo Blast > 2C > 5A+B > 214EX
- Standard follow-up after combo blast, if need be
Throw Starter
- 6C > 214A+B
- Best used to activate potential or trump
- 6C > 214A+B > 41236B+C
- If you can kill, go for it, but the scaling is pretty bad
4A+B Starter
- 4AB > C > j.B > j.C > jc > j.B > j.C > jc > j.C > j.236A
- You can use EX j.236 for a hard knockdown after the j.236A if you have the meter
Corner
Same as midscreen
Assists
Dokuro-Chan
- 5A > 5B > 5C > 5AB > 236AB > 5S > jB > jC > j41236BC
- Does 4251 Damage and uses 4 meter.
- 4AB > B > jB > jC > j236AB > 5A > 236Ab > 5S > jB > jC > j41236BC
- Does 4301 Damage and uses 5 meter.
- 5A > 5B > 5C > 214AB > 5S > jB > jC > j236AB
- This combo does 2849 Damage and uses 2 meter.
- 5A > 5B > jA > jB > jC > 5A > 5B > 5C > 236C > C > Combo Blast > jB > jC > double jump > jB > jC > j236AB > 5S > jB > jC > double jump > jB > jC > j41236BC
- This combo does 4228 Damage, 1 Combo Blast and uses 4 meter.
Assist Character 2
- 5A > 5B > 5C > 6D > etc
- Notes about this particular combo
Colors
| Color 1
|
Color 2
|
Color 3
|
Color 4
|
|
|
|
|
|
| Color 5
|
Color 6
|
Color 7
|
Color 8
|
|
|
|
|
|
| Color 9
|
Color 10
|
Color 11
|
Color 12
|
|
|
|
|
|
| Color 13
|
Color 14
|
Color 15
|
Color 16
|
|
|
|
|
|
| Color 17
|
Color 18
|
Color 19
|
Color 20
|
|
|
|
|
|
| Color 21
|
Color 22
|
Color 23
|
Color 24
|
|
|
|
|
|
| General
|
|
| Characters
|
|
| Assists
|
|


