User:Pythmere/VSAV/Gallon: Difference between revisions
(→6MK) |
|||
| Line 340: | Line 340: | ||
| info = | | info = | ||
{{AttackDataCargo-VSAV/Query|GA_6MP_or_6HP}} | {{AttackDataCargo-VSAV/Query|GA_6MP_or_6HP}} | ||
If you're smart, you won't be using this as much as Gallon's Kick Throw, since the Kick Throw has a built-in option select with c.5HK. Still, the Punch Throw is handy in very specific instances; particularly, if you anticipate a Tech Hit and you haven't buffered the motion for Wild Circular, Punch Throw is excellent in this situation because Gallon recovers from the throw very quickly. Conversely, Gallon's Kick Throw recovers just barely before his opponent gets back on the ground, so it doesn't leave Gallon a lot of breathing room to do much else except another throw. You won't be using this often, but don't forget about it, either. | |||
This throw can also be used after Dark Force Activation to set up an unblockable. | |||
}} | }} | ||
| Line 352: | Line 355: | ||
| info = | | info = | ||
{{AttackDataCargo-VSAV/Query|GA_6MK_or_6HK}} | {{AttackDataCargo-VSAV/Query|GA_6MK_or_6HK}} | ||
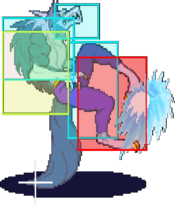
First rule: Always, always, always throw with HK. Using HK gives Gallon an Option Select; stay on the ground and get thrown, or jump and get reset immediately by c.5HK. Other than that, this throw is effective because of the horizontal space it covers, making it easy to put an opponent in the corner. | |||
K-Throw places the opponent backwards, causing turn around frames & negating the opponents ability to perform a REVERSAL. If the K-Throw is used to complete the first bat, Gallon will be backwards & cannot complete a REVERSAL. | |||
}} | }} | ||
| Line 364: | Line 370: | ||
| info = | | info = | ||
{{AttackDataCargo-VSAV/Query|GA_J_6P_or_J_4P}} | {{AttackDataCargo-VSAV/Query|GA_J_6P_or_J_4P}} | ||
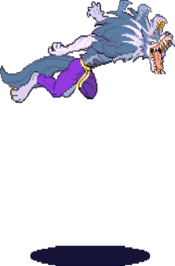
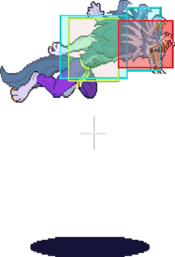
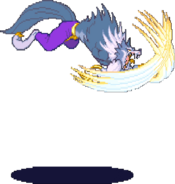
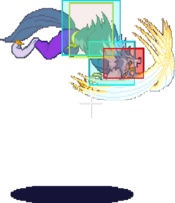
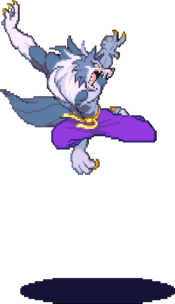
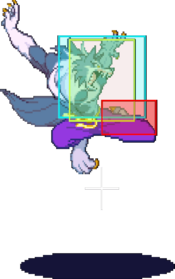
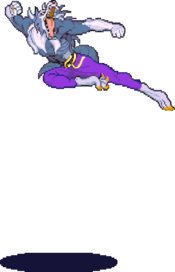
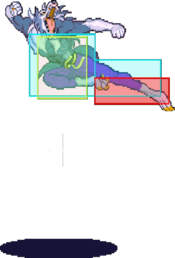
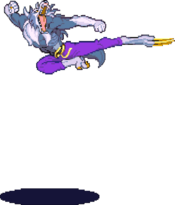
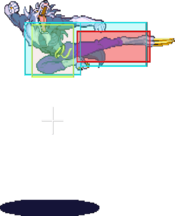
...Uhh...Well, it IS an air throw. I don't use it often, but it also causes Gallon to cover a lot of ground horizontally, so it CAN be useful... | |||
}} | }} | ||
=== Special Moves === | === Special Moves === | ||
Revision as of 03:57, 11 April 2023
Normal Moves
Standing Normals
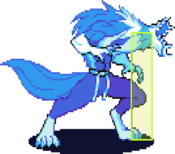
5LP
| Startup | Active | Recovery | Hit Adv. | Block Adv. | Renda Bonus |
|---|---|---|---|---|---|
| 4 | 3 | 7 | 6 | 5 | N/A |
| Guard | Cancel | Invuln | Red Damage | White Damage | Gauge |
| mid | yes | - | 8 | 4 | H: 6 G: 3 W: 0 |
5MP
| Startup | Active | Recovery | Hit Adv. | Block Adv. | Renda Bonus |
|---|---|---|---|---|---|
| 7 | 2 | 17 | 4 | 3 | N/A |
| Guard | Cancel | Invuln | Red Damage | White Damage | Gauge |
| mid | yes | - | 16 | 6 | H: 15 G: 9 W: 3 |
5HP
| Startup | Active | Recovery | Hit Adv. | Block Adv. | Renda Bonus |
|---|---|---|---|---|---|
| 9 | 3 | 19 | 6 | 4 | N/A |
| Guard | Cancel | Invuln | Red Damage | White Damage | Gauge |
| mid | no | - | 20 | 7 | H: 24 G: 15 W: 6 |
5LK
| Startup | Active | Recovery | Hit Adv. | Block Adv. | Renda Bonus |
|---|---|---|---|---|---|
| 5 | 3 | 8 | 5 | 4 | N/A |
| Guard | Cancel | Invuln | Red Damage | White Damage | Gauge |
| mid | yes | - | 8 | 4 | H: 6 G: 3 W: 0 |
5MK
| Startup | Active | Recovery | Hit Adv. | Block Adv. | Renda Bonus |
|---|---|---|---|---|---|
| 6 | 3 | 16 | 2 | 1 | N/A |
| Guard | Cancel | Invuln | Red Damage | White Damage | Gauge |
| mid | yes | - | 18 | 7 | H: 15 G: 9 W: 3 |
5HK
| Startup | Active | Recovery | Hit Adv. | Block Adv. | Renda Bonus |
|---|---|---|---|---|---|
| 9 | 3(3)3(4)3 | 22 | 0 | -1 | N/A |
| Guard | Cancel | Invuln | Red Damage | White Damage | Gauge |
| mid | no | - | 6+8+10 | 2+3+4 | H: 12+6+6 G: 9+3+3 W: 6 |
Close Normals
CK.5MP
CK.5HP
CK.5LK
CK.5HK
Crouching Normals
2LP
| Startup | Active | Recovery | Hit Adv. | Block Adv. | Renda Bonus |
|---|---|---|---|---|---|
| 5 | 3 | 8 | 5 | 4 | N/A |
| Guard | Cancel | Invuln | Red Damage | White Damage | Gauge |
| low | yes | - | 8 | 4 | H: 6 G: 3 W: 0 |
2MP
| Startup | Active | Recovery | Hit Adv. | Block Adv. | Renda Bonus |
|---|---|---|---|---|---|
| 8 | 3 | 20 | 1 | 0 | N/A |
| Guard | Cancel | Invuln | Red Damage | White Damage | Gauge |
| mid | no | - | 16 | 6 | H: 15 G: 9 W: 3 |
2HP
| Startup | Active | Recovery | Hit Adv. | Block Adv. | Renda Bonus |
|---|---|---|---|---|---|
| 9 | 5 | 28 | -8 | -9 | N/A |
| Guard | Cancel | Invuln | Red Damage | White Damage | Gauge |
| mid | no | - | 21 | 8 | H: 24 G: 15 W: 6 |
2LK
| Startup | Active | Recovery | Hit Adv. | Block Adv. | Renda Bonus |
|---|---|---|---|---|---|
| 5 | 3 | 8 | 5 | 4 | N/A |
| Guard | Cancel | Invuln | Red Damage | White Damage | Gauge |
| low | yes | - | 7 | 3 | H: 6 G: 3 W: 0 |
2MK
| Startup | Active | Recovery | Hit Adv. | Block Adv. | Renda Bonus |
|---|---|---|---|---|---|
| 7 | 3 | 18 | 3 | 2 | N/A |
| Guard | Cancel | Invuln | Red Damage | White Damage | Gauge |
| mid | yes | - | 16 | 7 | H: 15 G: 9 W: 3 |
2HK
| Startup | Active | Recovery | Hit Adv. | Block Adv. | Renda Bonus |
|---|---|---|---|---|---|
| 9 | 3 | 27 | - | -6 | N/A |
| Guard | Cancel | Invuln | Red Damage | White Damage | Gauge |
| low | no | - | 18 | 8 | H: 24 G: 15 W: 6 |
Air Normals
J.LP
| Startup | Active | Recovery | Hit Adv. | Block Adv. | Renda Bonus |
|---|---|---|---|---|---|
| 5 | 6 | 13 | - | - | N/A |
| Guard | Cancel | Invuln | Red Damage | White Damage | Gauge |
| overhead | yes | - | 8 | 4 | H: 6 G: 3 W: 0 |
As a jumping attack, this move doesn't have a lot of use. As with some of Gallon's other normals, it's not so much that it's a bad move as it is that Gallon just has even better options. It does have the fastest startup of Gallon's horizontal-reaching jump attacks, so it may be of use in like 1/100 matches?
As a dashing attack, this move sees a lot more use, thanks to the power of the the dash link [66LK, LP] against cornered opponents.J.MP
| Startup | Active | Recovery | Hit Adv. | Block Adv. | Renda Bonus |
|---|---|---|---|---|---|
| 6 | 6 | 7 | - | - | N/A |
| Guard | Cancel | Invuln | Red Damage | White Damage | Gauge |
| overhead | yes | - | 16 | 6 | H: 15 G: 9 W: 3 |
As a jumping attack, this move sees a bit of situational use in air-to-air defense, but its primary use is to lengthen your air chains for Chicken Guard mind games and setting up Guard Breaks.
As a dashing attack, this can be linked into dashing MK, but this is ultimately a rare occurrence; Gallon's dash attacks are pretty much exclusively used as overheads, and 66MP will whiff on crouching opponents. ...So, I guess what I'm trying to say is that the dashing version of this move has little-to-no practical use in a real match.J.HP
| Startup | Active | Recovery | Hit Adv. | Block Adv. | Renda Bonus |
|---|---|---|---|---|---|
| 7 | 5 | 8 | - | - | N/A |
| Guard | Cancel | Invuln | Red Damage | White Damage | Gauge |
| overhead | no | - | 21 | 8 | H: 24 G: 15 W: 6 |
As a jumping attack, this move is very powerful as a jump-in and will overwhelm many characters' anti-air defenses entirely when used in conjunction with crossup j.LK. If you anticipate a mistake from your opponent, it can be chained into j.HK before landing into a very big damage combo.
As a dashing attack, this attack is decent as a surprise finisher if you think it will end the match. Otherwise, it can be used as a meaty attack against opponents who like to roll back on wakeup. In that particular situation, it's pretty easy to follow it up with a chain combo or use it for a tick throw.J.LK
| Startup | Active | Recovery | Hit Adv. | Block Adv. | Renda Bonus |
|---|---|---|---|---|---|
| 5 | 6 | 4 | - | - | N/A |
| Guard | Cancel | Invuln | Red Damage | White Damage | Gauge |
| overhead | yes | - | 8 | 4 | H: 6 G: 3 W: 0 |
As a jumping attack, this is an extremely important jump-in. What it lacks in power compared to j.HP, it more than makes up for with its greater priority and superfluously easy crossup potential. It can be used as an ambiguous crossup after knocking down an opponent in the corner, and is generally the only reliable way to hit confirm into Moment Slice [Crossup j.LK, 2LP > 2MP xx Moment Slice]. Use this move liberally.
As a dashing attack, this move has a high amount of utility. It can be used in a short hop dash during Gallon's ground pressure game for some high/low mixup, and can also be used against cornered opponents to start a dash link [66LK, LP]. The dash link works on all but the shortest characters, but the flipside to this is that against those short characters, it's very easy for Gallon to do a crossup short hop attack.
Basically, this move rules. Do it.J.MK
| Startup | Active | Recovery | Hit Adv. | Block Adv. | Renda Bonus |
|---|---|---|---|---|---|
| 6 | 6 | 4 | - | - | N/A |
| Guard | Cancel | Invuln | Red Damage | White Damage | Gauge |
| overhead | yes | - | 16 | 7 | H: 15 G: 9 W: 3 |
As a jumping attack, this move is pretty important. Its reach and priority are very high, making it a good utility move in many situations. It also has crossup potential (albeit pretty low), and is part of Gallon's meter-building empty air chain (j.MK, j.HK). If Gallon connects with this move deep enough, it can also be comboed into a Beast Cannon.
As a dashing attack, this move is important for use as a short hop attack from ranges too far for the use of Dashing Short. It's also part of Gallon's other important Dash Link [66MK, LK], which works on taller characters in the corner AND midscreen. This makes the move a very important part of Gallon's ground pressure against tall characters.J.HK
| Startup | Active | Recovery | Hit Adv. | Block Adv. | Renda Bonus |
|---|---|---|---|---|---|
| 7 | 6 | 7 | - | - | N/A |
| Guard | Cancel | Invuln | Red Damage | White Damage | Gauge |
| overhead | no | - | 21 | 9 | H: 24 G: 15 W: 6 |
As a jumping attack, this move's primary use is for zoning in the air. It can be used as a jump-in in most matches, but it can and will whiff shorter characters, especially B.B Hood and Q-Bee. So, make sure to be conscientious when using this move against shorties.
As a dashing attack, it works pretty similarly to 66HP (gimmicky finisher, tick throw). It's not very good as a meaty for landing a chain combo afterwards, but it makes up for that with the gimmicky use of being able to hit people from far away for doing dumb stuff. See how long it takes a Q-Bee or Rapter player to wise up and stop doing IADs from full screen after pegging them with this move over and over again. Finally, this is a randomly good maneuver against Lilith, as Gallon can dash over a grounded Soul Flash from fullscreen and kick her in the face.Command Normals
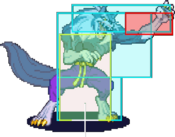
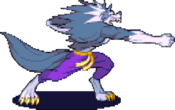
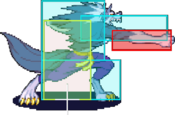
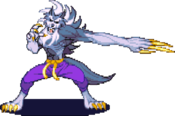
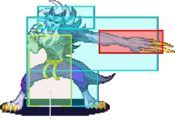
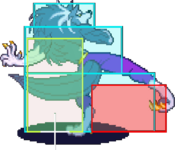
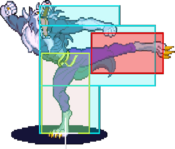
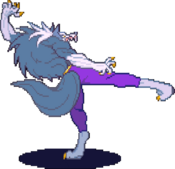
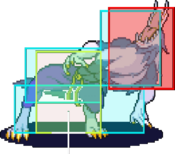
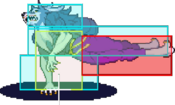
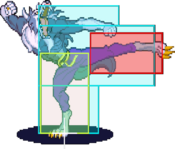
6MK
| Startup | Active | Recovery | Hit Adv. | Block Adv. | Renda Bonus |
|---|---|---|---|---|---|
| 10 | 3 | 16 | 2 | 1 | N/A |
| Guard | Cancel | Invuln | Red Damage | White Damage | Gauge |
| mid | no | - | 18 | 7 | H: 15 G: 9 W: 3 |
Normal Throws
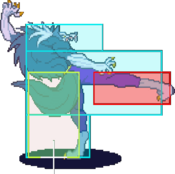
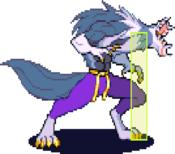
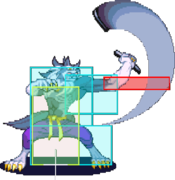
6MP or 6HP
| Startup | Active | Recovery | Hit Adv. | Block Adv. | Renda Bonus |
|---|---|---|---|---|---|
| 1 | - | 48 | - | - | N/A |
| Guard | Cancel | Invuln | Red Damage | White Damage | Gauge |
| throw | no | 1-47 whole body | 22 (11) | 8 (4) | H: 9 G: 0 W: 0 |
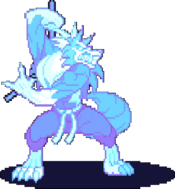
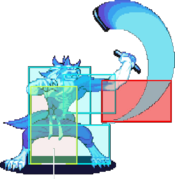
If you're smart, you won't be using this as much as Gallon's Kick Throw, since the Kick Throw has a built-in option select with c.5HK. Still, the Punch Throw is handy in very specific instances; particularly, if you anticipate a Tech Hit and you haven't buffered the motion for Wild Circular, Punch Throw is excellent in this situation because Gallon recovers from the throw very quickly. Conversely, Gallon's Kick Throw recovers just barely before his opponent gets back on the ground, so it doesn't leave Gallon a lot of breathing room to do much else except another throw. You won't be using this often, but don't forget about it, either.
This throw can also be used after Dark Force Activation to set up an unblockable.6MK or 6HK
| Startup | Active | Recovery | Hit Adv. | Block Adv. | Renda Bonus |
|---|---|---|---|---|---|
| 1 | - | 106 + landing 1 | - | - | N/A |
| Guard | Cancel | Invuln | Red Damage | White Damage | Gauge |
| throw | no | 1-105 whole body | 22 (11) | 8 (4) | H: 9 G: 0 W: 0 |
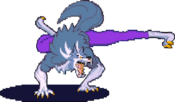
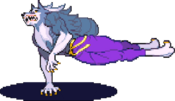
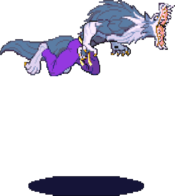
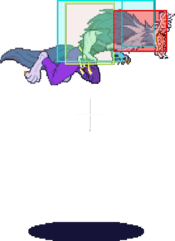
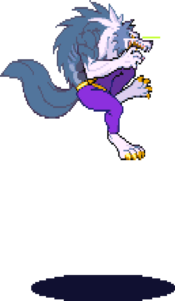
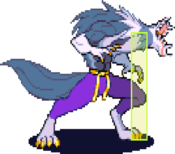
First rule: Always, always, always throw with HK. Using HK gives Gallon an Option Select; stay on the ground and get thrown, or jump and get reset immediately by c.5HK. Other than that, this throw is effective because of the horizontal space it covers, making it easy to put an opponent in the corner.
K-Throw places the opponent backwards, causing turn around frames & negating the opponents ability to perform a REVERSAL. If the K-Throw is used to complete the first bat, Gallon will be backwards & cannot complete a REVERSAL.J.6P or J.4P
| Startup | Active | Recovery | Hit Adv. | Block Adv. | Renda Bonus |
|---|---|---|---|---|---|
| 1 | - | 79 + 1 + turn 1 | - | - | N/A |
| Guard | Cancel | Invuln | Red Damage | White Damage | Gauge |
| throw | no | 1-79 whole body | 23 (11) | 8 (4) | H: 9 G: 0 W: 0 |
Special Moves
Quick Move
2KKK
| Startup | Active | Recovery | Hit Adv. | Block Adv. | Renda Bonus |
|---|---|---|---|---|---|
| - | - | 20 | - | - | N/A |
| Guard | Cancel | Invuln | Red Damage | White Damage | Gauge |
| - | - | 7-12 throw/feet | - | - | H: - G: - W: - |
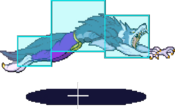
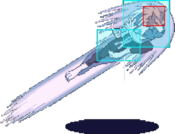
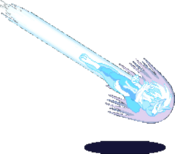
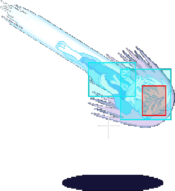
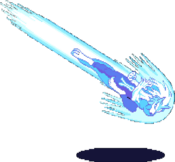
Beast Cannon
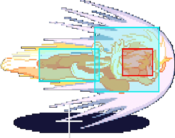
236P
| Startup | Active | Recovery | Hit Adv. | Block Adv. | Renda Bonus |
|---|---|---|---|---|---|
| 14 | 30 | 1 + landing 12 | - | - | N/A |
| Guard | Cancel | Invuln | Red Damage | White Damage | Gauge |
| mid | no | - | 19 | 8 | H: 21 G: 16 W: 12 |
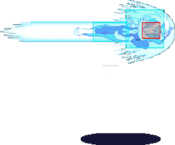
236PP
| Startup | Active | Recovery | Hit Adv. | Block Adv. | Renda Bonus |
|---|---|---|---|---|---|
| 14 | 30 | 1 + landing 12 | - | - | N/A |
| Guard | Cancel | Invuln | Red Damage | White Damage | Gauge |
| mid | no | - | 18 | 8 | H: 0 G: 0 W: 0 |
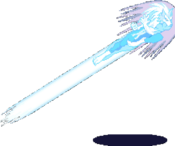
Diagonal Beast Cannon
623P
| Startup | Active | Recovery | Hit Adv. | Block Adv. | Renda Bonus |
|---|---|---|---|---|---|
| 14 | 30 | 20 + landing 12 | - | - | N/A |
| Guard | Cancel | Invuln | Red Damage | White Damage | Gauge |
| mid | no | - | 19 | 8 | H: 21 G: 16 W: 12 |
623PP
| Startup | Active | Recovery | Hit Adv. | Block Adv. | Renda Bonus |
|---|---|---|---|---|---|
| 14 | 30 | 20 + landing 12 | - | - | N/A |
| Guard | Cancel | Invuln | Red Damage | White Damage | Gauge |
| mid | no | - | 18 | 8 | H: 0 G: 0 W: 0 |
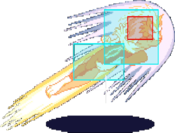
Air Beast Cannon
J.236P
| Startup | Active | Recovery | Hit Adv. | Block Adv. | Renda Bonus |
|---|---|---|---|---|---|
| 14 | until landing | landing 12 | - | - | N/A |
| Guard | Cancel | Invuln | Red Damage | White Damage | Gauge |
| mid | no | - | 19 | 8 | H: 21 G: 16 W: 12 |
J.236PP
| Startup | Active | Recovery | Hit Adv. | Block Adv. | Renda Bonus |
|---|---|---|---|---|---|
| 14 | until landing | landing 12 | - | - | N/A |
| Guard | Cancel | Invuln | Red Damage | White Damage | Gauge |
| mid | no | - | 18 | 8 | H: 0 G: 0 W: 0 |
Beast Cannon GC
623P
| Startup | Active | Recovery | Hit Adv. | Block Adv. | Renda Bonus |
|---|---|---|---|---|---|
| 14 | 30 | 20 + landing 12 | - | - | N/A |
| Guard | Cancel | Invuln | Red Damage | White Damage | Gauge |
| mid | no | 1-15 whole body | 9 | 4 | H: 21 G: 16 W: 12 |
623PP
| Startup | Active | Recovery | Hit Adv. | Block Adv. | Renda Bonus |
|---|---|---|---|---|---|
| 14 | 30 | 20 + landing 12 | - | - | N/A |
| Guard | Cancel | Invuln | Red Damage | White Damage | Gauge |
| mid | no | 1-15 whole body | 9 | 4 | H: 0 G: 0 W: 0 |
Climb Razor
2[8]LK
| Startup | Active | Recovery | Hit Adv. | Block Adv. | Renda Bonus |
|---|---|---|---|---|---|
| 5 | 6 | 24 + landing 12 | - | -18 | N/A |
| Guard | Cancel | Invuln | Red Damage | White Damage | Gauge |
| mid | no | 5-6 feet | 22,15 | 6,4 | H: 31 G: 26 W: 22 |
2[8]MK
| Startup | Active | Recovery | Hit Adv. | Block Adv. | Renda Bonus |
|---|---|---|---|---|---|
| 5 | 8 | 27 + landing 12 | - | -23 | N/A |
| Guard | Cancel | Invuln | Red Damage | White Damage | Gauge |
| mid | no | 5-6 feet | 24,16 | 7,4 | H: 31 G: 26 W: 22 |
2[8]HK
| Startup | Active | Recovery | Hit Adv. | Block Adv. | Renda Bonus |
|---|---|---|---|---|---|
| 5 | 10 | 29 + landing 12 | - | -27 | N/A |
| Guard | Cancel | Invuln | Red Damage | White Damage | Gauge |
| mid | no | 5-6 feet | 26,17 | 8,4 | H: 31 G: 26 W: 22 |
2[8]KK
| Startup | Active | Recovery | Hit Adv. | Block Adv. | Renda Bonus |
|---|---|---|---|---|---|
| 5 | 2,6,3 | 28 + landing 12 | - | -25 | N/A |
| Guard | Cancel | Invuln | Red Damage | White Damage | Gauge |
| mid | no | 5-6 feet | 21+11+11 | 5+3+3 | H: 0 G: 0 W: 0 |
Million Flicker
214LP
| Startup | Active | Recovery | Hit Adv. | Block Adv. | Renda Bonus |
|---|---|---|---|---|---|
| 11 | 3(12)3 | 18 | -3 | -4 | N/A |
| Guard | Cancel | Invuln | Red Damage | White Damage | Gauge |
| mid | no | - | 9xn | 4xn | H: 12+4xn G: 12+2xn W: 12 |
214MP
| Startup | Active | Recovery | Hit Adv. | Block Adv. | Renda Bonus |
|---|---|---|---|---|---|
| 11 | 3(12)3 | 18 | -3 | -4 | N/A |
| Guard | Cancel | Invuln | Red Damage | White Damage | Gauge |
| mid | no | - | 9xn | 4xn | H: 12+4xn G: 12+2xn W: 12 |
214HP
| Startup | Active | Recovery | Hit Adv. | Block Adv. | Renda Bonus |
|---|---|---|---|---|---|
| 11 | 3(12)3 | 18 | -3 | -4 | N/A |
| Guard | Cancel | Invuln | Red Damage | White Damage | Gauge |
| mid | no | - | 9xn | 4xn | H: 12+4xn G: 12+2xn W: 12 |
214PP
| Startup | Active | Recovery | Hit Adv. | Block Adv. | Renda Bonus |
|---|---|---|---|---|---|
| 11 | 3(11)3(10){3(4)}x7,3 | 23 | -44 | -45 | N/A |
| Guard | Cancel | Invuln | Red Damage | White Damage | Gauge |
| mid | no | - | 7x10 | 3x10 | H: 0 G: 0 W: 0 |
Wild Circular
632[4]K
| Startup | Active | Recovery | Hit Adv. | Block Adv. | Renda Bonus |
|---|---|---|---|---|---|
| 2 | 7 | 31 | - | - | N/A |
| Guard | Cancel | Invuln | Red Damage | White Damage | Gauge |
| throw | no | 1-9 whole body | 27 | 8 | H: 12 G: 0 W: 12 |
632[4]KK
| Startup | Active | Recovery | Hit Adv. | Block Adv. | Renda Bonus |
|---|---|---|---|---|---|
| 2 | 7 | 31 | - | - | N/A |
| Guard | Cancel | Invuln | Red Damage | White Damage | Gauge |
| throw | no | 1-9 whole body | 10+21 | 4+5 | H: 0 G: 0 W: 0 |
Pursuits
8P or 8K
| Startup | Active | Recovery | Hit Adv. | Block Adv. | Renda Bonus |
|---|---|---|---|---|---|
| 28 | 9 | landing 1 | - | - | N/A |
| Guard | Cancel | Invuln | Red Damage | White Damage | Gauge |
| mid | no | - | 5 | 5 | H: 24 G: 0 W: 6 |
8PP or 8KK
| Startup | Active | Recovery | Hit Adv. | Block Adv. | Renda Bonus |
|---|---|---|---|---|---|
| 28 | 9 | landing 1 | - | - | N/A |
| Guard | Cancel | Invuln | Red Damage | White Damage | Gauge |
| mid | no | - | 6+6 | 6+6 | H: 0 G: 0 W: 0 |
Ex Moves
412[6]KK
| Startup | Active | Recovery | Hit Adv. | Block Adv. | Renda Bonus |
|---|---|---|---|---|---|
| 16 | off screen | 97-121 | - | -19 | N/A |
| Guard | Cancel | Invuln | Red Damage | White Damage | Gauge |
| mid | no | - | 13x3 | 5x3 | H: 0 G: 0 W: 0 |

