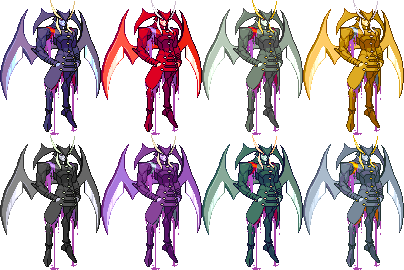
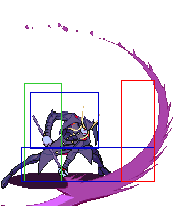
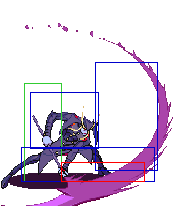
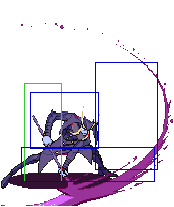
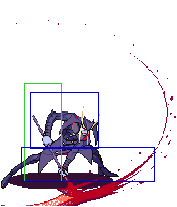
Vampire Savior/Jedah: Difference between revisions
No edit summary |
|||
| Line 1,302: | Line 1,302: | ||
== Matchups == | == Matchups == | ||
[[Image:portrait-zabel.gif|frame|left|Zabel]] | |||
'''[[Vampire Savior/Zabel|Zabel]]:''' 2-8. In this matchup you will notice your normals get out prioritized every time. Also that Zabel is fast and vicious. His combos are also very high damaging, and you have a risk of getting unblockable'd every time after one. Your Dark Force isn't as great here because he can Death Voltage your airdashes and it comes out fast enough to counter just about all of your normals. You won't find yourself dashing or airdashing as often as in other matchups because of his Death Voltage as well. He can do it in the air, off a dash, an airdash, and of course standing, so he can pretty much react and do it. IADing back or forward with j.MP takes a lot away from Jedah. | '''[[Vampire Savior/Zabel|Zabel]]:''' 2-8. In this matchup you will notice your normals get out prioritized every time. Also that Zabel is fast and vicious. His combos are also very high damaging, and you have a risk of getting unblockable'd every time after one. Your Dark Force isn't as great here because he can Death Voltage your airdashes and it comes out fast enough to counter just about all of your normals. You won't find yourself dashing or airdashing as often as in other matchups because of his Death Voltage as well. He can do it in the air, off a dash, an airdash, and of course standing, so he can pretty much react and do it. IADing back or forward with j.MP takes a lot away from Jedah. | ||
| Line 1,315: | Line 1,316: | ||
http://www.youtube.com/watch?v=jz4z1twnB40 | http://www.youtube.com/watch?v=jz4z1twnB40 | ||
[[Image:portrait-sasquatch.gif|frame|left|Sasquatch]] | |||
'''[[Vampire Savior/Sasquatch|Sasquatch]]:''' 3-7. You can't do a whole lot in this matchup either. But that's Jedah, so | '''[[Vampire Savior/Sasquatch|Sasquatch]]:''' 3-7. You can't do a whole lot in this matchup either. But that's Jedah, so | ||
you'll be seeing this a lot. A big problem here is Sasquatch's j.LK and j.MK. They outprioritize anything you have in the air, or on the ground unless you hit them with 2.MK from a distance. The only reason why this isn't a 2-8 matchup is because Jedah has a few tools that can hit Sasquatch to start some momentum. | you'll be seeing this a lot. A big problem here is Sasquatch's j.LK and j.MK. They outprioritize anything you have in the air, or on the ground unless you hit them with 2.MK from a distance. The only reason why this isn't a 2-8 matchup is because Jedah has a few tools that can hit Sasquatch to start some momentum. | ||
| Line 1,339: | Line 1,341: | ||
You should also remember to air-chain j.LP, j.MP, j.MK and j.HP to meet Sasquatch in the air, then land and 5.LP to start an offense. | You should also remember to air-chain j.LP, j.MP, j.MK and j.HP to meet Sasquatch in the air, then land and 5.LP to start an offense. | ||
[[Image:portrait-qb.gif|frame|left|Q-Bee]] | |||
'''[[Vampire Savior/Q-Bee|Q-Bee]]:''' 3-7~4-6. Tere are only a few Jedahs and a few Q-bees that can alter the outcome | '''[[Vampire Savior/Q-Bee|Q-Bee]]:''' 3-7~4-6. Tere are only a few Jedahs and a few Q-bees that can alter the outcome | ||
of this match. Whether the match is 3-7 or 4-6 really depends on the player, even in Japan. As far as the matchup goes, it's still leaned towards Q-bee's favor. The bad news is, she hits faster and stronger than you. The good news is, you can still hit her hard. | of this match. Whether the match is 3-7 or 4-6 really depends on the player, even in Japan. As far as the matchup goes, it's still leaned towards Q-bee's favor. The bad news is, she hits faster and stronger than you. The good news is, you can still hit her hard. | ||
| Line 1,354: | Line 1,357: | ||
usually she won't have an answer to it. | usually she won't have an answer to it. | ||
[[Image:portrait-bulleta.gif|frame|left|Bulleta]] | |||
'''[[Vampire Savior/Bulleta|Bulleta]]:''' 3-7. Like in any bad matchup, a lot of things stop you here. | '''[[Vampire Savior/Bulleta|Bulleta]]:''' 3-7. Like in any bad matchup, a lot of things stop you here. | ||
| Line 1,382: | Line 1,386: | ||
While there is more to the matchup than this, if Jedah is standing he is forced to block Bulleta's Cool Hunting EX Move and cannot crouch. If you happen to be already crouching when it comes out, you can punish with Jedah's Finale Rosso (Pit) EX Move. However, since the input for that attack is 22.PP, you'll invariably have to return to 5 (neutral, standing) to execute it, getting you hit by her attack. To properly punish, you must whiff a crouching normal such as 2.MP, buffer the 22 input during it, and press KK when you recovery, letting you grab Bulleta and punish the Cool Hunting. | While there is more to the matchup than this, if Jedah is standing he is forced to block Bulleta's Cool Hunting EX Move and cannot crouch. If you happen to be already crouching when it comes out, you can punish with Jedah's Finale Rosso (Pit) EX Move. However, since the input for that attack is 22.PP, you'll invariably have to return to 5 (neutral, standing) to execute it, getting you hit by her attack. To properly punish, you must whiff a crouching normal such as 2.MP, buffer the 22 input during it, and press KK when you recovery, letting you grab Bulleta and punish the Cool Hunting. | ||
[[Image:portrait-gallon.gif|frame|left|Gallon]] | |||
'''[[Vampire Savior/Gallon|Gallon]]:''' 3.5-6.5. This matchup is bad, but you can turn things around quick if given the | '''[[Vampire Savior/Gallon|Gallon]]:''' 3.5-6.5. This matchup is bad, but you can turn things around quick if given the | ||
opportunity. Otherwise, you're really going to have to work hard on this one. | opportunity. Otherwise, you're really going to have to work hard on this one. | ||
| Line 1,402: | Line 1,407: | ||
damage. Get good positioning and don't let him sit comfortably. | damage. Get good positioning and don't let him sit comfortably. | ||
[[Image:portrait-bishamon.gif|frame|left|Bishamon]] | |||
'''[[Vampire Savior/Bishamon|Bishamon]]:''' 5-5. Both characters in this matchup can rush vigorously. I think this is more of a momentum 5-5 type matchup, as opposed to a stalemate 5-5 matchup. You have to be careful about a few things here. | '''[[Vampire Savior/Bishamon|Bishamon]]:''' 5-5. Both characters in this matchup can rush vigorously. I think this is more of a momentum 5-5 type matchup, as opposed to a stalemate 5-5 matchup. You have to be careful about a few things here. | ||
| Line 1,418: | Line 1,424: | ||
The main part of this matchup is to mix up your dashing and get in, while keeping him outside where he doesn't have as much threats as an option. | The main part of this matchup is to mix up your dashing and get in, while keeping him outside where he doesn't have as much threats as an option. | ||
[[Image:portrait-aulbath.gif|frame|left|Aulbath]] | |||
'''[[Vampire Savior/Aulbath|Aulbath]]:''' 5-5. This is more of a stalemate 5-5 matchup. Jedah covers the air, Aulbath covers the ground. | '''[[Vampire Savior/Aulbath|Aulbath]]:''' 5-5. This is more of a stalemate 5-5 matchup. Jedah covers the air, Aulbath covers the ground. | ||
| Line 1,433: | Line 1,440: | ||
This matchup can go so many ways, it's up to you however you wanna play it. | This matchup can go so many ways, it's up to you however you wanna play it. | ||
[[Image:portrait-demitri.gif|frame|left|Demitri]] | |||
'''[[Vampire Savior/Demitri|Demitri]]:''' 4-6~3-7. I asked Oouchi for his opinion on this matchup. He tells me that his Jedah is 4-6 in this matchup, but for other Jedahs it will be 3-7. He also told me other matchups like that too, but I mainly agreed with his initial opinion. Air fireball controls a lot of your movement. Even at some points, you can't walk forward safely. Demon Craddle | '''[[Vampire Savior/Demitri|Demitri]]:''' 4-6~3-7. I asked Oouchi for his opinion on this matchup. He tells me that his Jedah is 4-6 in this matchup, but for other Jedahs it will be 3-7. He also told me other matchups like that too, but I mainly agreed with his initial opinion. Air fireball controls a lot of your movement. Even at some points, you can't walk forward safely. Demon Craddle | ||
also control a lot of what you do on mixup and affects what you can and cannot do. | also control a lot of what you do on mixup and affects what you can and cannot do. | ||
| Line 1,441: | Line 1,449: | ||
As for air fireballs, Oouchi told me to avoid one, then jump and LP spin scythe to match his fireball. You can also chicken guard a fireball but that isn't recommended often. You want to start out baiting his GC's and letting him know he can't do it often, and then start to attack with your normal game. It's not the easiest match, and you will be in for a long game. Play safe, smart, and block a lot. | As for air fireballs, Oouchi told me to avoid one, then jump and LP spin scythe to match his fireball. You can also chicken guard a fireball but that isn't recommended often. You want to start out baiting his GC's and letting him know he can't do it often, and then start to attack with your normal game. It's not the easiest match, and you will be in for a long game. Play safe, smart, and block a lot. | ||
[[Image:Leilei-portrait.gif|frame|left|Lei-Leil]] | |||
'''[[Vampire Savior/Lei-Lei|Lei-Lei]]:''' 5-5. Lei Lei has a lot of options from a distance. Very good zoning and can kill you once you're in the corner. | '''[[Vampire Savior/Lei-Lei|Lei-Lei]]:''' 5-5. Lei Lei has a lot of options from a distance. Very good zoning and can kill you once you're in the corner. | ||
| Line 1,458: | Line 1,467: | ||
There isn't too much limiting you in this matchup, so do your usual mixup thing and kill her, while maintaining what you know to avoid along with your gameplan. | There isn't too much limiting you in this matchup, so do your usual mixup thing and kill her, while maintaining what you know to avoid along with your gameplan. | ||
[[Image:portrait-felicia.gif|frame|left|Felicial]] | |||
'''[[Vampire Savior/Felicia|Felicia]]:''' 4-6. In this matchup, Jedah has to really work for his damage. You want to make it so that it's hard for both of you to hit each other, rather than just being hard for you to hit her. | '''[[Vampire Savior/Felicia|Felicia]]:''' 4-6. In this matchup, Jedah has to really work for his damage. You want to make it so that it's hard for both of you to hit each other, rather than just being hard for you to hit her. | ||
| Line 1,482: | Line 1,492: | ||
You're disadvantaged, but this matchup is surely winnable if you make the least amount of mistakes as possible. | You're disadvantaged, but this matchup is surely winnable if you make the least amount of mistakes as possible. | ||
[[Image:portrait-lilith.gif|frame|left|Lilith]] | |||
'''[[Vampire Savior/Lilith|Lilith]]:''' 4-6. This matchup is a little even, but leaned towards Lilith's side. | '''[[Vampire Savior/Lilith|Lilith]]:''' 4-6. This matchup is a little even, but leaned towards Lilith's side. | ||
| Line 1,503: | Line 1,514: | ||
The matchup will take a while to win. | The matchup will take a while to win. | ||
[[Image:portrait-victor.gif|frame|left|Victor]] | |||
'''[[Vampire Savior/Victor|Victor]]:''' 5-5. Against Victor, you want to avoid the corner at all costs. You need to be able control your space. because in the corner, a good Victor player is vicious. | '''[[Vampire Savior/Victor|Victor]]:''' 5-5. Against Victor, you want to avoid the corner at all costs. You need to be able control your space. because in the corner, a good Victor player is vicious. | ||
| Line 1,522: | Line 1,534: | ||
In general, you want to keep him out while maintaining your space and distance from the corner. If you need to, throw him back into your corner after a spin scythe mixup or dash mixup. | In general, you want to keep him out while maintaining your space and distance from the corner. If you need to, throw him back into your corner after a spin scythe mixup or dash mixup. | ||
[[Image:portrait-morrigan.gif|frame|left|Morrigan]] | |||
'''[[Vampire Savior/Morrigan|Morrigan]]:''': 5-5. Here, Morrigan is at an advantage when up close, and Jedah has the upperhand at about a character distance away. From full screen, the match is neutral. | '''[[Vampire Savior/Morrigan|Morrigan]]:''': 5-5. Here, Morrigan is at an advantage when up close, and Jedah has the upperhand at about a character distance away. From full screen, the match is neutral. | ||
| Line 1,549: | Line 1,562: | ||
Play safely, stay in your 'sweet spot' distance, and get your hits and momentum from there. | Play safely, stay in your 'sweet spot' distance, and get your hits and momentum from there. | ||
[[Image:portrait-anakaris.gif|frame|left|Anakaris]] | |||
'''[[Vampire Savior/Anakaris|Anakaris]]:''' 8-2. This matchup is so free in so many ways I don't know where to start. | '''[[Vampire Savior/Anakaris|Anakaris]]:''' 8-2. This matchup is so free in so many ways I don't know where to start. | ||
Revision as of 15:41, 30 September 2018
Introduction
Jedah is widely considered to be one of the more handicapped characters in the cast. His main game plan is to mix up and take chunks of damage very fast when given the opportunity. Otherwise, he's a very hit-and-run character at a neutral state.
His most damaging setups come from inside, or when the advantage is given from time by the spin scythes, Dark Force lockdowns, and other certain situations. He isn't exactly the zoning type, since the spin scythes come out fairly slow when executed alone, and running away is not smart with Jedah because the corner is not pretty with Jedah in it, however, Jedah does have to use defensive options to gain momentum at times. When this opportunity arises, you will see any good Jedah player take it to land some good tricks and mixups, as opposed to going away to gain some distance.
The reason I say Jedah shouldn't be running away is because of his poor defense. His anti air has a blind spot where it does not hit (near over his head), his GC (guard cancel) will whiff some faster jumpins and is never a good idea to anti air with, and to top it off you're a very tall target which can be hit multiple times, and very early. Your defensive mechanisms come down to doing AG's (if you want to play Jedah effectively, you'll need a minimum of 4 hit AG's to survive, and 5 hit ones to do average., chicken guarding with either MK, HK, or airdash, and situationally, meeting your opponent for air to airs or anti airing with airdash (which can be blocked, but it gets you free).
As for as offense, it's not the greatest in the game: you have to be very catious about which moves you decide to use. In this game, choosing the wrong decision and losing momentum could cost you the match. When you watch good Jedahs, you see a balance of offense, defense, and zoning. The ideal Jedah gameplay comes down to controling your ground, then exploding with offense and tricks when given the opportunity. This means he is very well playable when the opponent knows all your tricks and setups, because he has the options to mix them up different ways so that you can always have a way to come out on top of a situation.
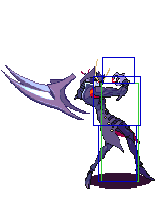
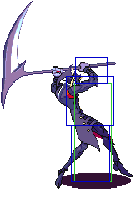
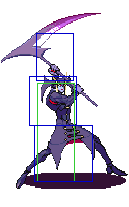
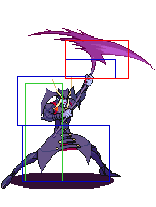
Movement
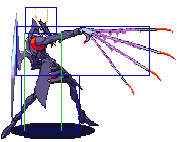
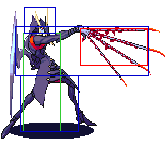
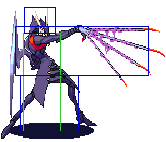
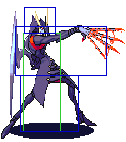
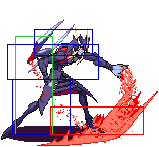
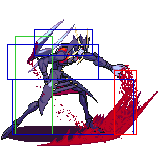
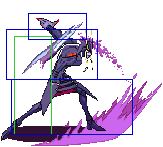
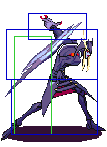
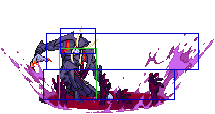
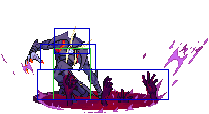
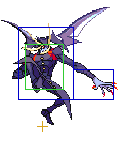
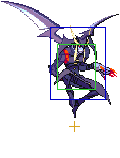
| Stand | Stand (Hitstun) |
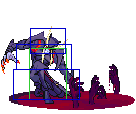
Crouch | Jump (Start Up) |
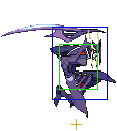
Jump Back (Peak) |
Jump Up (Peak) |
Jump Forward (Peak) |
Ground Dash (Start Up) |
Ground Dash (Peak) |
|---|---|---|---|---|---|---|---|---|

|
|
|
|

|

|

|
|

|
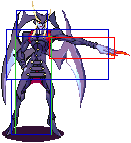
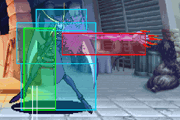
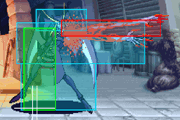
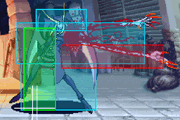
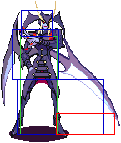
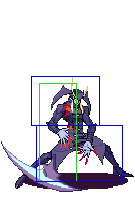
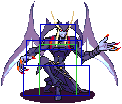
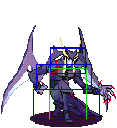
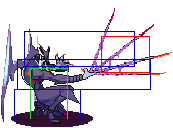
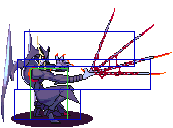
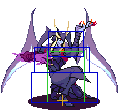
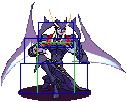
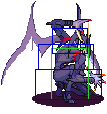
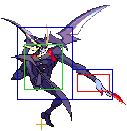
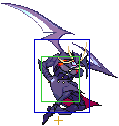
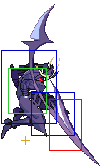
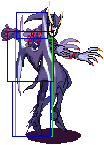
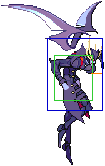
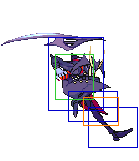
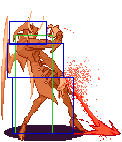
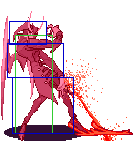
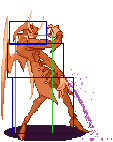
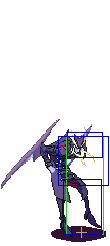
Stand: Incredibly tall as second tallest standing character in the game. His height opens him up to some extra pressure that's difficult to deal with; particularly from characters that don't jump very high and can spam air normals during the jump's ascent and descent. Three hit air chains on the way down are not uncommon.
His height gives him two benefits. One is that, like the other two tallest standing characters, while in standing hitstun Jedah's hurtbox becomes much shorter, causing certain jumping chain combos to miss that otherwise wouldn't (this actually makes several potential infinites not work thankfully). The other is that not only is he tall, he's thin, making it difficult to not only hit a cross-up, but to combo on the ground afterwards if one does happen to hit.
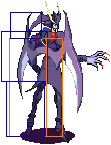
Walk: Average Walk Speed. Typically Jedah will not walk long distances and will mostly do it for slight positional adjustments to anti-air or while pressuring. He doesn't really feel like he's walking through mud though, and sometimes it's better to keep your feet on the ground so don't be afraid of taking a stroll.
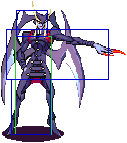
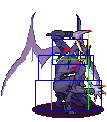
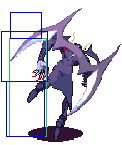
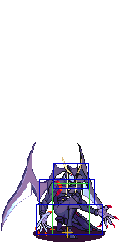
Crouch: The fourth tallest crouching character in the game. Jedah is forced to block a few extra attacks that shorter characters wouldn't, but the situation isn't nearly as bad as it is for the tallest two crouchers, Bishamon and Victor. He's a bit fat in the rear while crouching, making it easier to get hit with a cross-up.
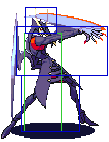
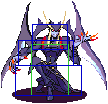
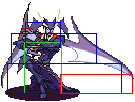
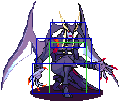
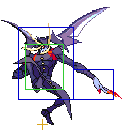
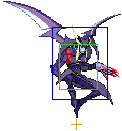
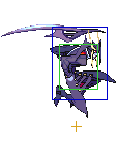
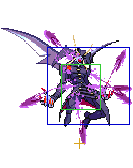
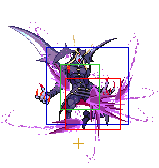
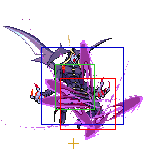
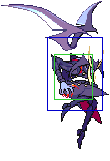
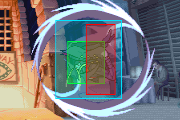
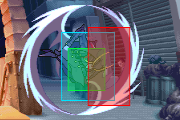
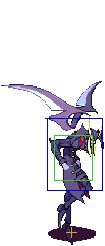
Jump: Jedah's jump is one of the two highest reaching in the game, which is both good and bad, but mostly good. His jump normals are well positioned to deal with his jump height, and once he is in the air it can be very difficult to bring him down. In addition, to make such a huge jump less predictable he has several options for changing his aerial momentum, including an air dash. The main downside to his jump is that his hurtbox becomes very fat.
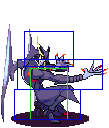
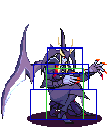
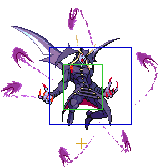
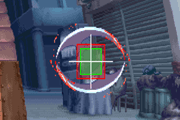
- Jump Start Up — The image above is when Jedah's feet initially leave the ground 6 frames after pressing up. His jump start up is extremely good, as he is already well into the air soon after pressing up. If the opponent's low attack meaties are off, Jedah may become very hard to pin down.
- Jump Back — The highest reaching of his jumps, but it travels less distance than his forward jump; which is probably a good thing or else he'd corner himself even faster. This can be seen as a quick escape, but the potential to corner yourself is still serious.
- Jump Up — Just a tiny bit shorter than his jump back. A well spaced neutral jump can position Jedah above most opponents that are jumping at him, potentially avoiding their attack while coming down on them with a j.MK.
- Jump Forward — The shortest of his jumps, but the distance on it is outrageous. Jumping forward launches Jedah by about 3/4ths of the screen, and combined with his huge jumping normals lets him attack from nearly a full screen distance away. The danger here is that as that such a huge jump is easily telegraphed, potentially making it an easy anti-air.
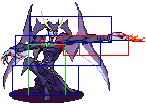
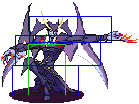
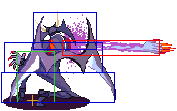
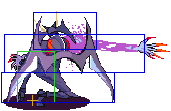
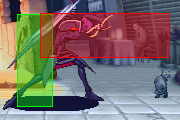
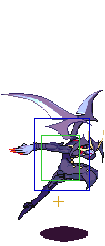
Ground Dash: A Jet Dash, similar to Morrigan's dash. This is a ground-to-air dash, and what makes Jedah's high/low game possible. Dashing is a commitment, as Jedah is unable to block until he lands. It is possible to cancel the ground dash into the air dash, granted you don't attack first. The rules regarding jump attacks completely change when ground dashing or air dashing, so be sure to take in the following:
- Air chain combos are not possible when dashing.
- Linking air normals is possible, however the links are difficult and limited.
- The speed of Jedah's descent after dashing is much slower than his jump's descent, which lets him (or should I say "forces") him to do pressure strings with his jump normals as he falls.
- All air normals become special cancelable at any point, even if they completely whiff.
- The meter gained from Medium and Hard normals attacks that hit or are blocked is reduced, and whiffing them results in no meter gain.
- Air throws are not possible when dashing.
Normal Moves
Standing
| HP
[ Startup: 9 | Hit:-13 | Block:-14 ] Though this button is an option for when attempting Jedah's Punch Throw, it is an extremely bad choice since from up close it's unsafe on whiff, block, and hit. This attack does not have much use outside of an ender for certain chain combos — and even then it's typically not the best option.
|
Crouching
Jumping
| j.HP
[ Startup: 9 ] Jumping hands. This is significantly more useful than the standing or crouching versions because while it retains the range, the recovery is neutralized by landing. Thus, backdash j.HP and backdash airdash j.HP and whiff j.HK j.HP become a lot more useful than the standing or crouching version. |
Pursuit Attack
An alright pursuit attack. When it hits, Jedah will be placed on the opposite side of the opponent a fixed distance away — so be weary of accidentally cornering yourself. There is some time to attempt dash attack okizeme after hitting with the pursuit, though the options from this position aren't the best.
Jedah's ES Pursuit is notable, as the damage on it is very high when it comes to pursuit attacks, plus it hits 5 times. It doesn't deal any permanent damage though so you may want to save it as a finisher.
Whiff pursuit mix-ups feel a bit risky with Jedah when the opponent does not tech roll; it seems slightly too slow when used like that. However, having a Dio Sega down on the screen, on top of or right next to the opponent as they recover, and then doing a whiff pursuit can lead to some fun situations.
Throws & Command Throws
Special Moves
| Dio Sega - 236P (air):
Scythe wheel. Hits 3 times. Knocks down airborne opponents. One of his main zoning tools.
|
| Nero Fatica — 214.LP/MP/HP/ES | |||||||||
| Damage | Normal:18/28 ES:29/41 |
1f
|
11f
|
18f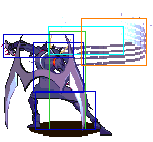
|
25f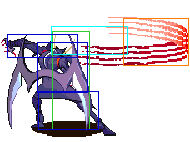
| ||||
| Hit Advantage | Knockdown | ||||||||
| Total Frames | 62 | ||||||||
| Meter Gain | Whiff: 14 Hit: 29 ES: 0 | ||||||||
| Frame Count | 10 | 15 | |||||||
26f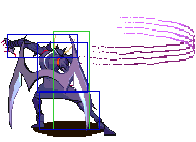
|
29f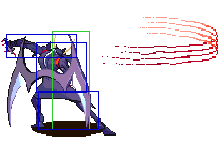
|
42f
|
45f
| ||||||
| Frame Count | 36 | ||||||||
|
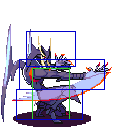
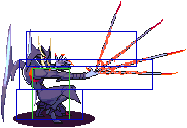
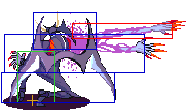
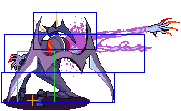
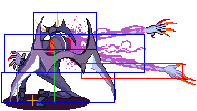
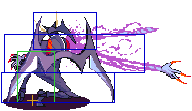
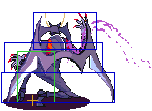
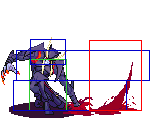
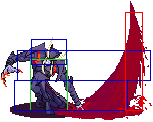
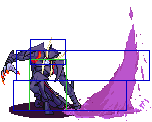
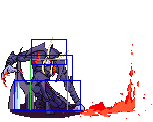
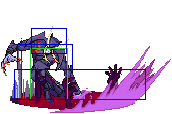
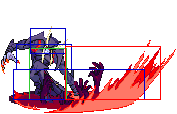
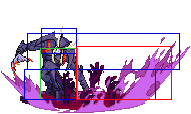
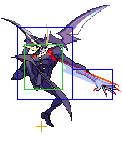
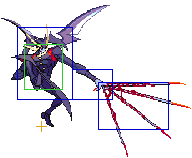
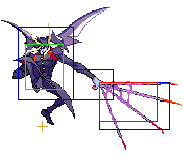
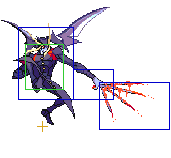
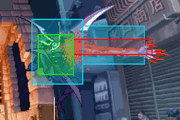
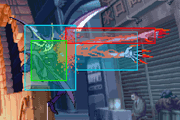
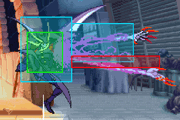
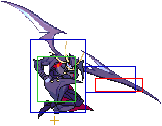
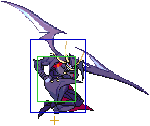
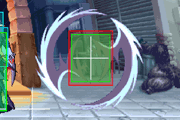
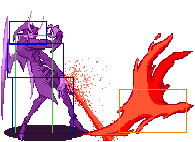
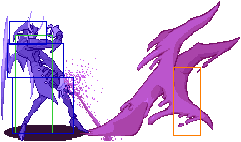
Nero Fatica. There is always some confusion on what to call this attack, with "claw" or "swipe" being the most common, but it's probably easiest to call it by it's actual name. An unblockable attack that is typically used as an anti-air, but it can also hit standing opponents. When preformed, Jedah slices the air with a clawed hand while sliding backward — if the opponent enters the sliced space they'll be caught by the move and be knocked down. By design it will never hit a crouching opponent, as the throw-box is disabled as long as they're crouching. During the active frames it also has the ability to absorb projectiles, but this is more of a bonus safety feature rather than something you can use against the opponent. Nero Fatica technically counts as a throw, so it must touch the opponents throwable-box to hit. Because of this, it may have trouble when used as an anti-air against certain jump-in attacks. Take Lilith's j.HK for example, even as an attack that would normally be easily anti-aired with Jedah's 2.MK, it's extremely long range could potentially hit Jedah out of his Nero Fatica attempt even with the backwards momentum. On the other hand, Nero Fatica may have an easier time catching jumping attacks that aim downward, which 2.MK may have a harder time anti-airing. You should only use the HP and ES versions of Nero Fatica. All versions of it have the same start-up, recovery, and throw-box, with the only difference being how far Jedah moves back when performing the move. The HP and ES versions move Jedah back significantly further and at a faster speed, making it less likely that he'll be hit before the attack grabs the opponent. In regards to how far the HP and ES versions actually move you, frame 25 shows how far Jedah will slide backward by the last active frame, while frame 29 shows the full distance he'll slide backward. Off-screen Glitch | |||||||||
| Ira Piano - 624K (air) , Any P:
Ira Piano (Scythe-wheel):
|
EX Moves
| Finale Rosso - 22PP (unblockable): Blood pit. This auto-targets the opponent and opens a portal below them, this is unblockable and will drag the opponent down for an auto-combo and decent damage. The startup is somewhat significant and it has a very poor recovery time if it fails to catch the opponent. It can be useful for punishing full-screen shenanigans, but other than that the Contract super tends to be marginally more useful. |
Dark Force
Santo Ario - Same strength P + K
- (Any Version) Enables Jedah free-action flying. During this mode he can move around in the air freely and chain his air attacks. His landing has no recovery and there is no recovery on deactivation while standing or crouching. Deactivating from forces a falling state & deactivating from wake-up is a 2f window which can be blocked on frame 1. the idea is to knock him down then do a normal which only hits standing to guarantee the punish.
Strategies
Airdash and floating normals
It is important to note that you can do different things from different heights in the air. I will categorize it in 3 sections: the first is the peak of your jump, which I will refer to simply as 'high' airdash. The second one is around above your opponent's head, which will be 'mid' airdash. Lastly, I will refer to the 'low" airdash which is around the head. When reading this, keep in mind that the button sequence used does matter and affects how many normals you can do during your airdash. Different normals have different properties.
LP/LK - These normals float you more, allowing you to execute more normals in the air. The total max is 3, and you cannot use the same normal twice. We'll go into that more later on.
MP/MK - They both don't float you, but they can have moves performed afterwards depending on height. More later.
HP/HK - These two are different. Once you press HP, that's it for your airdash, you cannot do anything after this except cancel into a spin scythe. With the HK normal, you can do a move after from the high airdash. More on this next.
Keep in mind that you may cancel any normal at any time with a special move. In the air that means a spin scythe, ES spin scythe, command grab, command grab feint wheel, and ES versions of both.
High Airdash - Here, you can do a max of 3 normals. If you want to use 3, you must use a weak attack in the middle. You may start with a MK, MP, or HK, then do LK or LP, then finish with whatever you want. HK will whiff on the 3rd move as well as HP. Otherwise, the choice is up to you. Examples: Airdash MK, LK, MP; Airdash LK, LP, MK or HK or MP. One more way to do a High Airdash string is with 2 normals. Here you can choose between medium and hard normals. Examples: Airdash MK, MP; Airdash MK, HK; Airdash MP, MK; Airdash MP, HP; Airdash HK, HP.
Mid Airdash - With this type of airdash, you can do one medium, and then two lights still. The only thing that has changed here is that you can't do two mediums, and can't do a HK into whatever. However, if you cross over their head and then MK, you are able to do MP even when low to the ground. It is important to remember that, this technique is very useful.
Low Airdash - With this airdash, you're limitted to either two lights, or one medium, and one strong attack.
Dashing Game
Jedah's regular dash plays another big part of his mixup game, and they are not limitted to only the ones that will be listed bellow: there are definitely more and other variations can be used, when you get creative, they become a lot more effective.
Again, there are height varying mixups that are used specifically. The HIGH dash I will refer to is a dash that goes over your opponent's head (this is performed by dashing and holding the last input, stop holding it when you go over their head). This can be used as a crossup or to gain distance after you get AG'd. You may do two medium inputs, a medium and a strong input, or a medium and two weak inputs. You could also use a normal, and then immediately cancel it into spin scythe for another mixup (ES spin scythe can lock down or if it whiffs you can AG them into it). Examples: High dash MK, HK (HK brings closer after crossup); High dash MK, HP (HP brings closer and has good frame advantage); High dash MK, LK, LP; High dash MK, MP.
There is no Mid dash for this one, since you can do the same things as you would with a low.
So next up is low: you may do two weak attacks, a weak and a medium or strong, or one medium or strong attack. You perform the low one by holding your last direction for a bit and then letting go. Some examples: Low dash LK, MP; Low dash LK, MK; Low dash LK, HK; Low dash HK; Low dash HP; Low dash MP. The purpose of this is just to get close while still keeping your momentum. Use the Low dash mixups to set up the High dash ones.
Finally, you have your normal dash overheads. If you're far, use MP and HP, if you're near use MK to hit under and not cross up, and use HK to cross up. You may also use LK to whiff and then throw. Or just empty dash and throw.
Lastly, you could also use an empty dash to catch your opponents by surprise. Empty dash and throw is good, and so is empty dash into cr. LK or cr. MK (these get a mention when a spin scythe is locking down which we will get into more later).
Blockstrings
By no means does Jedah excell in this area. However, it is necessary to pose this as a threat if you want your other mixups to work. A good player knows that to take the risk guarding the air dashes, and leaving open to block strings are beneficial to escape. Knowing this,you can stack up your ground and block strings.
Jedah doesn't initially do high damage like other characters, but when he has momentum going his moves start to hurt and it's hard to get him off. I will list block strings that I both personally use and have observed from top players (as I mentioned earlier they are pretty weak and short).
- 2.LK > 2.MP >>> 5.LK >> 5.LK > 5.MK
- Block confirm the first two hits, and then go for the rest.
- 2.LK >>> 2.LP
- This is good to reset them if they try to jump after your 2.LK. Dash mixup afterwards, or if they have a good DP, you may also choose to bait it. If they really like to jump out after 2.LK and don't think it's a big deal, cancel the 2.LP into a spin scythe to lock them down and mix up (spin scythe mixups in detail later on).
- 2.LK > 5.LK >>> 2.MK
- It looks like Jedah will dash or do something standing up, then you early anti-air them with 2.MK, or just hit them low as well. You may add a 2.HK at the end for more damage if you are close enough (if you are far use 2.HP).
- 2.LK >>> 2.LP > 2.LK > 5.MK.
- This is a far block string. It can also be used as a B&B.
- 2.LK >>> 5.LK > 2.HK.
- Another block string, the last hit hits low. 2.HK is one of his most damaging normals, so this option is useable.
Don't forget your Dash mixups. You may tick into your dash mixups, or use a dash mixup anywhere in between your strings, when you feel that it will hit. Jedah can also tick throw but it is risky if they jump since his normals don't early anti air and he is very tall.
For any other character, this would be a less necessary section, but because Jedah cannot chain into knockdown he must rely on some tricks.
- 2.LK [ > 2.LK ] [ > 2.LK ] xx LP/MP/HP/ES Dio Sega
- This is core to Jedah's game, but at the same time it isn't exactly safe. If the opponent has a long range normal they can use to knock him down inbetween the 2.LK and Dio Sega, that could be a problem, so generally you want to cancel into Dio Sega from the furthest range possible. Depending on your original distance you can do either one, two, or three 2.LK before canceling into Dio Sega. Most of your meter will be going into ES Dio Sega, since even if Jedah is hit, it won't disappear if it's already out, letting you set up trade situations from this. Using the LP/MP/HP Dio Sega is a bit better in the corner, and the idea here is so that the Dio Sega doesn't actually hit them, but instead is placed right in front of them, restricting their movement. An entire article could be written on when you should use LP/MP/HP (it can be spacing and character specific), but I'll have to do that another time!
Bread'n'Butter Combos
Jedah isn't the combo type. He is more of the mixup and trick type, momentum rusher, and space controller. He has a few B&B's and it's good to know which ones to use at what time. There are some things to know beforehand, however.
First, it's essential to always use 5.MK in combos instead of 2.MK, as the standing version causes much less pushback to the opponent, otherwise, they'll be too far away to connect the 2.HK ender, or do some sort of follow up pressure.
Also, none of Jedah's chain combos will knock the opponent down: because of this, you should know the frame advantage after each ender, what positions it is optimal for him to leave his opponent in, and a general idea in mind of what you're going to want to do after you hit them (it's easy to think every combo Jedah does will just return the situation to neutral, but with the right positioning, and reads, this can be somewhat overcome).
- 2.LK > 2.MP > 5.MK > 2.HK
- Jedah's primary four-hit ground chain combo, though most of the time you'll be leaving the 2.HK off due distance issues. Jedah has no chains that knock down, and even though this ends in a 2.HK it is no different. Ending on 2.HK leaves Jedah at -6 frames, which could be a problem if he was up close, but hit pushback leaves him sufficiently far enough away so that it's not a problem. After landing this combo, the match is at a neutral position. Remember, just because you can end in 2.HK, doesn't necessarily mean you want to when it comes to Jedah.
- 2.LK > 5.MK > 2.HK
- Usually done if you're just out of the first posted combo's range, or after an empty dash.
- 2.LP >> 2.LP > 5.LK > 5.MK
- Usually done if you're just out of the first posted combo's range, or after an empty dash.
- 2.LK > 2.MP > 5.MK > 5.HP
- This is used when you are further from the first combo's distance. It's used more when you realized that you are actually too far for the 2.HK to hit, so you just end with the 2.HP. It does about as much damage as the second combo posted.
Spin Scythe Mixups
Now that we have our dash mixups and BnB's, it's time to use some spin scythes to the mix.
The main purpose of the spin scythe is for them to be placed around somewhere close to them, not to actually hit them. This buys you time and you can do whatever you want for over a second. If they get smart and want to move towards it, or stand up to block it, you can use that opportunity to chain combo them.
With the ES spin scythes, you want to actually put them in blockstun, since it allows you to move around even if they AG or stay still. If they try to hit you, they can be most likely counter hit by the ES spin scythe since, unlike the regular versions, these ones do not disappear when Jedah take a hit.
- Throw to the corner, LP spin scythe.
- This works a little like Lilith's meaty LP Soul Flash, except better. From here, use your mixups and chain combos to do some heavy damage. Examples are: chain combo (spin scythe hits) dash or walk up and mix up; 2.LK, 5.LK, 2.LK, spin scythe hits, 66MP, land, 2.LK, 5.LK, 5.MK.
- Cancel an airdash after it hits with any normal except j. HK, land, LP spin scythe, whiff pursuit (crossup).
- Mix up from here. Either chain combo, dash, wait and chain combo, or airdash over and crossup j. HK. This setup is a little hard (Oouchi taught me this).
- 2.LK xx HP Spin Scythe.
- Use this after you have block stringed a bit. This opens up for your mixups as well.
- 2.LK >> 2.LP xx HP Spin Scythe.
- This is when they want to jump from the last one. Refer to mixups list to follow up.
- Airdash j. MP xx MP/LP Spin Scythe.
- This is good. Note that you can airdash all the way around and cancel it. Let's say you are on the P1 side, and you airdash over them. You are now on the P2 side, and facing the P2 side. You press MP, and Jedah will actually turn around and hit them. Then, cancel it into the spin scythe. Mix up after.
- Jump and Spin Scythe.
- Good thing to use when they are in the corner, specially when they are low on life and don't wanna get hit. Throw one out just in front of them, preferably the HP version. Start your mixup from there.
- Anti air 2.MK, and Spin Scythe.
- After an early or jump in anti air with 2.MK, you can stick out a spin scythe and start to mix up. Use this against Demitri and uppercutters if you think they will land and go for a reversal or GC.
That's about it for spin scythe mix ups. The power of them comes from the mixups you do after, and keeping the momentum going. It's very important that you hit with the mixups during and after the spin scythes.
Dark Force
Here's where the fun begins. You can use all of your previous mixups, and more. If you activate Dark Force at the right spot, ideally when you get reset'd, you can take well over a life bar in that position.
Here are some things you can do when you activate Dark Force:
- Activate DF, hold down-forward, air-chain j. MK into j. HK.
- From here, choose between tap up then hold forward, and air-chain j.LP, j.MP, j.MK, and j. HK. You can infinite this but the timing is hard, and it is more beneficial for Jedah to just reset it (to infinite, you must do the input like it was explained earlier, being as low to the ground as possible by tapping up, and moving forward by holding it afterwards, then tap down, tap up again, hold forward, and do the button series). Back to after j.MK into j.HK: here, you have many options. The more decent players will try and block high knowing that the biggest combo you eat is the overhead one. Knowing this, you can do 2.LK and chain combo, or 2. LK into 2.LK and then spin scythe, or just ES spin scythe to alternate. From there, mix p again with your previous skills. The combinations and possibilities are nearly endless. This is what you're banking on to kill a life bar is going for a good cross or two, and a few feints here and there.
- Activate DF, hover down a little, j.MK xx ES spin scythe.
- From here, you can air dash around them, j.HK, and mix up again from here. Or after your ES spin scythe, hover all the way down with j.MK into j.HK. Then from there you can dash around them, 2.MK into 2.HK, 2.LK xx spin scythe, overhead series, ground chain, etc.
- Activate DF, ES spin scythe.
- Aanother variation. Use it and mix up well afterwards.
It's good to remember that you can do ES claw move at the end of Dark Force after some high chain series. The reason it has to be at the end is because if you do it at the beginning, you lose most of your Dark Force time. This is used when they are blocking high.
Note that if you get pushed back at any time, you can back dash, airdash, and get close that way, or regular dash and hold it. Or you can hover around high and then airdash when you think the time is right.
Get used to not being able to jump, because that will mess you up if you try to do that to get close.
Also note that you can cancel a hovering normal with a spin scythe or ES spin scythe (or any special move) AT ANY TIME AND HEIGHT: that means you can do an overhead MP xx ES spin scythe and start up a mixup there.
Miscallaneous Info
- Unblockable 5.LP setup is, ideally, j.MK into j.HP, land, and 5.LP. Or j.LP, j.MP, j.MK, j.HP, land, and 5.LP. After
the 5.LP resets them, mix up from there.
- 5LP is good to stop dashers, hopping and flyers in particular. Even IAD characters.
- To build meter safely, you can do an instant air command-grab with a tiger knee input (it's not the best but it's what Jedah has). You can also kara-cancel any HK into spin scythe, then kara-cancel any HK into claw move.
- Against pressure characters like Sasquatch, 2.MK, 5.LP, then jump, is a good pattern to use, and allows you to react accordingly. If they run into it, then mix it up.
- You can do a non-game breaking glitch if you use the claw move and they tech hit. This glitch also works if you do a grab in the corner, hit with pursuit, then do a meaty claw move.
- 5.MK is a good poke to stop ground dashers, such as Lilith, Bishamon, and Anakaris.
- j.MP into whiffed j.MK and 2.MK is very good on tall characters. Even against characters like Lilith and Demitri. If the j.MP hits, the j.MK will whiff, then the 5MK will hit. If they GC'd, it will make the GC whiff. Use this, also, as a pressure tactic also.
- j.MP into j.HP has good hit stun and allows you to follow up with 66MP, then 2.LK, 5.lk, 5.MK, for some good damage.
- j.LK, j.MP, j.HK (whiffs) is a good air-to-air option. j. MK is good to meet in the air with, then land and 5MK to start mixups
and pressure with.
- j.MP into j.HK (whiffs), j.LK into j.MP. Good air chain to throw in once in a while.
- To counter GC's, do 2.LK into 2.LK, and cancel it into Spin Sythe.
- You can make your command grab hit by whiffing 5.LP. 66HK, whiff 5.LP, command grab. Or 66MK, whiff 5.LP, command grab.
Japanese Resources
- Dio Sega Install (Japanese) — http://blog.livedoor.jp/santuario_shimatuya/archives/4885180.html
Matchups
Zabel: 2-8. In this matchup you will notice your normals get out prioritized every time. Also that Zabel is fast and vicious. His combos are also very high damaging, and you have a risk of getting unblockable'd every time after one. Your Dark Force isn't as great here because he can Death Voltage your airdashes and it comes out fast enough to counter just about all of your normals. You won't find yourself dashing or airdashing as often as in other matchups because of his Death Voltage as well. He can do it in the air, off a dash, an airdash, and of course standing, so he can pretty much react and do it. IADing back or forward with j.MP takes a lot away from Jedah.
Now to go over some strategies to overcome this matchup. First off, you can't wait around for too long before he starts going on a rampage and rushes you down. Jedah is tall and doesn't like those long jump in strings. You don't have a reliable anti air against them, at all. 2.MK goes too far forward, 5.Lp is too low to use, and the claw move is way too slow to use on reaction. So what you do here is chicken guard and mount an offense when he has to guard.
Also remember that you can chicken with Jedah's airdash, so you can go around the other side and hit him as well. Later on when they see you are jumping and chicken guarding a lot, 5.HP and 2.HP becomes a problem. They will start to empty jump then do those moves which will hit you out of the air. Zabel's 5.hp goes about to the top of the screen so there isn't much you can do about that.
When they do start to empty jump in though, it's time to go to air block strings into 5.LP. Meet him in the air with j.LP, j.MP, j.MK, jHP, land, then 5.LP. From there, start your offense. Your 5.lp will always beat anything he tries to chicken guard with. Just remember to make use of the HP, and 5.LP right away when you land. The matchup breaks down to if you happened to use the right move when your opportunity to mix up arises. From a neutral position, you are very disadvantaged.
Here is a link to an example of the matchup.
http://www.youtube.com/watch?v=jz4z1twnB40
Sasquatch: 3-7. You can't do a whole lot in this matchup either. But that's Jedah, so you'll be seeing this a lot. A big problem here is Sasquatch's j.LK and j.MK. They outprioritize anything you have in the air, or on the ground unless you hit them with 2.MK from a distance. The only reason why this isn't a 2-8 matchup is because Jedah has a few tools that can hit Sasquatch to start some momentum.
ES ice tower hits a lot of your air moves and there's only one way to airdash around it. And even then, they can delay it and ES tower you out the sky anyway.
Spin scything isn't typical in this matchup, you can get hit out of them very easily, making them useless and not in your favor in a neutral position. If you want to throw one, you'll have to be a good distance away, or cancel it from 2.LK when they are trying to tech or block your strings.
Definitely control your space. Sasquatch has an insane advantage in the corner and this could cost you the game from a good player. Don't be a hero and try and GC him, he can make it whiff with his normals or dash overheads.
Dark Force is very useful, but you need to be careful that he doesn't predict it and j.LK into j.MK you out of it.
Your initial hits to start mixing up are gonna come from 2.MK, and 5.LP. Both have high priority and are used to take him out of jumps or dashes. A patient Sasquatch that knows the matchup, however, is an even bigger problem to deal with, because now he knows not to run into those and can be explosive when he lands a hit.
You can't really jump in or dash in on him, but you're gonna have to take risks at that point. Do your usual thing once you have the chance, and then follow up and don't let up on him.
66.MP is the safest poke you can get against Sasquatch that will put you in an advantage.
The main thing to do in this matchup is to gain momentum and take advantage of it, because that's where you're going to land big damage and hits. Try to contain him when you have him where you want him.
You should also remember to air-chain j.LP, j.MP, j.MK and j.HP to meet Sasquatch in the air, then land and 5.LP to start an offense.
Q-Bee: 3-7~4-6. Tere are only a few Jedahs and a few Q-bees that can alter the outcome of this match. Whether the match is 3-7 or 4-6 really depends on the player, even in Japan. As far as the matchup goes, it's still leaned towards Q-bee's favor. The bad news is, she hits faster and stronger than you. The good news is, you can still hit her hard.
Sadly, your Dark Force here is nerfed yet again (don't worry it gets better after these 3 match-ups). She can duck your high series combo, and she avoids spin scythes easily. You can use that to your advantage and knick a few hits off of her though.
Something that will give you a hard time is being a tall easy target when she's in the air. She can chain j.MP into j.HK and float IAD and mix up a lot of things when she goes to the air. Your best bet against that is to keep in 5.LP and 2.MK distance so that she doesn't gain that opportunity. If you're too close you can dash back, then airdash, or jump back and airdash, or just walk back.
A lot of the time you can meet her in the air by chaining j.MP, j.MK and j.HP, then land and 5.LP.
Q-bee is pretty straight-forward, and if you happen to lose, your opponent isn't exactly a genius. Anyone who can IAD properly can get wins. Realistically, you won't be block all of her hits in the corner, so you will lose chunks of life and you need to guess right in order to get out. Jump out when you think she will IAD again, and 2.MK if you think she will use 5.MP to stop you from jumping.
66.HK will save you a lot since it's easy to cross her up when dashing with that. You can do it a few times and usually she won't have an answer to it.
Bulleta: 3-7. Like in any bad matchup, a lot of things stop you here.
LP missile is a big problem here, as it limits a lot of your air game. When your air game is limited like that, you tend to stay on the ground some more.
Another problem is her dashing around 5.LP. It beats all of your air moves and even when she's turned around, when she 5.LP's it turns her around and anti airs you.
Her useless moves are good against you, but that's only if you're not playing smart. Don't do any full screen airdashes and you shouldn't get hit by that wine bottle fire move, or the gun super.
Her rushdown game is good on you and it's easy to get command grabbed because of your wide box.
She can play both offensively and defensively and have a good advantage. The scarier one is her offense because that's where you take the most damage. The defense compliments this as she can play it when she has a comfortable lead.
Here are some little things you can do to her though. If you're close, you can crouch under her high missile and 2.LK, 2.LK into 2.HP. It's not much damage, but again, it's what you have to settle for.
What you're aiming for here is a blocking jump to get close. When you're around on top of her head, dash around and j.MK, j.HK or j.MK, j.MP. That's how you gain momentum and get close here.
A very good move to use is 2.LK. It stops her dash, goes under high missiles, and just makes her gameplay change a little so you don't have to play her game at all times.
Another good move is 2.MK. While it can anti air, it's good as a low poke too. As you may have noticed, it's the only low poke that anti airs, early anti airs, has decent reach, and hits low. So stick that move out because it's better than doing nothing if she's severely rushing you.
You can ground spin scythe to buy some time and room if you need to, but watch out for ES missiles. Don't throw too many of the air ones, that can get you hit by the gun super.
Bulleta is small and that means she can get crossed by 66.HK easily. When you're in this position, mix it up with uncrouchable command grab, ES claw move, whatever. Just get your damage off while you can.
While there is more to the matchup than this, if Jedah is standing he is forced to block Bulleta's Cool Hunting EX Move and cannot crouch. If you happen to be already crouching when it comes out, you can punish with Jedah's Finale Rosso (Pit) EX Move. However, since the input for that attack is 22.PP, you'll invariably have to return to 5 (neutral, standing) to execute it, getting you hit by her attack. To properly punish, you must whiff a crouching normal such as 2.MP, buffer the 22 input during it, and press KK when you recovery, letting you grab Bulleta and punish the Cool Hunting.
Gallon: 3.5-6.5. This matchup is bad, but you can turn things around quick if given the opportunity. Otherwise, you're really going to have to work hard on this one.
The first thing you will notice is that Gallon out prioritizes you in the air. His combos are very easy, high damaging, and not hard to come around by. It's not very hard for him to close in on you either, which is the last place you want to be against him. It doesn't sound like much, but he can ride those things to victory.
First of all, you want to have a good method of AGing. LK-LP-MP-HP is preferred. This way, if he pauses for tick throw too long, you can 2.LK him, and if he does grab you, you can tech hit in time. If he jumps, you will whiff your 2.LK, but you can recover to block on time and AG again.
The next best thing you can do is Dark Force out of his option selects, but don't get too predictable and don't do it unless you're gonna get damage off of it, because escaping one situation isn't worth a whole bar (in Jedah's case, since meter is hard to come around).
The good news about this matchup is, Gallon takes damage worse than average. Which is great because it takes less mixups to kill, which will prove to be important once you see how hard the matchup is.
Another thing is his relatively poor defense. His GC is very situational, and more often than not useless. The Gallon player will usually resort to chicken guarding, which will will learn to counter in a bit. His anti air options are somewhat lacking, but are still useable against Jedah. Thankfully, you can alter your jump timings with a whiff j.HK.
Here is a technique I learned from Oouchi: j.LK, j.MP, j.MK, j.HP, land, and 5.LP. What this does is stop Gallon's jump spamming, fairly effectively. It takes good timing to land this proper, but it can go in your favor.
Grabbing him is also an effective tactic because he will be trying to block a lot of your stuff, trying not to eat the big damaging combos that Jedah can occassionally pull. Overall, you're going to have to play safe and be patient for your damage. Get good positioning and don't let him sit comfortably.
Bishamon: 5-5. Both characters in this matchup can rush vigorously. I think this is more of a momentum 5-5 type matchup, as opposed to a stalemate 5-5 matchup. You have to be careful about a few things here.
First off he's gonna be coming in charging like a bull. You can try to poke him with 5.MK at your risk, and 5.LP is a decent option with a less risk factor. You can poke with 66. MP, but be careful not to run into a fireball. If he likes to fireball, jump over and j.MP into jHP, then dash jMP, land, and 2.LK, 5.LK, and finish it with a 5.MK (you can do that from full screen, since Jedah's jump arc is so huge).
Also, don't jump when you're too close to him. He can 6.HP you and 66.MP. Also don't airdash into his 5.HP. It goes to the top of the screen and he can dash with it. You can poke him in the air with 66.MP. It beats most of his ground stuff, even when dashing.
Bishamon's rush is really really good, so if you need to you can Dark Force to try and get away. You want to get some damage for your meter though, so don't get GC'd and mix it up well.
There are a lot of tools Jedah can use in this match. One of them is 66.HP. It's really good because Bishamon still takes 2-3 hits while crouching. It isn't the easiest thing to GC either if you use it smart. You can infinite with this, but I highly don't recommend it, instead I advise you to go for the guarenteed damage with 66.HP, 66.MP, land, and 2.LK into 5.MK into 2.HK (if you're too far, trade 2.HK for 2.HP).
If you don't get hit out of your dashes, you can block string by dashing up to his head,j.MK, j.LK and then j.LP, or 66.LK, into j.LP into j.MP, or dash around and j.MK into j.HK. Dashing mixups are important against Bishamon, and you can mix up with your other stuff from there.
Don't forget about ES spin scythe either. You can use that when they get excited and try to hit you out of your strings, then they end up taking hits from the ES spin scythe. The normal ones I don't recommend as much in this matchup. Mainly because of his j.MP, ES fireball, and fast pokes. They usually hit you a lot, but the jumping ones are safe from a distance and could buy you some time.
The main part of this matchup is to mix up your dashing and get in, while keeping him outside where he doesn't have as much threats as an option.
Aulbath: 5-5. This is more of a stalemate 5-5 matchup. Jedah covers the air, Aulbath covers the ground.
They don't meet each other too often in their places. They each have some tools against each other in opposite territory though. Aulbath's j.LP and j.MP have excellent priority and will knock you out of a lot of almost everything. It's not too much of a big deal since it's not that damaging. But it can put you in bad situations which is why it deserves a mention.
To escape the bubble trap, just Dark Force and hold up/back and block at the top corner of the screen. You can chicken guard airdash, or just take the air throw if they're smart enough.
You can use dash back, then airdash and poke with j.MP, j.HP, or j.HK. But you need to be careful for ES sonic waves, or smoke. Aulbath here is trying to look to control space with his dashing game, and good jumping normal priority. So if you see you're getting back into the corner, try and push him out a little with some 2.LK's and 5.MK's. When he gets used to you doing that, jump over to make him start the pressure all over again.
66. MP is a good poke to use, but again, you need to be at a distance and then watch out for his special moves. If you jump over him, you can fake it with j.HK (whiff) and come down with j.MK or j.MP depending on the distance. If he's right below you, j.MK is great. If he's a little further in front, use j.MP.
One more thing: his standing LP. It beats your dashes and has high priority. Play around it and poke him also, and just time your dashes when he isn't expecting it. You do that by using your other safe options then switching to the riskier ones once they think you aren't gonna use it.
This matchup can go so many ways, it's up to you however you wanna play it.
Demitri: 4-6~3-7. I asked Oouchi for his opinion on this matchup. He tells me that his Jedah is 4-6 in this matchup, but for other Jedahs it will be 3-7. He also told me other matchups like that too, but I mainly agreed with his initial opinion. Air fireball controls a lot of your movement. Even at some points, you can't walk forward safely. Demon Craddle also control a lot of what you do on mixup and affects what you can and cannot do.
The easiest way to counter demon cradle is a delayed 2.MK. It's safe and best used from it's max distance for you to always come out on top. You can also avoid GC's with a far ranged 2.LK xx spin scythe. If you happen to block a drill kick, use 5.MK into 2.HK to punish: don't dash. If you do it right, the 5.MK into 2.HK trip guards and he can't block it.
As for air fireballs, Oouchi told me to avoid one, then jump and LP spin scythe to match his fireball. You can also chicken guard a fireball but that isn't recommended often. You want to start out baiting his GC's and letting him know he can't do it often, and then start to attack with your normal game. It's not the easiest match, and you will be in for a long game. Play safe, smart, and block a lot.
Lei-Lei: 5-5. Lei Lei has a lot of options from a distance. Very good zoning and can kill you once you're in the corner.
Jedah stays in this matchup because he can end the matchup anywhere on the screen. Lei Lei has really poor defensive mechanism against Jedah. She can be hit out of her GC (when invincibility ends), her stamina is one of the lowest in the game, and she doesn't have a really fast anti air to knock Jedah out of dashes.
What she can do to Jedah though, is a big combo. Watch out for air-chains into land, chain combo, sweep xx Tenraiha. That could end the game if you're in the corner.
If you tick a 2LK or something like that, go crazy with mixups. Lei-Lei crouches fairly small, so you can 66HK and cross her up pretty easily.
Since her defense is lacking, you can ES claw her if she tries to jump out (which at times is her best option).
In this matchup, use j.LP, j.MP, j.MK, j.HK into j. HP as an air-chain meet her in the air.
Don't airdash from full screen, because her MP projectile covers a lot of Jedah's movement. Also, don't try and jump in on her withot airdashing around at the peak of your jump: her 2.HK anti-air is very good.
There isn't too much limiting you in this matchup, so do your usual mixup thing and kill her, while maintaining what you know to avoid along with your gameplan.
Felicia: 4-6. In this matchup, Jedah has to really work for his damage. You want to make it so that it's hard for both of you to hit each other, rather than just being hard for you to hit her.
If the Felicia player knows what he's doing, you can get cornered very fast, and that isn't comfortable at all versus Felicia. Her mixup becomes a lot more of a threat in the corner, and you can get 5MK locked.
At the peak of your jump is where her 5LK, 2HP, and 2MP miss, so you can airdash out of the corner (but don't be predictable, or else she will jump back and j. HK you).
The neutral game can be really hard for you as well. She can play the ground game with her anti airs if you try to attack her, and she can also jump in on you at an angle where you can't anti air her at all. The best way to defeat her is to take your hits with small shots and stack up on them.
It's hard to create your own opportunities on Felicia because her game is overall solid and she doesn't have many weak points you can exploit. But, if you opportunities do arise, use them and make them count.
Careful when rushing though, her GC is pretty good and gives her the upper hand. You definitely don't want to get knocked down by Felicia, so just don't do anything too risky that will put you in bad situations.
66MP is, as always, a good poke. Poking with 2LK is also good, since it gives Jedah some options afterwards.
If she's dashing a lot, poke her out with 5LP.
ES spin scythes do really well here. If she jumps in on one of them, she has no air moves so you can always claw, or ES claw her.
If you need some room, you can grab her when the opportunity arises.
You're disadvantaged, but this matchup is surely winnable if you make the least amount of mistakes as possible.
Lilith: 4-6. This matchup is a little even, but leaned towards Lilith's side.
Her air fireballs zoning is very good and limit your movement. Her shiney blade isn't a warm welcome to your dashing and mixups either. Her jumping in can lock you down and put you in bad situations, especially if you're in the corner.
The good news is that it's easy to kill her while playing patiently, and you can keep her out for enough time to do damage. Play this matchup like you would do against Demitri, but here you have a little more freedom.
You can meet her in the air with j. LK, j. MP, j. MP, j. MK, into j. HP, and then land and 5LP. Also, remember to use your GC baits as explained in the Demitri section.
When you decide to Dark force, try and chicken block first to see if she shiney bladed or not. Or you could go around and j. MK xx ES spin scythe. You will get huge amounts of damage off of her because she has low stamina.
If she likes to jump a lot, and you predict one, 5MP her out of the air for an early anti air. 2MK is a good anti air from a distance, but don't do it if she superjumps on top of you because you could eat a big combo.
Just play some good zoning, pick her apart, take your hits and don't take too much damage from her stuff. It's not too hard to avoid damage against her because she doesn't have high/low mixups: her main mixups are just strings and jumping mixups, and the occassional throw.
The matchup will take a while to win.
Victor: 5-5. Against Victor, you want to avoid the corner at all costs. You need to be able control your space. because in the corner, a good Victor player is vicious.
66HP can zone pretty well, but careful to not get GC'd: a knockdown puts you in a bad position of either being mixed up, or rolling towards the corner. Victor isn't the fastest at cornering, but when he does get the chance, he won't be letting you out soon.
Make use of him being big and use your 66MP, 66HP, j. MP into whiffed j. MK into 5MK (this is very useful), and dashing over and around him with j. MK then j. HK, j. HP, or j. MP.
The hardest thing about this matchup is Victor's stamina, the best in the whole game. It might take a few more opportunities than normal to take him down. It's not too hard since he's so big and your number of options during mixups increases.
If you want to use spin scythes, use the ground LP one, or the air HP one. The idea is to put it low so that he can't cancel it out with his electric moves.
Since Victor is big, you can GC him if you want to, but don't abuse it.
5MP can poke him out of a lot of things and it can early anti air a jump when you expect one. Don't try and anti air him, his j. HP has too much priority. Instead, either chicken guard airdash or just chicken guard with j. MP, then dash up and mix it from there.
Dark Force is ok here, just don't get GC'd and you should be fine.
In general, you want to keep him out while maintaining your space and distance from the corner. If you need to, throw him back into your corner after a spin scythe mixup or dash mixup.
Morrigan:: 5-5. Here, Morrigan is at an advantage when up close, and Jedah has the upperhand at about a character distance away. From full screen, the match is neutral.
Morrigan will either be very close or farther than where you want her. This is more of a positioning match if anything and can take a while to get used to.
You can apply the same general tactics against Demitri and Lilith about their GC's.
When you're at a character space away, you can 5LP her out of her dashes and pokes.
Another good normal is 2MK, it serves the same purpose but it is a bit more valuable because you can early anti air her with it too.
In the air, you want to jump around where her DP will whiff hitting you. From that distance you can throw spin scythes.
When using Dark Force, include baiting her shadow blade as a mixup.
She is also small, so you can crossover 66HK easily.
Other alternatives are the usual 2LK xx ES spin scythe, or empty dash into 2MK and 2HK.
If you want to meet her in the air, use j. LP, j. MP, j. MK, j. HO, then land and 5LP.
Since she has some tools like ES shadow blade, and ES soul fist, it will test out your more basic Jedah skills, since you can't resort to your usual mixup dashing and airdashing.
This matchup is like the one vs Demitri, but a little easier, and slightly different because she has a hovering dash.
Play safely, stay in your 'sweet spot' distance, and get your hits and momentum from there.
Anakaris: 8-2. This matchup is so free in so many ways I don't know where to start.
Well, I guess I'll go over the one thing he can do before we proceed to learn how to make him a wrapped cloth punching bag mummy pinyata: the one thing he can do is get lucky with a few mixups, but he shouldn't even really be given that opportunity.
Ok to start off, HP of all kinds out prioritize his moves. 66HP is really good to spam on him, he can't to too much about it.
Another one is MP. On the ground it early anti airs him, in the air it just rapes him some more.
You can stop his dashing with 5MK pokes.
Your 5LP can knock him out of his little pyrimid tri jumps.
Another great normal is 2MK as it usually is for other matchups, and even better here.
Pretty much all your normals rape him. Even Jedah's j. HK is good and beats a lot of Anakaris' stuff.
To make matters better for you, he can't shake you off with an AG. So pretty much, you're free to use whatever tools you want to use in this matchup.
Go wild and freestyle. It's all a good tactic here, not many ways you could go wrong.
Attack Data Tables
Normals
| Input | Red Dmg. | White Dmg. | Cancelable | Guard Direction | Startup | Active | Recovery | Hit Adv. | Guard Adv. | Meter (Whiff/Block/Hit) | Notes |
|---|---|---|---|---|---|---|---|---|---|---|---|
| 5.LP | 5 | 8 | Special/Rapid | Both | 4 | 3 | 10 | +6 | +5 | 0/3/6 | Renda Bonus H:+9/G:+8 |
| 5.MP | 8 | 14 | — | Both | 10 | 3 | 19 | -1 | -2 | 3/9/15 | |
| 5.HP | 13 | 20 | — | Both | 9 | 2;2;2 | 38 | -13 | -14 | 6/9+3+3/12+6+6 | 3 hits (Each hit: 5r/8w) |
| 5.LK | 5 | 8 | Special/Rapid | Both | 5 | 3 | 7 | +6 | +5 | 0/3/6 | Renda Bonus H:+9/G+8 |
| 5.MK | 10 | 15 | — | Both | 7 | 5 | 26 | +1 | 0 | 3/9/15 | |
| 5.HK | 12 | 18 | — | Standing | 35 | 2;4 | 36 | KD | -7 | 6/15/24 | 2nd & 3rd hitboxes: 9r/14w |
| 2.LP | 5 | 8 | Special/Rapid | Both | 5 | 2 | 10 | +7 | +6 | 0/3/6 | Renda Bonus H:+9/G:+8 |
| 2.MP | 8 | 14 | — | Both | 12 | 5 | 16 | +3 | +2 | 3/9/15 | |
| 2.HP | 13 | 20 | — | Both | 10 | 2;2;2 | 44 | -18 | -19 | 6/9+3+3/12+6+6 | 3 hits (Each hit: 5r/8w) |
| 2.LK | 4 | 8 | Special/Rapid | Crouching | 6 | 3 | 8 | +6 | +5 | 0/3/6 | Renda Bonus H:+9/G:+8 |
| 2.MK | 9 | 15 | — | Crouching | 12 | 7 | 14 | +1 | 0 | 3/9/15 | |
| 2.HK | 12 | 19 | — | Crouching | 18 | 9 | 34 | -6 | -7 | 6/15/24 | |
| j.LP | 5 | 9 | Special | Standing | 6 | 4 | 8 | — | — | 0/3/6 | Meter after airdashing: |
| j.MP | 8 | 14 | — | Standing | 9 | 3 | 11 | — | — | 3/9/15 | Meter after airdashing: |
| j.HP | 13 | 20 | — | Standing | 9 | 2;2;2 | 27 | — | — | 6/9+3+3/12+6+6 | 3 hits (Each hit: 5r/8w) Meter after airdashing: |
| j.LK | 5 | 9 | Special | Standing | 5 | 6 | 3 | — | — | 0/3/6 | Meter after airdashing: |
| j.MK | 9 | 15 | Special | Standing | 7 | 4 | 9 | — | — | 3/9/15 | Meter after airdashing: |
| j.HK | 12 | 20 | — | Standing | 11 | 2;4 | 9 | — | — | 6/10+4/15+9 | 2 hits (1st: 7r/12w; 2nd: 5r/9w) Meter after airdashing: |
Special Moves
| Move | Startup | Hit
Advantage |
Block
Advantage |
Meter
Whiff/Block/Hit |
Guard | Notes |
| 236LP | 46 | 12/13+1+1/15+3+3 | Mid | Knocks down airborne | ||
| 236MP | 46 | 12/13+1+1/15+3+3 | Mid | |||
| 236HP | 46 | 12/13+1+1/15+3+3 | Mid | |||
| 236PP | 46 | 0/ 0/ 0 | Mid | |||
| j.236LP | 44 | 12/13+1+1/15+3+3 | Mid | Knocks down airborne | ||
| j.236MP | 44 | 12/13+1+1/15+3+3 | Mid | Landing Suki: 1F | ||
| j.236HP | 44 | 12/13+1+1/15+3+3 | Mid | |||
| j.236PP | 44 | 0/ 0/ 0 | Mid | |||
| 214LP | 11 | Down | 14/29 | Unblockable | ||
| 214MP | 11 | Down | 14/29 | Unblockable | ||
| 214HP | 11 | Down | 14/29 | Unblockable | ||
| 214PP | 11 | Down | 0/ 0/ 0 | Unblockable | ||
| j.624LK | 47 | Down | 12/22 | Unblockable | Landing Suki: 2 | |
| j.624MK | 47 | Down | 12/22 | Unblockable | ||
| j.624HK | 47 | Down | 12/22 | Unblockable | ||
| j.624KK | 47 | Down | 0/ 0/ 0 | Unblockable | ||
| j.624LK~P | 62 | Down | 12/21/30 | Mid | Landing Suki: 1 | |
| j.624MK~P | 62 | Down | 12/21/30 | Mid | ||
| j.624HK~P | 62 | Down | 12/21/30 | Mid | ||
| j.624KK~P | 62 | Down | 0/ 0/ 0 | Mid | ||
| 623LP (GC) | 13 | Down | -30 | 22/26/31 | Mid | Invulnerable Time: 13F |
| 623MP (GC) | 13 | Down | -30 | 22/26/31 | Mid | |
| 623HP (GC) | 13 | Down | -30 | 22/26/31 | Mid | |
| 623PP (GC) | 13 | Down | -42 | 0/ 0/ 0 | Mid | |
| 624MK | 6 | Down | x | 12/21 | Throw | |
| 624HK | 6 | Down | x | 12/21 | Throw |
EX Moves
| Move | Gauge | Startup | Hit
Advantage |
Block
Advantage |
Guard | Notes |
| 426KK~K | 1 | 33~ | Down | x | Unblockable | |
| 22PP | 1 | 42 | Down | x | Unblockable | Auto-targets |
Jedah Memos
- Character highlights from Twitter
- Use Neo-Fatica to break Felicia's "Cat Guard" after an air-block Dio-Sega
- Jedah's taunt has throw-invulnerable frames
- Punishing his Dark Force is best with a standing-only normal as he wakes up. If the punish is on frame-1, he can block it.
Jedah Bugs
- Nero Fatica Off-screen
- If the opponent push blocking Jedah who then cancels the normal that was push blocked into his Nero Fatica (214.P). If the opponent then stands up to get hit with the swipe, Jedah will zoom backwards and off of the screen. From this spot, although he can perform actions, he cannot hit his opponent and his opponent cannot hit him. Jedah is essentially trapped and unable to re-enter the screen. The only solution is to immediately do a pursuit attack to the knockdown that Nero Fatica caused, landing Jedah back onto the play-screen. In a tournament situation if Jedah fails to get the pursuit from Nero Fatica hitting, Jedah will forfeit the match. Otherwise the match is effectively unplayable and forced into a time over. There is one other way for Jedah to get back on the screen, he must somehow hits the opponent with his Finale Rosso (22.PP). If this hits he will re-enter the screen. It's hard to see coming since you can't see his start up animation, but it's still fully jumpable. If the opponent does not want to get hit by it the match has no choice but to time over. Zabel's Hell Dunk does not operate the same way, for if he hits an offscreen Jedah with it he is unable to complete the move itself, rendering both players unable to move until the match times over.
- It gets silly when Zabel does Hell-Dunk at this time. The number of bounces is determined by how many times Jedah has wrapped the screen
- Nero Fatica misses Zabel if walking from his crouch
- Wheel x Throw Tech
- Guard-Lock Unblock w/ Dio Sega
- Morrigan does not change colors with an interaction consisting of Finale Rosso & Cryptic Needle.
- If you activate DF from crouching, you can not guard against overhead attacks (jump attack?) command normals in the air. The state continues until landing and floating again.
- It's believed, but not proven, that while in Dark Force Jedah's flight command (66) is active on the first frame.
- While in Dark Force, air dashing into a Dio-Sega carries the momentum into the Dio-Sega. The projectile moves until the active frames begin.
- If dashing with 66 & holding 6, attacks come out 1f frame faster. Jedah has an {infinite of 66.J.HP} xN against standing Bishamon, Q-Bee & Demitri
- Player-2 walk through bug does not apply. (Verify) jedah is forced to dash (hold-6) to initiate the corpse-hop. Dashing J.HK then Neo-fatica can be effective.
- While in Dark Force, after an ES-Dio-Sega's, another ES-Dio-Sega or ES-Ira Spinta Dive Throw will have graphical inconsistencies (Light-Blue Graphs).
- Unexplained bug where a Dark Force activation causes shadows to become white.
- Dark Force x Nero Fatica Display Bug
- https://twitter.com/egooolei/status/980243812592238592
- https://twitter.com/egooolei/status/980818991823273985
- https://twitter.com/VMP_KyleW/status/988653035399270400
- https://twitter.com/VMP_KyleW/status/1034262031535202304
- https://twitter.com/VMP_KyleW/status/1034261920902086656
- https://twitter.com/VMP_KyleW/status/1034261748113498113
- https://twitter.com/VMP_KyleW/status/1034261554802262017
- https://twitter.com/VMP_KyleW/status/1034261440536797184
- Unblock ES-Guard Cancel Frames
- See The first chart here - Jedah is at frame# 07
- Jedah can cause display bug related to Dark-Force & the stage's background
- Draw Game x Dark Force x Finale Rosso - Display Bug
Notable Japan Players
Japanese Player Index: http://www21.atwiki.jp/vsplayer/pages/18.html
| Name (English) | Name (Japanese) | Color | Location | Contact | Notes |
|---|---|---|---|---|---|
| Oouchi (aka SaviorMeister) | 大内 | MK 
|
Yamagata | His color is purple - You must train for 10,000 years | |
| Shimatsuya | 始末屋 | HK 
|
Sendai | http://twitter.com/shimatuya https://www.youtube.com/channel/UCo394MFI-W0i9J5uXPO43aw |
|
| Teitoku | 提督 (Kanji) ていとく (Hiragana) |
LK 
|
Kanto region | http://twitter.com/teitoku_jedah | |
| Hoe | ほえ | HK 
|
Kanto region | ||
| Benzou | べん造 | HP 
|
Fukuoka | http://twitter.com/benzou0952 | |
| Futana | フタナ | LK 
|
|||
| Olive Oil | MK 
|
Rookie Champ & Artist | |||
| JB | HP 
|
