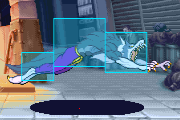
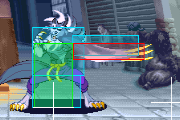
Vampire Savior/Gallon
Introduction
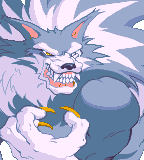
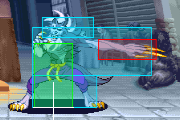
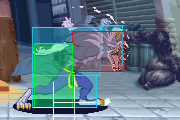
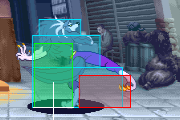
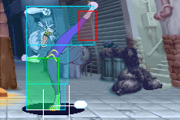
Gallon (ガロン), also known as Jon Talbain, the Werewolf. Gallon is a simple and powerful rushdown character with a high reward throw game backed up by powerful frametraps that, when he has meter, give him even higher reward. His jump arc and air buttons are some of the scariest to deal with in the game and he has a high walk speed that will low profile to some degree to back up his ground game. While he has a high/low game, it isn't super strong and his primary way of opening you up will be with strike/throw.
His defensive options are also a bit lacking with his guard cancel not being particularly strong or reliable and his health is a bit low. While he has some long range buttons on the ground, they can have awkward ranges relative to each other and you'll have to be quick with your confirms. Gallon's basic pressure is fairly simple, but will require creative use of his command dash and good awareness of the corner to open up strong players.
If you want a strong straightforward character with huge damage potential and solid pokes, Gallon may be for you.
| His Strengths | His Weaknesses |
|---|---|
|
|
Normal Moves
- Here is a Breakdown of Gallon's normal attacks; by KEN
Standing Normals
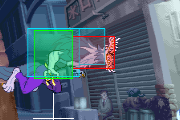
| 5LP
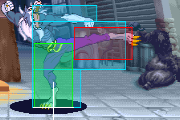
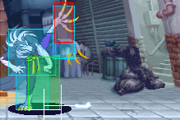
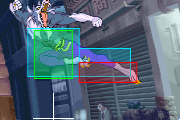
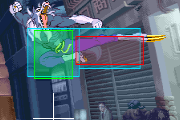
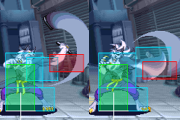
[ Startup: 4 | Hit: +6 | Block: +5 ] Gallon's standing LP isn't particularly outstanding; however, it has some situational uses that are very important to know. First off, this is the move you'll be using for Guard Breaks. Second is that it's one of Gallon's important moves for stopping Instant Air Dash (IAD) pressure. When the IAD is initiated in close proximity to Gallon, this is your fastest and most reliable answer, for better or worse. | |
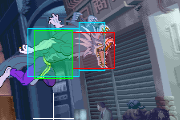
| f.5MP
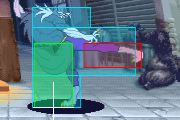
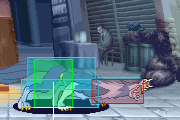
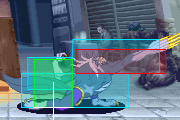
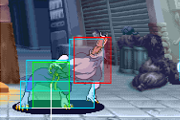
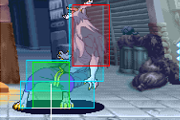
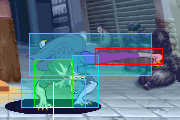
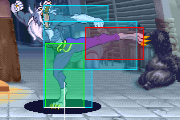
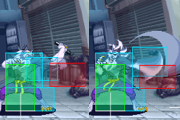
[ Startup: 7 | Hit: +4 | Block: +3 ] The only thing this move is really good for is baiting Guard Cancels; if you look at the hitbox, Gallon's vulnerable box doesn't expand outward nearly as far as his other standing normals. It's still not a GREAT option for baiting GCs, but it's worth remembering. | |
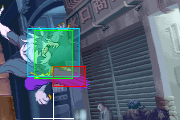
| c.5MP
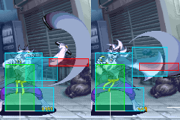
[ Startup: 6 | Hit: +3 | Block: +2 ] You won't be actively using this move; but, for what it's worth, it does more damage than its faraway counterpart, so smile if this one comes out during a chain. | |
| c.5HP
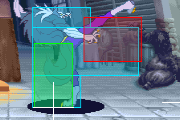
[ Startup: 9 | Hit: +6 | Block: +5 ] HP can be used for zoning to a small extent, but will fall to the wayside for his better options. More importantly, this is a good finisher for damage-oriented chain combos. | |
| f.5HP
[ Startup: 8 | Hit: +3 | Block: +2 ] I used to see no use for this move, but I did find one good use for this move by watching a great Gallon player: You can use this move as a meaty on wakeups or resets. Since the startup is different from Gallon's other usual pressure normals, its use for Variable Blockstun Pressure is wonderful. Try doing meaty f.5HP - 2HK a few times if you find your opponent likes to try and AG everything or jump all the time. | |
| f.5LK
[ Startup: 5 | Hit: +5 | Block: +4 ] This move might be more important if Gallon ever had to rely on it, cos the hitbox and frame advantage are not half bad. As it stands, though, Gallon is super agile and has a hop dash, so you won't be seeing this move too often. Also, it doesn't hit low. Laaaaaame! | |
| c.5LK
[ Startup: 5 | Hit: +3 | Block: +2 ] It's a less reliable version of 5LP; it has all the same uses (Guard Breaks and IAD Defense), but with lower priority and the added possibility of getting the far LK, which has absolutely no use for either of those situations. Seriously, stay away from the the Light Kick button if you are standing! | |
| 5MK
[ Startup: 6 | Hit: +2 | Block: +1 ] There is one, esoteric use for this move outside of combos: it's Gallon's best jump-deterrent from far ranges. Throw this in during ground pressure on occasion to keep your opponent from randomly jumping out. This move does more damage than its crouching counterpart, so if you're starting a chain combo from really close, don't be shy to throw in this move instead of 2MK. | |
| f.5HK
[ Startup: 9 | Hit: 0 | Block: -1 ] Considering Gallon's propensity for landing the near version of this move, you're bound to get a few of these on accident. Do not, however, proactively try and use this move, because it's just begging to get GC'ed and is not a very happy move on block in the first place. | |
| c.5HK
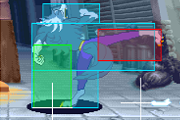
[ Startup: 7 | Hit: -3 | Block: -4 ] From a theoretical standpoint, this move looks like crap; the hitbox is stupid, and it has a frame disadvantage on HIT. However, this is one of Gallon's best moves, as it's a pivotal part of his throw option select; go for a throw using the HK button, and if your opponent attempts to escape by jumping, they'll be swatted out of the air by this move, resetting the situation. Don't be fooled - this move is awesome. |
Crouching Normals
| 2LP
[ Startup: 5 | Hit: +5 | Block: +4 ] One of Gallon's extremely important normals. It has an absurdly large and long-reaching hitbox for a Crouching Jab, it hits low, and can be canceled into special moves. It's also pivotal in Gallon's ground pressure, as he relies heavily on the reach of his normals combined with his Quick Move and hop dashes to lock an opponent down. Don't be surprised if a lot of your big-damage ventures start with a Crouching Jab. | |
| 2MP
[ Startup: 8 | Hit: +1 | Block: 0 ] This is another important part of Gallon's pressure strings, as it allows him to do some ground pressure from farther away than 2LP without the use of a dash. Its range is unnecessarily long and is also another excellent move for dealing with IAD Pressure when the opponent starts the IAD from a fair distance away. | |
| 2HP
[ Startup: 9 | Hit: -8 | Block: -9 ] Thanks to the terribad frame disadvantage on hit and block, it's imperative that this move be used only as an anti-air. Incidentally, this move is pretty situational thanks to how long it takes for the move's active hitbox to reach its full height. When the situation DOES call for C.Hp, though, it tends to be surprisingly powerful. Try using it in a Gallon mirror match and have a laugh when the opposing Gallon can't jump in on you at all. ...Also, try it in other situations. | |
| 2LK
[ Startup: 5 | Hit: +5 | Block: +4 ] You'll be seeing a lot of this move in pressure strings with Gallon, usually immediately after starting pressure with a 2LP. It's also important to throw this out intermittently during pressure strings because it's the only really solid GC bait that Gallon has, thanks to the relatively small vulnerable hitbox. Learn to use this move intelligently unless you love taking Demon Cradles to the face. | |
| 2MK
[ Startup: 7 | Hit: +3 | Block: +2 ] This is like the MVP of all Gallon's normals. It's very quick, has a long range, and a variety of uses. It can be used in Gallon's pressure strings to peg jumpers. It can be canceled into Quick Move for positioning. It's also the prime candidate for comboing into ES Beast Cannon for big damage, which can be done during pressure or just after connecting a jump-in. If you really want to spice things up, try canceling this move into ES Beast Cannon from max range; it will not combo, but it WILL leave just enough time for your opponent to try some sort of counter or escape (and fail), allowing you to land the entire BC anyways. | |
| 2HK
[ Startup: 9 | Hit: Knockdown | Block: -6 ] Gallon's sweep isn't all that great, but it has its uses. It will most commonly see use as a finisher for a knockdown-oriented chain combo. Another more esoteric use is for Gallon's ground pressure game; after canceling a normal into Quick Move, Gallon can throw this out for a ghetto high/low mixup game in tandem with his short hop dashes. Due to the long startup, however, this is not the safest maneuver; although it's a powerful option, it should be used with discretion. |
Jumping Normals
| j.LP
[ Startup: 5 ] As a jumping attack, this move doesn't have a lot of use. As with some of Gallon's other normals, it's not so much that it's a bad move as it is that Gallon just has even better options. It does have the fastest startup of Gallon's horizontal-reaching jump attacks, so it may be of use in like 1/100 matches? As a dashing attack, this move sees a lot more use, thanks to the power of the the dash link [66LK, LP] against cornered opponents. | |
| j.MP
[ Startup: 6 ] As a jumping attack, this move sees a bit of situational use in air-to-air defense, but its primary use is to lengthen your air chains for Chicken Guard mind games and setting up Guard Breaks. As a dashing attack, this can be linked into dashing MK, but this is ultimately a rare occurrence; Gallon's dash attacks are pretty much exclusively used as overheads, and 66MP will whiff on crouching opponents. ...So, I guess what I'm trying to say is that the dashing version of this move has little-to-no practical use in a real match. | |
| j.HP
[ Startup: 7 ] As a jumping attack, this move is very powerful as a jump-in and will overwhelm many characters' anti-air defenses entirely when used in conjunction with crossup j.LK. If you anticipate a mistake from your opponent, it can be chained into j.HK before landing into a very big damage combo. As a dashing attack, this attack is decent as a surprise finisher if you think it will end the match. Otherwise, it can be used as a meaty attack against opponents who like to roll back on wakeup. In that particular situation, it's pretty easy to follow it up with a chain combo or use it for a tick throw. | |
| j.LK
[ Startup: 5 ] As a jumping attack, this is an extremely important jump-in. What it lacks in power compared to j.HP, it more than makes up for with its greater priority and superfluously easy crossup potential. It can be used as an ambiguous crossup after knocking down an opponent in the corner, and is generally the only reliable way to hit confirm into Moment Slice [Crossup j.LK, 2LP > 2MP xx Moment Slice]. Use this move liberally. As a dashing attack, this move has a high amount of utility. It can be used in a short hop dash during Gallon's ground pressure game for some high/low mixup, and can also be used against cornered opponents to start a dash link [66LK, LP]. The dash link works on all but the shortest characters, but the flipside to this is that against those short characters, it's very easy for Gallon to do a crossup short hop attack. Basically, this move rules. Do it. | |
| j.MK
[ Startup: 6 ] As a jumping attack, this move is pretty important. Its reach and priority are very high, making it a good utility move in many situations. It also has crossup potential (albeit pretty low), and is part of Gallon's meter-building empty air chain (j.MK, j.HK). If Gallon connects with this move deep enough, it can also be comboed into a Beast Cannon. As a dashing attack, this move is important for use as a short hop attack from ranges too far for the use of Dashing Short. It's also part of Gallon's other important Dash Link [66MK, LK], which works on taller characters in the corner AND midscreen. This makes the move a very important part of Gallon's ground pressure against tall characters. | |
| j.HK
[ Startup: 7 ] As a jumping attack, this move's primary use is for zoning in the air. It can be used as a jump-in in most matches, but it can and will whiff shorter characters, especially B.B Hood and Q-Bee. So, make sure to be conscientious when using this move against shorties. As a dashing attack, it works pretty similarly to 66HP (gimmicky finisher, tick throw). It's not very good as a meaty for landing a chain combo afterwards, but it makes up for that with the gimmicky use of being able to hit people from far away for doing dumb stuff. See how long it takes a Q-Bee or Rapter player to wise up and stop doing IADs from full screen after pegging them with this move over and over again. Finally, this is a randomly good maneuver against Lilith, as Gallon can dash over a grounded Soul Flash from fullscreen and kick her in the face. |
Command Normals
| 6MK:
[ Startup: 10 | Hit: +2 | Block: +1 ] This is just like the normal 5MK, but Gallon takes a step towards the opponent first. Doing this move will end a chain combo. It's generally used in pressure situations if you anticipate that your opponent will try and escape your pressure by jumping back. |
Throws
P Throw:
If you're smart, you won't be using this as much as Gallon's Kick Throw, since the Kick Throw has a built-in option select with n.HK. Still, the Punch Throw is handy in very specific instances; particularly, if you anticipate a Tech Hit and you haven't buffered the motion for Wild Circular, Punch Throw is excellent in this situation because Gallon recovers from the throw very quickly. Conversely, Gallon's Kick Throw recovers just barely before his opponent gets back on the ground, so it doesn't leave Gallon a lot of breathing room to do much else except another throw. You won't be using this often, but don't forget about it, either.
This throw can also be used after Dark Force Activation to set up an unblockable.
K Throw:
First rule: Always, always, always throw with HK. Using HK gives Gallon an Option Select; stay on the ground and get thrown, or jump and get reset immediately by n.HK. Other than that, this throw is effective because of the horizontal space it covers, making it easy to put an opponent in the corner.
- K-Throw places the opponent backwards, causing turn around frames & negating the opponents ability to perform a REVERSAL. If the K-Throw is used to complete the first bat, Gallon will be backwards & cannot complete a REVERSAL.
Air Throw:
...Uhh...Well, it IS an air throw. I don't use it often, but it also causes Gallon to cover a lot of ground horizontally, so it CAN be useful...
Pursuit Attack
Pretty crappy Pursuit overall. Slow travel time, and low damage because it's only one hit (ES Pursuit is still only two hits). It's still effective to use as a late Pursuit to stay on your opponent though, so be sure to learn the timing for that.
Movement
Walk:
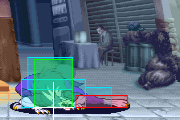
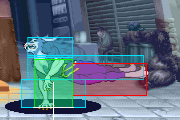
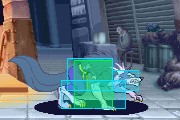
Gallon's walk animation & idle crouching animation is the second shortest in the game. It makes his vulnerable hitbox shorter and wider. He can walk under almost any fireball in the game, except for obvious ones like B.B Hood's low fireball. Watch out when trying to walk under a fireball and counter-attack; if you use the wrong moves while under a fireball, Gallon's hitbox will extend upwards, causing him to get hit by the fireball anyways.
Dash:
Gallon's Dash is a hop dash. It's probably the hardest of all three hop dashes to use effectively (and perhaps the only technically difficult maneuver with Gallon at all), but it's also a huge boon to his pressure game, so learn how to short hop effectively with 66LK and 66MK, as he can link out of these moves into full combos.
Jump:
Gallon's jump is so fast that from midscreen, you can anticipate your opponent throwing out a Medium or Hard attack, and do a jump-in into anything. Is it any wonder why new players abuse it so much? Make sure you abuse it too, but know your limits.
Specials
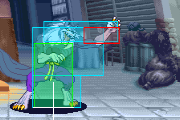
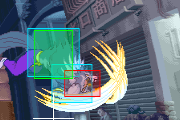
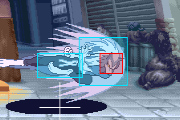
Beast Cannon – 236P:
| |
| Air Beast Cannon – j.236P:
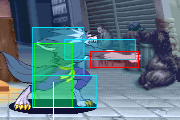
This is a variation of the other Beast Cannon attack, done in mid-air, which travels diagonally towards Gallon's opponent.
| |
| Beast Cannon (diagonal) – 623P (Guard Cancel OK):
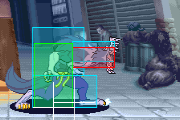
This is a variation of the other Beast Cannon attack, which travels diagonally towards Gallon's opponent.
As a final note, this move is Gallon's Guard Cancel. This may sound cool at first, but keep in mind that GCs do half damage, so you don't actually have an epic 50%-life ES Guard Cancel. Also, the hitbox is really tiny, so don't even think about using it unless your opponent is right up in your grill. | |
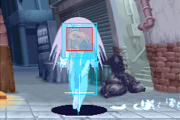
Climb Razor – 28K:
| |
Million Flicker – 214P:
| |
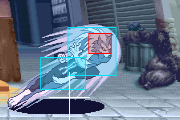
Wild Circular - 624K (close):
| |
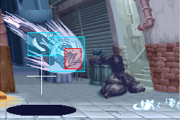
Quick Move - 1KKK, 2KKK or 3KKK:
|
EX Attacks
| Dragon Cannon - 41236KK:
As with most EX Attacks, this move is for specific situations. Dragon Cannon is very effective against opponents about to lose a lifebar. If you think your opponent is going to attack you - especially after a knockdown - throw this move out to punish them for making such a predictably desperate choice. For kicks, try doing this move if you think an opponent is going to roll behind you for a crossup Dragon Cannon. Note: the game accepts 4123KK as the input for this move | |
| Moment Slice - LP, MP, 6, LK, MK:
Command Super. It's important to not that even though the move says to press towards your opponent (6), it can be any toward motion (6, 9, or 3), and you'll usually be comboing with Down-Towards (3). Most command supers tend to be imperative to a character's game, but Gallon's is not. The main problem is that it's incredibly hard to hit-confirm; it's possible to do [2LP > 2MP xx Moment Slice]; but your opponent will be pushed too far away if you try to combo it off of a normal jump-in. To mitigate that, you could try [2LP/2LK xx Moment Slice], but that's still not all that easy to hit confirm (or to execute, for that matter). There's only one situation where Moment Slice is easy to hit-confirm, and in that instance, it's very important to do land it as much as possible: when landing a crossup j.LK, do the combo [Crossup j.LK, 2LP > 2MP xx Moment Slice]. Doing Moment Slice when possible is important for Gallon, because it's his best method of dealing red (unrecoverable) damage. This move can also be used in an option select after his 8j.LK crossup shenanigans. If you've knocked a cornered opponent down and you anticipate that they will roll towards you, jump straight up from the point where you think the roll will end, and do the following input: [j.LK, 2LP > 2MP, 3, 2LK > 2MK > 5HP]. If you crossed your opponent up successfully, you'll see [Crossup j.LK, 2LP > 2MP xx Moment Slice]. If you did not cross your opponent up, you'll get [j.LK, 2LP > 2MP > 2MK > 5HP]. Basically, go for this move if you land a cross-up, not so much if you didn't. Finally, this move will whiff crouching Q-Bee, so don't do it unless you get your jollies by doing elaborate whiff-to-throw setups. |
Dark Force
Illusion Attack: Mirage Body - Same strength P + K:
- (Any Version): Mirage Body causes all of Gallon's normals to hit multiple times at slightly staggered intervals, similar to a Variable Combo from Street Fighter Alpha 3. Gallon's Dark Force is crap as a pressure tool, because the duration is too short. If an opponent lands even one string or knockdown on Gallon, it's likely to run out and force a deactivate before he gets the chance to try and deactivate safely.
- Variance: Dark Force activation has (2) possible mirage patterns, each with a difference in the timing between Gallon starting an attack & the Mirage starting the same attack. Unfortunately, this makes all of Gallon's DF combos unreliable in a match as (1) version is perfect for links & the other is too slow.
- Pattern# 01 is a 9-frame delay
- Pattern# 02 is a 16-frame delay
- Either pattern can vary by +1-Frame
- Example Dark Force combos:
- It's best used as a a defensive tool, due to its prolonged invulnerability frames. Some common ways to set up a safe deactivate:
- Backdash j.HK, Deactivate
- Beast Cannon (towards, then away; 6, 4), Deactivate
Strategies
Gallon doesn't have the insane high/low mixup of the top tiers. What you want to do with Gallon is to zone/poke with his powerful pokes, mixup with throws and Beast Cannon, then for every opening go for his powerful ES Beast Cannon Juggle for the win.
Poking:
On the ground, use 2LP (quick, safe), 2MK (cancelable), 2MP (fast, good range) and 5HP. Use 2HP and close HK to beat jumps. If you predict a jump, 2MP is usually your best friend, as it's really fast and safe.
Gallon's jump is incredible. j.HK and j.MK are your friend in the air. Use them to keep people away from you.
From a distance, remember you have your dash to create overheads.
Pressure/mixup:
Use your long range ground pokes and j.MK, j.HP, j.HK to keep the opponent from jumping. Any j.HP that connects leads to whatever big combos you want.
Throws:
66LK, j.LK and 2LK are good ticks. Also, remember that cancellable normal xx 2KKK is great for getting in for a throw.
Finally, add Beast Cannon to your game. Don't activate it randomly. Find an opening when you jump (if they're afraid of your kicks) or use the ES version (faster, more followups). Beast Cannon can set up a lot of ambiguous crossups and even unblockables.
- SkankinGarbage's blog
Combos
Terminology
- > = next move is a chain
- , = next move is a link
- xx = next move is a special or EX cancel
To understand the numeric damage values, refer to the following explanation:
37/58 <--- First number = Red (permanent damage). Second Number = White (recoverable damage). All characters have 144 HP. Damage numbers tested on a character with average vitality.
Chains
There are three main chain combos to know, and I will list them along with the damage they deal.
1. 2LP > 2/5MP > 2/5MK > 5HP (26/44 Damage, or 29/47 Damage)
This is Gallon's primary damage chain. Damage chains are primarily used as a reset to set up a quick high/low mixup of some sort. They are also useful against characters who have a hard time taking advantage of 'neutral' situations where neither opponent has the offensive advantage (because, in a way, you technically give it up when you do a damage chain and get it back by landing a mixup right afterwards).
Anyways, this chain works on most of the cast, but will miss some characters...and by some characters, I mean Q-Bee. Screw her. The MP and MK can be done standing or crouching; the crouching versions have better range, while the standing counterparts deal more damage. The standing Mk will also miss against "some characters" so keep that in mind.
2. 2LP > 2LK > 2MP > 2MK (20/34 Damage)
This is Gallon's other damage chain. This one is of course favorable against Q-Bee because it actually works against her. However, it's still plenty useful in other situations. For one, the range on it is better than the first combo, because the finishing attack (2MK) has more range than the first combo's finisher (5HP). It also is better for resetting a situation, because the spacing is perfect for any dashing option that Gallon has. Try it against taller characters, as it sets up the Dash Link [66MK, LK] perfectly.
3. 2LP > 2LK > 2MK > 2HK (19/35 Damage)
This is Gallon's knockdown combo. Knockdown chains are less risky than Damage chains, as they (obviously) force a knockdown and leave you with the offensive advantage.
There's not much to be said about it. The range of Gallon's 2HK isn't particularly great, so I wouldn't generally attempt a different variation on this combo. In fact, sometimes I omit the 2MK entirely. You will be very sad if the 2HK whiffs, so if it looks risky, shorten the chain. Remember, your goal is to hit-confirm a knockdown with this chain - not to deal damage.
Dash Links
Of the three characters with Hop Dashes (Gallon, Sasquatch, Felicia), Gallon is the only character who can combo one dashing attack into another. Sasquatch can perform two attacks in a single dash; however, the recovery/startup on his attacks are too great for them to truly link. Use this to your advantage with Gallon. There are two Dash Links to know (Keep in mind that you will obviously follow these up with some sort of ground chain):
1. 66LK, LP
This is your more common Dash Link. It works on 2/3rds of the cast, and is quite an excellent maneuver to break out with suddenly. This Dash Link is for the corner only! You will fly right over your opponent if they are midscreen.
2. 66MK, LK
For midscreen purposes, this is what you'll want to be using. Keep in mind that you can still fly over your opponent if you do this too close; you'll want to be at the max range where an instant 66MK will hit the opponent. This Dash Link works in the corner as well, but the timing is much stricter than [66LK, LP]. so I don't recommend using it in the corner unless you're at the very specific range where this Dash Link will work and the other one won't (i.e not that often).
[66MK, LK] works only on taller characters, because most characters can crouch under 66MK unless used as a Short Hop. So, I've compiled this list for you!
The following characters can be hit by both 66MK and 66LK while crouching, meaning that both Dash Links work:
- Rikuo (Although [66MK, LK] can be tricky on him)
- Bishamon
- Demitri
- Jedah
- Anakaris
- Victor
The following characters can only be hit by 66LK while crouching, meaning only [66LK, LP] works:
- L.Raptor
- Sasquatch
- Felicia
- Hsien-Ko
The following characters can only be hit by Short Hops:
- Gallon
- BB Hood
- Q-Bee
- Morrigan
- Lilith
B&B Combos
Gallon has three very important combos. I will list them here in order of importance, along with the damage dealt.
So, without further ado...
1. Air Beast Cannon, ES Climb Razor (2-4 Hits, 37/53 Damage)
A lot of people think that Gallon's most important combo is C.Mk XX ES Beast Cannon. That combo is very important, but it requires Gallon to already have the offensive advantage. In Neutral Situations, Gallon's best bet is to fish for a knockdown by safely using Air BCs from max range. Thus, this combo is the most important B&B in his repertoire, as it can be used effectively in any situation - not just when Gallon is in the middle of his rush.
Simply fish for that Air BC, and if it lands, do an ES Climb Razor for big damage (almost 40% of a lifebar!), and then begin your devastating offense. It's an absolutely easy combo, and the one you'll probably see the most. Keep in mind that you should almost never attempt to follow up with an ES Climb Razor if the opponent was airborne when the Air BC connected. ES Climb Razor whiffs practically every time, so it's not worth it.
You can combo an Air BC off of j.MK if you want a possibly variation on this combo; however, j.MK xx Air Beast Cannon requires a pretty deep jump-in and a pretty unsafe-on-block Air BC. So, tacking on a j.MK is more for show than anything else.
2. 2MK xx ES Beast Cannon (6 Hits, 29/70 Damage)
This is the combo that makes Gallon infamous. Cancel your 2MK into the single most damaging attack in the entire game incredibly easy. Keep in mind, too, that this is the simplest variation; the damage listed assumes no jump-in attack preceded the 2Mk, and it also assumes that Gallon did not follow up with a Pursuit Attack. The damage on this combo can get extremely high.
You'll be using this combo an awful lot as Gallon. There's only two reasons I list this combo below the ES Climb Razor juggle combo in importance. For one, it's really not something you can break out with in a neutral situation. This requires Gallon to already be pressuring his opponent to even have a shot at using it, making it less common than the Climb Razor juggle. For two, the amount of red damage done is piddling. If Gallon loses the advantage after this move (and a lot of Gallon players do, because they tack on the Pursuit Attack for a measly three (3) points of white damage), the combo's damage can potentially be negated.
Use this one often, but be very careful not to back off (or be fended off) afterwards. Better yet, consider using it mainly to finish off an opponent's life bar; then, you don't have to worry about them recovering all that life.
Variations include tacking on a jump-in and adding a Pursuit. Keep in mind that using a Pursuit is usually a poor idea unless it will cause an opponent to lose a lifebar or the match, as it limits the scope of Gallon's wakeup games significantly. Other variations include comboing it off of a Short Hop/Dash Link (which will require you to cancel into ES Beast Cannon from 2LP, NOT 2MK). Keep in mind that the damage is lowered pretty significantly when doing this, though - especially when using the Dash Links, the white damage can be as low as nineteen (19) points. Not really worth it, considering how difficult it is to pull off.
3. Crossup j.LK, 2LP > 2MP xx Moment Slice (4 Hits, 41/59 Damage)
Moment Slice is a very important attack to land at any point when it's possible, as it nets the most red damage out of any of his attacks. The only problem is, while your options for landing Moment Slice are aplenty, many of them are either difficult to hit-confirm or situation-specific. This combo is the most consistent method of landing Moment Slice, so be sure to take an opportunity to cross up opponents whenever you can.
There are tons of variations: The above combo can be done without crossing up, but it requires Gallon to land point blank in front of his opponent (not very likely to happen). Many jump-ins can combo into Moment Slice if the 2MP is omitted; however, those are not easy to hit-confirm. If you can pull it off consistently without the 2MP, then you might consider comboing it off of a Short Hop/Dash Link. Thankfully, unlike doing Dash combos into ES Beast Cannon, Dash combos into Moment Slice are virtually unaffected by damage scaling.
...Oh, and also keep in mind that Moment Slice can also whiff on "Some Characters". Grrr.
ES Ground Beast Cannon Follow-ups
1. Midscreen
9-7-9-2
7-6-7-2
7-9-7-2 (Swap Positions)
8-6-8-3 (Corner Push)
2. Corner
9-9-9-9 (Doesn't work on all characters)
8-9-9-3 (Works against the entire cast)
3. Guard Cancel
1-8-4-8
Matchups
I will update individual matches with more info later. For now, I'll give a general idea of how I see Gallon's matches. Keep in mind that there is also a Japanese matchup chart with opinions of higher level Japanese players, which may also be useful. In general, though, my disagreements with the matchup chart are that I find Gallon's matchups with the top tiers to be more in his favor, and his matchups with the bottom tiers to be slightly less in his favor.
Gallon has a huge advantage over (7-3+):
Jedah (7-3 Gallon) (Tier List 7-3 Gallon)
Anakaris (7-3 Gallon) (Tier List 6.5-3.5 Gallon)
Morrigan (7-3 Gallon) (Tier List 7-3 Gallon)
Gallon has a slight advantage over (Around 6-4):
Lilith (6.5-3.5 Gallon) (Tier List 6.5-3.5 Gallon)
Victor (6.5-3.5 Gallon) (Tier List 7-3 Gallon)
Bishamon (6-4 Gallon) (Tier List 7-3 Gallon)
Hsien-Ko (6-4 Gallon) (Tier List 6-4 Gallon)
Demitri (6-4 Gallon) (Tier List 6.5-3.5 Gallon)
Gallon is about even with (Around 5-5):
Aulbath (5-5) (Tier List 6.5-3.5 Aulbath)
Zabel (5-5) (Tier List 6-4 Zabel)
Q-Bee (5-5) (Tier List 5-5)
BB Hood (5-5) (Tier List 6-4 Gallon)
Gallon has a slight disadvantage against (Around 6-4):
Sasquatch (6-4 Sasquatch) (Tier List 6-4 Sasquatch)
Felicia (6-4 Felicia) (Tier List 5.5-4.5 Felicia)
Frame Data
Normals
| Move | Startup | Hit
Advantage |
Block
Advantage |
Meter
Whiff/Block/Hit |
Guard | Cancel | Notes |
| n.LP | 4 | +6 | +5 | 0/3/6 | Mid | Yes | |
| n.MP | 6 | +3 | +2 | 3/9/15 | Mid | Yes | |
| n.HP | 8 | +3 | +2 | 6/15/24 | Mid | × | |
| n.LK | 5 | +3 | +2 | 0/3/6 | Mid | Yes | |
| n.MK | 6 | +2 | +1 | 3/9/15 | Mid | × | |
| n.HK | 7 | -3 | -4 | 6/15/24 | Mid | × | |
| LP | 4 | +6 | +5 | 0/3/6 | Mid | Yes | |
| MP | 7 | +4 | +3 | 3/9/15 | Mid | Yes | |
| HP | 9 | +6 | +5 | 6/15/24 | Mid | × | |
| LK | 5 | +5 | +4 | 0/3/6 | Mid | Yes | |
| MK | 6 | +2 | +1 | 3/9/15 | Mid | Yes | |
| HK | 9 | 0 | -1 | 6/9+3+3/12+6+6 | Mid | × | |
| 6MK | 10 | +2 | +1 | 6/15/24 | Mid | × | Ends chain combos |
| 2LP | 5 | +5 | +4 | 0/3/6 | Low | Yes | |
| 2MP | 8 | +1 | +0 | 3/9/15 | Mid | x | |
| 2HP | 9 | -8 | -9 | 6/15/24 | Mid | × | |
| 2LK | 5 | +5 | +4 | 0/3/6 | Low | Yes | |
| 2MK | 7 | +3 | +2 | 3/9/15 | Mid | Yes | |
| 2HK | 9 | KD | -6 | 6/15/24 | Low | × |
Gallon Memos
- Character highlights from Twitter
- Advanced Okizeme options
- Advanced Punishes
- K-Throw places the opponent backwards, causing turn around frames & negating the opponents ability to perform a REVERSAL. If the K-Throw is used to complete the first bat, Gallon will be backwards & cannot complete a REVERSAL.
- Gallon is considered airborne for the entire duration of beast cannon. He cannot be thrown.
- Gallon can be thrown during startup & recovery frames of QUICK MOVE. During the middle of QUICK MOVE, Gallon is off the ground & throw invulnerable.
- Meaty st.hp can LINK into cr.lp
- KEN's blog post about quick move
- KEN's blog post about combo damage & routes
- KEN's blog posts about utilizing short-hop
- KEN's "Common Punishes" video
- KEN's blog about using K-Throw at the screen's edge & it's ability to force a cross-up (or not!)
- KEN's blog post about Gallon's crouch & walk low-profile - Opportunities to go underneath attacks
- KEN's blog post about the intricacies of Million Flicker - Each version has different properties
- While in Dark Force, the Alter-Ego (Mirage) also does chip-damage. If you guard-lock the opponent in the corner, you can get 8-attacks.
- Moment slice "confirms" are unreliable so a recent trend is to use Moment Slice as a Frame-Trap. It's relatively safe, so it's a very low-risk for a high reward. a few possible spot to place are:
- After an ES-Beast Cannon on Block (1-frame reversal window for opponent)
- After a block 6mk (Frame-Trap opportunity with an attack or a throw)
- After a long-dash as Okizeme (Great buffer window for Gallon)
- After a corner pursuit, buffer & setup a walking Moment Slice
- As the opponent wakes up, such that Moment Slice will auto-correct on turn-around frames & be a surprise left-right mixup
- The fastest short-hop attack is 14-Frames. Because an action is only possible to start on frame-10.
- Special Moves can cancel dash startup frames.
- Gallon's Dark Force causes damage reduction to the final blow of Darkness Illusion & Luminous Illusion.
- Requires Verification - This could be a bad translation
- Gallon can jump out of Lilith & Morrigan's Option-Select HP-Throws. Morrigan or Lilith has to delay the HP by 3-4 frames to beat the jump option.
- Option selects to beat Zabel's Hell-Gate
- KEN's video about using 6mk to corpse-hop & force a crossup with Moment Slice
- During the hit-stop of Dragon Cannon, some moves will continue a combo. This is unrealistic to setup in a match.
- CPU can change beast Cannon direction at an elevation lower then usual.
- ES-Beast Cannon LINK ES-Climb Razor
- Dark Force Flow Chart Example:
- Gallon can use 6MK to reliably combo into Moment Slice on wider opponents
- https://twitter.com/haru_space/status/1020452634656772096
- https://twitter.com/haru_space/status/1020455701150175232
- https://twitter.com/haru_space/status/1020455990100078592
- https://twitter.com/haru_space/status/1020456524630568960
- https://twitter.com/haru_space/status/1020456776167186432
- https://twitter.com/haru_space/status/1020635693821784065
- https://twitter.com/haru_space/status/1020976162485309440
- https://twitter.com/haru_space/status/1020976330228187136
- While in D.F., Gallon can do extended air chains into a grounded UB
- While in D.F., Gallon's mirage pursuit can solo-hit
- Against the 5 short crouchers (MO, LI, GA, BU, QB), doing a short dash x Climb Razor is a hard-to-blockable
- 1998 Combo Video
Gallon Bugs
- Alter Ego Unblocks
- KEN's (7) Blog posts with details
- http://blog.livedoor.jp/kengallon/archives/2385530.html
- http://blog.livedoor.jp/kengallon/archives/3129788.html
- http://blog.livedoor.jp/kengallon/archives/6181291.html
- http://blog.livedoor.jp/kengallon/archives/6187267.html
- http://blog.livedoor.jp/kengallon/archives/7425568.html
- http://blog.livedoor.jp/kengallon/archives/7706821.html
- http://blog.livedoor.jp/kengallon/archives/8308826.html
- https://twitter.com/VMP_KyleW/status/1037902658613305344
- https://twitter.com/hosoquatch/status/1246836371781636096?s=20
- Moment Slice
- KEN's (7) Blog posts with details
- Delay Dark Force Deactivation w/ Million Flicker
- No Push-Back Bug
- Beast Cannon's downwards animation is always facing to the right (P1-Side), regardless if Gallon is player-1, player-2 or on either side of the screen. This can cause additional turn-around frames for some situations. This also determins the knock-back direction of if the attacks is hit or blocked.
- ES-Beast Cannon Sometimes it's just "Hard-to-block" Cross-Up or Unblock
- See the fith chart here
- http://darkstalkers.web.fc2.com/savior/system-s/bug-s/bug-s.html
- http://seesaawiki.jp/vswiki/d/%a1%da%a5%ac%a5%ed%a5%f3%a1%dbES%a5%d3%a1%bc%a5%b9%a5%c8%a5%ad%a5%e3%a5%ce%a5%f3%a4%ce%a5%ac%a1%bc%a5%c9%c9%d4%c7%bd
- https://twitter.com/VMP_KyleW/status/919651085869916160
- https://twitter.com/KENGALLON/status/919744550796529664
- See the fith chart here
- Million flicker's Variable Attack Speed
- Alter Ego Reduction applies to Gallon's Dark Force
- Dark Force x Juggle State
- Step# 01 = Gallon's Dark Force deactivates while it's in the hit-stun of Climb-Razor. Step# 02 = Re-enter Dark Force and you can do Climb-Razor combos. It's unconfirmed if Lilith or Morrigan's Dark Force starting-up animation enables this BUG on Gallon.
- Unblock ES-Guard Cancel Frames
- See The first chart here - Gallon is at frame# 07
- Felicia's DF activation/deactivation & certain moves (Dragon cannon, Please Help Me, Es-Cat Spike) can cause Gallon's mirage to hit an additional time.
- Video example shows a 3-hit combo
Notable Japan Players
Japanese Player Index: http://www21.atwiki.jp/vsplayer/pages/15.html
| Name (English) | Name (Japanese) | Color | Location | Contact | Notes |
|---|---|---|---|---|---|
| Takahashi | たかはし | HK |
Kansai, Ibaraki | http://twitter.com/takahashigallon http://www.youtube.com/user/takahashi301 |
West Japan's most effective Gallon Technical & Strong |
| KEN | ケン | HP |
Kanto | http://twitter.com/KENGALLON http://blog.livedoor.jp/kengallon/ https://www.youtube.com/user/KENGALLON |
Tokyo Tournament Organizer Veteran Okizeme of Dark Force x Wild Circular https://twitter.com/KENGALLON/status/1040448260320587781 |
| BUZZ | バズ | MK |
Kanto | http://twitter.com/dance_gallon | Well known for violently shaking the whole arcade cabinet while playing, Unpredictable character movement |
| MAB | マブ | HK |
Tokyo | http://twitter.com/MABgallon | Nama Beeru |
| Mako | マコ | HK |
Nagoya | Uses Tiger-Knee Beast Canon as Zurashi | |
| Haneman | ハネマン | PP |
Yamagata | Retired | |
| Verti / Welch | ヴェルチ | MK |
Nagoya | Retired | |
| Ginsho | ぎんしょう/銀晶 | LP |
Tokyo | https://twitter.com/ginshogallon | |
| Love | あらげ | LP |
|||
| Cerberus | ケルベロス | KK |
https://twitter.com/cerberus0607 |

