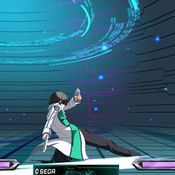
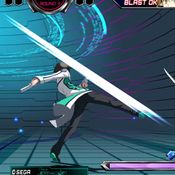
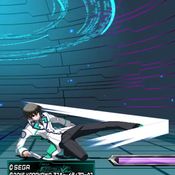
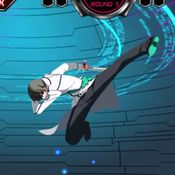
Dengeki Bunko: Fighting Climax/DFCI/Tatsuya Shiba

From Mizuumi Wiki
< Dengeki Bunko: Fighting Climax‎ | DFCI
Revision as of 16:32, 15 May 2022 by YURIWARRIOR (talk | contribs) (fixed 214A comment)
Jump to navigation Jump to search
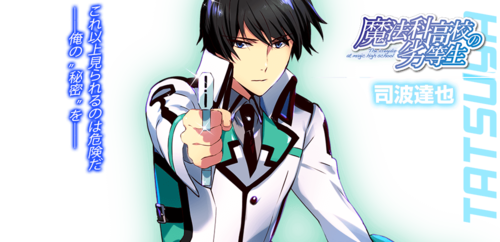
Tatsuya Shiba (司波 達也)

Players to Watch

JP:

NA:

Introduction

Elder of the Shiba siblings. A freshman in the National Magic University Affiliated First High School. A Year 1 Class E Course 2 student ridiculed as a "Weed". His expertise is the field of CAD design and technology.

Originally from the light novel series Mahouka Koukou no Rettousei, localized as The Irregular at Magic High School.

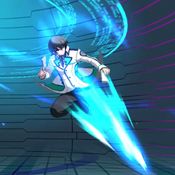
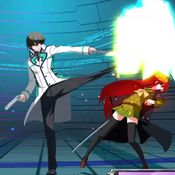
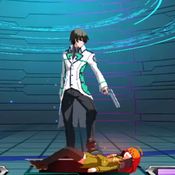
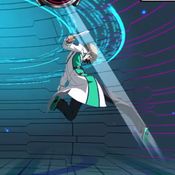
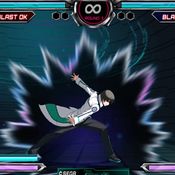
Tatsuya, not to be confused with his assist form, is an all-purpose character blessed with the most versatile special moves in the game. He is most known for his ability to be able to punish virtually anything from a full screen away, provided he has meter. Tatsuya's run speed is among the best in the game, even before the movement buff from his Blue Trump Card, giving him a terrifying tick throw game. Tatsuya is ultimately a "wait-and-see" character. Players with good reaction speed and spatial awareness will enjoy his toolset.

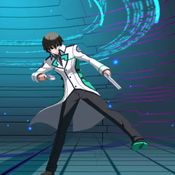
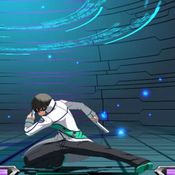
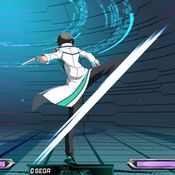
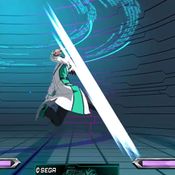
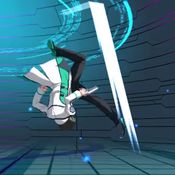
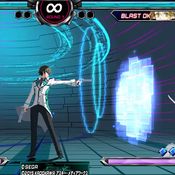
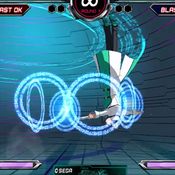
Tatsuya Gameplay Sample

Pros

  • Amazing specials for hit confirms, whiff punishing, hard knockdown, frame advantage, etc. You name it, he's probably got it.
  • Great Blue Trump Card that is technically unpunishable, having no cooldown frames
  • Impressive Impact Skills. 2AB is particularly strong and can invuln through Rusian, Iriya fireworks, escape blasts, etc.
  • High average damage output from virtually any starter with meterless HKD access off of 236x~B/j236x~B.
  • Good synergy with assists. Try experimenting as you get more experienced in DFCI!

Cons

  • Normals have relatively short reach compared to the other DFCI zoners, so learning to take advantage of his specials (with some 5A/5B) is key.
  • His strong EX moves may entice players to exhaust resources inappropriately
  • Can be overwhelmed by faster characters as his 236/j236 series has deadzones and higher recovery on whiff.
  • Pretty much nothing else, Tatsuya and Rusian together have no weaknesses that JP labels the team as the "Shana-killer".

Recommended Assists

Rusian - In tandem with Tatsuya's wait-and-see punish game, Rusian can easily overwhelm opponents with 6S Monster Train and completely control the pace of the match in Tatsuya's favor. 5S is a counter move with a huge trigger box in case one gets a little too close to Tatsuya for his liking. A fearsome combination with a high reward for Tatsuya that allows him to always remain a threat on the screen even if he isn't putting anything out on the screen.

Dokuro - Dokuro is both a powerful neutral tool and a damaging combo extender. 5S is DFCI's greatest anti-air, covering the entire vertical space two character lengths in front of you. Tatsuya in particular uses it for high damage combos, allowing him to do nearly 45-50% with 2 bars in trump making his momentum swings deadly.

Maou - Maou compliments Tatsuya by giving him "wait-and-see" reactionary defensive playstyle an explosive, unreactable tool that does massive damage or chip, with many burst bait options.

Iriya - Tatsuya's strong solo neutral allows him to cover Iriya 5S with ease. Iriya 5S grants him multiple tech chase options to remain slippery, combo extensions, and even oki. 6S is a fullscreen tool that approaches from behind the opponent, giving this character even more fullscreen options.

Potentials

Universal Potential: Increases damage dealt by 10% for 20 seconds when health falls under 30%. If behind in rounds won, increases damage dealt by 20% instead.

Character Potential: Call your assist without Miyuki being hit 4 times for Status Up Level 2 for 20 seconds. Can be activated twice a round.

Gameplan

This section is dedicated to showing unique elements in a characters gameplan, not necessarily defining it entirely (ie. explaining how Tatsuya might play around his j236x in neutral but not exactly what spacings to be at).

Neutral

A few elements worth highlighting in Tatsuya's gameplan is jA, jB, 5B, j214, 236/j236 and how he uses each to be able to constantly remain a threat despite staying away from the opponent.

jA
An above average jA in the world of DFCI, this is Tatsuya's go-to rising normal to control air space. As players may want to jump at you to get around 236/j236 or just to check how Tatsuya controls his space on the screen.

jB
IN PROGRESS

236
IN PROGRESS

j236
IN PROGRESS

j214
IN PROGRESS

Trump
IN PROGRESS

Assist Specific

Rusian
IN PROGRESS

Dokuro
IN PROGRESS

Maou
IN PROGRESS

Offense
Tatsuya's pressure outside of trump is mainly standard DFCI, being tickthrows to open up the opponent as well as staggers to answer pushblock. Specifically, shorter A strings as your B normals don't have much reach as other characters. Commonly you'll see A staggers backed with 2C~4AB/214A/236A or 5A jc, 5A (recover) grab, 2A~A~5C236A. Your 2C/5C are punishable so you do need to cancel them. On jump cancels, you can fall with jB, do j214x to blow-up fuzzy 5As, or even j236x to catch fuzzy dashblocking.

In trump your pressure style changes a bit. Doing 2A2C/5A2C becomes a common string, as your trump BnB uses 2C to launch and 2C moves you in, allowing you to after 2/5A2C frametrap into 2A/5A rebeat (followed by 5C236A or (recover) grab), delay jump cancel, 4AB, and more. Keeping your options are 2C ambiguous or just tickthrowing after 2A/5A without going into 2C is your key to staying ambiguous as you wait for Rusian (if applicable) to get off cooldown.


Defense
Tatsuya's defense is difficult to deal with as long as he keeps a trump available as it is impossible to grab (as long as you are OSing with 4AC). This constant threat opens up room for you to mash out, dash out, fuzzy superjump, and other various escape options. Your 5B is a nice grounded AA allowing you to deal with lazy jump cancel pressure, and for actual throwteching said 5B makes for a good 4B~C OS. Alternatively, just standard 4BC/4C throwteching still can catch airborne opponents due to the size of 5C and as you should be buffering 236A behind every 5C you can convert said air hit. 2C when whiffed from 1BC can slide you under the opponent if whiffed vs jump cancel pressure. 2AB is a hitgrab and difficult for the opponent to answer on a clash back due to it going airborne halfway through. A nice option to present later in the round if you haven't trumped yet and the opponent is super jumpy and oppressive to avoid trump.


Move List

L = Low, H = High, A = Air
JC = Jump Cancel, SC = Support Cancel, EX = EX Cancel
ISC = Impact Skill Cancel, TCC = Trump Card Cancel, CAC = Climax Art Cancel

Startup includes the first active frame.

Normal Moves

5A
DFC.Tatsuya.5A.jpg
Damage Startup Active Recovery Frame Adv Cancels Guard Hitbox
300 5 2 14 -3
+8 (JC)
JC, SC, EX, ISC, TCC, CAC HLA -

Fast 5A by DFCI standards for "zoner" characters. Reliable button all around.

2A
DFC.Tatsuya.2A.jpg
Damage Startup Active Recovery Frame Adv Cancels Guard Hitbox
300 6 3 14 -4 SC, EX, ISC, TCC, CAC LA -

Standard low 2A used to check space in front of Tatsuya or for tickthrows.

5B
DFC.Tatsuya.5B.jpg
Damage Startup Active Recovery Frame Adv Cancels Guard Hitbox
500 8 3 18 -6
+10 (JC)
JC, SC, EX, ISC, TCC, CAC HL -

Strong grounded AA that Tatsuya can use after a dash-under or vs superjump approaches. Does not OTG.

2B
DFC.Tatsuya.2B.jpg
Damage Startup Active Recovery Frame Adv Cancels Guard Hitbox
450 9 3 19 -7
+10 (JC)
JC, SC, EX, ISC, TCC, CAC L -

A nice low that Tatsuya can use in pressure or during an OTG string.

5C
DFC.Tatsuya.5C.jpg
Damage Startup Active Recovery Frame Adv Cancels Guard Hitbox
700 11 4 25 -12 SC, EX, ISC, TCC, CAC HLA -

A far reaching, large 5C that Tatsuya can use to catch players that are jumpy on landing or in strings to combat pushblocking. Worth buffering 236A behind it on grabs, throwtechs, or wherever due to it confirm on air hit or ground hit and his options on block.

2C
DFC.Tatsuya.2C.jpg
Damage Startup Active Recovery Frame Adv Cancels Guard Hitbox
700 10 3 24 -10 to -8 SC, EX, ISC, TCC, CAC L -

A sliding sweep that is punishable on block so is often cancelled into 4AB, 214A, 236A. 236A can whiff if 2C moves him too close midscreen.

j.A
DFC.Tatsuya.jA.jpg
Damage Startup Active Recovery Frame Adv Cancels Guard Hitbox
300 7 2 X+2 Varies JC, SC, EX HA -

Tatsuya's go-to air-to-air that's mainly used rising. Has a nice hitbox to stuff out players that are too comfortable in the air.


j.B
DFC.Tatsuya.jB.jpg
Damage Startup Active Recovery Frame Adv Cancels Guard Hitbox
500 9 3 X+3 Varies JC, SC, EX HA -

Tatsuya's go-to jump-in. Hits standing players for standing confirms or fuzzy jump (171B214B or 171B236x, fuzzy jump jB that confirms into divekick/j236x on hit)


j.C
DFC.Tatsuya.jC.jpg
Damage Startup Active Recovery Frame Adv Cancels Guard Hitbox
700 11 4 X+4 Varies JC, SC, EX HA -

Often used as a combo tool due to its slower start-up. Can be used preemptively on an air retreat.


Special Moves

Mist Dispersion
「ミスト・ディスパージョン」

236X
Air O.K.
DFC.Tatsuya.236X.jpg
Version Damage Startup Active Recovery Frame Adv Cancels Guard Hitbox
A 696 Ground: 16
Air: 14
6 Ground: 31
Air: X+10 (min is 37)
Ground: -6
Air: -8 to -15
Ground: SC, EX, TCC, CAC
Air: SC, EX
HLA -

Gunshot that goes about a character space or two in-front of Tatsuya (grounded).

Version Damage Startup Active Recovery Frame Adv Cancels Guard Hitbox
B 696 Ground: 18
Air: 16
6 Ground: 31
Air: X+13 (min is 42)
Ground: -6
Air: -13 to -20
Ground: SC, EX, TCC, CAC
Air: SC, EX
HLA -

Gunshot that goes roughly 1/2 screen.

Version Damage Startup Active Recovery Frame Adv Cancels Guard Hitbox
C 696 Ground: 20
Air: 20
6 Ground: 31
Air: X+15 (min is 46)
Ground: -6
Air: -17 to -24
Ground: SC, EX, TCC, CAC
Air: SC, EX
HLA -

Gunshot that goes roughly 3/4 screen.

Version Damage Startup Active Recovery Frame Adv Cancels Guard Hitbox
EX 850 Ground: 15
Air: 17
~6 Ground: 28
Air: X+10 (min is 40)
Ground: -3
Air: -15 to -26
Ground: SC, TCC, CAC
Air: SC
HLA -

Homes onto the opponent regardless of position. Great fullscreen punish/Power Blast punish. Has its own unique follow-up.

Additional Action
「追加アクション」

After 236X
Air O.K.
Version Damage Startup Active Recovery Frame Adv Cancels Guard Hitbox
A X 2 X Ground: 30
Air: 21
Ground: -10 to -13
Air: -8 to -13
N/A X -

Teleports right next to the opponent. Use in tandem with Cancel Support before the follow-up to do so safely.

Version Damage Startup Active Recovery Frame Adv Cancels Guard Hitbox
B 297 2 3 Ground: 51
Air: 56
-10 SC, EX, TCC, CAC L -

Same animation as 2C, causes hard knockdown.

Version Damage Startup Active Recovery Frame Adv Cancels Guard Hitbox
C 462 2 7 Ground: 62
Air: 64
Ground: -16
Air: -22
SC, EX, TCC, CAC HLA -

Tatsuya shifts through the opponent causing one hit and appears behind the opponent.

Version Damage Startup Active Recovery Frame Adv Cancels Guard Hitbox
EX 316 2 4*3 79 to 82 -16 SC, TCC, CAC HLA -

Follow-up to the EX version of Mist Dispersion. Occurs if you follow up with A, B, or C. The button pressed does not affect the follow-up.

Loop Cast
「ループキャスト」

214X
DFC.Tatsuya.214X.jpg
Version Damage Startup Active Recovery Frame Adv Cancels Guard Hitbox
A 858 15 9 22 -2 SC, EX HLA -

Commonly used with Rusian 6S coverage or after 2C to stay safe, as 2C is punishable otherwise.

Version Damage Startup Active Recovery Frame Adv Cancels Guard Hitbox
B 976 20 9 23 -3 SC, EX HLA -

Parrying a projectile will allow you to have A, B, and C follow-ups which are the same as Mist Dispersion follow-ups.

Version Damage Startup Active Recovery Frame Adv Cancels Guard Hitbox
C 1072 28 9 25 -5 JC, SC, EX HLA -

Parrying a projectile will allow you to have A, B, and C follow-ups which are the same as Mist Dispersion follow-ups. Last hit is jump cancellable either on whiff or block.

Version Damage Startup Active Recovery Frame Adv Cancels Guard Hitbox
EX 1382 14 18 33 -8 to -24 or +24* JC, SC HLA -

If you get the last hit on block, you can jump cancel for maximum advantage. The other listed advantages are for if the last hit does not connect. The opponent can also crouch to make all hits miss. It is impossible to get the last hit on grounded short characters.

Falcon
「隼」

j214X
DFC.Tatsuya.j214X.jpg
Version Damage Startup Active Recovery Frame Adv Cancels Guard Hitbox
A 954 12 Until landing X+18 -3 to -6 SC, EX HLA -

Divekick that stalls Tatsuya's air movement during start-up. Auto-corrects to the direction the player is in if they dash-under. Used in neutral to check dash options, or pressure to blowup fuzzy options.

Version Damage Startup Active Recovery Frame Adv Cancels Guard Hitbox
B 1054 14 Until landing X+20 -5 to -7 SC, EX HLA -

Divekick that stalls Tatsuya's air movement during start-up. Auto-corrects to the direction the player is in if they dash-under.

Version Damage Startup Active Recovery Frame Adv Cancels Guard Hitbox
C 1154 16 Until landing X+21 -9 to -7 SC, EX HLA -

Divekick that stalls Tatsuya's air movement during start-up. Auto-corrects to the direction the player is in if they dash-under.

Version Damage Startup Active Recovery Frame Adv Cancels Guard Hitbox
EX 1331 8 Until landing 15 +2 to +4 Block: SC
Hit: SC, TCC, CAC
HLA -

On hit, Hayabusa automatically goes into a follow-up that lands Tatsuya. Not plus enough to recover into Rusian call outside of trump. Can be cancelled into from non-EX j214 to be plus and safe.

Self-Restoration
「自己修復術式」
Damage Startup Active Recovery Frame Adv Cancels Guard Hitbox
N/A X X X X N/A N/A -

For one time only, when Tatsuya's life is depleted, he may revive when certain conditions are fulfilled.

Triggering conditions:

  • 1. Match round
  • 2. Universal potential is activated (upon reaching purple health gauge)
  • 3. One or more trump cards are available
  • 4. Blast Gauge at 100%

Self-restoration will automatically be activated when these four conditions are met.

After Revival you're put into the same state as using an Escape Blast. (If Blast Ignition was used than the blast recovery will appear white) If you have yellow health [denotes the player has over 30% health] and a combo kills you, Revival won't activate. In addition, if you're under 30% and the Universal Potential runs out [denoted by the health bar changing from purple back to yellow], Revival will not activate.


Universal Mechanics

Throw
6C or 4C
DFC.Tatsuya.64C.jpg
Damage Startup Active Recovery Frame Adv Cancels Guard Hitbox
1100 4 1 100 +54 (hit) SC, EX, TCC, CAC N/A -

Multi-hit grab that sends the opponent to roughly 236A spacing. Can dash 5A... OTG afterwards.

Impact Skill
Verdant Storm
「青嵐」

5A+B
DFC.Tatsuya.5AB.jpg
Damage Startup Active Recovery Frame Adv Cancels Guard Hitbox
1071 12 10 48 -15 Block: TCC
Hit: SC, EX, CAC
HLA -

Mainly a combo filler and visually identical to the C follow-up for 236. Causes Tatsuya to switch sides even on block and sometimes goes through moves (ie. Asuna 5AB).

Impact Skill
Drifting Cloud
「浮雲」

2A+B
DFC.Tatsuya.2AB.jpg
Damage Startup Active Recovery Frame Adv Cancels Guard Hitbox
1120 12 7 69 -28 Block: TCC
Hit: SC, EX, CAC
HLA -

Contender for the best 2AB. On hit, Tatsuya enters an invulnerable state that invulns through Rusian 6S, Iriya fireworks, escape blasts (even with escape blast buffed) etc. He disappears and goes airborne halfway through it, causing him to go over some clashback ABs. Can be used before a Climax Art to bait out bursts on reaction.

Impact Break
4A+B
DFC.Tatsuya.4AB.jpg
Damage Startup Active Recovery Frame Adv Cancels Guard Hitbox
First Hit: 900
Launcher: 800
First Hit: 22
Launcher: 9
First Hit: 8
Launcher: 2
First Hit: 14
Launcher: 50
First Hit: -2
Launcher: -37
First Hit: N/A
Launcher: SC, EX, TCC, CAC
(on hit)
First Hit: HA
Launcher: HLA
-

Standard DFCI 4AB with no particular special features.

Flash Cast
「フラッシュキャスト」

A+C
DFC.Tatsuya.5AC.jpg
Damage Startup Active Recovery Frame Adv Cancels Guard Hitbox
X 0 X X ±0 X X -

Trump card that grants tatsuya a run speed buff, faster fall speed, HKD off non-EX j214x in the corner, gives j214AB a total of 3 hits vs the usual one hit, and cannot be grabbed as it is +0. Generally considered the best "reversal" trump card.


Climax Arts

Sonic End
「ソニック・エンド」

41236B+C
DFC.Tatsuya.41236BC.jpg
Damage Startup Active Recovery Frame Adv Cancels Guard Hitbox
3510 10 7 40 -22 N/A HLA -

Standard DFCI CA that has decent horizontal and vertical reach.

Cadenza
「カデンツァ」

63214B+C
DFC.Tatsuya.63214BC.jpg
Damage Startup Active Recovery Frame Adv Cancels Guard Hitbox
2925 7 23 20 -28 N/A HLA -

Despite sharing the same startup time as other non-fullscreen ranbus, Tatsuya's ranbu has a faster run speed allowing him to punish Shana 5C on block and likely more niche options. Often used out of trump as Tatsuya's +0 trump does not allow him to "go through" A normals.


Combos

Midscreen

Standing

0 Bar

5A>(2A>)5B>j.B>j.C,5A>5B>5C>236A>B
2161(2149) damage
High damage for a meterless combo, ending with 236A>C adds like 60 damage) but lacks hard knockdown.
5A>(2A>)5B>j.B>j.C,5A>5B>5C>236A>C>A+C>214C>Powerup Blast
2399 damage
0 bar route into powerup blast and Trump state.

1 bar

5A>(2A>)5B>j.B>j.C,5A>5B>5C>236A>C>214A+B>Powerup Blast
2632 damage
Main route into powerup blast.

Anti Air

0 bar

anti air 5B>j.B>delay j.C,land,sj.A>j.C>dj.C>214C
1999 damage
Good meterless damage.

3 bar

anti air 5B>j.B>delay j.C,land,sj.A>j.C>dj.C>236A>C>236A+B>X>236B+C
3863 damage
Solid consistent air to air damage

Standing or Crouching

5A Starter

  • Notes about this particular combo

4A+B Starter

4A+B > B > j.A > etc
  • Notes about this particular combo

Assist

  • Notes about this particular combo

Corner

5A Starter

5A > 5B > 5C > 236A~C > 214AB > jc > j.C > j.214C > j.236AB
Corner specific, ends in hard knockdown.
Deals ~~2797-2850 damage.

4A+B Starter

4A+B > follow-up > j.ABC > jc > j.BC > j.214C (1 hit) > j.214AB > trump > Dash to corner
Could extend a bit for more damage with Dokuro 5S or Zero 6S after trump.
Serves as a route for trump state for more pressure in the corner after the combo.
Deals 2514 damage.

Assists

Assist Character 1

5A > 5B > 5C > 5D > etc
  • Notes about this particular combo

Assist Character 2

5A > 5B > 5C > 6D > etc
  • Notes about this particular combo

Colors

Color 1 Color 2 Color 3 Color 4
DFCTatsuya(player)-1.png
DFCTatsuya(player)-2.png
DFCTatsuya(player)-3.png
DFCTatsuya(player)-4.png
Color 5 Color 6 Color 7 Color 8
DFCTatsuya(player)-5.png
DFCTatsuya(player)-6.png
DFCTatsuya(player)-7.png
DFCTatsuya(player)-8.png
Color 9 Color 10 Color 11 Color 12
DFCTatsuya(player)-9.png
DFCTatsuya(player)-10.png
DFCTatsuya(player)-11.png
DFCTatsuya(player)-12.png
Color 13 Color 14 Color 15 Color 16
DFCTatsuya(player)-13.png
DFCTatsuya(player)-14.png
DFCTatsuya(player)-15.png
DFCTatsuya(player)-16.png
Color 17 Color 18 Color 19 Color 20
DFCTatsuya(player)-17.png
DFCTatsuya(player)-18.png
DFCTatsuya(player)-19.png
DFCTatsuya(player)-20.png
Color 21 Color 22 Color 23 Color 24
DFCTatsuya(player)-21.png
DFCTatsuya(player)-22.png
DFCTatsuya(player)-23.png
DFCTatsuya(player)-24.png

Additional Resources


General
Controls
Change List
FAQ
Glossary
HUD
System
Characters
Akira
Ako
Asuna
Emi
Kirino
Kirito
Kuroko
Kuroyukihime
Mikoto
Miyuki
Quenser
Rentaro
Selvaria
Shana
Shizuo
Taiga
Tatsuya
Tomoka
Yukina
Yuuki
Assists
Accelerator
Alicia
Boogiepop
Celty
Dokuro
Enju
Erio
Froleytia
Haruyuki
Holo
Innocent Charm
Iriya
Izaya
Kino
Kojou
Kouko
Kuroneko
Leafa
LLENN
Mashiro
Miyuki
Pai
Rusian
Ryuuji
Sadao
Tatsuya
Touma
Tomo
Uiharu
Wilhelmina
Zero