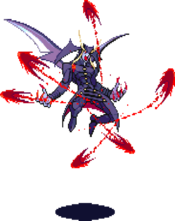
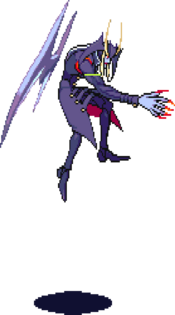
User:Pythmere/VSAV/Jedah
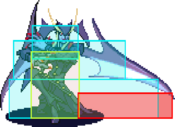
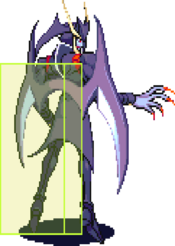
standing normal
5LP
| Startup | Active | Recovery | Hit Adv. | Block Adv. | Renda Bonus |
|---|---|---|---|---|---|
| 4 | 3 | 10 | 6 | 5 | H: 9 G: 8 |
| Guard | Cancel | Invuln | Red Damage | White Damage | Gauge |
| mid | yes | - | 8 | 3 | H: 6 G: 3 W: 0 |
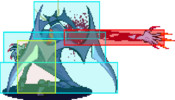
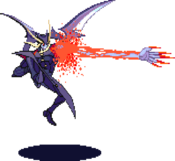
5MP
| Startup | Active | Recovery | Hit Adv. | Block Adv. | Renda Bonus |
|---|---|---|---|---|---|
| 10 | 3 | 19 | -1 | -2 | N/A |
| Guard | Cancel | Invuln | Red Damage | White Damage | Gauge |
| mid | no | - | 16 | 7 | H: 15 G: 9 W: 3 |
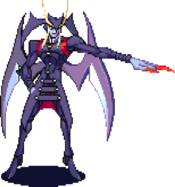
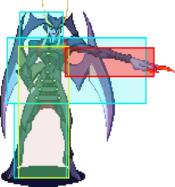
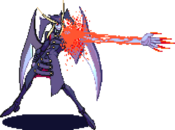
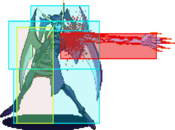
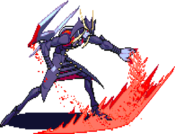
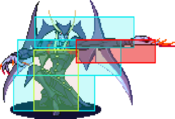
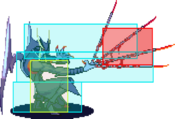
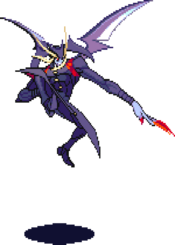
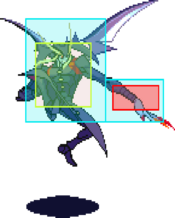
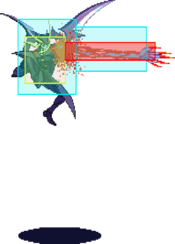
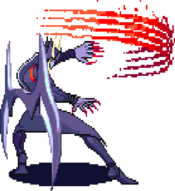
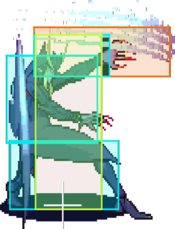
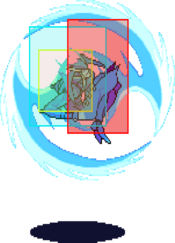
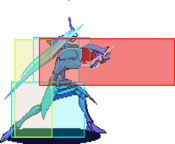
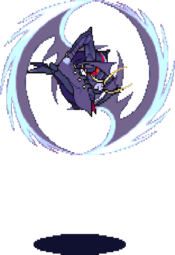
Between 5.MP and 5.HP, this is Jedah's superior throw button. It recovers much faster, is safe on hit and block, and there is a chance of hitting certain characters trying to jump away when attempting a throw.
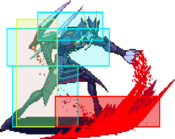
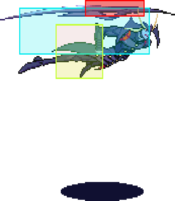
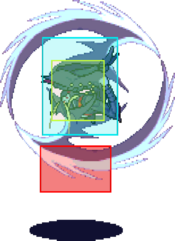
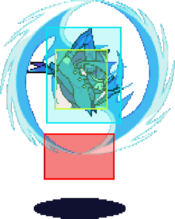
It has some decent potential as a poke, but mostly against the six characters who cannot crouch it. Against those who cannot duck it, it has an excellent hitbox that covers a large part of the screen, and will most likely hit them if they try to jump out. The problem is the awful hurtbox before the the attack is active, so to make it safe you may want to mix it in while staggering 2.LK so you have some frame advantage going into it.
If you happen to air reset an opponent with this, your ability to apply meaty pressure afterwards is somewhat limited. If you hit them high up in the air you can probably go for a dash j.LP/LK or j.MK, but otherwise you'll have to settle for inching forward and hitting with a 2.LK.
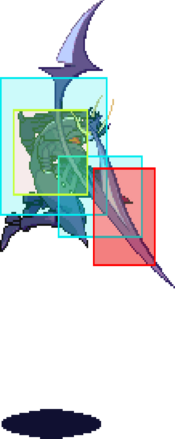
This move will only hit crouching: Anakaris, Aulbath, Bishamon, Demitri, Jedah, Victor5HP
| Startup | Active | Recovery | Hit Adv. | Block Adv. | Renda Bonus |
|---|---|---|---|---|---|
| 9 | 2(5)2(5)2 | 38 | -13 | -14 | N/A |
| Guard | Cancel | Invuln | Red Damage | White Damage | Gauge |
| mid | no | - | 8x3 | 3x3 | H: 12+6x2 G: 9+3x2 W: 6 |
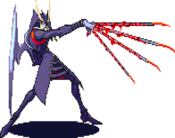
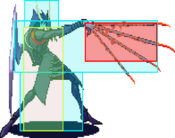
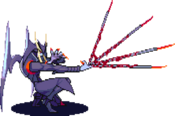
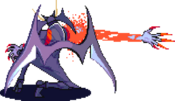
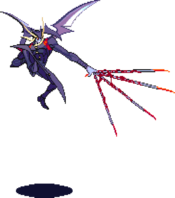
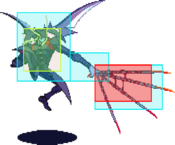
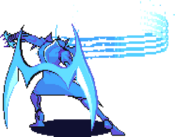
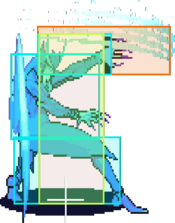
Though this button is an option for when attempting Jedah's Punch Throw, it is an extremely bad choice since from up close it's unsafe on whiff, block, and hit. This attack does not have much use outside of an ender for certain chain combos — and even then it's typically not the best option.
- • The first hit of this move will only hit crouching: Aulbath, Bishamon, Demitri, Jedah, Victor
- • The second hit whiffs on all crouching characters.
- • The second hit of this move will not hit standing: Aulbath, Felicia, Gallon Lei-Lei
- • This move will not hit crouching: Q-Bee
- Variable Frame Advantage
- • If only the first hit connects: H:-27/G:-28
- • If it does not hit past the second hit: H:-20/G:-21
- • If the third hit connects: H:-13/G:-14
5LK
| Startup | Active | Recovery | Hit Adv. | Block Adv. | Renda Bonus |
|---|---|---|---|---|---|
| 5 | 3 | 7 | 6 | 5 | H: 9 G: 8 |
| Guard | Cancel | Invuln | Red Damage | White Damage | Gauge |
| mid | no | - | 8 | 3 | H: 6 G: 3 W: 0 |
This isn't a bad attack, but it just doesn't end up seeing much play typically. Primarly used in chains to get a specific spacing, with 5LK being canceled into a Dio Sega.
This attack has the shortest total frame count out of all of Jedah's normals, and the quickest recovery — meaning there may be some potential use in using it to bait out guard cancels, but this would need to be tested.5MK
| Startup | Active | Recovery | Hit Adv. | Block Adv. | Renda Bonus |
|---|---|---|---|---|---|
| 7 | 5 | 26 | 1 | 0 | N/A |
| Guard | Cancel | Invuln | Red Damage | White Damage | Gauge |
| mid | no | - | 17 | 6 | H: 15 G: 9 W: 3 |
An excellent normal, and the typical ender for most of Jedah's chain combos. Jedah's frame advantage on his Hard Attacks is poor, and he can't chain into a knockdown, resulting in many of his chains simply ending on Standing Medium Kick. With a Hit Advantage of +1, you can attempt to pressure after ending your chain on one of these.
In the neutral game, this attack looks really strong. It has a great hitbox (reaches even further than 2LK), and a fast start-up with a lot of active frames — the only problem is that on whiff this move just hangs out there, leaving Jedah stuck with a fat and tall recovery hurtbox. If you whiff this attack and the opponent is already jumping at you, expect to eat a beefy combo. You should primarily use 5MK to poke when your opponent is already at some sort of frame disadvantage, making it less likely to get jumped in on.5HK
| Startup | Active | Recovery | Hit Adv. | Block Adv. | Renda Bonus |
|---|---|---|---|---|---|
| 35 | 6 | 36 | - | -7 | N/A |
| Guard | Cancel | Invuln | Red Damage | White Damage | Gauge |
| overhead | no | - | 20,16 | 7,6 | H: 24 G: 15 W: 6 |
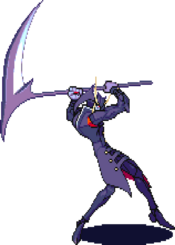
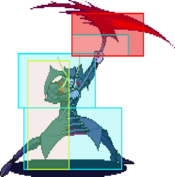
A scythe attack that must be blocked standing. It's primary use is getting you killed by coming out on accident when you're attempting a Dash j.HK.
This is Jedah's only normal attack that can knock the opponent down, however it is far to slow to combo into. It's so slow that it is incredibly easy to block high on reaction after seeing it just a few times.
That said, this does get some specialized use in the corner, where it's a bit better since the opponents movement is limited. From this position it's primarily useful for opponents who keep jumping up-back, since this has excellent anti-air capabilities and great range. You want to hit 5HK's max range, so with proper spacing do either a 2MK or 2.HP and then chain cancel it into a 5HK, if the opponent attempts to jump or presses a button after recovering from the initial attack they'll get hit with the scythe and be knockdown.crouching normal
2LP
| Startup | Active | Recovery | Hit Adv. | Block Adv. | Renda Bonus |
|---|---|---|---|---|---|
| 5 | 2 | 10 | 7 | 6 | H: 10 G: 9 |
| Guard | Cancel | Invuln | Red Damage | White Damage | Gauge |
| mid | yes | - | 8 | 3 | H: 6 G: 3 W: 0 |
Crouch jab. Pretty standard for a crouching jab, hits mid, good speed, rewards the most frame advantage out of any of his light attacks, chains into it self. Useful
for ticking and keeping people off of you.2MP
| Startup | Active | Recovery | Hit Adv. | Block Adv. | Renda Bonus |
|---|---|---|---|---|---|
| 12 | 5 | 16 | 1 | 0 | N/A |
| Guard | Cancel | Invuln | Red Damage | White Damage | Gauge |
| mid | yes | - | 16 | 7 | H: 15 G: 9 W: 3 |
2HP
| Startup | Active | Recovery | Hit Adv. | Block Adv. | Renda Bonus |
|---|---|---|---|---|---|
| 10 | 2(5)2(5)2 | 44 | -18 | -19 | N/A |
| Guard | Cancel | Invuln | Red Damage | White Damage | Gauge |
| mid | yes | - | 8x3 | 3x3 | H: 12+6x2 G: 9+3x2 W: 6 |
An extremely unsafe normal, even more so than 5.HP since 2.HP has even worse frame advantage. This is only to be used as the ender to chain combos when you're too far away for 2.HK to hit, but even then it's inadvisable unless it will kill.
- • The second hit of this move will not hit crouching: Gallon, Lei-Lei, Lilith, Morrigan, Q-Bee
- Variable Frame Advantage
- • If only the first hit connects: H:-32/G:-33
- • If it does not hit past the second hit: H:-25/G:-26
- • If the third hit connects: H:-18/G:-19
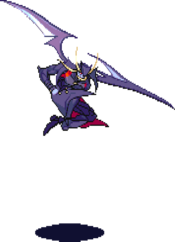
2LK
| Startup | Active | Recovery | Hit Adv. | Block Adv. | Renda Bonus |
|---|---|---|---|---|---|
| 6 | 3 | 8 | 6 | 5 | H: 9 G: 8 |
| Guard | Cancel | Invuln | Red Damage | White Damage | Gauge |
| low | yes | - | 8 | 4 | H: 6 G: 3 W: 0 |
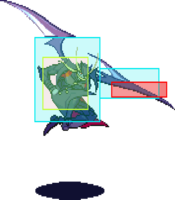
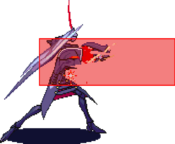
One of the longest reaching light attacks in the game, this is an incredible normal and a core part of Jedah's game. Because of the length, it can be difficult for many characters to counter poke Jedah when he's abusing this from max range.
2.LK has a lot of uses. Virtually all of his chain combos will start with this normal, since it's his only light attack that must be blocked low. Because of it's range and ability to rapid cancel, this is what you'll be typically special canceling with. When used at max distance it can bait out certain guard cancels.
In Jedah's high/low game, 2.LK is very important since it hits low and has excellent frame advantage. You want to be able to hit a quick 2.LK low and immediately dash the frame after recovering into an overhead attack.2MK
| Startup | Active | Recovery | Hit Adv. | Block Adv. | Renda Bonus |
|---|---|---|---|---|---|
| 12 | 7 | 14 | 1 | 0 | N/A |
| Guard | Cancel | Invuln | Red Damage | White Damage | Gauge |
| low | no | - | 17 | 7 | H: 15 G: 9 W: 3 |
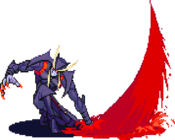
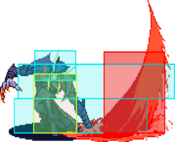
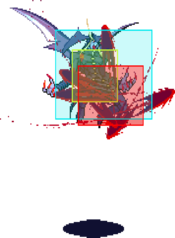
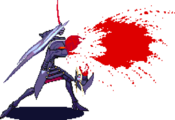
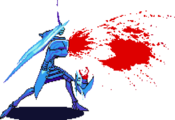
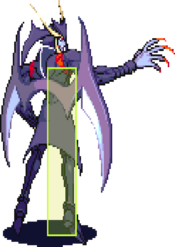
Blood spout. Arguably Jedah's best anti-air. This move also hits low, despite not looking like it should. It's also deceptively safe on block/hit. The only down
side is the startup speed, but in general this is one of Jedah's most valuable moves.2HK
| Startup | Active | Recovery | Hit Adv. | Block Adv. | Renda Bonus |
|---|---|---|---|---|---|
| 18 | 9 | 34 | -6 | -7 | N/A |
| Guard | Cancel | Invuln | Red Damage | White Damage | Gauge |
| low | no | - | 21 | 8 | H: 24 G: 15 W: 6 |
Blood pool. This also hits low, but does not cause a knockdown on hit. It's disadvantageous on hit/block but not nearly as bad as HP/c.HP, thus when hitting with a
chain this is the ideal ender. On block you may want to forgo the c.HK in order to maintain neutral/advantage.jumping normal
J.LP
| Startup | Active | Recovery | Hit Adv. | Block Adv. | Renda Bonus |
|---|---|---|---|---|---|
| 6 | 4 | 8 | - | - | N/A |
| Guard | Cancel | Invuln | Red Damage | White Damage | Gauge |
| overhead | yes | - | 9 | 4 | H: 6 G: 3 W: 0 |
Jumping jab. Useful in air strings and rushdown pressure.
- • From a normal jump, this move will not hit crouching: Q-Bee
J.MP
| Startup | Active | Recovery | Hit Adv. | Block Adv. | Renda Bonus |
|---|---|---|---|---|---|
| 9 | 3 | 11 | - | - | N/A |
| Guard | Cancel | Invuln | Red Damage | White Damage | Gauge |
| overhead | no | - | 16 | 7 | H: 15 G: 9 W: 3 |
J.HP
| Startup | Active | Recovery | Hit Adv. | Block Adv. | Renda Bonus |
|---|---|---|---|---|---|
| 9 | 2(3)2(3)2 | 27 | - | - | N/A |
| Guard | Cancel | Invuln | Red Damage | White Damage | Gauge |
| overhead | no | - | 8x3 | 3x3 | H: 12+6x2 G: 9+3x2 W: 6 |
Jumping hands. This is significantly more useful than the standing or crouching versions because while it retains the range, the recovery is neutralized by landing.
Thus, backdash j.HP and backdash airdash j.HP and whiff j.HK j.HP become a lot more useful than the standing or crouching version.J.LK
| Startup | Active | Recovery | Hit Adv. | Block Adv. | Renda Bonus |
|---|---|---|---|---|---|
| 5 | 6 | 3 | - | - | N/A |
| Guard | Cancel | Invuln | Red Damage | White Damage | Gauge |
| overhead | yes | - | 9 | 4 | H: 6 G: 3 W: 0 |
High wing. The hitbox on this is quite high, making it whiff air to ground a lot. But, the recovery is also good so it's still useful for rushdown and mix-up sequences, perhaps more so simply because it whiffs.
- • From a normal jump, this move will only hit crouching: Anakaris, Aulbath, Bishamon, Demitri, Jedah, Victor
J.MK
| Startup | Active | Recovery | Hit Adv. | Block Adv. | Renda Bonus |
|---|---|---|---|---|---|
| 7 | 4 | 9 | - | - | N/A |
| Guard | Cancel | Invuln | Red Damage | White Damage | Gauge |
| overhead | yes | - | 17 | 7 | H: 15 G: 9 W: 3 |
J.HK
| Startup | Active | Recovery | Hit Adv. | Block Adv. | Renda Bonus |
|---|---|---|---|---|---|
| 11 | 2,4 | 9 | - | - | N/A |
| Guard | Cancel | Invuln | Red Damage | White Damage | Gauge |
| overhead | no | - | 13+10 | 5+4 | H: 15+9 G: 10+4 W: 6 |
jumping command normal
J.66
| Startup | Active | Recovery | Hit Adv. | Block Adv. | Renda Bonus |
|---|---|---|---|---|---|
| 13 | 21 | landing + 1 | - | 2 | N/A |
| Guard | Cancel | Invuln | Red Damage | White Damage | Gauge |
| overhead | yes | - | 14 | 6 | H: 12 G: 6 W: 0 |
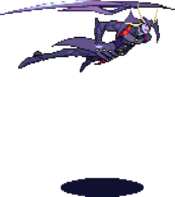
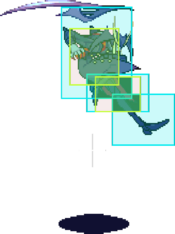
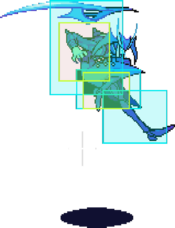
A jet-like dash, similar to Morrigan's. This is a ground-to-air dash, and what makes Jedah's high/low game possible. Dashing is a commitment, as Jedah is unable to block until he lands. It is possible to cancel the ground dash into the-air dash, granted you don't attack first. The rules regarding jump attacks completely change when ground dashing or air dashing, so be sure to take in the following:
- Air chain combos are not possible when dashing.
- Linking air normals is possible, however the links are difficult and limited.
- The speed of Jedah's descent after dashing is much slower than his jump's descent, which lets him (or should I say "forces") him to do pressure strings with his jump normals as he falls.
- All air normals become special cancelable at any point, even if they completely whiff.
- The meter gained from medium and hard normals attacks that hit or are blocked is reduced, and whiffing them results in no meter gain.
- Air throws are not possible when dashing.
special projectile
236P
| Startup | Active | Recovery | Hit Adv. | Block Adv. | Renda Bonus |
|---|---|---|---|---|---|
| 46 | 65 | 1 | - | - | N/A |
| Guard | Cancel | Invuln | Red Damage | White Damage | Gauge |
| mid | no | - | 8x3 | 4x3 | H: 15+3x2 G: 13+1x2 W: 12 |
es special projectile
236PP
| Startup | Active | Recovery | Hit Adv. | Block Adv. | Renda Bonus |
|---|---|---|---|---|---|
| 46 | 65 | 1 | - | - | N/A |
| Guard | Cancel | Invuln | Red Damage | White Damage | Gauge |
| mid | no | - | 8x5 | 4x5 | H: 0 G: 0 W: 0 |
command throw
214P
| Startup | Active | Recovery | Hit Adv. | Block Adv. | Renda Bonus |
|---|---|---|---|---|---|
| 11 | 15 | 36 | - | - | N/A |
| Guard | Cancel | Invuln | Red Damage | White Damage | Gauge |
| throw | no | - | 12+17 | 4+6 | H: 29 G: 0 W: 14 |
es command throw
214PP
| Startup | Active | Recovery | Hit Adv. | Block Adv. | Renda Bonus |
|---|---|---|---|---|---|
| 11 | 15 | 36 | - | - | N/A |
| Guard | Cancel | Invuln | Red Damage | White Damage | Gauge |
| throw | no | - | 12+5+5+4+4+16 | 4+2+2+1+1+3 | H: 0 G: 0 W: 0 |
command throw
J.632[4]K
| Startup | Active | Recovery | Hit Adv. | Block Adv. | Renda Bonus |
|---|---|---|---|---|---|
| 47 | until landing | 2 | - | - | N/A |
| Guard | Cancel | Invuln | Red Damage | White Damage | Gauge |
| throw | no | - | 6x5 | 2x5 | H: 22 G: 0 W: 12 |
es command throw
J.632[4]KK
| Startup | Active | Recovery | Hit Adv. | Block Adv. | Renda Bonus |
|---|---|---|---|---|---|
| 47 | until landing | 2 | - | - | N/A |
| Guard | Cancel | Invuln | Red Damage | White Damage | Gauge |
| throw | no | - | 7x6 | 2x6 | H: 0 G: 0 W: 0 |
special projectile
J.632[4]K~P
| Startup | Active | Recovery | Hit Adv. | Block Adv. | Renda Bonus |
|---|---|---|---|---|---|
| 62 | until landing + 10 | 8 + landing 1 | - | - | N/A |
| Guard | Cancel | Invuln | Red Damage | White Damage | Gauge |
| overhead | no | - | 27 | 10 | H: 30 G: 21 W: 12 |
es special
J.632[4]K~PP
| Startup | Active | Recovery | Hit Adv. | Block Adv. | Renda Bonus |
|---|---|---|---|---|---|
| 62 | until landing + 10 | 8 + landing 1 | - | - | N/A |
| Guard | Cancel | Invuln | Red Damage | White Damage | Gauge |
| overhead | no | - | 10x5 | 4x5 | H: 0 G: 0 W: 0 |
special GC
623P
| Startup | Active | Recovery | Hit Adv. | Block Adv. | Renda Bonus |
|---|---|---|---|---|---|
| 13 | 3 | 54 | - | -30 | N/A |
| Guard | Cancel | Invuln | Red Damage | White Damage | Gauge |
| mid | no | 1-13 whole body | 13 | 5 | H: 21 G: 16 W: 12 |
es special GC
623PP
| Startup | Active | Recovery | Hit Adv. | Block Adv. | Renda Bonus |
|---|---|---|---|---|---|
| 13 | 3x3 | 72 | - | -42 | N/A |
| Guard | Cancel | Invuln | Red Damage | White Damage | Gauge |
| mid | no | 1-13 whole body | 8x3 | 3x3 | H: 0 G: 0 W: 0 |
command throw
632[4]K
| Startup | Active | Recovery | Hit Adv. | Block Adv. | Renda Bonus |
|---|---|---|---|---|---|
| 6 | 1 | 24 | - | - | N/A |
| Guard | Cancel | Invuln | Red Damage | White Damage | Gauge |
| throw | no | - | 5+5+24 | 2+2+8 | H: 21 G: 0 W: 12 |
ex command throw
412[6]KK
| Startup | Active | Recovery | Hit Adv. | Block Adv. | Renda Bonus |
|---|---|---|---|---|---|
| 7 | 6 | 67 | - | - | N/A |
| Guard | Cancel | Invuln | Red Damage | White Damage | Gauge |
| throw | no | - | 5x6+18 | 2x6+4 | H: 0 G: 0 W: 0 |
ex
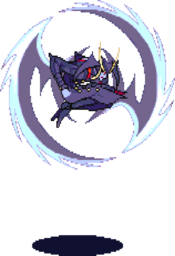
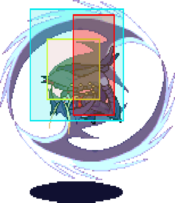
22PP
| Startup | Active | Recovery | Hit Adv. | Block Adv. | Renda Bonus |
|---|---|---|---|---|---|
| 42 | 19 | 57 | - | - | N/A |
| Guard | Cancel | Invuln | Red Damage | White Damage | Gauge |
| unblockable | no | - | 3x13+5 | 1x14 | H: 0 G: 0 W: 0 |
pursuit
8P or 8K
| Startup | Active | Recovery | Hit Adv. | Block Adv. | Renda Bonus |
|---|---|---|---|---|---|
| 30 | 9 | landing 1 | - | - | N/A |
| Guard | Cancel | Invuln | Red Damage | White Damage | Gauge |
| mid | no | 1-6 lower body | 7 | 7 | H: 24 G: 0 W: 6 |
es pursuit
8PP or 8KK
| Startup | Active | Recovery | Hit Adv. | Block Adv. | Renda Bonus |
|---|---|---|---|---|---|
| 30 | 9 | landing 1 | - | - | N/A |
| Guard | Cancel | Invuln | Red Damage | White Damage | Gauge |
| mid | no | 1-6 lower body | 4x5 | 4x5 | H: 0 G: 0 W: 0 |
ground throw
6MP or 6HP
| Startup | Active | Recovery | Hit Adv. | Block Adv. | Renda Bonus |
|---|---|---|---|---|---|
| 1 | - | 98 | - | - | N/A |
| Guard | Cancel | Invuln | Red Damage | White Damage | Gauge |
| throw | no | 1-96 whole body | 23 (11) | 8 (4) | H: 9 G: 0 W: 0 |
air throw
J.6P or J.4P
| Startup | Active | Recovery | Hit Adv. | Block Adv. | Renda Bonus |
|---|---|---|---|---|---|
| 1 | - | 103 +38 + landing 2 | - | - | N/A |
| Guard | Cancel | Invuln | Red Damage | White Damage | Gauge |
| throw | no | 1-96 whole body | 23 (11) | 8 (4) | H: 9 G: 0 W: 0 |
