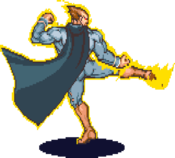
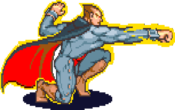
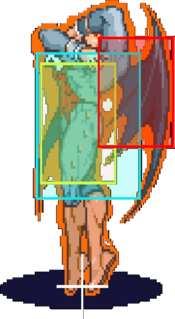
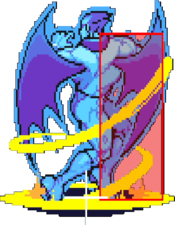
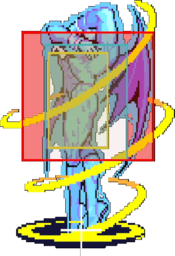
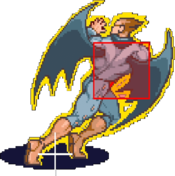
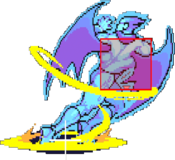
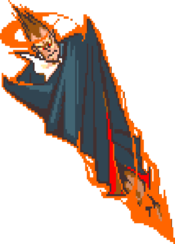
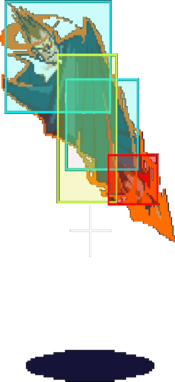
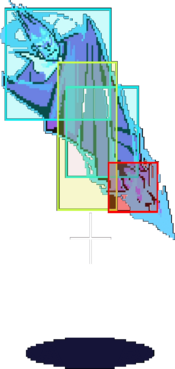
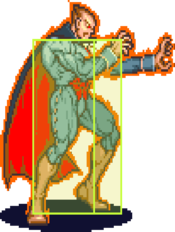
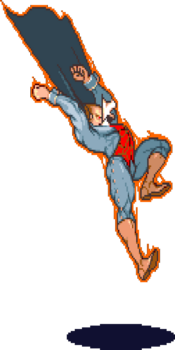
User:Pythmere/VSAV/Demitri
Normal Moves
Standing Normals
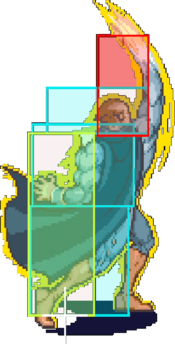
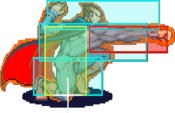
5LP
| Startup | Active | Recovery | Hit Adv. | Block Adv. | Renda Bonus |
|---|---|---|---|---|---|
| 4 | 3 | 7 | 6 | 5 | H: 9 G: 8 |
| Guard | Cancel | Invuln | Red Damage | White Damage | Gauge |
| mid | yes | - | 8 | 3 | H: 6 G: 3 W: 0 |
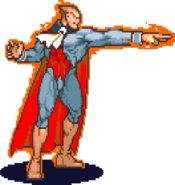
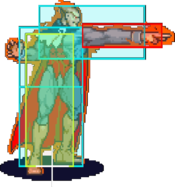
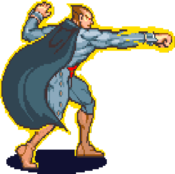
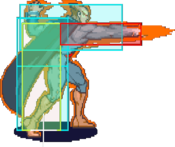
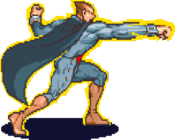
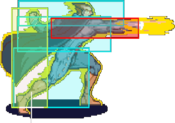
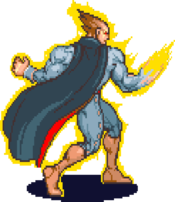
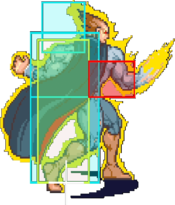
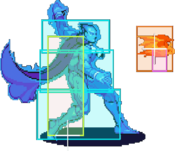
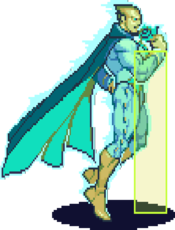
Demitri's standing LP is a decent move. It is good for anti-airing in specific situations, namely when you are facing an opponent with an airdash (Morrigan's ground dash, Zabel's IAD, Jedah's normal dash, etc.). It's quick enough that, if timed properly, it will hit them out of their airdash. It's worth noting that 5LP does not knock down when hitting an opponent in the air; this means that you can use 5LP to air reset your opponent and begin Demitri's mix up game.
- • This move will only hit crouching: Bishamon, Victor.
5MP
| Startup | Active | Recovery | Hit Adv. | Block Adv. | Renda Bonus |
|---|---|---|---|---|---|
| 7 | 3 | 20 | 1 | 0 | N/A |
| Guard | Cancel | Invuln | Red Damage | White Damage | Gauge |
| mid | no | - | 16 | 6 | H: 15 G: 9 W: 3 |
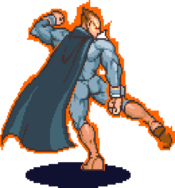
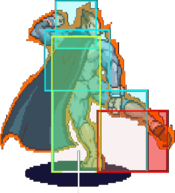
Most of the time you'll see this when attempting to throw from too far away. From the farthest distance that this will combo into 2HK it's a somewhat alright meaty attack after a knockdown, and it has some potential to catch jumpers if you time it late. Doing a proper meaty with a low attack is usually a better option though. Overall it's not that useful of a button.
• This move will not hit crouching: Bulleta, Gallon, Lilith, Morrigan, Q-Bee5HP
| Startup | Active | Recovery | Hit Adv. | Block Adv. | Renda Bonus |
|---|---|---|---|---|---|
| 9 | 3 | 26 | -1 | -2 | N/A |
| Guard | Cancel | Invuln | Red Damage | White Damage | Gauge |
| mid | no | - | 20 | 7 | H: 24 G: 15 W: 6 |
Most of the time you'll see this when attempting to throw from too far away. From the farthest distance that this will combo into 2HK it's a somewhat alright meaty attack after a knockdown, and it has some potential to catch jumpers if you time it late. Doing a proper meaty with a low attack is usually a better option though. Overall it's not that useful of a button.
• This move will not hit crouching: Bulleta, Gallon, Lilith, Morrigan, Q-Bee5LK
| Startup | Active | Recovery | Hit Adv. | Block Adv. | Renda Bonus |
|---|---|---|---|---|---|
| 5 | 3 | 8 | 5 | 4 | H: 8 G: 7 |
| Guard | Cancel | Invuln | Red Damage | White Damage | Gauge |
| mid | yes | - | 8 | 3 | H: 6 G: 3 W: 0 |
5MK
| Startup | Active | Recovery | Hit Adv. | Block Adv. | Renda Bonus |
|---|---|---|---|---|---|
| 7 | 4 | 24 | -3 | -4 | N/A |
| Guard | Cancel | Invuln | Red Damage | White Damage | Gauge |
| mid | no | - | 19 | 7 | H: 15 G: 9 W: 3 |
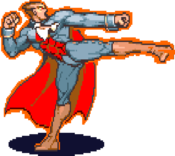
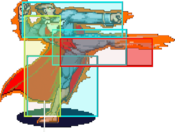
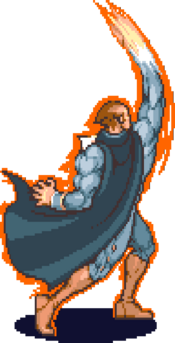
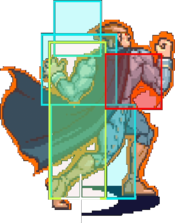
Amazing normal attack anti-air featuring great a great hitbox and active frames. This will destroy most jump in attacks if used properly, but has some difficulty in being spaced. Demitri's 5MK will turn into the "close" version from relatively far away, so trying to anti-air a deep jump in with this can easily backfire. However, long range jump ins will get eaten alive. It's a good to mix this up with his Demon Cradle as an anti-air because this cannot be blocked by airborne opponents, while Demon Cradle is fully air blockable. Mixing them together will make the opponent unsure if they should try to attack and beat the Far 5MK while jumping in or if they should attempt to chicken guard a Demon Cradle.
On hit, the air reset will place the opponent far away. After a midscreen anti-air, it's not practical to do much of a meaty outside of 2HK. You can attempt hit them with a dash attack, but they'll have plenty of time to move before that.
• This move will only hit crouching: Anakaris, Bishamon, Jedah, Victor5HK
| Startup | Active | Recovery | Hit Adv. | Block Adv. | Renda Bonus |
|---|---|---|---|---|---|
| 10 | 3 | 28 | -3 | -4 | N/A |
| Guard | Cancel | Invuln | Red Damage | White Damage | Gauge |
| mid | no | - | 22 | 8 | H: 24 G: 15 W: 6 |
Close Normals
CL.5MP
| Startup | Active | Recovery | Hit Adv. | Block Adv. | Renda Bonus |
|---|---|---|---|---|---|
| 6 | 3 | 19 | 2 | 1 | N/A |
| Guard | Cancel | Invuln | Red Damage | White Damage | Gauge |
| mid | yes | - | 17 | 6 | H: 15 G: 9 W: 3 |
Not used too often outside of a couple chain combos and specific throw situations. As a throw option select button for the most part Close 5HP outclasses this in every way, however this recovers faster. A few characters can actually jump above the anti-air capabilities of Demitri's c.5HP, so using c.5MP in a situation where the former is going to whiff may save you by recovering a little sooner.
- At 32 pixels away from the opponent this turns into Far 5MP.
- This move will not hit crouching: Q-Bee.
CL.5HP
| Startup | Active | Recovery | Hit Adv. | Block Adv. | Renda Bonus |
|---|---|---|---|---|---|
| 8 | 5 | 26 | -6 | -7 | N/A |
| Guard | Cancel | Invuln | Red Damage | White Damage | Gauge |
| mid | first | - | 21 | 7 | H: 24 G: 15 W: 6 |
An incredibly good throw option select, this is a core part of Demitri's game basic game plan. When using Close 5HP to throw your opponent, if they stand there they will be thrown, and if they jump they'll be anti-aired by the c.5HP coming out. Mix this in with meaties after obtaining a knockdown.
When an opponent on the ground is hit by or blocks this, cancel into a 2HK due to Close 5HP's negative frames. When an opponent in the air is hit by this, do not cancel in into 2HK, as Demitri can be punished near the corner if you anti-aired them low to the ground and then whiff a 2HK. You can chain cancel Close 5HP relatively late, to the point where it's possible to do it on reaction after you've confirmed this has hit a grounded or jumping opponent.
It's important to capitalize on the air reset if this happens to hit an opponent jumping out. When hitting an airborne opponent midscreen, the air reset will MAYBE give you enough time to inch forward and meaty with a 2~3 hit chain, but you can also attempt to dash forward into a Midnight Pleasure or Demon Cradle. After anti-airing an opponent in the corner you have time to set up nearly whatever pressure you want. On certain characters a cross under mix-up in the corner is possible if anti-aired when high up: Bulleta, Demitri, Jedah, Lilith(Hard~ish), Morrigan(Hard~ish) and Q-Bee.
- At 36 pixels away from the opponent this turns into Far 5HP.
- This move will not hit crouching Q-Bee.
CL.5MK
| Startup | Active | Recovery | Hit Adv. | Block Adv. | Renda Bonus |
|---|---|---|---|---|---|
| 6 | 3 | 22 | -1 | -2 | N/A |
| Guard | Cancel | Invuln | Red Damage | White Damage | Gauge |
| mid | yes | - | 18 | 6 | H: 15 G: 9 W: 3 |
Demitri's best normal for special canceling, Close 5MK will combo into an ES Chaos Flare from further away than his other normals. This has the odd attribute of remaining the close version of the attack from surprisingly far away, even after of a two hit air-to-ground chain or an ES Bat Drill. Due to that Close 5MK is used in Demitri's damage optimized combos, however, they are uncommon to land (and difficult to confirm into) so use of this normal is uncommon as well.
If, for some reason, you want to use Demitri's kick throw, this is a better button to attempt with than 5HK.
- At 52 pixels away from the opponent this turns into Far 5MK.
Crouching Normals
2LP
| Startup | Active | Recovery | Hit Adv. | Block Adv. | Renda Bonus |
|---|---|---|---|---|---|
| 5 | 3 | 7 | 6 | 5 | H: 9 G: 8 |
| Guard | Cancel | Invuln | Red Damage | White Damage | Gauge |
| mid | yes | - | 8 | 4 | H: 6 G: 3 W: 0 |
2MP
| Startup | Active | Recovery | Hit Adv. | Block Adv. | Renda Bonus |
|---|---|---|---|---|---|
| 7 | 3 | 18 | 3 | 2 | N/A |
| Guard | Cancel | Invuln | Red Damage | White Damage | Gauge |
| mid | yes | - | 16 | 7 | H: 15 G: 9 W: 3 |
2HP
| Startup | Active | Recovery | Hit Adv. | Block Adv. | Renda Bonus |
|---|---|---|---|---|---|
| 8 | 4 | 30 | -9 | -10 | N/A |
| Guard | Cancel | Invuln | Red Damage | White Damage | Gauge |
| low | no | - | 21 | 8 | H: 24 G: 15 W: 6 |
2LK
| Startup | Active | Recovery | Hit Adv. | Block Adv. | Renda Bonus |
|---|---|---|---|---|---|
| 5 | 3 | 8 | 5 | 4 | H: 8 G: 7 |
| Guard | Cancel | Invuln | Red Damage | White Damage | Gauge |
| low | yes | - | 8 | 4 | H: 6 G: 3 W: 0 |
A 2LK that suits the job. One of Demitri's primary meaty and pressure tools. This is your main chain combo starter and what you'll usually be linking into off of a jump in attack.
This rapid cancels, which means it cancels into itself on hit, block or whiff. Staggering this on block can open up the opponent if they try to jump away, mistime a throw tech or mess up a push block/guard cancel. Demitri doesn't have quick overhead attacks, so you better make those lows count.2MK
| Startup | Active | Recovery | Hit Adv. | Block Adv. | Renda Bonus |
|---|---|---|---|---|---|
| 8 | 3 | 22 | -4 | -5 | N/A |
| Guard | Cancel | Invuln | Red Damage | White Damage | Gauge |
| low | yes | - | 16 | 7 | H: 15 G: 9 W: 3 |
Decent low poke, but it's easy to be far enough from the opponent so that 2MK doesn't combo into 2HK, and frame advantage is too awful to use it alone. It's useful, but don't overestimate it and know your ranges.
Please keep this in mind: Demitri is not Ryu. You should not be canceling 2MK into a fireball unless you really know what you're doing.2HK
| Startup | Active | Recovery | Hit Adv. | Block Adv. | Renda Bonus |
|---|---|---|---|---|---|
| 10 | 4 | 25 | - | -1 | N/A |
| Guard | Cancel | Invuln | Red Damage | White Damage | Gauge |
| mid | no | - | 18 | 8 | H: 24 G: 15 W: 6 |
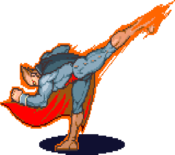
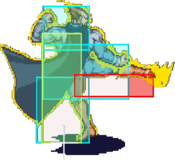
A core part of Demitri's game and one of the best sweeps in the game, it does everything besides hit low. The knockdown is essential to Demitri, every chain combo that hits should end in this normal. The frames on block make this completely safe, though it is rather susceptible to guard cancels so think twice of mindlessly ending your blocked chains into this.
As a poke, the range is ridiculous. It's not something to spam as the whiff may get you killed, but with good reads you can catch all sorts of things with this; it works pretty well at catching an overly aggressive opponent ground dashing at you. Use it for any long range punishes as well - blocked DI, LI or Rolling Buckler, the opponent whiffs an move from far away or whatever else it may be, just make sure you get that knock down.
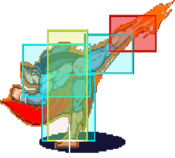
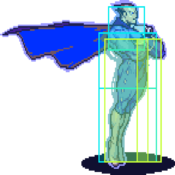
This works surprisingly well as a super long range anti-air in certain matchups. The hitbox of the move extends at the same point the hurtboxes appear, so if used with the proper positioning, the most the opponent can do is force a trade, which is just fine as long as you've scored the knockdown. Use this application of 2.HK with care, as it can easily be turned around on you if done incorrectly.Jumping Normals
J.LP
| Startup | Active | Recovery | Hit Adv. | Block Adv. | Renda Bonus |
|---|---|---|---|---|---|
| 5 | 6 | 3 | - | - | N/A |
| Guard | Cancel | Invuln | Red Damage | White Damage | Gauge |
| overhead | yes | - | 9 | 4 | H: 6 G: 3 W: 0 |
J.MP
| Startup | Active | Recovery | Hit Adv. | Block Adv. | Renda Bonus |
|---|---|---|---|---|---|
| 8 | 6 | 6 | - | - | N/A |
| Guard | Cancel | Invuln | Red Damage | White Damage | Gauge |
| overhead | yes | - | 17 | 6 | H: 15 G: 9 W: 3 |
Great multi-use air normal.
Demitri's primary air throw button. It's generally safer than using j.HP since if you miss the air throw and the opponent blocks j.MP, you have decent jump normals to chain into afterwards. The main issue when using this as an air throw is that the characters with the highest jumps go above j.MP causing it to whiff, so consider using j.HP to throw in those match-ups.
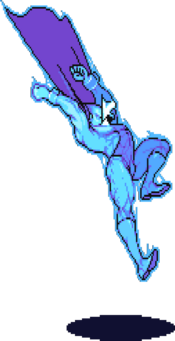
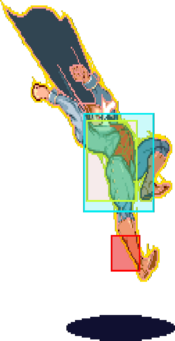
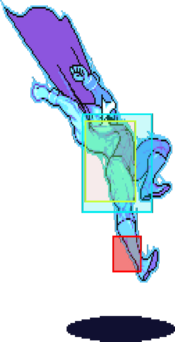
As an air-to-ground attack the hitbox is positioned downward almost as far as his j.LK while the hurtbox is while the hurtbox is higher making it a little harder to beat. For jump-ins the hurtbox position is even a little better than the amazing j.MK, but the the lack of range and fewer active frames make j.MP a little harder to use.
As an air-to-air, the hurtbox placement isn't great, but the hitbox hits a little higher up than j.MK does, giving it some (limited) potential against the mid-high range of jumpers.J.HP
| Startup | Active | Recovery | Hit Adv. | Block Adv. | Renda Bonus |
|---|---|---|---|---|---|
| 7 | 3 | 11 | - | - | N/A |
| Guard | Cancel | Invuln | Red Damage | White Damage | Gauge |
| overhead | no | - | 23 | 9 | H: 24 G: 15 W: 6 |
Primarily used as the last hit of an air chain, both air-to-air and air-to-ground.
When used as the ender of a 2-hit jump-in chain, after blocking the first hit most of the cast can crouch early to duck under the j.HP, potentially leaving Demitri vulnerable. Be aware of this and switch to using j.HK as the second hit instead when applicable. However, if you know your jump-in will not be blocked j.HP's faster startup and better range makes it more consistent and easier to use in combos than j.HK.
Demitri's secondary air throw button. Potentially this is better as a throw option-select against characters with high jumps (Gallon, Jedah, etc.) since j.MP can't hit them at the highest point of their jumps. The main problem with using this as a throw button is that if the throw misses and j.HP is blocked there are nothing to chain this into besides j.HK, which will most likely whiff on characters jumping that high leaving Demitri open.
• This move will only hit crouching: Anakaris, Bishamon, Jedah, Victor.J.LK
| Startup | Active | Recovery | Hit Adv. | Block Adv. | Renda Bonus |
|---|---|---|---|---|---|
| 5 | 6 | 3 | - | - | N/A |
| Guard | Cancel | Invuln | Red Damage | White Damage | Gauge |
| overhead | yes | - | 9 | 4 | H: 6 G: 3 W: 0 |
Has a hitbox is positioned lower than any other of Demitri's air normals besides j.HK. It has utility as the first hit of an air chain, and is also the best button to press after chicken blocking near the corner.
For air-to-air chains it works well as the first hit against characters with a below average max jumping height.
Against grounded opponents it allows for 2-hit jump in chains (j.LK > j.MK) on some of the below average height characters. It also can be used in faking cross ups. How it works is just before you'd normally cross over their head to do a cross up j.MK, you press LK early which should them from the from front. This is works better on taller characters, and when starting the jump farther away from the opponent. You'll need to chain after the j.LK to properly combo after landing. This shouldn't be applied until you're consistently able to properly space the j.MK cross up.
It's possible to use this to cross up, but it only works on a few characters and j.MK is a much better option.J.MK
| Startup | Active | Recovery | Hit Adv. | Block Adv. | Renda Bonus |
|---|---|---|---|---|---|
| 8 | 8 | 5 | - | - | N/A |
| Guard | Cancel | Invuln | Red Damage | White Damage | Gauge |
| overhead | yes | - | 16 | 6 | H: 15 G: 9 W: 3 |
J.HK
| Startup | Active | Recovery | Hit Adv. | Block Adv. | Renda Bonus |
|---|---|---|---|---|---|
| 10 | 3 | 7 | - | - | N/A |
| Guard | Cancel | Invuln | Red Damage | White Damage | Gauge |
| overhead | no | - | 21 | 8 | H: 24 G: 15 W: 6 |
Has a very low angled hitbox, but has some issues when used as a air-to-ground attack since it cannot be chained into anything. When used at the height that would make the most of it's downward hitbox it would result in the opponent recovering before you even touch the ground.
It's mostly used as the second hit of jump-in chain combos against standing opponents (j.Mx > j.HK), but due to the slow startup it does not come out before landing when used on characters of below-average standing height.
Another use of j.HK is to "kara" it into his air Chaos Flare to build extra meter. The input for that is 236HK~P, as in press HK and then a split second later hit any punch button. This technique cancels the first few frames of j.HK into a fireball, giving you meter from both attacks.Normal Throws
6MP or 6HP
| Startup | Active | Recovery | Hit Adv. | Block Adv. | Renda Bonus |
|---|---|---|---|---|---|
| 1 | - | 87 | - | - | N/A |
| Guard | Cancel | Invuln | Red Damage | White Damage | Gauge |
| throw | no | 1-86 whole body | 22 (11) | 8 (4) | H: 9 G: 0 W: 0 |
Demitri's Punch throw is probably the best out of his throws(outside of his 360) You can setup your wake up game using it, though if your opponent techs properly then you will lose your initiative. When using this throw, Make sure to pay very close attention to your opponent AFTER the throw has been executed. It could make the difference in winning or losing(though that goes with out saying). If it is teched everything is not lost, you can actually go for a surprise Midnight Pleasure to punish the tech.
Demitri's Punch Throw would normally give enough time to land a pursuit afterwards, but it causes a special type of knockdown that does not allow pursuits to connect. For whatever reason Q-Bee does not follow this rule and can be hit with a pursuit here, but only if she does not tech roll; if she rolls she cannot be hit.6MK or 6HK
| Startup | Active | Recovery | Hit Adv. | Block Adv. | Renda Bonus |
|---|---|---|---|---|---|
| 1 | - | 178 | - | - | N/A |
| Guard | Cancel | Invuln | Red Damage | White Damage | Gauge |
| throw | no | 1-176 whole body | 4x(3~12) (2x(3~12)) | 4+2 (2+1) | H: 9 G: 0 W: 0 |
J.6P or J.4P
| Startup | Active | Recovery | Hit Adv. | Block Adv. | Renda Bonus |
|---|---|---|---|---|---|
| 1 | - | 60 + landing 1 | - | - | N/A |
| Guard | Cancel | Invuln | Red Damage | White Damage | Gauge |
| throw | no | 1-60 whole body | 22 (11) | 8 (4) | H: 9 G: 0 W: 0 |
Special Moves
Chaos Flare
236P
| Startup | Active | Recovery | Hit Adv. | Block Adv. | Renda Bonus |
|---|---|---|---|---|---|
| 15 | 80 | 43 | 3 | -17 | N/A |
| Guard | Cancel | Invuln | Red Damage | White Damage | Gauge |
| mid | no | - | 18 | 6 | H: 21 G: 16 W: 12 |
| Startup | Active | Recovery | Hit Adv. | Block Adv. | Renda Bonus |
|---|---|---|---|---|---|
| 15 | 60 | 43 | 23 | -17 | N/A |
| Guard | Cancel | Invuln | Red Damage | White Damage | Gauge |
| mid | no | - | 24 | 9 | H: 0 G: 0 W: 0 |
When playing defensively this is your key zoning element. Mixing up your projectile speeds can keep players out for a while, leaving you free to build a bit of meter, stall for time, and be open to throw out a different move to punish them if they become too accustomed to your keep-away.
- (LP Version) Slowest speed.
- (MP Version) Mid speed.
- (HP Version) Fast speed.
- (ES Version) Moves the fastest and causes a bit more hitstun.
Demon Cradle
623P
| Startup | Active | Recovery | Hit Adv. | Block Adv. | Renda Bonus |
|---|---|---|---|---|---|
| 5 | 23 | 18 + landing 1 | - | -18 | N/A |
| Guard | Cancel | Invuln | Red Damage | White Damage | Gauge |
| mid | no | 1-6 whole body 8 feet | 24,18 | 6,4 | H: 31 G: 26 W: 22 |
| Startup | Active | Recovery | Hit Adv. | Block Adv. | Renda Bonus |
|---|---|---|---|---|---|
| 5 | 26 | 21 + landing 1 | - | -24 | N/A |
| Guard | Cancel | Invuln | Red Damage | White Damage | Gauge |
| mid | no | 1-6 whole body 8 feet | 26,19 | 7,4 | H: 31 G: 26 W: 22 |
| Startup | Active | Recovery | Hit Adv. | Block Adv. | Renda Bonus |
|---|---|---|---|---|---|
| 4 | 29 | 24 + landing 1 | - | -30 | N/A |
| Guard | Cancel | Invuln | Red Damage | White Damage | Gauge |
| mid | no | 1-6 whole body 8 feet | 28,20 | 8,4 | H: 31 G: 26 W: 22 |
| Startup | Active | Recovery | Hit Adv. | Block Adv. | Renda Bonus |
|---|---|---|---|---|---|
| 5 | 3x9,2 | 24 + landing 1 | - | -24 | N/A |
| Guard | Cancel | Invuln | Red Damage | White Damage | Gauge |
| mid | no | 1-8 whole body | 8x10 | 2x10 | H: 0 G: 0 W: 0 |
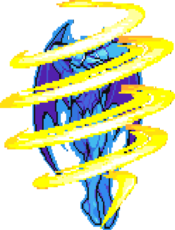
This version has the least recovery and is what you want to be using for your reversal. Even on block it recovers fast like a LP SRK in ST. Feel free to mash this move to build meter when you're at a safe distance, but using a Chaos Flare is safer.
- (MP Version)
Demitri spins a bit higher than in the lp version and it deals more damage, but the recovery is worse. This is his worst version of Demon Cradle to be honest.
- (HP Version)
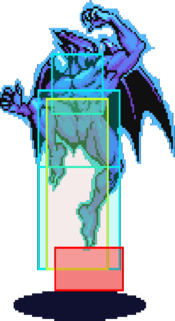
Demitri gets mad and spins for the sky. Terrible recovery, but good damage. This should be your combo ender if you have no meter.
- (ES Version)
Dashing Demon Cradle
66,623LP
| Startup | Active | Recovery | Hit Adv. | Block Adv. | Renda Bonus |
|---|---|---|---|---|---|
| 4 | 23 | 18 + landing 1 | - | -18 | N/A |
| Guard | Cancel | Invuln | Red Damage | White Damage | Gauge |
| mid | no | - | 24,18 | 6,4 | H: 31 G: 26 W: 22 |
66,623MP
| Startup | Active | Recovery | Hit Adv. | Block Adv. | Renda Bonus |
|---|---|---|---|---|---|
| 4 | 25 | 20 + landing 1 | - | -22 | N/A |
| Guard | Cancel | Invuln | Red Damage | White Damage | Gauge |
| mid | no | - | 26,19 | 7,4 | H: 31 G: 26 W: 22 |
66,623HP
| Startup | Active | Recovery | Hit Adv. | Block Adv. | Renda Bonus |
|---|---|---|---|---|---|
| 4 | 27 | 22 + landing 1 | - | -26 | N/A |
| Guard | Cancel | Invuln | Red Damage | White Damage | Gauge |
| mid | no | - | 28,20 | 8,4 | H: 31 G: 26 W: 22 |
66,623PP
| Startup | Active | Recovery | Hit Adv. | Block Adv. | Renda Bonus |
|---|---|---|---|---|---|
| 4 | 3x9 | 22 + landing 1 | - | -20 | N/A |
| Guard | Cancel | Invuln | Red Damage | White Damage | Gauge |
| mid | no | - | 8x9 | 2x9 | H: 0 G: 0 W: 0 |
Guard Cancel
623LP
| Startup | Active | Recovery | Hit Adv. | Block Adv. | Renda Bonus |
|---|---|---|---|---|---|
| 5 | 23 | 18 + landing 1 | - | -18 | N/A |
| Guard | Cancel | Invuln | Red Damage | White Damage | Gauge |
| mid | no | 1-6 whole body 8 feet | 24,18 | 6,4 | H: 31 G: 26 W: 22 |
623MP
| Startup | Active | Recovery | Hit Adv. | Block Adv. | Renda Bonus |
|---|---|---|---|---|---|
| 5 | 26 | 21 + landing 1 | - | -24 | N/A |
| Guard | Cancel | Invuln | Red Damage | White Damage | Gauge |
| mid | no | 1-6 whole body 8 feet | 26,19 | 7,4 | H: 31 G: 26 W: 22 |
623HP
| Startup | Active | Recovery | Hit Adv. | Block Adv. | Renda Bonus |
|---|---|---|---|---|---|
| 4 | 29 | 24 + landing 1 | - | -30 | N/A |
| Guard | Cancel | Invuln | Red Damage | White Damage | Gauge |
| mid | no | 1-6 whole body 8 feet | 28,20 | 8,4 | H: 31 G: 26 W: 22 |
623PP
| Startup | Active | Recovery | Hit Adv. | Block Adv. | Renda Bonus |
|---|---|---|---|---|---|
| 5 | 3x9,2 | 24 + landing 1 | - | -24 | N/A |
| Guard | Cancel | Invuln | Red Damage | White Damage | Gauge |
| mid | no | 1-8 whole body | 8x10 | 2x10 | H: 0 G: 0 W: 0 |
Bat Spin
214K
| Startup | Active | Recovery | Hit Adv. | Block Adv. | Renda Bonus |
|---|---|---|---|---|---|
| 30 | 2x10,1 | landing 1 | 14 | 13 | N/A |
| Guard | Cancel | Invuln | Red Damage | White Damage | Gauge |
| mid | no | 1-18 feet | 9x3 | 2x3 | H: 21+3+3 G: 19+1+1 W: 18 |
214KK
| Startup | Active | Recovery | Hit Adv. | Block Adv. | Renda Bonus |
|---|---|---|---|---|---|
| 30 | 2x10,1 | landing 1 | 14 | 13 | N/A |
| Guard | Cancel | Invuln | Red Damage | White Damage | Gauge |
| mid | no | 1-18 feet | 6x11 | 2x11 | H: 0 G: 0 W: 0 |
Negative Stolen
360+P
| Startup | Active | Recovery | Hit Adv. | Block Adv. | Renda Bonus |
|---|---|---|---|---|---|
| 6 | 1 | 42 | - | - | N/A |
| Guard | Cancel | Invuln | Red Damage | White Damage | Gauge |
| throw | no | - | 29 | 8 | H: 21 G: 0 W: 12 |
Pursuit
8P or 8K
| Startup | Active | Recovery | Hit Adv. | Block Adv. | Renda Bonus |
|---|---|---|---|---|---|
| 37 | 6 | landing 1 | - | - | N/A |
| Guard | Cancel | Invuln | Red Damage | White Damage | Gauge |
| mid | no | 8-10 feet | 6 | 6 | H: 24 G: 0 W: 6 |
| Startup | Active | Recovery | Hit Adv. | Block Adv. | Renda Bonus |
|---|---|---|---|---|---|
| 37 | 6 | landing 1 | - | - | N/A |
| Guard | Cancel | Invuln | Red Damage | White Damage | Gauge |
| mid | no | 8-10 feet | 8+1x4 | 6+1x4 | H: 0 G: 0 W: 0 |
Ex Moves
623KK
263PP
| Startup | Active | Recovery | Hit Adv. | Block Adv. | Renda Bonus |
|---|---|---|---|---|---|
| 12 | 29 | 17 | - | - | N/A |
| Guard | Cancel | Invuln | Red Damage | White Damage | Gauge |
| throw | no | - | 1x17+25 | 9 | H: 0 G: 0 W: 0 |
LP,MP,Towards,MK,MK
| Startup | Active | Recovery | Hit Adv. | Block Adv. | Renda Bonus |
|---|---|---|---|---|---|
| 2 | 29 | 1 | - | - | N/A |
| Guard | Cancel | Invuln | Red Damage | White Damage | Gauge |
| throw | no | - | 2x8+6+13+6+16 | 2+4+2+6 | H: 0 G: 0 W: 0 |
