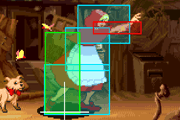
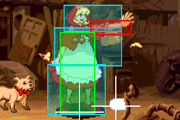
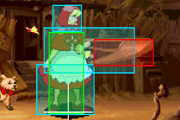
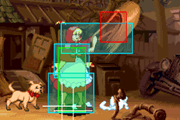
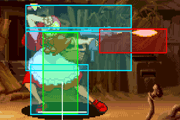
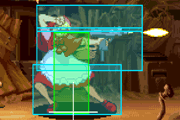
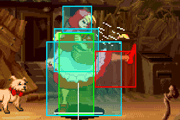
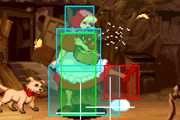
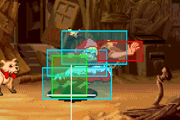
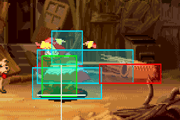
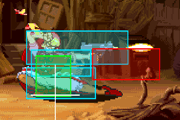
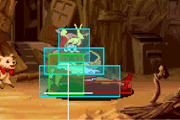
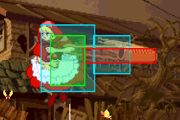
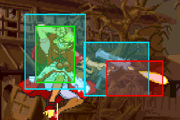
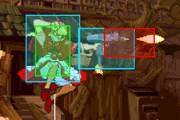
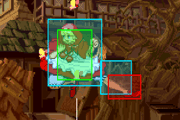
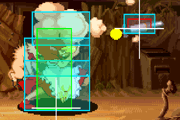
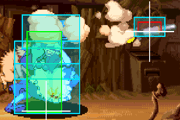
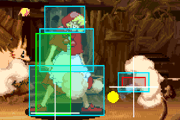
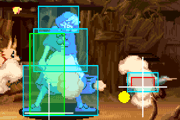
Vampire Savior/Bulleta
Introduction
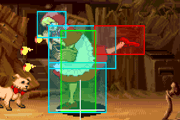
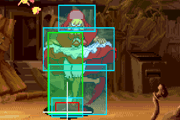
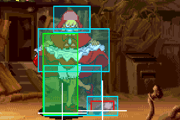
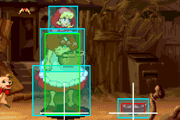
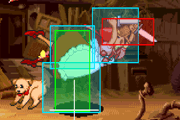
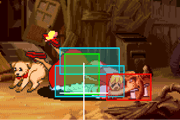
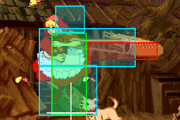
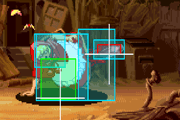
Bulleta (バレッタ), the Dark Hunter.
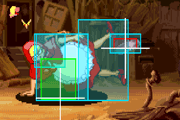
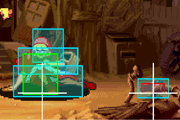
Infamous for her execution requirements and esoterics, she's a character for the hardest of core. She has compact and potent normals that, coupled with her fantastic movement and projectiles, make her zoning game very effective. With her amazing ground dash you can adjust on the fly to whatever your opponent feels like assaulting you with. She may be lacking in natural defense like a decent guard cancel or reversal, but she benefits greatly from system mechanics. Her normals and doublejump do wonders with airguard and, because her missiles persist after getting hit, push-blocking is a fantastic option. Her offense is brutal, assuming you have the execution and reactions to make it work. Between instant overheads, ambiguous jump-ins, jarring staggers, and a threatening command throw, you're almost sure to net some damage on any successful in. Her only real problems involve execution and footsies. You need exceptional spacial and situational understanding and awareness to keep up with this game's powerful top tier. The slightest misstep will most likely result in you taking damage. If you're willing to commit to the grind and already have the execution, this character will reward you in spectacular fashion.
Primary objective: Zoning with missiles, ambiguous rushdown.
Normal Moves
Standing
| LP
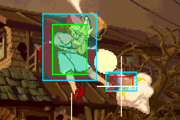
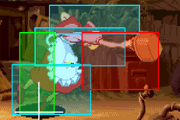
[ Startup: 4 | Hit:+10 | Block:+9 | Renda: H:+13 B:+12 ] Good jab with a gratuitous amount of stun, renda or otherwise. Great for stuffing iad shenanigans. Has essentially no whiff animation so you can use it with your dash to wavedash for some spacing without having to cancel it manually. Decent anti-air on its own, but what Bulleta gets off of the reset is outrageous. Bishamon and Victor can't crouch under it, so abuse it on them. | |
| n.LP
[ Startup: 4 | Hit:+6 | Block:+5 | Renda: H:+9 B:+8 ] Problematic normal. Pretty much the same as the far version, but with weaker frame-data. | |
| MP
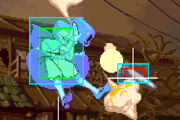
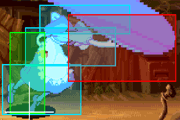
[ Startup: 6 | Hit:+6 | Block:+5 ] Amazing hitbox. Great frames. Dash in with it, hit-confirm into bnb of choice. Punish whiffed normals, stuff start-up of normals. Safe from guard cancels with good spacing. Basically, you're going to love this button. | |
| n.MP
[ Startup: 9 | Hit:+6 | Block:+5 ] Another problematic normal. The best range to use this, sadly, the game doesn't let you use it. You can use it to catch jump-outs or for convoluted dash-under anti-air. Whiffing at point blank is suicide. Avoid using it on accident. | |
| HP
[ Startup: 9 | Hit:-16 | Block:-17 ] Fires 7 bullets with a small range. She gets pushed back as the hits connect, so the number of connected hits will be less depending on how far you are, with 7 only being possible with a dashing HP. This move is mostly useless, however. | |
| LK
[ Startup: 6 | Hit:+4 | Block:+3 | Renda: H:+7 B:+6 ] Germy shin-kick. Best time to use it is when you think you don't have the 12 frames to keep someone still with dash MP. | |
| n.LK
[ Startup: 5 | Hit:+2 | Block:+1 | Renda: H:+5 B:+4 ] No real use. Just do c.LP. | |
| MK
[ Startup: 8 | Hit:+4 | Block:+3 ] Excellent anti-air. Dashing with it in place of mp is good for those folks who's stick is stuck on [7]. | |
| HK
[ Startup: 17 | Hit: KD | Block:-5 ] Very tricky projectile move. Stops your forward momentum completely and drops a mine. Toss at the end of a block-confirm to bait tech-hit. They'll still have to sit there and wait for the mine, or just flat out get hit from not expecting it. Absolutely dirty on oki. Predict their tech and place a mine at their feet. If you do it early enough, you can dash through them and they'll have to guess the direction on wake-up. If they block correctly you can start doing standard Bulleta nonsense. A very stylish and jarring gimmick is to whiff the meaty mine by just a pixel or two and do a command throw on oki. |
Crouching
| c.LP
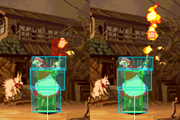
[ Startup: 4 | Hit:+6 | Block:+5 | Renda: H:+9 B:+8 ] A hit-confirm normal. Hits mid, but has better frame advantage than c.LK. Link into it from c.LK and figure out what you want to do from there. | |
| c.MP
[ Startup: 6 | Hit:+7 | Block:+6 ] Basically the low version of MP with the added bonus of being able to link into itself. | |
| c.HP
[ Startup: 9 | Hit:-16 | Block:-17 ] Fires 5 bullets at the same standard range of her standing HP, still pushing her back. Awful move. Avoid it. | |
| c.LK
[ Startup: 4 | Hit:+6 | Block: +5 ] Typical low short. Mostly used in her unblockable setup. Try your best to get into the habit of linking c.LP afterward. Its a nice, slow hit-confirm and leads into everything she has, pretty much. | |
| c.MK
[ Startup: 6 | Hit:+5 | Block:+4 ] Unremarkable kick. Toss it into your chains for 1-2-3-4's. | |
| c.HK
[ Startup: 7 | Hit:KD | Block:-3 ] Decent sweep. Mainly a finisher for your chains. |
Jumping
| j.LP
[ Startup: 5 ] You mainly come down with this on the shorter and skinnier characters like Felicia and Q-Bee. Follow up with j.MP for shenanigans. | |
| j.MP
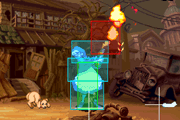
[ Startup: 7 ] Phenomenal instant-overhead. Works on everyone except Q-bee on the way up. Decent air-to-air. Use your double-jumps to get above someone and slap them around. | |
| 8.HP
[ Startup: 5 ] Fantastic air-to-air. Just smack people who are sitting on j9 all day. | |
| j.HP
[ Startup: 13 ] The best version of her Uzi. Deceptive range and no crippling recovery. Toss it out after j.mp to help with hit-confirms. If they block an air chain near the corner, use this to keep them in block-stun while you land and guard-break them. | |
| 8.HP
[ Startup: 13 ] Good for creating a wall that eats corner jump-outs. | |
| j.LK
[ Startup: 5 ] Better range than j.LP but whiffs on the obnoxiously short characters. | |
| j.MK
[ Startup: 7 ] An amazing cross-up. Fast and compact, this move can also be used as air-to-air. | |
| 8.MK
[ Startup: 7 ] If you read their tech and set up for an unblockable with j.HK c.LK, those who understand how to fight Bulleta may eventually just start blocking it correctly. Cycle back and come down with this kick to just hit them with a high. | |
| j.HK
[ Startup: 11 ] Basically a low done from the air. The hit-stop disallows them from switching block. If they blocked the mine high the following c.LK will be unblockable. Pretty solid hit-box on its own. If you're sloppy and already used up your j.MP than you can use this to stuff equally sloppy anti-airs. |
Command Normal Moves
| Surprise & Hop – 4.MK / 6.MK:
[ Startup: 5 | Hit:-3 | Block:-4 ] Bazooka knee. The classic use for this is to hold charge while you use it to get some forward movement in. Out of place in a game like this, however. Can be anti-air in some cases. | |
| Stumble & Blade – 6[6].MP / 4[4].MP:
[ Startup: 21 | Hit:-1 | Block:-2 ] Absolutely awful overhead attack. You get it on accident when trying to do dash MP | |
| Tricky Basket – 6.MP / 4.MP:
[ Startup: 12 | Hit:+4 | Block:+3 ] Sobasket. Another out-of-place displacement command normal that she's stuck with. Use it to annoy the hell out of an Anakaris player or tick into es command throw. | |
| 3.HK
[ Startup: 15 | Hit: KD | Block:-9 ] Use it in your strings to bait tech hit. A little faster than her standing mine. You can also chain into it from a longer range than c.HK. | |
| Tell Me Why – 2.LK+MK+HK:
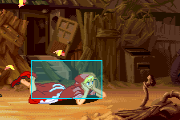
Bulleta crawls on the ground. A wholly defensive move, though not too hot. Throw immune, so you can bait the ones with a big whiff animation. | |
| P Throw:
Bulleta hops up on the enemy's shoulders and slits their throat. Though the pursuit will only connect if the other player doesn't press anything on knockdown, it still provides a closed gap to continue pressure. You should always do this through MP instead of HP, since you don't want to risk getting stuck with her uzi gun, would the throw whiff. | |
| Air Throw:
Just an aerial version of her normal throw. | |
| Pursuit:
Bulleta leaps a considerable distance and shoots downward onto her opponent, getting pushed back upwards. Whiff or not, this pursuit is essential to Bulleta's gameplay. It homes in to wherever the opponent is knocked down while still being very fast. ES Pursuit is definitely more satisfying to see, but should generally be saved for the guaranteed pursuits that come after her command throw. |
Movement
Walk: The only reason you should ever be walking as Bulleta is perhaps when you are moving backwards or need to walk a very short distance to follow up Tricky Basket with a throw. Walk as little as possible!
Dash: This is how you should be moving on the ground. Watching any Bulleta player, you'll notice how often dashing is required. The startup of the dash covers a large distance very quickly, allowing it to be 'cancelled' with any normal. If you only need to move a short distance, simply tap LP or press back out of your dash. Learn the properties of the dash, and get familiar with your movement with it alone or cancelled by a normal/back, and understand when you are open off the dash to do things like normal throw.
Jump: Bulleta is the only character in the game with a double jump! This gives her very good standing in any aerial situation, and also allows you to avoid many things on the ground. Use double jump where applicable to get in your opponent or dodge, but the most important thing about Bulleta's jump is to know when to chicken guard and when to air chain. This concept tends to come very naturally as you play and train.
Specials
| Smile & Missile (High) - [4]6P:
This is what you are always charging for. It builds your meter, stops rushdown, and keeps you safe. Like any fireball, you want to use certain versions in certain situations, but Bulleta's missiles tend to be more lenient. One good thing to learn is to feel safe behind your missiles for the most part. Bulleta can dash 'with' her missiles due to the huge dash range, and it provides a good wall to close the gap. This doesn't apply to ES, despite it going farther, because multiple hits are easier to tech or guard cancel.
| |
| Smile & Missile (Low) - [4]6K:
Really, there's nothing special to say about this version of the missile. It has all the same properties of the P missiles, and the K missiles should only be used in a situation where the P missile would miss. Just think Sagat's tiger shots. For some, it is also much more comfortable to land low ES missiles off two c.LK's over high ES missile. | |
| Hop & Missile - [2]8P:
Bulleta hops high into the air and fires a downward missile. Sadly, this move is mostly on 'never use' status with higher level players. It has very situational use and has a very obvious recovery time.
| |
| Cheer & Fire - 623P:
Boom champagne! This isn't your normal DP, it hits like one, but has no invincibility and requires pretty specific timing to hit someone out of the air. Being a special, it can just be blocked regardless. Stay away from this move unless your opponent is very predictable. The LP, MP, and HP versions are all the same.
| |
| Shyness & Strike - 214P:
This special is a big tool in Bulleta's arsenal, as it knocks down on hits and does a healthy amount of damage in one hit. While it has limited use as a pressure tool, you will want to save this for comboing into (don't underestimate the range). If you hold down the button before letting go, she will keep spinning the basket and it will get bigger and bigger. Obviously, this is incredibly easy to see and react to. The LP, MP, and HP versions are all the same, so use whichever is most comfortable in your combo input. You get a guaranteed pursuit after this move. | |
| Jealousy & Fake - 623K (GC Only):
Bulleta teleports behind the opponent, leaving a cloud of smoke and a doll in her original place. Unfortunately, although this move has 29F invulnerability, Bulleta is vulnerable for the last 10F of the animation before she can move, making this not an especially useful GC. Although it can get her out of the corner, it's best used against very laggy moves with a lot of active frames or simply not used at all. | |
| Sentimental Typhoon - 63214P:
It's as if they gave guile a command throw. Get a feel for the throw protection and make good use of it whenever you find yourself point blank. You can tick off of pretty much all of her standard dash normals. If you expect people to be 1hit teching your meaties, just dash up and use the ES version to spin them around a bit. Off instant j.mp j.mk, if you've already convinced them to sit still for this mix-up you can skip the whole high-low nonsense and land point blank for a throw. Half the strength of this move is the psychological effect. Because this move exists, there will be instances where you'll end up killing your opponent on jump-out punishes alone. Of course it'll come back full circle and you'll be allowed to just do a couple lights into dash forward command throw. Abuse it. |
Supers
| Cool Hunting - 41236PP:
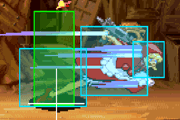
Hunters will pop up behind Bulleta and start firing along with Bulleta. This will fire a medium-long range stream of bullets along the bottom of the screen, and fullscreen missiles along the top of the screen. Fairly unsafe on miss, but characters like Victor can be free uses of it sometimes. In a smart sense, you won't see much of this super. Its best to people who use normals or air dash from a far, high up position; if they get hit by one missile, they will be forced to stay blocking in the air. In situations like Jedah air dashing in at a distance, it is pretty smart and safe to use Cool Hunting. | |
| Beautiful Memory - 41236KK:
With very short startup, Bulleta will move forward swinging knives. If whiffed, she will stop and be vulnerable for a short amount of time. If block, she will bounce off and likely eat a heavy normal punish. If it connects, it will keep them in the super and do full damage. Most players refuse to use their meter on this super. If you really have the game in your control, you can predict when people are going to throw something out trying to stop your rushdown and use this, as it has a fair amount of priority. That said, there is no specific way to use this super. Work it into your gameplay if you so desire, or save the meter for ES missiles. | |
| Apple For You - 63214KK:
A command throw in which she puts an apple out in front of her, and the other character will pick it up if she is close enough and doesn't get hit out of it. Unlike her command throw, there is a specific whiff animation for this (a whiffed command throw would come out as basket) in which she puts out the apple then puts it back and is vulnerable for a short amount of time. This is harder to land than ES command throw, but is used in the same exact situations that ES command throw would be applied. Dashing in with this doesn't seem to be a viable option, and it is more done after something like an empty jump after a lot of blocked pressure. |
Dark Force
The Killing Time - Same strength P + K
- All versions are the same. All of Bulleta's punches will be replaced with an instant missile that corresponds to the strength pushed, but you will keep all your kicks. That means you can dash into missiles, do multiple missiles at once, etc. Jumping and pressing will do the [2]8 Missile, pressing any P will be a high Missile, and crouching with any P will be a low Missile. Since you keep your kicks, this can be used regularly to move in with dashing LK and pressure with lots of missiles, but it sees more use as a panic/runaway tool to get the initial Dark Force invincibility on startup and then dash away repeatedly while firing missiles.
Strategies
Air Mixup
- Bulleta's j.mp is the source of most of her mayhem. On the way up, j.mp will be an instant overhead, and will chain into j.mk. Except against certain characters at certain ranges, it won't combo, but that's not really important. Chained j.mk has extremely short recovery on whiff, so you can toss out a move very shortly after the instant overhead. On some characters (particularly Sasquatch) you can j.lk to stop the forward momentum and hit on the incoming side. Mashing out another j.mk will allow you to crossover to hit on the far side.
- On the way down, j.mp is difficult to anti-air and can lead into a very bizarre mixup that is completely unique to Bulleta. Following the j.mp, you can do j.mk to go for the simple high-high jump-in. However, if you hit j.hk and they block it high, the hitstop from the mine will disallow the opponent from blocking low, making a c.lk unblockable. This creates a completely invisible, impossible to react to mixup that can only be stopped by 1-hit tech hit or guesswork.
Combos
Terminology
- > = next move is a chain
- >> = next move is a link
- xx = next move is a special or EX cancel
Basic Chains
- 2.LK > 2.MP > 2.MK > 2.HK
- 23 red/40 white
- Bulleta's basic four-hit knockdown chain. This is not her typical "bread & butter" combo due to the 2.HK being seriously short ranged. If you attempt this from anywhere other than point blank you'll be too far away to connect the 2.HK knockdown at the end. This is inconsistent even off of deep jump ins, so try not to make a habit of going to chains. Instead, use the "Basket Combos" listed below for her standard knockdown combos.
- 2.LK > 2.MP > 2.HK
- 18 red/32 white
- Excluding the 2.MK may allow the 2.HK hit a bit more consistently, but its still not perfect and the damage is not ideal when compared to her other options.
- 2.LK > 2.MP > 2.MK > 3.HK
- 25 red/43 white
- Corner only; Must be started from point blank range. **Check the benefit of using this**
Basket Combos
2.MP ONLY LINKS FROM A 2.LK WITH RENDA BONUS
- 2.LK > 2.LK >> 2.MP xx Basket
- 24 red/37 white
- Bulleta's BNB
-Use LP or MP Basket, so you don't accidentally cancel into 5.HP. All Baskets besides ES behave the same. -2.MP only links from a 2.LK with Renda Bonus.
- 2.MP >> 2.MP xx Basket
- 27r/42w
- 1 frame link; may not be practical to consistently go for.
- 2.LK > 2.LK xx Basket
- 19r/27w
- Only combos from 2.LK with Renda Bonus.
Missile Combos
Comboing into missile does not allow for any pursuit opportunities.
- 2.LK > 2.LK xx HK Low Missile
- 18 red/26 white
- 2.LK > 2.LK xx ES Low Missile
- 23 red/34 white
- Easy confirm that leaves you safe if you mess up. You need to be holding a charge for the missles though.
-Usually(?) needs the Renda Bonus from 2.LK canceled into itself to combo from the distance two light attacks puts you at.
- 2.LK > 2.LK >> 2.MP xx ES Low Missles
- 27 red/43 white
- Inconsistant when combo'd on standing opponents, only do to fatties. Works well enough on crouching opponents. Must be started from very close up.
Dash Link Combos
- Dash 5.MP >> 2.LK > 2.LK >> 2.MP xx Basket
- 31 red/47 white
- If you dash into them from very close range confirm
- Dash 5.MP >> 2.LK > 2.MP > 2.MK > 3.HK
- 31 red/51 white
- Corner only.
- Dash 5.MP >> 2.LK > 2.LK >> 2.MP xx ES Low Missile
- 34 red/53 white
- Dash 5.LP
- Typically best to use only on Bishamon and Victor since they cannot crouch under 5.LP.
Jump In Combo
- j.MP > j.MK >> 2.LK > 2.LK >> 2.MP xx Basket
- 36 red/58 white
- j.MP > j.MK >> 2.LK > 2.MK > 2.HK
- 30 red/51 white
- j.MP > j.MK >> 2.MP xx Missile
- 32 red/51 white
- j.MP > j.MK >> 2.MP xx Basket
- 33 red/52 white
- j.MP > j.MK >> 2.MP xx ES Missile
- 36 red/58 white
Sako Infinite
      LINK                     INSTANT DASH                INSTANT DASH
      ↓                        ↓                           ↓
2.LK >> (Start) 2.LP > 5.LP >> Dash 5.MP >> 2.LP > 5.LP >> Dash 5.MP >> 2.LP > 5.MP >> Dash 5.LP >> Dash 5.LP >> (Repeat Start) 2.LP > ...
   ↑                                        ↑
   LOW STARTER                              DASH LINK
Old Combo List
Most can be started from d.mp or jump-ins.
- c.lk c.mp c.hk
- Simple chain into knockdown.
- c.lk, c.lp ex missile
- Good knockdown.
- c.lp lp, cr.mp 214p
- c.lp c.lp, c.mp 214p
- c.lk c.lk, c.mp 214p
- c.lk, c.lp lp, c.mp 214p
- Various ways to land basket.
- c.lp lp, d.lp ("easy" dash link)
- c.lp lp, d.mp (if you're sako)
- d.lp, d.lp (use this to get back in after being pushed out)
- d.lp, c.lp lp
- d.mp, c.lp lp
- d.lp, d.lp, c.lp lp, c.mp 214p
- The pieces of the dash infinite. Lots of room for improvisation assuming you have the execution for it. An example below performed by Sako.
- c.lp lp, j.lk j.mp j.mk j.hp
- Demitri only? infinite.
- c.lp lp, j.lk j.mp j.hp
- Bishamon midscreen only?
Matchups
Anakaris
- If he's in the air you wanna just casually walk to your comfort zone and set up to catch his landing. Dash attack or missile his normals that pop out of the ground on whiff. To take some initiative, jump at him and air-block an attack, then double-jump with an attack to knock him out of the air. He generally out-ranges you on the ground, so just make him take to the air by putting missiles in his way. If he doesn't respect the missiles it's his loss. Dash up with the missile and use it get in on him. This is a match-up that's decided mid-screen. If you're getting sorely out-zoned, you're never going to get any damage and he's gonna just rush you down all day with the momentum you're giving him, so level up your footsies and zoning so you can earn an "in" and molest him.
- He can't push-block you away and cannot tech a throw. The throw part isn't particularly important because he's airborne extremely fast anyway. Off of a successful instant j.mp on him he can start a jump and take a reset from your follow-up, so be ready for that and turn it into damage with some command throw/meaty and high/low utilizing your j.hk. From some weird ranges you can j.LK for an ugly looking cross-up when it gets messy like that. Just stay on your toes and react as fast as you can. If he jumps and successfully blocks, do your best to confirm into a chain then n.LP reset, then turn that into another mix-up. Come down with j.MK if he's not mashing out or j.LP if he is. Once you build trust, of course, run unblocks and command throws. A dumb little string that doesn't actually accomplish anything is c.LP, 6.MP xN. He can't really mash out or do anything for that matter, but ultimately you get pushed back too far to really do anything with it.
- Defending his rush is complicated and highly reliant on who you're fighting. It's pretty easy to react to the dive on its own, but when he feints a dive and goes for a low, you have to start questioning what is actually gonna happen and what your opponent likes doing. Just simply blocking is fine and dandy, but if you want to turn your successful defense into a reset screen or just straight up damage, you do have some choices. Push-blocking will mess with his spacing and make him commit to something ugly if he isn't confirming, so punishing the button they like to push in their auto-pilot chain is a good way to violently shut off their momentum. If they're not respecting your buttons, time a s.LP or 4.MK to hit him as he's going up for the dive. If you are absolutely cock certain they're going to feint a high and go low, a jarring answer is to do an es command throw. Target habits and capitalize.
Aulbath
- low missile ftw
- double jump bubble
- dont get owned by j.lk
Bishamon
- can't duck under d.lp ftw
- dont care about missiles
Bulleta
- uuuuuugh
- j.mp your favorite button
Demitri
- play solid dont be dumb
Felicia
- learn to fight furries
Gallon
- ditto, cept you can actually guard-break him
Jedah
- cool matchup
Lei-Lei
- learn to zone and pushblock
- look out for c.rh when running your motions
Lilith
- play solid dont be dumb
Morrigan
- learn to block
Q-Bee
- vzzzzz vzzzzz vzzzz vzzzz vzzzzz
Sasquatch
- kill or be killed
- lose momentum lose a bat
Victor
- free free free
- molest all day everything works
Zabel
- ??????????
Frame Data
Normals
| Move | Startup | Hit
Advantage |
Block
Advantage |
Meter
Whiff/Block/Hit |
Guard | Cancel | Notes |
| n.LP | 4 | +6 | +5 | 0/ 3/ 6 | Mid | Yes/Rapid | Renda+: H:+9 B:+8 |
| n.MP | 9 | +6 | +5 | 3/ 9/15 | Mid | Yes | |
| n.HP | 9 | -16 | -17 | 6/7+1x6/9+3x6 | Mid | × | 密着から5ヒット時 |
| n.LK | 5 | +2 | +1 | 0/ 3/ 6 | Mid | Yes/Rapid | Renda+: H:+9 B:+8 |
| n.MK | 8 | +4 | +3 | 3/ 9/15 | Mid | Yes | |
| n.HK | 17 | Down | -5 | 6/15/24 | Mid | × | |
| LP | 4 | +10 | +9 | 0/ 3/ 6 | Mid | Yes/Rapid | Renda+: H:+9 B:+8 |
| MP | 6 | +6 | +5 | 3/ 9/15 | Mid | Yes | |
| HP | 9 | - | - | 6/7+1x6/9+3x6 | Mid | × | |
| LK | 6 | +4 | +3 | 0/ 3/ 6 | Mid | Yes/Rapid | Renda+: H:+9 B:+8 |
| MK | 8 | +4 | +3 | 3/ 9/15 | Mid | Yes | |
| HK | 17 | Down | - | 6/15/24 | Mid | × |
| Move | Startup | Hit
Advantage |
Block
Advantage |
Meter
Whiff/Block/Hit |
Guard | Cancel | Notes |
| c.LP | 4 | +6 | +5 | 0/ 3/ 6 | Mid | Yes/Rapid | Renda+: H:+9 G:+8 |
| c.MP | 6 | +7 | +6 | 3/ 9/15 | Low | Yes | |
| c.HP | 9 | -16 | -17 | 6/7+1x6/9+3x6 | Mid | × | 密着から5ヒット時 |
| c.LK | 4 | +6 | +5 | 0/ 3/ 6 | Mid | Yes/Rapid | Renda+: H:+8 G:+7 |
| c.MK | 6 | +5 | +4 | 3/ 9/15 | Low | Yes | |
| c.HK | 7 | Down | -3 | 6/15/24 | Low | × | |
| 3HK | 15 | Down | -9 | 6/15/24 | Mid | × | |
| 6MP | 12 | +4 | +3 | 3/ 9/15 | Mid | × | |
| 6MK | 5 | -3 | -4 | 3/ 9/15 | Mid | × | |
| 66MP | 21 | -1 | -2 | 3/ 9/15 | High | × |
| Move | Startup | Meter
Whiff/Block/Hit |
Guard | Cancel | Notes |
| 8.LP | 5 | 0/ 3/ 6 | High | × | |
| 8.MP | 7 | 3/ 9/15 | High | × | |
| 8.HP | 13 | 6/10+4/15+9 | High | × | |
| 8.LK | 5 | 0/ 3/ 6 | High | × | |
| 8.MK | 7 | 3/ 9/15 | High | × | |
| 8.HK | 11 | 6/15/24 | Mid | × | Down |
| j.LP | 5 | 0/ 3/ 6 | High | × | |
| j.MP | 5 | 3/ 9/15 | High | × | |
| j.HP | 13 | 6/10+4/15+9 | High | × | |
| j.LK | 5 | 0/ 3/ 6 | High | × | |
| j.MK | 7 | 3/ 9/15 | High | × | |
| j.HK | 11 | 6/15/24 | Mid | × | Down |
Specials
| Move | Startup | Hit
Advantage |
Block
Advantage |
Meter
Whiff/Block/Hit |
Guard | Notes |
| 4-6LP | 10 | Down | -1 | 15/18/21 | Mid | Downs Airborne Opponents |
| 4-6MP | 10 | Down | -1 | 15/18/21 | Mid | |
| 4-6HP | 10 | Down | -1 | 15/18/21 | Mid | |
| 4-6PP | 10 | Down | -2 | 0/0/0 | Mid | |
| 4-6LK | 10 | Down | -1 | 15/18/21 | Mid | Downs Airborne Opponents |
| 4-6MK | 10 | Down | -1 | 15/18/21 | Mid | |
| 4-6HK | 10 | Down | -1 | 15/18/21 | Mid | |
| 4-6KK | 10 | Down | -2 | 0/0/0 | Mid | |
| 2-8LP | 27 | Down | x | 15/18/21 | Mid | Landing Suki: 5F |
| 2-8MP | 27 | Down | x | 15/18/21 | Mid | |
| 2-8HP | 27 | Down | x | 15/18/21 | Mid | |
| 2-8PP | 27 | Down | x | 0/0/0 | Mid | |
| 623LP | 13 | Down | -9 | 18/21/24 | Mid | |
| 623MP | 15 | Down | -13 | 18/21/24 | Mid | |
| 623HP | 17 | Down | -18 | 18/21/24 | Mid | |
| 623PP | 11 | Down | x | 0/ 0/ 0 | Mid | |
| 214LP | 16〜 | Down | -9 | 18/21/24 | Mid | 発生値は可変 |
| 214MP | 64〜 | Down | -9 | 18/21/24 | Mid | 2段階目55F以上押す |
| 214HP | 112〜 | Down | -14 | 18/21/24 | Mid | 3段階目103F以上押す |
| 214PP | 27 | Down | -14 | 0/ 0/ 0 | Mid | |
| 623LK | x | x | x | x | x | Inv: 29F |
| 623MK | x | x | x | x | x | |
| 623HK | x | x | x | x | x | |
| 623KK | x | x | x | x | x | |
| 624MP | 2 | Down | - | 12/21 | Throw | |
| 624HP | 2 | Down | - | 12/21 | Throw | |
| 624PP | 2 | Down | - | 0/ 0 | Throw |
Supers
| Move | Gauge | Startup | Hit
Advantage |
Block
Advantage |
Guard | Notes |
| 426PP | 1 | 25 | Down | x | Mid | |
| 426KK | 1 | 17 | Down | -29 | Mid | 空中ヒット時追撃無し (*1) |
| 624KK | 1 | 18 | Down | x | Throw |
- Notes:
- 1: Invulnerable 16F. Landing Suki 1F
Notable Players
SAKO
Kosho (コショー)
