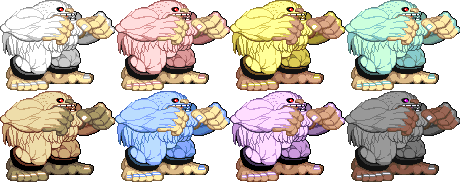
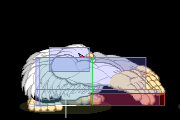
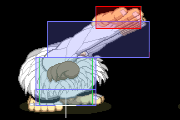
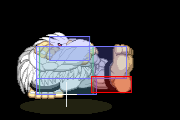
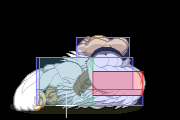
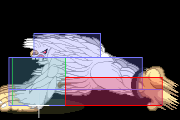
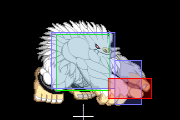
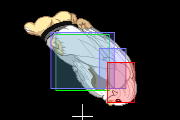
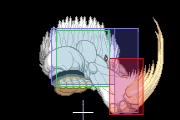
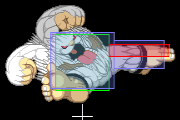
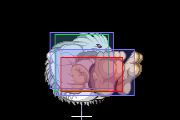
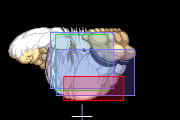
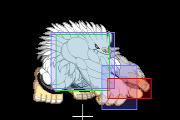
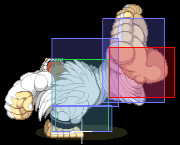
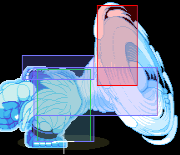
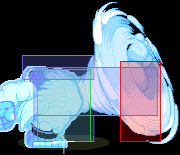
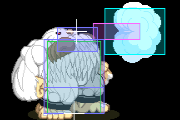
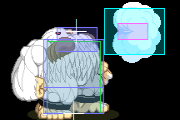
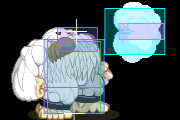
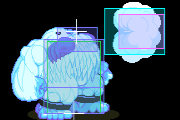
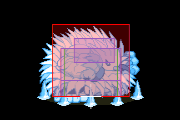
Vampire Savior/Sasquatch
Overview
Introduction
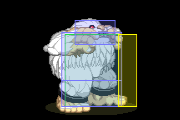
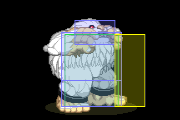
Sasquatch (サスカッチ), undeniably one of the two best characters in Vampire Savior, though he is more accessible than his counterpart Zabel.
His gameplay is characterized by extreme pressure and unseeable high/low mixups. He is backed up by high health, incredible movement speed(if you've mastered short hops), extremely buff normals, and some very high damage combos. His only weaknesses, however slight, is one of the worst walk speeds, though you won't be walking much, and a not quite good air game.
Executional Requirements
Low to Mid Level
Sasquatch is very strong at a low to mid level without putting in much work. At the very least you'll want to be able to do at least a single short hop at will for a mix up or to start some pressure.
Mastery
Sasquatch at a master level becomes a bit difficult, but compared to the rest of the cast it is still much easier. Short hop becomes extremely emphasized as you must be able to short hop the entire length of the screen, instantly short hopping right as you land from the previous one. Doing them them cleanly definitely takes some time to master, but it looks beautiful when executed perfectly.
You'll also want to be able to 1-hit push block at will. Sasquatch very easily turns defense into offense, potentially more so than the rest of the cast. You will simply push block, and short hop in behind it.
What To Focus On When Starting Out
- short hop practice
- air resets into high/low
Normal Moves
Standing Normals
| s.LP
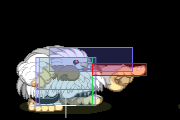
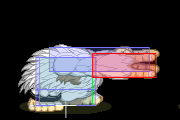
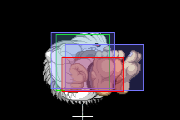
Near s.LP [ Startup:5 | Active:3 | Hit:+8 | Block:+7 | Renda: H:+11 B:+10 ] Special Cancels/Rapid Cancels Fairly standard st.LP. As with all standing light punches, you receive a renda bonus if you press the button twice. Good for stopping characters with hops, parabolic dashes, or instant air dashes if they are close. Abusing the renda bonus is necessary to give Anakaris a bad time, as the advantage on-block will be enough to go straight into long hop j.LP. | |
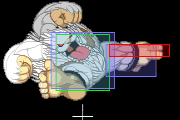
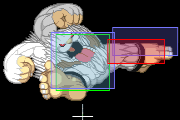
| s.MP
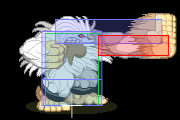
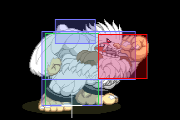
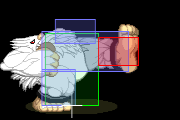
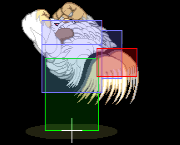
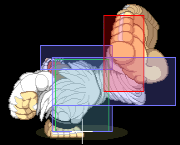
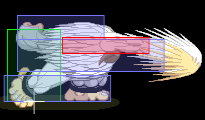
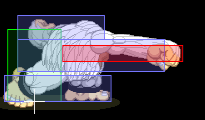
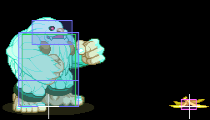
[ Startup:6 | Active:3 | Hit:+5 | Block:+4 ] Special Cancels Talk to the hand. Extremely good poke. If you don't know what to press as Sasquatch, this should probably be the button to press. It's almost as fast as most jabs in the games (most are 5f), but has a staggering amount of priority. Just like st.LP, you can use this to stop hops, parabolic dashes, or instant air dashes if they are close. The reward for doing so is much better, however. This button, along with st.HP, are your option select buttons for grabbing. | |
| s.HP
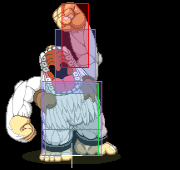
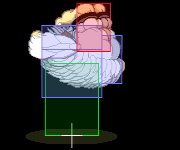
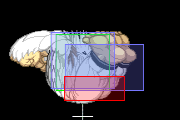
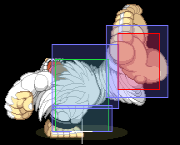
[ Startup:8 | Active:5(3+2) | Hit:+6 | Block:-7 ] Pretty good uppercut. This serves as your anti-air normal, but admittedly there won't be many usage of it as a proper anti-air as there are just generally more safe options. This button on-hit will always air reset the opponent, which will lead into one of Sasquatch's mixups afterwards. Along with st.MP, this is one of your two option select buttons for anti-air. The angle of it is so great that it will catch MOST upbacks in the corner. This button will not catch Felicia in the corner, however; use st.HK instead. | |
| s.LK
Near s.LK [ Startup:5 | Active:3 | Hit:+7 | Block:+6 ] Special Cancels High-hitting light kick. This move can be used as anti-hop, and if anything, is better than st.LP in that regard. The difference between st.LP and st.LK however is that this will not benefit from the renda bonus. Use this to tell pesky animals to sit down before hitting them with another mixup. Apparently this has near and far frame data. Maybe someone will fill in that part one day. | |
| s.MK
[ Startup:7 | Active:3 | Hit: 0 | Block:-1 ] For the most part, this serves the same purpose as st.MP in terms of anti-air, but overall inferior to st.MP in raw frame data. This isn't to say that this is a terrible move, as it does cover a higher angle than st.MP. As such, this is better for intercepting higher parabolic dashes or air dashes. Situational at most. | |
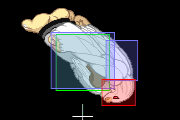
| s.HK
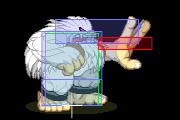
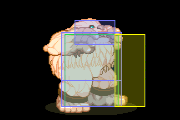
[ Startup:8 | Active:2/3 | Hit:+11 | Block:-2 ] The anti-air hitbox is active on the 12th frame. This move has a couple interesting properties. On the 8th frame it will go over lows, and even though Sasquatch is in the air, he is still considered grounded which means opponents cannot air block the anti-air. An interesting troll I saw SaviorMeister doing one day was whiffing this on his opponents wakeup. They'd wake up with a crouch LP or LK, which would whiff due to the lower body invincibility. He'd then recover and command throw them. Doesn't seem like it should be practical, and its not, but he made it work. |
Crouching Normals
| c.LP
[ Startup:5 | Active:3 | Hit:+6 | Block:+5 | Renda: H:+6 B:+5 ] Special Cancels/Rapid Cancels TEXT TEXT TEXT TEXT TEXT TEXT TEXT TEXT TEXT TEXT TEXT TEXT TEXT TEXT TEXT TEXT TEXT TEXT TEXT TEXT TEXT TEXT TEXT | |
| c.MP
[ Startup:6 | Active:3 | Hit:+4 | Block:+3 ] Special Cancels TEXT | |
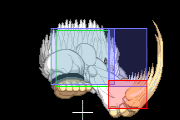
| c.HP
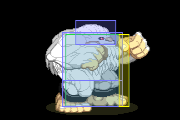
[ Startup:7 | Active:2+3 | Hit:+3 | Block: 0 ] Anti-Air hitbox is active on the 11th frame. | |
| c.LK
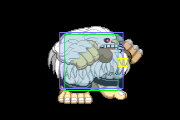
[ Startup:5 | Active:3 | Hit:+5 | Block:+4 ] Foot invincible frames 4F-13F. Must block low.
| |
| c.MK
[ Startup:5 | Active:3 | Hit:+5 | Block:+4 ] Special Cancels Must block low. | |
| c.HK
[ Startup:10 | Active:4 | Hit:Knockdown | Block:-6 ] Must block low. |
Forward and Back Jumping Normals
| j.LP
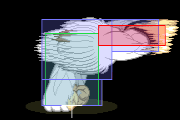
[ Startup:5 | Active:6 ] Hitbox is positionally the same as neutral jump LP, but the hurtbox on the arm is positioned a bit further forward and higher. Decent range, and downward trajectory on the hitbox. This is extremely useful for both jump ins, air chains and air whiffing. One of Sasquatch's main short hop normals on grounded opponents. | |
| j.MP
[ Startup:6 | Active:6 ] Hitbox is positionally the same as neutral jump MP, but the hurtbox on the neck is positioned much further back and a bit lower. Due to how much further back it is I'd say it's superior to the neutral jump version. Great air normal, use often. It works extremely well for option select air throws as well. One of Sasquatch's main short hop normals on grounded opponents. | |
| j.HP
[ Startup:10 | Active:4 ] TEXT | |
| j.LK
[ Startup:5 | Active:6 ] TEXT | |
| j.MK
[ Startup:6 | Active:6 ] TEXT | |
| j.HK
[ Startup:7 | Active:6 ] TEXT |
Neutral Jump Jumping Normals
| j.LP
[ Startup:5 | Active:6 ] TEXT TEXT TEXT TEXT TEXT TEXT TEXT TEXT TEXT TEXT TEXT TEXT TEXT TEXT TEXT TEXT TEXT TEXT TEXT TEXT TEXT TEXT TEXT | |
| j.MP
[ Startup:6 | Active:6 ] TEXT | |
| j.HP
[ Startup:10 | Active:4 ] TEXT | |
| j.LK
[ Startup:5 | Active:6 ] TEXT | |
| j.MK
[ Startup:6 | Active:6 ] TEXT | |
| j.HK
[ Startup:8 | Active:6(3+3) ] TEXT |
Old Normal Moves Info
LP: Small range but comes out fast with huge priority. Use as combo starters or to jab people out of everything. Whiff crouching opponents. Cancelable.
MP: 'Talk to the hand' move. Huge hitbox, come out fast and cancelable. Sasquatch's key to stopping air guard, wake up meaty and huge combos.
HP: Uppercut. Stop jumps.
LK: Not much use. Cancelable.
MK: Whiff crouching opponents but pretty good range.
HK: Despite its look it's air unblockable. Decent meaty, and goes over low attacks
c.LP: Like LP but doesn't whiff crouching. Seems to have less range though. Cancelable
c.MP: Similar to MP. Trades range for shrunk hitbox. Cancelable.
c.HP: The flip. End combo with this instead of cr.HK if you don't want to knock down your opponent (allowing them to roll away) . Also decent anti air.
c.LK: Hits low. Move yourself a little forward (possible kara cancel for Big Brunch grab ?) . Good combo starter. Cancelable.
c.MK: The ass. Less range than MK, but now cancelable !
c.HK: Sas' sweep. Reach like half a screen. Great combo ender.
j.LP: Good for short hops. Also j.LP j.LK is a good jump in chain.
j.MP: Headbutt. Staple move in short hops. Big hitbox, good damage and stun.
j.HP: A knockdown attack. j.MP will probably lead to more damaging combos but this move is good for mindless long dash raids ... hmmm
j.LK: Nifty. Use this for short hops instead of the punches.
j.MK: Identical to the LK version ... I think it has more starting frames and hit harder. Possibly everything you can do with j.LK can be done with this instead.
j.HK: The butt. 2 hit, and can cross up. Very powerful move in rushes.
Command Normal Moves
P Throw: Sasquatch slams his opponent on the ground. Leaves them at a close enough distance to follow up with pressure if they neutral tech or tech towards you.
Air Throw: Regular air throw. Slams them to the ground.
Pursuit: Doesn't do much damage, but leaves you at a great position for pressure. The es version is faster and hits twice
Special Moves and Throws
| Normal Throw (MP or HP)
[ Startup:1 | Active:1 | Hit:Knockdown | Throw Tech:+11] One of the best normal throws in the game. Both MP and HP excellent option select into anti-air normals if the opponent jumps, and if they tech they are left close to Sasquatch and he has a good advantage. In the corner, Sasquatch is left right next to the opponent and can throw loop them as long as they keep throw teching. Sasquatch actually gets +12 on a throw tech from Jedah, Bulleta and Q-Bee. | |
| Air Throw (MP or HP)
[ Startup:1 | Active:1 | Hit:Knockdown | Throw Tech:-3] One of the best air throws in the game. If you look at other characters air grabs, their grab 'box' is actually just a single pixel line. Sasquatch actually has a box for his air throw. | |
| Big Brunch - 63214P
[ Startup:2 | Active:1 | Total Frames: 65 ] An absolutely amazing command grab. When it connects, the opponent will be frozen and Sasquatch can hop in to get a free combo. This move is incredibly fast, and easily lets you confirm into an ES Big Typhoon for big damage. The only downside is that it is one of the few throws that always gives a whiff animation. The whiff animation is long enough that if someone neutral jumps they will have time to land on Sasquatch's head and punish. There is not any difference between the normal versions, and the ES Big Brunch does slightly more damage and freezes the opponent for longer. The main thing to keep in mind with this move is every character has a different freeze timing, and distance Sasquatch spits them out at. It is not at all consistent between characters. Check here for more information about the freeze times and distances for each characther:
| |
| Big Swing - 360K
[ Startup:2 | Active:1 | Total Frames:65 ] Good range, though not much reason to ever use this over Big Brunch, especially since this has a whiff animation as well. | |
| LK Big Typhoon MK Big Typhoon HK Big Typhoon | Big Typhoon - 623K
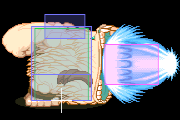
LK Big Typhoon [ Startup:8 | Active:11 | Hit:-5 | Block:-6 ] One of Sasquatch's two useful versions of this move. Its useful as an anti-air, though it is air blockable. Most character's won't be able to punish it on block unless they have a way of altering their air movement, and even then it can tend to be a bit of a tight punish. Still, it hits a nice part on the screen, comes out fast, and recovers surprisingly quickly. Useful in certain situations and matchups. As a guard cancel this move has 9 frames of invincibility, which makes it invincible past start up. This means will not lose or trade unlike the other two normal version guard cancels. Also, it is the safest version on block at -6, which is potentially punishable but not quite easily. Besides those advantages, the problems are numerous. You'll still be at -5 on hit afterwards, which is potentially punishable. You'll have to watch out for this completely whiffing on small crouching opponents due to the high hitbox. And even as the fastest version of Big Typhoon, it is still slow for a guard cancel and easily baited. In the end, the guard cancel LK Big Typhoon has a little bit of use, but you may as well push block instead. MK Big Typhoon [ Startup:11 | Active:22 | Hit:+2 | Block:-15 ] Not much to say about this version. It is plus on hit unlike his other two Typhoons, which may actually be punished. (I'm not sure if the game will select the weaker or stronger version of a special if you don't have meter for ES, but I am considering using LK+MK or MK+HK on the basis on which button combination will give you MK Typhoon if you have no meter. With the idea that the game will select the version that gives you a decent frame advantage if you do not have meter for ES Big Typhoon. This is only if you somehow have issues paying attention to how much meter you currently have.) As a guard cancel, this move has 9 frames of invincibility, and with an 11 frame startup, there is a chance it may be stuffed. Not only that, the startup is so slow it is very easy to bait out. Out of the 3 normal versions of this move, it is plus on hit which is nice, you just just won't get the chance to make use of it. HK Big Typhoon [ Startup:10 | Active:33 | Hit:-5 | Block:-22 ] Not much to say about this one either. Does the most hits and damage of any of the normal versions, but you're better off comboing into a knockdown or resetting to keep your momentum going. As a guard cancel, this move has 9 frames of invincibility, and with a 10 frame start up, this has a high chance of trading. Plus the start up is so long it will be easy to bait out, at which point you're dealing with -22F on block. Not a good guard cancel. ES Big Typhoon [ Startup:9 | Active:48 | Hit:Knockdown | Block:-52 ] The most useful version of Big Typhoon. Does massive damage and is great as a finishing move. While you are advantageous on hit, recovery is long, and you have a very good chance of losing pressure after knocking down with this move. Its generally best used when finishing an opponent off. While it looks like it may have a decent anti-air hitbox, do not use it as such since it is still air blockable and the recovery is long. As a guard cancel, this move has 9 frames of invincibility, and with a 9 frame start up it has a single active frame before the invincibility putters out. This is his best guard cancel of all version of big typhoon by far, as it starts up second fastest, fully invincible and completely safe on hit. It even does semi-decent damage on hit for a guard cancel. If baited though, it is by far the easiest to punish so watch out what move you cancel from into this. |
| LP Big Breath MP Big Breath HP Big Breath | Big Breath - 236P
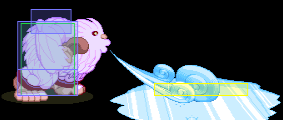
[ Startup:X | Active:X | Hit:+X ] Sasquatch shoots a little bit of hot air at the opponent, and freezes them if they get hit by it. No range, but it negates fireballs, and builds meter fairly fast. EX version allows for an additional hit if you freeze them.
|
| Big Towers - 22P
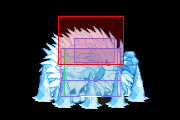
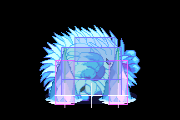
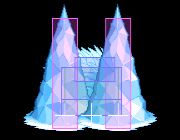
LK Big Towers [ Startup:7 | Active:12 | Hit:+24 | Block:-8 ] MK Big Towers [ Startup:7 | Active:22 | Hit:+14 | Block:-18 ] HK Big Towers [ Startup:10 | Active:32 | Hit:+4 | Block:-28 ] The normal versions of Big Towers are very useful, and generally aren't given enough credit by the player base who ignores them for ES Big Towers. The anti-air hitboxes are great, and its active for ages. The only real downside is they are air blockable, and probably only a little bit more easily punishable on an air block than ES Big Towers. Its use as an anti-air is a bit matchup dependant. Generally it is extremely strong against Jedah, Morrigan, and a few other characters who have to end up committing to their air movement. Tossing out the super active HK Big Towers means you don't even really have to time it either. I've seen it work consistently on Demitri as well since none of his normals can get below the hitbox down to the hurtbox. The plus and block frames on hit and guard listed up above don't really tell the full story, since that is on grounded opponents, and this does not have much utility outside of anti-airs. On an air hit, this move does a knockdown. ES Big Towers [ Startup:9 | Active:6(Each Spike) | Hit:Knockdown | Block:-18 ] This is the move. Usually referred to as 'Ice Tower', it is one of the most frustrating things to deal with when fighting Sasquatch. It is multi-functional, since it works as: An anti-air(but still air blockable), a full screen punish, and a combo tool. Hell, I even just mash it as a reversal sometimes when I see my opponents timing is slightly off. It travels full screen extremely fast, both in front of and behind Sasquatch. This can be used to punish people throwing bad fireballs, or just jumping around pressing buttons at any position on the screen. Advantage from a knockdown on hit is huge. You get plenty of time to dash in from full screen and start applying pressure. Plus it does tons of damage to boot. This is not something you want to be hit by. As a combo tool, I've seen it used occasionally to get a knockdown after a Big Brunch, but when they don't want to deal with the poor advantage on knockdown that ES Big Typhoon gives. Though this is at a price of less damage. |
| Big Blow - 623P (hold P to charge)
[ Startup:X | Active:X | Hit:+X ] Winds his fist up and unleashes a long punch. Goes further the longer you hold the button. The longer you hold the button, the more unsafe it becomes on block. Es version fully charged hits 3 times. Really useless move. Takes too long to start up, and the unsafeness of it makes it worthless.
|
EX Moves
| Big Sledge - 720kk
[ Startup:2 | Active:1 | Total Frames: 65 ] EX Command throw. If Sasquatch didn't have Big Brunch, this would actually be a strong move. It does a ton of damage and has a great throw range. But when you can do comparable damage or more with Big Brunch and gain meter from the follow up hits, you really don't have a good reason to be using this. On a miss, it always gives a throw whiff animation, like the rest of his command throws. | |
| Big Freezer - 41236pp
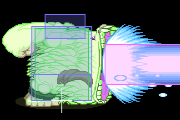
[ Startup:38 | Active:49 | Hit:Knockdown | Block:-25 ] Ice Beam. Generally ES Big Towers is favored over this by most players as it initially comes out much faster and is generally safer against opponents jumping in on you randomly. At full screen, I'm not quite sure which would reach the other end first, but I am inclined to say ES Big Towers would or it would be about even as Big Freezer doesn't travel quite as fast as it may seem. There are a few characters I'll occasionally use this on from full screen, such as Lei-Lei, Demitri, Morrigan or Jedah. Usually its just if they are jumping around doing dumb stuff. This move does slightly more damage than ES Big Towers, but its hard to say if you get any REAL benefit out of using it. Not sure of the comparative advantage on hit you get from this fullscreen compared to ES Big Towers either.
|
| Big Eisbahn - 41236kk
[ Startup:45 | Active:67 | Total Frames on Whiff:119 ] The Puddle. Unblockable, super-active, character-detached ground grab. A strong move, especially in the corner and the opponent is up-backing just outside of your anti-air range. They'll land on the ice sheet and be unable to escape. You can also set it up with a s.MP canceled into this. There isn't much of a gap to poke out, especially if you canceled from a s.MP that air resets. Setups from s.MP aren't exactly solid though, as in all cases if they notice it, they can simple hold up forward and punish Sasquatch. On defense, make sure you don't try up backing away from it in the corner. You'll just fall back on top of it as you land due to how super-active the move is. |
| Banana - 41236 + Start
[ Startup:70 | Active:179 | Hit:Knockdown | Regains Movement:74 ] Easter Egg EX Move. Hits low. Causes knockdown on hit. Even though this is projectile that sits on the screen for a good 3 seconds it isn't very good. It costs a meter, has an extremely long start up time, and does almost no damage. Its just not really worth it. |
Dark Force
Super Armor: Big Resistor / M.A.P.S. - Same strength P + K
- Big Resistor (Light or Medium Version/LP+LK or MP+MK: Super Armor: Big Resistor. Adds super armor (not hyper armor). Useful for getting out of traps. A decent option to use when being pressured, but only works on the ground. It also allows you to chain more attacks when dashing.
- M.A.P.S. (Heavy Version/HP+HK): Magical Avalanche Penguin Super-units. Summons an army of penguins to throw at your opponent. Toss penguins by hitting any punch. Penguins chip on block, and the distance depends on the strength of the punch button. Can be used on the ground and in the air
Movement
Walk: The forward walk speed is fairly average, but his backwards walk is a little slower.
Dash: Sasquatch takes a big leap at his opponent. Very easy to hit him out of a regular dash, but Sasquatch also has a shorthop. (Forward, Forward, Back). It shortens the total distance of the hop, but increases the speed greatly. A good portion of where his pressure game comes from.
Jump:
Base Strategy
You want to master Sasquatch's short hop (6,6,4). From the short hop Sasquatch can create a variety of fast, high priority overheads that also get him closer to the opponent! This leads to a multitude of mixups that all ends with painful combos.
Mixup :
MP : stop people from jumping away and air guard Sas' short hop attacks.
short hop MP/LP/LK link to ground combos : hits high
(empty short hop) cr.LK -> ground chain : hits low
(empty short hop) Big Brunch grab -> combo or just P throw : unblockable
Generally Sas is strong against practically anyone, and his game isn't too overly complicated either. In neutral situations space yourself out for your short hop attacks and sweep to hit at max range. Use MP and LP to defend yourself, or just stay back building meter with backdash HP and kara canceled breath.
Ice wave (22PP) is one of the tools to setup your pressure. Use it to catch Demitri spamming air fireballs, catching people off guard when they try to dash in, etc even anti air. Don't be too predictable though, this move is easily react to from a good distance. Don't spam it, decent players won't try to counterattack Sas after one Ice wave, you're just wasting meters.
Once you've knocked them into the corner, keep them there as long as possible. Air throw to keep them from chickenguard jumping out, if they tech it then either sweep, MP or prepare for a command grab. Also ending combos with cr.HP is a pretty good idea to end combos, it prevents rolling, after the reset a random sweep can catch desperate players offguard. MP is still your main sort of annoyance, cancel into sweep if you see your opponent block it high. Once you've maintained good pressure, keep hopping.
Also the Whale super thingie ... it's a big gimmick (you can really get killed for using it) but it's incredibly effective to throw out once in awhile when you're pressuring your opponent. When you've trained your opponent to stay defensive when you're at hop distance, throw out a MP xx this super and it'll break their guard. If you haven't used it a lot, you might just pull this off TWICE in a match.
Advanced Techniques
- Long dash links in the Corner
- Dashing J.attack, recover, J.attack. This string can combo if linked with the right normals & will negate tech-Hits as Sasquatch maintains his momentum.
- Renda cheese to exploit Anakaris
- (st.lp, RENDA st.LP, instant long dash j.lp, instant J.hk, Land) xN
- Long dash links after Brunch
- Some opponents make it possible to combo after brunch with long dash links, The initial attack becomes MEATY to allow the second link to connect & be easier to execute. without the MEATY setup, d.j.lp, LINK j.lk is a 1-2 frame link.
- Long dash cross-ups at mid-screen
- Against wide opponents (GA, LE, BI, VI, JE) whom are crouching at mid-screen, it's possible for Sasquatch to long dash on the first side & connect with J.hk as a cross-up on the second air attack.
- Short-Hop cross-ups at mid-screen.
- Against short crouchers (MO, LI, BU, GA, QB) whom are crouching at mid-screen, it's possible for Sasquatch to short hop and force a J,hk to cross up.
- Short-hop x Turn Around Brunch
- Against short crouchers (MO, LI, BU, GA, QB) whom are crouching at mid-screen, it's possible for Sasquatch to short hop over the opponent then avoid the turn around frames by a perfect input of ES-brunch. ES-Brunch will grab behind Sasquatch & force an instant turn-around.
- Guard Cancel on trade combos
- See memo's section below - HK guard cancel, on trade, can lead to a ridiculously long hit-stun state on the opponent. This creates very easy combos.
- 2-Hit Ice Towers
- Ice towers can hit twice, so long as the opponent's hurt-box resides on both sides of Sasquatch during activation.
- Hosokawa Resets
- While the opponent is in the corner, it's ultra-effective to constantly do short chains ending in cl.hk to force a corner reset. This build tremendous white life. Mix in these options until the next opening will be a max damage to secure the deathblow.
- cr.lk, st.hk
- Short hop j.mp, cr.lk, st.hk,
- Brunch, Short-hop j.mp, cr.lk, st.hk
- https://twitter.com/VMP_KyleW/status/962082780673748993
- https://twitter.com/VMP_KyleW/status/966400918756376576
- While the opponent is in the corner, it's ultra-effective to constantly do short chains ending in cl.hk to force a corner reset. This build tremendous white life. Mix in these options until the next opening will be a max damage to secure the deathblow.
- Guard-Lock Short-hops
- Completing a frame tight short-hop j.lp, land short-hop j.mp is a 100% block-stun state with no gap for the opponent to act otherwise. the only option for the opponent is GC or Tech-Hit.
- J.mp chain to beat throw attempts
- When you make a read that the opponent will throw you, execute an instant 8-jump j.mp, j.mk (whiff), falling j.lp, j.hk string to get some offense & advantage out of the situation.
- HP-Throw OS & Backwards Knockdown
- HP-Throw is also an Option Select for catching players jumping out of the corner; abuse this. Additionally, recognize that after Sasquatch'S HP-Throw connects (No throw-tech) the opponent wakes up BACKWARDS. Their ground rolls are reversed & will most likely NOT execute a reversal.
- cr.lk corpse hop
- cr.lk slightly moves Sasquatch forward. Use this to corpse hop after correctly guessing the opponents ground roll.
- Throw-Tech Offense/Confirms
- After executing HP-Throw & the opponent completes a Throw-tech, Sasquatch can still maintain an advantage with specific attacks.
- Short-Hop J.mk confirms at neutral
- At neutral Sasquatch has a really strong approach/confirm tool; short-hop j.mk. be sure to follow-up according to the scenario.
- Opponent crouches & is hit = st.mp xx ES-Typhoon
- Opponent stands & blocks = Another short hop or a low attack to maintain offense
- Opponent air blocks the j.mk = confirm into a grounded UB normal then purse after the reset scenario
- Opponent is hit out of jump-startup = purse after the reset scenario
- At neutral Sasquatch has a really strong approach/confirm tool; short-hop j.mk. be sure to follow-up according to the scenario.
- St.mp xx Big Eisbahn
- Gimmicky, but effective if the opponent is being very defensive - after a corner reset, mount an offense with st.mp xx Big Eisbahn or a corner combo ending in cr.hp then do an immediate Big Eisbhan
- J.hk hits on both sides
- Correctly guess the opponents ground roll then descend with a 8-jump J.hk just as they wake-up.
- Pursuit (whiff) - Big Towers Option Select
- When going for a deathblow with pursuit, the opponent may roll away (instant back-roll). Sasquatch can execute ES-Big Towers to cover the whiff & force an instance of cheap-kill damage. Just execute 22+PPP just after Sasquatch lands from the sweep.
- If the opponent rolled away = Es-Big Towers cheap-kill
- If the opponent didn't roll away = Pursuit's animation covers the 22+PPP input.
- https://twitter.com/VMP_KyleW/status/903126037776629760
- When going for a deathblow with pursuit, the opponent may roll away (instant back-roll). Sasquatch can execute ES-Big Towers to cover the whiff & force an instance of cheap-kill damage. Just execute 22+PPP just after Sasquatch lands from the sweep.
- Kowappa-Sweeps
- At higher levels of play, because of the overall risk-reward being in Sasquatch's favor to dash-in at mid-range, most opponents block standing at this distance. Kowappa recognizes this & successfully land many cr.hk's at this range. The sweep gives Sasquatch time to dash-in & cover all of the opponents roll options.
Combos
Terminology
- > = next move is a chain
- >> = next move is a link
- xx = next move is a special or EX cancel
Basic Combos
- 2.LK > 2.MP > 2.MK > 2.HK
- 23 red/41 white
- Sasquatch's most basic close range knockdown combo. Works on the entire cast.
- 2.LK > 2.MP > 2.HK
- 18 red/32 white
- If you're too far away to connect all four hits of the combo above then use this as a long range knockdown chain.
Short Hop Combos
All the following combos can be done from either a regular jump in attack, or off of a short hop (664). The j.MP can also be substituted for a j.MK, which has longer range but can be crouched by certain characters.
- j.MP >> 2.LK > 2(or)5.MP > 2(or)5.MK > 2.HK
- 29 red/50~ white
- After a short hop, depending on the spacing, you may not be able to land all four hits of the ground attacks due to push back, usually having to remove one of the medium strength attacks (MK recommended) to connect the sweep – I find that this is usually a problem standing opponents. However, by using 5.MP and 5.MK rather than 2.MP and 2.MK in the middle of your chain you are able to hit all four grounded hits from a greater distance due to the standing normals having less push back on hit. The problem with that is about half the cast can croucher under 5.MK and Q-Bee can crouch under 5.MP, so you either need to confirm that the opponent is standing after the 2.LK or just not do chains with standing normals on those characters. The characters that can crouch under 5.MK are: Bulleta, Felicia, Gallon, Lei-Lei, Lilith, Morrigan, Q-Bee, Sasquatch and Zabel.
- j.MP >> 5.MP > 5.MK > 2.HP
- 33 red/55 white
- Most damage available from basic chain off of a short hop. 2.HP gives an air reset on hit and leaves Sasquatch at +3, this reset is most useful in the corner. You can add in an 2.LK before the MP to add in a bit of a high low mix up, however this will actually cause the combo to do less damage at -2 red/-3 white due to damage scaling.
- j.MP >> 5.MP xx 623.HK
- 35 red/55 white
- j.MP >> 5.MP xx 623.KK
- 38 red/59 white
- 664 j.HK (1 hit) >> 2.LK > 2.MP > 2.MK > 2.HK
- 26 red/44 white
- Used on crouching opponents that are crossed up when short hopping.
Jump-In Combos
Including j.HK (2 hits) in your jump in combos is more of an optimized thing and doesn't pop up too often in real matches. Most of the time you'll be jumping in with "j.LP > j.MP" or "j.MP > j.MK" chains.
- j.MP > j.HK(2 hits) >> 5.MP > 5.MK > 2.HK
- 35 red/57 white
- j.MP > j.HK(2 hits) >> 5.MP xx 623.LP(or)MP
- 38 red/59 white
- j.MP > j.HK(2 hits) >> 5.MP xx 623.HK
- 40 red/65 white
- j.MP > j.HK(2 hits) >> 5.MP xx 623.KK
- 44 red/69 white
Big Brunch Combos
There are three important things to know about Big Brunch, first being that the opponent can mash while frozen to escape sooner, second that Sasquatch spits the opponents out at different distances some follow ups will not work on the characters that are spit out further away, and lastly ES Big Brunch gives you more time to follow up.
- 63214.xP >> Short Hop j.MK >> 5.MP xx 623.KK
- 51 red/77 white
- Mid-screen big brunch combo, works on the entire cast.
- 63214.PP >> j.MP > j.HK(2hit) >> 5.MP xx 623.KK
- 58 red/92 white
- ES Big Brunch only(?); Corner only
Other Combos
- 5.LP > 5.LP xx 623.KK
- 28 red/45 white
- 5.LP > 5.LP >> 5.MP xx 623.KK
- 34 red/54 white
- 66j.LP (Early) >> j.MP >> 2.LK > 2.MP > 2.MK > 2.HK
- 29w/51r
- Dash link combo. You must start your dash from far away, press j.LP a bit early so that it will hit later in the active frames which will allow you to link into j.MP. The right spacing and timing is necessary even for comboing into the ground chain portion.
- 236PP >> (brief wait) >> j.MP >> j.HK (2 hits) >> 5.MP xx 623.KK
- 52 red/81 white
- ES Ice Puff allows for a follow up combo, but if you attack the frozen opponent too early it will cause an air reset and only allow a single hit.
Dark-Force Combos (LP+LK / MP+MK ver.)
- 66j.LP > j.MP > j.HK(2 hits) >> 2.LK > 2.MP > 2.MK > 2.HK
- 33 red/54 white
- Basic combo utilizing Sasquatch's ability to chain air hits during his hops while Dark-Force is activated.
- 66j.LP > j.MP > j.MK > j.HK >> 66j.LP > j.MP > j.MK > j.HK >> 66j.LP > j.MP > j.MK > j.HK >> 66j.LP > j.MP > j.MK > j.HK >> 2.LP > 5.MP > 5.MK > 2.HK
- 51 red/88 white
- You do the dash loop 4 times and then end in the ground chain. 24 hits. Works only on standing opponents. It may be possible to get one more dash loop...
Matchups
Frame Data
Normals
| Move | Startup | Hit
Advantage |
Block
Advantage |
Meter
Whiff/Block/Hit |
Guard | Cancel | Notes |
| n.LP | 5 | +8 | +7 | 0/3/6 | Mid | Yes/Rapid | Renda+: H: +11F G: +10F |
| n.MP | 6 | +5 | +4 | 3/9/15 | Mid | yes | |
| n.HP | 8 | +6 | -7 | 6/15/24 | Mid | no | |
| n.LK | 5 | +7 | +6 | 0/3/6 | Mid | yes | |
| n.MK | 7 | 0 | -1 | 3/9/15 | Mid | no | |
| n.HK | 8 | +11 | -2 | 6/15+9/24 | Mid | no | |
| LP | 5 | +5 | +4 | 0/3/6 | Mid | yes/rapid | Renda+: H:+8F G:+7F |
| MP | 6 | +5 | +4 | 3/9/15 | Mid | yes | |
| HP | 8 | +6 | -7 | 6/15/24 | Mid | no | |
| LK | 5 | +5 | +4 | 0/3/6 | Mid | yes | |
| MK | 7 | 0 | -1 | 3/9/15 | Mid | no | |
| HK | 8 | +11 | 0 | 6/15+9/24 | Mid | no |
| Move | Startup | Hit
Advantage |
Block
Advantage |
Meter
Whiff/Block/Hit |
Guard | Cancel | Notes |
| c.LP | 5 | +6 | +5 | 0/3/6 | Mid | yes | Renda+: H:+9F G:+8F |
| c.MP | 6 | +4 | +3 | 3/9/15 | Mid | yes | |
| c.HP | 7 | +3 | -6 | 6/15+9/24 | Mid | no | |
| c.LK | 5 | +5 | +4 | 0/3/6 | Low | no | |
| c.MK | 6 | +5 | +4 | 3/9/15 | Low | yes | |
| c.HK | 10 | Down | -6 | 6/15/24 | Low | no |
| Move | Startup | Meter
Whiff/Block/Hit |
Guard | Cancel | Notes |
| j.LP | 5 | 0/3/6 | High | no | |
| j.MP | 6 | 3/9/15 | High | no | |
| j.HP | 10 | 6/15/24 | High | no | |
| j.LK | 5 | 0/3/6 | High | no | |
| j.MK | 6 | 3/9/15 | High | no | |
| j.HK | 8 | 6/10+4/15+9 | High | no |
Specials
| Move | Startup | Hit
Advantage |
Block
Advantage |
Meter
Whiff/Block/Hit |
Guard | Notes |
| 236LP | 28 | +60 | +24 | 12/12/12 | Mid | |
| 236MP | 28 | +60 | +24 | 12/12/12 | Mid | |
| 236HP | 30 | +62 | +26 | 12/12/12 | Mid | |
| 236PP | 30 | +103 | +26 | 0/0/0 | Mid | |
| 623LP | 18~ | down | -19 | 18/22/26 | Mid | |
| 623MP | 37~ | down | -31 | 18/22/26 | Mid | |
| 623HP | 69~ | down | -47 | 18/22/26 | Mid | |
| 623PP | 22~ | down | -45 | 0/0/0 | Mid | |
| 623LK | 8 | -5 | -6 | 18/19+1/21+3 | Mid | |
| 623MK | 11 | +2 | -15 | 18/19+1+1/21+3+3 | Mid | |
| 623HK | 10 | -5 | -22 | 18/19+1x3/21+3x3 | Mid | |
| 623KK | 9 | down | -52 | 0/0/0 | Mid | |
| 22LP | 7 | +24 | -8 | 18/21/24 | Mid | |
| 22MP | 7 | +14 | -18 | 18/21/24 | Mid | |
| 22HP | 10 | +4 | -28 | 18/21/24 | Mid | |
| 22PP | 9 | down | -18 | 0/0/0 | Mid | |
| 624MP | 2 | variable | - | 12/22 | Throw | Causes Freeze |
| 624HP | 2 | variable | - | 12/22 | Throw | Opponent can mash out |
| 624PP | 2 | variable | - | 0/0 | Throw | |
| 360MK | 2 | down | - | 12/42 | Throw | |
| 360HK | 2 | down | - | 12/42 | Throw | |
| 360KK | 2 | down | - | 0/0 | Throw |
Supers
| Move | Gauge | Startup | Hit
Advantage |
Block
Advantage |
Guard | Notes |
| 426PP | 1 | 38 | Knockdown | -25 | Mid | |
| 426KK | 1 | 45 | Knockdown | - | Unblockable | |
| 426[Start] | 1 | 70 | Knockdown | - | Unblockable | |
| 720KK | 1 | 2 | Knockdown | - | Throw |
Sasquatch Memos
- Character highlights from Twitter
- HK_Guard Cancel, on a trade, can lead to big damage
- Use close.HP to Guard Cancel bait against Demitri
- Cr.hp & no chain is better recovery then cr.hp, st.hk
- It's possible to get (3) attacks from a single long-dash using (3) 1-frame links
- Punish Tenraiha on block examples
- Mid-Screen throw-tech follow-ups
- Punish/Option-Select for Zabel's Hell-Gate on wake-up
- Punish Aulbath's mid-screen throw-tech x Bubble
- Punish ES-C>R x TK-Quick Jelly setup
- Unlike most projectiles, Sasquatch can issue a Big-Towers while another one is still on the screen
- If using super-armor to beat Aulbath's Water-Jail, do not block. you have to use an attack or be in neutral
- Guard-Lock Unblock will not work with Dark Force Penguins as they have no hitstop.
- The distance & frame advantage after Big-Brunch varies by the opponent. See the frame data here:
- Cr.mk hits low & is tall enough to hit air-opponents. Because of these properties, it's super effective to beat Felicia's Cat-Guard Bug
- Ascending J.mp will hit against - Victor, Bishamon, Jedah & Anakaris
- Brunch combos are specific to the opponent. Some opponents require a long-dash instant J.lp then LINK J.mk afterwards.
- Although ES-towers is not invulnerable, it's still very strong & you should be confident to use the technique as a REVERSAL.
- While in Dark Force-Armor, Sasquatch can chain from dash attacks
- To do short-hop j.lp, x short-hop j.mp at the fastest possible timing causes the opponent to remain in block-stun such that a Guard Cancel or an invincible attack cannot be accepted.
- How to ground roll to avoid Sasquatch's ES-Pursuit: By Hosokawa
- Sasquatch has a secret Draw Game Animation
- Big-Trap Combos
- Big-Trap does not interrupt throw, air-throw, 360, 720 or Puddle for additional damage/combo potential
- Extended corner Big-brunch combo against Gallon'
- 1998 Combo Video
Sasquatch Bugs
- Super Armor Blocks Command Overheads
- Y-axis During cr.lk x Throw
- Standing Animation x Sprite Layer
- 2-Hit Ice Tower
- https://twitter.com/VMP_KyleW/status/891746082484506625
- https://twitter.com/VMP_KyleW/status/891585374425718784
- https://twitter.com/VMP_KyleW/status/915418732553310208
- https://twitter.com/VMP_KyleW/status/944096741233590273
- http://seesaawiki.jp/vswiki/d/%a1%da%a5%b5%a5%b9%a5%ab%a5%c3%a5%c1%a1%dbES%a5%bf%a5%ef%a1%bc%a4%ce2%a5%d2%a5%c3%a5%c8
- Post ES-Brunch, Resets = Forced Knockdown
- ES-Typhoon Graphical Bug -
- ES-Big Typhoon must be interrupted on specific frames then Sasquatch must go to player-2 side.
- https://twitter.com/egooolei/status/992750948870111232
- https://www.youtube.com/watch?v=7-F3xtqDuZM#t=29m20s
- https://twitter.com/VMP_KyleW/status/992248319068979201
- https://twitter.com/VMP_KyleW/status/992254593277964288
- https://youtu.be/uyhq_jZcXj0?t=12m35s
- https://twitter.com/egooolei/status/1008340868015611905
- https://twitter.com/egooolei/status/1008342223446990853
- https://twitter.com/VMP_KyleW/status/1155653085353541633?s=20
- https://twitter.com/VMP_KyleW/status/1155683341955260416?s=20
- ES-Big Typhoon must be interrupted on specific frames then Sasquatch must go to player-2 side.
- Tech-Hit x Projectile Displacement w/ Puddle
- if the opponent is hit, the animation transports to the original position
- Turn-Around Priority x ES-Brunch
- Similar to Anakaris's curses, Sasquatch's "Big-trap (Banana)" has no guard-stop graphic. It's easy to confirm because the animation is there in AUTO-GUARD mode.
- Big-Blow will buffer punch inputs causing some execution challenges. Even if the buttons are pressed 1-frame apart, the input is still retained.
- Unblock ES-Guard Cancel Frames
- See The first chart here - Sasquatch is at frame# 07
- ES-Big Breath graphical errors
- ES-Breath into any other ice animation can retains an ice animation
- ES Breath into an instant attack (sweep, D.lp, Etc.) retains the ice animation longer than normal - Ice may have a minimum duration.
Notable Japan Players
Japanese Player Index: http://www21.atwiki.jp/vsplayer/pages/16.html
| Name (English) | Name (Japanese) | Color | Location | Contact | Notes |
|---|---|---|---|---|---|
| DD | DD or 山岡士郎 | LP |
Kanto Region | http://twitter.com/DDsas http://blog.livedoor.jp/iamddsas23/ https://www.youtube.com/channel/UCX93eVj3PS-r2yqLR32ZATA |
#01 Sassy GO,GO,GO,GO! |
| Haitani | ハイタニ | HK |
Osaka, Japan | http://twitter.com/hai090 | Inactive, but a GOD |
| TKO | — | KK |
Kanto Region | http://twitter.com/tkocombo http://www.youtube.com/channel/UCr_qlYFz9KjvwZxMJf5dZ-g |
Japanese Vampire Hunter Community leader #01 Hunter Sasquatch |
| Sasunii | さす兄 | MP |
Tokyo, Japan | http://twitter.com/sasquatch21chan https://www.youtube.com/channel/UCr_qlYFz9KjvwZxMJf5dZ-g/about |
Big Brother Sasquatch |
| Nasu | ナス | LK |
Kanto Region | http://twitter.com/nasu_stupid | |
| Hosokawa | ホソカワ | MP |
Nagoya, Japan | http://www.youtube.com/channel/UCY6ruY39OZ6J7jb4fpEk9AQ https://twitter.com/hosoquatch |
uses st.hk as corner resets |
| Okekebi | おけけび | MP |
Saitama, Japan | http://twitter.com/okkb_tt | |
| Orecom | 俺こん | LP |
http://www.youtube.com/user/orecomchan/ | Used to be Felicia. | |
| Kowappa | こわっぱ | LP |
Kanto Region | http://twitter.com/kowappa0530 | Also goes by "Kowahara" Very Active Comedian #02 Sasquatch |
| Kuma | クマ | HP |
Yamagata, Japan | http://twitter.com/kumamk | |
| Tsune | ツネ | KK |
Kanto Region |
