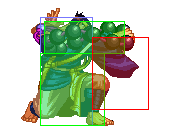
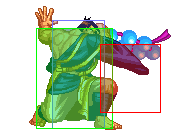
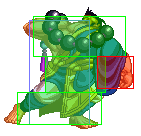
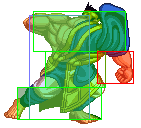
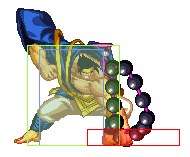
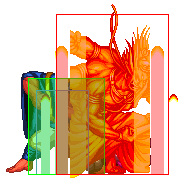
Samurai Shodown V Special/Gaira Kafuin
Introduction
KAH!
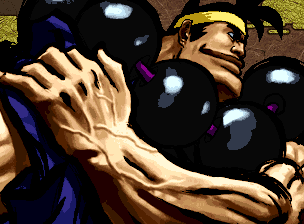
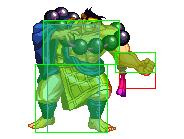
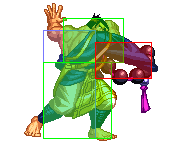
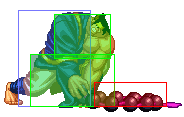
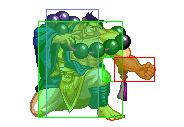
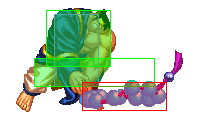
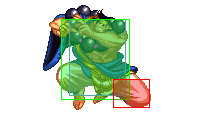
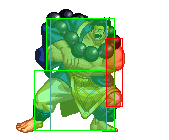
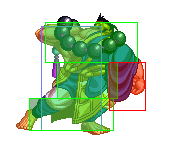
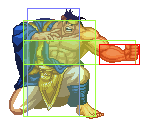
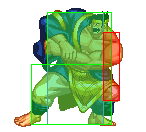
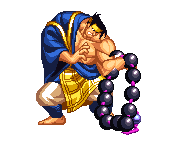
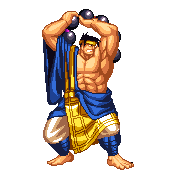
Gaira is a big, strong Buddhist monk who's always grumpy, probably because everyone keeps underrating him. His high damage potential, large amount of tools and ability to crack open defensive players make him a wild card at any level of play. He is a grappler, and has all the tools a grappler needs to hurt people: his command grab has the highest potential damage of any throw in the game, he has a fast anti air grab with good reach, a ground-pound, a sorta fireball with great priority that knocks down and even reflects projectiles, and overhead/low mixup grabs that hit hard. His defense is tied with Gedo as the highest in the game. The downside? He's slow. His hops leave him vulnerable for way too long, his rolls cover barely any distance, and his normals take forever to get out.
| Strengths | Weaknesses |
|---|---|
|
|
Data
- Damage taken: 90%
- Rage duration: 9 seconds
- Amount to rage: 16
- Walk speed: 416
- Backwalk speed: 336
- Dash speed: 840 (unarmed is 1024)
- Jump duration: 45 frames
- Width: 24
- Throw range: 28
- Throw recovery: 39 frames
- Tier placing: B
Normals
Far Slashes
| 5A:
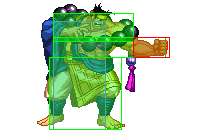
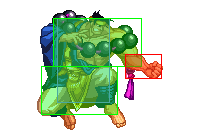
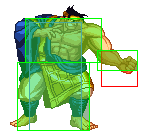
A (relatively) quick backhand swat. This is the closest he has to a "get off me" poke, and while the speed is lacking, it has decent range and can't be deflected. |
| 5B:
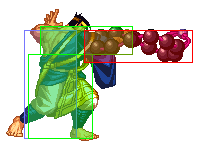
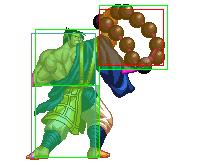
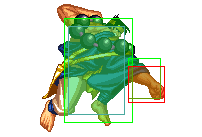
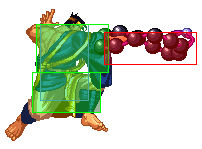
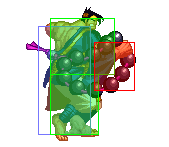
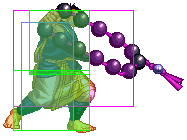
A horizontal swing with Gaira's beads. Good range and priority, but it's slow and can be ducked/rolled under by a lot of characters. Good anti-hop. |
| 5AB:
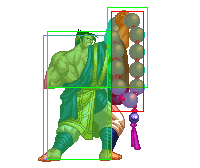
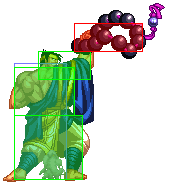
Gaira makes a huge, slow swing with his beads. It's similar to Jubei's AB. It can make a good anti-air but the hitbox is finicky and you can't really get a hit if they're in front of your beads. |
| 2A: |
| 2B:
Like 5B with much shorter range but it can't be ducked. |
| 2AB:
Slow and short range, but one of the highest-damage punishers in the game thanks to its cancellability. 2AB xx 421B does 1/2-2/3 damage even without rage. |
Near Slashes
| n.5A:
Same speed and damage as far 5A but with a bigger hitbox so it can't be ducked. |
| n.5B:
Properties: Cancelable. Recoil cancel on block. Deflectable. Less damage than regular 5B but can be cancelled to combo into KATSU or 421S grabs. Also recoil cancelable into fun stuff like 47896AB if blocked. |
| n.5AB:
Properties: Recoil cancel on block. Deflectable. 2-Hit heavy that does most of its damage with the second hit and for some reason can not be cancelled between the two hits. Can combo into a well-timed 421C in the corner though. |
| n.2A: |
| n.2B: |
| n.2AB:
Same as 2AB |
Overheads
| 5BC:
Slow and doesn't avoid throws/lows. You have no reason to use this, 421B is better in every way. |
| u.5BC: |
Kicks
| 5C:
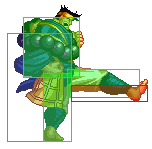
One of Gaira's best pokes. A little slow but stays out forever and depending on when it's blocked it's safeish or completely safe. |
| 6C:
Similar to 5C but hits low instead of mid and does 1 point more damage. Also slightly worse on block (and hit). |
| 2C:
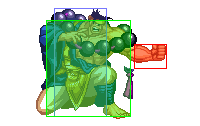
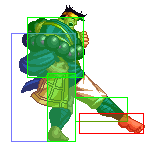
His fastest low. |
| 3C:
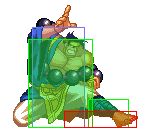
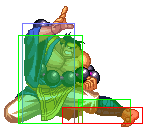
Properties: Knockdown. Overall slower than 2C, but more damage and knocks down. Not a bad tool for knocking them into the corner if the distance is right. |
Jumping
| j.8A: |
| j.A:
Not totally amazing, but still your best bet for a quick air-to-air because j.C's hitbox is too low. |
| j.B:
Gaira swings his beads about shoulder-height in front of him. Horizontal hitbox is insane, the range is just a little in past when the camera is fully zoomed-in. Great air-to-air, just with slow-ish startup so get it out in time. |
| j8.AB:
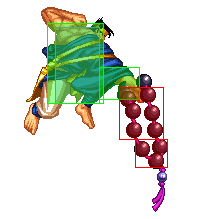
Gaira's neutral jump AB is a lot better than his normal jump AB. Gaira gives a quick swing straight down with his beads, comes out very fast with great vertical reach, and is a strong mixup tool but also punishable if blocked. |
| j.AB:
Slow startup but good damage and priority (seeing a trend?). If you're on the offensive, you can time the AB to land just before the startup frames and go for a command throw instead. Can crossup. |
| j.C:
The low-hanging hitbox makes this one fail as an air-to-air most of the time. You can use it during a forward jump to jump right through a high Tam Tam skull though, so that's nice. |
Dashing
| 66A:
Since all his other dashing attacks knock down, this one is the only dashing move he can use to buffer into a command grab (aside from buffering during run stop, which is more difficult). |
| 66B:
Properties: Knockdown. Pretty much his 5BC from a dash. |
| 66AB:
Properties: Knockdown. |
| 66C:
Properties: Knockdown. |
Unarmed
| u.5S: |
| u.2S:
Properties: Throw Invulnerable |
| u.66S
Properties: Knockdown. |
| uj.S: |
System
| Deflect - 216D: |
| Weapon Pickup - 5A: |
| Taunt Disarm - Start Start Start:
His beads make a little pa-tink noise when he puts them down. |
Specials
| Hyakkan Otosho - j.2AB: (can be used unarmed)
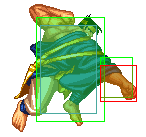
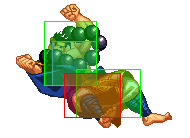
Elbow drop with a fast startup. This is your anti-anti-throw tool, it catches hops and jumps and knocks down on hit. The damage is pretty beefy too. It stays out for a long time and has a pretty big hitbox. Not safe at all on block. |
| Jishin Gan - 22S:
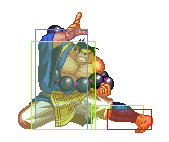
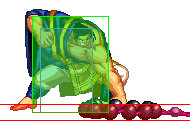
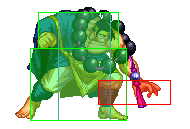
Ground-pound. The damage is low and the long recovery makes it difficult to take advantage of a knockdown, but it's very nice to have something than can hit from full screen when people keep running away from you. |
| Katsu! - 236S: (can be used unarmed)
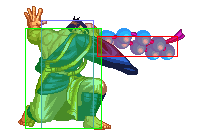
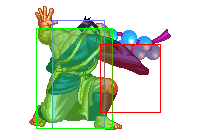
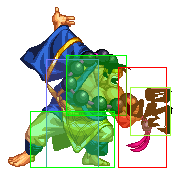
Gaira leans forward and coughs out a kanji. Massive hitbox that knocks down on hit, it stretches up high so it even works as an anti-air when you're not in range for a 421A. This blows through a ton of moves and the damage isn't too shabby either. It starts up pretty fast so this is one of Gaira's best pokes, but it very punishable on block and whiff. It also reflects projectiles. Sometimes the hitboxes are weird and you get hit by the projectile and reflect it at the same time. |
| Tsukamuzo - 421x: (can be used unarmed)
Hitgrab series that forms a very threatening set of options for various purposes, ranging from mixups to punishes to denying the opponent's offense. All versions are very punishable on block (heavy punishable by pretty much the entire cast), but also recover slightly faster when unarmed.
|
| Enshinsatsu - 47896AB or 486AB:
Gaira's famous command throw. Spinning your stick around can increase the damage up to over double what it usually does. It actually starts up one frame slower than a regular throw, but has huge range. Its recovery time is over a second and a half, so for god's sake be careful, you can be punished by literally anything. If half circle movements aren't your thing for some reason, just inputting 486AB is fine too. See 'Strategies' section for more in-depth information on how to utilize this move. |
| Niou Bakushin Satsu - 236CD:
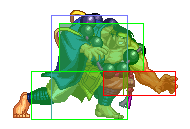
Gimmicky but useful. It can work as an anti-air when spaced right. Tends to get stuffed by everything due to no invincibility frames, but can also hop over some low pokes. Can be combo'd into from 2AB, which hurts. |
Combos
Normal
- n.5B ...
- ...xx236S
- ...xx421B
- ...xx421C
- n.2AB ...
- ... xx 421B
- ... xx 236CD
- ... xx 214CD
- n.5AB 421C (Corner)
- 47896AB .. 8BC
Backturned
- n.2AB ...
- ... xx 22S
Time slow
Strategies
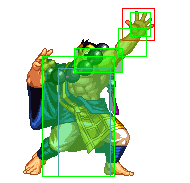
Unlike most characters, Gaira doesn't need characters to screw up to do big damage. On offense he only needs to guess right two or three times to win the round. The problem is getting on offense. Because he's so slow he has trouble taking advantage of far knockdowns from a Katsu! or ground-pound. 421A is a great anti-air and lets him get in ideal mixup range, out of normal throw range but close enough to mix up between his command throw, overhead, low, and elbow. 236S works in a pinch, and AB works on characters with slow jumps or air normals without good vertical range.
Utilizing the command grab
Gaira's command throw is impossible to do standing, so you have to find ways to sneak in a buffer. The most simple way is doing a normal move like 5A or 5C, buffering 47896 during the normal (hold the 6), then pressing AB when the normal ends. One of his best options is from a run, stopping, and buffering the grab during the cooldown as 6[6]~47896AB. He has several options from a jump: his j.AB has a long startup so you can do a late j.AB, land during the startup, and throw when you land. You can also tick throw with j.A or j.C. He can buffer one from a roll, and while that covers very little distance, it's still a great option. If you're super pro you have a few more options: the startup of his close A can be canceled so you can do 4A~7896AB, and you can even buffer it from meditation cooldown. Get in close, tap D, 47896AB, your opponent won't know what the fuck.
Storing the grab
One neat little thing about Gaira's command grab is that the game allows for a 50 frame delay between inputting the 4(7)8 and finishing with 6AB, basically allowing you to "store" the grab for just under a second. This is useful especially when facing players that are good at reading your grab and dodging it with well-timed jumps or D button movements. You can buffer the 4(7)8 part of the command, go for a brief low block (1) or crouch (2), wait if you see any movement, and then unleash the grab by pressing 6AB.
But wait there's more!
The game actually allows for 10 MORE frames of delay between the pressings of 6 and AB, meaning you can buffer 4(7)8, take a step forward (6), and press AB to activate the grab. It's not really hard to execute but it may still take some practice to get the timing down. Keep in mind it's a 50 or 60 frame store at most so it still has to be done pretty quickly.
Matchups
- vs. Rimururu
- Rimu's air iceberg pad has a long startup. If Rimu's trying to turtle in the air you should go for a 421A as soon as you're in range.
- vs. Tam Tam
- Not in your favor. Tam Tam's quick, long-ranged normals can pretty easily beat you out both on the ground and in the air. Get your deflects ready and remember you can destroy skulls so you don't have to take chip damage. Use 2C or 3C to destroy low skulls, and a neutral or forward j.C for high ones.
- vs. Ukyo
- 0-10, change characters.
- No but seriously this matchup sucks. He can anti air you on reaction with 2B or Tsubame Gaeshi with next to no risk and even his slow floaty jump lands in time to punish a whiffed command grab. You better hope you can wade through his sea of pokes and anti-airs and land something big, or you lose the instant he backdashes away.
Frame Data
| Move | Damage | Startup | Active | Total | Cancel | Weapon Clash |
Hit Adv. |
Backhit Adv. |
Block Adv. |
Guard | Notes |
| 5A | 6 | 11 | 4 | 22 | 1~10(10) | - | -1 | -1 | -6 | Mid | Weak attack |
| 5B | 14 | 18 | 4 | 38 | 1~2(2) | 16~17(2) | -2 | +6 | -9 | Mid | Medium attack, Deflectable(med) |
| 5AB | 29 | 24 | 6 | 65 | x | - | -4 | +6 | -21 | Mid | Heavy attack, Deflectable(heavy) |
| 2A | 6 | 11 | 5 | 23 | 1~5(5) | - | -2 | -2 | -7 | Mid | Weak attack |
| 2B | 13 | 17 | 4 | 39 | 1~4(4) | - | -4 | +4 | -9 | Mid | Medium attack, Deflectable(med) |
| 2AB | 29 | 21 | 2 | 56 | 25~27(3) | - | +2 | +12 | -21 | Mid | Heavy attack, Deflectable(heavy) |
| n.5A | 6 | 11 | 4 | 22 | 1~5(5) | - | -1 | -1 | -6 | Mid | Weak attack |
| n.5B | 8 | 17 | 2 | 34 | 17~18(2) | 14~16(3) / 19~20(2) | +1 | +9 | -9 | Mid | Medium attack, Deflectable(med) |
| n.5AB | 5, 25 | 19 | 1 | 52 | 1~5(5) | 16~18(3) | +8 | +18 | -21 | Mid | Weak attack, Deflectable(heavy) |
| n.2A | 6 | 11 | 4 | 22 | 1~5(5) | - | -1 | -1 | -6 | Mid | Weak attack |
| n.2B | 13 | 16 | 5 | 42 | 16(1) | - | -8 | +0 | -9 | Mid | Medium attack, Deflectable(med) |
| n.2AB | 29 | 21 | 2 | 56 | 25~27(3) | - | +2 | +12 | -21 | Mid | Heavy attack, Deflectable(heavy) |
| 5C | 7 | 13 | 13 | 32 | 30~32(3) | - | -1 | +7 | -14 | Mid | Medium attack |
| 6C | 8 | 9 | 13 | 32 | 30~32(3) | - | -5 | +3 | -18 | Low | Medium attack when unarmed, 9-21f throw invincible |
| 2C | 2 | 6 | 7 | 18 | x | - | -2 | -2 | -7 | Low | Weak attack when unarmed, 6-12f throw invincible |
| 3C | 7 | 9 | 12 | 28 | x | - | KD | KD | -14 | Low | Knockdown attack when unarmed, 9-20f throw invincible |
| j8.A | 6 | 10 | 8 | 26 | 1~5(5) | - | -- | -- | -- | High | Medium attack |
| j.A | 6 | 10 | 3 | 44 | x | - | -- | -- | -- | High | Medium attack |
| j.B | 12 | 19 | 3 | 32 | 1~4(4) | - | -- | -- | -- | High | Medium attack, Deflectable(med) |
| j8.AB | 25 | 17 | 4 | 37 | 1~6(6) | - | -- | -- | -- | High | Heavy attack, Deflectable(heavy) |
| j7/9.AB | 25 | 20 | 4 | 44 | 1~5(5) | - | -- | -- | -- | High | Heavy attack, Deflectable(heavy) |
| j.C | 5 | 9 | 7 | 22 | 1(1) / 16~22(7) | - | -- | -- | -- | High | Medium attack |
| ju.C | 5 | 9 | 7 | 22 | 1(1) / 16~22(7) | - | -- | -- | -- | High | Medium attack |
| 5BC | 14 | 20 | 4 | 36 | x | - | KD | KD | -10 | High | Medium attack Knockdown attack |
| u.5BC | 14 | 20 | 4 | 36 | x | - | KD | KD | -10 | High | Medium attack Knockdown attack |
| 66A | 8 | 9 | 14 | 30 | x | - | +0 | +0 | -16 | Mid | |
| 66B | 12 | 20 | 4 | 34 | x | - | KD | KD | -9 | High | Medium attack Knockdown attack |
| 66AB | 15 | 7 | 5 | 50 | x | - | KD | KD | -38 | Mid | Knockdown attack |
| 66C | 5 | 9 | 10 | 28 | x | - | KD | KD | -14 | Low | Knockdown attack |
| u.5S | 6 | 11 | 4 | 22 | 1~5(5) | - | -1 | -1 | -6 | Mid | Weak attack |
| u.2S | 6 | 11 | 4 | 23 | 1~5(5) | - | -2 | -2 | -7 | Mid | Weak attack 6-14f throw invincible |
| ju.S | 6 | 10 | 11 | 28 | 1(1) | - | -- | -- | -- | High | Medium attack |
| u.66S | 8 | 9 | 14 | 30 | x | - | KD | KD | -16 | Mid | Knockdown attack |
| u.66C | 5 | 9 | 10 | 28 | x | - | KD | KD | -14 | Low | Knockdown attack |
| 2BC | 6 | 16 | 6 | 35 | x | - | -- | -- | -- | Mid | |
| u.2BC | 6 | 16 | 6 | 35 | x | - | -- | -- | -- | Mid | |
| 8BC | 9 | 39 | 8 | 82 | x | - | -- | -- | -- | Mid | |
| u.8BC | 9 | 39 | 8 | 82 | x | - | -- | -- | -- | Mid | |
| Hyakkan Otoshi - j.8AB | 21 | 8 | x | x | x | - | KD | KD | ?? | High | Medium attack Knockdown attack |
| Jishin Gan - 22S | 10 | 27 | 1, 17 | 73 | x | - | KD | KD | -36 | Low | Knockdown attack |
| Katsu! - 236S | 16 | 10 | 20 | 52 | x | - | KD | KD | -36 | Mid | Knockdown attack |
| Tsukamuzo - 421A | 22 | 3 | 8 | 38 | x | - | KD | KD | -26 | Mid | Knockdown attack |
| Tsukamuzo - u.421A | 22 | 3 | 8 | 23 | x | - | KD | KD | -11 | Mid | Knockdown attack |
| Tsukamuzo - 421B | 25 | 16 | 2 | 57 | x | - | KD | KD | -32 | High | Medium attack Knockdown attack |
| Tsukamuzo - u.421B | 25 | 16 | 2 | 52 | x | - | KD | KD | -27 | High | Medium attack Knockdown attack |
| Tsukamuzo - 421C | 22 | 5 | 2 | 41 | x | - | KD | KD | -30 | Low | Knockdown attack |
| Tsukamuzo - u.421C | 22 | 5 | 2 | 37 | x | - | KD | KD | -26 | Low | Knockdown attack |
| Enshinsatsu - 47896AB | x | 4 | 3 | 106 | x | - | KD | KD | -- | Mid | 29 lowest damage 53 highest damage fixed damage |
| Niou Bakushin Satsu - 236CD | 30 | 28 | 55 | 128 | x | - | KD | KD | -95 | Mid | Knockdown attack |
