Samurai Shodown V Special/Jubei Yagyu
Jump to navigation
Jump to search
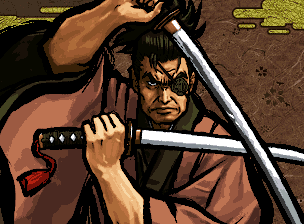


柳生 十兵衛, Yagyu Jubei

Colors
Introduction
Depth perception is for wimps.
Defined by having catch counters, long range pokes, fast ground speed, so-so specials, strong chipping potential, and a pretty lousy jump, Jubei is a well-rounded zoning oriented character with strong active defense that takes some guts to play effectively. He uses his strengths to makes his opponents not want to sit still or take careless guesses, and takes advantage of that.
| Strengths | Weaknesses |
|---|---|
|
|
Data
- Damage taken: 105%
- Rage duration: 18 seconds
- Amount to rage: 26
- Walk speed: 512
- Backwalk speed: 384
- Dash speed: 1600
- Jump duration: 51 frames
- Width: 24
- Throw range: 16
- Throw recovery: 46 frames
- Tier placing: C
Normals
Far Slashes
5A
5A  |
|---|
5B
5B  |
|---|
5AB
5AB  |
|---|
n.2A
2A  |
|---|
2B
2B  |
|---|
2AB
2AB   |
|---|
Near Slashes
n.5A
n.5A  |
|---|
n.5B
n.5B  |
|---|
n.5AB
n.5AB  |
|---|
Overheads
5BC
5BC  |
|---|
u.5BC
u.5BC  |
|---|
Kicks
5C
5C  |
|---|
6C
6C  |
|---|
2C
2C  |
|---|
3C
3C   |
|---|
Jumping
j.A
j.A  |
|---|
j.B
j.B |
|---|
j.AB
j.AB  |
|---|
j.C
j.C  |
|---|
Dashing
66A
66A  |
|---|
66B
66B  |
|---|
66AB
66AB  |
|---|
66C
66C  |
|---|
Unarmed
u.5S
u.5S  |
|---|
u.2S
u.2S  |
|---|
u.jS
u.jS  |
|---|
u.66S
u.66S  |
|---|
System
Deflect
Deflect  216D 216D
|
|---|
Weapon Pickup
Weapon Pickup  u.5A u.5A
|
|---|
Taunt Disarm
Taunt Disarm  3 x Start 3 x Start
|
|---|
Special Moves
Specials
Kattotsu Suigetsutou
Kattotsu Suigetsutou  236A or B 236A or B  236AB 236AB
|
|---|
Nikkaku Ratou
Nikkaku Ratou  623S 623S
|
|---|
Hassouhappa
Hassouhappa     Mash S Mash S
|
|---|
Shingantou
Shingantou  214A 214A  214B 214B  214C 214C
|
|---|
Weapon Flipping Technique
Zetsu Suigetsutou
Zetsu Suigetsutou  236CD 236CD
|
|---|
Combos
Normal
- (5A or n.5A or 2A or n.2A or 66A or 3C first hit) ...
- Lots of starters for light hits, which are all comboable. This gives Jubei a wide variety of fast punishment tools, though 5A and 66A are the fastest.
- ... xx 236A
- Works at most ranges, resets to neutral.
- ... xx 623A
- Good damage at very close range.
- (5B or n.5B or 2B or n.2B) ...
- Medium starters, for larger openings.
- ... xx 236A
- For spacing, resets to neutral.
- ... xx 623B
- This works from surprisingly far away, almost the full range of 5B. Great for punish combos.
- ... xx 623AB 2BC
- Have to start it from close range but hurts like crazy. Start it from 2B!
- 2AB 2BC
- Have to start from close range for both hits to connect, for the 2BC followup you have to backhit or be near the corner. Good knockdown option, though.
- 66AB 2BC
- Near corner. Sadly, you can't 8BC even on antiair.
- 6C xx 8BC
- Hits low, good range, hard to see coming, fairly safe on block and cancelable into other stuff. Abuse liberally!
- 3C xx 8BC
- Second hit combos into 8BC easily enough, you can confirm if you want to off of the first hit and go into something else otherwise.
- 66C 2BC
- If you ever use this, you can get a little bit more damage.
- 623AB 2BC
- Very tiny amount of extra damage, but you take what you can get.
- 236AB 8BC
- Nice damage boost if they get hit by it. Plus, you can't rage explode the 236AB so it's a guaranteed finisher.
- 236CD 8BC
- For that extra little bit of hurt.
Time slow
- (vs air) j.AB j.AB j.AB
- If you can't wait for them to come down to Issen.
Strategies
General
- Jubei's a strong footsies character, his mixups are not terribly great but he's good at making the opponent very edgy. You have a fast dash speed but poor dashing attacks, so use sparingly or against jumpers. Your long poke range makes it easy for you to just walk in and out of the opponent's range safely, or to make him walk into your attacks.
- Watch the opponent's patterns carefully, your catch counters are terrifyingly strong if you land them, so if they're mashing pokes or predictable specials feel free to make them stop forcefully. This is best used against grounded attacks, rather than jumpins, since good players will watch that approach carefully. As good as your catch counters are, don't forget that you have a normal deflect, and that it is a lot safer than them in most scenarios.
- Use whiffed 623A to catch attacks or to fake out into another mixup. Learn the range on it well!
- Learn the 5B/2B 623S combos and the ranges at which they work, they are very strong punishment tools when available.
- 236A is incredibly obnoxious and outside of minimum range is incredibly difficult to stop. Be careful since they can hop it on reaction. Mix it up with 236B for faster recovery.
- 236AB is good for forcing them to jump or block, since some characters can't hop it and it beats most other projectiles clean. Be careful that you're not in jumpin range during startup, though.
- 5BC is an amazingly long range overhead that is really difficult to punish when spaced, and can function as a poke in a pinch. Plus, you can mix it up with 6C 8BC, which is a very fast low hit with solid range and cancelability.
- He is pretty slow to rage, but rages for a relatively long time as far as this game goes. It's pretty easy to find room to charge for Issen but his damage can get serious and that 18 seconds can feel like forever when he's on the offense. Gauge which way fits your playstyle and strategy better.
Damage and defense
- Jubei has a few ways of punishing for solid damage:
- 2B 623x - His staple punishment combo. Reasonably fast, does really nice damage, but the knockdown doesn't set up good okizeme for you and it's easily explodable. At close range you'll want to use 623AB, further away you'll have to use 623B.
- 5AB or n.5AB - Very slow startup, only use on really laggy attacks. This doesn't knock down or give you frame advantage, but it does reset you to the neutral game.
- 2AB - This is only viable at close enough range that the both hits connect. Starts up slightly faster than 2B, forces a far knockdown and does good damage. Since it's two hits you have to watch out for rage explosion.
- n.5A 623A - Point blank only, but the startup is fast enough it will catch things nothing else will.
- Antiair options:
- 5AB - Decent against far anti-air, watch out for anyone with a good downwards slice though. Will actually catch crossups, but you'll probably get n.5AB instead which you don't want.
- 66AB - Best option if they jump over you while you're dashing, it's free on crossunder.
- 7 or 8 j.S - His jump is slow but his jumping attacks are fast with great range, which means he can stop jumps before they get to him. Be careful about landing resets, though.
- 214C - Antiair catch. Don't use this against players smart enough to not mash something out every time.
Frame Data
| Move | Damage | Startup | Active | Total | Cancel | Weapon Clash |
Hit Adv. |
Backhit Adv. |
Block Adv. |
Guard | Notes |
| 5A | 5 | 9 | 2 | 24 | 9~10(2) | 7(1) / 11~12(2) | -4 | -4 | -3 | Mid | Weak attack, Deflectable(weak) |
| 5B | 12 | 13 | 2 | 33 | 13~33(21) | 15~18(4) | -2 | +6 | -13 | Mid | Medium attack, Deflectable(med) |
| 5AB | 29 | 22 | 4 | 55 | x | 18~21(4) | +4 | +14 | -21 | Mid | Heavy attack, Deflectable(heavy) |
| 2A | 5 | 10 | 3 | 34 | 5~34(30) | - | -14 | -14 | -3 | Low | Weak attack |
| 2B | 12 | 12 | 2 | 33 | 13~33(21) | - | -3 | +5 | -13 | Mid | Medium attack, Deflectable(med) |
| 2AB | 5, 22 | 10 | 3 | 61 | x | - | +10 | +20 | -21 | Low | Heavy attack Second hit deflectable(heavy) |
| n.5A | 5 | 5 | 10 | 20 | 5~20(16) | 3~4(2) | -5 | -5 | -3 | Mid | Weak attack, Deflectable(weak) |
| n.5B | 8 | 14 | 3 | 39 | 14~16(3) | 10~11(2) | -7 | +1 | -13 | Mid | Medium attack, Deflectable(med) |
| n.5AB | 27 | 17 | 3 | 55 | 1~16(16) | 13~16(4) | -1 | +9 | -21 | Mid | Heavy attack, Deflectable(heavy) |
| n.2A | 5 | 10 | 3 | 34 | 5~34(30) | - | -14 | -14 | -3 | Low | Weak attack |
| n.2B | 12 | 12 | 2 | 33 | 12~13(2) | - | -3 | +5 | -13 | Mid | Medium attack, Deflectable(med) |
| n.2AB | 5, 22 | 10 | 3 | 61 | x | - | KD | KD | -21 | Low | Heavy attack Second hit deflectable(heavy) |
| 5C | 7 | 13 | 10 | 35 | x | - | -4 | +4 | -17 | Mid | Medium attack |
| 6C | 6 | 13 | 10 | 31 | 13~27(15) | - | KD | KD | -13 | Low | Knockdown attack |
| 2C | 2 | 7 | 8 | 18 | x | - | -1 | -1 | -6 | Low | Weak attack |
| 3C | 2, 5 | 9 | 8 | 47 | 9~20(12) | - | KD | KD | -18 | Low | Medium attack Knockdown attack |
| j.A | 5 | 8 | 6 | 27 | x | - | -- | -- | -- | High | Weak attack, Deflectable(weak) |
| j.B | 9 | 11 | 8 | 42 | x | - | -- | -- | -- | High | Medium attack, Deflectable(med) |
| j.AB | 26 | 12 | 2 | 44 | x | - | -- | -- | -- | High | Heavy attack, Deflectable(heavy) |
| j.C | 4 | 8 | 18 | 30 | x | - | -- | -- | -- | High | Heavy attack |
| ju.C | 6 | 8 | 18 | 30 | x | - | -- | -- | -- | High | Heavy attack |
| 5BC | 16 | 20 | 5 | 38 | x | - | KD | KD | -12 | High | Medium attack Knockdown attack |
| u.5BC | 4 | 20 | 7 | 46 | x | - | KD | KD | -20 | High | Medium attack Knockdown attack |
| 66A | 7 | 6 | 8 | 18 | 6~7(2) | - | -2 | -2 | -21 | Mid | Weak attack, Deflectable(heavy) |
| 66B | 8 | 8 | 3 | 27 | 3~7(5) | - | -1 | +7 | -21 | Low | Medium attack |
| 66AB | 15 | 13 | 4 | 42 | x | 10~12(3) | KD | KD | -24 | Mid | Knockdown attack |
| 66C | 4 | 8 | 8 | 27 | 1~7(7) | - | KD | KD | -14 | Low | Knockdown attack |
| u.5S | 3 | 11 | 3 | 25 | x | - | -4 | -4 | -9 | Mid | Weak attack |
| u.2S | 3 | 10 | 8 | 22 | x | - | -2 | -2 | -7 | Mid | Weak attack |
| ju.S | 4 | 14 | 3 | 29 | x | - | -- | -- | -- | High | Heavy attack |
| u.66S | 4 | 9 | 8 | 21 | x | - | KD | KD | -7 | Mid | Knockdown attack |
| u.66C | 4 | 8 | 8 | 27 | 1~7(7) | - | KD | KD | -14 | Low | Knockdown attack |
| 2BC | 4 | 10 | 5 | 22 | x | - | -- | -- | -- | Mid | |
| u.2BC | 4 | 10 | 5 | 22 | 18~22(5) | - | -- | -- | -- | Mid | |
| 8BC | 13 | 39 | 2 | 116 | x | - | -- | -- | -- | Mid | |
| u.8BC | 8 | 39 | 1 | 102 | x | - | -- | -- | -- | Mid | |
| Kattotsu Suigetsutou - 236A | 9 | 10 | x | 47 | x | - | +0 | KD | -25 | Mid | Medium attack |
| Kattotsu Suigetsutou - 236B | 11 | 24 | x | 50 | x | - | +11 | KD | -14 | Mid | Medium attack |
| Retsu Suigetsutou - 236AB | 8, 9, 1, 1, 1 | 26 | x | 62 | x | - | KD | KD | +1 | Low | Medium attack |
| Nikkaku Ratou - 623A | 2x3, 16, 1 | 7 | 11 | 26 | x | - | KD | KD | -76 | Mid | Shoulder part weak attack Remainder knockdown attack 1-6f full invincible |
| Nikkaku Ratou - 623B | 2x3, 19, 1x2 | 9 | 23 | 40 | x | - | KD | KD | -73 | Mid | Shoulder part weak attack Remainder knockdown attack 1-8f full invincible |
| Nikkaku Ratou - 623AB | 2x3, 23, 1x4 | 15 | x | x | x | - | KD | KD | -74 | Mid | Shoulder part weak attack Remainder knockdown attack 1-10f full invincible |
| Hassouhappa - 6A x2 | 7x7, 4x5 | 16 | 2 | 114 | x | - | ?? | ?? | ?? | Mid | Medium attack |
| Hassouhappa - 6B x2 | ?x21 | 16 | 2 | 129 | x | - | ?? | ?? | ?? | Mid | Medium attack damage 5 or 1 |
| Hassouhappa - 6AB x2 | ?x34 | 12 | 2 | 177 | x | - | ?? | ?? | ?? | Mid | Medium attack damage 5, 6, or 1 |
| Shingantou: Suigetsu - 214A | 40 | x | x | 62 | x | - | KD | KD | -- | Mid | 1-18f low catch |
| Shingantou: Souha - 214B | 45 | x | x | 62 | x | - | KD | KD | -- | Mid | 1-18f mid catch |
| Shingantou: Tenra - 214C | 40 | x | x | 62 | x | - | KD | KD | -- | Mid | 1-18f high catch |
| Zetsu Suigetsutou - 236CD | 1x7, 28 | 36 | 58 | 129 | x | - | KD | KD | -27 | Mid | Knockdown attack |