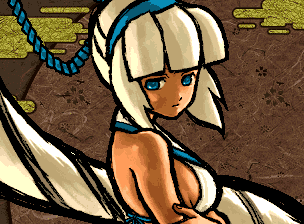
真鏡名 ミナ, Majikina Mina
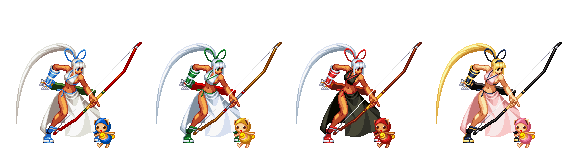
Colors
Introduction
Mina and Chanpuru, both masters of annoying their opponents to death.
At first glance, Mina looks like a zoning character. This is wrong. She's much more of a high risk, high reward style. Very high damage, very low health, good mixups. Her matches tend to end up with one player or another having most of their health left, since whenever she's wrong she tends to lose half of her lifebar right then and there. Because of that, she's not very good at winning in a consistent way as she's very high variance character. You're going to have to get used to that if you want to play her.
All of her best zoning tools can be reacted to easily if the opponent is simply walking instead of running or dashing, meaning they're only really good for running the clock down. On the other hand, she can shut all jumps down on reaction easily and her mixup game is strong, very able to force the opponent's hand when she's being aggressive.
| Strengths |
Weaknesses
|
- High damage all around.
- Nearly unblockable setup with the skyfall arrow.
- Lots of annoying left/right/high/low ambiguous mixups.
- Several ways to control air movement.
- Not vulnerable to deflects.
|
- Has extremely low health, can be killed in two well placed hits.
- Can't really keep the opponent out safely.
- Quick rage also means no time to meditate.
- Extra recovery time after doing an aerial attack means almost guaranteed to be thrown.
- Useless WFT.
|
Data
- Damage taken: 150%
- Rage duration: 8 seconds
- Amount to rage: 18
- Walk speed: 400
- Backwalk speed: 312
- Dash speed: 1600
- Jump duration: 47 frames
- Width: 12
- Throw range: 8
- Throw recovery: 46 frames
- Tier placing: C-
Normals
Far Slashes
5A:
- Properties:
- High angle antiair arrow that curves downwards after a distance. Will pretty much catch anyone jumping on reaction.
- Starts higher up than 2A, so catches a different angle. Learn the difference!
|
5B:
- Properties: Reflectable.
- Fires at a slight upwards angle, which will connect on near standing opponents and most low jumpers. Good general purpose "you shall not pass" type arrow. The angle makes it safe against reflections unless they are right next to you. This is incredibly effective to spam against Gaira at range since he is tall and his reflects will be useless.
|
5AB:
- Properties: Reflectable.
- Shoots straight forward for massive damage. Comes out slowly, so don't use carelessly. Can be used as antiair against far jumps.
- It's surprisingly not too horrible on block, making it difficult for some characters to punish when spaced out properly.
|
2A:
- Properties:
- Like 5A, it's a high angle arrow that curves downwards. This is great antiair and comes out faster than 5A.
- Learn the difference between this and 5A's angles, since they catch different approaches.
|
2B:
- Properties: Hits low. Reflectable.
- Ground-hugging arrow. Doesn't knock down, but comes out very quickly.
- The recovery is pretty horrible, so if you miss it will probably hurt, especially if they do a jumping attack since it's free stun. Good players can 6D hop over this on reaction, so be careful.
|
2AB:
- Properties: Reflectable.
- Fires diagonally up and forwards. Does a lot of damage, combos into 8BC easily, makes for great antiair. The startup is really slow, though, so you can't use it on reaction against every character safely, only anticipation.
- This is a good punishment or combo tool, but be careful about missing it since it's extremely punishable on whiff.
|
Near Slashes
n.5A:
- Properties: Deflectable.
- Bow swipe that is safer on block than on hit.
- Low damage and weak hitbox makes it not a very good tool for any reason.
|
n.5B:
- Properties: Recoil cancel on block. Deflectable.
- Longer range bow swipe that has painfully slow startup, though it'd be nice if you could use it from further away.
- This is a pretty good move since the recoil cancel allows you to setup a mixup into skyfall arrow, deflect, or the flip.
|
n.5AB:
- Properties: Recoil cancel on block. Deflectable.
- Mina leans forward and baps them in the face with her bow. This comes out quickly and is neutral on hit, pushing you far enough back to start random arrow pressure again. There is a recoil cancel period but it comes late, making this not the safest option.
- This is a good move for punishing, but the threat of being disarmed from a deflect makes it hard to argue for throwing it out randomly. Worse, if it hits as antiair it takes so long to recover you're at disadvantage.
|
n.2A:
- Properties: Cancelable.
- A so-so poke for pushing the opponent back. This is her only cancelable attack. Because it doesn't hit low you'll probably want to use 2C instead, which is basically the same framewise.
- This move is a liability, because you can do it from pretty far and it has overlap with 2A which is a necessary antiair. Learn the range on it so you don't get it by accident.
|
n.2B:
- Properties: Hits low. Knockdown.
- Low sweep that comes out surprisingly fast. Unfortunately it has no recoil and it is ridiculously punishable on block. At least it has very little hitstop, to make it harder to react to quickly.
- In combination with 421B you can make a near unblockable high/low mixup.
|
n.2AB:
- Properties: Knockdown.
- Same as 2AB.
|
Overheads
5BC:
- Properties: hits high. Knockdown.
- This is an interesting move. Mina hops backwards, swinging her bow forwards to hit at surprisingly far range. The hitbox will also hit behind her, stuffing anyone who tries to hop through you, such as when they try to throw.
- Because of the movement it's actually not a bad choice against dashing pressure or random pokes.
|
u.5BC:
- Properties: Hits high. Knockdown.
- Decent range, but an obvious startup animation and pretty bad on block.
- Because of how far it hits it's sometimes good to catch advancing opponents.
|
Kicks
5C:
- Properties:
- Ridiculously slow startup for a standing kick, has poor range, damage, and recovery. Not very useful, but at least you can't deflect it.
|
6C:
- Properties: Hits low. Knockdown.
- Starts up slow, but hits at a good range and then Mina rolls far, far, far away, making it difficult to punish. Useful move for getting some distance.
- Mina's very low profile means this will go under a lot of mid-height attacks, and can even be used as viable anti-air against some characters.
|
2C:
- Properties: Hits low.
- Low kick for spacing. Not so great on block but good for pushback and setting up tick throws.
|
3C:
- Properties: Hits low. Knockdown.
- Slides forward and then Mina poses for the camera. Insanely punishable on block, poor recovery means no followup. Does a surprisingly large amount of damage, though.
- This comes out fairly quick so you can use it as a punisher in some circumstances, just be aware that it takes a long time to get back up since she thinks she's in a photo shoot or something.
|
Jumping
j.A:
- Properties: Hits high.
- Mina stops midair and fires straight ahead. This is rarely useful, since ground to air is always a superior choice for Mina, the damage is weak, and j.B will probably hit them in air to air situations anyway.
|
j.B:
- Properties: Hits high.
- Stops and fires diagonally downwards. This is helpful since it can hit forward advances, and when used instantly from the ground can stop advances and works as an overhead. If blocked it's punishable, though, so be careful.
|
j.AB:
- Properties: Hits high.
- Stops and fires almost straight down. Does a lot of damage, and in the right positioning the side it hits on can be ambiguous. Not pleasant to have blocked, and even on hit it's possible to punish sometimes, so using it carelessly is risky.
|
j.C:
- Properties: Hits high.
- This move is surprisingly good! Comes out almost instantly, has good active time, and has a great hitbox. You can beat a lot of attacks with it air to air, and since it has almost no hitstop against a grounded opponent it's good for beating throw mash on landing.
|
Dashing
66A:
- Properties: Recoil cancel on block. Deflectable.
- Decent range bow swipe. The recoil cancel is nice for mixups, but be careful of being deflected.
|
66B:
- Properties:
- Mina runs up and does a stupefyingly short range shove. It has a very fast animation and it gives you a surprising amount of frame advantage.
- It's an okay move but it just doesn't have any purpose for Mina. It's not a position she wants to be at, and the hitbox is really poor for anything other than a direct grounded hit.
|
66AB:
- Properties: Knockdown.
- Leans forward and hits with the bow. This is surprisingly fast and actually a good move as a punisher.
- It's really nice antiair because the hitbox on the bow goes ridiculously high, and it forces knockdown in all situations.
|
66C:
- Properties: Hits low. Knockdown.
- Quick good range sliding low kick. Combos into 2BC. What's not to like? Besides that it's punishable on block.
|
Unarmed
u.5S:
- Properties:
- A "Help me I don't know how to punch" punch. Good hitbox but punishable even on hit, so not very useful.
|
u.2S:
- Properties: Hits low.
- Basically n.2A, now everywhere. Actually a decent move for pushback now that you don't have to worry about overlap with 2A.
|
ju.S:
- Properties: Hits high.
- Mina holds her hand out flat. Damage is bad, hitbox is bad, and it has very few active frames. Stick with j.C.
|
u.66S:
- Properties: Knockdown.
- Same as her 66B, only it knocks down now. It's quick, but it has no range.
|
System
Deflect - 216D:
- Short ranged slap. Surprisingly pretty useful, but don't expect to be swatting anything from far away.
|
Weapon Pickup - 5A:
- Frustratingly slow. Only Yoshitora's is slower.
- This is a real problem with Mina's low health, she needs a far knockdown to pick it up safely and she doesn't have many ways of getting it.
- If she cancels a throw into the weapon pickup she's vulnerable by the time they recover, so that's out too.
- The answer here is to try very hard to not get disarmed. Deflects aren't really a big worry, but watch out for WFTs. Since Mina's opponents tend to rage easily (in more ways than one), you have to stay alert about this.
|
Taunt Disarm - Start Start Start:
- Long and uncancelable. Takes over a second before she actually drops the bow.
|
Specials
Jikyuushin - [4]6S:
- A rare charge input move, you'll most likely scream when you get this by accident.
- The A, B, and AB versions fire 3, 4, and 5 arrows respectively. They all have very slow startup, but are completely safe on block and ridiculously advantageous on hit, so you might consider using them against poor jumpins.
- B is least advantageous, and AB will have the last arrow go over the head of average sized characters, so the A version is the most recommended.
- All versions can be comboed from into 421B, which opens up a lot of damage opportunities. At close range 5AB is also valid.
|
Tenkyuushin - [4]6C:
- Mina jumps up and forwards, stops, and fires five arrows diagonally downwards as she falls back down.
- This move is not advantageous on block, but it's almost impossible to punish anyway. Good for chipping the opponent.
|
Sungan no Sasoi - 421A:
- Fires an arrow into the sky. This charges 421B up to three times. You'll want to try to do this when you have the opportunity, because 421B is awesome.
- The arrow itself can actually hit the opponent for almost no damage. Its angle makes this useless as antiair.
|
Sungan no Mukae - 421B:
- Mina points and, if it's been charged with 421A, an arrow falls from the sky straight down to where the opponent is, hitting overhead. This is easily her most useful special.
- This is a very nice move, because it's surprisingly fast and Mina recovers just before the arrow hits, allowing her to combo with pretty much anything. 5AB and 2AB hurt a lot when they connect, allowing you to compensate for their slow startup. Since 2B, n.2B, and 66C all hit low, timed right it can make the block timing very ambiguous. 2C works the same way but sets up a tick throw.
- In a pinch it works as an OTG pursuit, which would be useful with a far knockdown if it did more than a pixel of damage.
- Strangely, the startup is also throw invincible.
|
Shinimabui no Nageki - 623S:
- Flips forward and shoots back the way she came. All three versions have a different purpose.
- If it hits someone on the back they'll be juggled straight up, letting you follow up with 8BC.
- 623A - Goes about half screen range. It's in the air very quickly, making this a decent reversal option. The startup CAN be reacted to so you will likely get punished if it's blocked.
- 623B - Somewhat slower startup, but goes all the way to the other end of the stage. If you can get it started it's a mostly safe escape, though it leaves you at major disadvantage if they react in time, sometimes leaving you in the same situation you tried to get out of. Still, when you need to get out of the corner, this is your best option.
- 623AB - Same as 623B, except the arrow is fired when Mina is still in the air. This is meant for knocking people out of the air, but is of almost no use since it means your jump arc will go through the same space the opponent will be trying to hit. At least it attacks considerably faster.
|
Kajifuchi - j.2C: (can be used unarmed)
- Diagonal downwards dive, hitting up to 4 times. There can be used on any jump at any time and there is no landing recovery. As this is not considered a special move you can't TK it or do it from a backdash, though.
- This has a good hitbox and is Mina's only safe air control, making it really useful for altering her angle.
- Be careful about landing on the opponent with this, because it has almost no blockstun. You'll want to be ready to do something immediately on landing to prevent getting thrown or worse.
|
Chanpuru: 214x:
- 214B and 214C are useless moves that either scoop up Chanpuru or put him to sleep. Doing the same one a second time will cause him to return.
- Use either as taunts or to get him to shut up. Strangely, they can't be used when unarmed.
|
Umichimun no Ikari - 236CD - WFT:
- Mina shoots herself out of her bow, landing a fixed distance away. It does a lot of damage, but because of its slow startup it's almost as useless as Galford's.
- At the right range, roughly just past when the screen zooms out, you can set it up an ambiguous crossup. Which would be useful if they couldn't just roll or dash out of the way on reaction to the super flash, so don't try this.
- Because of its extremely slow startup you can't even use it on reaction to opponent's jumps.
- It does have a small amount of startup invincibility against hits, but it wears off before she leaves the ground, making this a subpar choice for escaping pressure.
- If you see something that's a guaranteed punish go ahead, but the odds of the opponent doing something like that is unlikely. You're better off using the rage period for its damage, instead of gambling on this.
- After landing, the final three frames can be canceled to an unarmed weapon catch.
|
Combos
Normal
- Any projectile knockdown ...
- Mina can combo into a pursuit off of any antiair 5A/5B/2A, a backhit 623S, or any 2AB/5AB hit.
- Near corner only. This is going to be the heaviest damage option when it's available.
- Near corner only. Works in more situations. Sometimes you can do ... 66 4 2BC to dash up, come to a quick stop, and then do it.
- Opponent near corner only. This does very little damage and is kind of a waste of a sky arrow, but when you need that extra little bit of damage it helps. If you're in the situation to use this, you're probably better off just charging another arrow with 421A instead.
- Skyfall arrow combos into basically everything, making this an ideal punish for anything that's stationary and not too fast. It being overhead also helps a lot, since the extra stun against a crouching opponent makes it easier to link Mina's heavies.
- If not crouching, close range only, otherwise about half screen range works. From here, the usual knockdown followups work. This is Mina's strongest combo.
- When 421B connects in the air, you can actually juggle into 2AB if you do it immediately!
- Surprisingly long range, knocks them far back. 2BC followup only works near the corner.
- Works at any range. Since it's a high followed by a low, it's hard to block correctly when closer up.
- When you can't follow up with anything else, for a bit of extra damage. Usually a waste of arrows.
- Almost simultaneous high/low. Very hard to block, knocks down and does good damage if it connects.
- Like the last one, very difficult to block. Great for a tick throw setup if they're not expecting it, and it's also very fast to recover.
- At close range, this is unblockable and does a small amount of damage, but be careful about them jumping.
- If for some reason you actually connect the charge move, you can follow it up for more damage.
- This is the best option since it's the easiest and combos into basically everything else.
- Works from all but the furthest ranges, forces a far knockdown and gets you close in.
- At close range only, this is a viable followup.
- Easiest way to combo, though it doesn't do much damage.
- Free damage followup from the sweep.
- Safer than n.2B but less damage, also gives you a viable dash mixup, though it's punishable on block if they're looking for it.
- Near corner only. Decent damage.
Time slow
- The opponent can be juggled while he's still rising, so you can combo from there into any AB or more 421B.
Strategies
General
- Above anything else, Mina is not subtle footsies character. Her painfully slow walk speed and having the lowest throw range really limits her options in how she moves, while nearly all of her grounded attacks can be reacted to easily. On the other hand, her dash is very quick and her jump arc is difficult to deal with since she has a lot of air control.
- Although it's not obvious, all of j.A, j.B, and j.AB have a short, seven frame landing recovery. She can block during this, but can't do anything else and is vulnerable to throws. Be careful using these when pressed in the corner; not only can most characters dash in for a free throw, but some can also land a well-timed heavy slash during your helpless descent from a blocked or whiffed aerial shot.
- Good players can hop over Mina's 2B with 6D and block Mina's 5AB and 623A on reaction, and will walk instead of jump or run, making it very difficult for you keep them out. She just isn't that sort of character, you need to be willing to take risks with her mixups and very fast dash speed.
- Because Mina's arrows cause her to stay in the air slightly, you actually have a strong high/low/throw mixup on jumpins because people don't want to risk challenging it. If you can get a safe jumpin you run either j.B, j.AB, land throw, land n.2B, or j.C for the deep hit stun/anti throw mash, and they won't know which way to block or answer. This can be risky, so don't do it carelessly.
- Similarly, you can jump over the opponent to create ambiguous left/right situations by doing crossover j.AB at the right positions. This is pretty much a straight up 50/50, so be careful about whiffing it. Getting into the position for it can also be a problem, since if you do it from too high it might take too long for you to recover. It's easiest to set this up as an okizeme trick.
- 421B n.2B 2BC is almost impossible to block and forces a knockdown. If you can get the opponent to stand still for it, go for it! You can also run 421B 2C which sets up a reset into tick throw or another mixup.
- 623A will beat a lot of dashes with a backhit if they don't just stop dead, so if the opponent is dashing up carelessly go for it.
- Don't forget about j.2C! It's great for changing the angle of back and neutral jumps to screw with the opponent's timing, and preventing otherwise hard landings.
- Her rage balance is likely her biggest problem. Being caught by a time slow is almost guaranteed death for Mina against anyone with solid mixups, and having her entire movement set shut down by the possibility of quick death is also a huge issue. You need to be able to take the game to them first. Unfortunately, because of her low life she rages very quickly, and her difficulty in keeping people out doesn't give her much time to meditate. You may find it easier to not bother and try to win matches outright with rage explosion's bonus damage instead.
- While she has no good ways to disarm the opponent, don't forget that she still has deflect available. Players are often eager to try and hit her whenever possible because of her low life, so baiting out slashes and aiming for block recoil shenanigans can be a good idea.
Damage and defense
- Mina has no really fast punishers, so she doesn't take advantage of small openings easily without resorting to throws, so get used to doing dash up throw a lot.
- Her pursuits, 2BC and 8BC do ridiculous amounts of damage, and you should always try to follow up with them when available, if you don't need the time to meditate or charge with 421A.
- Best punishers:
- 5AB 8BC - Slow, but you can't go wrong with this.
- 421B 5AB 8BC - Because of the speed the skyfall arrow comes out at, you can sometimes use 5AB from farther away like this, especially if they're in a crouching position.
- 421B 2B - If you're not, there's always this.
- 2B - When nothing else works.
- n.2B 2BC - This is your best option for small openings, because it forces a knockdown into decent damage.
- 3C - Unarmed option, when you want the damage. u.66S 8BC is okay sometimes too.
- Antiair:
- 2AB 8BC - Slowest startup, but easiest to followup with 8BC for the highest damage. If you can react in time to the opponent's jump, you should always do this.
- 2A or 5A - The fastest option, will work against pretty much everyone on reaction to their jump.
- 5B - Stops lower jumps, does slightly more damage.
- 5AB 8BC - Hits far jumps cleanly, but don't use closer.
- 421B 2AB 8BC - Beats all neutral or slow moving jumps.
Frame Data
| Move
|
Damage
|
Startup
|
Active
|
Total
|
Cancel
|
Weapon
Clash
|
Hit
Adv.
|
Backhit
Adv.
|
Block
Adv.
|
Guard
|
Notes
|
| 5A |
8 |
10 |
x |
41 |
1~2(2) |
- |
+6 |
KD |
-19 |
Mid |
|
| 5B |
11 |
12 |
x |
41 |
1~2(2) |
- |
+8 |
KD |
-17 |
Mid |
|
| 5AB |
28 |
22 |
x |
59 |
1~6(6) |
- |
KD |
KD |
-19 |
Mid |
|
| 2A |
8 |
12 |
x |
47 |
1~4(4) |
- |
+2 |
KD |
-23 |
Mid |
|
| 2B |
13 |
12 |
x |
42 |
1~3(3) |
- |
+7 |
KD |
-18 |
Low |
|
| 2AB |
28 |
25 |
x |
56 |
1~6(6) |
- |
+0 |
KD |
-19 |
Mid |
|
| n.5A |
5 |
9 |
4 |
30 |
x |
13~16(4) |
-11 |
-11 |
-6 |
Mid |
Weak attack, Deflectable(weak)
|
| n.5B |
10 |
16 |
5 |
35 |
x |
10~12(3) / 21~35(15) |
-1 |
+7 |
-18 |
Mid |
Medium attack, Deflectable(med)
|
| n.5AB |
25 |
13 |
6 |
56 |
1~3(3) |
- |
-6 |
+4 |
-26 |
Mid |
Heavy attack, Deflectable(heavy)
|
| n.2A |
4 |
8 |
7 |
20 |
1~7(7) / 15~20(6) |
- |
-2 |
-2 |
-7 |
Mid |
Weak attack
|
| n.2B |
11 |
10 |
6 |
48 |
1~9(9) |
- |
KD |
KD |
-33 |
Low |
Knockdown attack
|
| n.2AB |
28 |
25 |
x |
56 |
1~6(6) |
- |
KD |
KD |
-19 |
Mid |
|
| 5C |
7 |
16 |
8 |
31 |
1~10(10) |
- |
+3 |
+11 |
-10 |
Mid |
Medium attack
|
| 6C |
5 |
20 |
6 |
59 |
x |
- |
KD |
KD |
-33 |
Low |
Knockdown attack
|
| 2C |
2 |
6 |
6 |
18 |
x |
- |
-2 |
-2 |
-7 |
Low |
Weak attack
|
| 3C |
10 |
12 |
10 |
62 |
1~5(5) |
- |
KD |
KD |
-45 |
Low |
Knockdown attack
6-16f feet invincible
|
| j.A |
8 |
9 |
x |
x |
x |
- |
-- |
KD |
-- |
Mid |
|
| j.B |
17 |
13 |
x |
x |
x |
- |
-- |
KD |
-- |
High |
Medium attack
|
| j.AB |
30 |
16 |
x |
x |
x |
- |
-- |
KD |
-- |
High |
Medium attack
|
| j.C |
4 |
3 |
9 |
19 |
x |
- |
-- |
-- |
-- |
High |
Heavy attack
|
| ju.C |
4 |
3 |
9 |
19 |
x |
- |
-- |
-- |
-- |
High |
Heavy attack
|
| 5BC |
16 |
20 |
4 |
40 |
x |
- |
KD |
KD |
-14 |
High |
Medium attack Knockdown attack
|
| u.5BC |
6 |
20 |
13 |
44 |
1~5(5) |
- |
KD |
KD |
-18 |
High |
Medium attack Knockdown attack
|
| 66A |
5 |
11 |
5 |
31 |
x |
1~10(10) / 15~27(13) |
-2 |
+6 |
-6 |
Mid |
Weak attack, Deflectable(heavy)
|
| 66B |
4 |
11 |
9 |
24 |
x |
- |
+8 |
+8 |
-8 |
Mid |
|
| 66AB |
16 |
13 |
6 |
47 |
x |
- |
KD |
KD |
-29 |
Mid |
Knockdown attack
|
| 66C |
4 |
6 |
7 |
34 |
x |
- |
KD |
KD |
-23 |
Low |
Knockdown attack
|
| u.5S |
6 |
5 |
4 |
26 |
1~4(4) |
- |
-11 |
-11 |
-16 |
Mid |
Weak attack
|
| u.2S |
4 |
8 |
7 |
20 |
1~7(7) |
- |
-2 |
-2 |
-7 |
Mid |
Weak attack
|
| ju.S |
4 |
12 |
4 |
35 |
x |
- |
-- |
-- |
-- |
High |
Medium attack
|
| u.66S |
4 |
11 |
9 |
24 |
x |
- |
KD |
KD |
-8 |
Mid |
Knockdown attack
|
| u.66C |
4 |
6 |
7 |
34 |
x |
- |
KD |
KD |
-23 |
Low |
Knockdown attack
|
| 2BC |
12 |
19 |
1 |
41 |
x |
- |
-- |
-- |
-- |
Mid |
|
| u.2BC |
5 |
6 |
10 |
30 |
x |
- |
-- |
-- |
-- |
Mid |
|
| 8BC |
18 |
39 |
15 |
94 |
x |
- |
-- |
-- |
-- |
Mid |
|
| u.8BC |
12 |
39 |
11 |
94 |
x |
- |
-- |
-- |
-- |
Mid |
|
| Jikyuushin - [4]6A |
8 |
49 |
x |
71 |
x |
- |
+32 |
KD |
+0 |
Mid |
|
| Jikyuushin - [4]6B |
8 |
53 |
x |
81 |
x |
- |
+26 |
KD |
+0 |
Mid |
|
| Jikyuushin - [4]6AB |
8 |
57 |
x |
113 |
x |
- |
+37 |
KD |
-2 |
Mid |
|
| Tenkyuushin - [4]6C |
8 |
55 |
x |
113 |
x |
- |
+15 |
KD |
-25 |
Mid |
|
| Sungan no Sasoi - 421A |
1 |
26 |
x |
43 |
x |
- |
-- |
-- |
-- |
Mid |
|
| Sungan no Mukae - 421B |
8 |
22 |
x |
18 |
x |
- |
?? |
?? |
?? |
Mid |
Medium attack
1-15f throw invincible
27f hit time vs standing Haohmaru
can hit otg for 2 damage
|
| Shinimabui no Nageki - 623A |
16 |
31 |
x |
65 |
x |
- |
+3 |
KD |
-22 |
Mid |
5-34f airborne
|
| Shinimabui no Nageki - 623B |
16 |
50 |
x |
95 |
x |
- |
-8 |
KD |
-33 |
Mid |
9-53f airborne
|
| Shinimabui no Nageki - 623AB |
16 |
41 |
x |
100 |
x |
- |
?? |
KD |
?? |
Mid |
9-59f airborne
|
| Kajifuchi - j.2C |
2 |
15 |
5 |
x |
x |
- |
?? |
?? |
?? |
High |
Weak attack
5f interval between hits
|
| Umichimun no Ikari - 236CD |
40 |
48 |
14 |
75 |
73~75(3) |
- |
KD |
KD |
-9 |
High |
Medium attack Knockdown attack
1-8f melee invincible
9-21f feet invincible
22-61f airborne, 62-75f grounded
|

