Super Naruto: Clash of Ninja 4/CS2 Sasuke

From Mizuumi Wiki
Jump to navigation Jump to search

Summary

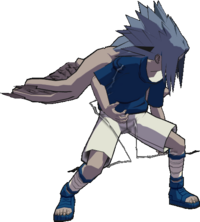
Like in Vanilla, Curse Seal level 2 ("CS2") Sasuke is an agile, offensive beast who demolishes the enemy with his long & strong strings, cross-up teleport kick, instant guard break running B Chidori, heat-seeking fireballs, signature piledriver, and high damage 5X. His reduced HP in comparison to Vanilla, combined with a lack of a traditional, guard-frame 4B attack emphasizes the "claw first, ask questions later" nature of this edgier, giant bat-hand-wing-baseball mitts version of SCON4 Sasuke Icon.png Sasuke.

Main Strengths

  • Versatile strings that either lead to great combos or pressure on block
  • Adept at mix-ups, having an instant guard crush (running B) and quick ways to land back hits on the opponent (4B, running A sideswitch, BBA string)
  • Relatively weak defense; CS2's 4B has no autoguard frames and without meter only has a 15F high crush to work with. 5X high crushes in 6F but can be high crushed itself.

Notes

Super Cancel Points:

  • B Button(B Button)
  • ForwardB ButtonA ButtonA Button(B Button)
  • DownB ButtonA Button(B Button)
  • BackB ButtonA Button(B Button)
  • A ButtonA Button(B Button)

String List

String # Inputs Notes
CONR3 STRING.png 01 B ButtonB ButtonB ButtonB ButtonB ButtonB ButtonB Button
  • X ButtonCancellable at B Button(B Button)
  • For CONR3 STRING.png 01 and CONR3 STRING.png 03, switches sides with the final move.
  • For CONR3 STRING.png 02, can hold the final input to extend the move's duration.
  • For CONR3 STRING.png 04, can hold the final input to change the move's effect.
CONR3 STRING.png 02 B ButtonB ButtonB ButtonB ButtonA Button
CONR3 STRING.png 03 B ButtonB ButtonB ButtonA Button
CONR3 STRING.png 04 B ButtonB ButtonA ButtonA Button
CONR3 STRING.png 05 ForwardB ButtonB ButtonB ButtonB ButtonB Button
CONR3 STRING.png 06 ForwardB ButtonB ButtonB ButtonA Button
  • Can hold the final input to extend the move's duration.
CONR3 STRING.png 07 ForwardB ButtonB ButtonA ButtonA Button
  • Can hold the final input to change the move's effect.
CONR3 STRING.png 08 ForwardB ButtonA ButtonB ButtonB ButtonB Button
CONR3 STRING.png 09 ForwardB ButtonA ButtonB ButtonA Button
  • Can hold the final input to extend the move's duration.
CONR3 STRING.png 10 ForwardB ButtonA ButtonA ButtonB ButtonB ButtonB ButtonB ButtonB Button
  • For CONR3 STRING.png 10-12, X ButtonCancellable at ForwardB ButtonA ButtonA Button(B Button)
  • For CONR3 STRING.png 10 and 13, switches sides with the final move.
  • For CONR3 STRING.png 11, can hold the final input to extend the move's duration.
  • For CONR3 STRING.png 12, can hold the final input to change the move's effect.
CONR3 STRING.png 11 ForwardB ButtonA ButtonA ButtonB ButtonB ButtonA Button
CONR3 STRING.png 12 ForwardB ButtonA ButtonA ButtonB ButtonA ButtonA Button
CONR3 STRING.png 13 ForwardB ButtonA ButtonA ButtonA ButtonB Button
CONR3 STRING.png 14 BackB ButtonB ButtonB ButtonB ButtonB ButtonB Button
  • For all, switches sides with the first move.
  • For CONR3 STRING.png 18 and CONR3 STRING.png 20, switches sides with the final move.
  • For CONR3 STRING.png 16-19, X ButtonCancellable at BackB ButtonA Button(B Button)
  • For CONR3 STRING.png 15 and CONR3 STRING.png 17, can hold the final input to extend the move's duration.
  • For CONR3 STRING.png 19, can hold the final input to change the move's effect.
CONR3 STRING.png 15 BackB ButtonB ButtonB ButtonA Button
CONR3 STRING.png 16 BackB ButtonA ButtonB ButtonB ButtonB ButtonB ButtonB ButtonB Button
CONR3 STRING.png 17 BackB ButtonA ButtonB ButtonB ButtonB ButtonA Button
CONR3 STRING.png 18 BackB ButtonA ButtonB ButtonB ButtonA Button
CONR3 STRING.png 19 BackB ButtonA ButtonB ButtonA ButtonA Button
CONR3 STRING.png 20 BackB ButtonA ButtonA ButtonB Button
CONR3 STRING.png 21 DownB ButtonB Button
CONR3 STRING.png 22 DownB ButtonA ButtonB ButtonB ButtonB ButtonB ButtonB ButtonB Button
  • For CONR3 STRING.png 22-25, X ButtonCancellable at DownB ButtonA Button(B Button)
  • For CONR3 STRING.png 23, can hold the final input to extend the move's duration.
  • For CONR3 STRING.png 24 and CONR3 STRING.png 26, switches sides with the final move.
  • For CONR3 STRING.png 25, can hold the final input to change the move's effect.
CONR3 STRING.png 23 DownB ButtonA ButtonB ButtonB ButtonB ButtonA Button
CONR3 STRING.png 24 DownB ButtonA ButtonB ButtonB ButtonA Button
CONR3 STRING.png 25 DownB ButtonA ButtonB ButtonA ButtonA Button
CONR3 STRING.png 26 DownB ButtonA ButtonA ButtonB Button
CONR3 STRING.png 27 A ButtonB ButtonB ButtonB ButtonB Button
CONR3 STRING.png 28 A ButtonB ButtonA Button
  • Can hold the final input to extend the move's duration.
CONR3 STRING.png 29 A ButtonA ButtonB ButtonB ButtonB ButtonB ButtonB ButtonB Button
  • For CONR3 STRING.png 29-31, X ButtonCancellable at A ButtonA Button(B Button)
  • For CONR3 STRING.png 29 and CONR3 STRING.png 32, switches sides with the final move.
  • For CONR3 STRING.png 30, can hold the final input to extend the move's duration.
  • For CONR3 STRING.png 31, can hold the final input to change the move's effect.
CONR3 STRING.png 30 A ButtonA ButtonB ButtonB ButtonA Button
CONR3 STRING.png 31 A ButtonA ButtonB ButtonA ButtonA Button
CONR3 STRING.png 32 A ButtonA ButtonA ButtonB Button
CONR3 STRING.png 33 UpA ButtonB Button
  • Switches sides with the final move.
CONR3 STRING.png 34 RunA ButtonA Button
  • Switches sides twice.
CONR3 STRING.png 35 Air AttackB ButtonB Button
  • Switches sides with the first move.
  • Leaves Sasuke in a backturned state upon completion.

Weak Attacks

5B

B Button
SCON4 CS2 Sasuke 5B.png
SCON4 CS2 Sasuke 5B hitbox.png
Damage Hit Level Startup Active Frames Recovery Guard Damage Blockstun Advantage on Hit Advantage on Block
13 High 15 2 29 - - - -10
  • Primary Jab.
  • Can go into B Button(B Button) on whiff.

A basic jab that hits high. BBBB can be a decent meterless combo filler.

Toggle Hitboxes
Toggle Hitboxes

6B

ForwardB Button
SCON4 CS2 Sasuke 6B.png
SCON4 CS2 Sasuke 6B hitbox.png
Damage Hit Level Startup Active Frames Recovery Guard Damage Blockstun Advantage on Hit Advantage on Block
18 Mid 20 2 31 - - - -8

Longer range normal. 6BBBBB leads into a kick that sends the opponent into a wall.

Toggle Hitboxes
Toggle Hitboxes

2B

DownB Button
SCON4 CS2 Sasuke 2B.png
SCON4 CS2 Sasuke 2B hitbox.png
Damage Hit Level Startup Active Frames Recovery Guard Damage Blockstun Advantage on Hit Advantage on Block
13 Low 20 4 27 - - - -11

High crushes. 2BABBB is a solid combo filler.

Flag Data
High Crush frames 15~30
Toggle Hitboxes
Toggle Hitboxes

4B

BackB Button
Damage Hit Level Startup Active Frames Recovery Guard Damage Blockstun Advantage on Hit Advantage on Block
14 High 30 3 26 - - - -8
  • Fully invincible on frames 11~13

CS2 teleports behind the opponent and hits them with a wheel kick, similar to regular SCON4 Sasuke Icon.png Sasuke's SharinganUpA Button. This 4B is the only 4B in the game without autoguard frames, so CS2's ability to use it to escape strings is limited to only when there is about an 11+ frame gap in a string as opposed to whenever there is a 2+ frame gap like everyone else. Since the teleport tracks very strongly, it's great at punishing jump back and closing distance against zoners, and also can work to beat KnJs in the middle of combos if timed well. Even against opponents who like to play around way high up in the air where 4B doesn't hit, the recovery is decent enough to get CS2 close in while also avoiding punishment.

8B

UpB Button
SCON4 CS2 Sasuke 8B.png
SCON4 CS2 Sasuke 8B hitbox.png
Damage Hit Level Startup Active Frames Recovery Guard Damage Blockstun Advantage on Hit Advantage on Block
5, 25 High 15 12 48 - - - -

High-damage hitgrab piledriver that results in a hard knockdown.

Just like Sasuke, 8B is CS2's ideal combo ender whenever supers aren't possible or when conserving chakra because it deals completely unscaled damage when used anywhere in a combo.

Toggle Hitboxes
Toggle Hitboxes

Running B

RunB Button
Damage Hit Level Startup Active Frames Recovery Guard Damage Blockstun Advantage on Hit Advantage on Block
20 Mid 20 2 39 - - - Guard Crush
  • Guard crushes on block
  • Horizontal launch on hit

CS2 charges with a Chidori punch that instantly guard breaks the opponent if they block it. Very strong when performed instant while running, as CS2 can do strings like 5BBBB on block and then IWR running B as a part of a mix-up attempt between strike/throw/guard crush/back hit.

Running B leads into a combo with 5B or 5A if the opponent doesn't shake out from the Guard Crush properly, and CS2 is still at frame advantage if they do.

j.B

Air AttackB Button
Damage Hit Level Startup Active Frames Recovery Guard Damage Blockstun Advantage on Hit Advantage on Block
16 Mid 24 15 Until L + 21 - - - -
  • Launches on hit
  • Landing recovery can be cancelled into any action after 9 frames

Winged air dive that travels in a downward to upward arc. Leaves CS2 airborne if he doesn't hit the ground during the swoop and can string into a second one even on whiff. If CS2 hits the ground on his downward arc, the move will landing cancel which can lead to plus frames and thus a strike/throw mix-up on block, on top of being able to stay very safe on whiff.

Without landing cancelling, only combos into a j.BB or j.A on hit, which are also height dependent. If landing cancelled, it combos into basically anything on hit due to the launch and lack of recovery. Valuable part of CS2 anti-KnJ combo loop with j.B > 2A ad nauseum.

Strong Attacks

5A

A Button
SCON4 CS2 Sasuke 5A.png
Damage Hit Level Startup Active Frames Recovery Guard Damage Blockstun Advantage on Hit Advantage on Block
21 Mid 20 3 43 - - - -

A claw attack that deals chip damage and is optimal for damage in combos whenever possible, and can also hit OTG. Beware the very long whiff recovery.

5A(A) crushes highs during its entire startup up until the frame before it goes active.

6A

ForwardA Button
Damage Hit Level Startup Active Frames Recovery Guard Damage Blockstun Advantage on Hit Advantage on Block
5x(n) - 35 very - - - - -
  • Can be held to continue blowing fire at the cost of chakra
  • Fireballs increase in size the further they travel
  • Minimum 5 fireballs upon use

Slow firebreath. Used almost exclusively as OTG on a missed tech, or to chip out a low health opponent on their wakeup.

2A

DownA Button
Damage Hit Level Startup Active Frames Recovery Guard Damage Blockstun Advantage on Hit Advantage on Block
11 Mid 27 8 - - - - -
  • Can be charged up to 2 times by holding A Button
  • Spinning launches on hit
  • Lifts on block

CS2 does a chakra burst that hits 360 degrees around himself. The launch on hit is extremely high and makes it a great combo tool for most other follow-ups when Y-Cancel, especially since it can anti-KnJ fairly easily and also reset into another combo when it does.

Charging 2A increases its size and damage per stage from the last, however CS2 rarely if ever needs to do this. The charge is more often used for delay to be able to hit a KnJ that's aimed to teleport past and punish 2A.

4A

BackA Button
Damage Hit Level Startup Active Frames Recovery Guard Damage Blockstun Advantage on Hit Advantage on Block
- - 10 26 - - - - -

Average counter, but can be Y-Cancel on activated hit to start a combo.

8A

UpA Button
Damage Hit Level Startup Active Frames Recovery Guard Damage Blockstun Advantage on Hit Advantage on Block
9, 5x3 Mid 14 3(2)1(3)1(3)1 40 - - - -

Low-profiling loop de loop that absolutely cheats neutral with its hurtbox ducking and the fact that it goes across 1/3rd to 1/2 of many stages. Also has many very quick multi-hits, so it beats most 4B on its own by hitting so many times and so rapidly. Punishable on block by everyone, but only with a kunai j.A or a non-divekick air attack (jump forward before your attack), so risk is low.

Running A

RunA Button
Damage Hit Level Startup Active Frames Recovery Guard Damage Blockstun Advantage on Hit Advantage on Block
- - - - - - - - -
  • Invincible on frames 4~5
  • Can be repeated once by pressing A Button again

Running teleport with a set distance that can cross up the opponent if close enough. It also has a follow-up with the same button that will teleport CS2 back to the same side. Can be used as a mix-up to land back hits on the opponent and also bait twitch reactions to BackB Button, especially when executed IWR.

j.A

Air AttackA Button
Damage Hit Level Startup Active Frames Recovery Guard Damage Blockstun Advantage on Hit Advantage on Block
- - 16 Until hit Until landing - - - -

CS2 shoots a heatseeking fireball barrage that has longer range the higher CS2 is in the air. Above average damage for a projectile, and does well for counter-zoning other projectile-intensive characters like SCON4 Tenten Icon.png Tenten and SCON4 Sakura Icon.png Sakura.

Throws

5Y

Y Button
Damage Hit Level Startup Active Frames Recovery Guard Damage Blockstun Advantage on Hit Advantage on Block
20 - 1 1 48 - - - -

Average throw. Follow up with A Button into more claw attacks for optimal damage, certain routes even allowing TOD on low health characters if it's after Billy no Jutsu.

Specials

5X

X Button
Damage Hit Level Startup Active Frames Recovery Guard Damage Blockstun Advantage on Hit Advantage on Block
10, 78 High 23 2 37 - - - -
  • Costs 100% (4 bars) chakra

Flapping Chidori cutscene super. 7 hits max before super (except for wall jank). The starting crouch can low profile highs, but the attack itself is a high so it can be high crushed too.

Flag Data
High Crush frames 6~21

2X

DownX Button
Damage Hit Level Startup Active Frames Recovery Guard Damage Blockstun Advantage on Hit Advantage on Block
60 - 21 very Until L - - - -
  • Costs 75% (3 bars) chakra

CS2 leaps very high into the air very quickly before shooting a giant fireball down. It deals less damage than most other supers, but instead it can quickly get CS2 out of the current situation thanks to to the movement and instant low crush, deal a lot of guard damage, and be used to punish WUK and substitutions handsomely. This super can also hit OTG, and still deals a decent amount of damage when it does.

Flag Data
Low Crush frames 1~end

Strategy

Colors

Default ()
Color 2 ()
Anbu ()
Color 4 ()

Changes from Vanilla

  • Health: decreased from 220 to 200
  • Grabbable Moves: 6A, 2A, JA, 8B landing
  • 5B: hitbox appears one frame later, elbow hitbox does not appear on frame 1
  • 5B(B): hitbox appears one frame later; slightly less lift
  • 4B: hitbox appears one frame later to better match the animation, can be grabbed on startup; moves and appears 3 frames sooner; same strike timing
  • 2B(B): launches higher, launches on block, mid instead of high, hitbox appears later
  • 8B: cannot be subbed until later
  • A8B: is hittable after releasing the opponent
  • 5A: hitbox appears two frames later
  • 5A(A): adjusted high crush frames to make more sense
  • 6A: animation adjusted to not look so jumpy; strings into this new timing adjusted
  • 4A: activation window improved
  • A4A: is unblockable
  • 2A: Damages adjusted: 0C (15 to 11); 1C (15 to 13); 2C: (15)
  • 8A: damage and block damage reduced from 14,10,10,10 to 9,6,6,6
  • RA, RA(A): given three grabbable frames at the startup before the teleport
  • JA: now builds meter and lifts airborne opponents; can be subbed and teched
  • 2X: comes out faster, requires and uses 75%; damage reduced from 80 to 60
  • GRKnJ: moved backwards

Resources

Gameplay footage

Navigation

General
Controls
HUD
FAQ
System
Esoterica
Technical Data
Stages
Strategy
Characters
Anko
Choji
Gaara
Haku
Hinata
Awakened Hinata
Ino
Iruka
Itachi
Jiraiya
Jirobo
Kabuto
Kakashi
Kankuro
Kiba
Kidomaru
Kimimaro
Kisame
Might Guy
Mizuki
Naruto
OTK Naruto
Neji
Orochimaru
Rock Lee
Sakura
Sasuke
CS2 Sasuke
Shikamaru
Sakon & Ukon
Shino
Tayuya
Temari
Tenten
Third Hokage
Tsunade
Zabuza
Archived Information
Glossary
Training Modes
Netplay
Changelog
Resources