Summary
Puppet user Kankuro received some major nerfs from Vanilla to Super, yet remains a strong, versatile pick. He has an adaptive defense which ranges from impenetrability (without trading hits with his puppet, Crow) to completely ineffective against even basic strings. A Kankuro with strong awareness of Crow's positioning can quickly snowball even small advantages into round wins. Despite his low health, he boasts extremely punishing combos, both on standing opponents and juggled ones, and a pair of some of the strongest supers to combo into, his j.X and 2X.
Character Traits
- Strong neutral & zoning game with displaced puppet attacks
- Great mixups and pressure, including incredibly tight throw traps and practical unblockable/sandwich setups
- Standing infinites that force substitution; 5BA loops into itself at walls, 6BA loops into itself anywhere
- Puppet can tank hits for Kankuro, bodyblock the opponent, and also trade to punish the opponent for basic counterplay such as landing throws or stepping attacks.
- Can OTG reliably post-super to gain a bar of chakra or more back from 2X or j.X.
- Kankuro is throwable on all puppet commands, however good luck doing so
- Falls victim to uniquely longer combos and pressure strings if the opponent is hitting his puppet at the same time.
Unique Mechanics and Notes
About Crow
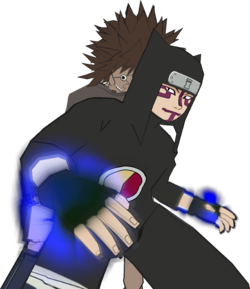
As an actual puppeteer jutsu practitioner in the source material, Kankuro uses his puppet  Crow (also known as Karasu) to fight in a two-on-one style akin to puppet-archetype characters found in more traditional fighting games. The puppet gives Kankuro uniquely strong pressure with his range and sandwich ability. In addition to this, Crow comes with a couple quirks:
- Crow cannot block.
- Holding [4] or [6] will reposition Crow, no matter what Kankuro is doing. Crow can also be commanded to jump in the same manner with any jumping direction (7/8/9).
- Whenever Crow is hit, Kankuro does not take damage; instead, his chakra gauge is drained a bit per hit.
- Crow can be hit by cinematic 5Xs like a regular character, and the super will have no effect on Kankuro himself if this happens. Additionally, only the activator will drain chakra from Kankuro.
- Crow does not have a Ground Throw, while Kankuro does; conversely, Kankuro does not have an Air Throw, while Crow does.
- The opponent can
 attacks that hit Crow. This can be done even if the attack that hits Crow is also blocked by Kankuro.
- Most of Crow's attacks (mainly supers) are always guaranteed to come out once they've been started even if Kankuro gets hit afterward, as long as Crow itself is not hit.
- If Crow is airborne, he will not participate in strings that perform his grounded attacks. For example, if Crow is airborne when Kankuro inputs the
 in his
  string, Crow will perform his
  instead of his grounded string follow-up.
Air R-KnJ
Kankuro has a non-standard air RKnJ; he teleports behind the opponent like normal, but instead of falling with a hammer punch, he floats backward as he summons Crow to perform his () attack lunge. Has a much further area of coverage than the standard air RKnJ as a result.
| Kankuro
|
|
| Health:
|
200
|
| Guard Gauge:
|
1600
|
| Backdash Type:
|
Normal
|
String List
| String #
|
Inputs
|
Notes
|
 01 01
|
|
 Cancellable at () Cancellable at ()- For 04 and 09, can hold the final input to change the move's effect.
- For 05 and 10, switches sides with the second-to-last move.
- For 07 and 12, the final move requires 75% meter to be used.
|
| 02
|
|
| 03
|

|
| 04
|
|
| 05
|
|
| 06
|
|
| 07
|
|
| 08
|
|
| 09
|
|
| 10
|
|
| 11
|
|
| 12
|
|
| 13
|
|
| 14
|
|
- For 15-16, can hold the final input to change the move's effect.
- For 16, switches sides with the second-to-last move.
- For 18, the final move requires 75% meter to be used.
|
| 15
|
|
| 16
|
|
| 17
|
|
| 18
|
|
| 19
|
|
| 20
|
|
- For 21-22, can hold the final input to change the move's effect.
- For 22, switches sides with the second-to-last move.
- For 24, the final move requires 75% meter to be used.
|
| 21
|
|
| 22
|
|
| 23
|
|
| 24
|
|
| 25
|

|
|
| 26
|
|
|
| 27
|
|
|
| 28
|
|
- Can hold the final input to change the move's effect.
|
| 29
|
|
- For 29-30, can hold the final input to change the move's effect.
- For 30, switches sides with the second-to-last move.
- For 33, the final move requires 75% meter to be used.
|
| 30
|
|
| 31
|
|
| 32
|
|
| 33
|
|
| 34
|
|
| 35
|
|
|
| 36
|
|
- The final move requires 75% meter to be used.
|
| 37
|

|
- Quickly inputting after either input (usually done by sliding from to ) will change either move's behavior.
|
Weak Attacks
5B
|
|
| Damage
|
Hit Level
|
Startup
|
Active Frames
|
Recovery
|
Guard Damage
|
Blockstun
|
Advantage on Hit
|
Advantage on Block
|
| 10
|
Mid
|
15
|
3
|
28
|
-
|
19
|
-
|
-10
|
- Primary Jab.
- Can go into () on whiff.
|
|
6B
|
|
| Damage
|
Hit Level
|
Startup
|
Active Frames
|
Recovery
|
Guard Damage
|
Blockstun
|
Advantage on Hit
|
Advantage on Block
|
| 17
|
Mid
|
17
|
9
|
25
|
-
|
22
|
-
|
-10
|
A mid-hitting move that moves Kankuro forward. It's very effective at punishing your opponent's landing after an avoided jump attack.
6BA loops into itself repeatedly on hit no matter where on the stage, as long as Crow is nearby for it. That combo has very useful carry for pushing the opponent to a wall or corner.
Flag Data
| High Crush
|
frames 16~35
|
|
|
2B
|
|
| Damage
|
Hit Level
|
Startup
|
Active Frames
|
Recovery
|
Guard Damage
|
Blockstun
|
Advantage on Hit
|
Advantage on Block
|
| 11
|
Low
|
22
|
3
|
29
|
-
|
18
|
-
|
-12
|
A sweep that high crushes on frame 15(?). It can beat wake up kicks and follow up into further strings even on whiff, making it a good option when pressuring wakeups.
Flag Data
| High Crush
|
frames 15~38
|
|
|
4B
|
|
| Damage
|
Hit Level
|
Startup
|
Active Frames
|
Recovery
|
Guard Damage
|
Blockstun
|
Advantage on Hit
|
Advantage on Block
|
| 20
|
Mid
|
38
|
3
|
28
|
-
|
23
|
-
|
-6
|
One of the worst  in the game. While it has above average guard frames, it also has above average startup, poor range and doesn't give nearly as much reward as a Crow trade if it actually does hit so it must be used much more precisely. At least the push blockstun keeps Kankuro surprisingly safe on block, even in the corner. in the game. While it has above average guard frames, it also has above average startup, poor range and doesn't give nearly as much reward as a Crow trade if it actually does hit so it must be used much more precisely. At least the push blockstun keeps Kankuro surprisingly safe on block, even in the corner.
Flag Data
| Autoguard
|
frames 2~20
|
|
|
8B
|
|
| Damage
|
Hit Level
|
Startup
|
Active Frames
|
Recovery
|
Guard Damage
|
Blockstun
|
Advantage on Hit
|
Advantage on Block
|
| -
|
-
|
-
|
-
|
44 Total
|
-
|
-
|
-
|
-
|
Instead of an attack, Kankuro does a quick vaulting flip forward which can go over the opponent's head when spaced properly. This unusual maneuver can be used as an unsafe escape tool or crossup option to either let Kankuro escape CQC that's not on his terms, or quickly sandwich the opponent between him and Crow for mix.
Flag Data
| Low Crush
|
frames 7~39
|
|
|
Running B
|
|
| Damage
|
Hit Level
|
Startup
|
Active Frames
|
Recovery
|
Guard Damage
|
Blockstun
|
Advantage on Hit
|
Advantage on Block
|
| 18
|
Low
|
16
|
7
|
33
|
-
|
23
|
-
|
-15
|
A sliding kick that has long range and decent blockstun. Punishable by jabs if it connects on early frames, but can hit meaty to stay safe on block. It shines when you pair the high blockstun with an incoming charged smokebomb to pressure cornered opponents with low risk.
Flag Data
| High Crush
|
frames 12~45
|
|
|
j.B
|
|
| Damage
|
Hit Level
|
Startup
|
Active Frames
|
Recovery
|
Guard Damage
|
Blockstun
|
Advantage on Hit
|
Advantage on Block
|
| 11
|
Mid
|
17
|
4
|
Until L + 9
|
-
|
28
|
-
|
-
|
One of the airborne hammer punch attacks. Used to either frametrap / secure more plus frames after , or mash out of strings that lift Kankuro on block.
|
|
Strong Attacks
5A
|
|
| Damage
|
Hit Level
|
Startup
|
Active Frames
|
Recovery
|
Guard Damage
|
Blockstun
|
Advantage on Hit
|
Advantage on Block
|
| 5
|
-
|
36
|
Until Hit
|
-
|
-
|
14
|
-
|
+8
|
- Can be charged by holding
- Frame advantage is recorded with Crow point blank to the opponent and Kankuro is standing, not performing another action (raw 5A)
The cornerstone of Kankuro's offense and defense. A smoke bomb projectile that explodes on walls or on hit, leaving a very active cloud in its wake. The charged version's cloud is extremely large, allowing you to defend yourself in the corner or pressure cornered opponents with a bit of prediction, though it's highly unreliable midscreen without Crow being perfectly lined up with the opponent.
Crow can cancel 5A charge into other attacks without the bomb coming out if they're input immediately after releasing the smoke bomb hold.
|
|
6A
|
|
| Damage
|
Hit Level
|
Startup
|
Active Frames
|
Recovery
|
Guard Damage
|
Blockstun
|
Advantage on Hit
|
Advantage on Block
|
| 16
|
-
|
24
|
-
|
-
|
-
|
14
|
-
|
-5
|
- Frame advantage is recorded with Crow at point blank to the opponent
Crow lunges forward for a mid-hitting move that tracks its opponent. A useful tool for positioning the puppet in front of your opponent, and farther away from Kank, its ideal range. It can also combo into Down A loops on hit for decent reward. Extremely unreliable as a trading tool, as its tracking is only accurate at longer ranges, and even at close range it may be clipped by the same attack you were hoping to trade with given its slow startup.
|
|
2A
|
|
| Damage
|
Hit Level
|
Startup
|
Active Frames
|
Recovery
|
Guard Damage
|
Blockstun
|
Advantage on Hit
|
Advantage on Block
|
| 9
|
-
|
12
|
-
|
-
|
-
|
-
|
-
|
-
|
A fast spinning attack from Crow that lifts the opponent on block, and acts as an effective high-speed close range trade option if the opponent is not lined up for an  , but is next to Crow. Leads into decent damage on hit even at extreme ranges away from Kankuro, as it can be combo'd into itself, either by looping the first hit or through the first four hits comboing into the first four hits again. , but is next to Crow. Leads into decent damage on hit even at extreme ranges away from Kankuro, as it can be combo'd into itself, either by looping the first hit or through the first four hits comboing into the first four hits again.
|
|
4A
|
|
| Damage
|
Hit Level
|
Startup
|
Active Frames
|
Recovery
|
Guard Damage
|
Blockstun
|
Advantage on Hit
|
Advantage on Block
|
| -
|
-
|
-
|
-
|
32 Total
|
-
|
-
|
-
|
-
|
Kankuro pulls Crow back to his position no matter what else he's doing, which can realign Crow with the opponent if he's off-axis or far away. This can also pick Crow up from off the ground if he just got hit by a sweep, or out of the air if he gets launched. Important to note that Kank is invulnerable to mids and highs halfway through the duration of this move until a frame before the end, to where most lows may be too slow to punish on reaction.
Flag Data
| High Crush
|
frames 14~31
|
| Mid Crush
|
frames 14~31
|
|
|
8A
|
|
| Damage
|
Hit Level
|
Startup
|
Active Frames
|
Recovery
|
Guard Damage
|
Blockstun
|
Advantage on Hit
|
Advantage on Block
|
| 7x5
|
-
|
17...
|
-
|
-
|
-
|
14 per kunai
|
-
|
-2(?)
|
- Frame advantage is recorded with Crow at point blank to the opponent
A barrage of kunai launched forward and upward by Crow. Your go-to midscreen trade option when Crow is aligned, and a low-risk check to opponents jumping too recklessly.
|
|
Running A
|
|
| Damage
|
Hit Level
|
Startup
|
Active Frames
|
Recovery
|
Guard Damage
|
Blockstun
|
Advantage on Hit
|
Advantage on Block
|
| 11
|
High
|
8
|
-
|
-
|
-
|
18
|
-
|
-8
|
Basically a while-running version of . It's his fastest poke, and is very useful for stuffing the opponent for trying to move in neutral at range. It's also useful as a panic option while running from an opponent, but is highly unsafe at times. Show restraint in using this move against sidestep-happy opponents.
Depending on spacing and timing, Kankuro can combo into this from projectile attacks such as j.A or 8A, and then combo out of it directly into jab for a juggle combo.
|
|
j.A
|
|
| Damage
|
Hit Level
|
Startup
|
Active Frames
|
Recovery
|
Guard Damage
|
Blockstun
|
Advantage on Hit
|
Advantage on Block
|
| -
|
-
|
-
|
-
|
-
|
-
|
-
|
-
|
-2~3 or so
|
- Frame advantage recorded on Naruto at closest range that the kunais will connect. Worse on block against taller opponents and vice versa.
A multi-kunai attack from Crow in the air. While it can sometimes cost Kankuro an easy way to relieve pressure during lifting blockstrings as Crow isn't always on-axis or even nearby, it still serves an important part of his arsenal as he can use Crow's displacement to put pressure on the opponent at ranges where he doesn't want to move in yet or cannot reach. It covers a wide range and is a strong meterless combo ender, due to its high damage if all kunai connect, and extreme meter gain. Extremely punishable if your opponent sidesteps it at mid range.
Kankuro can also use this during strings that don't originally use if he forces Crow to jump during the string while he's doing his own part.
|
|
Throws
5Y
|
|
| Damage
|
Hit Level
|
Startup
|
Active Frames
|
Recovery
|
Guard Damage
|
Blockstun
|
Advantage on Hit
|
Advantage on Block
|
| 20
|
-
|
1
|
1
|
48
|
-
|
-
|
-
|
-
|
|
|
|
j.Y
|
|
| Damage
|
Hit Level
|
Startup
|
Active Frames
|
Recovery
|
Guard Damage
|
Blockstun
|
Advantage on Hit
|
Advantage on Block
|
| -
|
-
|
-
|
-
|
-
|
-
|
-
|
-
|
-
|
Kankuro only has access to an air throw through Crow.
|
|
Special
5X
|
|
| Damage
|
Hit Level
|
Startup
|
Active Frames
|
Recovery
|
Guard Damage
|
Blockstun
|
Advantage on Hit
|
Advantage on Block
|
| 10, 70
|
-
|
28
|
3
|
43
|
-
|
-
|
-
|
-
|
Kankuro sends Crow to break everything but the opponent's neck. Relatively slow startup, but there's many opportunities to route Kank's BNBs into this. Often inferior to his other two supers, but has utility as an unblockable option on wakeups.
|
|
2X
|
|
| Damage
|
Hit Level
|
Startup
|
Active Frames
|
Recovery
|
Guard Damage
|
Blockstun
|
Advantage on Hit
|
Advantage on Block
|
| 72
|
-
|
19
|
very
|
-
|
-
|
-
|
-
|
-
|
- Costs 75% (3 bars) chakra
Crow launches a stream of kunai at the opponent. One of Kank's trade options that are actually reliable when he's displaced, as Crow can deal a massive amount of damage to the opponent from behind and very quickly, and in some situations where Kank uses it as a combo ender it can actually punish substituting out of it if he's far enough behind too. The main downside is that the kunai spew actually has a deceptively small spread to the sides, so only use this move if your opponent is directly lined up with Crow, otherwise you will be caught without meter and stuck in high lag.
Kankuro can follow up after successful 2X with 2B6B to regain a lot of the meter he just spent, and it can be done fast enough to where the opponent can't substitute after getting loaded with chakra from the super.
|
|
j.X
|
|
| Damage
|
Hit Level
|
Startup
|
Active Frames
|
Recovery
|
Guard Damage
|
Blockstun
|
Advantage on Hit
|
Advantage on Block
|
| 69(?)
|
-
|
-
|
-
|
-
|
-
|
-
|
-
|
-
|
Costs 75% chakra. The meat of Kankuro's punish game. You can combo into this after BBBA loops, dealing high damage and allowing a Running B or Forward B to hit your opponent on the ground to regain more meter. This super has extremely high value for minimal risk, use it as much as possible in your juggles.
|
|
Strategy
Kankuro is a defensive monster, as long as the puppet isn't out of position. An experienced opponent will sidestep frequently at midrange before engaging, trying to get into the puppet's blind spots before approaching to take advantage of Kankuro's abysmal defense and health without Crow to cover him. As Kankuro, your gameplan will heavily revolve around forcing those sidesteps and punishing with your jab, stacking your health lead further and further and stealing the health lead with his incredible punish options such as or his grounded , infinite.
Due to Kankuro's low health and low guard, an opponent can easily shred his health should they whiff punish his jab or other trade options. Notably, attackers can off attacks which launch Crow even while Kankuro is blocking allowing for guard pressure strings only performable against Kankuro. However, due to his high damage and excellent aerial  substitution Kankuro is always able to make a comeback, though he may lose access to his trades at low health.
Despite his strong punish game, it's not advised to rush in and try to mix your opponent at close range with Kankuro himself unless you have to, such as when he has a large health deficit. Kankuro is at his most deadly when he forces his opponent into approaching him in specific ways while controlling the positioning of the two fighters. A patient Kankuro can quickly become a nuisance to play against and in his strongest matchups it can feel like the health lead is all it takes for a game to spiral completely out of his opponent's control.
- () / () sometimes whiffs on block, but if the string connects and the opponent doesn't jump, Kankuro can be plus enough to run up and strike/throw.
- Can be escaped by jumping out after the lift
- / dunk the opponent almost instantly down into landing recovery, allowing for a throw.
- Opponent can actually throw before Kank, so it's ideal to mash out the throw to break a reversal throw
- () sets up for an instant air throw on the opponent with Crow if he's close.
Colors
Changes from Vanilla
List may be outdated
Kankuro:
- 3ME entrances are modified: airborne option is the same air sub as everyone else, grounded version is RB
- Health: decreased from 185 to 180
- Grabbable moves: 6B(A), 8B, 5A, 6A, 6A(A), 4A, 2A, 2A(A), 2AA(A), 2AAA(A), 2AAAA(A), RA, RA(A), 8A, JA
- Health: 185 to 180
- 5B: elbow hitbox appears on the second active frame; two less damage; more float
- 5B(B): hitbox appears and disappears one frame later
- 6B: hitbox disappears one frame sooner
- 6B(A): has six more frames endlag; staggers on hit
- 6BA(B): transition made to end at the normal timing
- 8B strings removed; duration changed from 49 frames to 44 frames (lands on 40)
- 6A: when done in strings has five more frames of endlag
- 5X: starts moving two frames sooner in super freeze
Karasu ("K" affects Kankuro's puppet usage):
- (K) Backdash ends 5 frames sooner
- (K) Sleep stun lasts significantly longer
- (K) Grabbable moves: 8B, 8A, JA
- 5B: strong on block, staggers; elbow hitbox appears on the second active frame
- 6BAAA(A) added by changing 6BAA(A) to RA
- 2B(B) added as 8B
- 8B(B) removed
- (K) 2A, 2A(A), 2AA(A), 2AAA(A) have 4 more damage each
- (K) 5Y grounded throw removed
- (K) Air throw added
Resources
Notable Players
- Disclaimer: This list is derived from community input and is in no way comprehensive or a form of ranking of any kind. Our community criteria can be found here.
Navigation
| General
|
|
| Characters
|
|
| Archived Information
|
|


