Super Naruto: Clash of Ninja 4/Kisame
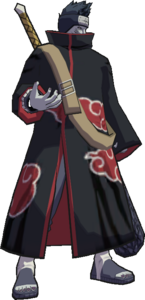
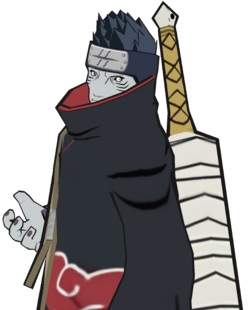
| Kisame
| |
|---|---|
| |
| Health: | 230 |
| Guard Gauge: | 1840 |
| Backdash Type: | Normal |
Summary
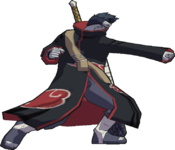
As a clone character, Kisame trades away some of the string prowess and agility of his swordsman brethren ![]() Zabuza, and instead benefits from the chakra-sapping sword Samehada. Similar to his Vanilla incarnation, Kisame emphasizes a simple gameplan with the undeniable power of meter drain.
Zabuza, and instead benefits from the chakra-sapping sword Samehada. Similar to his Vanilla incarnation, Kisame emphasizes a simple gameplan with the undeniable power of meter drain.
Character Traits
- High health and strong guard bar.
- Samehada attacks have long range and drain chakra from the opponent (6A, 8A, 5BBA(A), 5X)
- They're also notably slow to start up and recover. Hard to poke or counterpoke with any of them except j.A.
- Like Zabuza, has an alternate throw that sideswitches on demand and is one of the best combo starters in the game
- Only really has one usable low (2A) and it's very poor, so Kisame is weak to high+mid crush reversals and WUK
- Very weak string pressure. All of Kisame's strings are either really short, really easy to escape or both. Relies on spamming j.A and 5BB for pressure more than anything.
- No projectiles outside of 2X, but at least his sword attacks can deflect some
String List
| String # | Inputs | Notes |
|---|---|---|
| ||
| ||
| ||
| ||
| ||
| ||
| ||
Weak Attacks
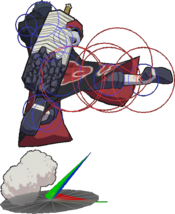
5B
Toggle Hitboxes Toggle Hitboxes
|
|---|
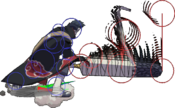
6B
Toggle Hitboxes Toggle Hitboxes
|
|---|
2B
4B
Toggle Hitboxes Toggle Hitboxes
|
|---|
8B
Toggle Hitboxes Toggle Hitboxes
|
|---|
Running B
j.B
Strong Attacks
5A
Toggle Hitboxes Toggle Hitboxes
|
|---|
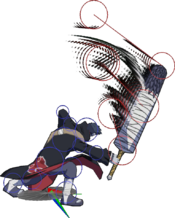
6A
Toggle Hitboxes Toggle Hitboxes
|
|---|
2A
4A
8A
Running A
j.A
Throws
5Y
2Y
Special
5X
Toggle Hitboxes Toggle Hitboxes
|
|---|
2X
Toggle Hitboxes Toggle Hitboxes
|
|---|
Strategy
Like Zabuza, Kisame opens the opponent frequently using his overhead aerial slash, ![]()
![]() . The attack auto-cancels on landing, resulting in plus frames (approximately between 6 and 17 depending on how far Kisame is from the ground when the attack is blocked) and leading to a strike/throw mix. The quickness and range of
. The attack auto-cancels on landing, resulting in plus frames (approximately between 6 and 17 depending on how far Kisame is from the ground when the attack is blocked) and leading to a strike/throw mix. The quickness and range of ![]()
![]() can punish opponents for recklessly mashing in neutral or attempting to take their turn back after a Kisame string, and can also be used defensively to punish blockstrings which lift Kisame into the air.
can punish opponents for recklessly mashing in neutral or attempting to take their turn back after a Kisame string, and can also be used defensively to punish blockstrings which lift Kisame into the air.
As counterplay, once Kisame jumps, the opponent can sidestep to put Kisame off-axis and avoid and punish ![]()
![]() . While
. While ![]()
![]() gives Kisame a powerful mix on block, the vast majority of Kisame's strings past
gives Kisame a powerful mix on block, the vast majority of Kisame's strings past ![]()
![]() are slow and allow the opponent to
are slow and allow the opponent to ![]()
![]() or sidestep to punish Kisame for over-committing. As such, much of Kisame's guard pressure will rely on
or sidestep to punish Kisame for over-committing. As such, much of Kisame's guard pressure will rely on ![]()
![]() ,
, ![]() , and
, and ![]()
![]() .
.
- Zabuza and Kisame's backwalks are faster than most other characters, allowing them to walk backwards out of some blockstrings.
- Phantom Sword: There is a one-frame window just before Kisame lands in which the hitbox of

 will be displaced, resulting in an unblockable attack that also hits to the sides of Kisame.
 - Kisame's signature punish,


 drains chakra both mid-combo and during the super, making it one of the most devastating combos in the game. Kisame can then press his advantage due to his opponent likely being left with little or no meter. The combo requires a just-frame input for 5X, though Kisame's just-frame window is 2 frames due to the amount of active frames on his
  (
( ).
). 
 is a deceptively fast high crush and is a good option against characters with fast high jabs such as Lee or Gai.
 also high crushes and saps chakra. Activated
 saps chakra and can be
  leading to his BnB. Kisame's
 is poor and should be used sparingly.
 , Kisame's only ranged attack, beats projectiles and can be used to whiff punish or punish charged attacks at range. It also hits on-the-ground (OTG) and can finish combos or rounds.
- Against
 Kankuro, Kisame may have trouble cancelling his
 due to the shockwave hitting Karasu. Kisame can instead combo with


 .
.
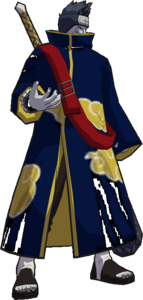
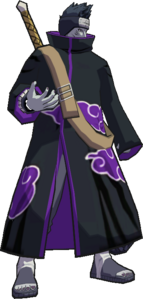
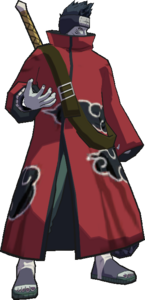
Colors
Changes from Vanilla
(May be outdated. Please contact an editor with further updates.)
- Health: decreased from 240 to 230
- Guard: decreased from 1920 to 1840
- 5Y: does normal overhead throw
- 2Y: is slam throw
- Grabbable Move: JB Ground Hit
- All non sword moves: do -2 damage (except 5B and 5B(B))
- 5B: elbow hitbox appears on active frame 2
- 5BBB(B): can now be delayed
- 6B: staggers
- 2B: ends sooner
- 2B(A): changed to be 6A
- 8B: high crushes on frame 6
- 8B(B): added as 6B with follow ups
- JB: shockwave hitbox is now -1 on hit (was -8)
- 5A: +5 damage and block damage, more lift on hit
- 5A(A): has more lift on hit
- 6A: uncharged juggles better, hitbox appears one frame sooner, hilt hitbox is larger; final hit on 1 and 2 charges is a sweep
- 6A2C: is unblockable; sweep ender is untechable
- 4A: Window for activation improved
- A4A: is unblockable and drains chakra
- 8A: high crush changed from 1-end to 11-32 to match the animation better
- JA: phantom sword glitch applies to both players; hitbox is active for one more frame
- 5X: hitbox appears one frame sooner; drains 50% meter (GNT4 is 47.8%)
- 2X: requires and costs 75%; changed to a single hit from a multi-hit move
- GRKnJ: changed to a custom 6B
Resources & Footage
- Kandle vs Abbock and Lemo, Combo Breaker 2022 top 4 (vs
 Kiba,
Kiba,  Kankuro)
 - Kandle vs Ricky Ant and IceBro, CEOtaku 2022 top 4 (vs
 Kimimaro,
  Kankuro)
