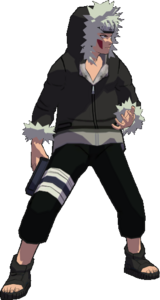
Super Naruto: Clash of Ninja 4/Kiba

From Mizuumi Wiki
Jump to navigation Jump to search

Summary

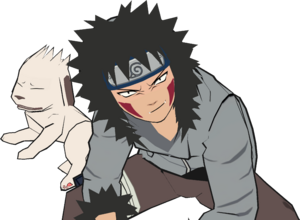
From Vanilla to Super, this character has recieved nothing but quality of life improvements to his setplay style. With the help of his dog Akamaru Akamaru, you can now pull off some nasty crossups into long, meterless combos using both characters and good spacing. The best example of his improvement was the increased window in pulling off the now-developer-celebrated "Dog Glitch", where Kiba puts Akamaru in a state where he is both charging and left alone, allowing for insane pressure from all sides. Kiba has also received improved frame data across the board and has a new move that commands Akamaru to perform a sand-kick.

Character Traits

  • He's got that Dog Glitch with him. Can have a projectile primed and ready to launch for a long while whenever he has the chance to set up.
    • When timed right, this allows Kiba to get some extra unsubbable damage from throws if he gets the restand
  • Plenty of ability to set up into mix-ups such as crossups/unblockables with Akamaru placed well (via Dog Glitch or 2A).
  • Hands down the best high crushes in the game with fast startup and great comboability.
  • Akamaru whiff strings give Kiba plus frames for strike/throw on block and also let him punish counterpoke attempts.
  • 5BBBAA string is an almost fully guaranteed combo on backturned hit. Only has one step point at 5B(B) and it's a 1~2 frame window.

Notes

Akamaru

Akamaru Akamaru is Kiba's small, but ferocious pet ninja dog and fighting partner in this game. Some attacks that Kiba performs additionally have Akamaru follow up as a part of the string.

  • Akamaru slowly follows behind Kiba wherever he walks or runs to in the play area. Normally he will just walk, but the further the two are from one another, the faster Akamaru will run back to Kiba's side.
  • Akamaru only tracks the opponent the moment a standalone or string command to him starts. He does not track or autocorrect while already in motion for an attack.
  • The opponent cannot hit Akamaru at all, neither while he's moving on the ground, nor during his attacks. While Akamaru does possess a collision box, his very short size often prevents him from body-blocking the opponent.
  • Making Kiba block or even hitting Kiba will not stop Akamaru's attack if he's already on his way either, similar to SCON4 Kankuro Icon.png Kankuro & Crow Crow's ability to trade.
  • While Akamaru is attacking and for a short time after Akamaru finishes an attack, Kiba cannot command Akamaru, instead throwing shurikens.

The Dog Glitch

Normally, when Kiba holds down A Button, he is supposed to be forced to kneel where he is while readying Akamaru for his bite attack. However, if the command is pressed, released, and held again on with precise timing (a 2-frame window), Kiba will do the animation to command Akamaru to attack but Akamaru will remain sitting in place. More specifically, after first pressing A Button, you must press and hold down A Button on frame 9 or 10. Once Kiba's animation is done, he will then be freed to do whatever he wants (walk, jump, attack, etc) while he still has Akamaru primed to attack for as long as the player holds A Button. This is called the Dog Glitch, and it allows Kiba to use Akamaru's high-priority lunge both immediately and at almost any time, including while performing other solo attacks, in the middle of his ground and air throw animations, and while he is blocking the opponent's attacks. This bolster's Kiba's offense greatly as he is able to make himself safe or plus on block and whiff at almost any time the opponent is in range of Akamaru, and also has access to an extra attack at times when he normally wouldn't, which is amazing for combos.

The fun part is that this glitch is not only possible off of A Button. Kiba can also set up the Dog Glitch off of ForwardB ButtonDownA Button and RunA ButtonForwardB ButtonDownA Button, making the opponent have to guess against delayed strings vs whether or not Kiba will set up a Dog Glitch for the next interaction. The press and hold timing is the same for each string.

String List

String # Inputs Notes
CONR3 STRING.png 01 B ButtonB ButtonB ButtonB Button
  • X ButtonCancellable at B Button(B Button)
CONR3 STRING.png 02 B ButtonB ButtonB ButtonA ButtonB ButtonB Button
CONR3 STRING.png 03 B ButtonB ButtonB ButtonA ButtonA ButtonB Button
CONR3 STRING.png 04 B ButtonB ButtonA ButtonA ButtonA Button
CONR3 STRING.png 05 ForwardB ButtonB ButtonB Button
CONR3 STRING.png 06 ForwardB ButtonA Button
CONR3 STRING.png 07 ForwardB ButtonDownA Button
  • Can hold the final input to change the move's effect.
CONR3 STRING.png 08 DownB ButtonA Button
CONR3 STRING.png 09 UpB ButtonB ButtonB ButtonB Button X ButtonCancellable at UpB Button(B Button)
CONR3 STRING.png 10 UpB ButtonB ButtonB ButtonA ButtonB ButtonB Button
CONR3 STRING.png 11 UpB ButtonB ButtonB ButtonA ButtonA ButtonB Button
CONR3 STRING.png 12 UpB ButtonB ButtonA ButtonA ButtonA Button
CONR3 STRING.png 13 RunB ButtonB Button
  • Can hold any direction alongside the final input to change the move's behavior.
CONR3 STRING.png 14 Air AttackB ButtonB Button
CONR3 STRING.png 15 ForwardA ButtonB ButtonB Button
CONR3 STRING.png 16 ForwardA ButtonA ButtonB Button
CONR3 STRING.png 17 RunA ButtonB ButtonB ButtonB Button
CONR3 STRING.png 18 RunA ButtonB ButtonA Button
CONR3 STRING.png 19 RunA ButtonB ButtonDownA Button
  • Can hold the final input to change the move's effect.
CONR3 STRING.png 20 RunA ButtonA Button

Weak Attacks

5B

B Button
Damage Hit Level Startup Active Frames Recovery Guard Damage Blockstun Advantage on Hit Advantage on Block
12 High 15 3 27 - - - -11
  • Primary Jab.
  • Can go into B Button(B Button) on whiff.

6B

ForwardB Button
Damage Hit Level Startup Active Frames Recovery Guard Damage Blockstun Advantage on Hit Advantage on Block
15 Mid 24 6 35 - - - -17

A crouching slash launcher with high crush properties. Good for damage when looped into itself repeatedly with 6BA, and the string can also punish counterattacking since the followup commands Akamaru to lunge at the opponent, even on whiff.

Flag Data
High Crush frames 7~20

2B

DownB Button
Damage Hit Level Startup Active Frames Recovery Guard Damage Blockstun Advantage on Hit Advantage on Block
13 Low 15 7 42 - - - -30

A breakdance sweep that is hands down the best high crush in the game due to how quickly and for how long Kiba low profiles attacks. Has a single A Button follow-up, which is a fantastic string as it commands Akamaru to do a slide attack while Kiba recovers (even on whiff), allowing him to be plus on block or punish an opponent's whiff punish attempts on this move. 2BA also lets Kiba convert into a full combo by linking 5B if the Akamaru follow-up hits late enough.

Flag Data
High Crush frames 6~50

4B

BackB Button
Damage Hit Level Startup Active Frames Recovery Guard Damage Blockstun Advantage on Hit Advantage on Block
18 Mid 34 5 23 - - - -9

A slow axe kick that has OK guard frames that then turn into low crush frames. Leads into stagger and deals respectable damage, making it good for follow-ups to Akamaru's bite.

Flag Data
Low Crush frames 23~36
Autoguard frames 2~21

8B

UpB Button
Damage Hit Level Startup Active Frames Recovery Guard Damage Blockstun Advantage on Hit Advantage on Block
12 Mid 19 12 24 - - - -17

Crescent-moon kick. Respectable on block, good juggle tool and leads into 5B(B) for a super-cancel. Surprisingly good at catching air-KnJ since it hits slightly behind Kiba too.

Running B

RunB Button
Damage Hit Level Startup Active Frames Recovery Guard Damage Blockstun Advantage on Hit Advantage on Block
17 Mid 11 18 -37 - -31 - -
  • Airborne on frames 4~??

An incredibly fast rolling attack that goes above lows and can be tilted in 5 different directions after landing. Kiba can roll back to stay relatively safe on block or punish KnJ, and roll forward while at the walls for juggle combos or to frametrap. Insane whiff punish move and can hit OTG on the second roll.

Flag Data
Low Crush frames 4~

j.B

Air AttackB Button
Damage Hit Level Startup Active Frames Recovery Guard Damage Blockstun Advantage on Hit Advantage on Block
15 Mid 25 - - - - - -

Divekick style roll attack, the followups are the same as run BB. Respectable 360 hitbox and can crossup cornered opponents.

Strong Attacks

5A

A Button
Damage Hit Level Startup Active Frames Recovery Guard Damage Blockstun Advantage on Hit Advantage on Block
12 - - - - - - - -

Summon Akamaru for a high lunge attack. If charged, Akamaru will go for an unsubbable bite attack that lasts for about 2 seconds, and has them stunned for about 4. Performing A - release - hold A will trigger the Dog Glitch, which lets Kiba move freely as Akamaru awaits his command to bite (Release A).

Timing for "Dog Glitch": tap and release A to start the command, then hold A again the moment Kiba fully kneels.

6A

ForwardA Button
Damage Hit Level Startup Active Frames Recovery Guard Damage Blockstun Advantage on Hit Advantage on Block
15 - - - - - - - -

2-stage slash attack (BBBAA) with amazing speed and mid properties for a damaging combo starter/filler/block-string tool.

2A

DownA Button
Damage Hit Level Startup Active Frames Recovery Guard Damage Blockstun Advantage on Hit Advantage on Block
10 - - - - - - - -

Holding this will command Akamaru to sit. Awww! Let go and he performs an area-of-effect sand kick attack that heavily push-backs on block, and staggers on hit.

4A

BackA Button
Damage Hit Level Startup Active Frames Recovery Guard Damage Blockstun Advantage on Hit Advantage on Block
- - 11 25 - - - - -

Standard counter move that staggers on activation hit.

8A

UpA Button
Damage Hit Level Startup Active Frames Recovery Guard Damage Blockstun Advantage on Hit Advantage on Block
5×4 - - - - - - - -

Standard up-shuriken

Flag Data
High Crush frames 3~6

Running A

RunA Button
Damage Hit Level Startup Active Frames Recovery Guard Damage Blockstun Advantage on Hit Advantage on Block
13 Mid 17 7 25 - - - -

A sliding elbow jab straight from the anime. Amazing for tick throws on characters with low or normal walk speed. The A followup is pretty bad.

Flag Data
High Crush frames 8~39

j.A

Air AttackA Button
Damage Hit Level Startup Active Frames Recovery Guard Damage Blockstun Advantage on Hit Advantage on Block
5×2 - - - - - - - -

Air shuriken (standard air shanks)

Throws

5Y

Y Button
Damage Hit Level Startup Active Frames Recovery Guard Damage Blockstun Advantage on Hit Advantage on Block
20 - 1 1 48 - - - -
  • Description

j.Y

Air AttackY Button
Damage Hit Level Startup Active Frames Recovery Guard Damage Blockstun Advantage on Hit Advantage on Block
- - - - - - - - -
  • Description

Special

5X / 6X

X Button
Version Damage Hit Level Startup Active Frames Recovery Guard Damage Blockstun Advantage on Hit Advantage on Block
5X 10, 9×4, 24 Mid 21 5 29 - - - Unblockable
6X 10, 9×4, 24 Mid 21 3 37 - - - Unblockable
5X

This super high crushes on the very first frame all the way to the first active, making it a true high crush. Good for when you don't have Akamaru set up during a combo and you need some form of a finisher. Also useful against characters with high jabs and other high-hitting neutral tools (i.e. against SCON4 Itachi Icon.png Itachi 6B).


6X

Inputting with 6X will change the activator of this super into a long-range claw lunge (reuses the same as SCON4 OTK Naruto Icon.png OTK Naruto's 5X so you know it's horrific), exchanging the high crush for low crush frames instead but not as potent.


5X flag data
Flag Data
High Crush frames 1~21

6X flag data
Flag Data
Low Crush frames 10~25

2X

DownX Button
Damage Hit Level Startup Active Frames Recovery Guard Damage Blockstun Advantage on Hit Advantage on Block
10, 81 Mid 27 4 30 - - - -

Kiba scuttles forward before doing almost the same super as 5X but with more hits. Uniquely, holding [X] with Akamaru available will also make the dog do an unblockable lunge at the opponent, dealing small damage on his own but enabling some dog shenanigans.

Fundamentally, 2X does more damage than 5X, but has a longer startup and only high crushes at later frames. Struggles to be used as a combo ender thanks to the movement and startup, but instead is the optimal choice in damage when used as a follow-up to Akamaru's bite or in unblockable setups with Dog Glitch.

2[X] adding Akamaru to the move makes it much more interesting, though. Akamaru's lunge can be used to help add bonus damage to a connect or a surprise at range since he will still track and then lunge at the opponent no matter where he is on the stage, and he can also trade with opponents whose mids/lows are going to hit Kiba. Sometimes there is the issue where in some close range scenarios Akamaru can potentially ruin the combo or connect as Akamaru's hit tends to hit first in CQC and is subbable unlike the activator. There's also the fact that he can sometimes punish KnJ if 2X is combo'd into while he is close (such as at stage edges).

Flag Data
High Crush frames 8~22

Strategy

Colors

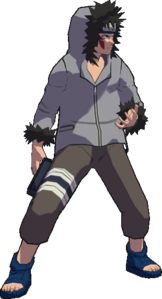
Default ()
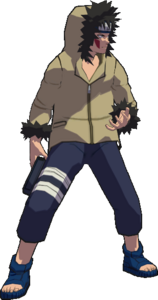
Color 2 ()
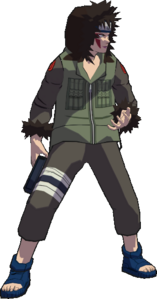
Color 3 ()
Color 4 ()

Navigation

General
Controls
HUD
FAQ
System
Esoterica
Technical Data
Stages
Strategy
Characters
Anko
Choji
Gaara
Haku
Hinata
Awakened Hinata
Ino
Iruka
Itachi
Jiraiya
Jirobo
Kabuto
Kakashi
Kankuro
Kiba
Kidomaru
Kimimaro
Kisame
Might Guy
Mizuki
Naruto
OTK Naruto
Neji
Orochimaru
Rock Lee
Sakura
Sasuke
CS2 Sasuke
Shikamaru
Sakon & Ukon
Shino
Tayuya
Temari
Tenten
Third Hokage
Tsunade
Zabuza
Archived Information
Glossary
Training Modes
Netplay
Changelog
Resources