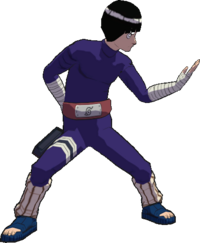
Summary
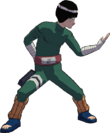
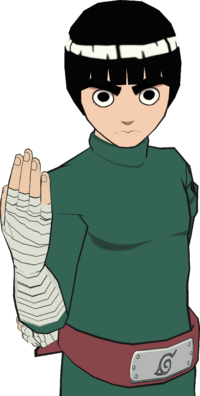
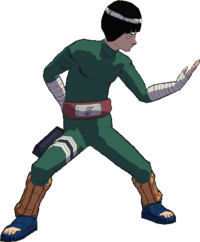
Taijutsu specialist Rock Lee focuses on overwhelming the opponent with his fast, safe buttons, block pressure mixups and lengthy, flying-screen combos. While he can be walled by zoners due to his limited options at range, he packs a punch once he is in his opponent's face. His two 4X chakra gate-releases serve as invincible reversals which also level up Lee's damage and give him access to new abilities, including his Full Gate 5X: the Hidden Lotus, a devastating, full screen teleport super.
Character Traits
- Fastest jab in the game. Lee can hard punish lots of moves on block that other characters can't, and he has the upper hand in plenty of scrambles.
- Can unlock Gates to increase his damage output and augment his moveset for the better. Gate unlocks also double as invincible reversals, a rarity in this game.
- Sports Hyuuga Cancels for string pressure resets and mix-ups.
- Incredibly good wall/corner carry with his flying screen combo parts of BBBB(A) and 8BA.
- Completely lacks any ranged options at all, his best equivalent is making himself into a projectile with run B... purely H2H character.
- Unimpressive damage without gates unlocked.
Notes
- Eight Gates: Rock Lee can
 open the Gate of Rest and the Gate of Life, with each Gate enhancing his abilities.
| Rock Lee
|

|
| Health:
|
220
|
| Guard Gauge:
|
1760
|
| Backdash Type:
|
Normal
|
String List
| String #
|
Inputs
|
Notes
|
 01 01
|
    
|
 Cancellable at Cancellable at  ( ( ) )- For
 02, can 02, can     
- For
 03-04, can 03-04, can     
|
 02 02
|
   
|
 03 03
|
    
|
 04 04
|
    
|
 05 05
|
    
|
|
 06 06
|
   
|
|
 07 07
|
    
|
|
 08 08
|
    
|
 09 09
|
   
|
|
 10 10
|
  
|
|
 11 11
|
    
|
- For all, can hold the first input to change the move's effect.
- For
 12, can 12, can      . .
|
 12 12
|
   
|
 13 13
|
  
|
 14 14
|
    
|
|
 15 15
|
    
|
 16 16
|
  
|
|
 17 17
|
  
|
|
 18 18
|
    
|
 Cancellable at Cancellable at  ( ( ) )- For
 19, can 19, can     
- For
 20-21, can 20-21, can     
|
 19 19
|
   
|
 20 20
|
    
|
 21 21
|
    
|
 22 22
|
   
|
|
 23 23
|
    
|
|
 24 24
|
    
|
Weak Attacks
5B
|
|
| Damage
|
Hit Level
|
Startup
|
Active Frames
|
Recovery
|
Guard Damage
|
Blockstun
|
Advantage on Hit
|
Advantage on Block
|
0G: 10
1G: 12
2G: 15
|
High
|
11
|
2
|
26
|
-
|
19
|
-
|
-
|
- Can go into
 ( ( ) on whiff. ) on whiff.
11f jab- one of the best in the game due to the speed and additionally has very fast recovery.
|
|
Toggle Hitboxes Toggle Hitboxes
|
6B
|
|
| Damage
|
Hit Level
|
Startup
|
Active Frames
|
Recovery
|
Guard Damage
|
Blockstun
|
Advantage on Hit
|
Advantage on Block
|
0G: 14
1G: 17
2G: 22
|
Mid
|
20
|
3
|
31
|
-
|
-
|
-
|
-
|
|
|
|
Toggle Hitboxes Toggle Hitboxes
|
2B
|
|
| Damage
|
Hit Level
|
Startup
|
Active Frames
|
Recovery
|
Guard Damage
|
Blockstun
|
Advantage on Hit
|
Advantage on Block
|
0G: 11
1G: 14
2G: 18
|
Low
|
29
|
1
|
36
|
-
|
-
|
-
|
-
|
A stomping ground shockwave. Incredibly slow low, but hits 360 degrees around Lee. If timed to hit frame perfectly when the opponent hits the ground from a launch (very difficult), it can pop them back up for a combo extension.
|
|
Toggle Hitboxes Toggle Hitboxes
|
4B
|
|
| Damage
|
Hit Level
|
Startup
|
Active Frames
|
Recovery
|
Guard Damage
|
Blockstun
|
Advantage on Hit
|
Advantage on Block
|
0G: 12 [19]
1G: 16 [26]
2G: 20 [34]
|
Mid
|
30~?
|
3
|
30
|
-
|
23
|
-
|
-9
|
Guard frame attack where Lee leans back and then steps into a gut punch, which can continue into strings on connect. Can be charged and has extra guard frames when released. 1G charged deals about half the opponent's guard bar; 2G charged is an instant guard break.
Flag Data
| Autoguard
|
frames 2~22
|
|
|
Toggle Hitboxes Toggle Hitboxes
|
8B
|
|
| Damage
|
Hit Level
|
Startup
|
Active Frames
|
Recovery
|
Guard Damage
|
Blockstun
|
Advantage on Hit
|
Advantage on Block
|
0G: 9x2
1G: 12x2
2G: 15x2
|
High
|
14
|
3(14)3
|
-
|
-
|
-
|
-
|
-
|
Lifting double kicks. His most consistent combo pickup on flying launch near walls.
Flag Data
| Low Crush
|
frames 15~
|
|
|
Toggle Hitboxes Toggle Hitboxes
|
Running B
|
|
| Damage
|
Hit Level
|
Startup
|
Active Frames
|
Recovery
|
Guard Damage
|
Blockstun
|
Advantage on Hit
|
Advantage on Block
|
0G: 16
1G: 21
2G: 27
|
High
|
19
|
8
|
-
|
-
|
-
|
-
|
-
|
A flying kick with very high range; great as a whiff punish option. Can be Y-cancelled into a combo when close to walls.
Flag Data
| Low Crush
|
frames 14~
|
|
|
Toggle Hitboxes Toggle Hitboxes
|
j.B
|
|
| Damage
|
Hit Level
|
Startup
|
Active Frames
|
Recovery
|
Guard Damage
|
Blockstun
|
Advantage on Hit
|
Advantage on Block
|
0G: 21
1G/2G: 29
|
Mid
|
25
|
Until landing
|
-
|
-
|
-
|
-
|
-
|
A basic divekick. Good combo filler due to its high damage.
|
|
Toggle Hitboxes Toggle Hitboxes
|
Strong Attacks
5A
|
|
| Damage
|
Hit Level
|
Startup
|
Active Frames
|
Recovery
|
Guard Damage
|
Blockstun
|
Advantage on Hit
|
Advantage on Block
|
0G: 12
1G: 15
2G: 19
|
Mid
|
14
|
5
|
33
|
-
|
-
|
-
|
-
|
A palm strike; Lee's palm behind him also has a hitbox; functions like a mid jab since it has similar strings to 5B.
|
|
Toggle Hitboxes Toggle Hitboxes
|
6A
|
|
| Damage
|
Hit Level
|
Startup
|
Active Frames
|
Recovery
|
Guard Damage
|
Blockstun
|
Advantage on Hit
|
Advantage on Block
|
0G: 3, 25
1G: 4, 31
2G: 5, 38
|
High
|
22
|
3(18)5
|
35
|
-
|
-
|
-
|
-
|
Leaf hurricane; starts up faster than Guy's version, but doesn't allow combos after. Good damage and useful as a combo finisher.
Flag Data
| Low Crush
|
frames 18~
|
|
|
Toggle Hitboxes Toggle Hitboxes
|
2A
|
|
| Damage
|
Hit Level
|
Startup
|
Active Frames
|
Recovery
|
Guard Damage
|
Blockstun
|
Advantage on Hit
|
Advantage on Block
|
0G: 12
1G: 15
2G: 19
|
Low
|
18
|
4
|
28 [20]
|
-
|
23
|
-
|
-8 [+1]
|
Leaf whirlwind; a sweep that becomes remarkably better in gates; after gate release(s), recovery is able to be cancelled early with other attacks and links into 5B on hit.
Flag Data
| High Crush
|
frames 16~40
|
|
|
Toggle Hitboxes Toggle Hitboxes
|
4A
|
|
| Damage
|
Hit Level
|
Startup
|
Active Frames
|
Recovery
|
Guard Damage
|
Blockstun
|
Advantage on Hit
|
Advantage on Block
|
| -
|
-
|
8
|
28
|
18
|
-
|
-
|
-
|
-
|
One of the best counters in the game; catches attacks faster than most and allows a guaranteed 5X
|
|
Toggle Hitboxes Toggle Hitboxes
|
8A
|
|
| Damage
|
Hit Level
|
Startup
|
Active Frames
|
Recovery
|
Guard Damage
|
Blockstun
|
Advantage on Hit
|
Advantage on Block
|
0G: 11
1G: 7, 12
2G: 9, 14
|
[High], Mid
|
[8], 29
|
4
|
26
|
-
|
-
|
-
|
-
|
His signature overhead kick first performed on Gaara. When in at least one Gate, Lee has a hitbox on his knee while rising, however it can whiff even at point blank on certain characters. Ground bounces the opponent.
Flag Data
| Low Crush
|
frames 7~
|
|
|
Toggle Hitboxes Toggle Hitboxes
|
Running A
|
|
| Damage
|
Hit Level
|
Startup
|
Active Frames
|
Recovery
|
Guard Damage
|
Blockstun
|
Advantage on Hit
|
Advantage on Block
|
| 20
|
Mid
|
-
|
-
|
-
|
-
|
-
|
-
|
-
|
When gateless, run A is a running slam that pushes on block; 1G turns into a running teleport with a set distance; in 2G, the running teleport tracks behind the opponent regardless of distance.
|
|
Toggle Hitboxes Toggle Hitboxes
|
j.A
|
|
| Damage
|
Hit Level
|
Startup
|
Active Frames
|
Recovery
|
Guard Damage
|
Blockstun
|
Advantage on Hit
|
Advantage on Block
|
0G: 14
1G: 17
2G: 21
|
Mid
|
18
|
4
|
-
|
-
|
-
|
-
|
-
|
An overhead slam. Ground bounces on hit and crumples and pushes on block. Good air-to-air option.
|
|
Toggle Hitboxes Toggle Hitboxes
|
Throws
5Y
|
|
| Damage
|
Hit Level
|
Startup
|
Active Frames
|
Recovery
|
Guard Damage
|
Blockstun
|
Advantage on Hit
|
Advantage on Block
|
| 20
|
-
|
1
|
1
|
48
|
-
|
-
|
-
|
-
|
|
|
|
Gate j.Y
|
|
| Damage
|
Hit Level
|
Startup
|
Active Frames
|
Recovery
|
Guard Damage
|
Blockstun
|
Advantage on Hit
|
Advantage on Block
|
| 20
|
-
|
1
|
-
|
-
|
-
|
-
|
-
|
-
|
Going gates unlocks Lee's air throw, which is a good tool to dissuade jumping after his Hyuuga cancels.
|
|
2 Gate j.Y
|
|
| Damage
|
Hit Level
|
Startup
|
Active Frames
|
Recovery
|
Guard Damage
|
Blockstun
|
Advantage on Hit
|
Advantage on Block
|
| 35
|
-
|
1
|
-
|
-
|
-
|
-
|
-
|
-
|
After 2G, Lee's air throw gets a buff; it has a smaller tech window, deals more damage, leaves the opponent next to Lee and has a special throw animation.
|
|
Special
5X
|
|
| Damage
|
Hit Level
|
Startup
|
Active Frames
|
Recovery
|
Guard Damage
|
Blockstun
|
Advantage on Hit
|
Advantage on Block
|
| -
|
High
|
21
|
3
|
59
|
-
|
-
|
-
|
-
|
Lee kicks the opponent up into a piledriver. This super is Lee's fastest low crush, but also has bad range and easily punishable recovery. Combos easily after flying screen launches when close to stage edges.
Flag Data
| High Crush
|
frames 6~
|
|
|
Toggle Hitboxes Toggle Hitboxes
|
4X
|
|
| Damage
|
Hit Level
|
Startup
|
Active Frames
|
Recovery
|
Guard Damage
|
Blockstun
|
Advantage on Hit
|
Advantage on Block
|
| -
|
Mid
|
19
|
8
|
22
|
-
|
-
|
-
|
-
|
- Costs 50% (2 bars) chakra for the first activation, and 75% (3 bars) chakra for the second activation.
- Activation burst pushes on block
- Invincible on frames 1~20
Signature transformation super; Lee unlocks one of his two inner Gates whenever this is used, which buffs his offense in various ways for the rest of the round each time.
1 Gate grants Lee a damage buff to most attacks and some technical buffs to strings and moves, such as reducing the recovery on   , giving his , giving his   a fast rising hitbox, and increasing guard bar damage on his a fast rising hitbox, and increasing guard bar damage on his   . 2 Gates retains the buffs from 1 Gate but also gives him an even larger damage buff, makes every attack he lands a super cancel point, and also gives him access to his 2 Gates exclusive super: Hidden Lotus, however Lee's health starts to drain itself out for the rest of the round. . 2 Gates retains the buffs from 1 Gate but also gives him an even larger damage buff, makes every attack he lands a super cancel point, and also gives him access to his 2 Gates exclusive super: Hidden Lotus, however Lee's health starts to drain itself out for the rest of the round.
Both Gates activation bursts can use their invincibility from frame 1 paired with the 360 hitbox to function as a true reversal, meaning that Lee can make the choice of either rushing his Gates to get to his augmented moveset as soon as he has the meter, or relying on them as reversals against opponents with strong offense.
|
|
Toggle Hitboxes Toggle Hitboxes
|
Gate 5X
|
|
| Damage
|
Hit Level
|
Startup
|
Active Frames
|
Recovery
|
Guard Damage
|
Blockstun
|
Advantage on Hit
|
Advantage on Block
|
| -
|
-
|
-
|
-
|
-
|
-
|
-
|
-
|
-
|
Same as gateless 5X, but deals more damage.
|
|
Toggle Hitboxes Toggle Hitboxes
|
2 Gate 5X
|
|
| Damage
|
Hit Level
|
Startup
|
Active Frames
|
Recovery
|
Guard Damage
|
Blockstun
|
Advantage on Hit
|
Advantage on Block
|
| 115
|
High
|
21
|
2
|
60
|
-
|
-
|
-
|
-
|
- Costs 100% (4 bars) chakra
- Invincible on frames 1~6
Lee's 2 Gates exclusive cinematic super where he teleports to wherever the opponent is on the stage and attempts to hit them with a standard unblockable activator, and on hit, pinballs them in the air with strikes at unreal speeds before bashing them to the ground.
Hidden Lotus is one of the strongest if not the strongest super in the game. It tracks anywhere on the ground, deals half a health bar's worth of damage or more against a majority of characters, and can be confirmed into from just about anything thanks to Gates 2's super cancels, including on block. Despite its strength, getting to use this super is so meter intensive that by the time you get enough bar for it, you could have probably killed them with normal 1 Gate or Gateless combos and supers.
Flag Data
| High Crush
|
frames 6~
|
|
|
Toggle Hitboxes Toggle Hitboxes
|
Strategy
In addition to increased damage, many of Lee's move properties change as he releases gates with 
 .
.


 : Less recovery making the attack plus on block. Mix opponent by going for grab, jab, or even another 2A. Becomes a combo starter as it links to
  .
.

 : Now does half guard damage! Obviously good for guard breaking.
- Gate 2

 : Now breaks complete guard! Self explanatory why that is good.
- Gate 2

 : Becomes neutral on block. Still not the best option to do on blocking opponent.
 or Gate 2
 : Changes running fist into teleport. Great for approaching when difficult to otherwise, can also reposition yourself when knocking down the opponent.
  is a set-distance teleport, Gate 2 tracks to the back of the opponent.
 or Gate 2
 :
:  unlocks Lee's air throw. Good pressure tool combined with 5BBAA. Gate 2
 has a shorter window to tech than any other techable grab in the game, does more damage, leaves the opponent next to Lee and has a special animation.
 : Increased damage
- Gate 2
 : Highest damaging super in the game outside of Sasuke and Kakashi's full chidori charge. Lee can super cancel off of every grounded move while in Gate 2.


 is unavoidable after the final backfist due the push on block leaving the victim stuck in their guarding animation.
Similar to the Hyuugas and Tsunade, Lee can feint or "Hyuuga-cancel" certain moves by pressing  during the start up of the attack, improving Lee's guard pressure and allowing him to perform strike/throw mixes.
Hyuuga-cancelable Strings:
Colors
Changes from Vanilla
- List may be outdated
- Works like a level up character with 2G mode having no passive life or meter drain
- Damages adjusted between all forms:
- 5B: 9,13,17 > 9,12,15
- 6B: 11, 17, 22 > 11,15,19
- 4B: 12,18,23 > 12,16,20
- 4B1C: 18, 27, 35 > 18,26,34
- 2B: 10,15,19 > 10,14,18
- RB: 15,22,28 > 15,21,27
- 5A: 11,17,22 > 11,15,19
- 6A: 9,14,18; 18, 24, 30 > 9,13,17 > 18,22,26
- 2A: 11,17,22 > 11,15,19
- JB: 21,28,34 > 21,25,29
- JA: 13,19,24 > 13,17,21
- 8B: 0,7,9; 10,13,17 > 0,7,9; 10,12,14
- 8A: 8,12,15
- 5BB: 8,12,15
- 6BA: 18,26,30 > 18,22,26
- 4BB: 12,18,23 > 12,16,20
- 5BBAA: 15,22,28 > 15,19,23
- 8BA: 15,22,28 > 15,19,23
- 5BBA: 12,22,28 > 12,16,20
- 6B(A):, JB, 6A second hit, 8A, Throw damage adjusted across the three states
- 5B: has more lift
- 5B(B): recovers one frame slower
- 5BBA(A): has more lift and a hyuuga cancel before he leaves the ground
- 5B(A): Added
- 6B: replaced with 4B(B) animation, no launch, when done in a string does vanilla 6B that ends 6 frames sooner
- 6B(A): Hyuuga cancel added
- 1G: Untechable knockdown
- 2G: Untechable bounce
- 4B: charged:
- 1G: 3x guard damage
- 2G: Instant guard break
- 4B(B): high crush from 13-36
- 2B: changed to have better hit and block stun
- 8B: first hit lifts on block
- JB: has slighty adjusted launch direction and slightly more lift
- 5A: has more lift
- 1G: Deflects projectiles
- 2G: Staggers on hit
- 6A: first hit has increased hitstun , lifts higher on block, direction of hit changed; second hit size increased
- 1G: First hit lifts on block, second hit pushes on block
- 2G: Second hit hard knockdown
- 4A: active window is increased
- A4A; can only be subbed the first frame
- 2A has more lift on hit
- 1G: Ends sooner
- 2G: Lifts instead of sweeps
- 8A: has more block damage, made strong on block
- 1G: Has an initial hit on the way up
- 2G: Untechable bounce on the second hit
- RA: is unchanged in no gates, is a set distance teleport with 1G open, is a set distance appearance teleport with 2G open and less startup than 1G
- JY:
- 0G: Nothing
- 1G: Normal Air throw
- 2G: Special lotus air throw
- 5X: does Gaara version of the super on everyone, damage is 55; activator does 10 damage
- 1G5X: does 65 damage with the vanilla version; activator does 10 damage
- 2G5X: does 110 damage from 146
- 4X: requires 50% and takes 50%
- 1G4X: requires 75% and takes 100%; hard knockdown
- GRKnJ: moved further back on appearance; made a mid from a high
Resources
Guides and Info
Notable Players
- Disclaimer: This list is derived from community input and is in no way comprehensive or a form of ranking of any kind. Our community criteria can be found here.
| Name
|
Usual Color
|
Region
|
Contact
|
Example Play
|
| Leeshmow
|

|

United States
|
Unavailable
|
Tournament Footage
|
Navigation
| General
|
|
| Characters
|
|
| Archived Information
|
|
 open the Gate of Rest and the Gate of Life, with each Gate enhancing his abilities.
![]()
![]() .
.


 : Less recovery making the attack plus on block. Mix opponent by going for grab, jab, or even another 2A. Becomes a combo starter as it links to
  .
.

 : Now does half guard damage! Obviously good for guard breaking.
 : Now breaks complete guard! Self explanatory why that is good.
 : Becomes neutral on block. Still not the best option to do on blocking opponent.
 or Gate 2
 : Changes running fist into teleport. Great for approaching when difficult to otherwise, can also reposition yourself when knocking down the opponent.
  is a set-distance teleport, Gate 2 tracks to the back of the opponent.
 or Gate 2
 :
:  unlocks Lee's air throw. Good pressure tool combined with 5BBAA. Gate 2
 has a shorter window to tech than any other techable grab in the game, does more damage, leaves the opponent next to Lee and has a special animation.
 : Increased damage
 : Highest damaging super in the game outside of Sasuke and Kakashi's full chidori charge. Lee can super cancel off of every grounded move while in Gate 2.


 is unavoidable after the final backfist due the push on block leaving the victim stuck in their guarding animation.
![]() during the start up of the attack, improving Lee's guard pressure and allowing him to perform strike/throw mixes.
during the start up of the attack, improving Lee's guard pressure and allowing him to perform strike/throw mixes.
