Super Naruto: Clash of Ninja 4/Orochimaru

From Mizuumi Wiki
Jump to navigation Jump to search
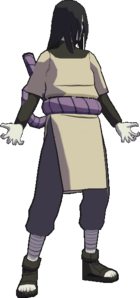
Orochimaru

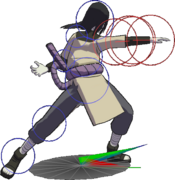
SCON4 Orochimaru Portrait.png
Health: 220
Guard Gauge: 1760
Backdash Type: Normal


Summary

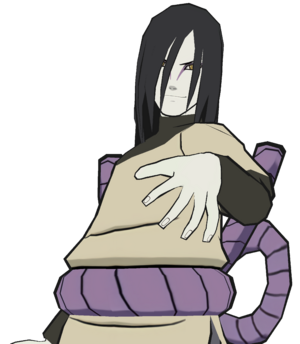
At a first glance, Orochimaru seems to be built like a fundamentals character — good, basic B buttons, above-average kunai projectiles, a 4A teleport and useful but not busted jump attacks. His 5X super is, however, a game-changer. The snake Sannin's Five-Pronged Seal jutsu takes away all of his victim's chakra and prevents them from gaining back their meter for 10 seconds, leaving them completely at Orochimaru's mercy.

Notes

String List

String # Inputs Notes
CONR3 STRING.png 01 B ButtonB ButtonB ButtonB ButtonB ButtonB Button
  • X ButtonCancellable at B Button(B Button)
  • For CONR3 STRING.png 03, switches sides with the final move; can hold Forward until reappearance to prevent.
CONR3 STRING.png 02 B ButtonB ButtonB ButtonB ButtonB ButtonA Button
CONR3 STRING.png 03 B ButtonB ButtonB ButtonB ButtonA Button
CONR3 STRING.png 04 B ButtonB ButtonB ButtonA ButtonA Button
CONR3 STRING.png 05 ForwardB ButtonB ButtonB Button
CONR3 STRING.png 06 ForwardB ButtonB ButtonA Button
CONR3 STRING.png 07 ForwardB ButtonA ButtonA ButtonA Button
CONR3 STRING.png 08 ForwardB ButtonA ButtonB ButtonB Button
CONR3 STRING.png 09 ForwardB ButtonA ButtonB ButtonA Button
CONR3 STRING.png 10 BackB ButtonA Button
  • Can hold the final input to extend the move's duration.
CONR3 STRING.png 11 DownB ButtonB ButtonB ButtonB ButtonB Button
CONR3 STRING.png 12 DownB ButtonB ButtonB ButtonB ButtonA Button
CONR3 STRING.png 13 DownB ButtonB ButtonB ButtonA Button
  • Switches sides with the final move; can hold Forward until reappearance to prevent.
CONR3 STRING.png 14 DownB ButtonB ButtonA ButtonA Button
CONR3 STRING.png 15 DownB ButtonA Button
CONR3 STRING.png 16 RunB ButtonB Button
CONR3 STRING.png 17 RunB ButtonA Button
CONR3 STRING.png 18 A ButtonA Button
  • Can hold the first input to change the move's effect.
CONR3 STRING.png 19 DownA ButtonB ButtonB Button
CONR3 STRING.png 20 DownA ButtonB ButtonA Button
CONR3 STRING.png 21 DownA ButtonA ButtonA Button

Weak Attacks

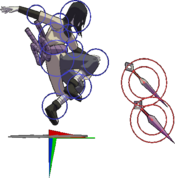
5B

B Button
SCON4 Orochimaru 5B.png
SCON4 Orochimaru 5B hitbox.png
Damage Hit Level Startup Active Frames Recovery Guard Damage Blockstun Advantage on Hit Advantage on Block
13 High 13 2 29 - - - -
  • Primary Jab.
  • Can go into B Button(B Button) on whiff.
Toggle Hitboxes
Toggle Hitboxes

6B

ForwardB Button
SCON4 Orochimaru 6B.png
SCON4 Orochimaru 6B hitbox.png
Damage Hit Level Startup Active Frames Recovery Guard Damage Blockstun Advantage on Hit Advantage on Block
18 Mid 17 6 35 - - - -
  • Staggers on hit
Toggle Hitboxes
Toggle Hitboxes

2B

DownB Button
SCON4 Orochimaru 2B.png
SCON4 Orochimaru 2B hitbox.png
Damage Hit Level Startup Active Frames Recovery Guard Damage Blockstun Advantage on Hit Advantage on Block
12 Low 14 4 33 - - - -

One of the fastest lows in the game. If the opponent techs the landing, they are forced to forward roll.

Flag Data
High Crush frames 9~34
Toggle Hitboxes
Toggle Hitboxes

4B

BackB Button
Damage Hit Level Startup Active Frames Recovery Guard Damage Blockstun Advantage on Hit Advantage on Block
10, 12 Mid 17 7(22)6 - - - - -
  • 2nd hit launches on hit

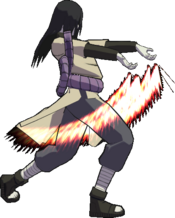
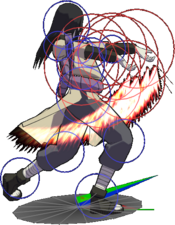
Orochimaru's 4B is the 3rd fastest in the game, but it must be precisely timed due to its small number of guard frames. This is a two-part attack- the first hit is short range and may whiff, though because Oro leans back during the move's startup, he may avoid the incoming attack entirely before connecting with his second swipe. The launching second hit can be linked into 2B to continue a combo, or Y-Cancel if you have better ideas.

Flag Data
High Crush frames 30~40
Autoguard frames 2~7
Toggle Hitboxes
Toggle Hitboxes

8B

UpB Button
Damage Hit Level Startup Active Frames Recovery Guard Damage Blockstun Advantage on Hit Advantage on Block
15 Mid 29 5 21 - - - -
  • Techable ground bounce on hit

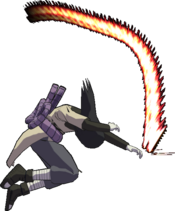
Axe stomp that also uniquely has guard frames; as a matter of fact, better guard frames than 4B and also has decent startup low crush frames after the autoguard window until it hits. Oro can link out of 8B into buttons meterlessly on hit.

Flag Data
Low Crush frames 13~28
Autoguard frames 2~13
Toggle Hitboxes
Toggle Hitboxes

Running B

RunB Button
SCON4 Orochimaru runB.png
SCON4 Orochimaru runB hitbox.png
Damage Hit Level Startup Active Frames Recovery Guard Damage Blockstun Advantage on Hit Advantage on Block
18 Mid 18 6 36 - - - -
  • Description
Toggle Hitboxes
Toggle Hitboxes

j.B

Air AttackB Button
SCON4 Orochimaru jB.png
SCON4 Orochimaru jB hitbox.png
Damage Hit Level Startup Active Frames Recovery Guard Damage Blockstun Advantage on Hit Advantage on Block
12 Mid 17 6 - - - - -
  • Description
Toggle Hitboxes
Toggle Hitboxes

Strong Attacks

5A

A Button
Damage Hit Level Startup Active Frames Recovery Guard Damage Blockstun Advantage on Hit Advantage on Block
- - - - - - - - -
  • Description
Toggle Hitboxes
Toggle Hitboxes

6A

ForwardA Button
Damage Hit Level Startup Active Frames Recovery Guard Damage Blockstun Advantage on Hit Advantage on Block
5×n - 31 - - - - - -
  • Description
Toggle Hitboxes
Toggle Hitboxes

2A

DownA Button
Damage Hit Level Startup Active Frames Recovery Guard Damage Blockstun Advantage on Hit Advantage on Block
12, 18 Mid×2 15 3(15)3 33 - - - -
  • Description
Toggle Hitboxes
Toggle Hitboxes

4A

BackA Button
Damage Hit Level Startup Active Frames Recovery Guard Damage Blockstun Advantage on Hit Advantage on Block
- - - - 45 Total - - - -
  • Invincible on frames 16~35, actionable on frame 11 after re-appearing
  • Re-appearance can be delayed by holding A Button, and the side can be reversed by holding Forward

Orochimaru has a teleport instead of a taijutsu counter. His is special in that if timed right on the opponent's wakeup, it can force them to wake up backturned to him to give him an opportunity to open them up.

Toggle Hitboxes
Toggle Hitboxes

8A

UpA Button
SCON4 Orochimaru 8A.png
SCON4 Orochimaru 8A hitbox.png
Damage Hit Level Startup Active Frames Recovery Guard Damage Blockstun Advantage on Hit Advantage on Block
- - - - - - - - -
  • Description
Toggle Hitboxes
Toggle Hitboxes

Running A

RunA Button
SCON4 Orochimaru runA.png
SCON4 Orochimaru runA hitbox.png
Damage Hit Level Startup Active Frames Recovery Guard Damage Blockstun Advantage on Hit Advantage on Block
18 Low 13 4 40 - - - -
  • Description
Flag Data
High Crush frames 4~40
Toggle Hitboxes
Toggle Hitboxes

j.A

Air AttackA Button
SCON4 Orochimaru jA.png
SCON4 Orochimaru jA hitbox.png
Damage Hit Level Startup Active Frames Recovery Guard Damage Blockstun Advantage on Hit Advantage on Block
- - - - - - - - -
  • Description
Toggle Hitboxes
Toggle Hitboxes

Throws

5Y

Y Button
Damage Hit Level Startup Active Frames Recovery Guard Damage Blockstun Advantage on Hit Advantage on Block
20 Throw 1 1 48 - - - -
  • Description

2Y

DownY Button
Damage Hit Level Startup Active Frames Recovery Guard Damage Blockstun Advantage on Hit Advantage on Block
30 Throw 1 1 48 - - - -
  • Staggers after hit

Orochimaru snake bites the opponent, leaving them staggered for a followup attack.

Special

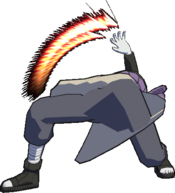
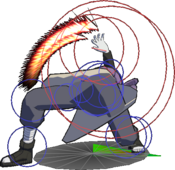
5X

X Button
SCON4 Orochimaru 5X.png
SCON4 Orochimaru 5X hitbox.png
Damage Hit Level Startup Active Frames Recovery Guard Damage Blockstun Advantage on Hit Advantage on Block
10, 50 Mid 21 6 29 - - - -
  • Costs 100% (4 bars) chakra
  • Drains all of the opponent's chakra on hit, and disables chakra-activated installs (i.e. Sharingan, Nine-Tails) if the opponent had any active
  • Seals the opponent's chakra gain for them for the next ~10 seconds as well
  • Hard knockdown on hit

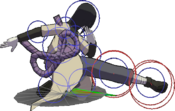
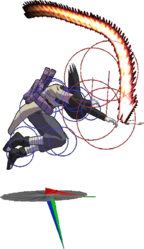
Orochimaru's cinematic super; the activator is a leaping claw attack, and then he constricts the opponent with his tongue before blasting them with a Five-Pronged Seal. The most defining part of his character due to how it destroys the opponent's resources for a period of time.

This super doesn't deal as much damage as other cinematic supers, but it trades the damage for being able to temporarily turn off the opponent's access to essential mechanics such as KnJ or Y-Cancel. In those 10 seconds, Oro can dish out devastating combos that can't be escaped if he lands a hit, and the opponent may be unable to land threatening combos on him depending on their starter or even whole character if they open him up first. It's also one of the better wake-up supers in the game due to the active frames and hitbox size letting it be able to hit sidestep recovery, meaning that only OTG substitution can escape it if the opponent's WUS timing is right.

Toggle Hitboxes
Toggle Hitboxes

2X

DownX Button
Damage Hit Level Startup Active Frames Recovery Guard Damage Blockstun Advantage on Hit Advantage on Block
10, 75 High, Mid 10 2(18)16 48 - - - -
  • Description
Flag Data
Low Crush frames 12~
Toggle Hitboxes
Toggle Hitboxes

Strategy

Strengths

  • Chakra-seal 5X with lots of active frames
  • Fast 2B low
  • Sudden, long sliding run A dash attack
  • 2Y is one of the better throws in the game, leaving the opponent standing in front of Orochimaru
  • 4B is the third-quickest in the game and the lean back at startup can avoid incoming attacks
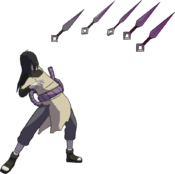
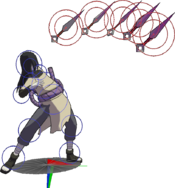
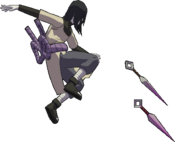
  • Orochimaru throws a large number of kunai for his 5A and 8A projectiles
    • 8A is a low committal throw follow-up that the opponent may need to respect with a KNJ
    • Lots of chip-out options between 5A, 6A fireball, snake attacks and various claw and kunai string attacks
  • 4A with hold and reverse options
  • 2X as the alternate, high damage super when Orochimaru wants to end the round

Weaknesses

  • Neutral may feel too "fair" at times; Oro may have trouble breaking down zoners
  • Block strings are predictable with clear escape or punish points
  • If Orochimaru wins the round with 5X damage, the victim can skip the super cinematic by pressing Start before Orochimaru takes away their chakra (the 10-second chakra seal will not happen regardless of whether the cinematic is skipped)

5X Usage

Orochimaru's strongest tool is his signature Five-Prong Seal. While the super deals less damage than others, it both takes away the victim's chakra and prevents them from gaining chakra for 10 seconds- which can feel like an eternity considering it may only take a single opening and a few seconds for Orochimaru to deplete the rest of their lifebar. The chakra advantage is game-warping enough that much of Orochimaru's approach to the game can resolve around finding openings to land the super.

Orochimaru's confirms into 5BBX include:

  • 5BBA
  • 2BA
  • 4B
  • j.B
  • Both 5Y and 2Y

Five active frames make it un-sidesteppable during the victim's wake-up. Generally, Orochimaru will 4A teleport during the wake-up kick (WUK) window, dodging behind WUK if used, and then close distance and 5X. This technique is unavoidable with perfect reactions from the Orochimaru player and foes must therefore mix up their wake-up options and conserve chakra for KnJ to keep Orochimaru guessing and mess up his timing. Once in a combo or knocked down, the defender's options include:

  • KNJ before the knockdown
  • L or R KNJ from the ground after being knocked down
  • 4-way roll
  • Neutral get-up with or without the "do-nothing" invincibility (three extra frames of invulnerability)
  • Wake-up backdash is often the best option when facing a late 5X (jump instead when at the wall)
  • Wake-up sidestep's three frames of invulnerability is the best option against an early 5X
  • Tech roll recovery is in general very weak to wake-up super due to its predictability and should be avoided when Orochimaru has 100% chakra

On top of sealing away the victim's chakra, Orochimaru will have a hard knockdown with an opportunity to enforce an okizeme mix after the super. A 5B strike/throw mix is the most basic approach, with 2B and mid-attacks 6B and 2A covering high crush attempts. By making the most of his chakra advantage, Oro can chain together neutral wins with 5X finishers and landslide his opponent while denying them the chakra needed to threaten KNJ.

Colors

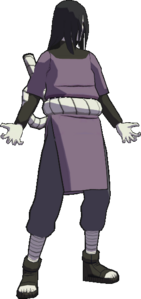
Default ()
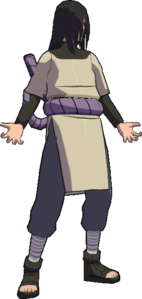
Color 2 ()
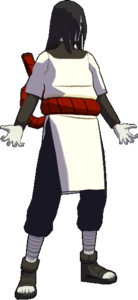
Color 3 ()
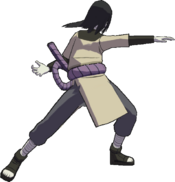
Color 4 ()

Changes from Vanilla

List may be outdated

  • Grabbable Moves: JA, 8A, 2A(A), 2AA(A), 6A, 2B(A)
  • 5B: has slightly more stun on block and more lift on hit
  • 5B(B): improved advantage on hit and block; move ends four frames sooner; can follow up on whiff
  • 6B: can do A follow up on whiff
  • 6B(B): added as 2BBB(B) with follow ups
  • 2B: can follow up on whiff
  • 2BBB(B): has more lift
  • 2BBB(A): changed from RA to 4A
  • 2BBBB(B): bounces closer on hit
  • 8B: has guard frames until Oro jumps; done in string replaced with 2BBB(B) with follow ups
  • RB: lifts on block
  • RB(B): added as 2BBBB(B)
  • JB: can be DIed in the air with 6 or 4
  • 5A: charge time changed from 11 frames to 8
  • 5A(A): added as 2AA(A)
  • 4A: "attachment" window changed from 10 frames to 14
  • 2A: has more stun on the second hit, less hitbox duration
  • 2AB(B): added as 2BBBB(B)
  • 2A(A): has slightly more stun
  • RA: is an untechable sweep
  • 2BBBB(A): and 2AA(A) snakes do chip
  • 2Y: staggers on hit, opponent cannot be grabbed, opponent cannot shake the stagger
  • 5X: damage reduced 65 to 50
  • 2X: hits better on both hits; damage on the activated portion, first hit lifts on block and is blockable; ends sooner. Damage is spread between the two hits: 84 (SCON4) instead of 85 (Vanilla).
Navigation

General
Controls
HUD
FAQ
System
Esoterica
Technical Data
Stages
Strategy
Characters
Anko
Choji
Gaara
Haku
Hinata
Awakened Hinata
Ino
Iruka
Itachi
Jiraiya
Jirobo
Kabuto
Kakashi
Kankuro
Kiba
Kidomaru
Kimimaro
Kisame
Might Guy
Mizuki
Naruto
OTK Naruto
Neji
Orochimaru
Rock Lee
Sakura
Sasuke
CS2 Sasuke
Shikamaru
Sakon & Ukon
Shino
Tayuya
Temari
Tenten
Third Hokage
Tsunade
Zabuza
Archived Information
Glossary
Training Modes
Netplay
Changelog
Resources