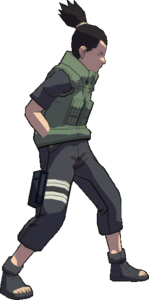
Super Naruto: Clash of Ninja 4/Shikamaru
Summary
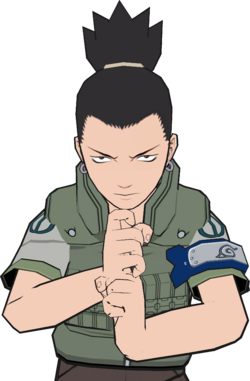
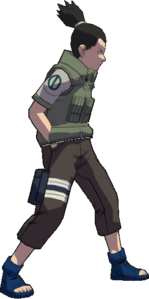
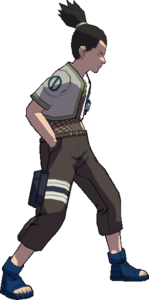
One of the most improved characters in the jump from Vanilla to Super, Shikamaru now augments his rangy normals and high damage with a variety of quality-of-life improvements, quicker super activations and more versatile and effective wisdom stance (4A). Shikamaru is known for his teleport attacks and one of the strongest oki tools in the game: his unblockable 2X shadow jutsu.
Character Traits
- Multi-use stance that gives Shikamaru numerous tracking teleports to use in pressure, neutral, combos, etc
- Passive auto-dodge makes him almost impossible to guard crush unless he's stuck at a wall
- 2X is a very strong wake-up super that can be a guaranteed unblockable on over half the cast, even if they OTG substitution.
Unique Mechanics
Auto Dodge
Shikamaru is so lazy that instead of putting in the effort to actually block attacks, he will reflexively dodge incoming attacks instead. The dodge has a couple of unique animations that all take as long as the would-be blockstun of the attack, so the frame advantage is the same as if he did block it, but he does not suffer any guard gauge damage while dodging. Shikamaru does not dodge if he would block an attack that pushes or lifts on block, nor does he dodge if his back is too close to the stage's wall. He also cannot dodge projectiles and will not dodge when blocking moves while airborne. Aside from those restrictions, any blockable attack can be dodged, including moves that would otherwise instant guard break such as ![]() Zabuza's charged
Zabuza's charged ![]()
![]() .
.
To complement this, Shikamaru has the weakest guard bar in the game alongside this gimmick, meaning that getting cornered spells trouble for him very quickly, especially against characters that have potent blockstrings and guard damage like ![]() OTK Naruto and
OTK Naruto and ![]() Zabuza. He also still receives chip damage when dodging, so it won't save him from checkmate scenarios and chip-out kills.
Zabuza. He also still receives chip damage when dodging, so it won't save him from checkmate scenarios and chip-out kills.
 Wisdom Stance
Instead of having a traditional counter, Shikamaru's ![]()
![]() puts him into his wisdom stance that he's known for in the series. From the stance, he can use different buttons and directions to perform various teleport actions:
puts him into his wisdom stance that he's known for in the series. From the stance, he can use different buttons and directions to perform various teleport actions:

 teleports behind the enemy with a descending aerial dive.
 teleports behind the enemy on the ground with a running kunai slash.
 can be held to reverse the direction of a teleport attack.


 teleports in front of the enemy with no attack.

 teleports behind the enemy with no attack.
 is also super-cancellable with
  or
or 
 , allowing Shikamaru to combo into supers.
 cancels the stance.
Shikamaru's teleport attacks are powerful as they can track the opponent and can lead to combos, though he can be punished if the opponent avoids the attack by sidestepping or otherwise moving out of the way. If the enemy is avoiding teleport attacks, Shikamaru can mix them up by using his "empty" teleport, ![]()
![]()
![]() . If he has his back to the enemy, he can use
. If he has his back to the enemy, he can use ![]()
![]()
![]() instead.
instead. ![]()
![]() (stance cancel) helps Shikamaru quickly return to neutral while threatening a teleport attack and to bait his opponent's twitch reactions if they anticipate an attack.
(stance cancel) helps Shikamaru quickly return to neutral while threatening a teleport attack and to bait his opponent's twitch reactions if they anticipate an attack.
String List
| String # | Inputs | Notes |
|---|---|---|
| ||
| ||
| ||
| ||
| ||
| ||
| ||
| ||
| ||
| ||
| ||
|
Weak Attacks
5B
Nutcracker
|
|
|---|---|
Toggle Hitboxes Toggle Hitboxes
|
6B
Slide
|
|
|---|---|
Toggle Hitboxes Toggle Hitboxes
|
2B
Sweep
|
|
|---|---|
Toggle Hitboxes Toggle Hitboxes
|
4B
Guard Frame Kick
|
|
|---|---|
Toggle Hitboxes Toggle Hitboxes
|
8B
Uppercut
|
|
|---|---|
Toggle Hitboxes Toggle Hitboxes
|
Running B
Toggle Hitboxes Toggle Hitboxes
|
|---|
j.B
Divekick
|
|
|---|---|
Toggle Hitboxes Toggle Hitboxes
|
Strong Attacks
5A
Shuriken
|
|
|---|---|
Toggle Hitboxes Toggle Hitboxes
|
6A
Skullcrusher
|
|
|---|---|
Toggle Hitboxes Toggle Hitboxes
|
2A
Ankle Shank
|
|
|---|---|
Toggle Hitboxes Toggle Hitboxes
|
4A
Wisdom Stance
|
|
|---|---|
Toggle Hitboxes Toggle Hitboxes
|
8A
Up Shuriken
|
|
|---|---|
Toggle Hitboxes Toggle Hitboxes
|
Running A
Toggle Hitboxes Toggle Hitboxes
|
|---|
j.A
Air shuriken
|
|
|---|---|
Toggle Hitboxes Toggle Hitboxes
|
Throws
5Y
Special
5X
Toggle Hitboxes Toggle Hitboxes
|
|---|
2X
Toggle Hitboxes Toggle Hitboxes
|
|---|
Strategy
Strengths
Between his rangy normals, mid jab and high crushes, Shikamaru is highly effective at mid-range and can be difficult to approach.
- Some of the longest ranging normal attacks in the game (notably
 and
and 
 ).
).  is a mid and hits close to the ground, snuffing out high crushes and low profiles.
- Several good high crushes:

 : Quickest (crushes on frame 8) and can be used to break up slow strings or delayed string pressure.
 : Lower commitment because Shikamaru sweeps his foot away from his body. Used as a poke in neutral.
 : Long range attack which can whiff punish or surprise an unsuspecting opponent.

 can also be used when Shikamaru is backturned to quickly slide away from the opponent. Be aware that many characters can punish this if they anticipate it.
- Shikamaru hits hard.


 is one of the better combo filler loops in the game and


 is a great whiff punish starter.
 - Stance teleports, most often


 , can be used to punish substitutions.
 punishes jump back.
- Grounded


 and
and 


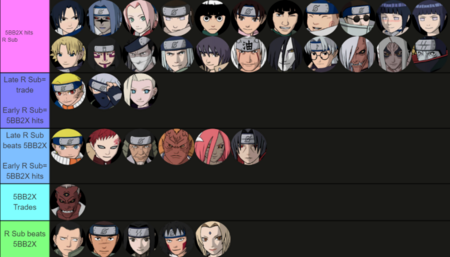
 can "checkmate" the opponent, catching them even if they ground KNJ (see the chart to the side for which characters can substitute against
 ).
). 
 links to combos, primarily with
  and
and 
 . It can also cross-up if Shikamaru manages to get under a jumping opponent.
- Shikamaru has a unique mechanic when blocking. He will dodge physical attacks when on the ground and not next to the wall and not take guard damage, though he still takes chip damage.
- Shikamaru can dodge auto-guard breaks such as
 Might Guy
 ,
,  CS2 Sasuke
 and
and  Zabuza
 .
.
- Shikamaru can dodge auto-guard breaks such as
Weaknesses
- Shikamaru does not threaten opponents on block due to low guard damage and the escapability of his strings.

 (-6) is his only safe blockstring.
 (-13) and
 (-12) may be safe depending on the opposing character.
- Poor continuations make Shikamaru's block strings predictable and easy for the opponent to take back their turn or punish.
- A near-complete lack of strings which can be performed on whiff make his buttons high commitment and his whiffs easier to punish as compared to characters which can continue strings on whiff.
- Teleport attacks can be sidestepped, jumped or otherwise avoided and punished.
- Shikamaru is a low health, low guard character. His dodge mechanic does not work when he is in the vicinity of the wall, so his guard may be broken easily.
- His slow

 , slow
 and lack of a true reversal make him vulnerable to guard pressure from certain characters, especially when
 is ineffective.
 - His only button/string starters which can be
 -cancelled in combos are
  and the very situational
 .
.
2X Usage
![]()
![]() is a powerful oki option. While it loses to wake-up-kick (WUK), when properly spaced it is unavoidable and leads to a combo.
is a powerful oki option. While it loses to wake-up-kick (WUK), when properly spaced it is unavoidable and leads to a combo.
- Common ways to land the super include:
- Combos:


 or
or 


 up to about 7 or 8 hits.
  directly into
 (at the total cost of 100% chakra) to access
 from other combo points or at higher combo counts.
- Throw >

 is guaranteed.
 - Backdash or walk backwards at the end of a combo to space outside of WUK range.


 to avoid a WUK- an immediate
 should catch the opponent before they can jump.
- If a recovery roll is predicted, Shikamaru can run forward to chase the roll and

 .
. - In some situations close to the wall, Shikamaru can move backwards while staying close enough to

 regardless of whether the opponent tech rolls or not.
- Combos:
- After being captured by

 , the victim cannot KNJ until landing or being hit.
 resets the combo counter. Landing a
 leads to a punish mix as the opponent will need to sub if Shikamaru commits to a combo.
- The opponent will very often have enough chakra to KNJ after a

 so Shikamaru should put thought into his follow-up as to not be punished with a KNJ at low chakra.
 - Shikamaru has several options for his follow-up attack to

 :
:

 : The most common follow-up at short range. Decent damage, quick recovery and threatens a combo.
 : The easiest button to time and can be
  -cancelled.
 has a quick recovery.


 : On the safer side for a Shikamaru string. Can be used as a lower committal way to score extra damage and build chakra.
 : Most damage in a single hit and can potentially combo to
  , but the opponent can tech roll recovery the bounce.
- The amount of time Shikamaru has between the

 animation and the victim reappearing will depend on the distance from the opponent. If Shikamaru is farther away, he may have time for one of:

 ,
, 
 and
and 
 : Strong attacks which threaten an extended combo.
 : If the opponent does not have enough chakra to KnJ.
Other Notes

 punishes all of Sasuke's options after blocking his

 . This can also work against
  CS2 Sasuke, though loses to his


 .
.
 low profiles
  Shino's


 covers
  Itachi's strike/throw mix after
 and beats


 .
.


 is a low committal combo segment to stay safe from KNJ.
Combos
| Combos | Notes |
|---|---|
| Short super confirms † | |
| Basic super confirm using wisdom stance | |
| A reliable super confirm for combos up to ~8 hits | |
| The shuriken toss can be omitted | |
| Connects when hitting the opponent directly into the wall or a corner | |
| 25% chakra opponent | |
| Shikamaru only needs to walk forward to get into range of | |
| Must juggle high with first | |
| Just frame combo | |
| The shuriken throw can be omitted | |
| Alternate: | |
| Alternate: | |
| Just frame combo | |
| 0% chakra opponent | |
| 204 damage | |
| 201 damage. Requires a wall. | |
| The "qbtod" off of a throw. 204 damage. | |
| 191 damage. If the teleport attack is delayed, the slash may still connect while starting a new combo. In this case, the combo deals a total of 210 damage because damage scaling is reset. | |
| 191 damage | |
| 195 damage | |
| 195 damage | |
| 194 damage combo with high chakra build. Only works going into the wall; Shikamaru can direct | |
| 194 damage | |
| 172 damage, but leaves Shikamaru with over 25% chakra. | |
| 189 damage. Shika must follow if the opponent tech rolls, or backdash if the opponent does not tech roll. | |
| 211 damage. The big kick needs a wall to link into 5B. Shika can change directions during the teleport to make this happen. | |
| Clem tod. 226 damage. The big kick needs a wall to link into 5B. Shika can change directions during the teleport to make this happen. |
Additional combo notes
- †Shikamaru has several ways to combo into supers at low combo counts, which grants the ability to finish rounds with a large chunk of damage before the opponent builds enough chakra to KNJ.
- ‡

 >
> 

 does the same amount of damage as


 .
. 
 >
> 

 may connect to
  at higher combo counts, but in general


 is more reliable;
 combos can be disrupted by the wall.

 >
>  is inconsistent at higher combo counts because it depends on the number of shuriken which connect.

 or
or 


 (particularly the second hit- the knee) is high damage filler. When in doubt, use this string to get close to optimal damage.
- Chakra can be conserved by intentionally dropping the combo early and going for an oki

 . The sequence of 2X + 8B deals 48 damage, compared to 75 for 5X, but can leave Shikamaru with over 25% chakra making it preferable in many situations.
Colors
Changes from Vanilla
- HP increased from 200 to 210
- Grabbable Moves: 8A, JA
- 5BB(A): launches with more lift, one frame less on the hitbox

 has faster action and high crushes at frame 6; can super cancel into 5X and 2X
 now teleports Shikamaru behind the enemy, instead of in front
- SB(B) more lift on hit
- SBB(B) replaced with SABB(B)
- SABB(B) deals more damage
- SA(A) now staggers
- SAA(A) replaced with 8A
 can be held to reverse teleport attack directions

 added
added

 added
added
 sped up
 Teleport strings are now true combos, instead of being side-steppable with a fast mash on hit (due to the stagger effect)
 replaced with modified


 from Vanilla; 8BA follow up after landing
 sweeps instead of a grounded hit; less lift
- 6B(B) has more lift
- 2BBB(B) ends sooner and has more lift
- RB: starts up three frames later
 sped up by four frames
 has less super freeze and comes out faster, can move faster when hitting from further away than right next to the opponent, opponent falls slower, opponent cannot sub until they hit the ground or are hit; resets combo counter

 is now possible
 is now subbable after the enemy hits the ground or is hit
Resources
- Shikamaru Replaytheater
- Boocock's Shikamaru fundies introduction
- Clemente's written Shikamaru guide
- Shikamaru defensive tech in SCON4
Notable Players
- Disclaimer: This list is derived from community input and is in no way comprehensive or a form of ranking of any kind. Our community criteria can be found here.
| Name | Usual Color | Region | Contact | Example Play |
|---|---|---|---|---|
| Clemente | 
|
United States |
Unavailable | Clemente Replaytheater |
